


接到一个新任务,要求自动给三千台服务器修改账号和密码(统一管控服务器预定用户的使用时间),对这方面比较陌生,就去买了一本python自动化运维(刘天斯著),观摩了大佬的作品,感觉用ansible的api实现这个功能应该是一个不错的思路,只需要在主机上面部署好服务就行,被控服务器不需要部署客户端,默认通过paramiko进行ssh连接下发执行命令或者配置,定时修改账号密码任务的创建是由Flask-APScheduler库触发的,定时任务存储在MySQL里,框架会定期轮询任务,到了预定时间就会触发执行ansible方法。
部署ansible主机服务参考:https://mp.csdn.net/console/editor/html/109224132
部署ansible的时候有遇到一个坑,在centos7.6下,通过yum安装的ansible,最新版是2.9.14,执行的时候会在baseurl参数那里报错,导致定时任务失败。
查看yum源的ansible版本:

[root@pa_cicd ~]# yum list | grep ansible

ansible.noarch                              2.9.14-1.el7               @epel
ansible.noarch                              2.9.15-1.el7               epel
ansible-doc.noarch                          2.9.15-1.el7               epel
后来通过系统里的python36,安装了新版2.10.3的ansible,步骤如下:
[root@pa_cicd ~]# pip3 install ansible

安装好之后查看版本

[root@pa_cicd ~]# ansible --version
ansible 2.10.3
  config file = /etc/ansible/ansible.cfg
  configured module search path = ['/root/.ansible/plugins/modules', '/usr/share/ansible/plugins/modules']
  ansible python module location = /usr/local/lib/python3.6/site-packages/ansible
  executable location = /usr/local/bin/ansible
  python version = 3.6.8 (default, Aug  7 2019, 17:28:10) [GCC 4.8.5 20150623 (Red Hat 4.8.5-39)]
这个版本实测OK,可以完美运行ansible定时任务。
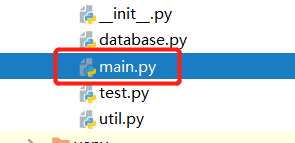
具体项目的目录结构如下:


在main.py模块内,创建APScheduler的实例并启动。
#!/usr/bin/env python

# -*- coding: utf-8 -*-
# @Time    : ********
# @Author  : ********
# @function: Flask main model


from flask import Flask, url_for
from flask_apscheduler import APScheduler

from src.database import init_db
from src.auto_modify import views as auto_blueprint


def make_app(debug=False, **kwargs):
    app = Flask(__name__)
    app.config.from_pyfile('../config.py')
    app.debug = not app.config['PRODUCTION']
    app.jinja_env.auto_reload = True
    app.jinja_env.globals.update(**kwargs)
    app.permanent_session_lifetime = 5 * 3600  # session live for seconds
    db = init_db()
    db.init_app(app)
    src.admin.models.init_app(app)

    scheduler = APScheduler()
    scheduler.init_app(app)
    scheduler.start()
    return app


app = make_app()

if app.config['CORS_SWITCH']:
    #only for debug to CROS
    from flask_cors import CORS
    CORS(app,supports_credentials=True)

app.register_blueprint(auto_blueprint.auto)
在config.py模块内,配置apscheduler的参数。
#!/usr/bin/env python

# -*- coding: utf-8 -*-
# @Time    : ********
# @Author  : ********
# @function: project config model


import os

from apscheduler.jobstores.sqlalchemy import SQLAlchemyJobStore


BASE_DIR = os.path.dirname(__file__)

SQLALCHEMY_DATABASE_URI_PREFIX = 'mysql+mysqldb://root:{passwd}@0.0.0.0/'.format(passwd=DB_PASSWD)
SQLALCHEMY_TRACK_MODIFICATIONS = False

SQLALCHEMY_DATABASE_URI = SQLALCHEMY_DATABASE_URI_PREFIX + '%s?charset=utf8' % DB_NAME

SCHEDULER_JOBSTORES = {
    'default': SQLAlchemyJobStore(url=SQLALCHEMY_DATABASE_URI)
}

SCHEDULER_EXECUTORS = {
    'default': {'type': 'threadpool', 'max_workers': 5}
}

SCHEDULER_JOB_DEFAULTS = {
    'coalesce': False,
    'max_instances': 3
}

SCHEDULER_API_ENABLED = True
在auto_modify\views.py内,写好对应的路由蓝图,供前端在用户预定服务器的时候,调用路由设置定时任务并存储到数据库。下面例子是添加定时任务的,还需要删除定时任务,修改定时任务的路由,参照着写就行。
#!/usr/bin/env python

# -*- coding: utf-8 -*-
# @Time    : ********
# @Author  : ********
# @function: auto modify server BMC account and password


import json
import random
import logging
import datetime

from flask_login import login_required
from flask import request, jsonify, session, current_app, Blueprint

from src.reservation.models import SutData
from src.auto_modify.models import ApschedulerJobs


auto = Blueprint('auto', __name__)
LOG = logging.getLogger(__name__)


def random_num():
    """
    Get 8 random password containing uppercase letters, lowercase letters and numbers
    :return:
    """
    ret = ""
    for i in range(8):
        num = random.randint(0, 9)

        # Lowercase letter
        letter = chr(random.randint(97, 122))

        # Uppercase letter
        Letter = chr(random.randint(65, 90))
        s = str(random.choice([num, letter, Letter]))
        ret += s
    return ret


@auto.route('/auto/add/', methods=["POST"])
@login_required
def auto_add():
    """
    Add auto task
    :return:
    """
    data = request.form
    if not data:
        data = json.loads(request.data)

    start_date = data.get('start_date')
    end_date = data.get('end_date')
    ip = data.get('ip')
    sut_id = data.get('sut_id')
    user = data.get('user')

    passwd = random_num()

    # Get server admin account and password from database
    sut = SutData.query.get_or_404(sut_id)
    if sut:
        sut_user = sut.sutLoginUser
        sut_passwd = sut.sutLoginPassword
    else:
        return jsonify({
            'success': False,
            'message': "sut id is wrong!",
        })

    now_date = str(datetime.datetime.now().date())
    if start_date:
        start_date = str(start_date)

    end_job_name = passwd + "1"
    if end_date:
        end_date = str(end_date)
        end_date = end_date + " 23:55:00"

    start_func = "ansible_config:add_user"
    end_func = "ansible_config:delete_user"

    # If Scheduled start date is now, change account and password immediately
    if start_date == now_date:
        try:
            current_app.apscheduler.add_job(id=passwd, func=start_func, args=(sut_user, sut_passwd, ip, user, passwd))
        except:
            return jsonify({
                'success': False,
                'message': "Failed to create automatic modification task!",
            })
    else:
        try:
            current_app.apscheduler.add_job(id=passwd, func=start_func, trigger='date', replace_existing=True,
                                            run_date=start_date, args=(sut_user, sut_passwd, ip, user, passwd))
        except:
            return jsonify({
                'success': False,
                'message': "Failed to create automatic modification task!",
            })

    # While at the end of the scheduled date, add task to delete user's account and password
    try:
        current_app.apscheduler.add_job(id=end_job_name, func=end_func, trigger='date', replace_existing=True,
                                        run_date=end_date, args=(sut_user, sut_passwd, ip, user))
    except:
        return jsonify({
            'success': False,
            'message': "Failed to create automatic modification task!",
        })

    return jsonify({
        'success': True,
        'passwd': passwd,
    })
在auto_modify\model.py内, 创建数据库表用来存储任务。这里创建此模块,是为了避免存储定时任务的表被migrate初始化的时候删除掉。
参考venv\lib\python2.7\site-packages\apscheduler\jobstores\sqlalchemy.py库的SQLAlchemyJobStore类初始化方法里面的self.jobs_t设置就行。
#!/usr/bin/env python

# -*- coding: utf-8 -*-
# @Time    : ********
# @Author  : ********
# @function: auto modify server BMC account and password


from sqlalchemy import Column, String, Integer, Text, DateTime, Unicode, Float, LargeBinary

from src.database import db


class ApschedulerJobs(db.Model):
    __tablename__ = 'apscheduler_jobs'

    id = Column(Unicode(191, _warn_on_bytestring=False), primary_key=True)
    next_run_time = Column(Float(25), index=True)
    job_state = Column(LargeBinary, nullable=False)

在ansible_config.py里,编写具体要被执行的ansible方法。
#!/usr/bin/env python

# -*- coding: utf-8 -*-
# @Time    : ********
# @Author  : ********
# @function: ansible function


import re
import logging
import subprocess


LOG = logging.getLogger(__name__)


def add_user(sut_user, sut_passwd, bmc_ip, new_user, new_password):
    """
    Add User
    :param sut_user:
    :param sut_passwd:
    :param bmc_ip:
    :param new_user:
    :param new_password:
    :return:
    """
    command = '/usr/local/bin/ansible localhost -m redfish_command -a "category=Accounts command=AddUser ' \
              'baseuri=%s username=%s password=%s roleid=Administrator new_username=%s ' \
              'new_password=%s timeout=60"' % (bmc_ip, sut_user, sut_passwd, new_user, new_password)
    LOG.info("This is step: Add XCC User.\n")
    LOG.info("This step will add a XCC user %s, password is %s, role is Administrator\n" % (new_user, new_password))

    try:
        output = subprocess.check_output(command, shell=True, universal_newlines=True)
    except Exception as err:
        LOG.error("Failed to execute command! The error info [%s]\n" % err)
        return
    check = re.compile(r"\"msg\": \"Action was successful\"")
    check_result = check.findall(output)
    if len(check_result) == 0:
        LOG.error("Add user command Failed.\n")
        LOG.error(output)
    else:
        LOG.info("Add user command Succeed.\n")


def delete_user(sut_user, sut_passwd, bmc_ip, new_user):
    """
    Delete User
    :param sut_user:
    :param sut_passwd:
    :param bmc_ip:
    :param new_user:
    :return:
    """
    command = '/usr/local/bin/ansible localhost -m redfish_command -a "category=Accounts command=DeleteUser ' \
              'baseuri=%s username=%s password=%s new_username=%s timeout=60"' % \
              (bmc_ip, sut_user, sut_passwd, new_user)
    LOG.info("This step will delete user %s \n" % new_user)
    try:
        output = subprocess.check_output(command, shell=True, universal_newlines=True)
    except Exception as err:
        LOG.error("Failed to execute command! The error info [%s]\n" % err)
        return
    check = re.compile(r"\"msg\": \"Action was successful\"")
    check_result = check.findall(output)
    if len(check_result) == 0:
        LOG.error("Delete user command Failed.\n")
        LOG.error(output)
    else:
        LOG.info("Delete user command Succeed.\n")
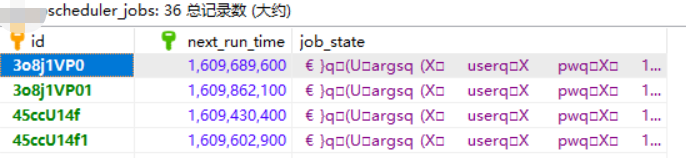
这是MySQL存储的定时任务:
至此,初步的无人值守修改大量服务器账号密码功能就实现了。


 370
370


 被折叠的 条评论
为什么被折叠?
被折叠的 条评论
为什么被折叠?
 到【灌水乐园】发言


