


一、录制并生成测试用例
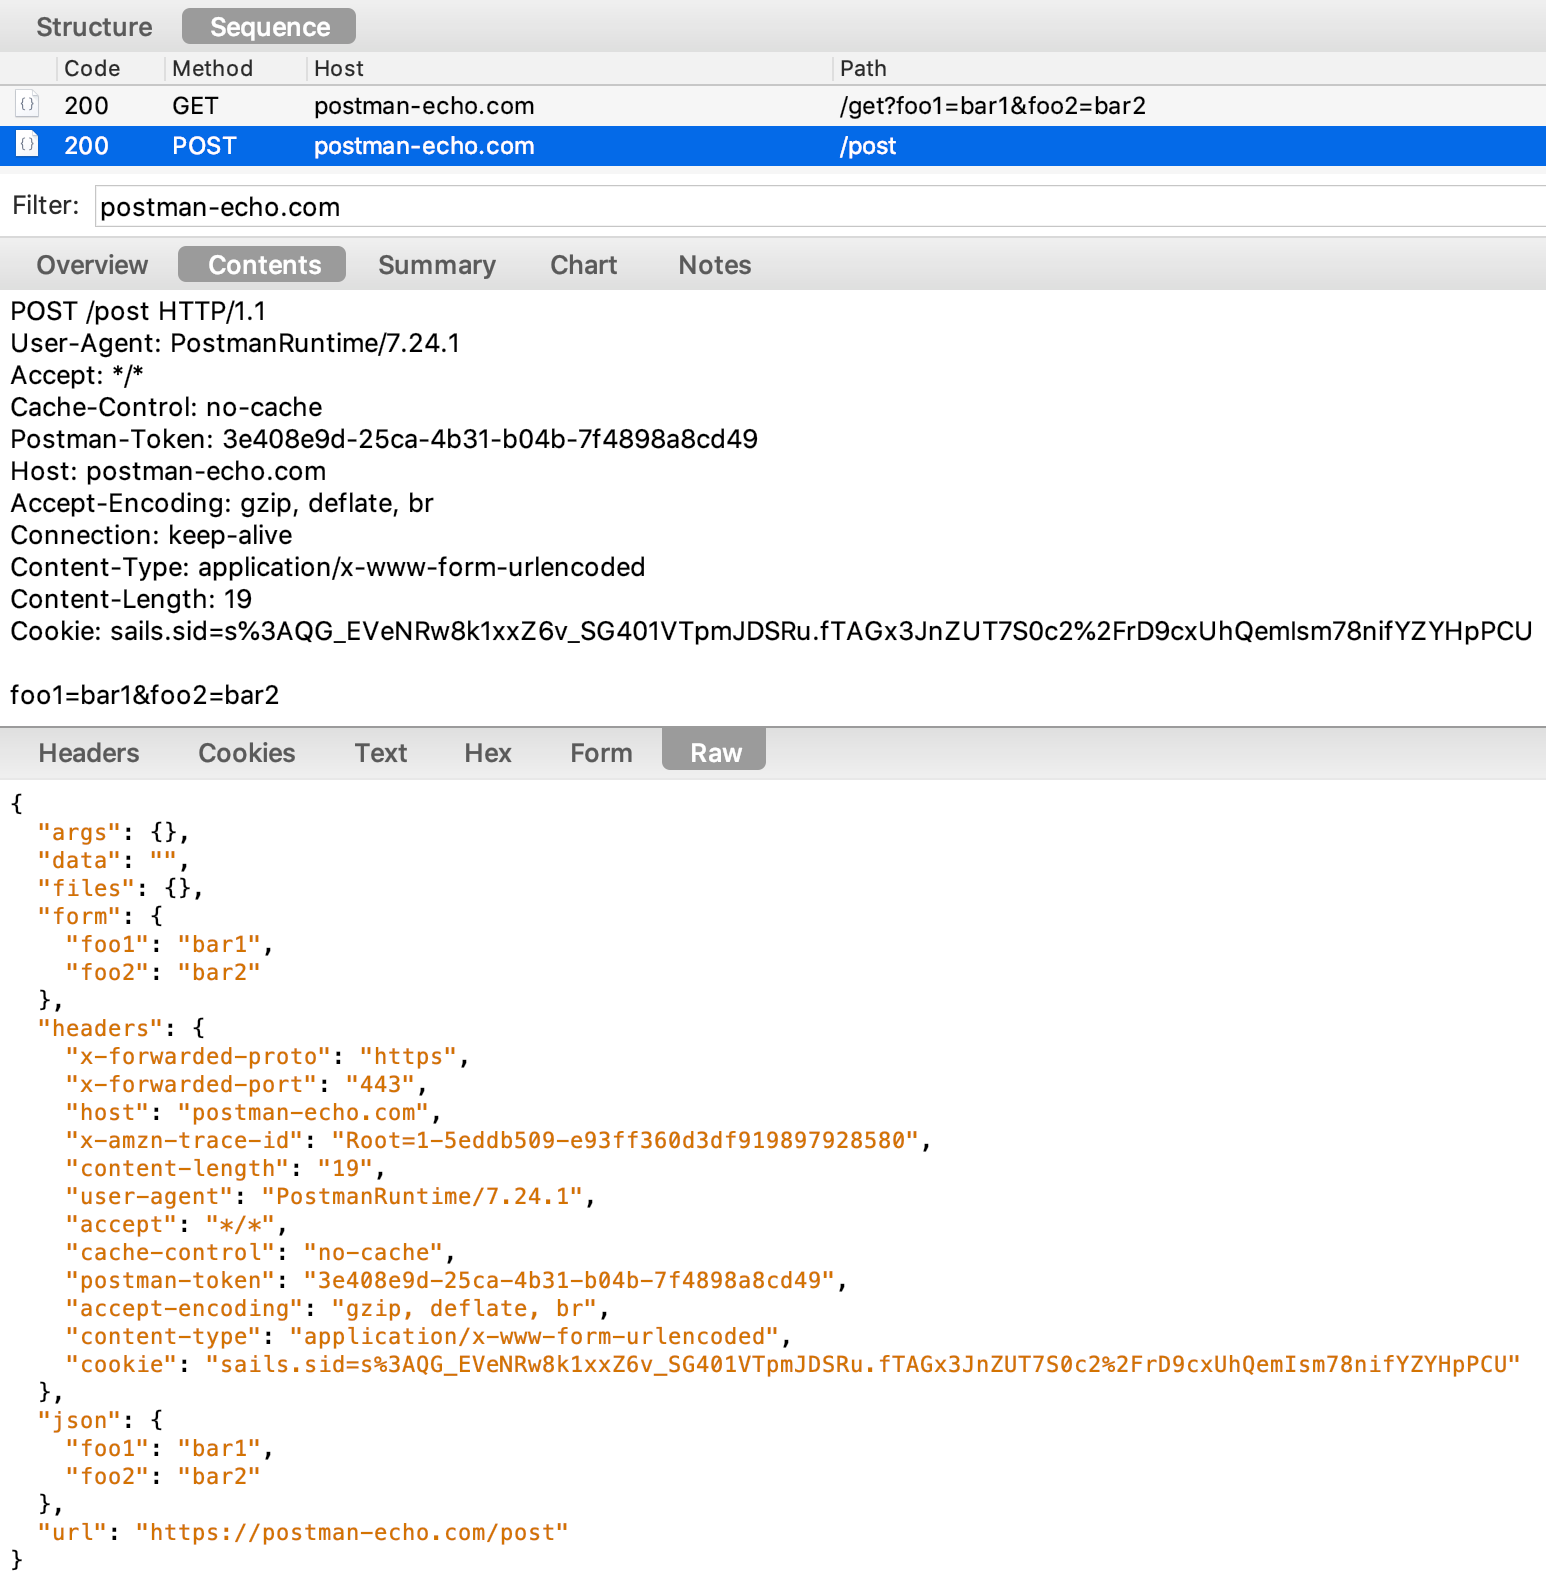
1.抓包http请求和response
抓包示例,如下图所示:
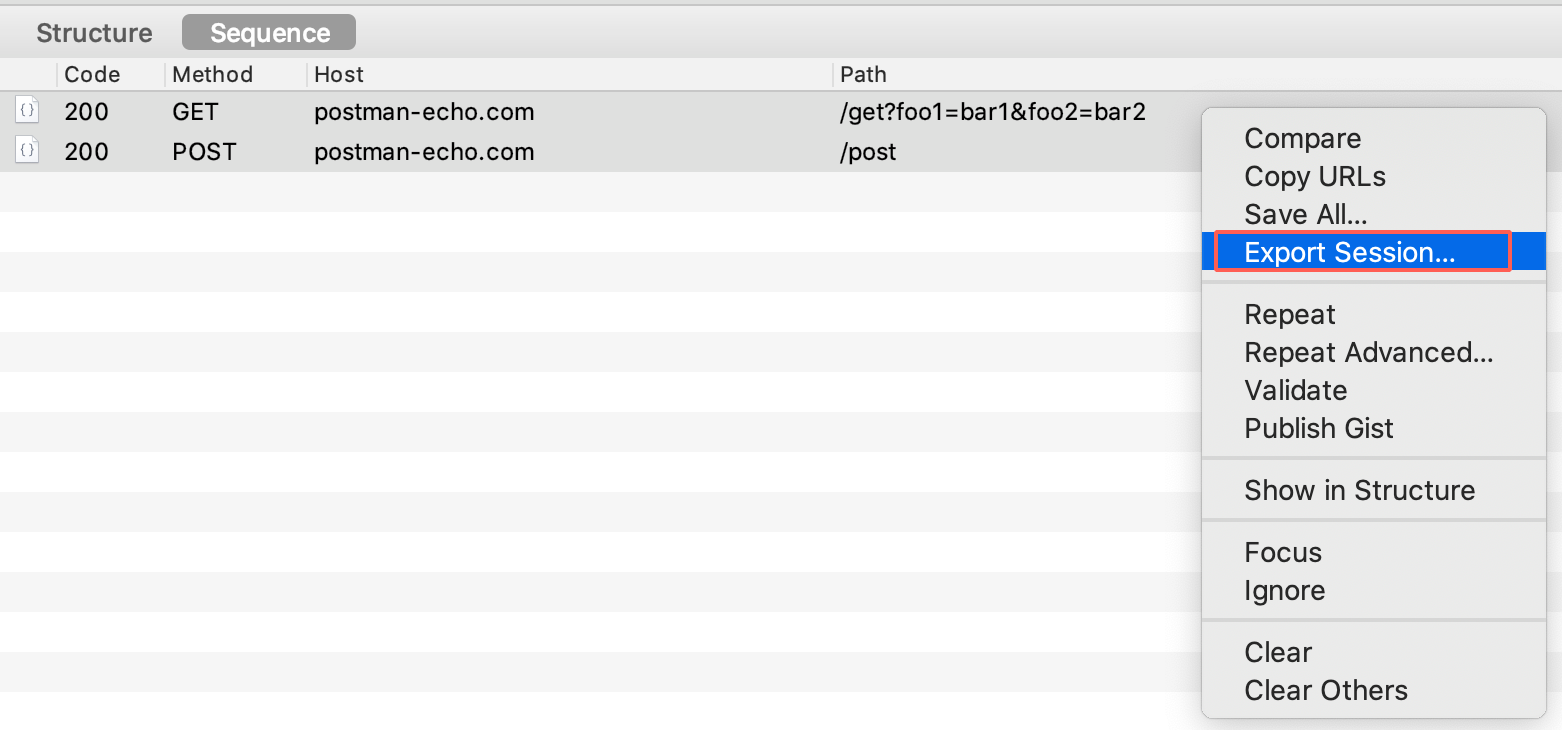
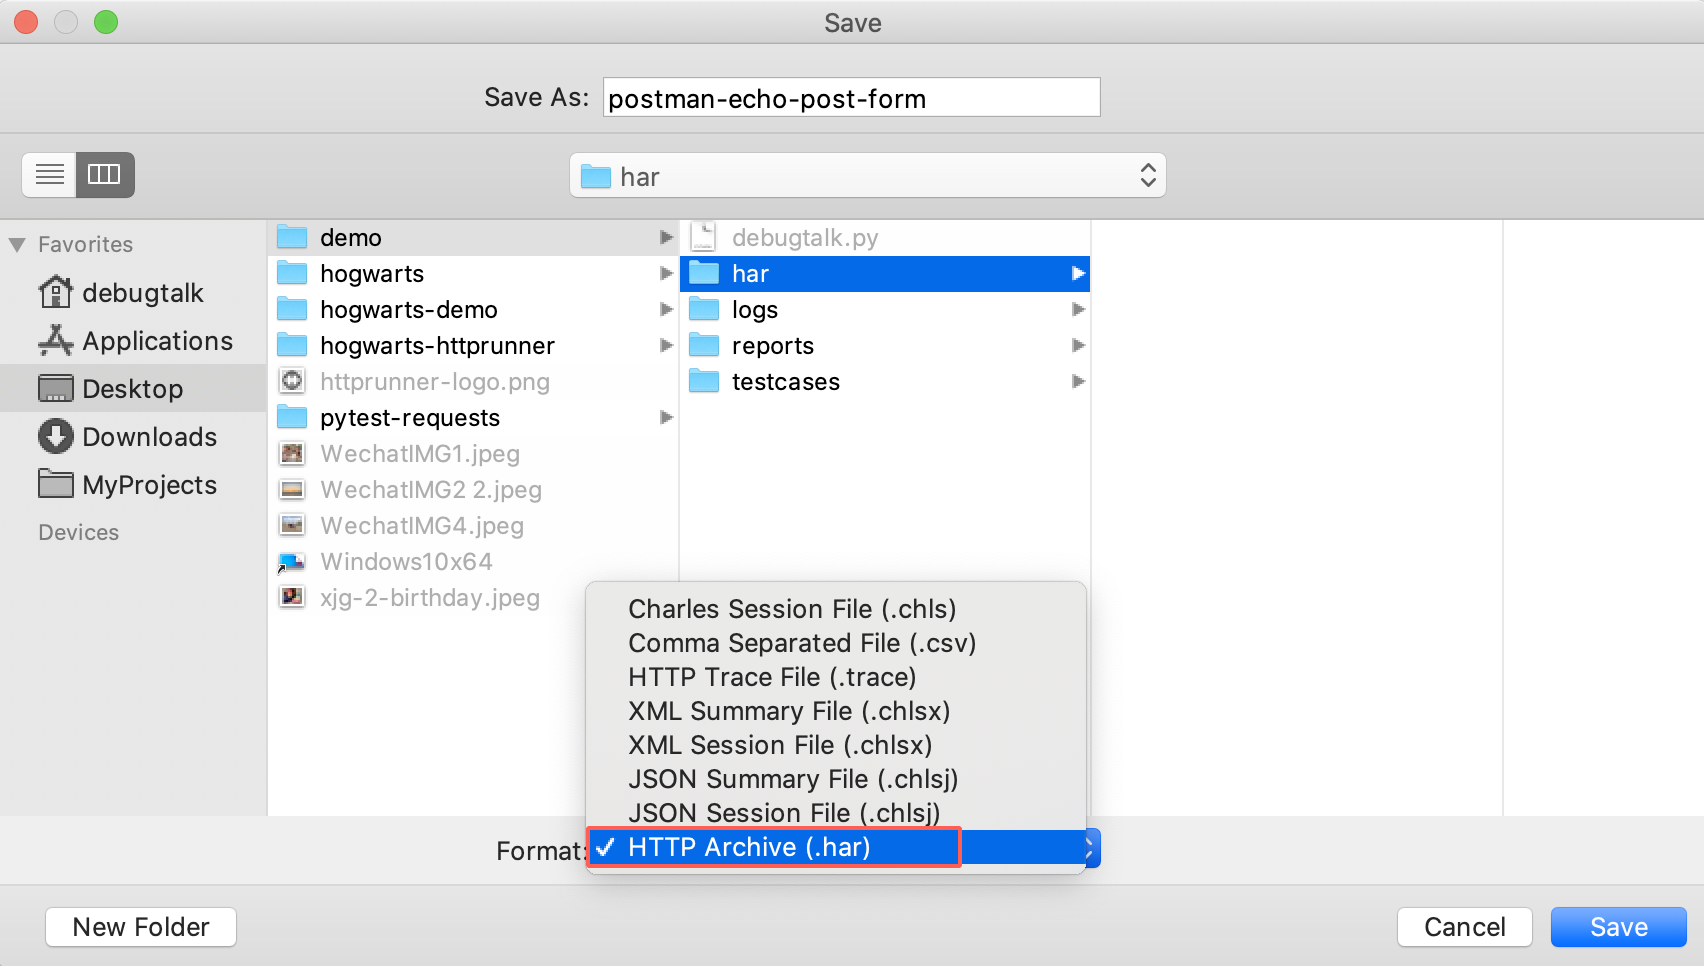
导出HAR文件
我们可以选择捕获的请求和响应,并将会话导出到Har文件
2.har2case生成用例
可以使用命令har2case将Har文件转成测试用例。HttpRunner 3.0.7版本开始,har2case将HAR文件默认转换成pytest
$ har2case har/postman-echo-post-form.har
可以使用命令hrun或pytest运行,实际上,hrun是pytest的封装,效果基本相同。
$ hrun har/postman_echo_post_form_test.py
$ pytest har/postman_echo_post_form_test.py
你也可以生成YAML/JSON测试用例,只需要在har2case命令后 添加-2y/--to-yml或-2j/--to-json。
$ har2case har/postman-echo-post-form.har -2j
$ hrun har/postman-echo-post-form.json
二、编写测试用例
1.用例结构
每个用例都是HttpRunner的子类,且必须包含属性:config和teststeps。
config:配置测试用例,包含base_url,verify,variables,exportteststeps:测试步骤的列表,每个步骤都对应一个API请求或另一个用例的引用,另外variables/extract/validate/hooks支持创建极其复杂的测试用例。
RuntestCase(name)
RunTestCase用于在测试步骤中引用其他测试用例。 RunTestCase的name用于指定teststep name,将会在执行log和测试报告中展示。
.with_variables
跟RunRequest的.with_variables一样。
.call
指定引用的测试用例类。
.export
指定从引用的测试用例中提取的变量名。该变量在后面的test steps中可以引用。
import os
import sys

sys.path.insert(0, os.getcwd())

from httprunner import HttpRunner, Config, Step, RunRequest, RunTestCase

from examples.postman_echo.request_methods.request_with_functions_test import (
    TestCaseRequestWithFunctions as RequestWithFunctions,
)


class TestCaseRequestWithTestcaseReference(HttpRunner):
    config = (
        Config("request methods testcase: reference testcase")
        .variables(
            **{
                "foo1": "testsuite_config_bar1",
                "expect_foo1": "testsuite_config_bar1",
                "expect_foo2": "config_bar2",
            }
        )
        .base_url("https://postman-echo.com")
        .verify(False)
    )

    teststeps = [
        Step(
            RunTestCase("request with functions")
            .with_variables(
                **{"foo1": "testcase_ref_bar1", "expect_foo1": "testcase_ref_bar1"}
            )
            .call(RequestWithFunctions)
            .export(*["foo3"])
        ),
        Step(
            RunRequest("post form data")
            .with_variables(**{"foo1": "bar1"})
            .post("/post")
            .with_headers(
                **{
                    "User-Agent": "HttpRunner/${get_httprunner_version()}",
                    "Content-Type": "application/x-www-form-urlencoded",
                }
            )
            .with_data("foo1=$foo1&foo2=$foo3")
            .validate()
            .assert_equal("status_code", 200)
            .assert_equal("body.form.foo1", "bar1")
            .assert_equal("body.form.foo2", "bar21")
        ),
    ]


if __name__ == "__main__":
    TestCaseRequestWithTestcaseReference().test_start()
三、运行测试用例
hrun = httprunner run
运行用例的各种方式
(1)运行指定路径的用例
hrun path/to/testcase1
(2)指定多个测试用例路径执行
hrun path/to/testcase1 path/to/testcase2
(3)运行测试项目中所有测试用例 指定测试项目的绝对路径
hrun path/to/testcase_folder/ 每个用例都会生成一个执行log,位置:<ProjectRootDir>/logs/TestCaseID.run.log.
测试用例ID和Request ID
为排除故障,每个测试用例将生成唯一ID(uuid4),每个request header将自动添加一个带有测试用例ID的HRUN-Request-ID
HRUN-Request-ID = "HRUN-<TestCase ID>-<timestamp_six_digits>"
timestamp_six_digits = str(int(time.time() * 1000))[-6:])
换句话说,同一个测试用例中的所有request有同样的HRUN-Request-ID前缀,并且每个请求有唯一的HRUN-Request-ID后缀。
Client & Server IP:PORT
有时,记录远程服务器的IP和端口对于解决问题特别有用,尤其是当有多台服务器并且我们要检查哪一台返回错误时。
从3.0.13开始,HttpRunner将在调试阶段记录客户端和服务端IP:PORT
测试用例摘要:
"address": {
    "client_ip": "10.90.205.63",
    "client_port": 62802,
    "server_ip": "34.233.204.163",
    "server_port": 443
},
四、测试报告
受益于pytest的集成,HttpRunner v3.x可以利用pytest所有插件,包括pytest-html和allure-pytest
内置html报告
pytest-html插件随HttpRunner一期安装。当你运行测试用例想生成html报告时,可以在命令行中添加--html
$ hrun /path/to/testcase --html=report.html
如果想创建一个独立的、更加方便共享测试结果的html报告,可以在命令行中添加--self-contained-html
$ hrun /path/to/testcase --html=report.html --self-contained-html
详情请看pytest-html
allure报告
allure-pytest是HttpRunner的可选依赖项,所以如果想生成allure报告时,需要单独安装:
pip install allure-pytest
或者在安装httprunner时选择安装:
pip install "httprunner[allure]"
一旦allure-pytest安装好,可以用hrun/pytest使用如下功能: * --alluredir = DIR:在指定目录中生成“魅力”报告(可能不存在) * --clean-alluredir:清理alluredir文件夹(如果存在) * --allure-no-capture:不要将pytest捕获的日志记录/ stdout / stderr附加到报告中
要使Allure侦听器能够在测试执行期间收集结果,只需添加--alluredir选项,并提供指向应存储结果的文件夹的路径。 例如。:
$ hrun /path/to/testcase --alluredir=/tmp/my_allure_results
注意:这里需要安装allure ,并配置系统环境变量 要在测试完成后查看实际报告,您需要使用Allure命令行实用程序从结果生成报告。
# 在线打开报告
$ allure serve /tmp/my_allure_results
# 生成html报告
allure generate reports/allure -o reports/allure/html
此命令将在默认浏览器中显示您生成的报告 详情请看:allure-pytest
五、执行性能测试
通过重复使用Locust,您可以进行负载测试,而无需进行额外的工作。
$ locusts -V
locust 1.0.3
为了充分利用它们,您可以运行locusts -h来查看帮助,并且您会发现它与locust -h相同。


 383
383


 被折叠的 条评论
为什么被折叠?
被折叠的 条评论
为什么被折叠?
 到【灌水乐园】发言


