


目录
2.13.移动端适配--(postcss-px-to-viewport)
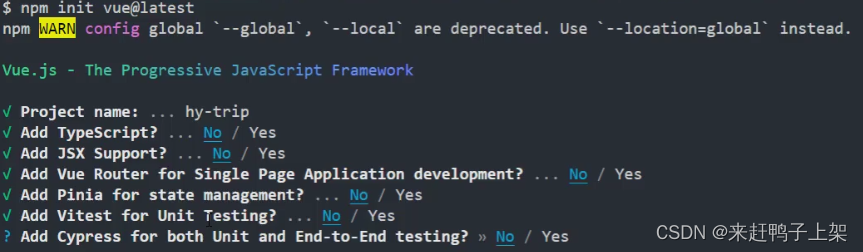
1.使用vite创建项目
npm init vue@latest
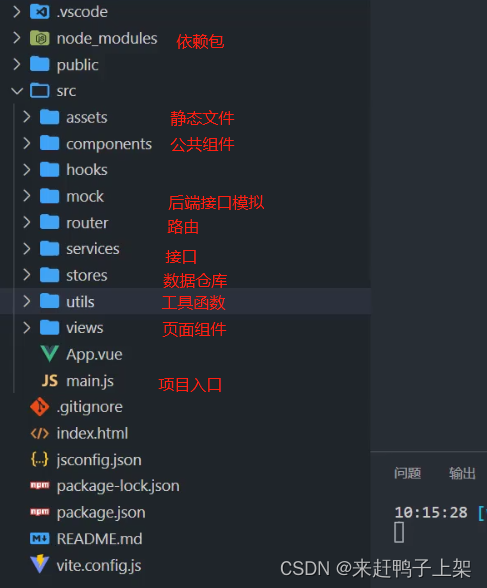
1.1项目目录结构
1.2.样式初始化normalize.css
npm install --save normalize.css
在main.js中导入:import "normalize.css"
1.3.使用vant组件库
下载vant: npm install vant
自动按需导入:在vite.config.js配置以下代码
……
import Components from 'unplugin-vue-components/vite'
import { VantResolver } from 'unplugin-vue-components/resolvers'
……
plugins: [
Components({
resolvers: [VantResolver()]
})
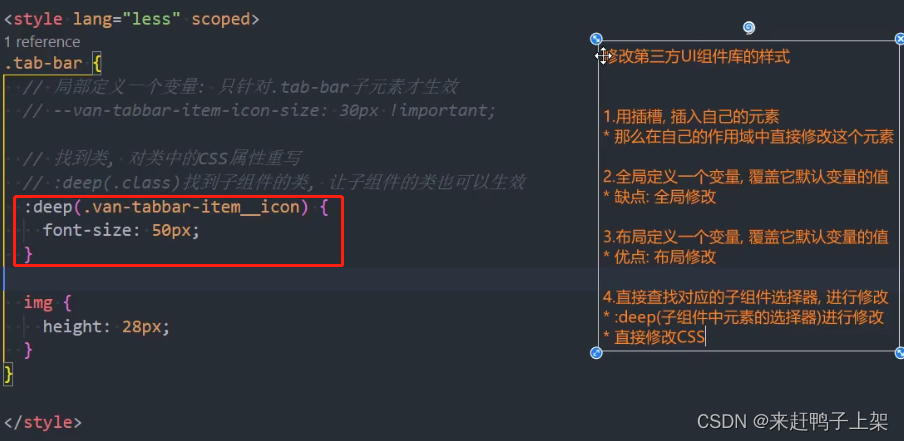
],1.4对UI组件库的样式修改
2.首页
2.1.获取位置
获取经纬度的api,内置API
  navigator.geolocation.getCurrentPosition(
    (res) => {
      console.log(res)
    },
    (err) => {
      console.log(err)
    },
    {
      enableHighAccuracy: true,
      timeout: 5000,
      maximumAge: 0
    }
  )
2.2.根据页面确定是否显示tabbar
第一种实现方式
设置对应路由页面meta.hideTabBar属性
{
      path: '/city',
      component: () => import('@/views/city/city.vue'),
      meta: {
        hideTabBar: true
      }
    }
tabbar组件设置v-if判断
<tabBar v-if="!router.meta.hideTabBar"></tabBar>
……
import { useRoute } from 'vue-router'
const router = useRoute()
第二种实现方式--利用视图层级
2.3接口封装
目录结构
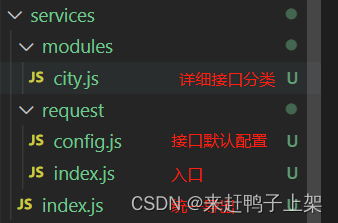
src\services\request\index.js
import axios from 'axios'
// import { useLoadingStore } from '@/store/modules/loading'
import { baseURL, TIMEOUT } from './config'
// const loadingStore = useLoadingStore()
class HYRequest {
  constructor(baseURL) {
    this.instance = axios.create({
      baseURL,
      timeout: TIMEOUT
    })
  }

  request(config) {
    // loadingStore.changeLoading(true)
    return new Promise((resolve, reject) => {
      this.instance
        .request(config)
        .then((res) => {
          resolve(res.data)
        })
        .catch((err) => {
          console.log('request err:', err)
          reject(err)
        })
        .finally(() => {
          // loadingStore.changeLoading(false)
        })
    })
  }

  get(config) {
    return this.request({ ...config, method: 'get' })
  }

  post(config) {
    return this.request({ ...config, method: 'post' })
  }
}

export default new HYRequest(baseURL)
src\services\request\config.js
// const baseURL = "http://localhost:1888/api"
const baseURL = 'http://123.207.32.32:1888/api'
const TIMEOUT = 5000

export { baseURL, TIMEOUT }
src\services\modules\city.js
import HYRequest from '../request'
export function getCityAPI() {
  return HYRequest.get({
    url: '/city/all'
  })
}
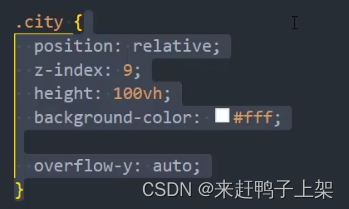
2.4.顶部搜索框固定(不滚动)
实现方式一:设置部分滚动
//将滚动的部分。使用容器包裹起来,后设置样式
.content {
    height: calc(100vh - 100px); //100px为不滚动的部分
    overflow-y: auto; //剩下的自适应滚动
  }
(不推荐使用,滚动条位置异常)实现方式二:将固定部分设置固定定位,滚动部分设置内边距或外边距

2.5.根据选择tabs的不同,展示不同内容
tabs绑定属性name---使选择状态赋值为name绑定的值
<van-tabs v-model:active="active">
        <van-tab
          v-for="(value, key, index) in allCities"
          :key="key"
          :name="key"
          :title="value.title"
        ></van-tab>
      </van-tabs>
获取对应内容---响应式computed
const { allCities } = storeToRefs(cityStore)
const currentGroup = computed(() => allCities.value[active.value])
2.5.字体偏上问题---行高原因
由于使用了github上的normal.css默认样式,里面设置了html默认行高为1.15;造成内容偏上的现象,内容位置=(行高-字体大小)/ 2将两个值分别分给上下
处理方式:将html行高设置为1.2
2.6.关于使用内置获取定位的API使用问题
chorome
项目运行在谷歌浏览器时,它获取定位经纬度是通过,获取谷歌服务器的数据来确定的。而国内访问不了谷歌服务器,所以出现超时错误
edge
能正常获取定位数据,因为这个浏览器是获取浏览器本地的定位数据的。
2.7.接口文档在线地址
2.8.封装触底事件hooks函数
监听window滚动事件---封装成hooks-----根据传进来的dom,确定滚动类型是窗口内容滚动还是标签内容滚动
import { onDeactivated, onMounted, onUnmounted, ref } from 'vue';
import { throttle } from 'underscore'

export default function useScroll(elRef) {
  let el = window

  const isReachBottom = ref(false)

  const clientHeight = ref(0)
  const scrollTop = ref(0)
  const scrollHeight = ref(0)

  // 防抖/节流
  const scrollListenerHandler = throttle(() => {
    if (el === window) {
      clientHeight.value = document.documentElement.clientHeight
      scrollTop.value = document.documentElement.scrollTop
      scrollHeight.value = document.documentElement.scrollHeight
    } else {
      clientHeight.value = el.clientHeight
      scrollTop.value = el.scrollTop
      scrollHeight.value = el.scrollHeight
    }
    if (clientHeight.value + scrollTop.value >= scrollHeight.value) {
      console.log("滚动到底部了")
      isReachBottom.value = true
    }
  }, 100)

  onMounted(() => {
    if (elRef) el = elRef.value
    el.addEventListener("scroll", scrollListenerHandler)
  })

  onUnmounted(() => {
    el.removeEventListener("scroll", scrollListenerHandler)
  })

  return { isReachBottom, clientHeight, scrollTop, scrollHeight }
}
组件中使用--home.vue
import { useScroll } from '@/hooks/useScroll'

const { isReachBottom } = useScroll()
watch(isReachBottom, (newValue) => {     //使用侦听器,响应式侦听触底标识
  if (newValue)
    useHome.fetchHomeList().then(() => {  //判断是否调用接口完成,再执行关闭触底事件
      isReachBottom.value = false
    })
})
2.9.防抖节流函数的包--underscore
下载:npm install underscore
节流使用:
import { onMounted, onUnmounted, ref } from 'vue'
import { throttle } from 'underscore'  //导入节流函数
export function useScroll() {
  const isReachBottom = ref(false)
  const clientHeight = ref(0)
  const scrollTop = ref(0)
  const scrollHeight = ref(0)

  const scrollBottomHandler = throttle(() => {   //使用节流,参数一:回调函数,参数二:时间间隔
    clientHeight.value = document.documentElement.clientHeight
    scrollTop.value = document.documentElement.scrollTop
    scrollHeight.value = document.documentElement.scrollHeight
    console.log('111')
    if (scrollTop.value + clientHeight.value >= scrollHeight.value) {
      isReachBottom.value = true
    }
  }, 100)
  onUnmounted(() => {
    window.removeEventListener('scroll', scrollBottomHandler)
  })
  onMounted(() => {
    window.addEventListener('scroll', scrollBottomHandler)
  })
  return { clientHeight, scrollTop, scrollHeight, isReachBottom }
}
2.11.关于给组件绑定事件或属性
根据组件根标签是否使只有一个决定能否进行绑定事件和绑定属性,默认绑定的事件和属性是绑定到了$attrs中,添加到根标签上。
2.12.vue3中路由编程式跳转的使用
使用router.push()等函数时,需要从vue-router中导出useRouter()方法,
使用route.path等数据时,需要从vue-router中导出useRoute()方法
2.13.移动端适配--(postcss-px-to-viewport)
$ npm install postcss-px-to-viewport --save-dev
常见配置:
{
  unitToConvert: 'px',
  viewportWidth: 320,
  unitPrecision: 5,
  propList: ['*'],
  viewportUnit: 'vw',
  fontViewportUnit: 'vw',
  selectorBlackList: [],
  minPixelValue: 1,
  mediaQuery: false,
  replace: true,
  exclude: undefined,
  include: undefined,
  landscape: false,
  landscapeUnit: 'vw',
  landscapeWidth: 568
}
真实用例
import { fileURLToPath, URL } from 'node:url'
import { defineConfig } from 'vite'
import vue from '@vitejs/plugin-vue'
import Components from 'unplugin-vue-components/vite';
import { VantResolver } from 'unplugin-vue-components/resolvers';

import postcsspxtovw from 'postcss-px-to-viewport'

// https://vitejs.dev/config/
export default defineConfig({
  plugins: [
    vue(),
    Components({
      resolvers: [VantResolver()],
    })
  ],
  resolve: {
    alias: {
      '@': fileURLToPath(new URL('./src', import.meta.url))
    }
  },
  css: {
    postcss: {
      plugins: [
        postcsspxtovw({
          viewportWidth: 375,
          selectorBlackList: ["favor"]
        })
      ]
    }
  }
})
2.14.使用dayjs包---格式化时间
下载:npm install dayjs --save
使用
import dayjs from 'dayjs'

//将时间格式化为指定格式
export function formatMonthDay(date, formatStr = "MM月DD日") {
  return dayjs(date).format(formatStr)
}

//计算时间间隔,传day即计算时间间隔天数
export function getDiffDays(startDate, endDate) {
  return dayjs(endDate).diff(startDate, "day")
}
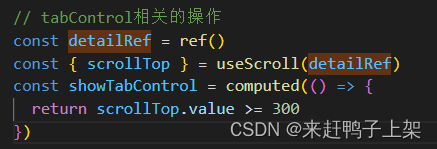
2.15.详情页tab设置,滚动对应模块位置-----实现方案
自定义详情页头部模块组件;
设置v-if,使用自定义的hooks监听滚动事件,当滚动距离超过指定值时,显示tab
传递由详情页各部分内容组件的name属性组成的数组,用作tab每一项的名称;
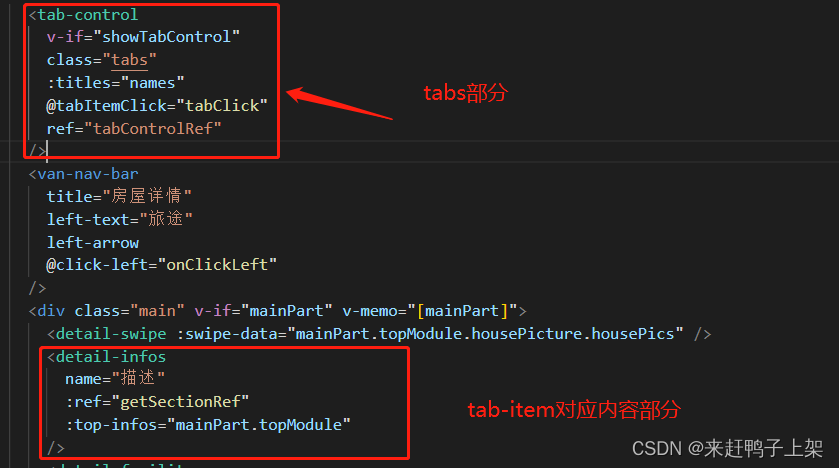
绑定tab项点击选中事件;
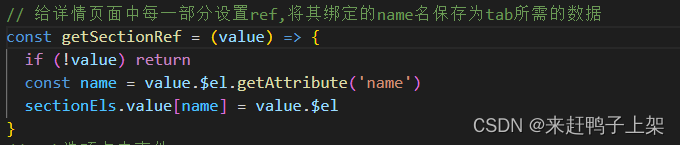
给tab-item对应内容部分绑定ref,用于获取dom,保存为tab-item的names数组和获取dom距离顶部距离,用于滚动定位。
2.16.兼容性问题---放大问题
问题1:在移动端页面按住shift+拖动鼠标,可以进行画面放大;
解决方案:在index.html文件进行配置,编辑meta标签;
原meta:
<meta name="viewport" content="width=device-width, initial-scale=1.0>更改: (禁止画面放大)
<meta name="viewport" content="width=device-width,
 initial-scale=1.0, maximum-scale=1.0, minimum-scale=1.0, user-scalable=no" />
2.17.兼容性--pxtovw分辨率转化
插件使用,vant建议使用的:postcss-px-to-viewport(
yarn add -D postcss-px-to-viewport)
在webpack的环境下,webpack会自动解析postcss.config.js这个文件
项目根目录创建:postcss.config.js文件,代码如下:
// vue cli/vite
module.exports = {
  plugins: {
    'postcss-px-to-viewport': {
      viewportWidth: 375,
      selectorBlackList: ["favor"]
    }
  }
};
更多配置参考:postcss-px-to-viewport/README_CN.md at master · evrone/postcss-px-to-viewport (github.com)


 2570
2570


 被折叠的 条评论
为什么被折叠?
被折叠的 条评论
为什么被折叠?
 到【灌水乐园】发言


