


一、什么是IP ADDRESS
internet protocol ADDRESS ##网络进程地址
ipv4 internet protocol version 4
1. 2X32 二进制的32位
ip是由32个01组成
11111110.11111110.11111110.11111110 = 254.254.254.254
区域的集和叫做网络位
区域中的一个人叫做主机位
2.子网掩码
用来划分网络区域
子网掩码非0的位对应的ip上的数字表示这个ip的网络位
子网掩码0位对应的数字是ip的主机位
网络位表示网络区域
主机位表示网络区域里的某台主机
3.ip通信判定
网络位一致,主机位不一致的2个IP可以直接通讯
172.25.254.1/24 表示172.25.254的第一台主机 24=255.255.255.0
172.25.254 网络位
172.25.254.2/24
172.25.0.1/16 包括以上两个ip
网络位前两位只要一样就可以通讯,只不过信号不是很好
4.网络设定工具
ping ##检测网络是否通畅
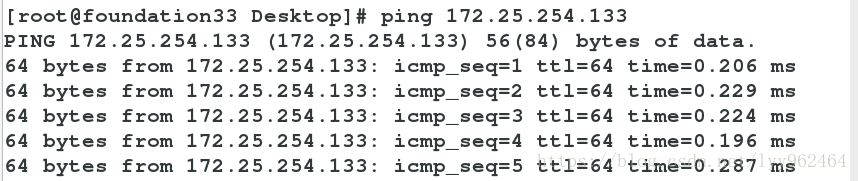
ifconfig ##查看或设定网络接口
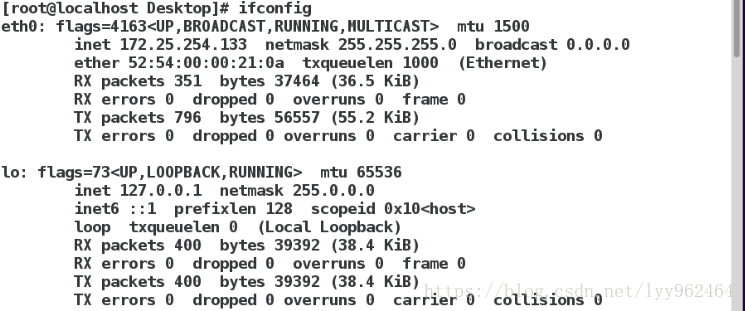
ifconfig ##查看
ifconfig device ip/24 ##设定
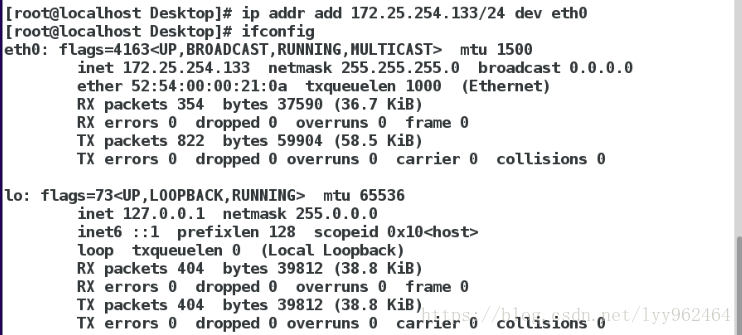
ip addr ##检测或设定网络接口
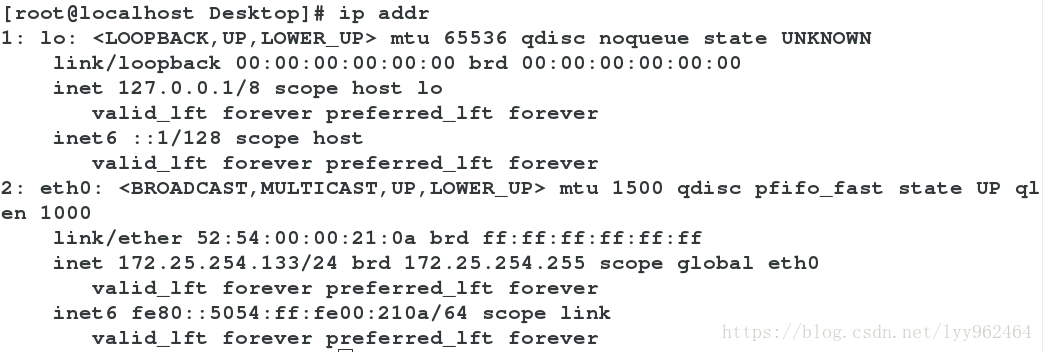
ip addr show ##检测

ip addr add ip/24 dev device ##设定
注意:
“device的名字是一个物理事实,看到什么名字只能用什么名字”
二、图形方式配置网络
配置文件更改后需要重启网络
nm-connection-editor
systemctl stop NetworkManager
systemctl restart network
systemctl start NetworkManager
systemctl status NetworkManager ##记录网络状态
1.执行nm-connection-editor打开网络配置图形
![]()

2.删除原有的网络,添加新的网络

3.填写静态ip和子网掩码,网关点一下就好,不点的话保存不了。
DNS服务器地址可填可不填,然后save保存。

4.设置好之后需要重启网络来查看eth0的ip


三、命令方式设定网络
nmcli ##NetworkManger必须开启
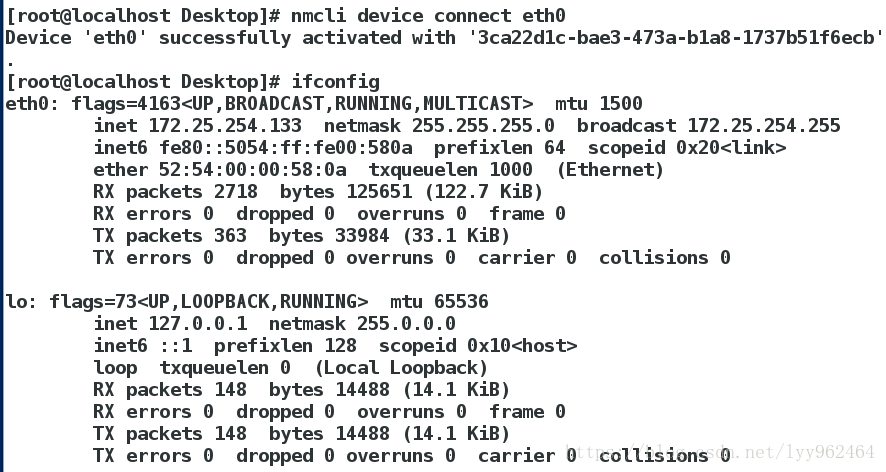
nmcli device connect eth0 ##启用eth0网卡
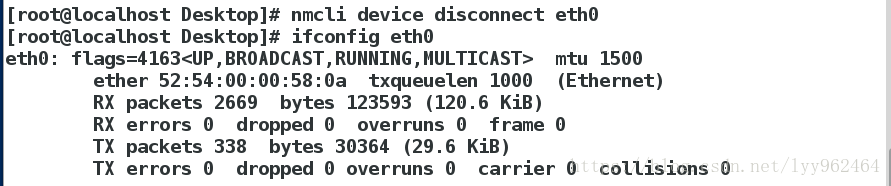
nmcli device disconnect eth0 ##关闭eth0网卡
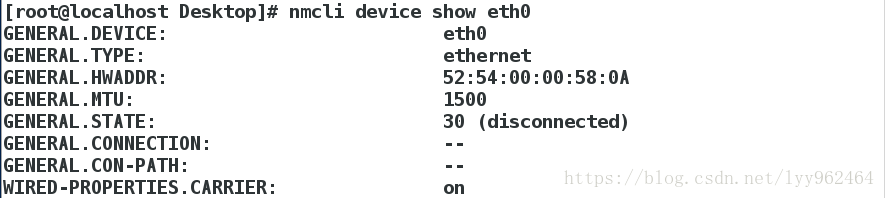
nmcli device show eth0 ##查看网卡信息
nmcli device status eth0 ##查看网卡为哪个接口服务

nmcli connection show

nmcli connection up westos ##开启设备westos

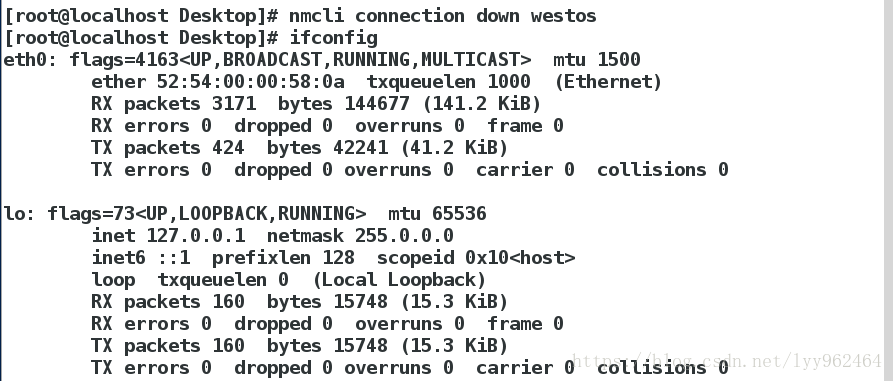
connection down westos ##关闭设备westos
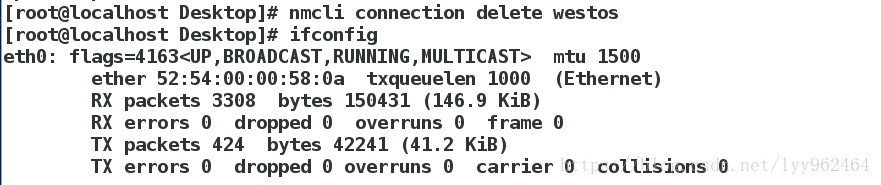
nmcli connection show westos ##开启链接

nmcli connection delete westos ##删除链接
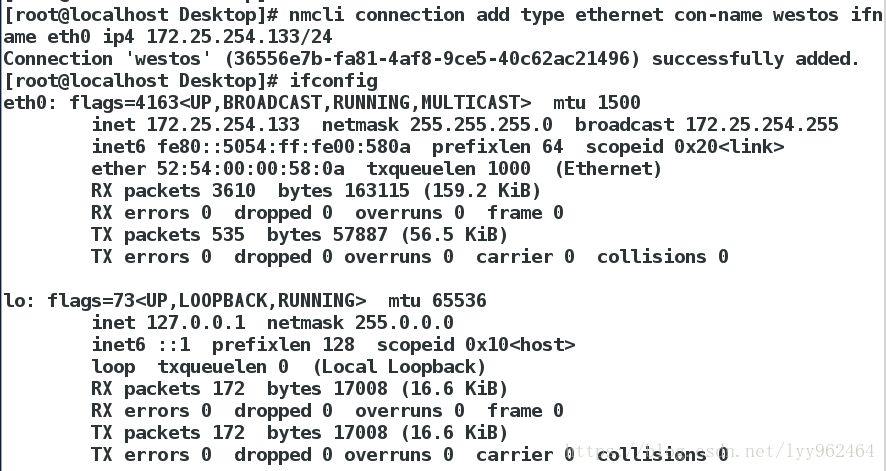
connection add type ethernet con-name westos ifname eth0 ip4 172.25.254.133/24
connection modify westos ipv4.method manual ##更改westos的工作方式为静态

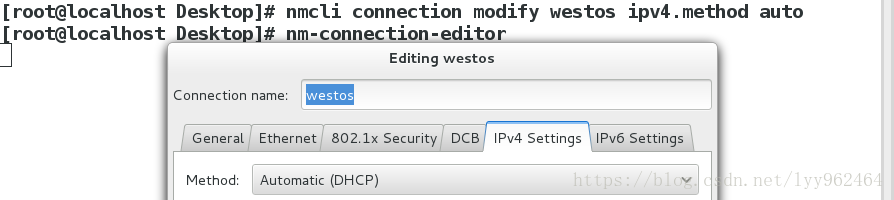
connection modify westos ipv4.method auto ##更改他的工作方式为动态的
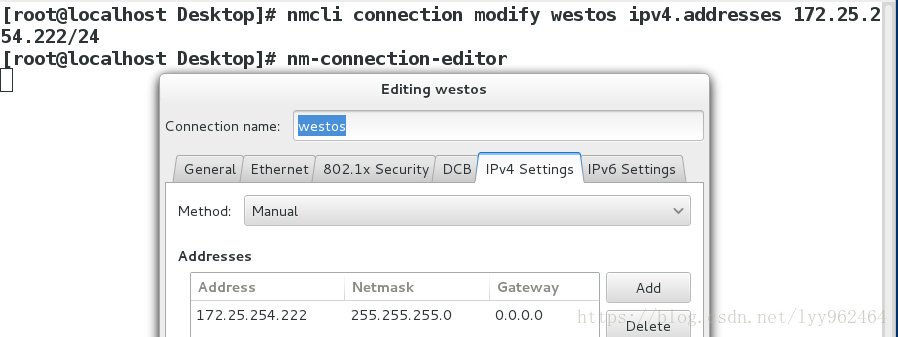
connection modify westos ipv4.address 172.25.254.233/24
四、管理网络配置文件
网络配置目录
/etc/sysconfig/network-scripts/
网络配置文件的命名规则
ifcfg-xxx
DEVICE=XXX ##设备名称
BOOTPROTO=dhcp|static|none ##设备工作方式(none为静态获取ip,dhcp为动态获取ip)
ONBOOT=yes ##网络服务开启时自动激活网卡
IPADDR= ##IP地址
PREFIX=24 ##子网掩码
NETMASK=255.255.255.0 ##子网掩码
NAME= ##接口名称
示例:
静态网络设定文件
vim /etc/sysconfig/network-scripts/ifcfg-eth0
DEVICE=eth0
BOOTPROTO=none
ONBOOT=yes
IPADDR=172.25.254.133
NETMASK=255.255.255.0
NAME=westos
systemctl restart network


一块网卡上配置多个IP
vim /etc/sysconfig/network-scripts/ifcfg-eth0
DEVICE=eth0
BOOTPROTO=none
ONBOOT=yes
IPADDR0=172.25.254.133
NETMASK0=255.255.255.0
NAME=westos
IPADDR1=172.25.0.100
PREFIX1=24
systemctl restart network
ip addr show etho 显示多个ip


五、文本方式配置网络
1.用nmtui打开网络配置界面,点击Edit a connection:

2.点击Add添加:

3.选择Ethernet的网络:

4.填写网络配置信息:

5.点击quit退出

重启网络服务,查看ip

六、lo回环接口
回环接口------人的神经-----127.0.0.1----localhost
七、网关
1.把真实主机变成路由器
systemctl stop libvirtd
systemctl restart firewalld
systemctl start libvirtd
firewall-cmd --list-all
firewall-cmd --permanent --add--masquerade
firewall-cmd --reload
firewall-cmd --list-all
public (default, active)
interfaces: br0 enp0s25 wlp3s0
sources:
services:dhcpv6-localhost ssh
ports:
masquerade: yes <<地址伪装功能开启,真实主机变成路由器
forward-ports:
icmp-blocks:
rich rules:


2.设定虚拟机网关
vim /etc/sysconfig/network ##全局网关,针对所有没有设定网关的网卡生效
GATEWAY=172.25.254.33
vim /etc/sysconfig/network-scripts/ifcfg-eth0
GATEWAY0=172.25.254.33 ##当网卡中设定的IP有多个时,指定对于那个IP生效
GATEWAY=172.25.254.33 ##当网卡中设定的IP只有一个时,即生效
route -n ##查看网关
Destination Gateway genmask Flags Metric Ref Use Iface
0.0.0.0 172.25.254.33 0.0.0.0 UG 1024 0 0 0 eth0
172.25.254.0 0.0.0.0 255.255.255.0 U 0 0 0 eth0

八、设定dns
domain name server == 域名解析服务 ##解析就是把域名变成IP
vim /etc/hosts ##本地解析文件
ip 域名
220.181.111.188 www.baidu.com

在dns建立之后,重启之后的内容会被刷新掉
vim /etc/resolv.conf ##dns的指向文件
nameserver 114.114.114.114 ##当需要某个域名的IP地址时去问114.114.114.114


重启之后的内容不会被刷新掉:
vim /etc/sysconfig/network-scripts/ifcfg-xxxx
DNS1=114.114.114.114


注意:
当网络工作模式为dhcp时
那么/etc/resolv.conf会被获得到的信息修改
如果不需要获得dns信息
在网卡配置文件中加入
PEERDNS=no,若未加入PEERDNS=no,重启网络服务之后则dns服务器地址就会发生改变
11.设定解析的优先级
系统默认:
/etc/hosts > /etc/resolv.conf
vim /etc/nsswitch.conf
39 hosts: files dns ##/etc/hosts优先
![]()
![]()

![]()


vim /etc/nsswitch.conf
39 hosts: dns files ##/etc/resolv.conf dns指向优先


九、dhcp服务配置
yum install dhcp -y
cp /user/share/doc/dhcp*/dhcpd.conf.example /etc/dhcp/dhcp.conf
vim /etc/dhcp/dhcp.conf
systemctl restart dhcpd
systemctl stop firewalld


在客户端测试:
将BOOTPROTO=dhcp,然后重启网络服务,用ifcinfig查看ip,GATEWAY,dns

测试:
在网络工作模式是dhcp的主机中重启网络
则可看到
ip
GW
dns
全部获取成功


 949
949

 被折叠的 条评论
为什么被折叠?
被折叠的 条评论
为什么被折叠?
 到【灌水乐园】发言


