


一、接入和使用
1、依赖导入
工程下gradle下
buildscript{

    dependencies {

        // 用于导入aspectj的plugin
        classpath 'com.hujiang.aspectjx:gradle-android-plugin-aspectjx:2.0.8'
    }
}
对应app或者module的gradle下
// 在当前模块应用aspectj实现字节码插桩
apply plugin: 'android-aspectjx'

// 常用排除一些目录下的代码
aspectjx {
    exclude 'versions.9', 'androidx', 'com.google', 'com.taobao', 'com.ut'
}

dependencies {

    // 主要导入对应注解和一些通用模板代码
    implementation 'org.aspectj:aspectjrt:1.8.9'
}
2、基础使用(仅简单例子)
// 标记这个类包括需要插入的代码和对应插入位置
@Aspect
public class Aspectj {

    // 指定对应的切入点
    @Pointcut("execution(* android.com.aspectj.BaseActivity+.onCreate(..)) && within(android.com.aspectj.MainActivity)")
    public void activityOnCreatePointcut() {

    }

    // 在该方法执行前插入
    @Before("activityOnCreatePointcut()")
    public void activityOnCreateBefore(JoinPoint joinPoint) {
        Log.d("xx", "activityOnCreateBefore: " + joinPoint.getThis());
    }

    // 增强的插入方法
    @Around("activityOnCreatePointcut()")
    public void activityOnCreateAround(ProceedingJoinPoint joinPoint) throws Throwable {
        Log.d("xx", "activityOnCreateAround: " + joinPoint.getThis());
        joinPoint.proceed();
    }

    // 如果After和Around同时存在,After必须在Around之后
    @After("activityOnCreatePointcut()")
    public void activityOnCreateAfter(JoinPoint joinPoint) {
        Log.d("xx", "activityOnCreateAfter: " + joinPoint.getThis());
    }

}按照Aspectj定下规则,就是可以编写出想要在哪里插入想要的代码,具体的规则说明就不详细的描述了,可以参照AspectJTM 编程指南文档,安卓具体用法会存在不同之处。
二、基础原理说明
1、大体的原理
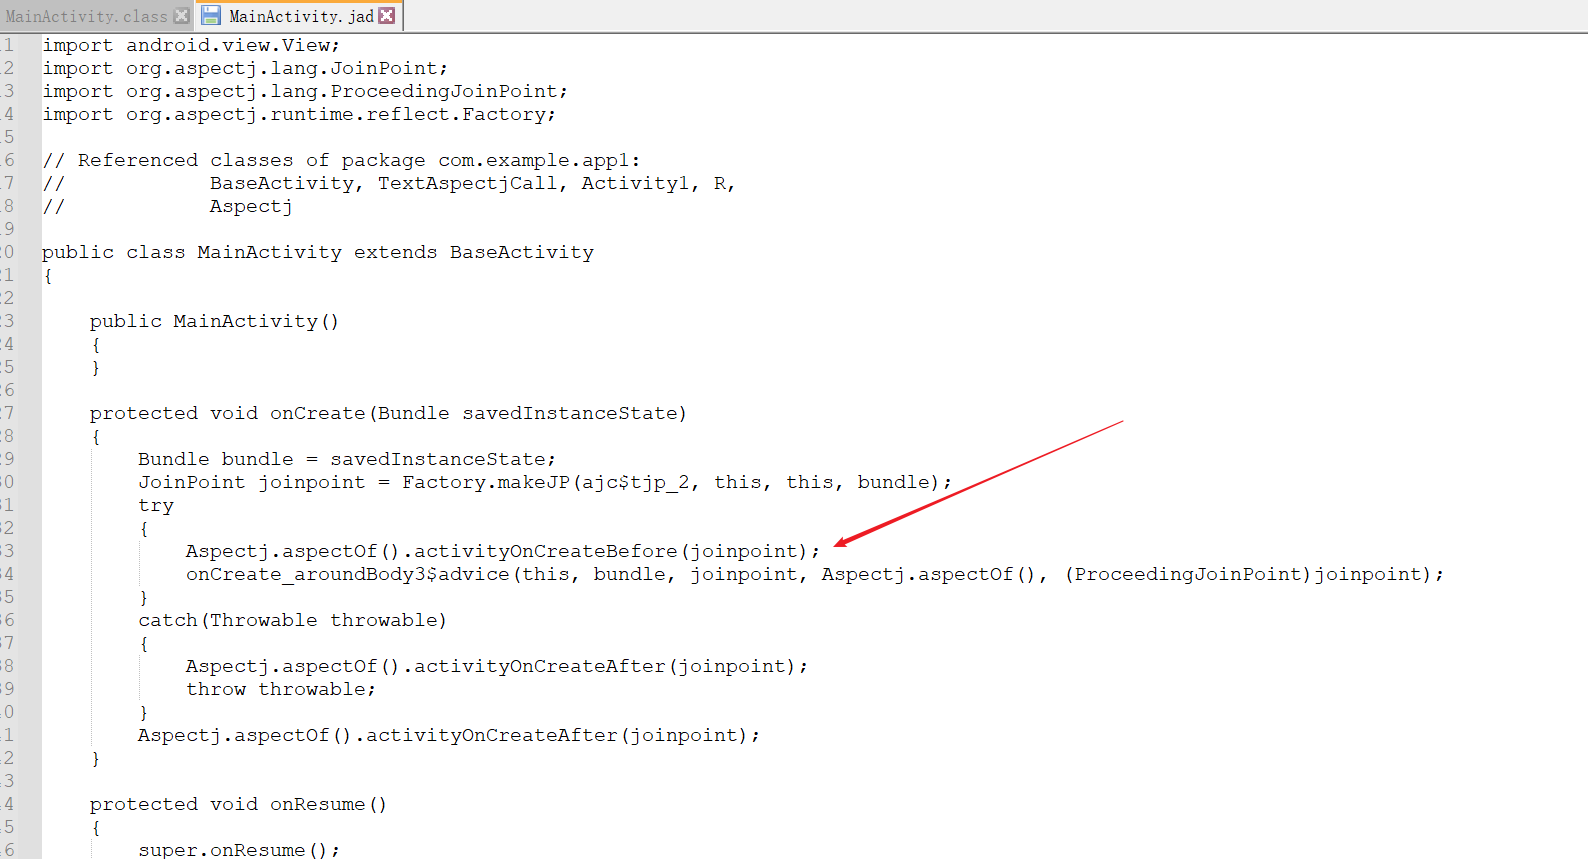
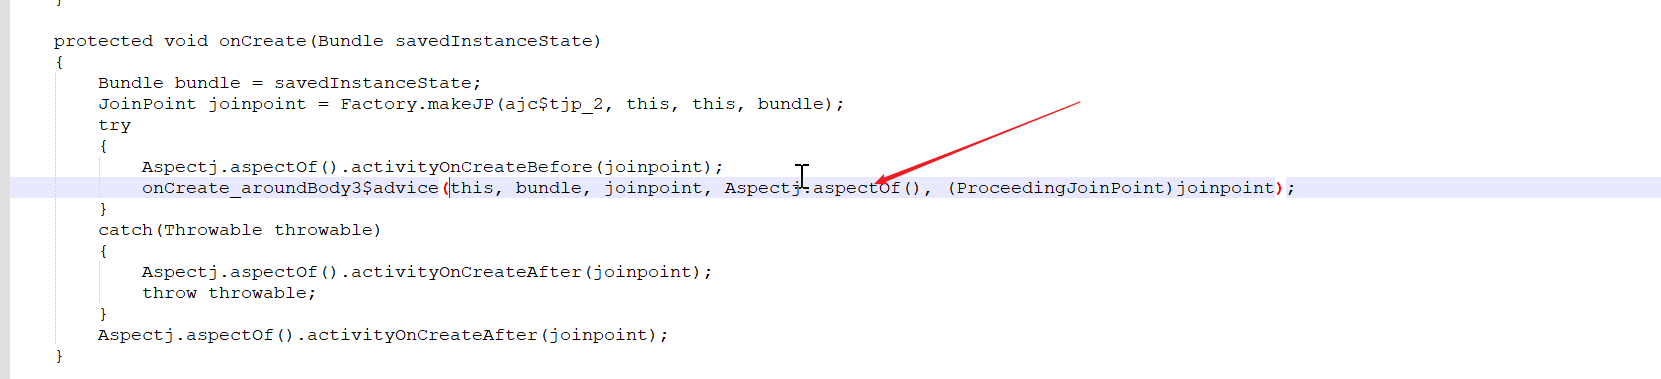
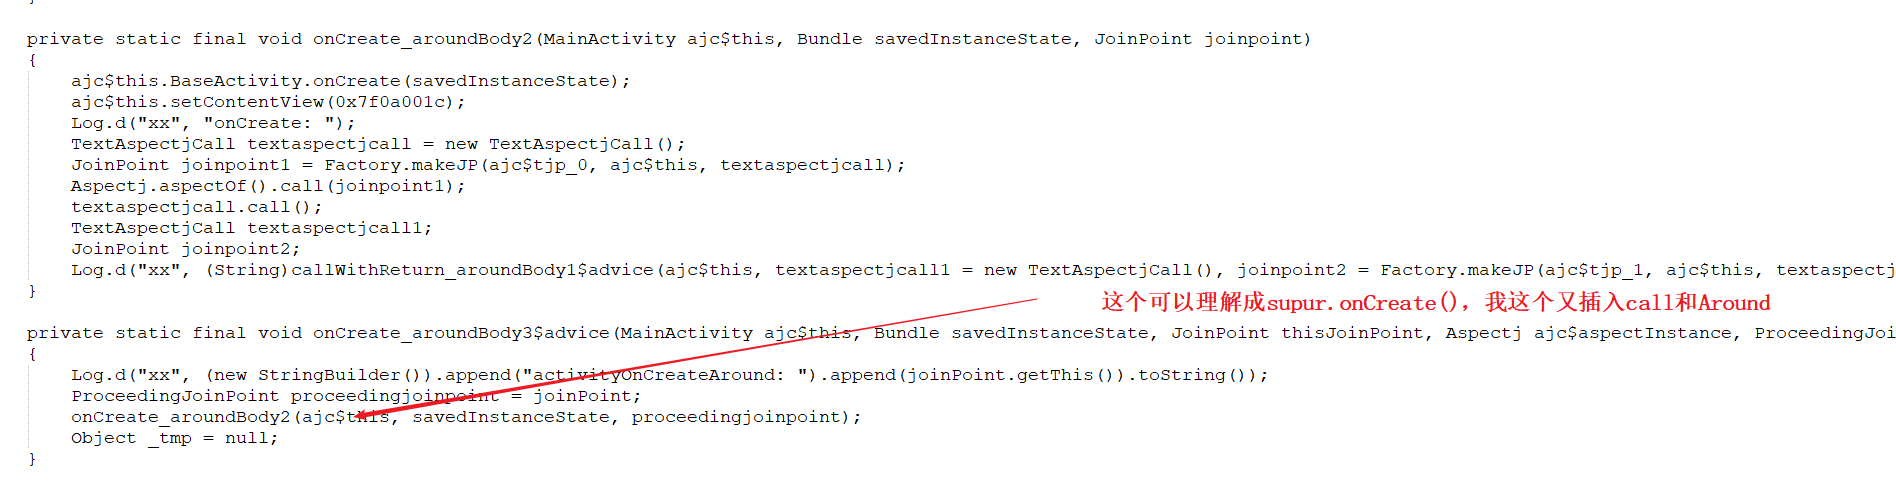
通过android提示transform的api,操作javac编译出字节码和jar引入的字节码。找到@Aspect标记的类,通过@Pointcut获得我们要插入方法的位置,@Before,@Around,@After标记的方法就是我们要插入的方法(@Aspect对应的类会改变成单例,就可以在对应的位置插入方法)。
2、解析具体的注解和关键字
主要分析方式通过查看操作的后的字节码,分析具体插入方法和实现方式
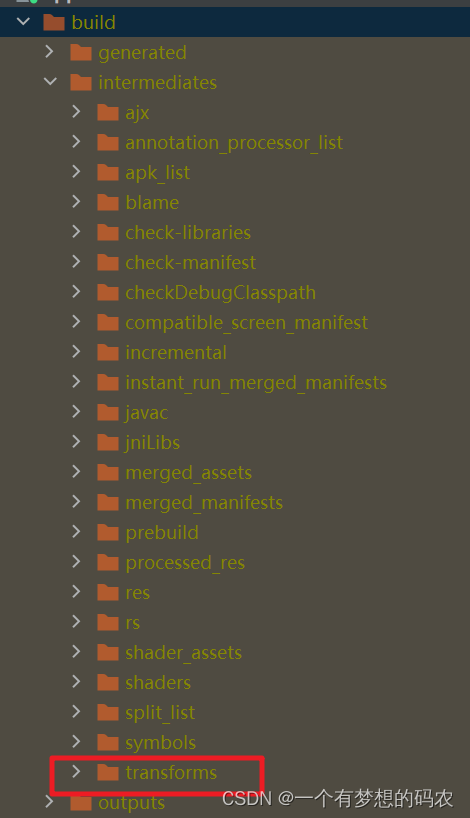
由于是基于transform的api,可以在Transform的目录找到其加过后的代码
(1) 使用execution在对应的方法内插入代码配合@Before @After
    @Pointcut("execution(* android.com.aspectj.BaseActivity+.onCreate(..)) && within(android.com.aspectj.MainActivity)")
    public void activityOnCreatePointcut() {

    }

    @Before("activityOnCreatePointcut()")
    public void activityOnCreateBefore(JoinPoint joinPoint) {
        Log.d("xx", "activityOnCreateBefore: " + joinPoint.getThis());
    }
(2)使用call在对应方法调用插入代码配合@Before @After
   @Pointcut(
        "call(* com.example.app1.TextAspectjCall.call()) && withincode(* com.example.app1.MainActivity.onCreate(..))")
    public void callPointcut() {

    }

    @Before("callPointcut()")
    public void call(JoinPoint joinPoint) {
        Log.d("xx", "callBefore(call): " + joinPoint.getThis());
    }
(3)@Around增强版的方法插入
1、配合execution
生成一个新方法,插入相关代码,放入原先的方法中调用
   @Pointcut("execution(* com.example.app1.BaseActivity+.onCreate(..)) && within(com.example.app1.MainActivity)")
    public void activityOnCreatePointcut() {

    }

    @Around("activityOnCreatePointcut()")
    public void activityOnCreateAround(ProceedingJoinPoint joinPoint) throws Throwable {
        Log.d("xx", "activityOnCreateAround: " + joinPoint.getThis());
        joinPoint.proceed();
    }
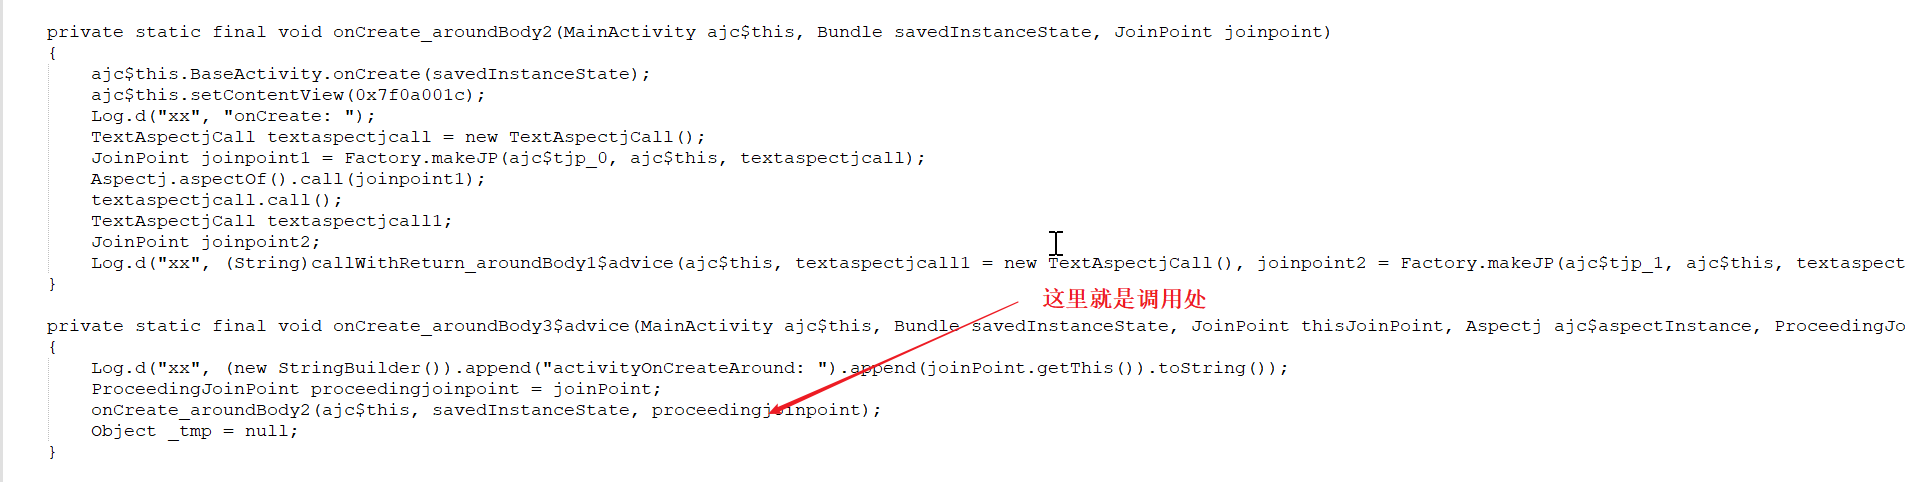
 2、配合call
在调用处,形成一个新的方法,在这个方法内插入代码,通过调用这个方法,就实现了在调用处实现使用这个@Around插入代码
    @Pointcut("call(* com.example.app1.TextAspectjCall.callWithReturn())")
    public void callWithReturn() {

    }

    @Around("callWithReturn()")
    public Object call2(ProceedingJoinPoint joinPoint) throws Throwable {
        long start = System.currentTimeMillis();
        Object result = joinPoint.proceed();
        long duration = System.currentTimeMillis() - start;
        Log.d("xx", "callWithReturn" + duration);
        return result;
    }
以上就是常用4种方案的解析
三、总结
Aspectj的基本用法没有什么难度,基本原理也是基于transform api。往深的摸索就是字节码的生成,还有怎么编译的速度。


 589
589


 被折叠的 条评论
为什么被折叠?
被折叠的 条评论
为什么被折叠?
 到【灌水乐园】发言


