


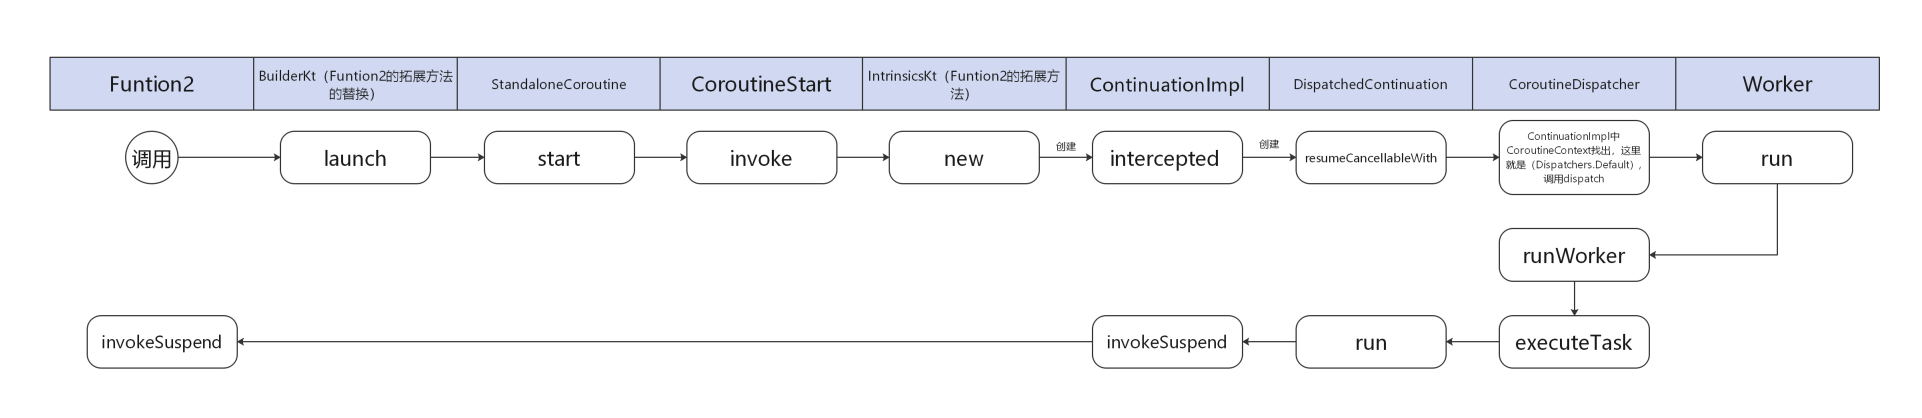
先上一张流程图
追踪源码前,先了解一些Kotlin高阶写法,方便阅读代码
高阶拓展函数 T.()
一种类似 (T) 效果的写法
class A() {
    fun testA(block: A.() -> Unit) {
        block(this)
    }
}

val a = A()
a.testA {
    this // 指的就是a
}
operator关键字
(1) 重写 []
class A(){
    operator fun get(i:Int):String {
        when(i){
            1->"a"
            else ->""
        }
    }
}

val a = A()
val value = a[1]
(2) 重写 +
class A(){
    operator fun plus(a:A):A{
    }
}

val value = A() + A() // 这个写法就是CoroutineContext的基础实现方法
invoke的写法
class A(){
    fun invoke(i:Int)
}

val a = A()
a.invoke(1)
a(1)  // invoke可以省略
kotlin的扩展方法编译成java时,会生成一个类,构造方法的参数就是 该类 加 扩展方法的参数
通过最简单的协程调用方法来追踪协程的源码执行流程
suspend fun testA() {
}
// 最简单的调用
GlobalScope.launch {
testA()
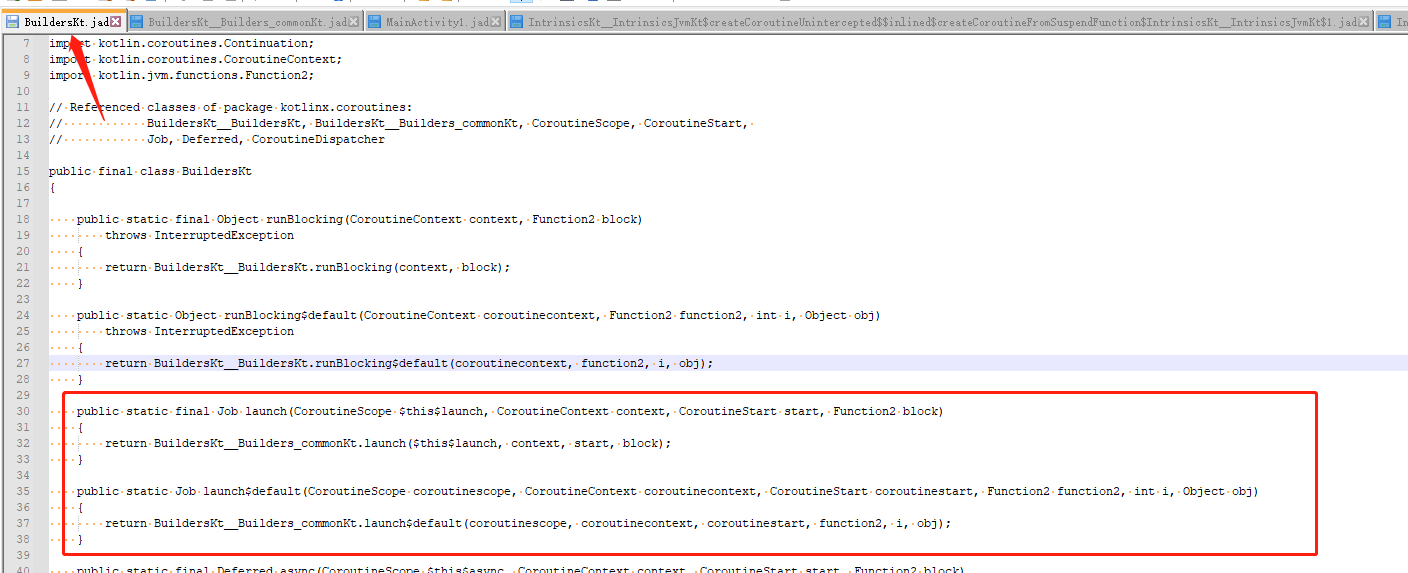
}拓展方法launch编译后被替换成
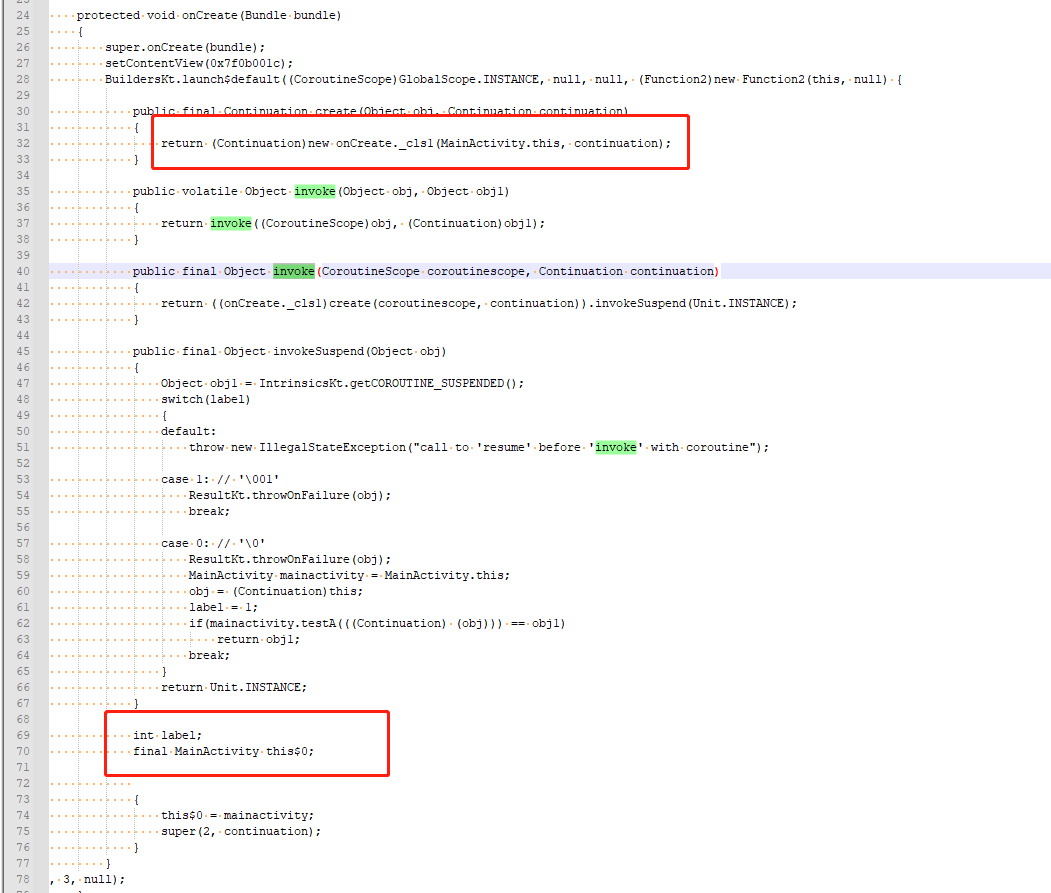
在BuildersKt和BuildersKt_Builders_commonKt 两个类之间相互调用
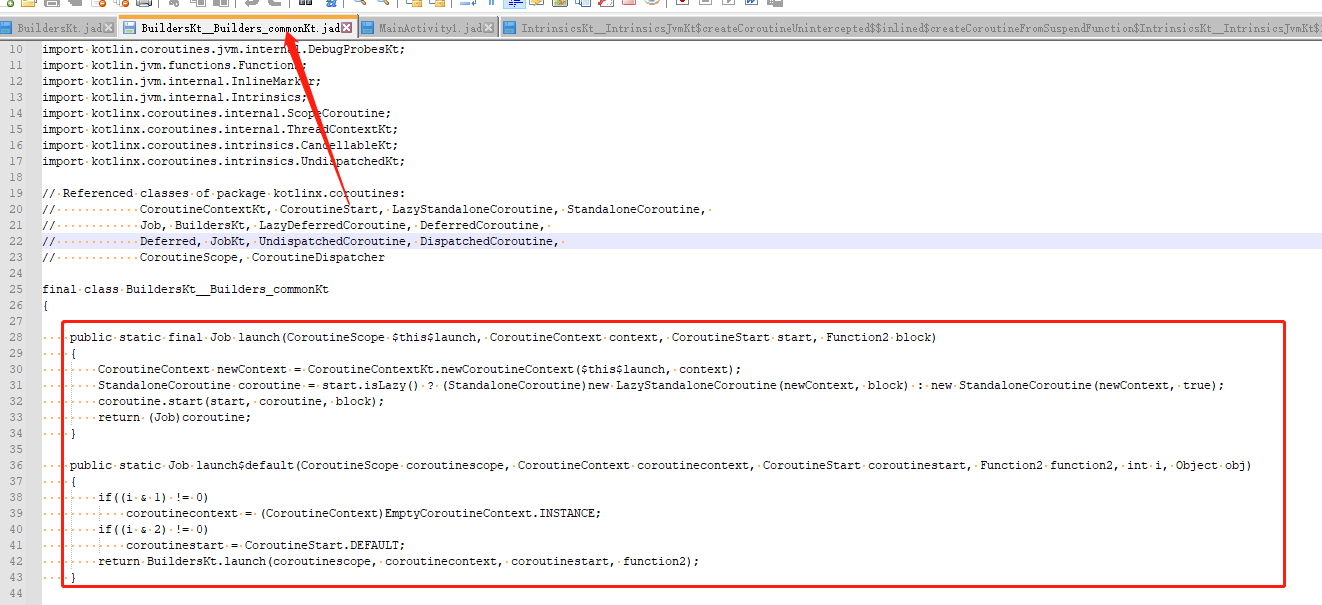
生成StandaloneCoroutine类,这个类的基类在注解说明了该类的作用:
协程构建器中协程实现的抽象基类。此类实现完成 Continuation、Job 和 CoroutineScope 接口。 它将继续的结果存储在作业的状态中。 此协程在完成之前等待子协程完成,并通过中间失败状态失败。
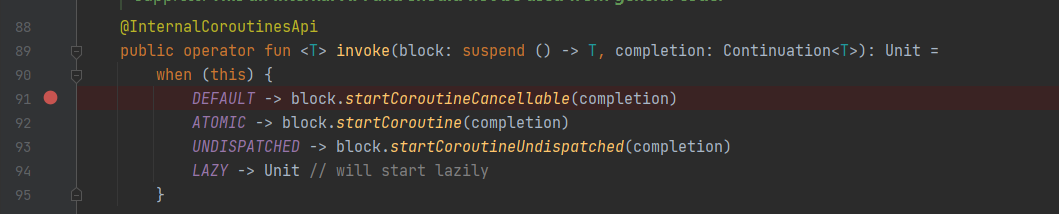
调用start方法,通过CoroutineStart创建Continuation(这个类实现挂起和取消挂起的关键作用)

调用CoroutineStart的invoke方法

图中有三个拓展函数,下面将分成三个点
补充:Continuation这个类,代表的就是一个状态机
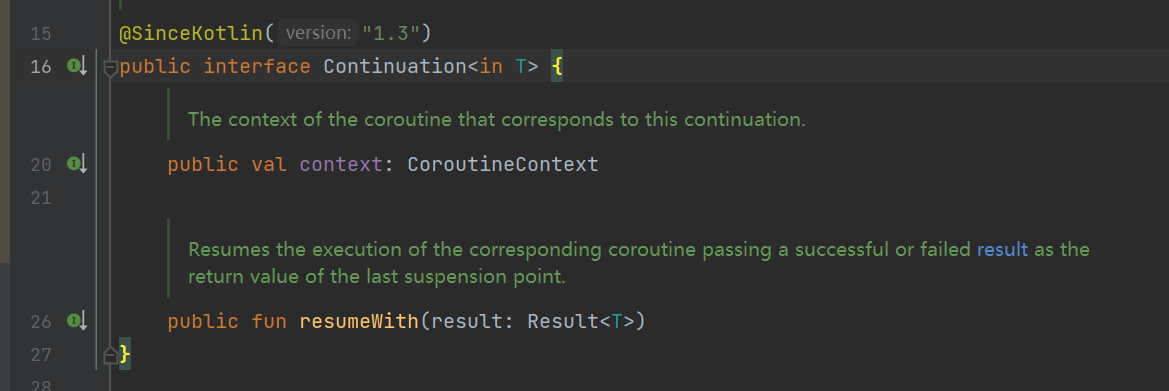
基类唯一一个变量CoroutineContext,是一个链表,存在当前协程的所有状态;resumeWith,注解写的意思就是 恢复执行相应的协程,将成功或失败的结果作为最后一个暂停点的返回值。当调用一个suspend方法时,当前方法的协议就在该位置被挂起,等suspend方法内的代码被执行完后,调用resumeWith回调被挂起的位置取消挂起继续执行,就结果作为参数返回,具体代码如下
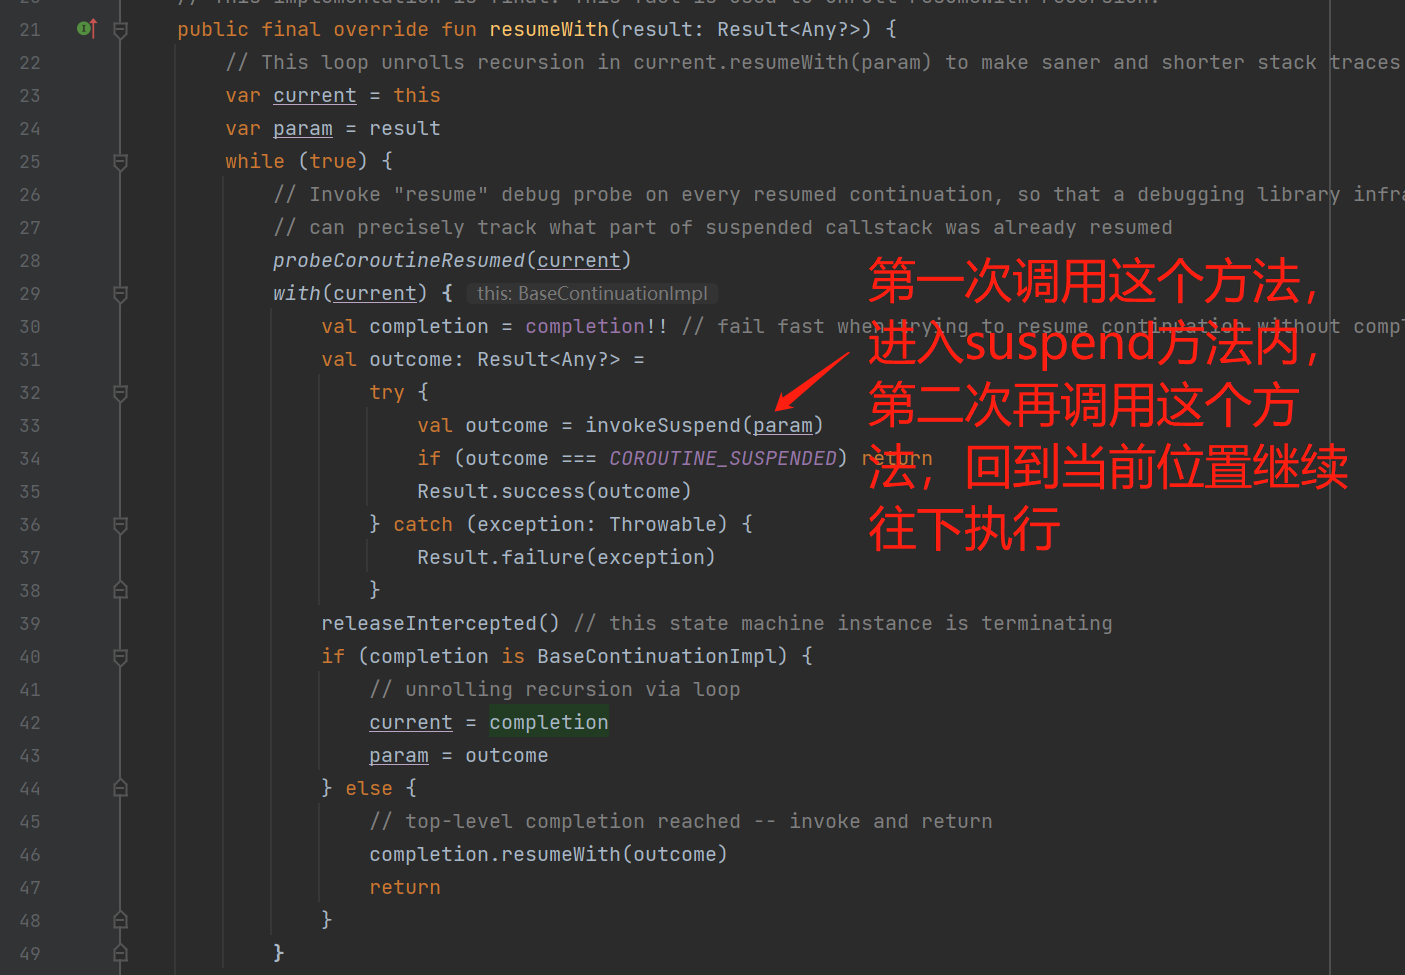
这里地方应该就是协程能够实现挂起,切换线程等待的巧妙之处,本质还是使用了callback的做法
调用CoroutineStart的invoke方法创建Continuation,调用Funtion2的扩展方方法startCoroutineCancellable,创建继承ContinuationImpl的实例
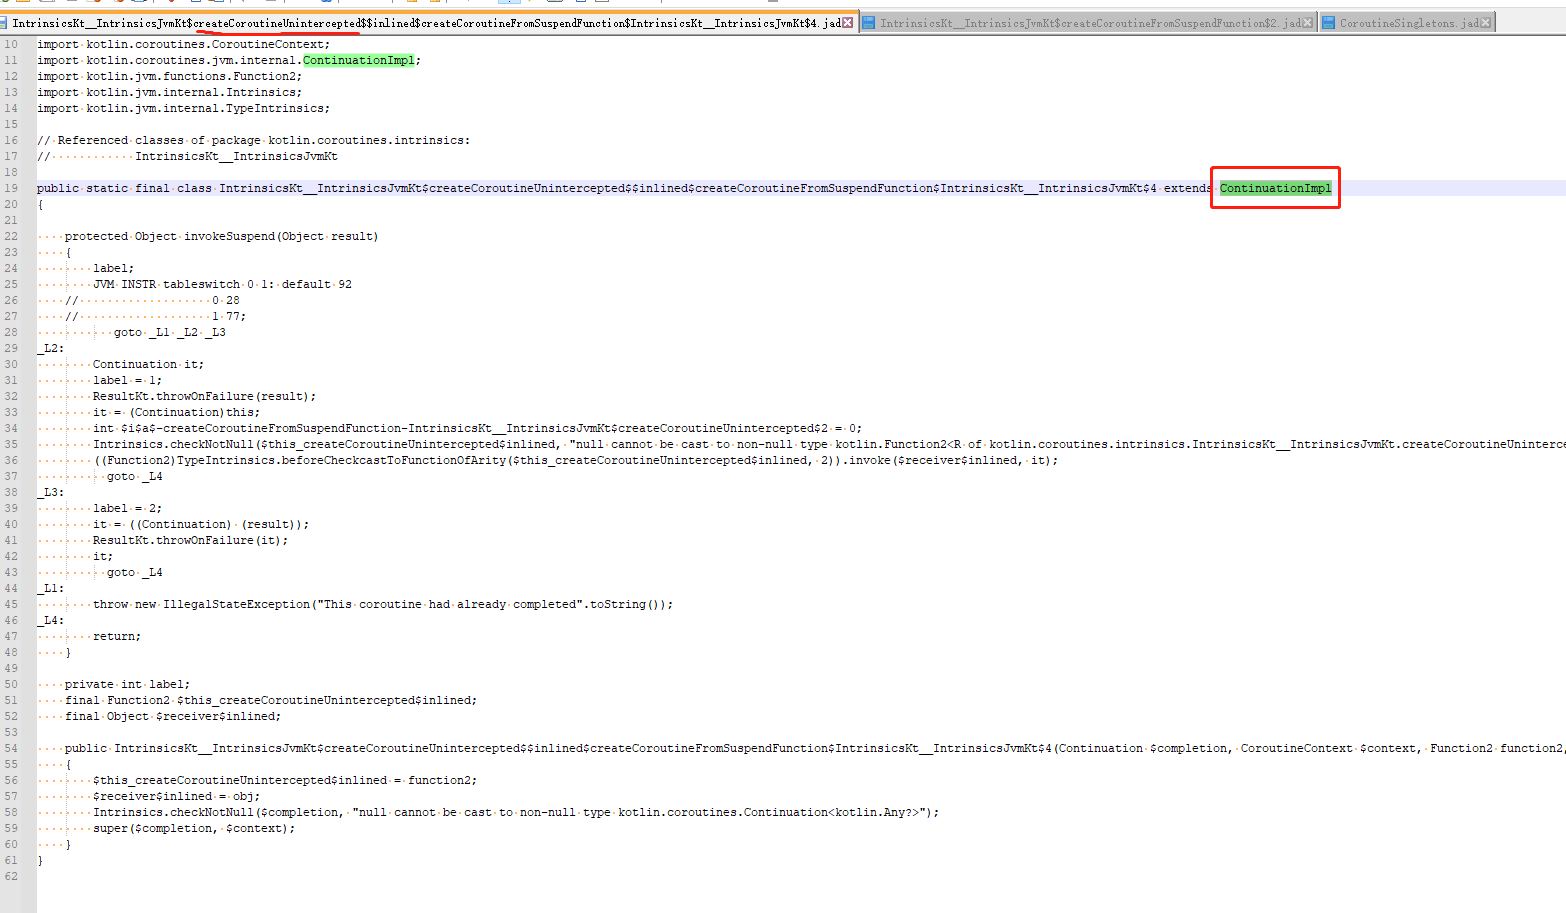
调用了ContinuationImpl的intercepter方法


context[ContinuationInterceptor] 返回是一个 CoroutineDispatcher,调用intercepetContinuation 返回 继承DispatchedTask 本质也是一个runnable
调用resumeCancellableWith 将任务塞到Dispatcher(这里实现线程切换)

由于我们一开始是lauch(CoroutineStart.DEFAULT)

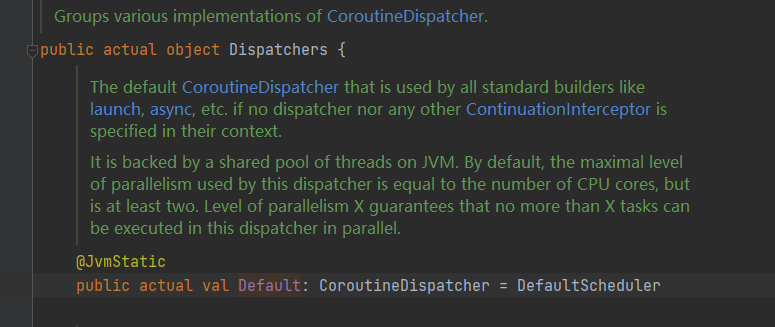
调用Dispatchers.Default的dispathch方法,会进入到对应的线程池内,等待执行

被执行
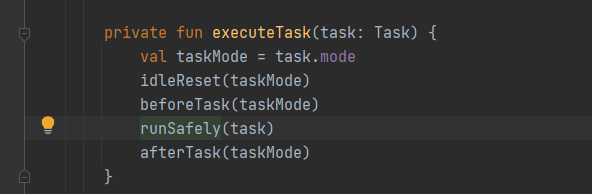
runSafely方法内执行的是之前CoroutineDispatcher的run方法

开始执行我们的目标的业务代码

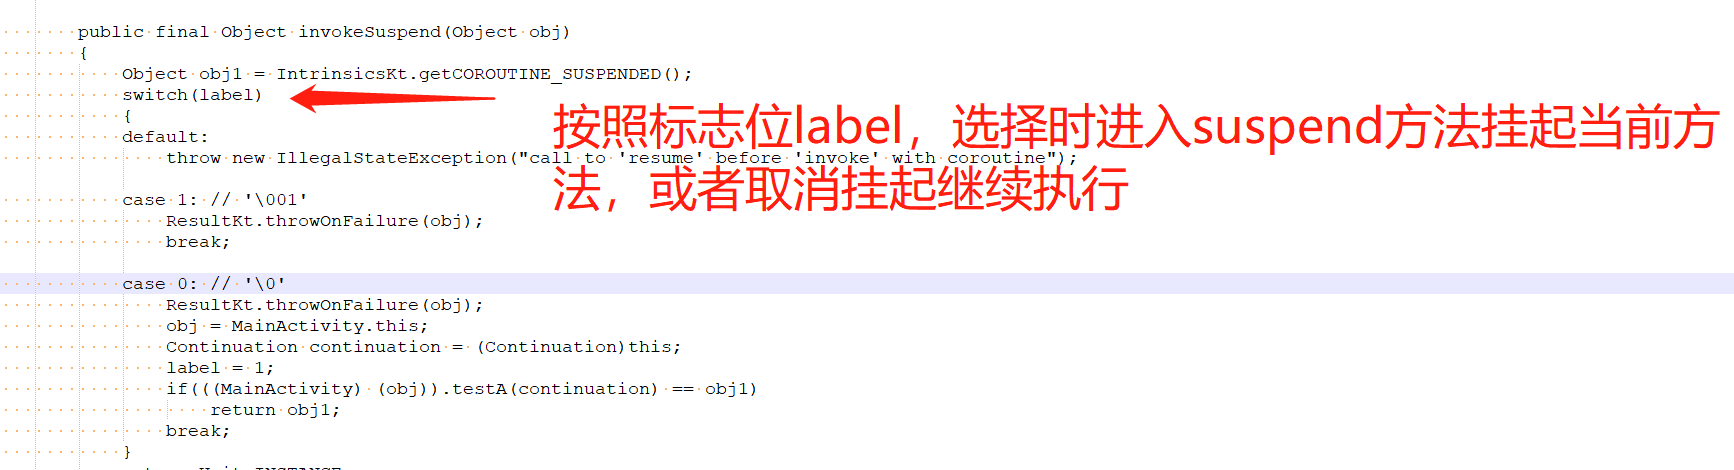
进而调用ContinuationImpl的resumeWith 进而调用最开始的invokeSuspend
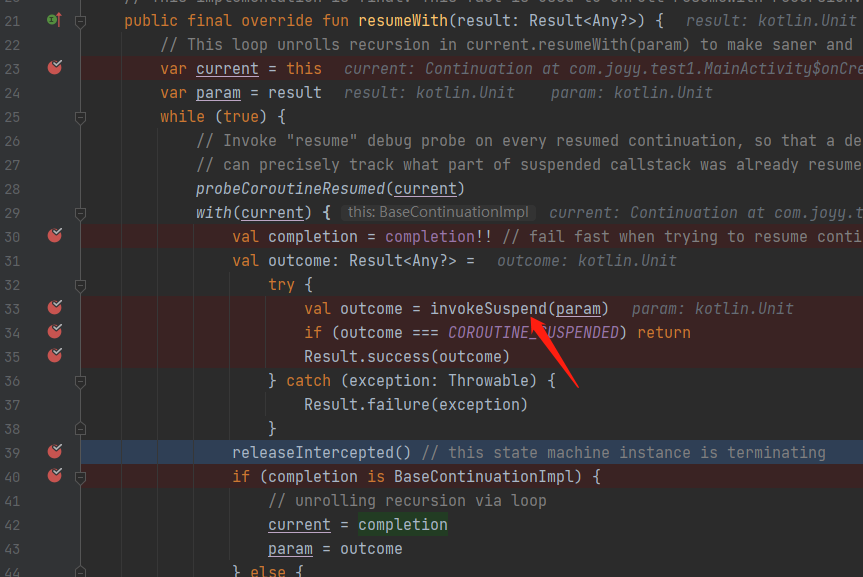
通过Continuation这个状态机进而suspend方法的调用,当前方法的挂起和取消挂起
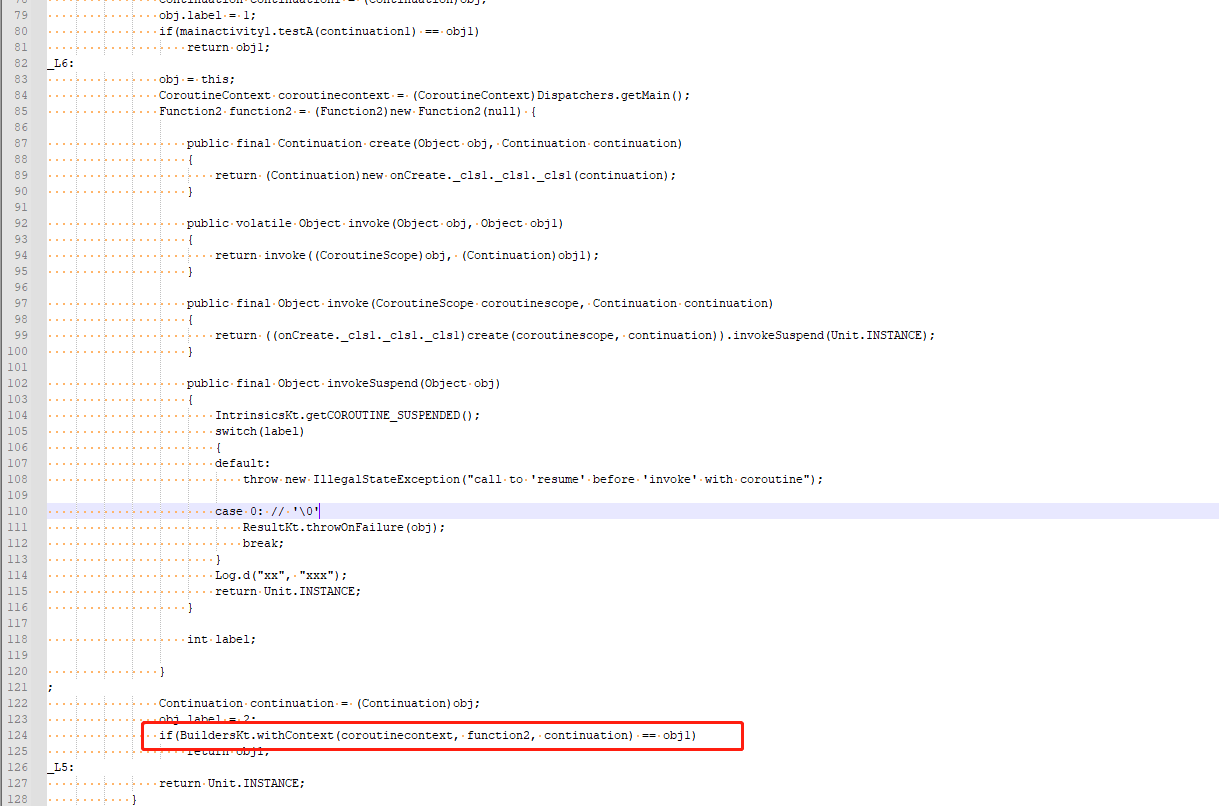
到这里就是一次完整的最简单的协程调用。当我们再协程里面继续通过关键字withContext,开启新的协程,其实本质就是再嵌套了一层上面的调用流程,唯一的不用就是不用再新建一个新的Continuation,而是把当前协程的Continuation继续往下传递,从而实现父协程可以控制子协程,并且子协程可以挂起父协程或取消挂起


 492
492


 被折叠的 条评论
为什么被折叠?
被折叠的 条评论
为什么被折叠?
 到【灌水乐园】发言


