


文章目录
前言
通过前面几章的学习我们知道了MyBatis对外的主要接口就是SqlSession,通过SqlSession可以获取mapper接口的代理实现,我们知道在Spring当中是直接将对应的mapper接口作为单例注入到业务接口中的,而一旦成了单例,那么MapperProxy中的sqlSession属性不就只有一个了吗?我们知道SqlSession不能是全局唯一的。那么Spring是如何解决这个问题的呢?
与MyBatis相关的Bean
首先看一下当前各个框架模块的版本
<dependency>
  <groupId>org.mybatis</groupId>
  <artifactId>mybatis</artifactId>
  <version>3.4.6</version>
</dependency>
<dependency>
  <groupId>org.mybatis</groupId>
  <artifactId>mybatis-spring</artifactId>
  <version>1.3.3</version>
</dependency>
<dependency>
  <groupId>org.mybatis.spring.boot</groupId>
  <artifactId>mybatis-spring-boot-autoconfigure</artifactId>
  <version>1.3.2</version>
</dependency>
<dependency>
  <groupId>org.mybatis.spring.boot</groupId>
  <artifactId>mybatis-spring-boot-starter</artifactId>
  <version>1.3.2</version>
</dependency>
mybatis通过SpringBoot自动注入主要涉及到类org.mybatis.spring.boot.autoconfigure.MybatisAutoConfiguration,在这个类当中,Spring注入了与MyBatis相关的Bean。

首先这里注册了两个Bean,一个是SqlSessionFactory,另一个是SqlSessionTemplate。还有一个ImportBeanDefinitionRegistrar类,这个类之所以能起效是在用户没有注入MapperFactoryBean。

通过ImportBeanDefinitionRegistrar一般的目的也是为了注册Bean,那么AutoConfiguredMapperScannerRegistrar注册了哪些Bean呢?
org.mybatis.spring.boot.autoconfigure.MybatisAutoConfiguration.AutoConfiguredMapperScannerRegistrar#registerBeanDefinitions
@Override
public void registerBeanDefinitions(AnnotationMetadata importingClassMetadata,
		BeanDefinitionRegistry registry) {

	logger.debug("Searching for mappers annotated with @Mapper");

	ClassPathMapperScanner scanner = new ClassPathMapperScanner(registry);

	try {
		if (this.resourceLoader != null) {
			scanner.setResourceLoader(this.resourceLoader);
		}
        1. 默认的包名为SpringBoot主类的所在的包名
		List<String> packages = AutoConfigurationPackages.get(this.beanFactory);
		if (logger.isDebugEnabled()) {
			for (String pkg : packages) {
				logger.debug("Using auto-configuration base package '{}'", pkg);
			}
		}
		2. 添加注解用于做扫描类型过滤
		scanner.setAnnotationClass(Mapper.class);
		scanner.registerFilters();
		3. 注意这里直接调用doScan方法
		scanner.doScan(StringUtils.toStringArray(packages));
	} catch (IllegalStateException ex) {
		logger.debug("Could not determine auto-configuration package, automatic mapper scanning disabled.", ex);
	}
}
以上的这个方法通过ClassPathMapperScanner扫描SpringBoot主类目录下的所有带有@Mapper接口的类作为BeanDefinition进行注册。 ClassPathMapperScanner是ClassPathBeanDefinitionScanner的子类,Spring中主要是通过ClassPathBeanDefinitionScanner来扫描注定目录下的类并注册的。ClassPathMapperScanner覆盖了doScan方法。
/**
 * Calls the parent search that will search and register all the candidates.
 * Then the registered objects are post processed to set them as
 * MapperFactoryBeans
 */
@Override
public Set<BeanDefinitionHolder> doScan(String... basePackages) {
    // 扫描并注册
    Set<BeanDefinitionHolder> beanDefinitions = super.doScan(basePackages);
    if (beanDefinitions.isEmpty()) {
        logger.warn("No MyBatis mapper was found in '" + Arrays.toString(basePackages) + "' package. Please check your configuration.");
    } else {
        // 通过通用模式扫描的BeanDefinitions中保存的className为mapperInterface 但是其实是MapperFactoryBean
        // 通过MapperFactoryBean的getObject就可以获取目标对象了
        // MapperFactoryBean唯一的构造方法的参数为mapperInterface 因此需要修改beanDefinition的className以构造参数
        // 还有些参数需要设置到
        processBeanDefinitions(beanDefinitions);
    }

    return beanDefinitions;
}
单纯覆盖这个方法是没有用的,额外还做了两件事,第一个就是覆盖isCandidateComponent方法过滤掉不是接口的类还有是非内部类的或者内部类是静态的(主要目的是非静态内部类的构造需要依赖外部类)。
@Override
protected boolean isCandidateComponent(AnnotatedBeanDefinition beanDefinition) {
    return beanDefinition.getMetadata().isInterface() && beanDefinition.getMetadata().isIndependent();
}
第二个就是要注册过滤器,只扫描指定注解的。对应方法org.mybatis.spring.mapper.ClassPathMapperScanner#registerFilters
/**
 * Configures parent scanner to search for the right interfaces. It can search
 * for all interfaces or just for those that extends a markerInterface or/and
 * those annotated with the annotationClass
 */
public void registerFilters() {
    boolean acceptAllInterfaces = true;

    1. 添加AnnotationTypeFilter 只针对指定注解 默认为@Mapper
    // if specified, use the given annotation and / or marker interface
    if (this.annotationClass != null) {
        addIncludeFilter(new AnnotationTypeFilter(this.annotationClass));
        acceptAllInterfaces = false;
    }

    2. 添加AssignableTypeFilter只针对指定接口的实现类 这个接口由用户设置 默认是没有值的
    // override AssignableTypeFilter to ignore matches on the actual marker interface
    if (this.markerInterface != null) {
        addIncludeFilter(new AssignableTypeFilter(this.markerInterface) {
            @Override
            protected boolean matchClassName(String className) {
                return false;
            }
        });
        acceptAllInterfaces = false;
    }

    3. 这个类型过滤器时没啥用的
    if (acceptAllInterfaces) {
        // default include filter that accepts all classes
        addIncludeFilter(new TypeFilter() {
            @Override
            public boolean match(MetadataReader metadataReader, MetadataReaderFactory metadataReaderFactory) throws IOException {
                return true;
            }
        });
    }

    4. 过滤掉package-info.java,这种类仅仅是介绍当前包的功能的 没实际用处
    // exclude package-info.java
    addExcludeFilter(new TypeFilter() {
        @Override
        public boolean match(MetadataReader metadataReader, MetadataReaderFactory metadataReaderFactory) throws IOException {
            String className = metadataReader.getClassMetadata().getClassName();
            return className.endsWith("package-info");
        }
    });
}
通过以上的步骤之后,就能确保最后能被扫描到的是在主类目录下包含有注解@Mapper而且是接口的类了。扫描到了之后就需要进行注册了,由于这里扫描到的接口是要作为mapper实现的,所以在注册的时候还要做一些改变。首先扫描到的是一个接口,我们知道接口通过反射是没法实例化的,所以Spring采用包装的方式将这些接口包装为MapperFactoryBean,然后将对应的接口作为mapperInterface属性。

在org.mybatis.spring.mapper.ClassPathMapperScanner#processBeanDefinitions方法中最主要的目的就是修改BeanClass和添加构造参数,另外还设置一起其他的属性。
private void processBeanDefinitions(Set<BeanDefinitionHolder> beanDefinitions) {
       GenericBeanDefinition definition;
       for (BeanDefinitionHolder holder : beanDefinitions) {
           definition = (GenericBeanDefinition) holder.getBeanDefinition();

           if (logger.isDebugEnabled()) {
               logger.debug("Creating MapperFactoryBean with name '" + holder.getBeanName()
                       + "' and '" + definition.getBeanClassName() + "' mapperInterface");
           }
           // the mapper interface is the original class of the bean 修改bean的类型为MapperFactoryBean 默认
           // but, the actual class of the bean is MapperFactoryBean 修改构造参数为mapperInterface
           // 此处要转为 MapperFactoryBean(Class<T> mapperInterface)构造对象
           1. 修改bean的类型和构造参数
           definition.getConstructorArgumentValues().addGenericArgumentValue(definition.getBeanClassName()); // issue #59
           definition.setBeanClass(this.mapperFactoryBean.getClass());
           2. 添加bean的属性
           definition.getPropertyValues().add("addToConfig", this.addToConfig);

           boolean explicitFactoryUsed = false;

		   3. 如果用户设置了ClassPathMapperScanner的sqlSessionFactory、sqlSessionTemplateBeanName、sqlSessionFactoryBeanName属性,则将这些属性添加到bean的定义当中
           if (StringUtils.hasText(this.sqlSessionFactoryBeanName)) {
               definition.getPropertyValues().add("sqlSessionFactory", new RuntimeBeanReference(this.sqlSessionFactoryBeanName));
               explicitFactoryUsed = true;
           } else if (this.sqlSessionFactory != null) {
               definition.getPropertyValues().add("sqlSessionFactory", this.sqlSessionFactory);
               explicitFactoryUsed = true;
           }

           if (StringUtils.hasText(this.sqlSessionTemplateBeanName)) {
               if (explicitFactoryUsed) {
                   logger.warn("Cannot use both: sqlSessionTemplate and sqlSessionFactory together. sqlSessionFactory is ignored.");
               }
               definition.getPropertyValues().add("sqlSessionTemplate", new RuntimeBeanReference(this.sqlSessionTemplateBeanName));
               explicitFactoryUsed = true;
           } else if (this.sqlSessionTemplate != null) {
               if (explicitFactoryUsed) {
                   logger.warn("Cannot use both: sqlSessionTemplate and sqlSessionFactory together. sqlSessionFactory is ignored.");
               }
               definition.getPropertyValues().add("sqlSessionTemplate", this.sqlSessionTemplate);
               explicitFactoryUsed = true;
           }
           3. 根据类型自动注入 很重要
           if (!explicitFactoryUsed) {
               if (logger.isDebugEnabled()) {
                   logger.debug("Enabling autowire by type for MapperFactoryBean with name '" + holder.getBeanName() + "'.");
               }
               definition.setAutowireMode(AbstractBeanDefinition.AUTOWIRE_BY_TYPE);
           }
       }
   }
通过以上步骤,将带有@Mapper的接口注册为了MapperFactoryBean,而对应的接口类最为构造参数mapperInterface。

总结一下,在Spring注册Bean的阶段(准确来说是在invokeBeanFactoryPostProcessors的时候通过ConfigurationClassPostProcessor来完成的),注册了SqlSessionFactory、SqlSessionTemplate、并且将@Mapper接口注册为了MapperFactoryBean。
bean实例化的流程
注册完Bean之后,Spring最后会走到bean实例化的流程(AbstractApplicationContext#finishBeanFactoryInitialization),此时会针对上面注册的Bean进行实例化,那么这些Bean实例化的流程是怎样的呢?有没有先后顺序呢?从MapperFactoryBean、SqlSessionFactory、SqlSessionTemplate三者的类定义来看,没有包含影响类初始化的元素,也不是Spring中的关键类(比如BeanPostProcessor之类)。所以说从类型上看不出实例化的先后顺序的。当然注册的先后顺序会决定他们的实例化先后顺序。比如在beanDefinitionNames这个List当中对应的beanName的先后顺序如下

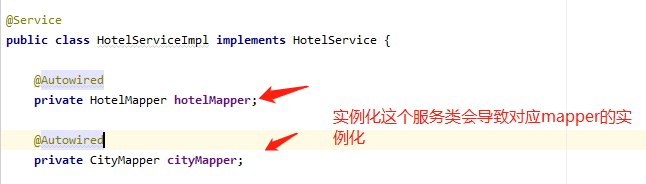
但实际情况却是,用户定义的类一般注册在前面,会首先实例化,比如某个服务类,这个时候就会去注入依赖的mapper接口。
那么此时是怎么能查到目标类的呢?按类型的话,此时的BeanDefinition对应的类是MapperFactoryBean,按名称吗?不太可能,要是用户定义的名称不为hotelMapper是不是就找不到了。其实MapperFactoryBean作为一个FactoryBean,它的类型是通过getObjectType来获取的,看一下对应的实现
@Override
public Class<T> getObjectType() {
    return this.mapperInterface;
}
所以,Spring在查找的时候,如果是FactoryBean就会通过这个方法查看类型是否匹配了。另外通过查看这个类的继承结构,还发现这个类是实现了InitializingBean这个接口的。

在实例化的过程中会调用afterPropertiesSet方法的。主要的流程是在DaoSupport当中定义的。
@Override
public final void afterPropertiesSet() throws IllegalArgumentException, BeanInitializationException {
	// Let abstract subclasses check their configuration.
	checkDaoConfig();

	// Let concrete implementations initialize themselves.
	try {
		initDao();
	}
	catch (Exception ex) {
		throw new BeanInitializationException("Initialization of DAO failed", ex);
	}
}
MapperFactoryBean实现checkDaoConfig方法来完成afterPropertiesSet流程的。
@Override
protected void checkDaoConfig() {
    1. 调用父类方法
    super.checkDaoConfig();

    notNull(this.mapperInterface, "Property 'mapperInterface' is required");

    2. 获取MyBatis的Configuration
    Configuration configuration = getSqlSession().getConfiguration();
    // 如果没有进行注册 因为通过配置文件mappers节点注册的时候会自动注册的
    if (this.addToConfig && !configuration.hasMapper(this.mapperInterface)) {
        try {
            3. 如果当前接口还没有注册 则注册当前接口
            configuration.addMapper(this.mapperInterface);
        } catch (Exception e) {
            logger.error("Error while adding the mapper '" + this.mapperInterface + "' to configuration.", e);
            throw new IllegalArgumentException(e);
        } finally {
            ErrorContext.instance().reset();
        }
    }
}
对于上面的代码我们是不是很熟悉,但是不妨要想一下,这里getSqlSession能够获取到吗?如果不能获取到,那岂不是会报错。如果能获取到,是如何获取到的呢?同时我们查看了第一行代码,父类的checkDaoConfig方法。
@Override
protected void checkDaoConfig() {
	notNull(this.sqlSession, "Property 'sqlSessionFactory' or 'sqlSessionTemplate' are required");
}
在这里,对sqlSession属性进行了检查,保证了不为空,也就是说sqlSession属性在之前已经设置到了这个MapperFactoryBean当中,可是在前面我们并没有设置这个属性呀?对应的BeanDefinition当中除了addToConfig,也不包含其他属性。其实在这里,我们设置了对应BeanDefinition的setAutowireMode,如下所示
definition.setAutowireMode(AbstractBeanDefinition.AUTOWIRE_BY_TYPE);
所以在根据构造方法完成MapperFactoryBean的实例化之后,在初始化(afterPropertiesSet)之前,会进行属性的填充(populateBean)的时候,会自动根据类型查找SqlSessionFactory、SqlSessionTemplate两个Bean实例,并回调SqlSessionDaoSupport的如下两个方法,完成sqlSession属性的设值。
public void setSqlSessionFactory(SqlSessionFactory sqlSessionFactory) {
	if (!this.externalSqlSession) {
		this.sqlSession = new SqlSessionTemplate(sqlSessionFactory);
	}
}

public void setSqlSessionTemplate(SqlSessionTemplate sqlSessionTemplate) {
	this.sqlSession = sqlSessionTemplate;
	this.externalSqlSession = true;
}
所以在这里得出一个MapperFactoryBean实例化的先后流程:
1. MapperFactoryBean实例化(构造)
2. MapperFactoryBean在属性填充阶段会注入sqlSessionFactory和sqlSessionTemplate并获取sqlSession
3. MapperFactoryBean初始化阶段(根据sqlSession获取MyBatis的配置,并注册mapper)
由于MapperFactoryBean依赖于sqlSessionFactory和sqlSessionTemplate,所以sqlSessionFactory和sqlSessionTemplate的实例化和初始化会在MapperFactoryBean初始化前面完成

从Bean最终完成实例化初始化来看,先后顺序则是SqlSessionFactory -> SqlSessionTemplate -> MapperFactoryBean。
弄清楚了实例化的先后顺序之后,这下就可以逐个研究实例化过程了。
1. SqlSessionFactory实例化和初始化
SqlSessionFactory是通过@Bean注解注册的,实例化的流程其实就是调用对应的方法。如果不理解这段,可以参考博客:@Bean注册Bean,你有多了解?
注册SqlSessionFactory对应的方法如下
@Bean
@ConditionalOnMissingBean
public SqlSessionFactory sqlSessionFactory(DataSource dataSource) throws Exception {
    1. 创建一个SqlSessionFactoryBean
	SqlSessionFactoryBean factory = new SqlSessionFactoryBean();

    2. 设置Spring的数据源和VFS实现类
  	factory.setDataSource(dataSource);
	factory.setVfs(SpringBootVFS.class);

    3. 用户设置了mybatis-config.xml文件的路径 则设置到factory中
	if (StringUtils.hasText(this.properties.getConfigLocation())) {
		factory.setConfigLocation(this.resourceLoader.getResource(this.properties.getConfigLocation()));
	}

	4. 用户自己定义好了MyBatis的Configuration实现 默认为null
	Configuration configuration = this.properties.getConfiguration();
	if (configuration == null && !StringUtils.hasText(this.properties.getConfigLocation())) {
		configuration = new Configuration();
	}
	5. 针对自己定义的Configuration做一些修改 默认为null
	if (configuration != null && !CollectionUtils.isEmpty(this.configurationCustomizers)) {
		for (ConfigurationCustomizer customizer : this.configurationCustomizers) {
			customizer.customize(configuration);
		}
	}
	factory.setConfiguration(configuration);
	6. 设置用户设置的参数
	if (this.properties.getConfigurationProperties() != null) {
		factory.setConfigurationProperties(this.properties.getConfigurationProperties());
	}
	if (!ObjectUtils.isEmpty(this.interceptors)) {
		factory.setPlugins(this.interceptors);
	}
	if (this.databaseIdProvider != null) {
		factory.setDatabaseIdProvider(this.databaseIdProvider);
	}
	if (StringUtils.hasLength(this.properties.getTypeAliasesPackage())) {
		factory.setTypeAliasesPackage(this.properties.getTypeAliasesPackage());
	}
	if (StringUtils.hasLength(this.properties.getTypeHandlersPackage())) {
		factory.setTypeHandlersPackage(this.properties.getTypeHandlersPackage());
	}
	if (!ObjectUtils.isEmpty(this.properties.resolveMapperLocations())) {
		factory.setMapperLocations(this.properties.resolveMapperLocations());
	}

	return factory.getObject();
}
以上的流程无非就是通过SqlSessionFactoryBean将用户通过配置文件针对MyBatis的一系列配置进行了读取,同时保存了Spring的数据源以及自己的VFS实现。通过前面章节对MyBatis配置文件的解析,这些应该都不是问题。最后就是通过getObject方法获取SqlSessionFactory的实例了。
@Override
public SqlSessionFactory getObject() throws Exception {
    if (this.sqlSessionFactory == null) {
        afterPropertiesSet();
    }

    return this.sqlSessionFactory;
}
主要的流程在afterPropertiesSet方法当中
@Override
public void afterPropertiesSet() throws Exception {
    notNull(dataSource, "Property 'dataSource' is required");
    notNull(sqlSessionFactoryBuilder, "Property 'sqlSessionFactoryBuilder' is required");
    state((configuration == null && configLocation == null) || !(configuration != null && configLocation != null),
            "Property 'configuration' and 'configLocation' can not specified with together");

    this.sqlSessionFactory = buildSqlSessionFactory();
}
这里首先做一些验证,dataSource不允许为空,在前面已经设置过。sqlSessionFactoryBuilder是在类中直接创建的。
private SqlSessionFactoryBuilder sqlSessionFactoryBuilder = new SqlSessionFactoryBuilder();
接下来就是验证configuration和configLocation不能同时存在,因为通过configLocation读取配置文件最终就是构造configuration,所以二者同时存在会冲突的。(一山不能容二虎,容器内只能存在一个Configuration实例)
终于可以创建SqlSessionFactory了。
protected SqlSessionFactory buildSqlSessionFactory() throws IOException {

    Configuration configuration;

    XMLConfigBuilder xmlConfigBuilder = null;
    if (this.configuration != null) {
        configuration = this.configuration;
        if (configuration.getVariables() == null) {
            configuration.setVariables(this.configurationProperties);
        } else if (this.configurationProperties != null) {
            configuration.getVariables().putAll(this.configurationProperties);
        }
    } else if (this.configLocation != null) {
        xmlConfigBuilder = new XMLConfigBuilder(this.configLocation.getInputStream(), null, this.configurationProperties);
        configuration = xmlConfigBuilder.getConfiguration();
    } else {
        if (LOGGER.isDebugEnabled()) {
            LOGGER.debug("Property 'configuration' or 'configLocation' not specified, using default MyBatis Configuration");
        }
        configuration = new Configuration();
        if (this.configurationProperties != null) {
            configuration.setVariables(this.configurationProperties);
        }
    }

    if (this.objectFactory != null) {
        configuration.setObjectFactory(this.objectFactory);
    }

    if (this.objectWrapperFactory != null) {
        configuration.setObjectWrapperFactory(this.objectWrapperFactory);
    }

    if (this.vfs != null) {
        configuration.setVfsImpl(this.vfs);
    }

    if (hasLength(this.typeAliasesPackage)) {
        String[] typeAliasPackageArray = tokenizeToStringArray(this.typeAliasesPackage,
                ConfigurableApplicationContext.CONFIG_LOCATION_DELIMITERS);
        for (String packageToScan : typeAliasPackageArray) {
            configuration.getTypeAliasRegistry().registerAliases(packageToScan,
                    typeAliasesSuperType == null ? Object.class : typeAliasesSuperType);
            if (LOGGER.isDebugEnabled()) {
                LOGGER.debug("Scanned package: '" + packageToScan + "' for aliases");
            }
        }
    }

    if (!isEmpty(this.typeAliases)) {
        for (Class<?> typeAlias : this.typeAliases) {
            configuration.getTypeAliasRegistry().registerAlias(typeAlias);
            if (LOGGER.isDebugEnabled()) {
                LOGGER.debug("Registered type alias: '" + typeAlias + "'");
            }
        }
    }

    if (!isEmpty(this.plugins)) {
        for (Interceptor plugin : this.plugins) {
            configuration.addInterceptor(plugin);
            if (LOGGER.isDebugEnabled()) {
                LOGGER.debug("Registered plugin: '" + plugin + "'");
            }
        }
    }

    if (hasLength(this.typeHandlersPackage)) {
        String[] typeHandlersPackageArray = tokenizeToStringArray(this.typeHandlersPackage,
                ConfigurableApplicationContext.CONFIG_LOCATION_DELIMITERS);
        for (String packageToScan : typeHandlersPackageArray) {
            configuration.getTypeHandlerRegistry().register(packageToScan);
            if (LOGGER.isDebugEnabled()) {
                LOGGER.debug("Scanned package: '" + packageToScan + "' for type handlers");
            }
        }
    }

    if (!isEmpty(this.typeHandlers)) {
        for (TypeHandler<?> typeHandler : this.typeHandlers) {
            configuration.getTypeHandlerRegistry().register(typeHandler);
            if (LOGGER.isDebugEnabled()) {
                LOGGER.debug("Registered type handler: '" + typeHandler + "'");
            }
        }
    }
    // 如果设置了databaseIdProvider就可以使用databaseId了 //fix #64 set databaseId before parse mapper xmls
    if (this.databaseIdProvider != null) {
        try {
            configuration.setDatabaseId(this.databaseIdProvider.getDatabaseId(this.dataSource));
        } catch (SQLException e) {
            throw new NestedIOException("Failed getting a databaseId", e);
        }
    }
    // 支持用户自定义二级缓存实现对象
    if (this.cache != null) {
        configuration.addCache(this.cache);
    }
    // 配置了configLocation属性
    if (xmlConfigBuilder != null) {
        try {
            // 解析配置文件和mapperXml文件
            xmlConfigBuilder.parse();
            if (LOGGER.isDebugEnabled()) {
                LOGGER.debug("Parsed configuration file: '" + this.configLocation + "'");
            }
        } catch (Exception ex) {
            throw new NestedIOException("Failed to parse config resource: " + this.configLocation, ex);
        } finally {
            ErrorContext.instance().reset();
        }
    }

    if (this.transactionFactory == null) {
        this.transactionFactory = new SpringManagedTransactionFactory();
    }
    // 事务以及数据源都以Spring为准
    configuration.setEnvironment(new Environment(this.environment, this.transactionFactory, this.dataSource));
    // 自己定义mapper路径
    if (!isEmpty(this.mapperLocations)) {
        for (Resource mapperLocation : this.mapperLocations) {
            if (mapperLocation == null) {
                continue;
            }

            try {
                XMLMapperBuilder xmlMapperBuilder = new XMLMapperBuilder(mapperLocation.getInputStream(),
                        configuration, mapperLocation.toString(), configuration.getSqlFragments());
                xmlMapperBuilder.parse();
            } catch (Exception e) {
                throw new NestedIOException("Failed to parse mapping resource: '" + mapperLocation + "'", e);
            } finally {
                ErrorContext.instance().reset();
            }

            if (LOGGER.isDebugEnabled()) {
                LOGGER.debug("Parsed mapper file: '" + mapperLocation + "'");
            }
        }
    } else {
        if (LOGGER.isDebugEnabled()) {
            LOGGER.debug("Property 'mapperLocations' was not specified or no matching resources found");
        }
    }

    return this.sqlSessionFactoryBuilder.build(configuration);
}
这个代码虽然看起来非常冗长,但是就是参照MyBatis的一个解析流程,先是XMLConfigBuilder解析配置,然后是xmlMapperBuilder解析mapper。 唯一需要注意的一个点就是这里Spring将Environment实现替换为自己的了。第一个必须使用Spring的DataSource,第二个就是使用Spring实现的事务工厂类SpringManagedTransactionFactory。

为啥呢?因为Spring有自己的事务,整合MyBatis与Spring不仅仅是注册Mapper接口的问题,还有就是事务的整合。通过上面的方法最后sqlSessionFactoryBuilder创建完一个SqlSessionFactory实例,全局唯一的实例。
2. SqlSessionTemplate实例化和初始化
SqlSessionTemplate的实例化是非常简单的,就是通过构造函数创建一个对象,这里依赖于SqlSessionFactory。
@Bean
@ConditionalOnMissingBean
public SqlSessionTemplate sqlSessionTemplate(SqlSessionFactory sqlSessionFactory) {
	ExecutorType executorType = this.properties.getExecutorType();
	if (executorType != null) {
		return new SqlSessionTemplate(sqlSessionFactory, executorType);
	} else {
		return new SqlSessionTemplate(sqlSessionFactory);
	}
}
而构造SqlSessionTemplate最终调用的是如下的这个构造方法,这里有意思了。
public SqlSessionTemplate(SqlSessionFactory sqlSessionFactory, ExecutorType executorType,
		PersistenceExceptionTranslator exceptionTranslator) {

	notNull(sqlSessionFactory, "Property 'sqlSessionFactory' is required");
	notNull(executorType, "Property 'executorType' is required");

	this.sqlSessionFactory = sqlSessionFactory;
	this.executorType = executorType;
	this.exceptionTranslator = exceptionTranslator;
	this.sqlSessionProxy = (SqlSession) newProxyInstance(SqlSessionFactory.class.getClassLoader(),
			new Class[] { SqlSession.class }, new SqlSessionInterceptor());
}
首先SqlSessionTemplate包含有一个sqlSessionProxy的属性,然后自己实现了SqlSession的接口,而且方法实现都是交给了sqlSessionProxy去完成的。


再结合构造函数的里面的代码
this.sqlSessionProxy = (SqlSession) newProxyInstance(SqlSessionFactory.class.getClassLoader(),
			new Class[] { SqlSession.class }, new SqlSessionInterceptor());
可以看到这里是一个动态代理类,调用这个代理类的方法会首先进入到SqlSessionInterceptor当中。
/**
* Proxy needed to route MyBatis method calls to the proper SqlSession got
* from Spring's Transaction Manager
* It also unwraps exceptions thrown by {@code Method#invoke(Object, Object...)} to
* pass a {@code PersistenceException} to the {@code PersistenceExceptionTranslator}.
*/
private class SqlSessionInterceptor implements InvocationHandler {
	@Override
	public Object invoke(Object proxy, Method method, Object[] args) throws Throwable {
		SqlSession sqlSession = getSqlSession(SqlSessionTemplate.this.sqlSessionFactory,
				SqlSessionTemplate.this.executorType, SqlSessionTemplate.this.exceptionTranslator);
		try {
			Object result = method.invoke(sqlSession, args);
			if (!isSqlSessionTransactional(sqlSession, SqlSessionTemplate.this.sqlSessionFactory)) {
				// force commit even on non-dirty sessions because some databases require
				// a commit/rollback before calling close() 非事务性才自己提交
				sqlSession.commit(true);
			}
			return result;
		} catch (Throwable t) {
			Throwable unwrapped = unwrapThrowable(t);
			if (SqlSessionTemplate.this.exceptionTranslator != null && unwrapped instanceof PersistenceException) {
				// release the connection to avoid a deadlock if the translator is no loaded. See issue #22
				closeSqlSession(sqlSession, SqlSessionTemplate.this.sqlSessionFactory);
				sqlSession = null;
				Throwable translated = SqlSessionTemplate.this.exceptionTranslator
						.translateExceptionIfPossible((PersistenceException) unwrapped);
				if (translated != null) {
					unwrapped = translated;
				}
			}
			throw unwrapped;
		} finally {
			if (sqlSession != null) {
				closeSqlSession(sqlSession, SqlSessionTemplate.this.sqlSessionFactory);
			}
		}
	}
}
在这里首先会通过getSqlSession获取一个SqlSession,然后再调用真实的方法,如果是非事务方法(isSqlSessionTransactional)还会自动进行事务的提交, 执行过程中遇到异常则通过exceptionTranslator解析异常,并且关闭sqlSession,如果没有遇到异常,也会在最后关闭sqlSession。这里最重要的就是在getSqlSession方法了
/**
 * Gets an SqlSession from Spring Transaction Manager or creates a new one if
 * needed. Tries to get a SqlSession out of current transaction. If there is not
 * any, it creates a new one. Then, it synchronizes the SqlSession with the
 * transaction if Spring TX is active and
 * <code>SpringManagedTransactionFactory</code> is configured as a transaction
 * manager.
 *
 * @param sessionFactory      a MyBatis {@code SqlSessionFactory} to create new
 *                            sessions
 * @param executorType        The executor type of the SqlSession to create
 * @param exceptionTranslator Optional. Translates SqlSession.commit()
 *                            exceptions to Spring exceptions.
 * @throws TransientDataAccessResourceException if a transaction is active and
 *                                              the {@code SqlSessionFactory} is
 *                                              not using a
 *                                              {@code SpringManagedTransactionFactory}
 * @see SpringManagedTransactionFactory
 */
public static SqlSession getSqlSession(SqlSessionFactory sessionFactory, ExecutorType executorType,
		PersistenceExceptionTranslator exceptionTranslator) {

	notNull(sessionFactory, NO_SQL_SESSION_FACTORY_SPECIFIED);
	notNull(executorType, NO_EXECUTOR_TYPE_SPECIFIED);
	1. 根据sessionFactory绑定session 其实就是一个线程一个SqlSession资源
	SqlSessionHolder holder = (SqlSessionHolder) TransactionSynchronizationManager.getResource(sessionFactory);
	2. 从包装器里面获取SqlSession
	SqlSession session = sessionHolder(executorType, holder);
	if (session != null) {
		return session;
	}

	if (LOGGER.isDebugEnabled()) {
		LOGGER.debug("Creating a new SqlSession");
	}
	3. 包装器里面不存在sqlSession 则创建一个
	session = sessionFactory.openSession(executorType);
	4. 注册
	registerSessionHolder(sessionFactory, executorType, exceptionTranslator, session);

	return session;
}
这里出现了一个TransactionSynchronizationManager,在Spring的事务当中,这是一个相当重要的类,用于在事务执行过程中进行资源同步的类,限于篇幅问题,此处不详细展开。在这里的意思就是,在一个事务当中,Spring会将创建好的SqlSession保存起来,同一个事务请求就直接使用同一个SqlSession对象了。在保存这个SqlSession的时候(registerSessionHolder)还会考虑注册一个SqlSessionSynchronization同步器。
private static void registerSessionHolder(SqlSessionFactory sessionFactory, ExecutorType executorType,
		PersistenceExceptionTranslator exceptionTranslator, SqlSession session) {
	SqlSessionHolder holder;
	1. 当前事务活跃
	if (TransactionSynchronizationManager.isSynchronizationActive()) {
		Environment environment = sessionFactory.getConfiguration().getEnvironment();

		if (environment.getTransactionFactory() instanceof SpringManagedTransactionFactory) {
			if (LOGGER.isDebugEnabled()) {
				LOGGER.debug("Registering transaction synchronization for SqlSession [" + session + "]");
			}
			// 包装sqlSession 并与事务同步
			holder = new SqlSessionHolder(session, executorType, exceptionTranslator);
			2. 保存SqlSession包装器
			TransactionSynchronizationManager.bindResource(sessionFactory, holder);
			3. 注册一个事务资源同步器
			TransactionSynchronizationManager
					.registerSynchronization(new SqlSessionSynchronization(holder, sessionFactory));
			holder.setSynchronizedWithTransaction(true);
			holder.requested();
		} else {
			if (TransactionSynchronizationManager.getResource(environment.getDataSource()) == null) {
				if (LOGGER.isDebugEnabled()) {
					LOGGER.debug("SqlSession [" + session
							+ "] was not registered for synchronization because DataSource is not transactional");
				}
			} else {
				throw new TransientDataAccessResourceException(
						"SqlSessionFactory must be using a SpringManagedTransactionFactory in order to use Spring transaction synchronization");
			}
		}
	} else {
		if (LOGGER.isDebugEnabled()) {
			LOGGER.debug("SqlSession [" + session
					+ "] was not registered for synchronization because synchronization is not active");
		}
	}
}
为什么要注册这个同步器呢?因为Spring中的事务还涉及到事务传播的问题,但是MyBatis的事务只有提交和回滚的功能。所以必须通过这个同步器做一些处理,比如在Spring的事务挂起的时候就是另一个事务了,也必须将SqlSession资源挂起(不能再共享了)。而事务恢复的时候,又要将之前不再共享的SqlSession资源再次绑定。如下就是挂起(suspend)和恢复(resume)的实现了。
private final SqlSessionHolder holder;

private final SqlSessionFactory sessionFactory;

private boolean holderActive = true;

public SqlSessionSynchronization(SqlSessionHolder holder, SqlSessionFactory sessionFactory) {
	notNull(holder, "Parameter 'holder' must be not null");
	notNull(sessionFactory, "Parameter 'sessionFactory' must be not null");

	this.holder = holder;
	this.sessionFactory = sessionFactory;
}

@Override
public void suspend() {
	if (this.holderActive) {
		if (LOGGER.isDebugEnabled()) {
			LOGGER.debug(
					"Transaction synchronization suspending SqlSession [" + this.holder.getSqlSession() + "]");
		}
		TransactionSynchronizationManager.unbindResource(this.sessionFactory);
	}
}

@Override
public void resume() {
	if (this.holderActive) {
		if (LOGGER.isDebugEnabled()) {
			LOGGER.debug(
					"Transaction synchronization resuming SqlSession [" + this.holder.getSqlSession() + "]");
		}
		TransactionSynchronizationManager.bindResource(this.sessionFactory, this.holder);
	}
}
再回到org.mybatis.spring.SqlSessionUtils#closeSqlSession方法中,其实每次请求完毕并不是会把sqlSession进行完毕,而是要看是不是在事务当中,如果是在Spring的事务当中共享资源的情况下,只会将相应的计数减1而已、
public static void closeSqlSession(SqlSession session, SqlSessionFactory sessionFactory) {
	notNull(session, NO_SQL_SESSION_SPECIFIED);
	notNull(sessionFactory, NO_SQL_SESSION_FACTORY_SPECIFIED);
    1. 获取共享资源
	SqlSessionHolder holder = (SqlSessionHolder) TransactionSynchronizationManager.getResource(sessionFactory);
	2. 共享资源存在 而且内部的sqlSession正是当前session
	if ((holder != null) && (holder.getSqlSession() == session)) {
		if (LOGGER.isDebugEnabled()) {
			LOGGER.debug("Releasing transactional SqlSession [" + session + "]");
		}
		3. 简单的技术减少而已
		holder.released();
	} else {
		if (LOGGER.isDebugEnabled()) {
			LOGGER.debug("Closing non transactional SqlSession [" + session + "]");
		}
		如果不存在资源共享而且不是同一个SqlSession 才会真实关闭
		session.close();
	}
}
通过分析SqlSessionTemplate不难发现,虽然SqlSessionTemplate是一个单例,但是每次请求的时候通过代理请求,会创建一个sqlSession对象发起真实请求,如果在Spring的事务当中,还会将这个真实的sqlSession进行共享。也就是说,在一个事务当中,其实SqlSession对象是同一个,只是不同的事务中,SqlSession才不是同一个。因此Spring事务中SqlSession是共享的,同时Spring通过SqlSessionSynchronization将Spring的事务和SqlSession的事务操作绑定在一起,这样针对数据库的事务才不会出现问题。
3. MapperFactoryBean实例化和初始化
终于轮到MapperFactoryBean,实例化的过程就不需要讲解了,无非就是反射调用构造函数而已,然后就是设置属性,这里尤其重要的就是sqlSession属性了。此时你会发现,这里竟然使用的是SqlSessionTemplate,通过以上的分析,我们知道SqlSessionTemplate是多么的重要。所以说,MapperFactoryBean最重要的属性其实就是这个SqlSessionTemplate对象了。

最后就是MapperFactoryBean的初始化了。
protected void checkDaoConfig() {
    super.checkDaoConfig();

    notNull(this.mapperInterface, "Property 'mapperInterface' is required");

    Configuration configuration = getSqlSession().getConfiguration();
    // 如果没有进行注册 因为通过配置文件mappers节点注册的时候会自动注册的
    if (this.addToConfig && !configuration.hasMapper(this.mapperInterface)) {
        try {
            configuration.addMapper(this.mapperInterface);
        } catch (Exception e) {
            logger.error("Error while adding the mapper '" + this.mapperInterface + "' to configuration.", e);
            throw new IllegalArgumentException(e);
        } finally {
            ErrorContext.instance().reset();
        }
    }
}
通过getSqlSession获取到SqlSessionTemplate,而SqlSessionTemplate中有包含SqlSessionFactory,SqlSessionFactory中又有Configuration,一切顺理成章,都是单例,最后通过addMapper注册接口即可。只是这里为啥要通过hasMapper判断一下呢?
其实通过扫描配置文件或者解析mapperXml文件也会去注册对应的接口到configuration当中的,还有一点,就是这个addMapper其实也会去加载默认路径下的mapperXml文件的,不知道还记不记得org.apache.ibatis.builder.annotation.MapperAnnotationBuilder#loadXmlResource这个方法。也就是说可以不配置mapper路径,程序也不会报错(此时mapperXml文件的路径与对应mapper接口包名是相同的)。
mapper接口实例的请求过程
通过以上一系列的注册Bean,初始化过程,我们不难看出最后mapper接口实例对应的就是MapperFactoryBean,而它是一个FactoryBean,所示真实对象是通过getObject方法来获得的。
@Override
public T getObject() throws Exception {
    return getSqlSession().getMapper(this.mapperInterface);
}
而这个我们在前面已经分析过了,最后对应的就是一个代理类。而调用这个代理就是调用MapperProxy方法。

接下来的请求就是MyBatis的那一套了。只不过SqlSession会与Spring的事务进行联动了。
总结
本章详细介绍了MyBatis整合到Spring的方方面面,其实最重要的还是SqlSessionTemplate这个类,因为整合MyBatis与Spring不仅仅是注册Mapper接口的问题,还有就是事务的整合。这里事务的整合一方面是在SqlSessionInterceptor这个类当中,另一方面是在SpringManagedTransactionFactory这个类当中。由于涉及到Spring的详细知识,这里就不继续展开了。


 1820
1820


 被折叠的 条评论
为什么被折叠?
被折叠的 条评论
为什么被折叠?
 到【灌水乐园】发言


