


构建docker镜像
jenkins插件管理安装:docker-build
jenkins安装了docker
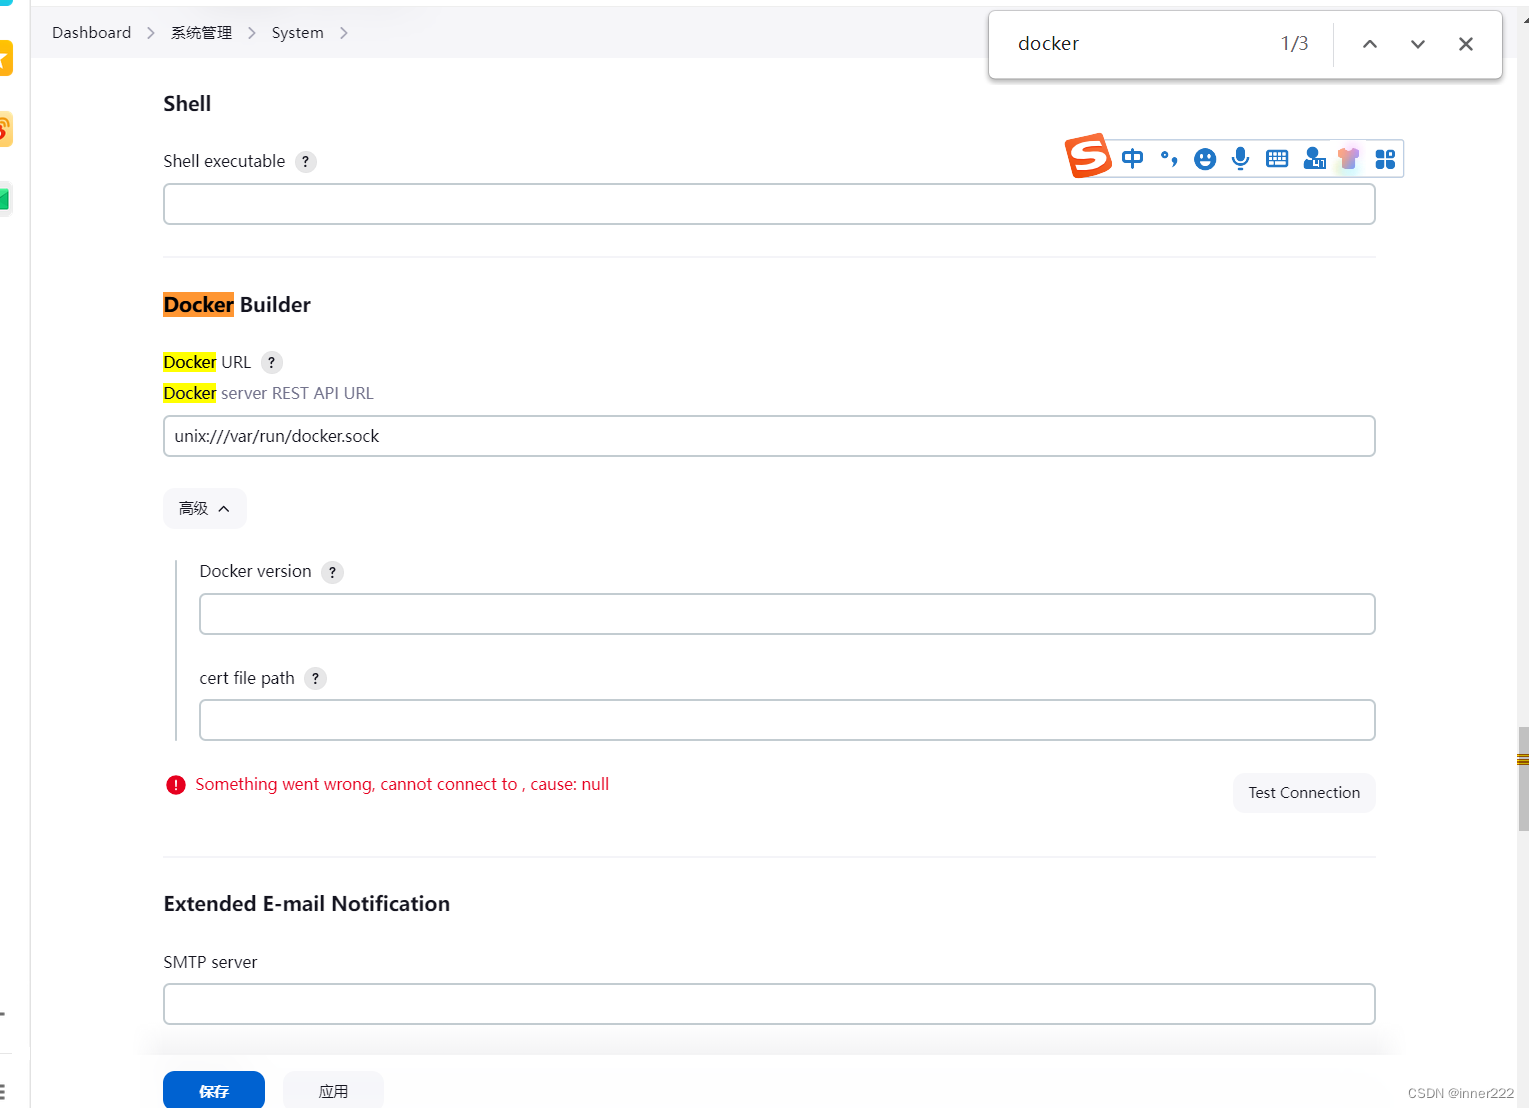
配置docke builder
添加
unix:///var/run/docker.sock
root@ubuntu20:~# usermod -G docker jenkins
测试失败
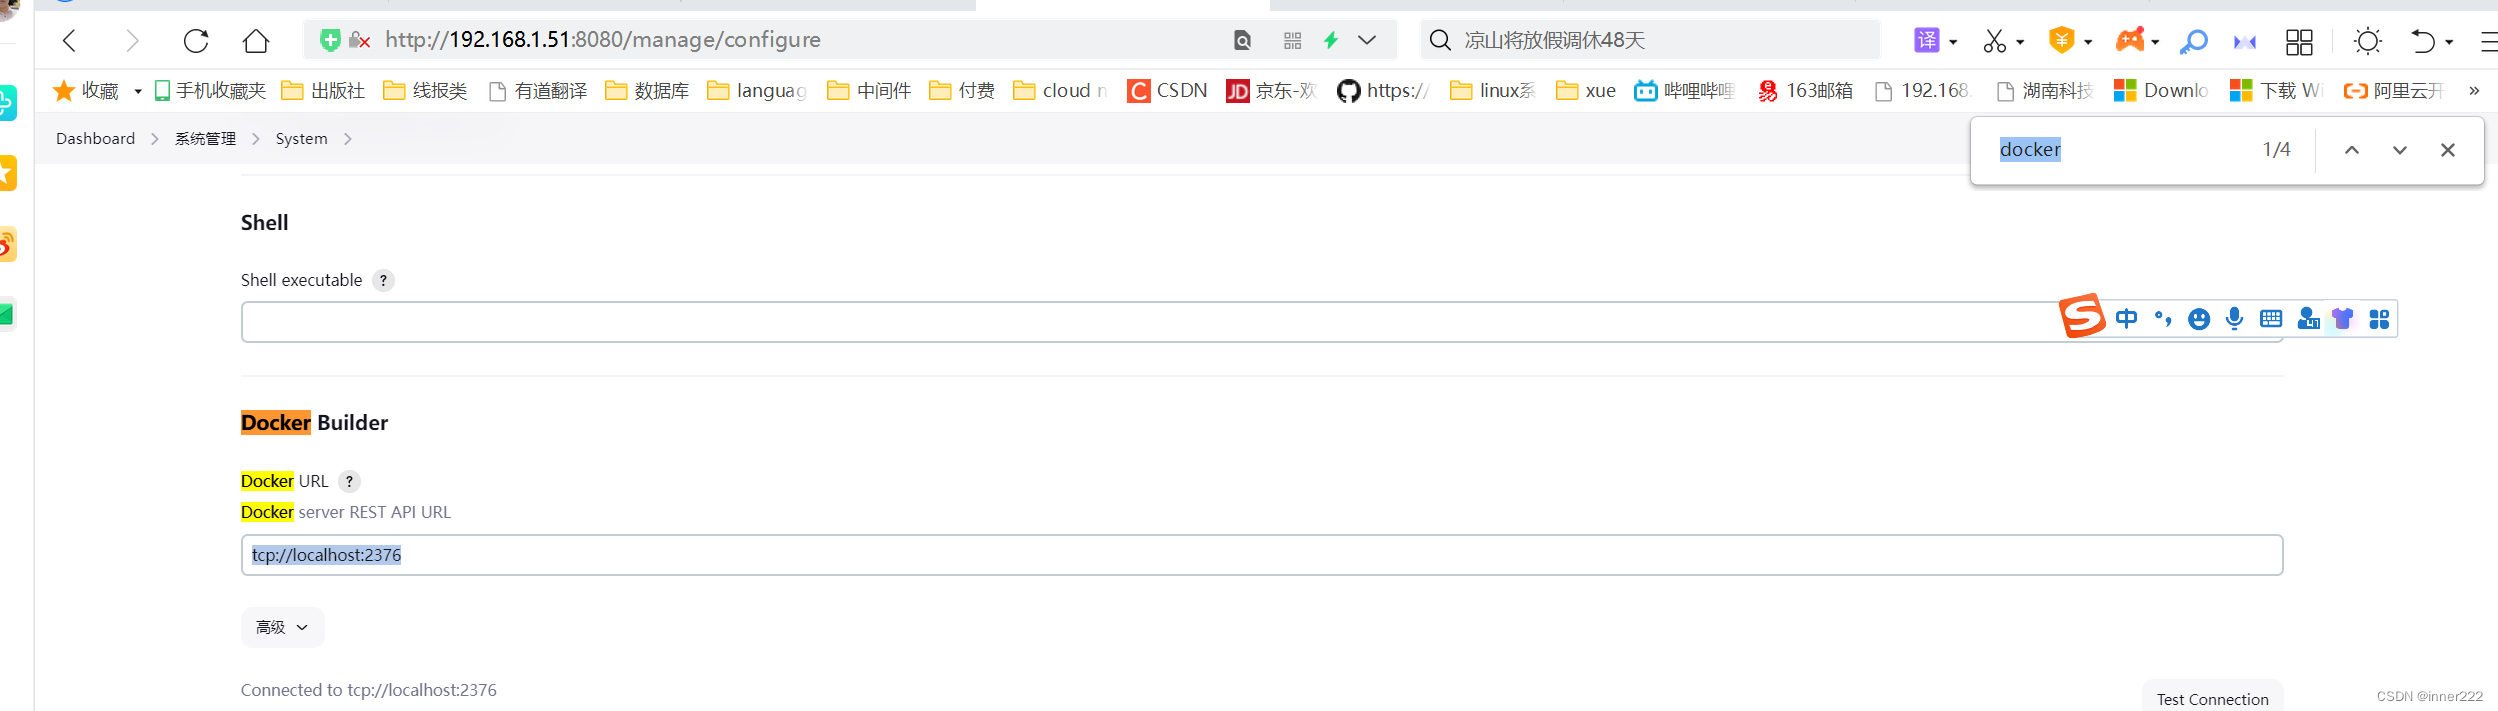
修改docker中service文件添加
-H tcp://0.0.0.0:2376
jenkins中系统管理中
tcp://localhost:2376
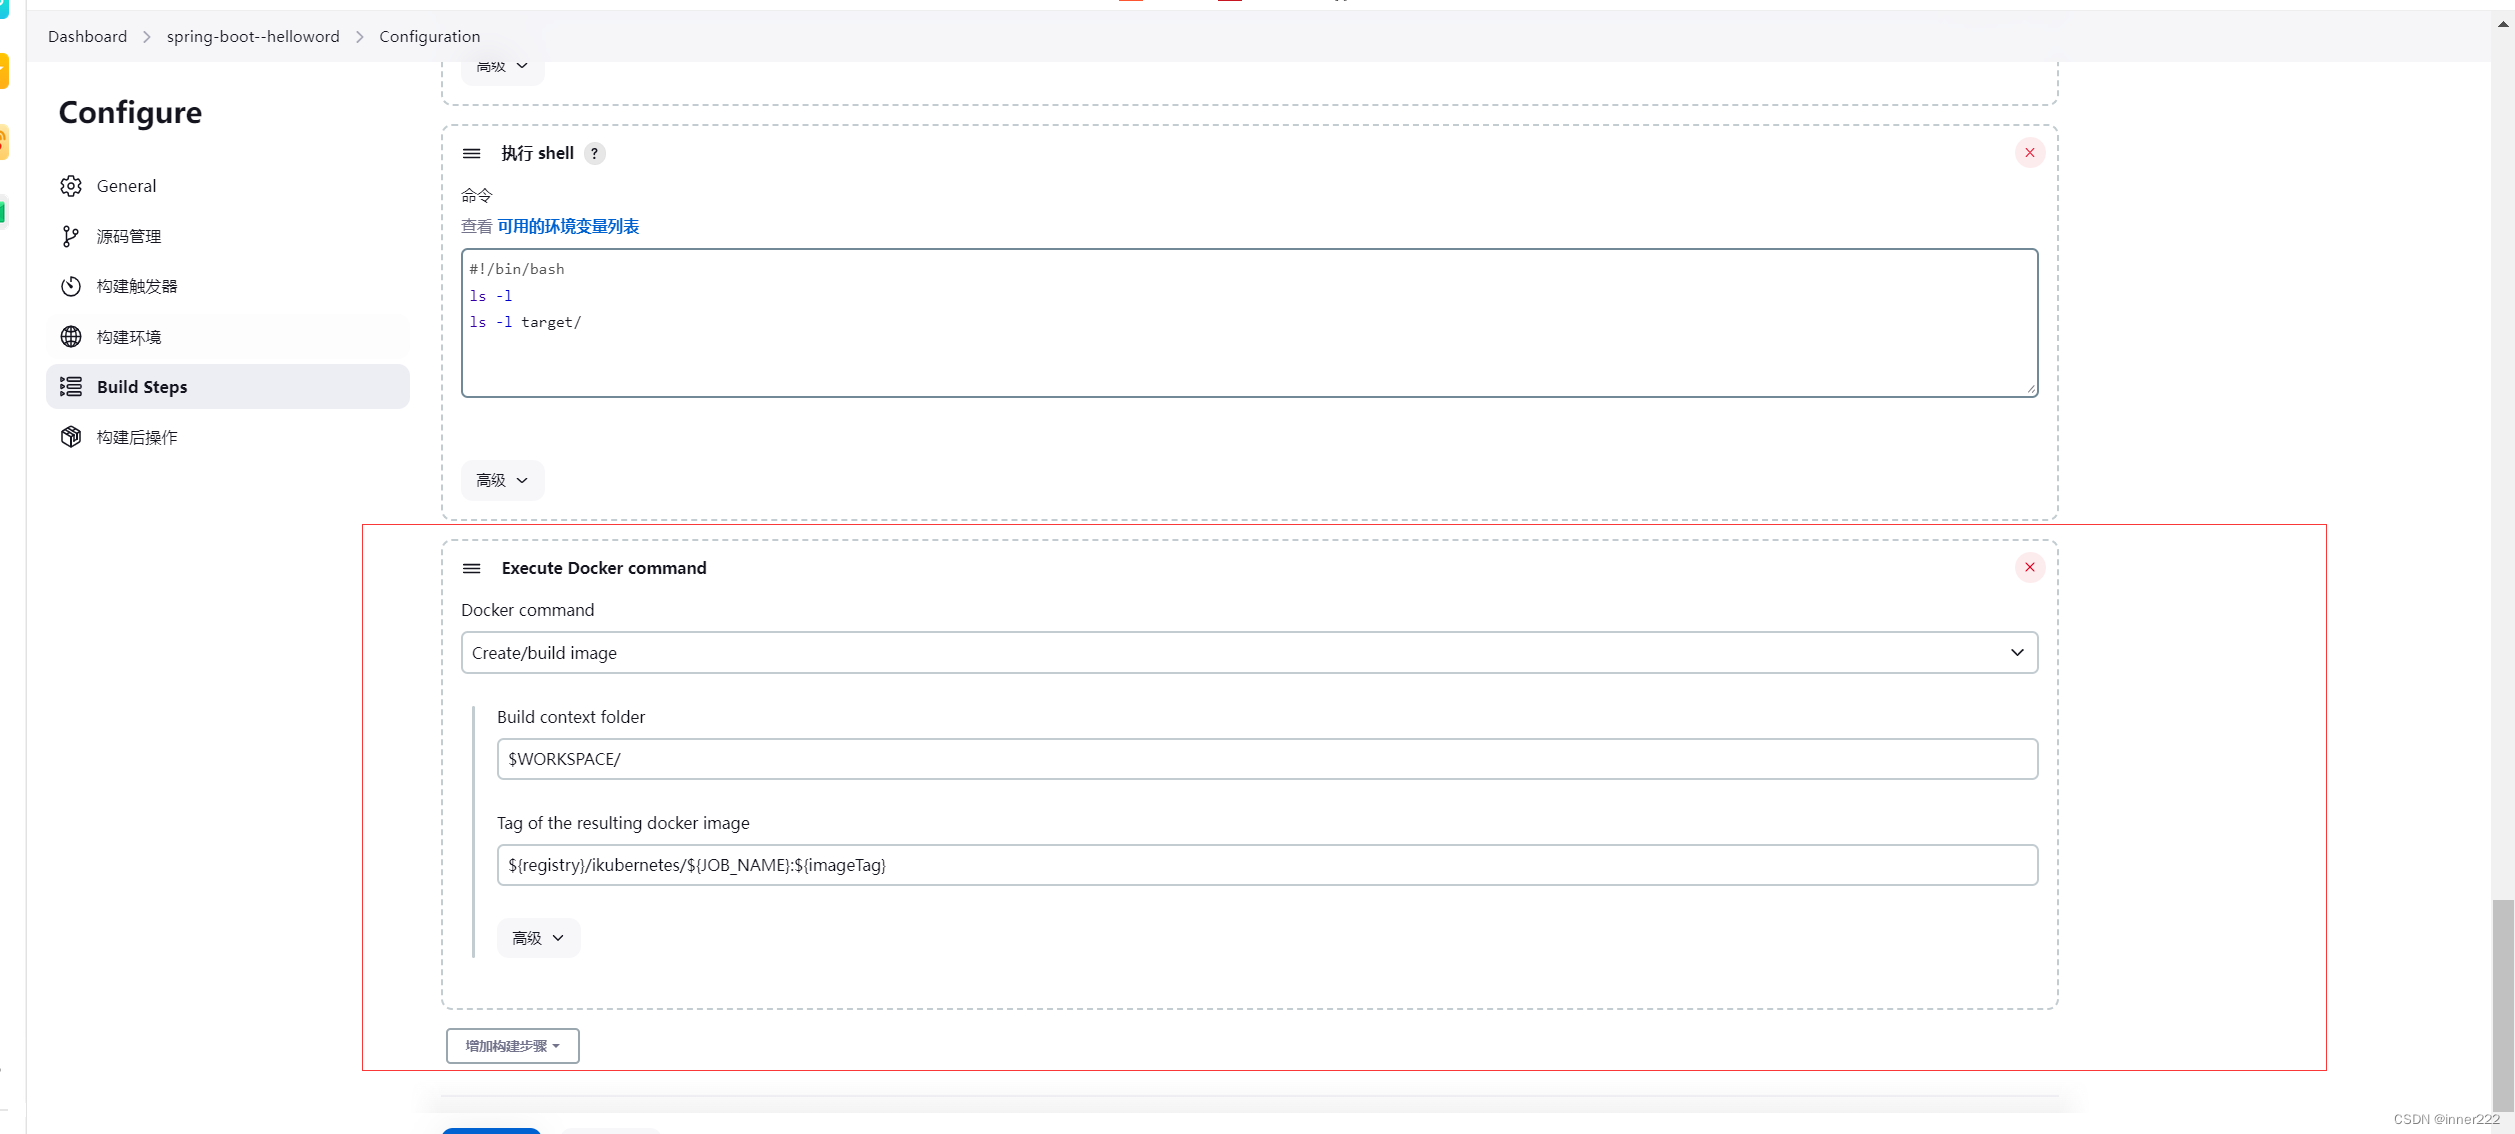
添加流水线,添加docker构建
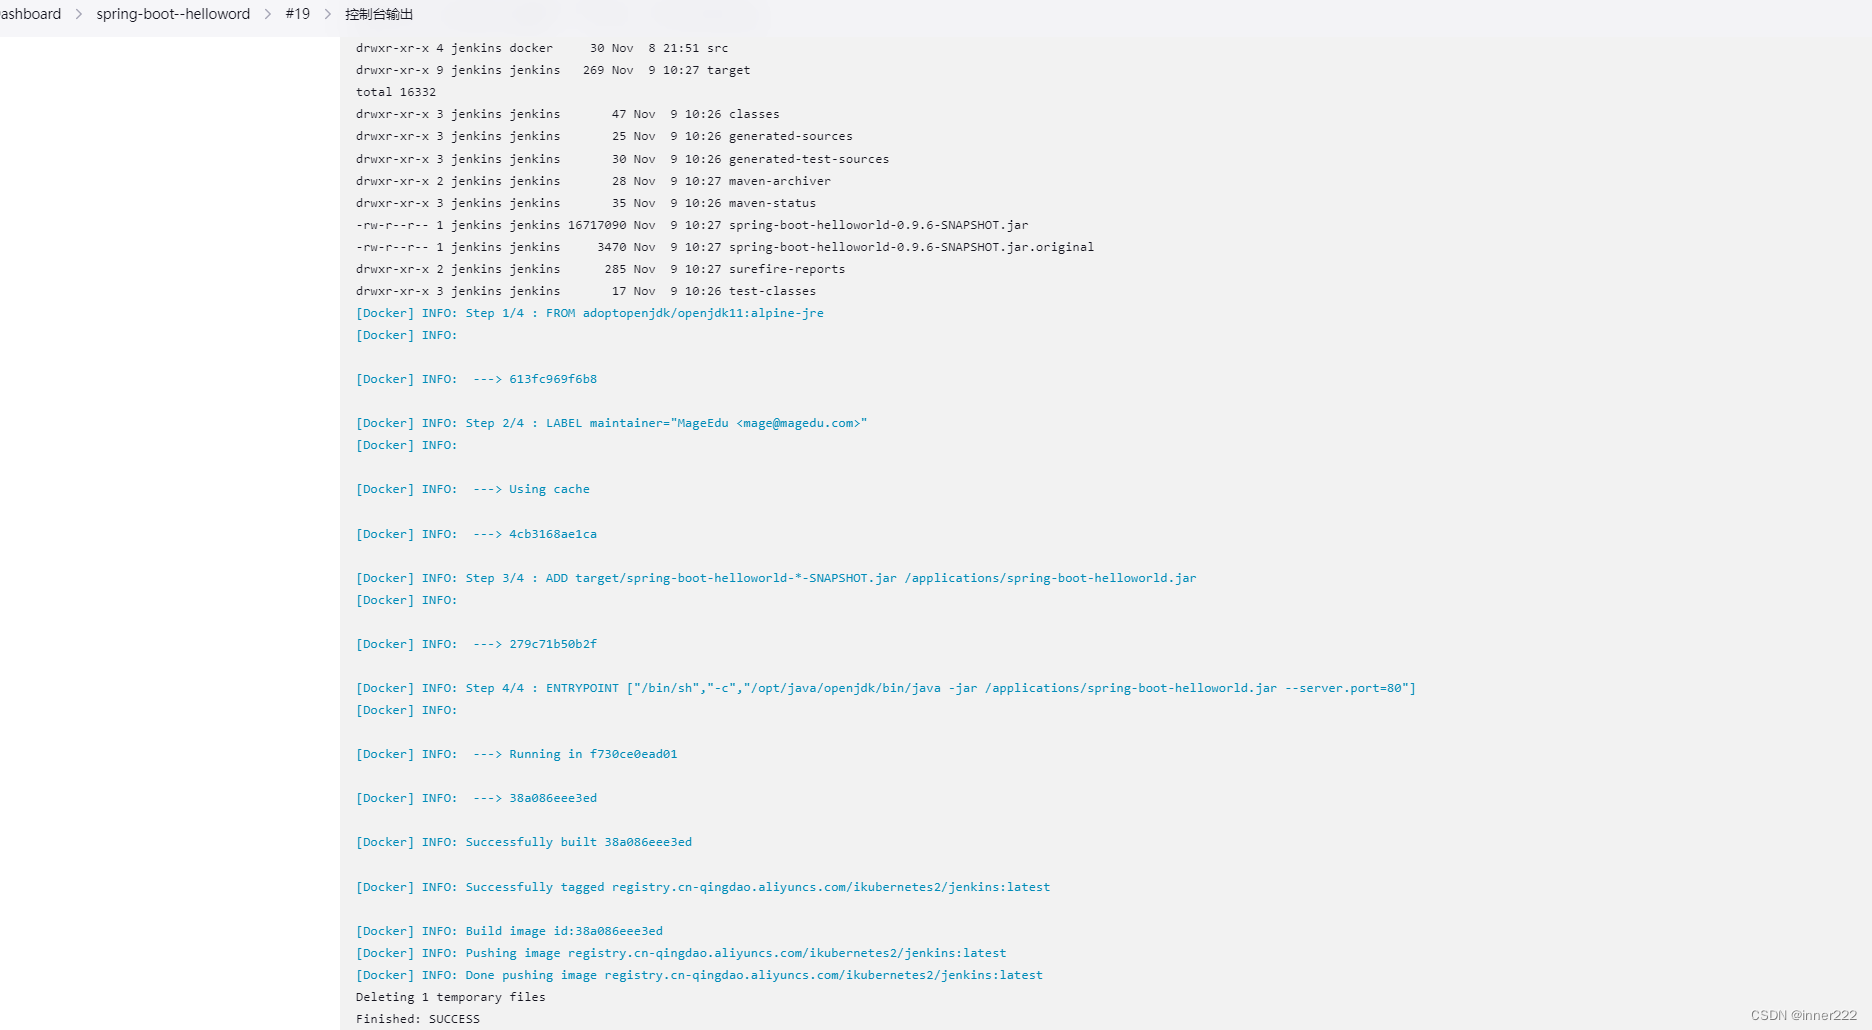
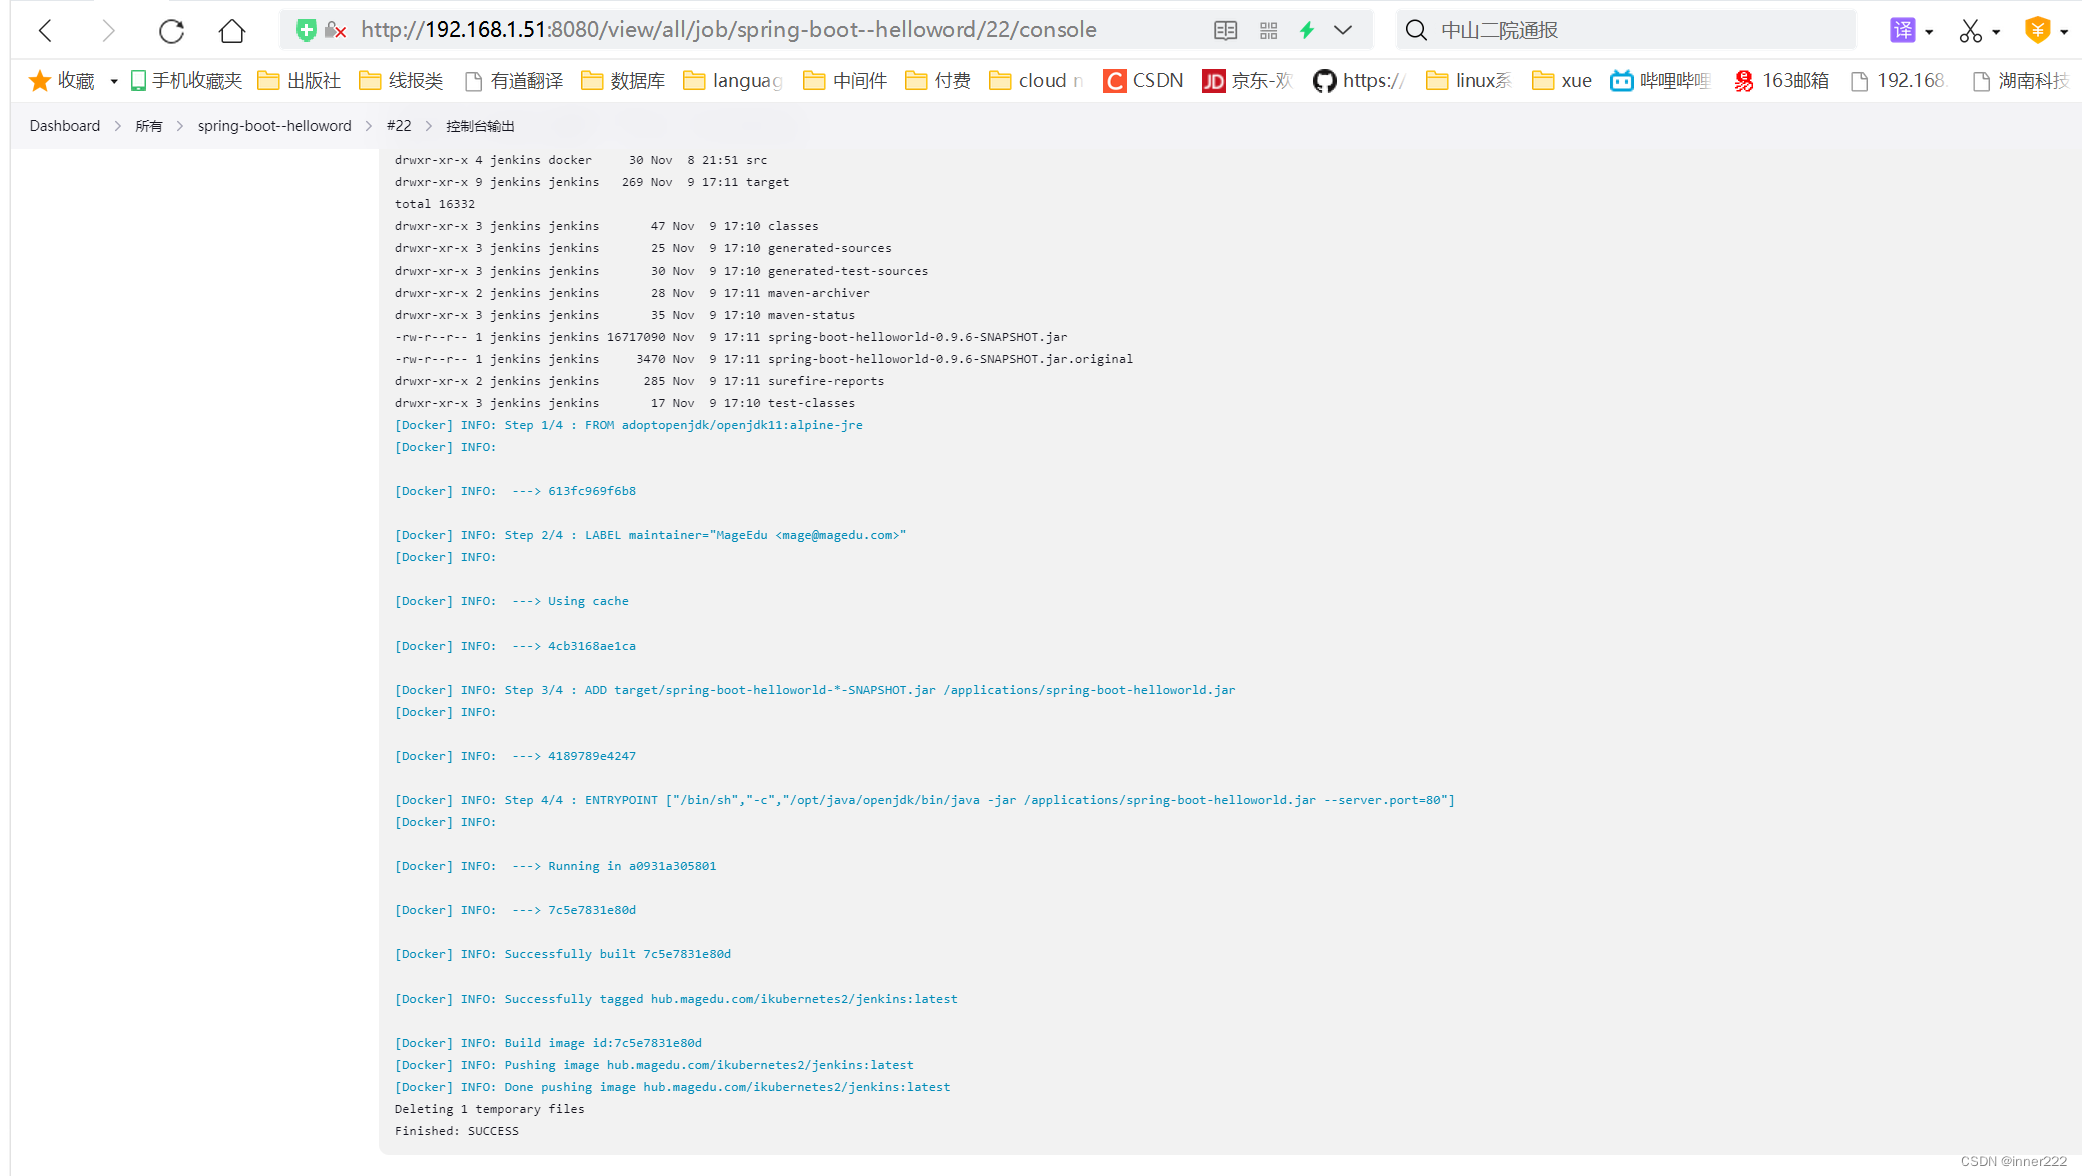
构建成功
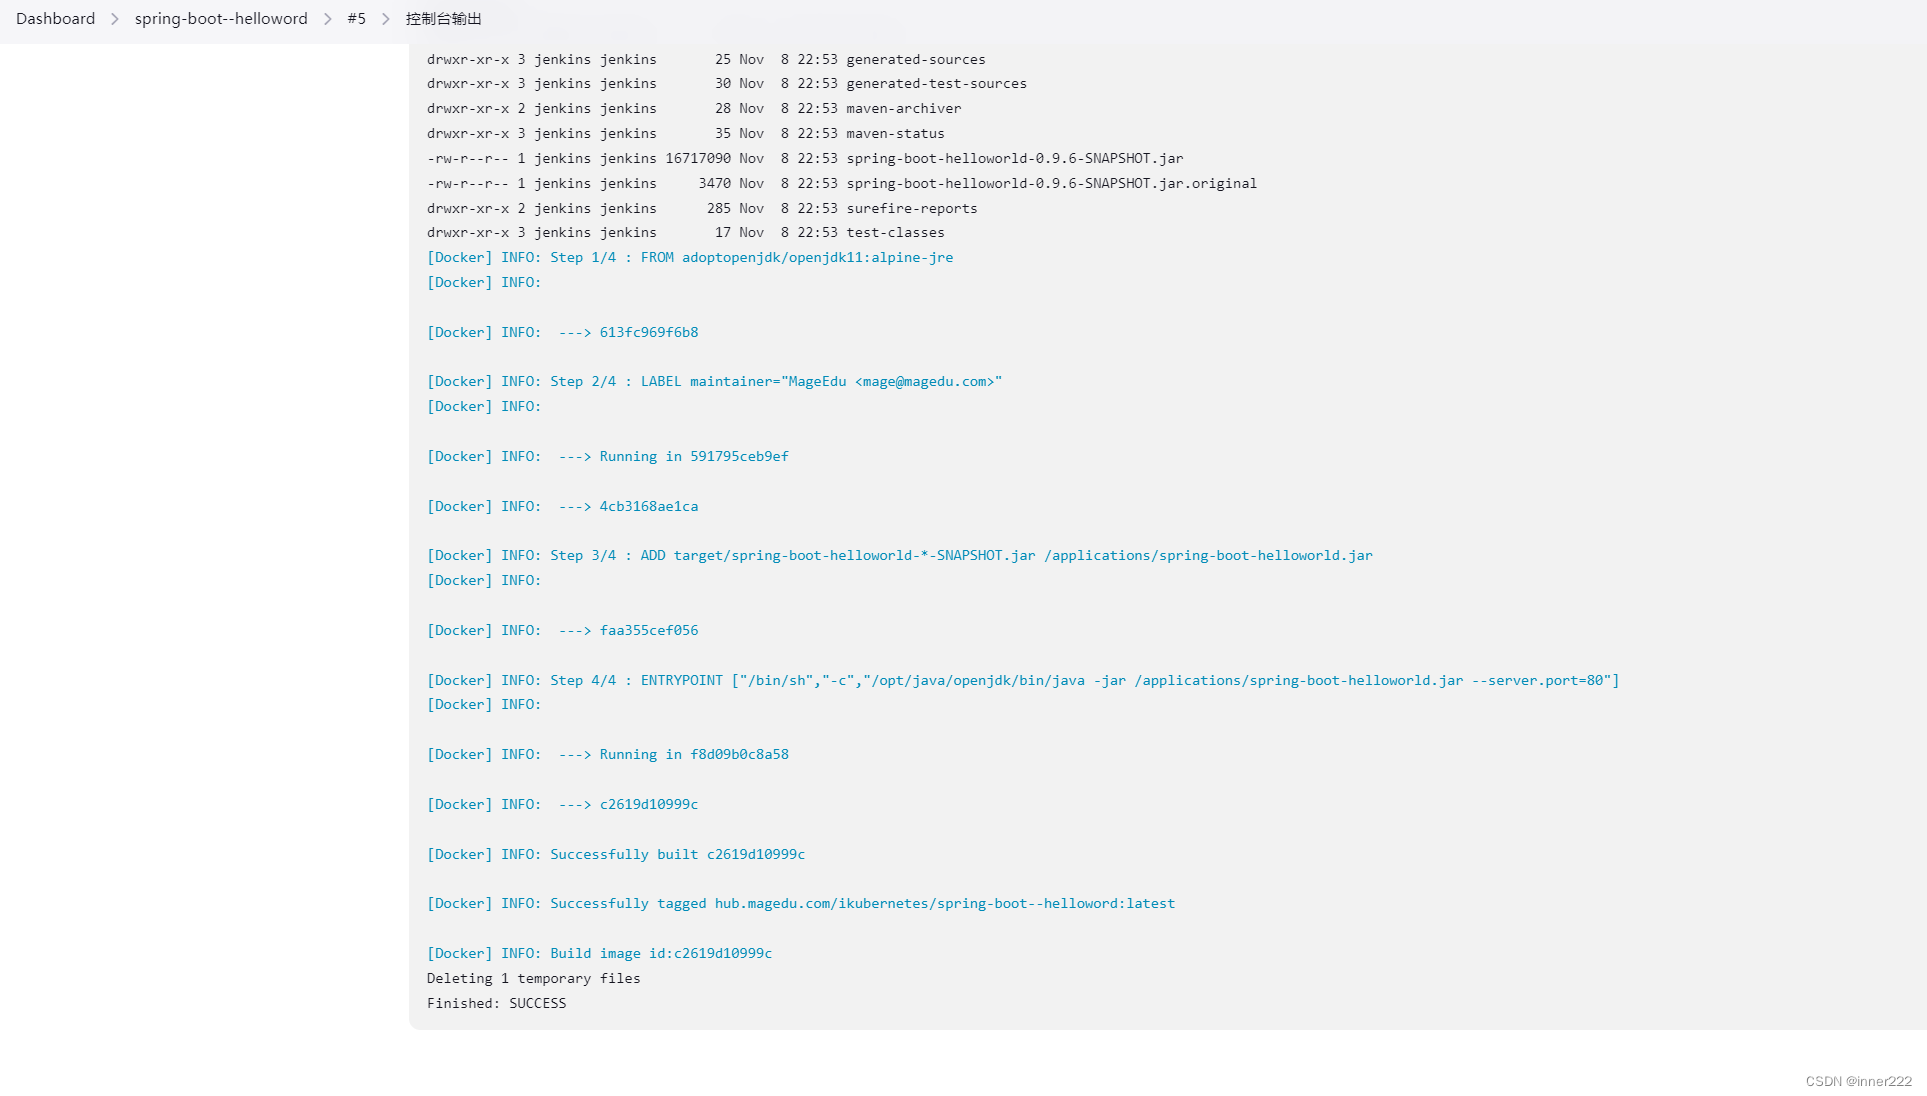
jenkins 查看镜像
root@ubuntu20:~# docker image ls
REPOSITORY                                          TAG          IMAGE ID       CREATED         SIZE
hub.magedu.com/ikubernetes/spring-boot--helloword   latest       c2619d10999c   2 minutes ago   165MB
增加推送步骤,推送到阿里云,也可以推送到harbor镜像仓库
${jOB_NAME}:${imageTag}


luo2/jenkins
${imageTag}
${registry}

${registrUrl}
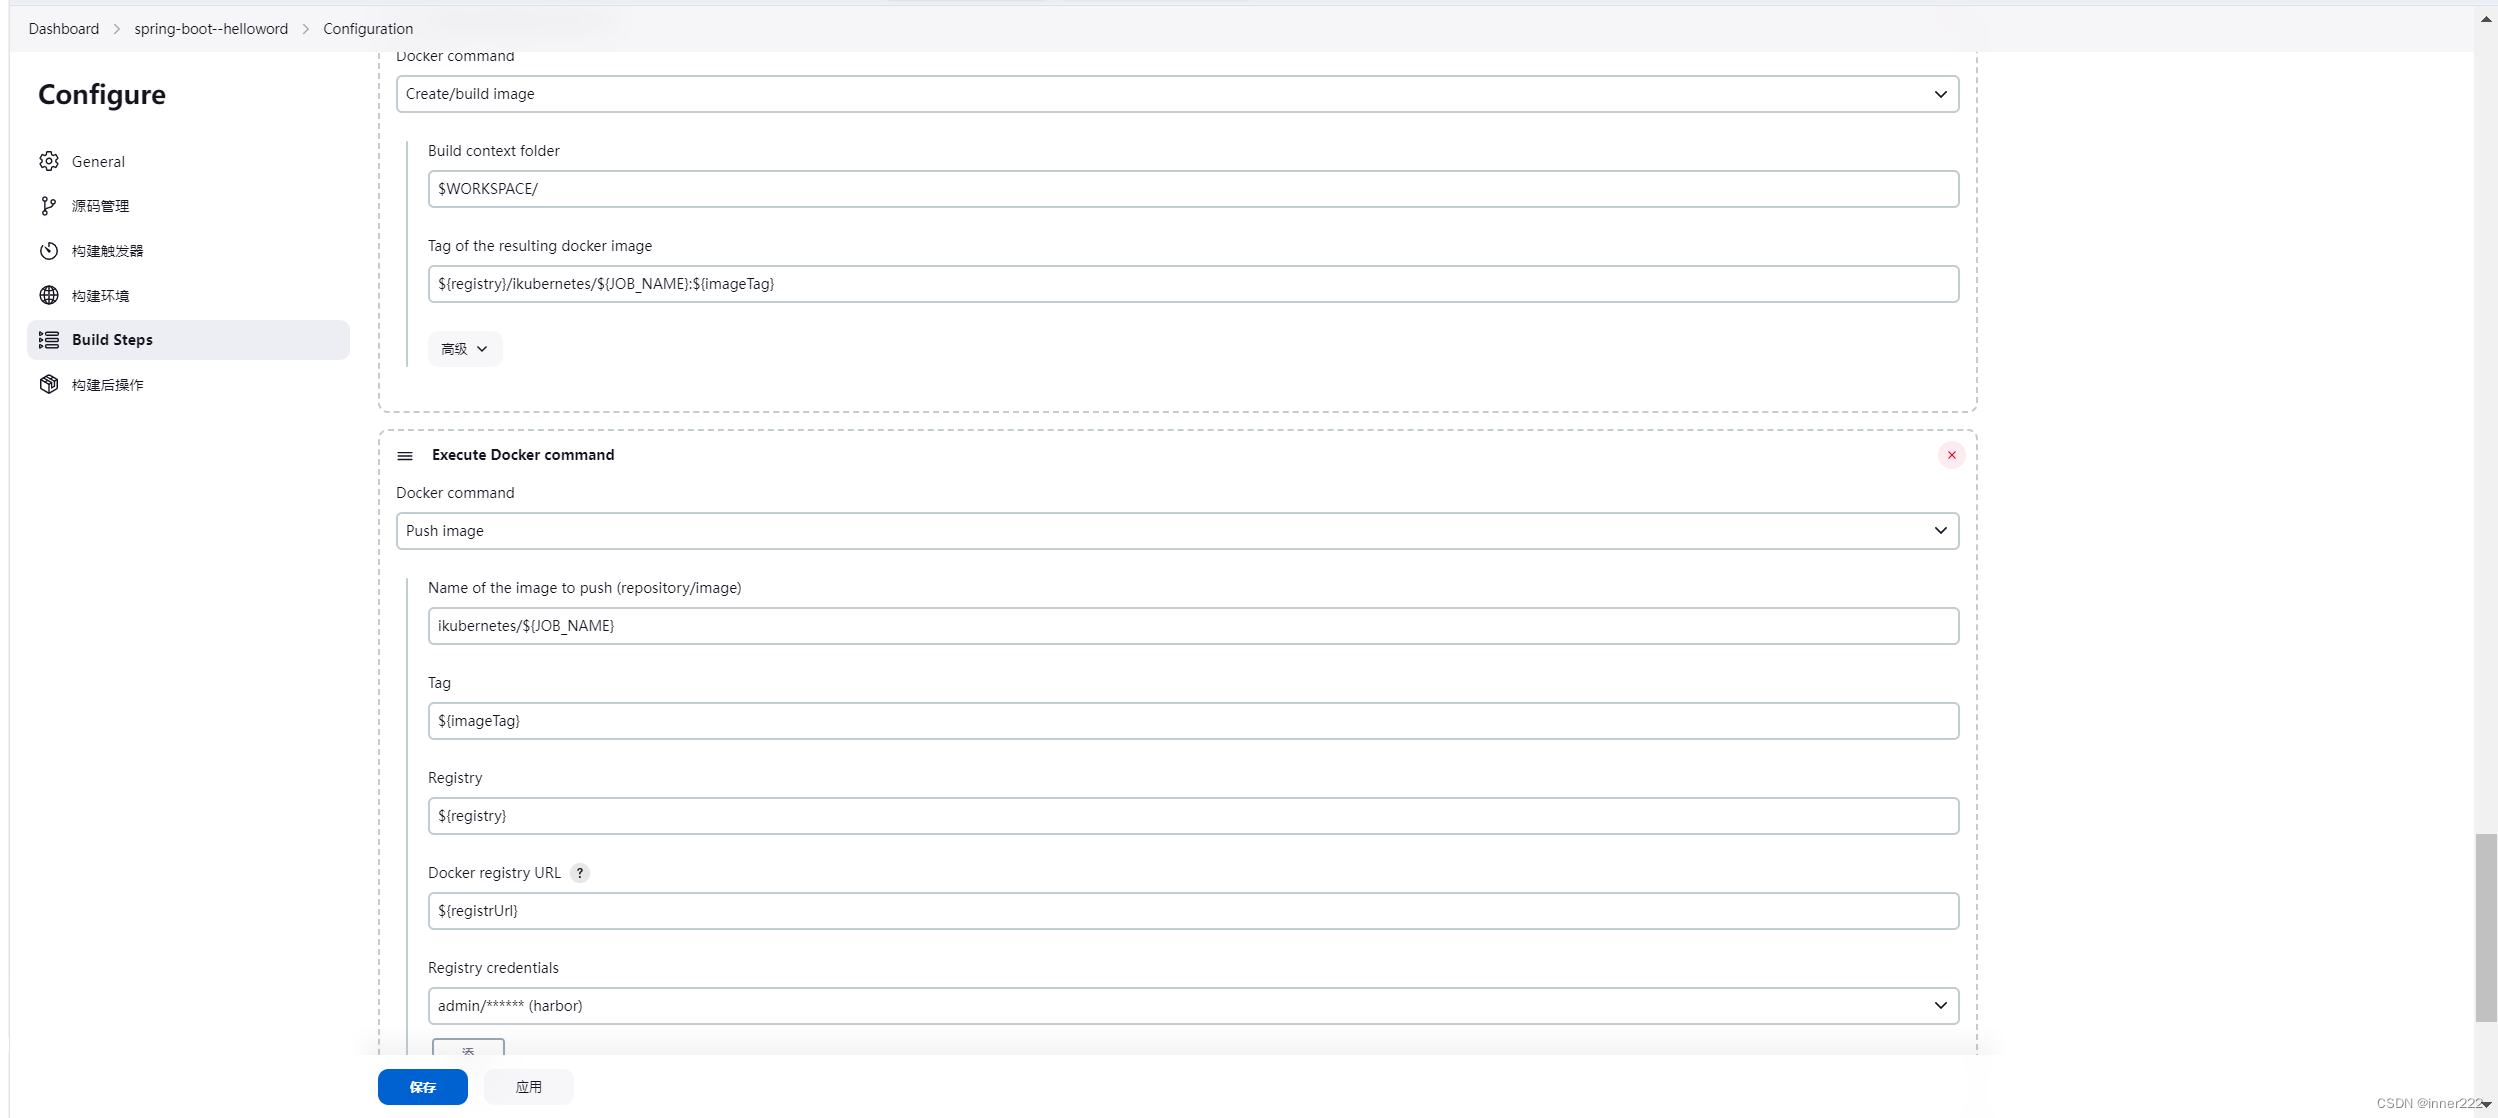
推送到harbor
[Docker] ERROR: failed to push image 192.168.1.30/ikubernetes2/jenkins:latest
ERROR: Build step failed with exception
com.github.dockerjava.api.exception.DockerClientException: Could not push image: Get "https://192.168.1.30/v2/": tls: failed to verify certificate: x509: cannot validate certificate for 192.168.1.30 because it doesn't contain any IP SANs
	at com.github.dockerjava.core.command.PushImageResultCallback.throwFirstError(PushImageResultCallback.java:42)

jenkins 中docker配置文件中daemon.json 中添加配置文件
"insecure-registries": ["hub.magedu.com"]


root@ubuntu20:~# docker login  hub.magedu.com
Username: admin
Password:
WARNING! Your password will be stored unencrypted in /root/.docker/config.json.
Configure a credential helper to remove this warning. See
https://docs.docker.com/engine/reference/commandline/login/#credentials-store

Login Succeeded
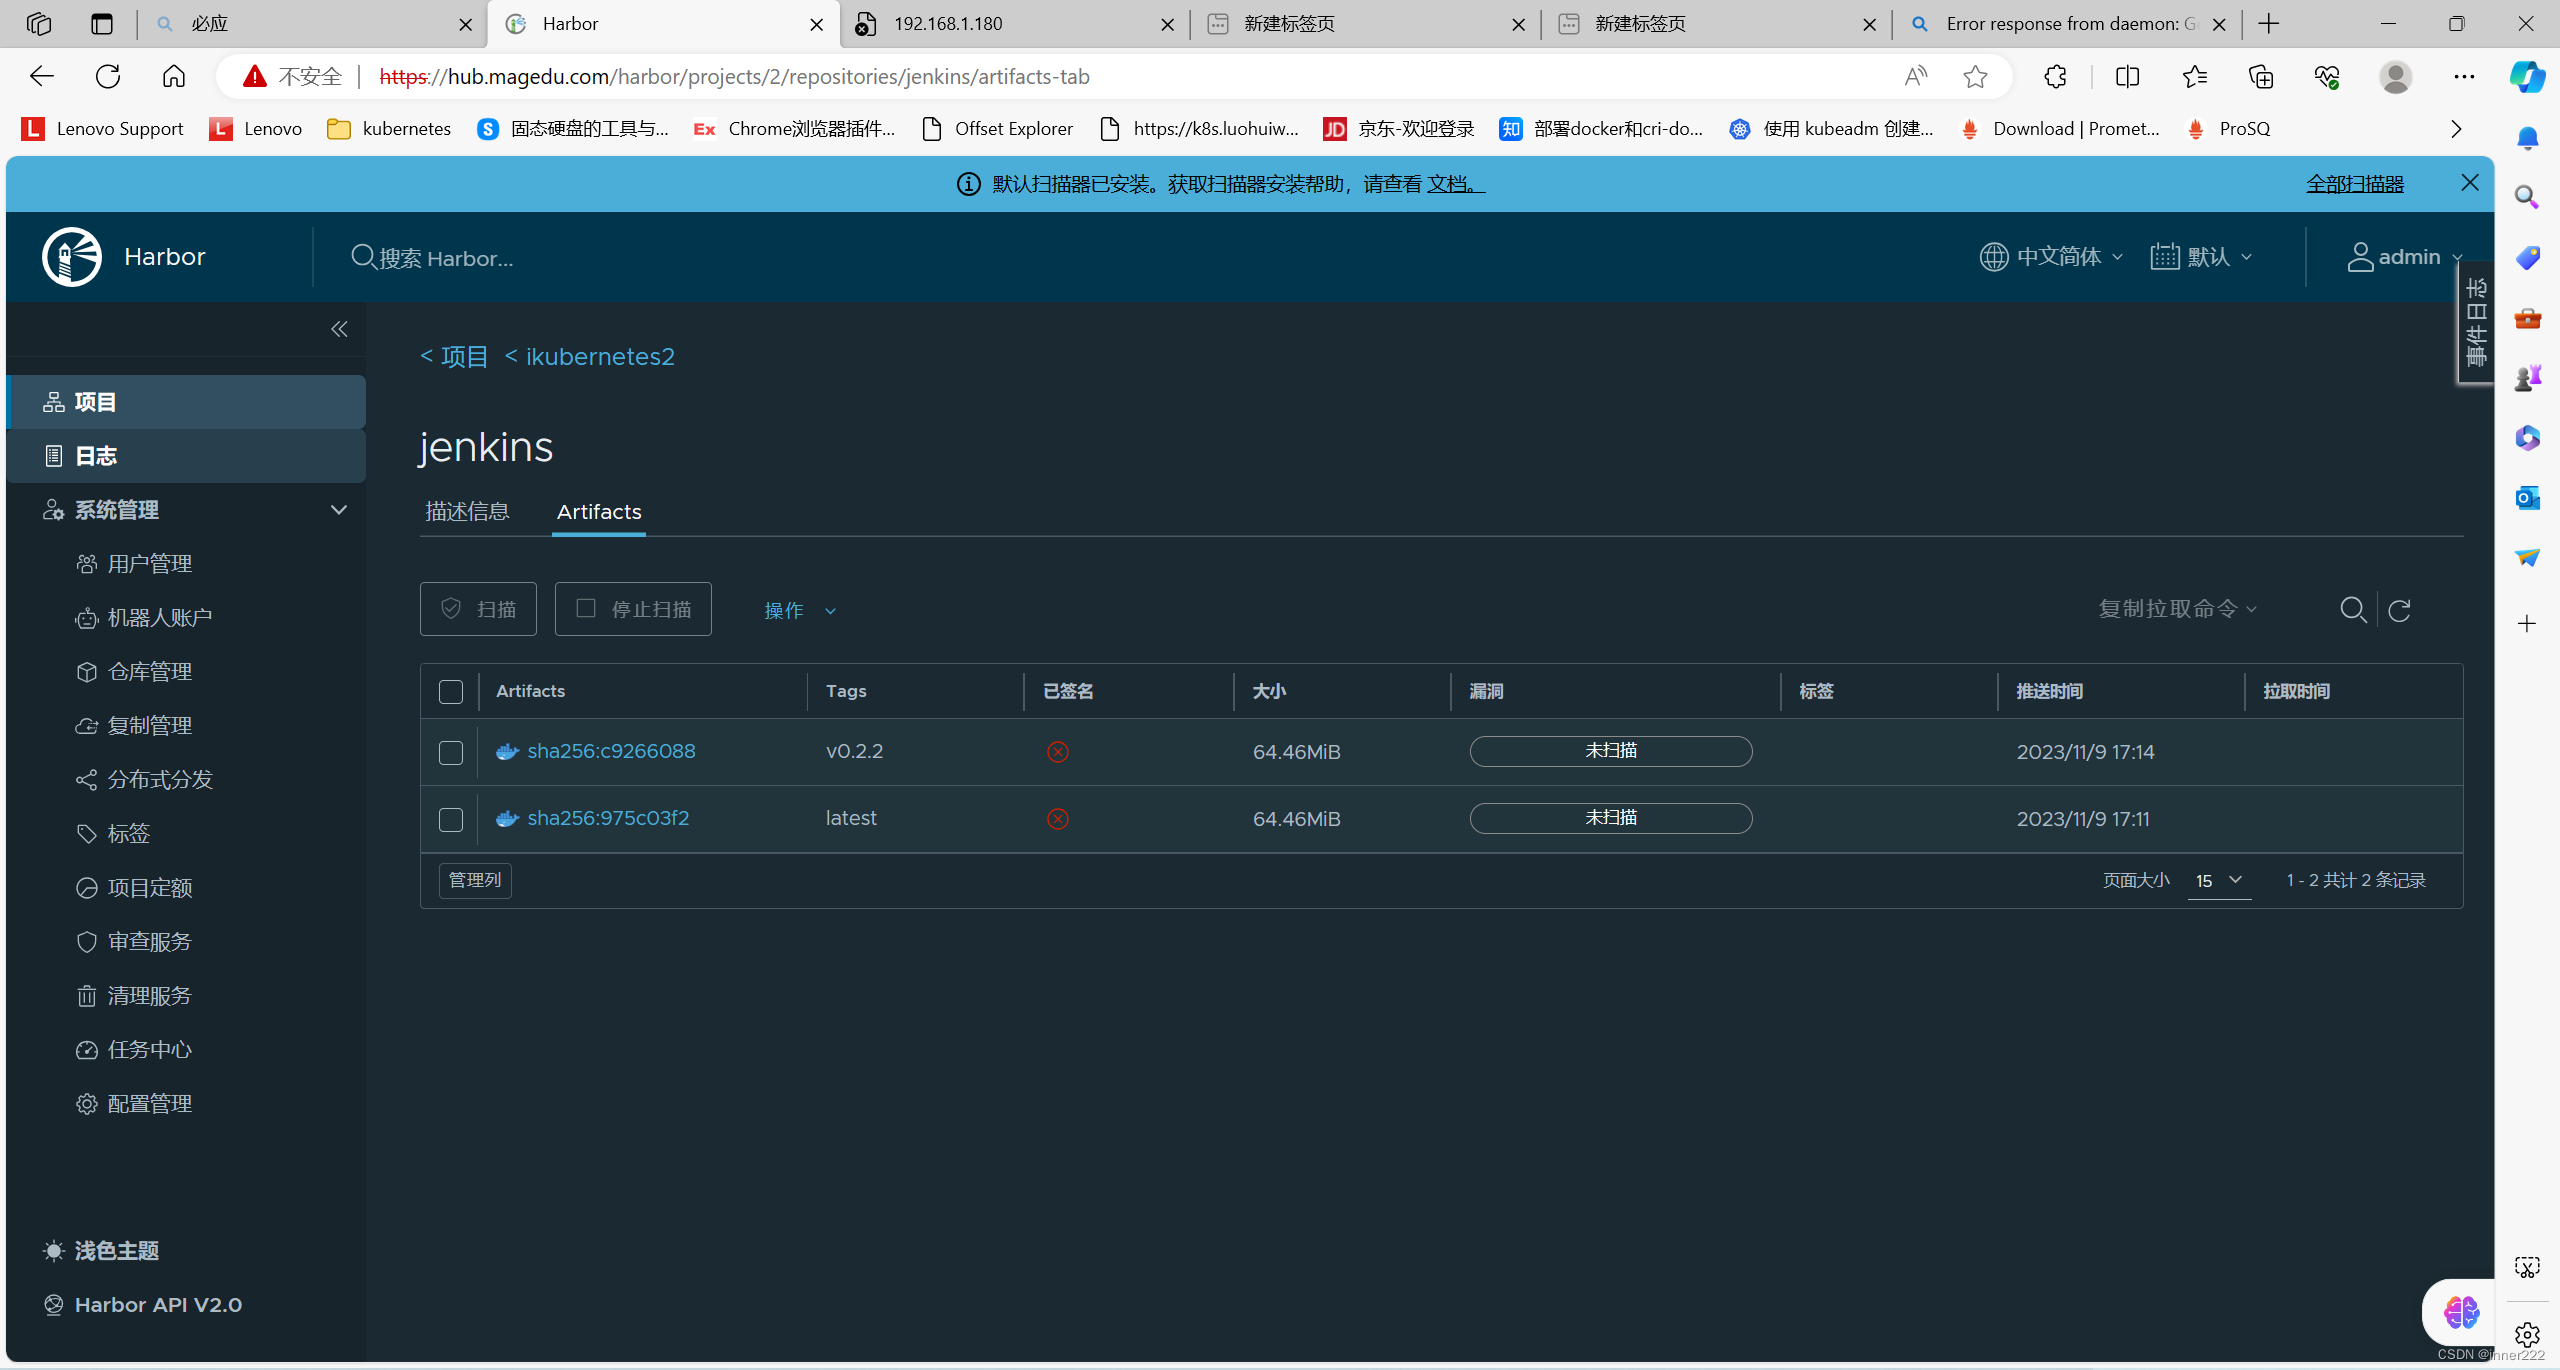
通过helm部署harbor
 cat harbor-values.yaml
expose:
  type: ingress
  tls:
    enabled: true
    certSource: auto
  ingress:
    hosts:
      core: hub.magedu.com
      notary: notary.magedu.com
    controller: default
    annotations:
      kubernetes.io/ingress.class: "nginx"

ipFamily:
  ipv4:
    enabled: true
  ipv6:
    enabled: false


externalURL: https://hub.magedu.com

# 持久化存储配置部分
persistence:
  enabled: true
  resourcePolicy: "keep"
  persistentVolumeClaim:        # 定义Harbor各个组件的PVC持久卷
    registry:          # registry组件(持久卷)
      storageClass: "nfs-csi"           # 前面创建的StorageClass,其它组件同样配置
      accessMode: ReadWriteMany          # 卷的访问模式,需要修改为ReadWriteMany
      size: 5Gi
    chartmuseum:     # chartmuseum组件(持久卷)
      storageClass: "nfs-csi"
      accessMode: ReadWriteMany
      size: 5Gi
    jobservice:
      jobLog:
        storageClass: "nfs-csi"
        accessMode: ReadWriteOnce
        size: 1Gi
      #scanDataExports:
      #  storageClass: "nfs-csi"
      #  accessMode: ReadWriteOnce
      #  size: 1Gi
    database:        # PostgreSQl数据库组件
      storageClass: "nfs-csi"
      accessMode: ReadWriteMany
      size: 2Gi
    redis:    # Redis缓存组件
      storageClass: "nfs-csi"
      accessMode: ReadWriteMany
      size: 2Gi
    trivy:         # Trity漏洞扫描
      storageClass: "nfs-csi"
      accessMode: ReadWriteMany
      size: 5Gi

harborAdminPassword: "qwert123"

kubeApiServer
kubeapi.magedu.com
自动触发流水线
允许本地
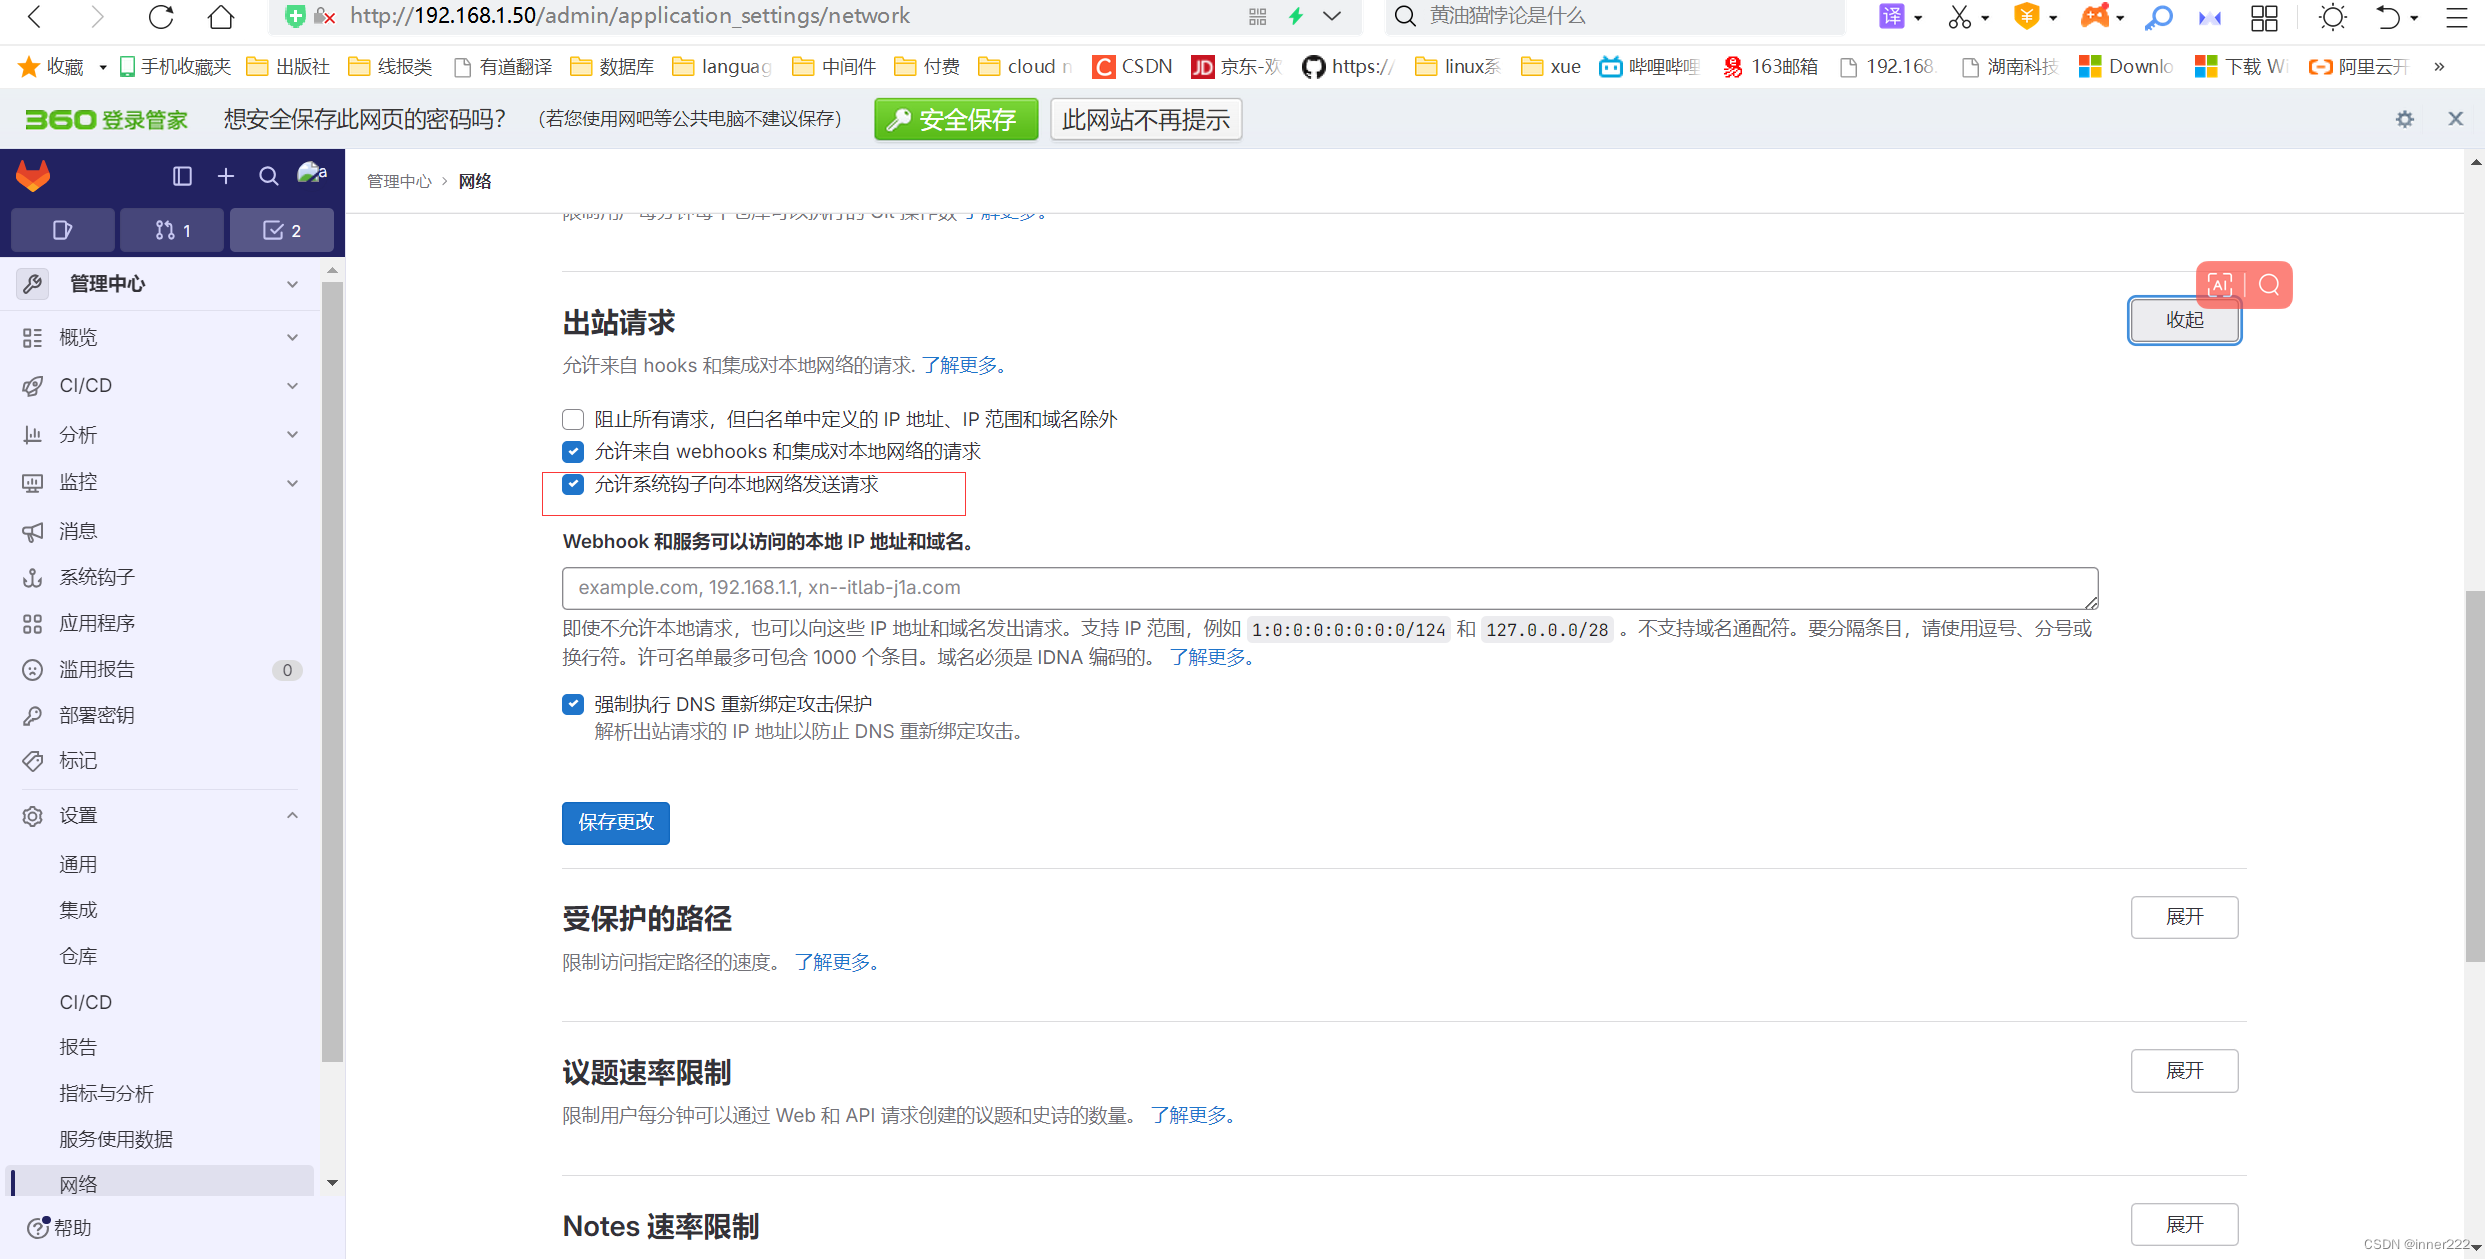
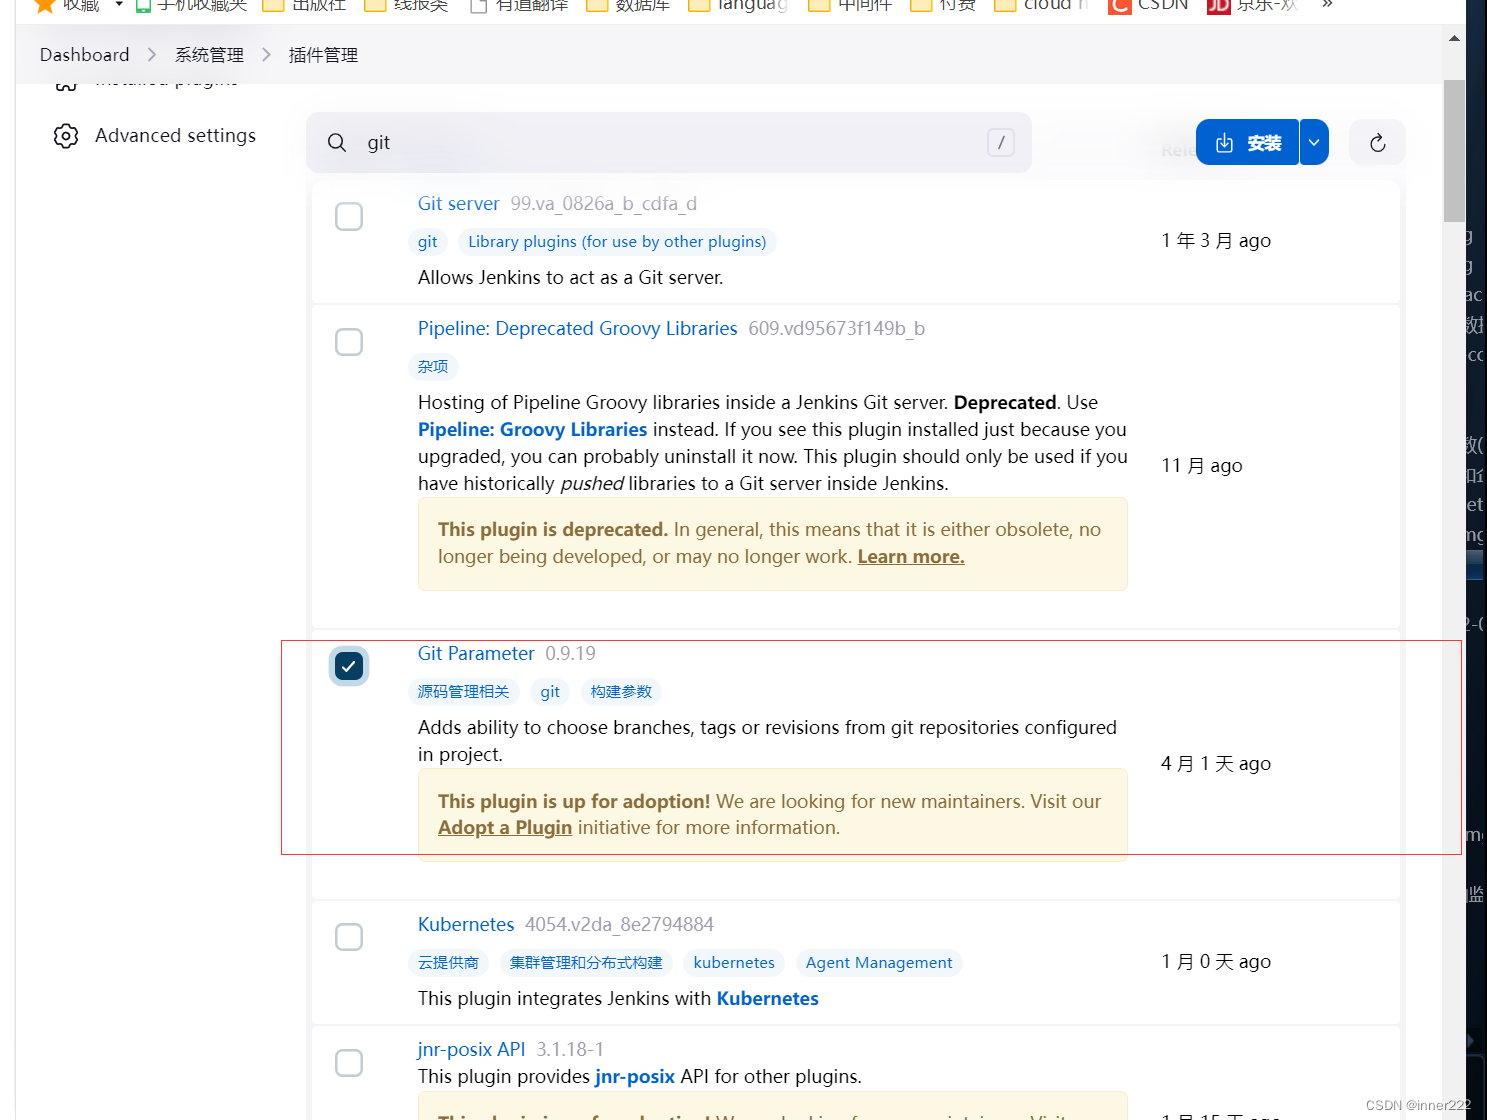
安装插件
root@ubuntu20:/etc/gitlab# sudo gitlab-rails console
user = User.find_by_username(‘root’)
user.password = ‘2368756722Aa@’
user.password_confirmation = ‘2368756722Aa@’
user.save!
exit
gitlab root修改密码
--------------------------------------------------------------------------------
 Ruby:         ruby 3.0.6p216 (2023-03-30 revision 23a532679b) [x86_64-linux]
 GitLab:       16.3.6 (abc892a30ec) FOSS
 GitLab Shell: 14.26.0
 PostgreSQL:   13.11
-----------------------------------------------------------[ booted in 113.54s ]

Loading production environment (Rails 7.0.6)
irb(main):001:0> user = User.find_by_username('root')
=> #<User id:1 @root>
irb(main):002:0> user.password = '2368756722Aa@'
=> "2368756722Aa@"
irb(main):003:0> user.password_confirmation = '2368756722Aa@'
=> "2368756722Aa@"
irb(main):004:0> user.save!
=> true
irb(main):005:0> exit
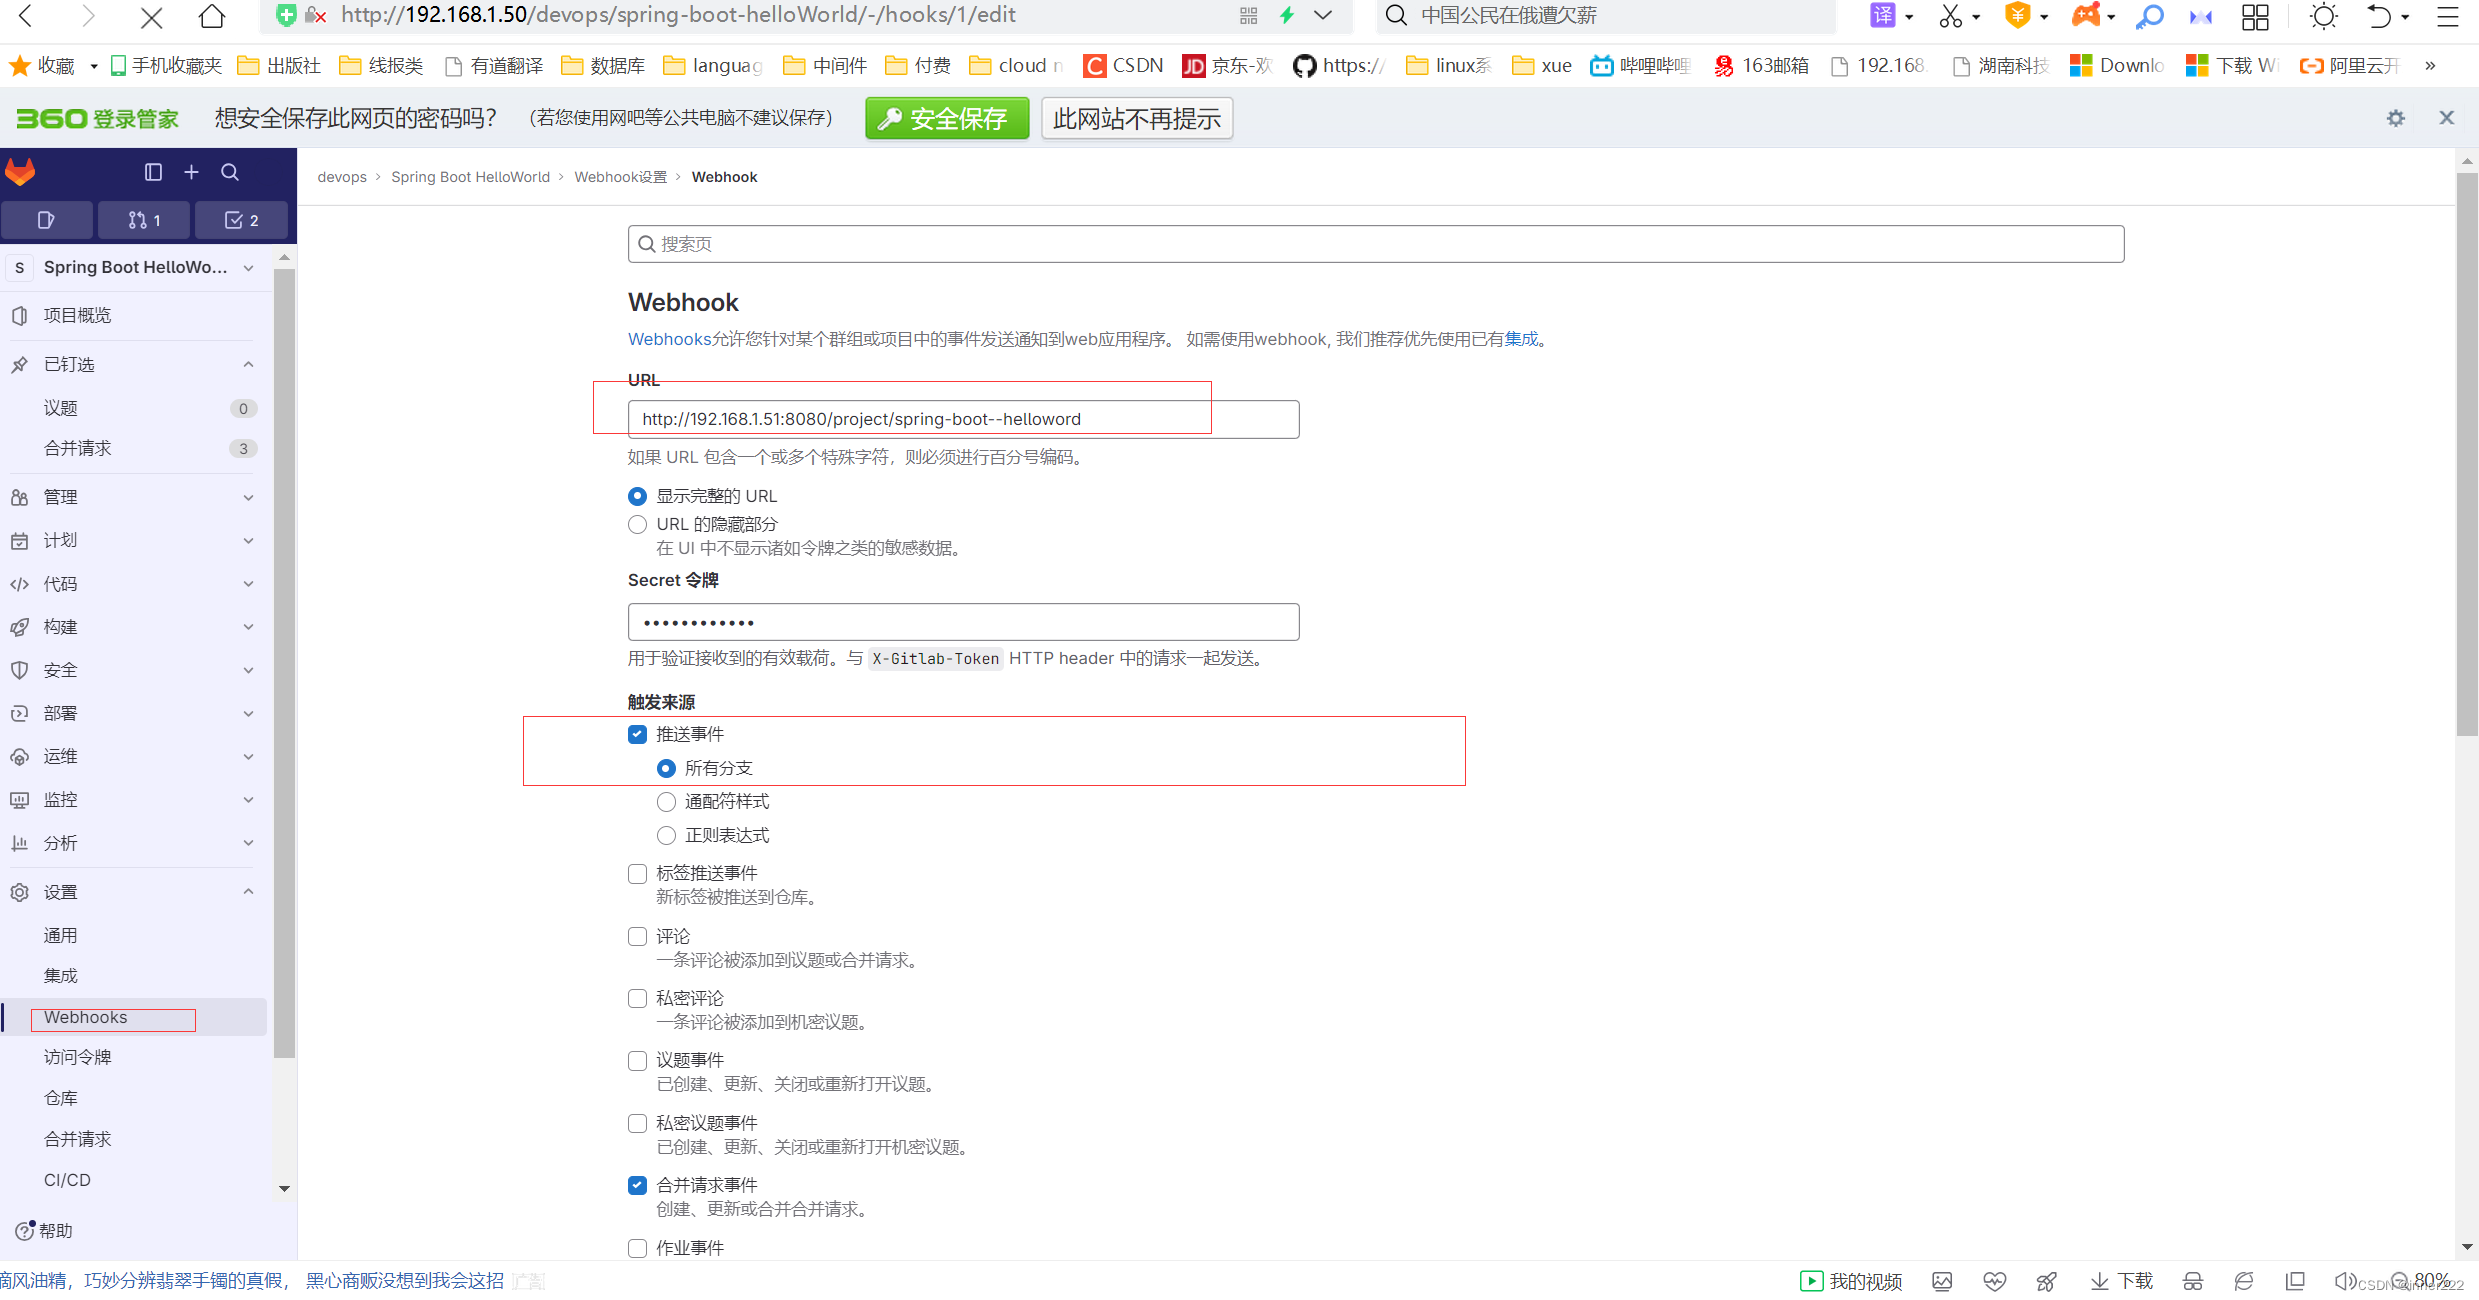
编辑流水线,添加
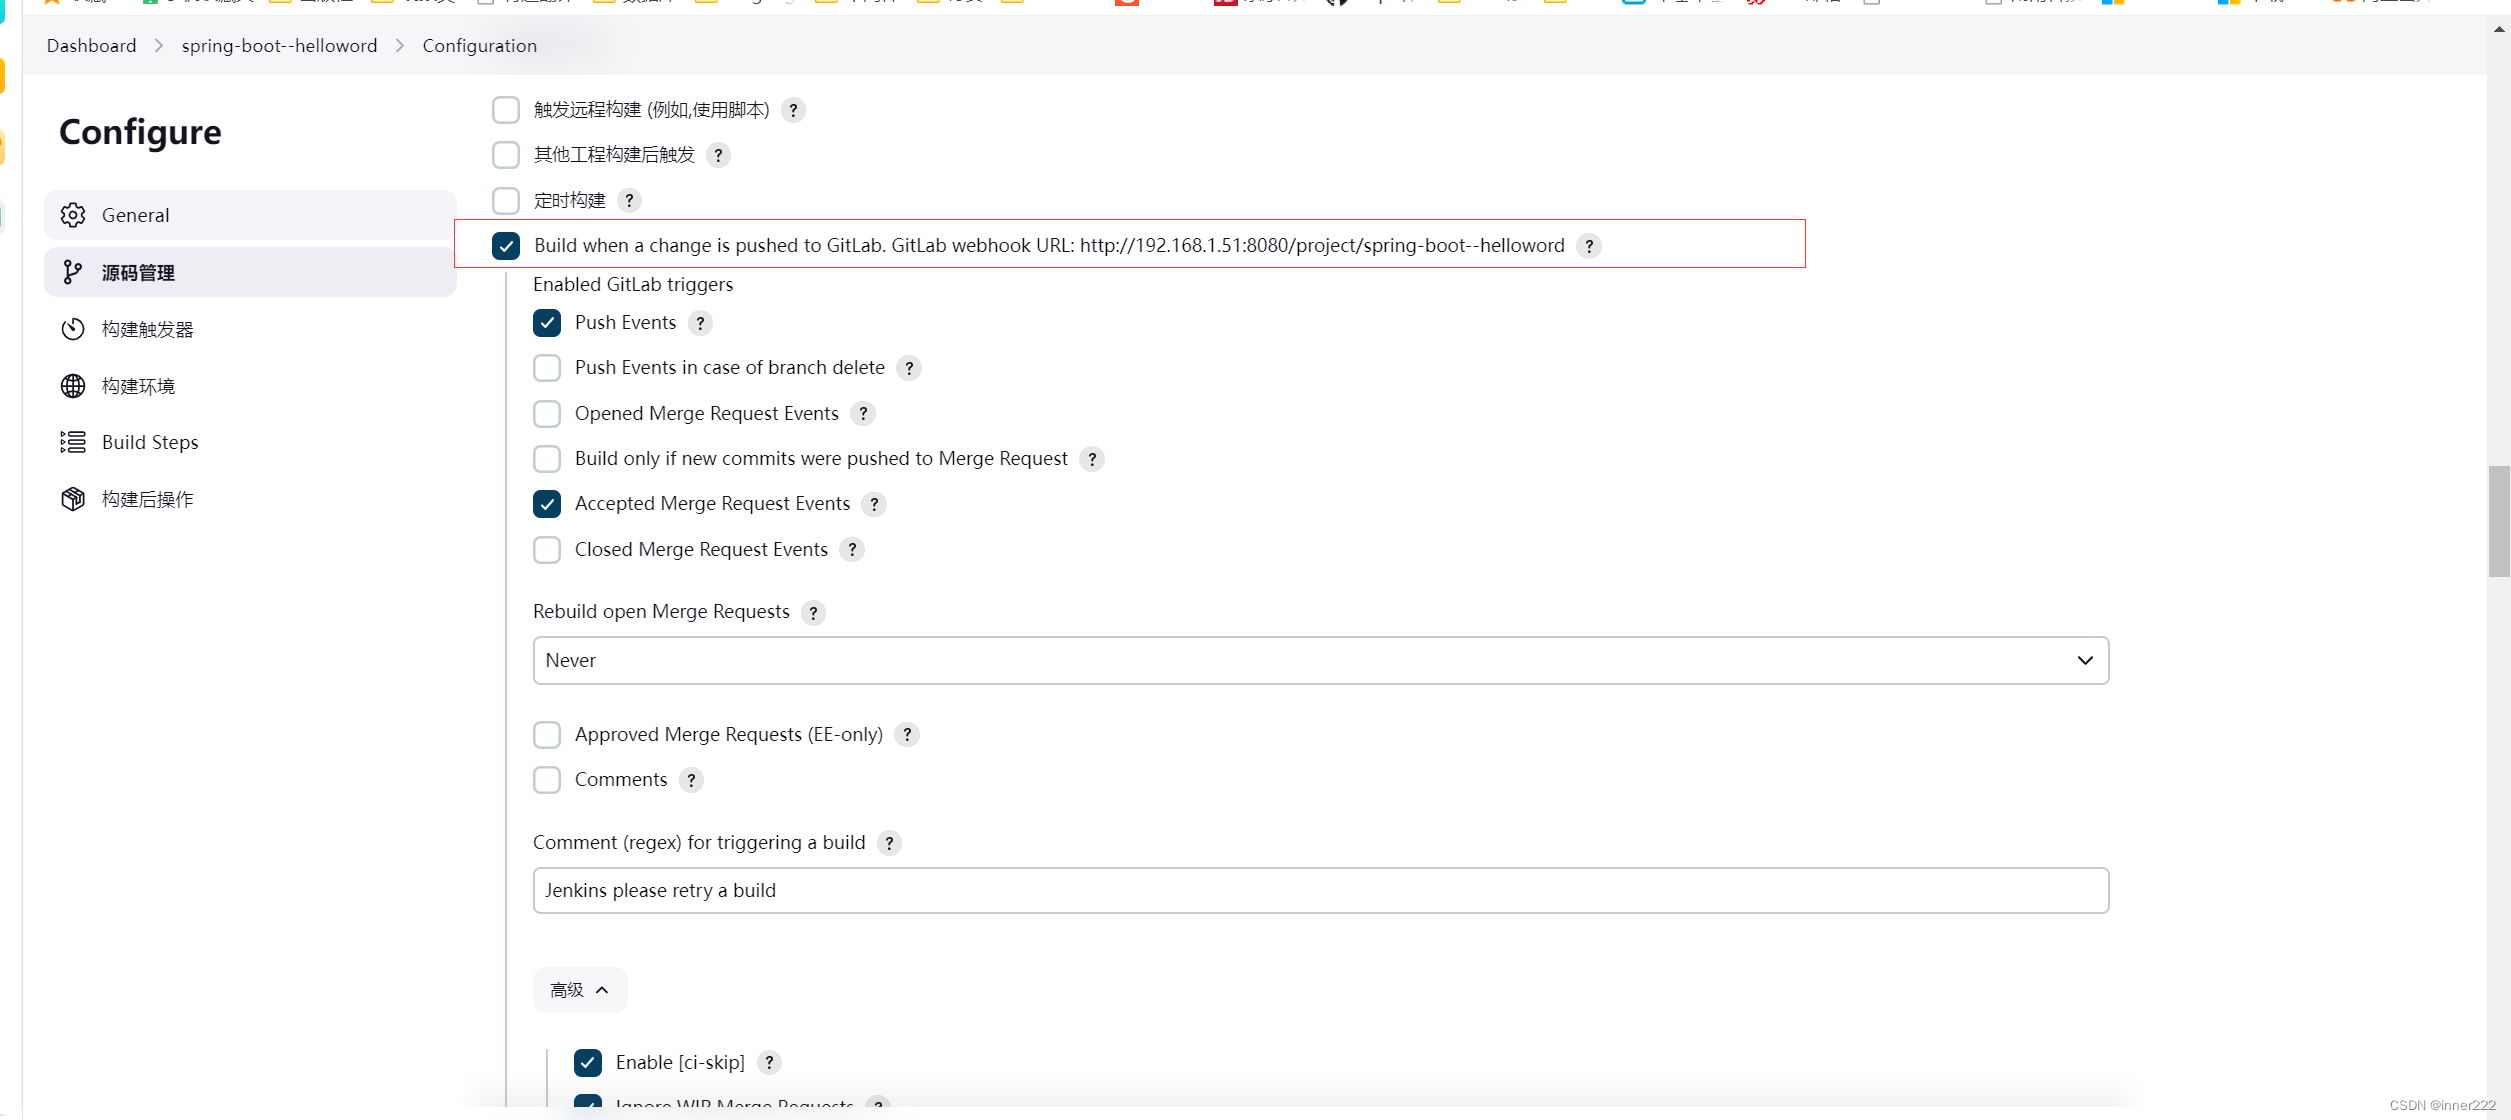
Secret token 用于添加Webhook的令排
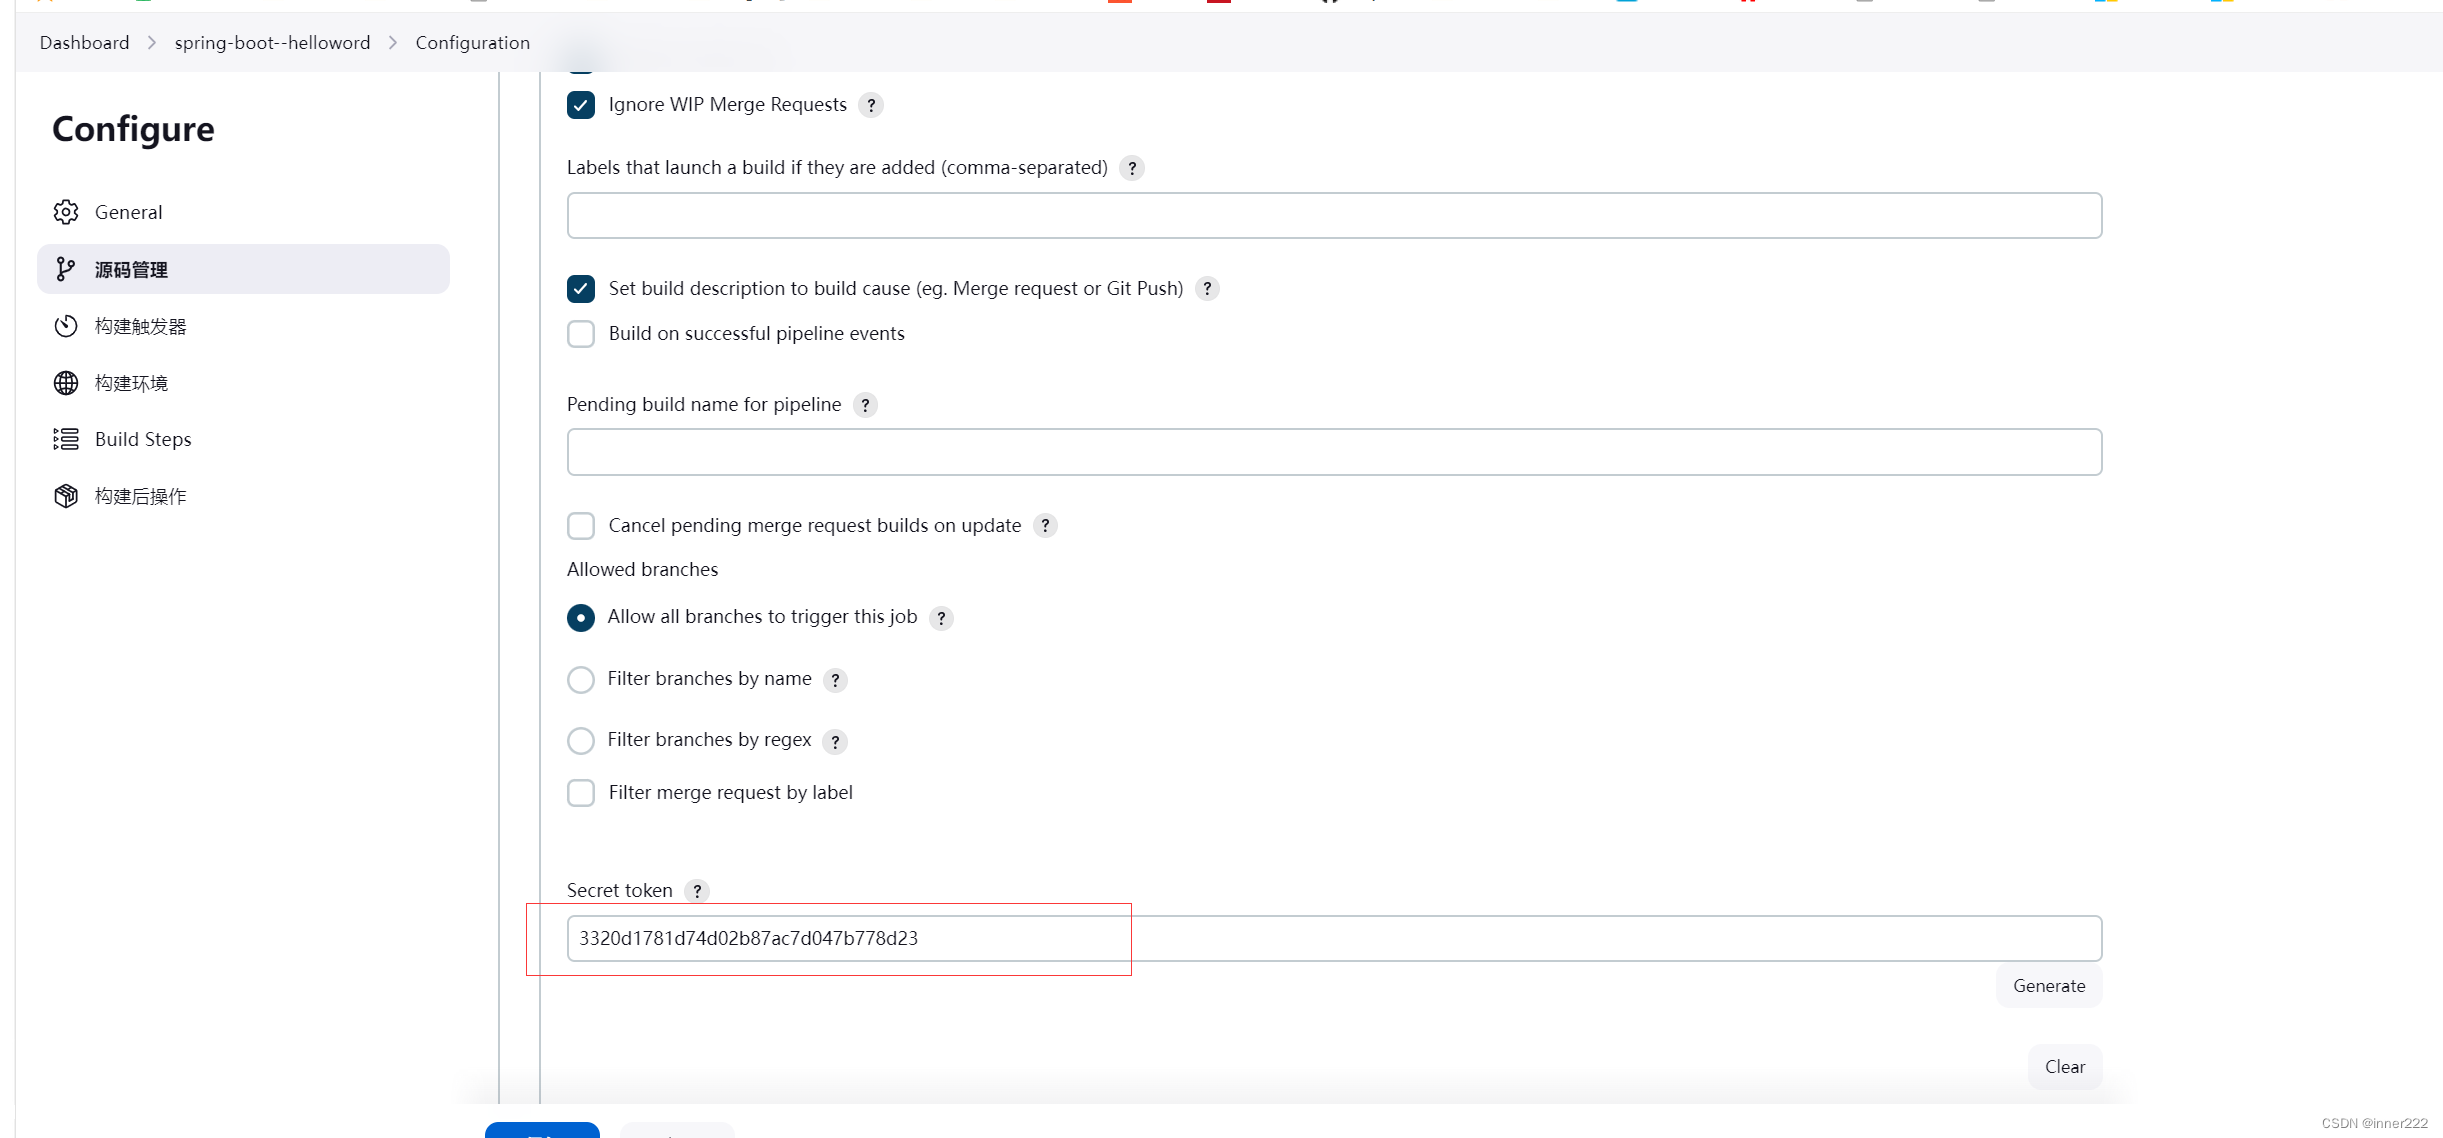
gitlab添加Webhook
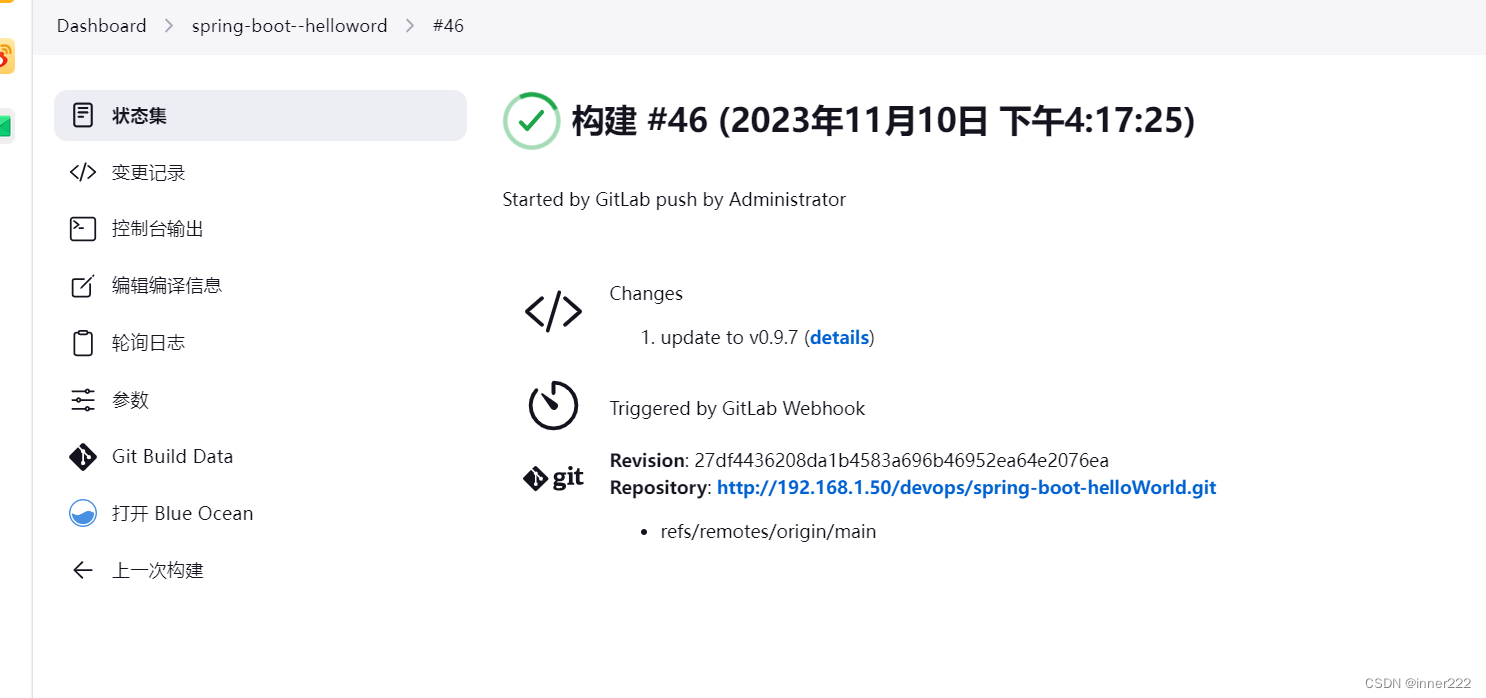
修改代码提交代码后,jenkins会自动构建
修改文件中的版本为v0.9.7
root@ubuntu20:~/luohuiwen/spring-boot-helloWorld# git status
On branch main
Your branch is up to date with 'origin/main'.

Changes not staged for commit:
  (use "git add <file>..." to update what will be committed)
  (use "git restore <file>..." to discard changes in working directory)
	modified:   pom.xml
	modified:   src/main/java/com/neo/controller/HelloWorldController.java

no changes added to commit (use "git add" and/or "git commit -a")

提交
root@ubuntu20:~/luohuiwen/spring-boot-helloWorld# git config --local user.name luohuiwen
root@ubuntu20:~/luohuiwen/spring-boot-helloWorld# git config --local user.email 2@qq.com
root@ubuntu20:~/luohuiwen/spring-boot-helloWorld# git add .
root@ubuntu20:~/luohuiwen/spring-boot-helloWorld# git commit -m "update to v0.9.7"
[main 27df443] update to v0.9.7

推送
root@ubuntu20:~/luohuiwen/spring-boot-helloWorld#  git push  origin
Username for 'http://192.168.1.50': root
Password for 'http://root@192.168.1.50':
Enumerating objects: 19, done.
Counting objects: 100% (19/19), done.
Delta compression using up to 2 threads
Compressing objects: 100% (8/8), done.
Writing objects: 100% (10/10), 731 bytes | 731.00 KiB/s, done.
Total 10 (delta 3), reused 0 (delta 0)
To http://192.168.1.50/devops/spring-boot-helloWorld.git
   d26d5d2..27df443  main -> main
3 合并请求 自动提交流水线
gitlab 生成令牌
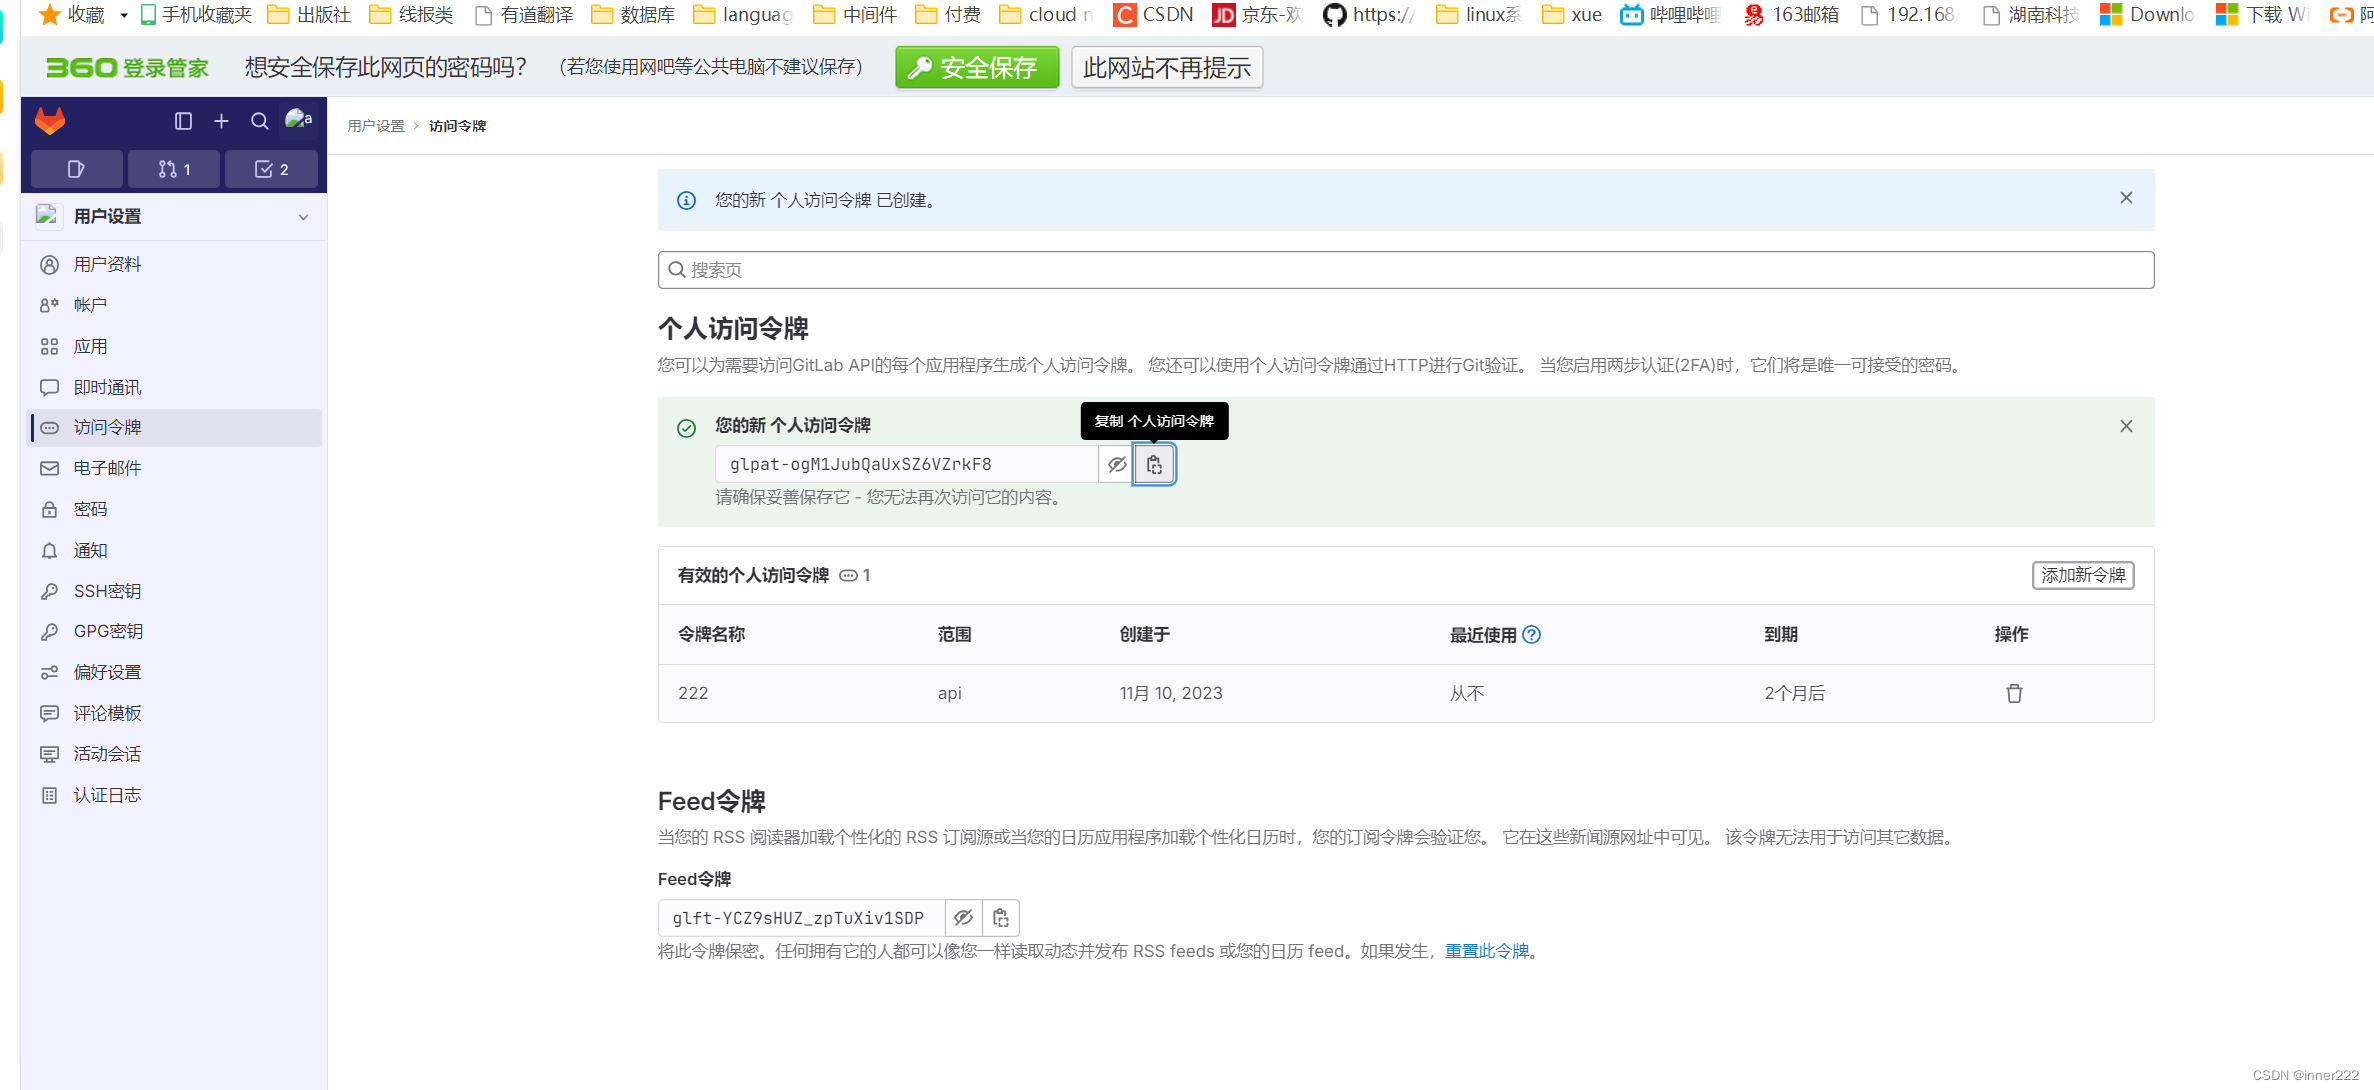
glpat-ogM1JubQaUxSZ6VZrkF8
jenkins中新建 secret填写gitlab中生成的令牌

配置gitlab

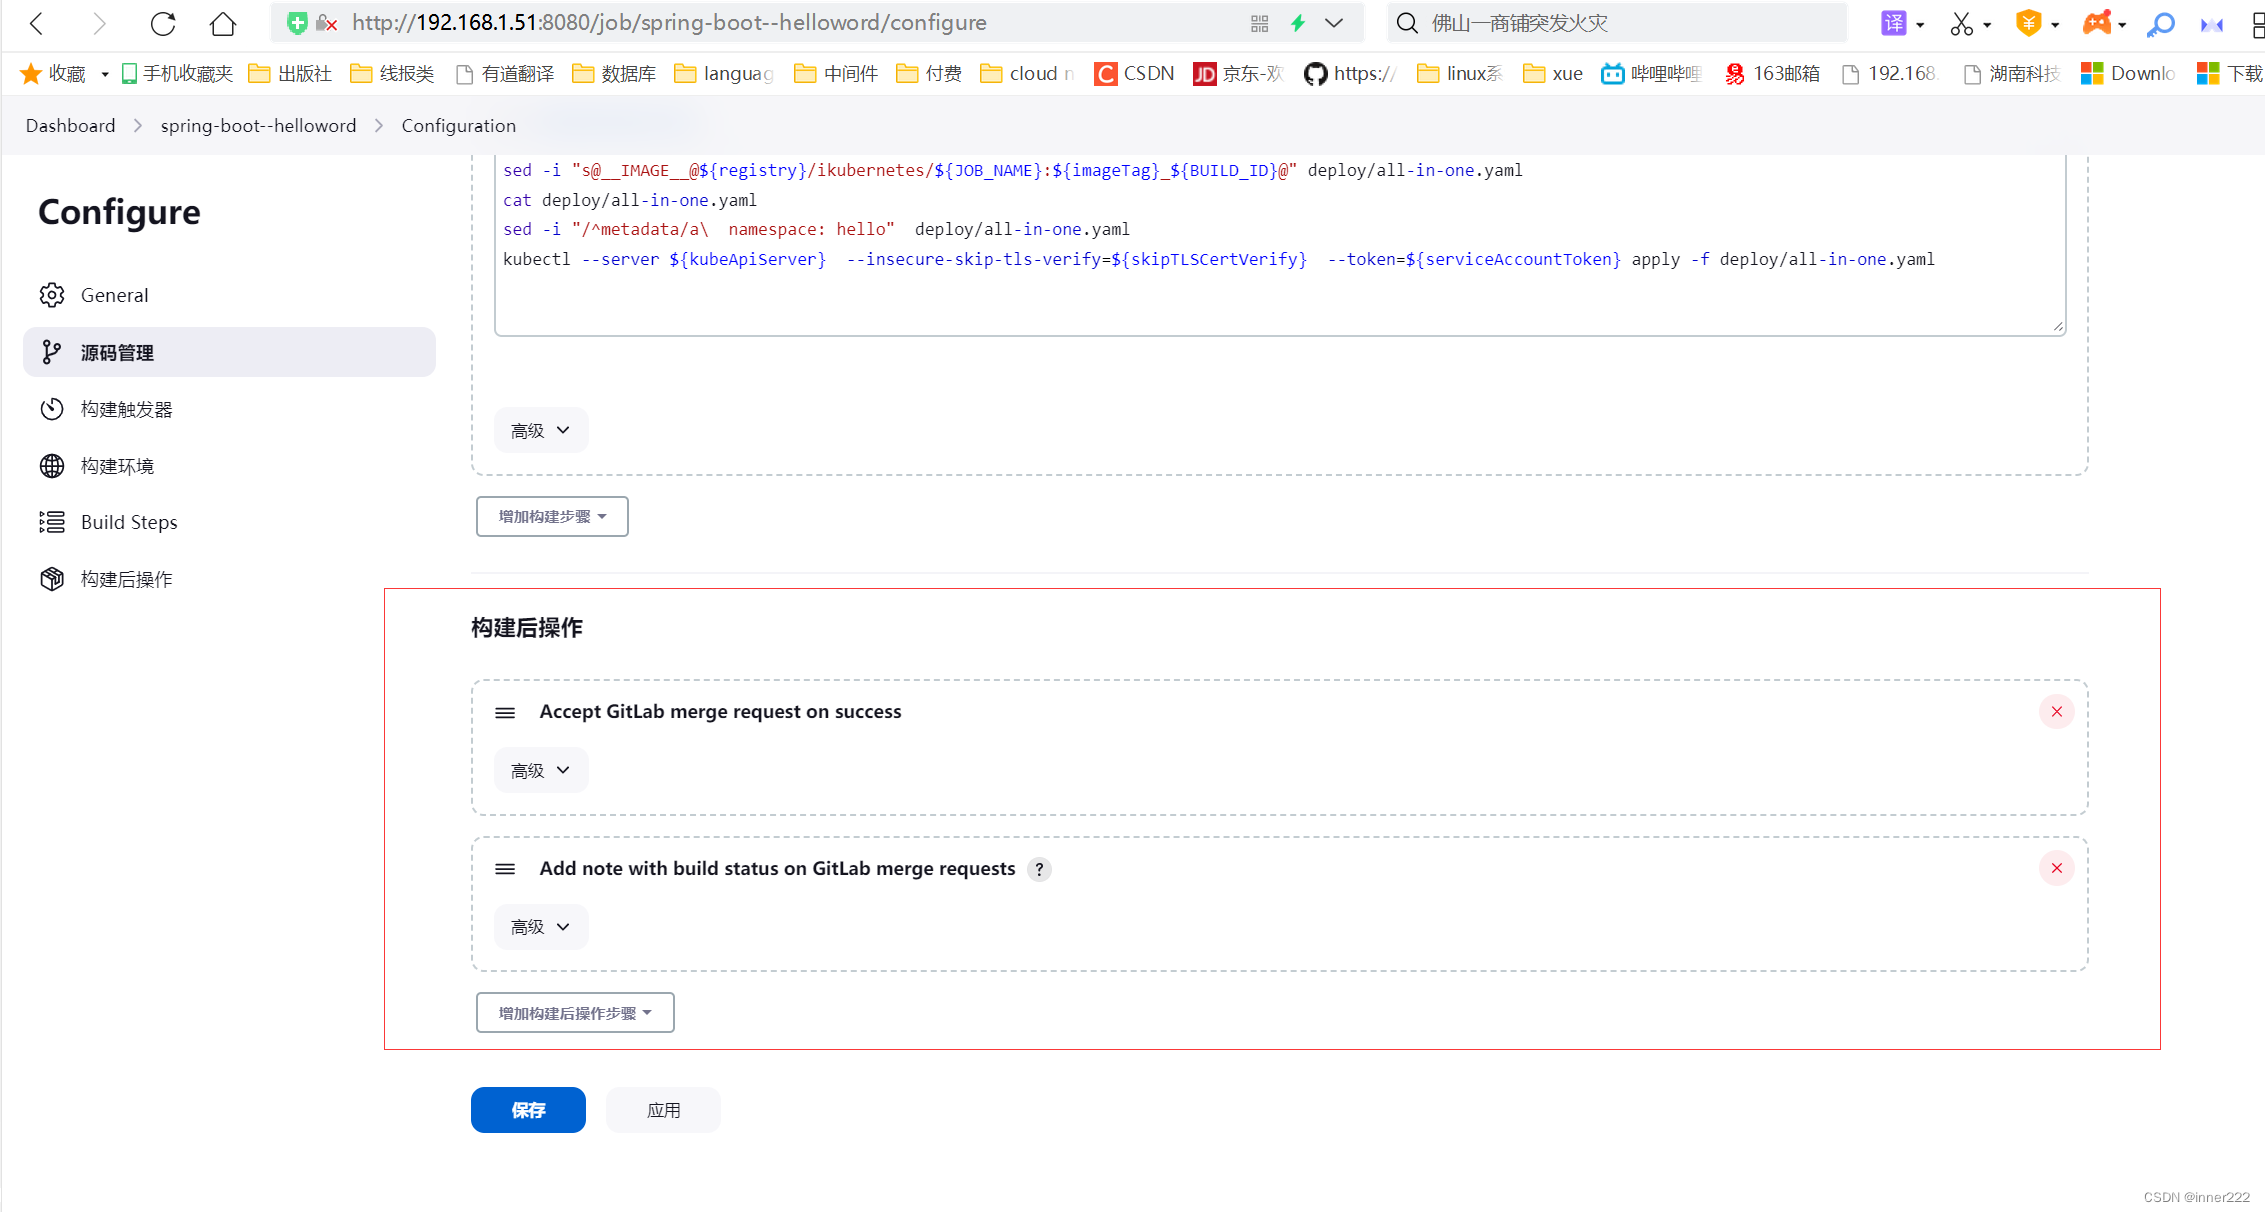
配置流水线,添加
更新代码,推送
root@ubuntu20:~/luohuiwen/spring-boot-helloWorld# git add .
root@ubuntu20:~/luohuiwen/spring-boot-helloWorld# git commit -m "update to v0.9.8."
[develop c8d76d2] update to v0.9.8.
 2 files changed, 8 deletions(-)
root@ubuntu20:~/luohuiwen/spring-boot-helloWorld# git push  origin
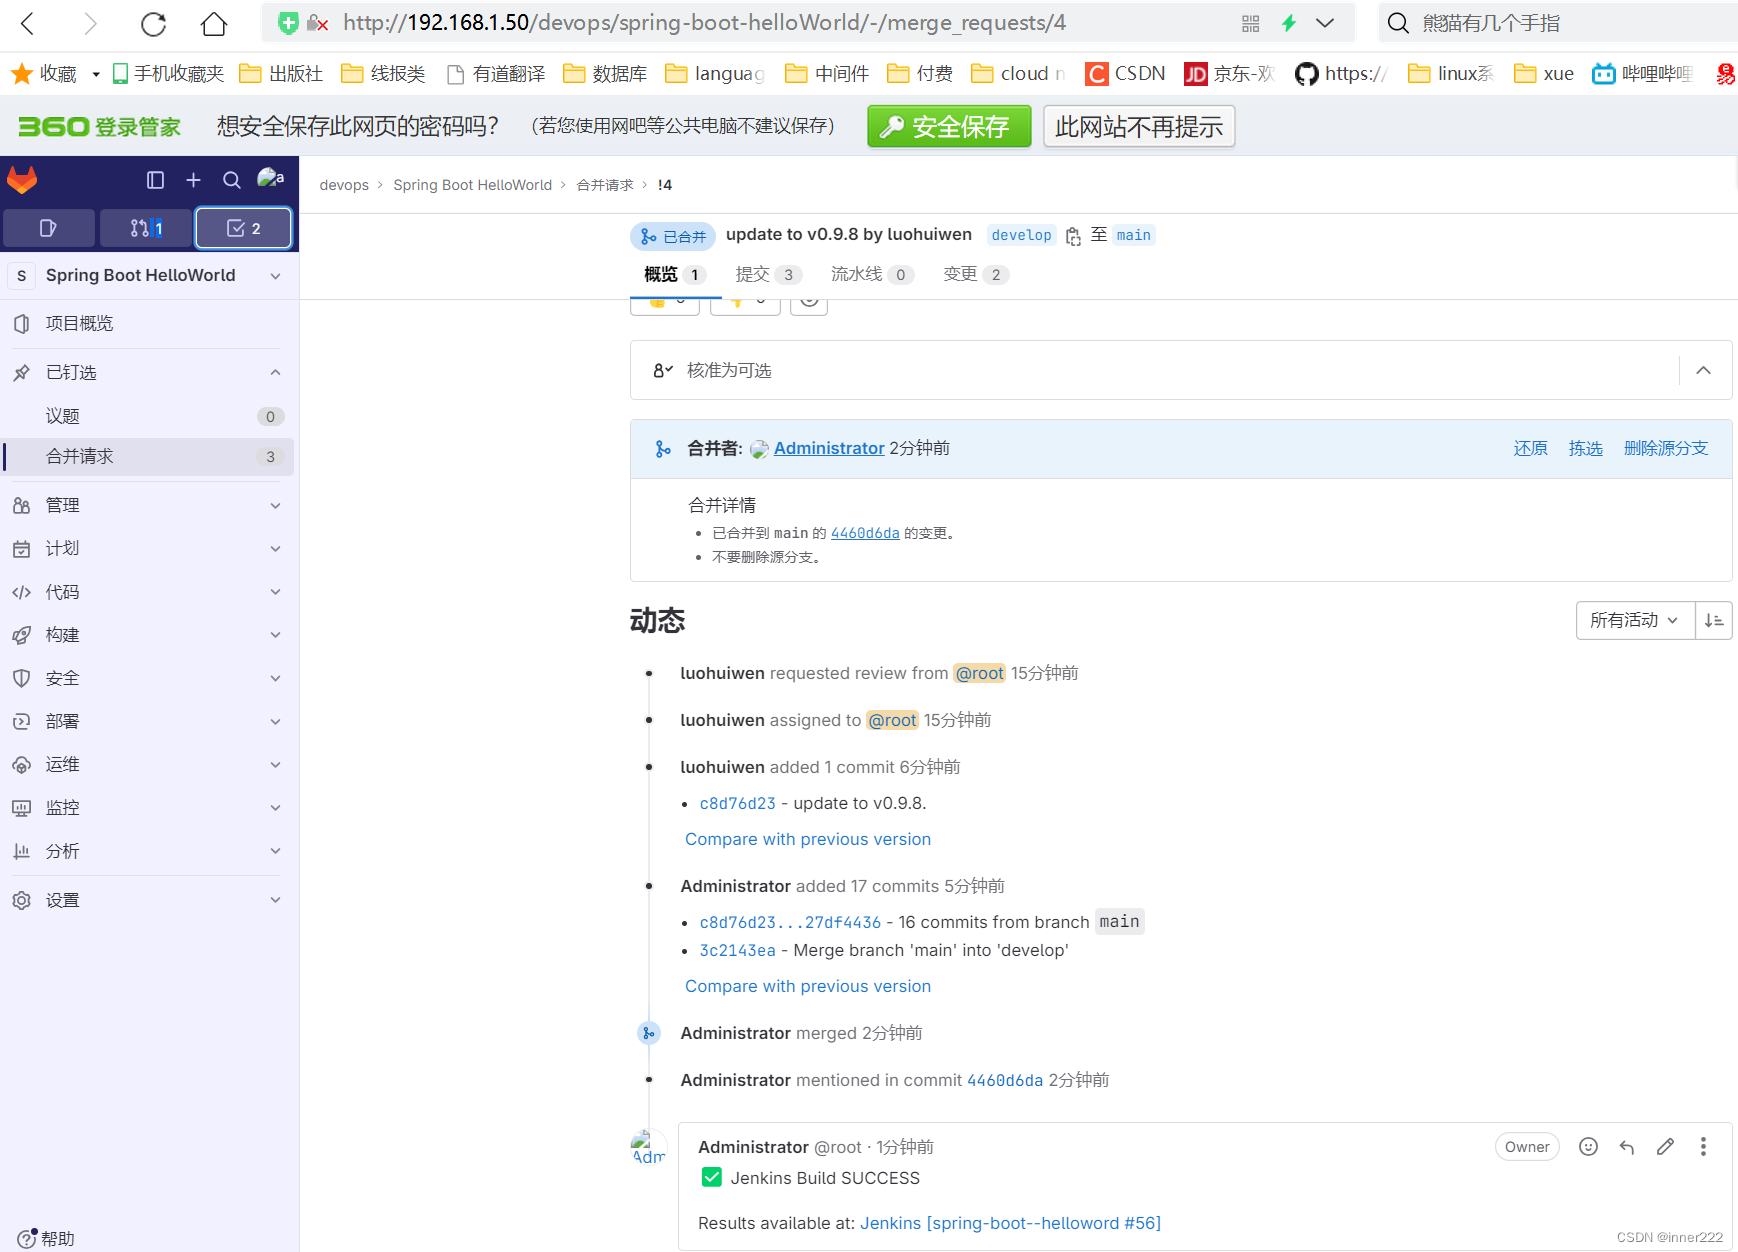
luohuiwen用户提交合并请求
git 中root用户批准
查看Jenkins流水线会自动触发


 362
362


 被折叠的 条评论
为什么被折叠?
被折叠的 条评论
为什么被折叠?
 到【灌水乐园】发言


