


1.背景
在【菜单栏程序坞APP的实现】一文中,描述了之前开发的一款简单的菜单栏APP,它同拖拽方式把APP以Button的方式显示在菜单栏弹窗视图中,通过点击Buton来实现打开对应的软件,如下图:(具体详情可以去看看之前的文章)

但这不是我想要的最终效果,我们是希望以APP图标和名称的方式显示在弹窗界面中,点击对应的图标来打开对应的软件,通过一个星期的准备和开发,这个小软件基本上已经完成了,但还存在一些小瑕疵,这个在最后简单描述一下。先看一下界面的显示: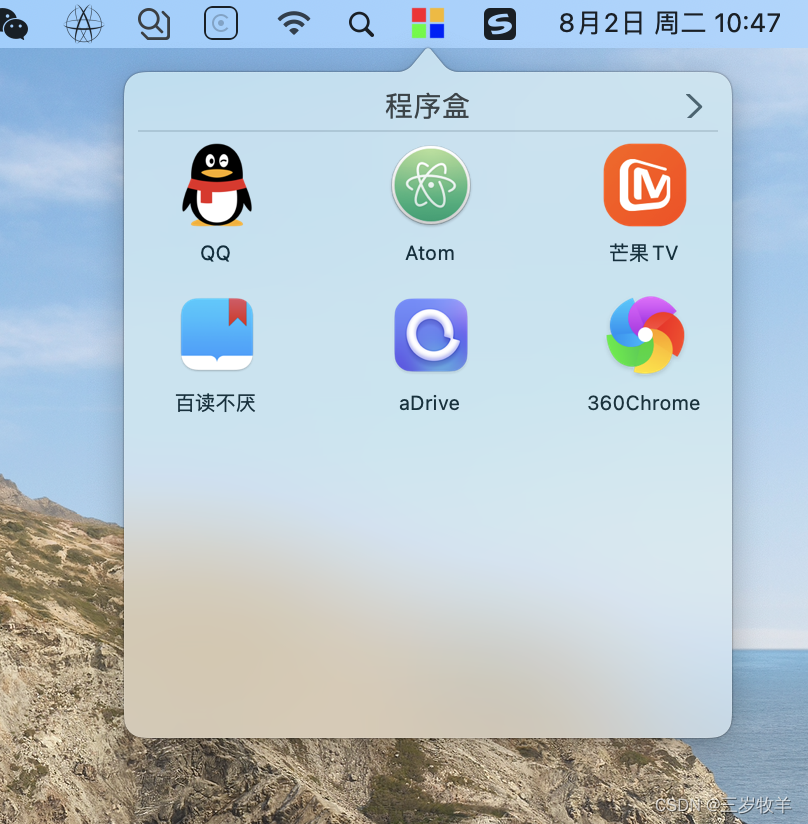
2.开发环境和功能介绍
2.1 开发环境
MacOS 11.0
语言:Swift 5
之前在【菜单栏程序坞APP的实现】中使用的是Objective-c,现在这个软件是完全使用swift 5实现的,可以当成是一个从头开发的小软件。
2.2 功能介绍
软件命名为【程序盒】,它移除了桌面视图和程序坞图标,只在菜单栏显示一个小图标,点击小图标即可打开对应的视图,里面是我们添加好的APP,点击APP的图标,可以打开对应的APP。程序盒同样是通过拖拽的方式把APP拉到添加界面中去,在添加界面可以选择对应的table行,进行移除功能,保存后即可在主视图视图显示。
主视图右上角有个箭头,点击它,可以把功能部分显示出来,如下:

点击添加,可以把添加视图显示出来,在添加视图中增加APP和移除APP:
在视图中点击设置可以把设置界面显示出来,设置界面可以调节主视图内APP图标大小和名称的大小,和允许【程序盒】软件在开机的时候自启动,以及对软件的介绍:

在主视图中点击退出按键,可以退出软件。
整体来讲,整个软件的功能比较单一,但对于我们日常的使用,非常方便,特别是我们常常需要的一些工具类软件,可以把它放到这个【程序盒】中。
3.软件开发需要解决的问题
3.1.在菜单栏显示一个图标,点击出现弹框,移除桌面视图和程序坞图标的显示。
这一步我在【菜单栏程序坞APP的实现】一文中有详细说过,但那个是Objective-c版本的,Swift版本的实现,原理是一样的,唯一不一样的是AppDelegate中添加的代码需要改成:
//
//  AppDelegate.swift
//  程序盒
//
//  Created by jianyi.chen on 2022/7/23.
//

import Cocoa

@main
class AppDelegate: NSObject, NSApplicationDelegate {

    var boxPopverController:BoxPopverController = BoxPopverController()

    var ToolsItem = NSStatusItem()
    var popover = NSPopover()

    func applicationDidFinishLaunching(_ aNotification: Notification) {
        // Insert code here to initialize your application
        ToolsItem = NSStatusBar.system.statusItem(withLength: CGFloat(NSStatusItem.variableLength))
        ToolsItem.button?.image = NSImage.init(named: "Setting")
        popover.appearance = NSAppearance.init(appearanceNamed: NSAppearance.Name.aqua, bundle: nil)
        boxPopverController = BoxPopverController.init(nibName: "BoxPopverController", bundle: nil)
        print(boxPopverController.view)
        popover.contentViewController = boxPopverController
        popover.behavior = NSPopover.Behavior.transient
        ToolsItem.button?.action = #selector(showMyPopover(button:))
    }

    func applicationWillTerminate(_ aNotification: Notification) {
        // Insert code here to tear down your application
    }

    func applicationSupportsSecureRestorableState(_ app: NSApplication) -> Bool {
        return true
    }

    @objc func showMyPopover(button:NSStatusBarButton) {
        boxPopverController.refreshToolsPopoverView()
        popover.contentViewController = boxPopverController;
        popover.show(relativeTo: button.bounds, of: button, preferredEdge: NSRectEdge.maxY)
        popover.contentViewController?.view.window?.makeFirstResponder(self.popover.contentViewController?.view.window)
    }
}
至此,可以点击弹出视图
3.2.NSCollectionView视图的使用
整个小软件中,比较麻烦的就是NSCollectionView视图,每个图标+名称可以看做是一个Item,每个Item还必须可以移动,这样可以更改APP的位置。
创建四个数组分别用来存放APP的图标、名称、以及对应的路径
var wallpapers   = Array<NSImage> ()
var appNameArray = Array<String> ()
var appPathArray = Array<String> ()
调用NSCollectionView的方法进行加载,
  func collectionView(_ collectionView: NSCollectionView, numberOfItemsInSection section: Int) -> Int {
        return wallpapers.count
    }

    func collectionView(_ collectionView: NSCollectionView, itemForRepresentedObjectAt indexPath: IndexPath) -> NSCollectionViewItem {
        let item = collectionView.makeItem(withIdentifier: NSUserInterfaceItemIdentifier(rawValue: "CustomCollectionViewItem"), for: indexPath)
        guard let collectionViewItem = item as? CustomCollectionViewItem else { return item }
        collectionViewItem.imageView?.image = wallpapers[indexPath.item]
        collectionViewItem.textField?.stringValue = appNameArray[indexPath.item]
        collectionViewItem.textField?.font = NSFont.systemFont(ofSize: appNameSize)
        collectionViewItem.imageView?.identifier = NSUserInterfaceItemIdentifier.init(rawValue: String(indexPath.item))
        collectionViewItem.appPath = appPathArray[indexPath.item]
        return collectionViewItem
    }
如果需要对Item进行移动,需要调用下面的方法
 func collectionView(_ collectionView: NSCollectionView, pasteboardWriterForItemAt indexPath: IndexPath) -> NSPasteboardWriting? {
        return appNameArray[indexPath.item] as NSString
    }

    func collectionView(_ collectionView: NSCollectionView, draggingSession session: NSDraggingSession, willBeginAt screenPoint: NSPoint, forItemsAt indexPaths: Set<IndexPath>) {
        // This seems to be overriden by NSCollectionView's default NSDraggingDestination implementation.
        // The draggingFormation never appear to be "pile" when the NSCollectionView is the drop destination.
    }

    func collectionView(_ collectionView: NSCollectionView, draggingSession session: NSDraggingSession, endedAt screenPoint: NSPoint, dragOperation operation: NSDragOperation) {
    }

    // Drop
    func collectionView(_ collectionView: NSCollectionView, validateDrop draggingInfo: NSDraggingInfo, proposedIndexPath proposedDropIndexPath: AutoreleasingUnsafeMutablePointer<NSIndexPath>, dropOperation proposedDropOperation: UnsafeMutablePointer<NSCollectionView.DropOperation>) -> NSDragOperation {
        return .move
    }
3.3.功能区域的显示于隐藏
在主界面我们可以看到点击右上角的箭头按钮可以把功能部分显示出来,这个会使用到视图的动画效果,实现的原理其实比较简单,就是改变NSCollectionView的大小,把原先存在功能部分的视图显示出来,由于坐标的问题,在改变视图高度的时候,需要对应的改变视图的Y轴。这个功能需要用到NSViewAnimation的方法
        let dict = NSMutableDictionary()
        dict.setObject(self.scrollView as Any, forKey:  NSViewAnimation.Key.target as NSCopying)
        dict.setObject(NSValue.init(rect: self.scrollView.frame), forKey: NSViewAnimation.Key.startFrame as NSCopying)
        dict.setObject(NSValue.init(rect: firstFrame), forKey: NSViewAnimation.Key.endFrame as NSCopying)
        let animation = NSViewAnimation.init(viewAnimations: NSArray.init(object: dict) as! [[NSViewAnimation.Key : Any]])
        animation.start()
3.4.添加视图的实现
在添加视图中,我们会使用NStableView视图来保存APP的名称和路径,通过拖放的形式进行加载
func tableView(_ tableView: NSTableView, validateDrop info: NSDraggingInfo, proposedRow row: Int, proposedDropOperation dropOperation: NSTableView.DropOperation) -> NSDragOperation {

    }

    func tableView(_ tableView: NSTableView, acceptDrop info: NSDraggingInfo, row: Int, dropOperation: NSTableView.DropOperation) -> Bool {

    }
在加载时,注意路径下的中文字符处理,要不会显示乱码
 let pasteBoard = info.draggingPasteboard
        if pasteBoard.pasteboardItems != nil && pasteBoard.pasteboardItems!.count <= 1 {
            guard let fileURL = pasteBoard.pasteboardItems?[0].string(forType: .fileURL) else {
                return false
            }
            let url = URL.init(string: fileURL)
            var string:String = url!.absoluteString
            //处理中文乱码
            string = string.removingPercentEncoding!
            string = string.replacingOccurrences(of: "file://", with: "")
            if string.last == "/" {
                string = String(string.dropLast())
            }
            array_path.insert(string, at: row)
            table_view.reloadData()
            return true
        }
在拖放后,会把APP的名称、图标、路径存储到Plist中,在主界面打开时,加载到主界面去,如果主界面上APP的位置发生改变,同样需要改变Plist,这样在打开设置界面才能加载正确的数据
3.5.图标的获取
一般的APP获取图标的路径是在./Contents/Resources路径下,如何确定我们需要的图标名称呢?可以通过/Contents/Info.plist里的Icon file来确定。对于没有图标的APP,可以给它一个系统默认的图标,对于不是APP的执行文件,也可以给一个对应的图标。
4.不足之处
- 软件不能通过拖拉到主界面的方式直接加载到主界面,一个原因是因为在点击其它地方的时候,主界面会消失,如果把主界面固定住,这样的话,也不方便,第二个是因为技术上有些难题需要处理,我不知道怎么去判断这个拖拉的APP是原先在主界面上的还是原本没有的,如果哪天我明悟了,我再想想要不要优化一下
- 因为加载在加载界面,移除也放在加载界面,如果上面那条解决了,那可以把移除也放在主界面,通过点击图标上面的减号移除APP,当然,这个减号需要软件对图标进行一个处理才行,比较麻烦
- 对文件夹的判断,目前该软件的功能是添加APP,但如果你想添加文件夹的话,也未尝不可,只是图标不会是文件夹的图标,是执行文件的图标,这个不影响使用。如果后续有时间或者兴致来了,再把文件夹处理一下吧
- 软件的整个本人已经做到最好看的样子了,哈哈哈,毕竟连图标都是我自己PS的,虽然不是很好看哈
- 等等
5.更新
2022.8.5
1.添加文件夹、可执行文件的对应图标
2.修复界面移动Item时,位置出错问题
如果需要体验一下的,可以下载用用,有技术上交流的也可以私信我


 565
565


 被折叠的 条评论
为什么被折叠?
被折叠的 条评论
为什么被折叠?
 到【灌水乐园】发言


