


关于如何在SpringBoot整合Swagger2(亲测&&附带源码)
1.1 前言
最近在跟着王松老师的《SpringBoot2教材合集》指南来学习SpringBoot,指南中正好有关于SpringBoot整合Swagger2这一部分的内容。刚好看到指南这部分,发现可能由于SpringBoot的版本迭代的原因,案例不能按预期那样正常运行。然后自己通过查阅相关的资料,故此将自己踩过的坑,以及就目前如何将SpringBoot整合Swagger2过程做此说明,希望给大家带来帮助。
2.1 什么是Swagger?
在以往API文档往往是后台开发人员定义,有时候因为某个API定义的修改,未及时个更新文档,会导致前端人员和后端API文档内容的不一致,这会让沟通成本和代价变得很大。Swagger 是一个规范和完整的框架,用于生成、描述、调用和可视化 RESTful 风格的 Web 服务。在前后端分离开发模式中,API文档是最好的沟通方式。Swagger具有四大特点,1.及时性:接口变更后,能够及时准确地通知相关前端人员;2.规范性:保证接口的规范性,如接口地址,请求方式,参数及响应格式和错误信息; 3.一致性 (接口信息一致,不会出现因开发人员拿到的文档版本不一致,而出现分歧);4.可测性:可直接在接口文档上进行接口测试。
3.1 开始整合
3.1.1 新建SpringBoot项目并在Pom.xml中添加Swagger2所属依赖。
<!-- 解决maven引入swagger依赖产生的版本问题,以下二个包要在Swagger2包之上,即1.5.20版本的需要被1.5.21覆盖 -->
 <dependency>
     <groupId>io.swagger</groupId>
     <artifactId>swagger-annotations</artifactId>
     <version>1.5.21</version>
 </dependency>
 <dependency>
     <groupId>io.swagger</groupId>
     <artifactId>swagger-models</artifactId>
     <version>1.5.21</version>
 </dependency>
 <!-- 引入Swagger2的支持 -->
 <dependency>
     <groupId>io.springfox</groupId>
     <artifactId>springfox-swagger2</artifactId>
     <version>2.9.2</version>
 </dependency>

 <dependency>
     <groupId>io.springfox</groupId>
     <artifactId>springfox-swagger-ui</artifactId>
     <version>2.9.2</version>
 </dependency>

<dependency>
     <groupId>org.springframework.boot</groupId>
     <artifactId>spring-boot-starter-web</artifactId>
    <version>2.5.6</version>
 </dependency>
注意:以上步骤忽略了建立项目的过程,建立后的项目中pom.xml文件下的spring-boot-starter-parent版本需要修改为2.6.0版本以下的jar包,可用使用2.5.0。(默认从SpringBoot官网:https://start.spring.io/拉下来的版本为2.7.1)
3.1.2 配置Swagger2
@Configuration
@EnableSwagger2  //1.启用Swagger2
public class SwaggerConfig {
    public static final  String SWAGGER_SCAN_BASE_PACKAGE="com.itnice.springbootswagger2.controller";

    @Bean
    public Docket createRestApi(){
        //2.配置一个Docket Bean,这个Bean中,配置映射路径和要扫描的接口的位置,在apiInfo中,
        //主要配置一下Swagger2文档网站的信息,例如网站的title,网站的描述,联系人的信息,使用的协议
        return new Docket(DocumentationType.SWAGGER_2).
                //是否开启 (true 开启  false隐藏。生产环境建议隐藏)
                //.enable(false)
                pathMapping("/")
                .select()
                .apis(RequestHandlerSelectors.basePackage(SWAGGER_SCAN_BASE_PACKAGE))
                .paths(PathSelectors.any())
                .build().apiInfo(apiInfo());
    }

    private ApiInfo apiInfo(){
        return  new ApiInfoBuilder()
                .title("SpringBoot整合Swagger")
                .description("SpringBoot整合Swagger,详细信息.....")
                .version("1.0")
                .contact(new Contact("嗷嗷嗷","blog.csdn.net","455164325@qq.com"))
                .license("The Apache License")
                .licenseUrl("http://www.baidu.com")
                .build();
    }
代码释义:通过@Configuration将SwaggerConfig变为一个配置类,首先通过@EnableSwagger2注解启用Swagger2,然后配置一个Docket Bean,这个Bean中,配置映射路径和要扫描的接口的位置,在apiInfo中,主要配置一下Swagger2文档网站的信息,例如网站的title,网站的描述,联系人的信息,使用的协议等等。
3.1.3 创建接口
@RestController
@RequestMapping("/user")
@Api(value = "测试接口",tags = "用户管理相关接口")
public class UserController {

    /**
     * 保存用户数据
     * @param user
     * @return
     */
    @PostMapping("/save")
    //方法参数说明,name参数名;value参数说明,备注;dataType参数类型;required是否必传,默认false;
    //@ApiOperation(value = “接口说明”, httpMethod = “接口请求方式”,
    // response =“接口返回参数类型”, notes = “接口发布说明”;
    @ApiImplicitParams({
            @ApiImplicitParam(name = "id", value = "用户编号",required = true),
            @ApiImplicitParam(name = "username", value = "用户名",required = true),
            @ApiImplicitParam(name = "address", value = "用户地址")
    })
    @ApiOperation(value = "添加用户",httpMethod ="POST",response =String.class,notes = "添加用户")
    public String saveUser(User user){
        return "保存用户成功!";
    }


    @GetMapping("/findUserById")
    @ApiImplicitParam(name="id",value = "用户编号",required = true)
    @ApiOperation(value = "根据用户id查找指定用户",httpMethod ="GET",response =User.class,notes = "根据用户id查找指定用户")
    public User getUserById(int id){
        return new User();
    }

    @GetMapping("/removeUserById")
    @ApiImplicitParam(name="id",value = "用户编号",required = true)
    @ApiOperation(value = "根据用户id删除指定用户",httpMethod ="GET",response =String.class,notes = "根据用户id删除指定用户" )
    public String deleteUserById(int id){
        return "保存用户成功!";
    }
代码释义:
@Api注解可以用来标记当前Controller的功能。
@ApiOperation注解用来标记一个方法的作用。
@ApiImplicitParam注解用来描述一个参数,可以配置参数的中文含义,也可以给参数设置默认值,这样在接口测试的时候可以避免手动输入。
如果有多个参数,则需要使用多个@ApiImplicitParam注解来描述,多个@ApiImplicitParam注解需要放在一个@ApiImplicitParams注解中。
需要注意的是,@ApiImplicitParam注解中虽然可以指定参数是必填的,但是却不能代替@RequestParam(required = true),前者的必填只是在Swagger2框架内必填,抛弃了Swagger2,这个限制就没用了,所以假如开发者需要指定一个参数必填,@RequestParam(required = true)注解还是不能省略。
如果参数是一个对象(例如上文的更新接口),对于参数的描述也可以放在实体类中。例如下面一段代码:
@ApiModel
public class User {
    @ApiModelProperty(value = "用户id")
    private int id;
    @ApiModelProperty(value = "用户名")
    private String username;
    @ApiModelProperty(value = "用户地址")
    private String address;
	//省略get/set方法
}
3.1.4 启动项目,访问:http://localhost:8080/swagger-ui.html即可正常访问swagger。页面如下:

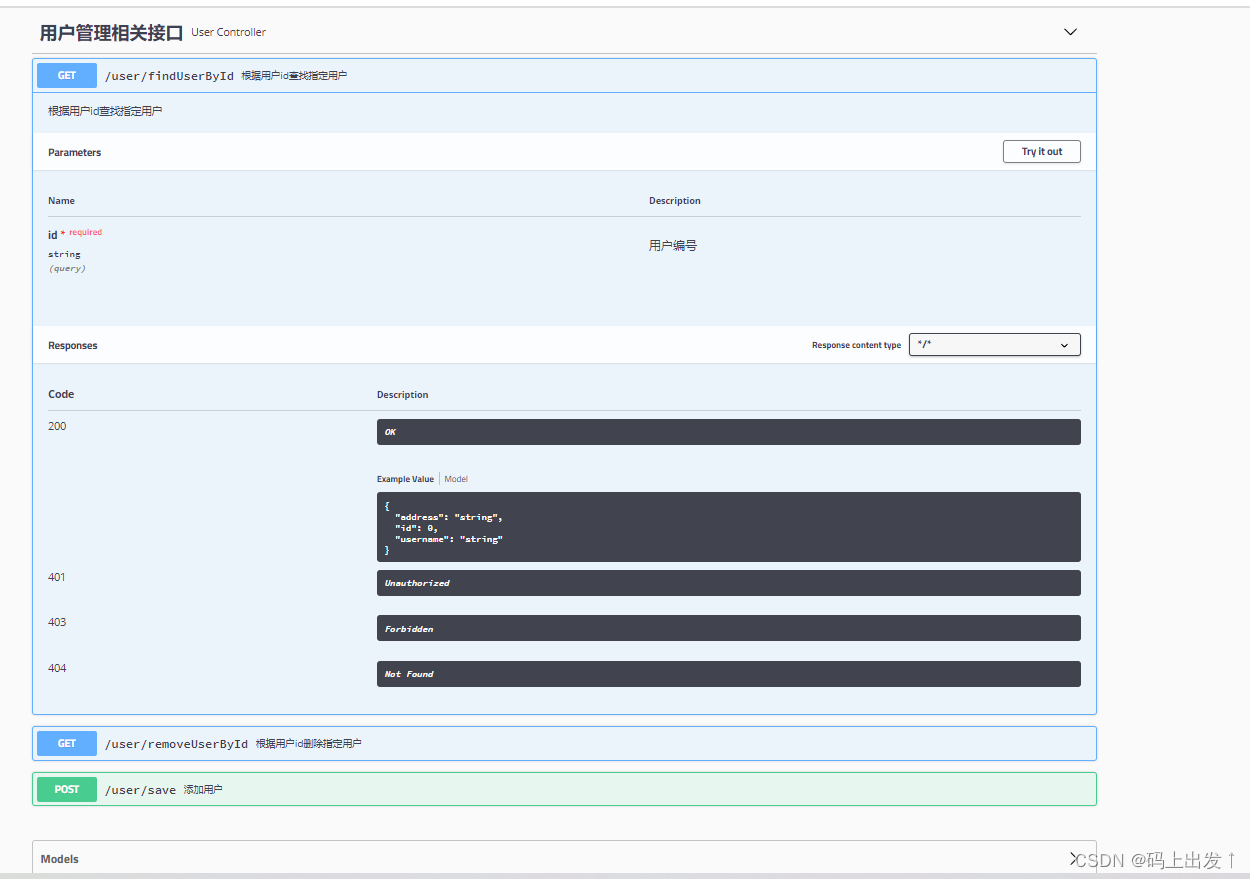
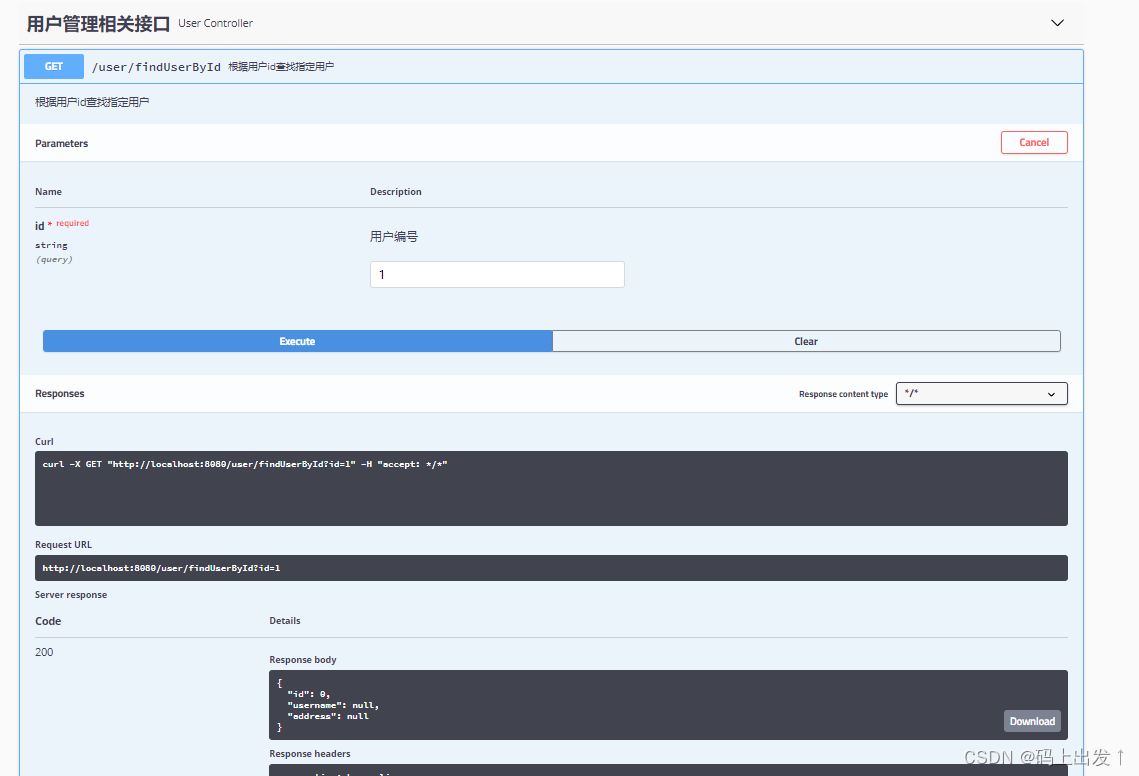
注意:Swagger除了可用用做API文档外,还可以用来进行接口测试,可用通过在界面的“Try it out”按钮去进行接口测试。
4.1 整合时踩到的坑,避坑
1. 问题一 SpringBoot版本过高导致启动项目后,访问localhost:8080/swagger-ui.html页面出现404。
解决方案:将pom.xml中的spring-boot-starter-parent版本降至2.6.0版本以下,亲测(2.5.0)版本可用。
2. 问题二 访问swagger-ui.html后台报错(swagger错误),错误描述:WARN i.s.m.p.AbstractSerializableParameter -【getExample,421】 - Illegal DefaultValue null。
问题产生的原因:maven引入swagger依赖产生的问题,swagger依赖的swagger-annotations,swagger-models版本为1.5.20,而所需版本为1.5.21。
解决方案:直接修改pom依赖:同路径长度下,谁先声明谁优先,把1.5.21放在上面,即可排除springfox-swagger2依赖的1.5.20版本。
5.1 项目源码地址(Gitee)
https://gitee.com/brave_zeng/SpringBootSwagger2
6.1 扩展知识,在Security中的配置
如果我们的Spring Boot项目中集成了Spring Security,那么如果不做额外配置,Swagger2文档可能会被拦截,此时只需要在Spring Security的配置类中重写configure方法,添加如下过滤即可:
@Override
public void configure(WebSecurity web) throws Exception {
    web.ignoring()
            .antMatchers("/swagger-ui.html")
            .antMatchers("/v2/**")
            .antMatchers("/swagger-resources/**");
}


 791
791


 被折叠的 条评论
为什么被折叠?
被折叠的 条评论
为什么被折叠?
 到【灌水乐园】发言


