


一个简洁的博客网站:http://lss-coding.top,欢迎大家来访
学习娱乐导航页:http://miss123.top/
1. 简介
官方参考地址:https://gitee.com/ld/J2Cache
J2Cache —— 基于内存和 Redis 的两级 Java 缓存框架
J2Cache 是 OSChina 目前正在使用的两级缓存框架(要求至少 Java 8)。第一级缓存使用内存(同时支持 Ehcache 2.x、Ehcache 3.x 和 Caffeine),第二级缓存使用 Redis(推荐)/Memcached 。 由于大量的缓存读取会导致 L2 的网络成为整个系统的瓶颈,因此 L1 的目标是降低对 L2 的读取次数。 该缓存框架主要用于集群环境中。单机也可使用,用于避免应用重启导致的缓存冷启动后对后端业务的冲击。
数据读取
-
读取顺序 -> L1 -> L2 -> DB
-
数据更新
1 从数据库中读取最新数据,依次更新 L1 -> L2 ,发送广播清除某个缓存信息
2 接收到广播(手工清除缓存 & 一级缓存自动失效),从 L1 中清除指定的缓存信息
2. 构建测试环境
-
创建一个 Spring Boot 项目,引入缓存所需要的依赖
Spring Boot 版本:2.2.5.RELEASE
<dependency>
    <groupId>org.springframework.boot</groupId>
    <artifactId>spring-boot-starter-data-redis</artifactId>
</dependency>
<dependency>
    <groupId>org.springframework.boot</groupId>
    <artifactId>spring-boot-starter-cache</artifactId>
</dependency>
<dependency>
    <groupId>org.springframework.boot</groupId>
    <artifactId>spring-boot-starter-web</artifactId>
</dependency>
<dependency>
    <groupId>mysql</groupId>
    <artifactId>mysql-connector-java</artifactId>
    <scope>runtime</scope>
</dependency>
<dependency>
    <groupId>com.baomidou</groupId>
    <artifactId>mybatis-plus-boot-starter</artifactId>
    <version>3.5.0</version>
</dependency>
<dependency>
    <groupId>org.springframework.boot</groupId>
    <artifactId>spring-boot-starter-test</artifactId>
    <scope>test</scope>
</dependency>
<dependency>
    <groupId>org.projectlombok</groupId>
    <artifactId>lombok</artifactId>
    <version>1.18.22</version>
</dependency>
<dependency>
    <groupId>org.junit.jupiter</groupId>
    <artifactId>junit-jupiter</artifactId>
    <version>RELEASE</version>
    <scope>test</scope>
</dependency>
<!-- j2cache 主要依赖-->
<dependency>
    <groupId>com.alibaba</groupId>
    <artifactId>fastjson</artifactId>
    <version>1.2.60</version>
</dependency>
<dependency>
    <groupId>net.oschina.j2cache</groupId>
    <artifactId>j2cache-spring-boot2-starter</artifactId>
    <version>2.7.6-release</version>
</dependency>
<dependency>
    <groupId>net.oschina.j2cache</groupId>
    <artifactId>j2cache-core</artifactId>
    <version>2.8.2-release</version>
    <exclusions>
        <exclusion>
            <groupId>org.slf4j</groupId>
            <artifactId>slf4j-simple</artifactId>
        </exclusion>
        <exclusion>
            <groupId>org.slf4j</groupId>
            <artifactId>slf4j-api</artifactId>
        </exclusion>
        <exclusion>
            <groupId>com.alibaba</groupId>
            <artifactId>fastjson</artifactId>
        </exclusion>
        <exclusion>
            <groupId>redis.clients</groupId>
            <artifactId>jedis</artifactId>
        </exclusion>
    </exclusions>
</dependency>
<dependency>
    <groupId>redis.clients</groupId>
    <artifactId>jedis</artifactId>
    <version>2.9.1</version>
</dependency>
<dependency>
    <groupId>io.lettuce</groupId>
    <artifactId>lettuce-core</artifactId>
</dependency>
- 创建一个 student-manager 数据库,创建表 user
CREATE TABLE `user` (
   `id` bigint(10) NOT NULL,
   `name` varchar(255) DEFAULT NULL,
   PRIMARY KEY (`id`)
 ) ENGINE=InnoDB DEFAULT CHARSET=utf8
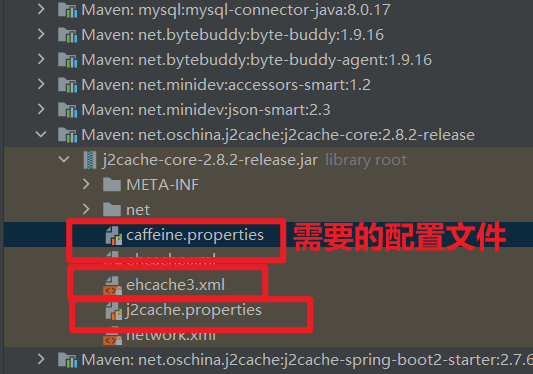
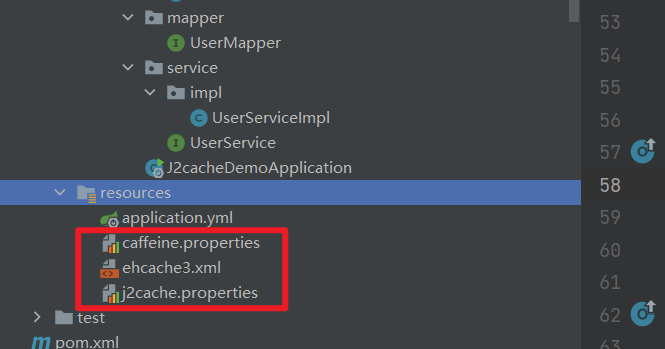
- 在左侧源码部分找到
j2cache-core包里面的 caffeine.properties、ehcache3.xml、j2cache.properties 三个配置文件复制到 resources 目录下
- application.yml 中配置数据源、redis、j2cache
spring:
  datasource:
    url: jdbc:mysql://localhost:3306/student-manager?userUnicode=true&characterEncoding=utf-8&serverTimezone=UTC
    username: root
    password: root
    driver-class-name: com.mysql.cj.jdbc.Driver
  redis:
    host: 49.xxx.xxx.200
    port: 6379
  cache:
    type: none

j2cache:
  config-location: /j2cache.properties
  redis-client: lettuce
  open-spring-cache: true
- 修改 caffeine.properties 中的 30m 为 30s,这个设置的是一级缓存的过期时间,30s 比较好进行测试
- 修改 j2cache.properties 中的 redis 部分为自己的 redis 服务器的 ip 地址等信息
- ehcache3.xml 配置文件不需要动
-
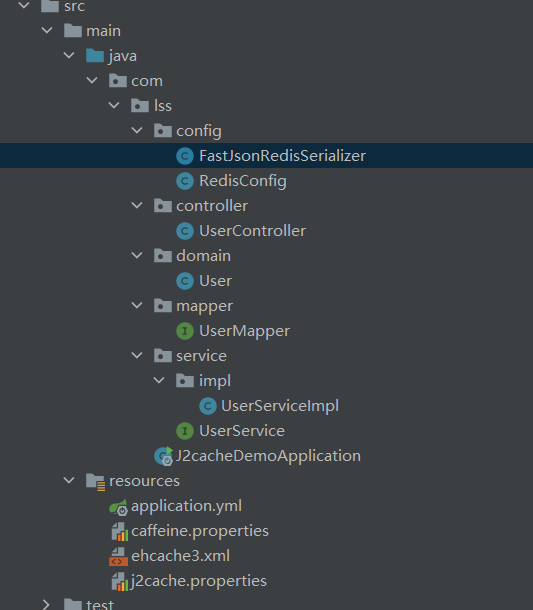
创建 config、domain、mapper、service、impl、controller 各个分层的包,项目虽小,结构不能乱套
-
创建 FastJsonRedisSerializer 配置 Redis 存储的序列化
public class FastJsonRedisSerializer<T> implements RedisSerializer<T> {
    public static final Charset DEFAULT_CHARSET = StandardCharsets.UTF_8;

    private Class<T> clazz;

    public FastJsonRedisSerializer(Class<T> clazz) {
        super();
        this.clazz = clazz;
    }

    @Override
    public byte[] serialize(T t) throws SerializationException {
        if (t == null) {
            return new byte[0];
        }
        return JSON.toJSONString(t, SerializerFeature.WriteClassName).getBytes(DEFAULT_CHARSET);
    }

    @Override
    public T deserialize(byte[] bytes) throws SerializationException {
        if (bytes == null || bytes.length <= 0) {
            return null;
        }
        String str = new String(bytes, DEFAULT_CHARSET);
        return (T) JSON.parseObject(str, clazz);
    }
}
- 创建 RedisConfig 配置类
@Configuration
@Slf4j
public class RedisConfig {
    @Autowired
    RedisConnectionFactory redisConnectionFactory;
    @Autowired
    Environment environment;
    @Bean(name = "redisTemplate")
    @ConditionalOnMissingBean(RedisTemplate.class)
    public RedisTemplate<String, Object> redisTemplate() {
        FastJsonRedisSerializer<Object> fastJsonRedisSerializer = new FastJsonRedisSerializer<>(Object.class);
        RedisTemplate<String, Object> redisTemplate = new RedisTemplate<>();
        redisTemplate.setKeySerializer(new StringRedisSerializer());
        redisTemplate.setHashKeySerializer(new StringRedisSerializer());
        redisTemplate.setValueSerializer(fastJsonRedisSerializer);
        redisTemplate.setHashValueSerializer(fastJsonRedisSerializer);
        redisTemplate.setConnectionFactory(redisConnectionFactory);
        return redisTemplate;
    }
    @Bean
    public CacheChannel channel() {
        CacheChannel channel = null;
        try {
            String configUrl = environment.resolvePlaceholders("${j2cache.config-location}");
            J2CacheConfig config = J2CacheConfig.initFromConfig(configUrl);
            J2CacheBuilder j2CacheBuilder = J2CacheBuilder.init(config);
            channel = j2CacheBuilder.getChannel();
//            log.info("j2cache建立CacheChannel成功->" + "configUrl->" + configUrl + " 一级缓存->" + config.getL1CacheName() + " 二级缓存->" + config.getL2CacheName());
        } catch (IOException e) {
//            log.error("j2cache建立CacheChannel报错->" + e);
        }
        return channel;
    }
}
- 数据库对应的实体类 User
/**
 * @author lishisen
 * @description 用户表实体类
 * @date 2022/1/17 16:34
 **/
@Data
@AllArgsConstructor
@NoArgsConstructor
@TableName("user")
public class User implements Serializable{

    // 主键 用户id
    private Long id;
    // 用户名
    private String name;

}
- UserMapper 接口
/**
 * @author lishisen
 * @description 用户的 mapper 接口层
 * @date 2022/1/17 16:37
 **/
@Mapper
public interface UserMapper extends BaseMapper<User> {
}
- UserService 接口
/**
 * @author lishisen
 * @description 用户的实现层接口
 * @date 2022/1/17 16:44
 **/
public interface UserService {

    // 放入缓存
    User getUser(Long id);

    // 清理缓存中的数据
    public User userClear(Long id);

}
- UserServiceImpl 接口实现类
/**
 * @author lishisen
 * @description 用户的实现层接口的实现类
 * @date 2022/1/17 16:36
 **/
@Service
public class UserServiceImpl implements UserService {

    @Autowired
    private UserMapper userMapper;

    /**
     * @author lishisen
     * @description 当访问到这个接口的时候,
     *                  判断用户传输过来的 id 是否在一级缓存中存在,如果存在则直接返回结果,不进入下面的方法
     *                 如果不存在则会进入到 Redis 中查看是否存在,如果存在则返回结果,不进入下面的方法
     *                 如果不存在在则会进入方法查询数据库中的值,并将查询结果放入一级缓存ehcache和二级缓存redis
     *                 然后返回结果。
     * @date 2022/1/17 17:23
     **/
    // 加缓存
    @Override
    @Cacheable(value = "userInfo", key = "#id")
    public User getUser(Long id) {

        SimpleDateFormat simpleDateFormat = new SimpleDateFormat("yyyy-MM-dd HH:mm:ss");
        String formatDate = simpleDateFormat.format(new Date());
        System.out.println("访问数据库中的数据!!!" + formatDate);
        User user  = userMapper.selectById(id);
        return user;
    }
	// 清缓存
    @CacheEvict(value = "userInfo", key = "#id")
    public User userClear(Long id) {
        System.out.println("清理一级缓存中 id:" + id + "的数据");
        User user  = userMapper.selectById(id);
        return user;
    }
}
- UserController
/**
 * @author lishisen
 * @description 用户控制器
 * @date 2022/1/17 16:46
 **/
@RestController
public class UserController {

    @Autowired
    private UserService userService;

    @RequestMapping("/user/{id}")
    public String getUserList(@PathVariable Long id) {
        System.out.println("查找id为:" + id + "的用户  " + new Date());
        User user = null;
        try {
            user = userService.getUser(id);
            if (user == null) {
                return "您查询的用户不在!!!";
            }
            return user.toString();
        } catch (Exception e) {
            e.printStackTrace();
            return "系统异常,请稍后重试!!!";
        }

    }
    @RequestMapping("/user/clear/{id}")
    public String userClear(@PathVariable Long id) {
        System.out.println("清楚缓存id为:" + id + "的用户  " + new Date());
        User user = null;
        try {
            user = userService.userClear(id);
        } catch (Exception e) {
            e.printStackTrace();
            return "系统异常,请稍后重试!!!";
        }
        return user.toString();
    }
}
至此测试项目的结构搭建完成
3. 启动项目进行测试
- 当项目启动后,我们的一级缓存(jvm中) ehcache3 中是没有任何的缓存数据的,二级缓存 Redis 中也是没有数据的,所以当我们请求接口 http://localhost:8080/user/10001 的时候会先判断一级缓存没有数据,二级缓存没有数据,那么就会查询数据库中的数据来进行回显
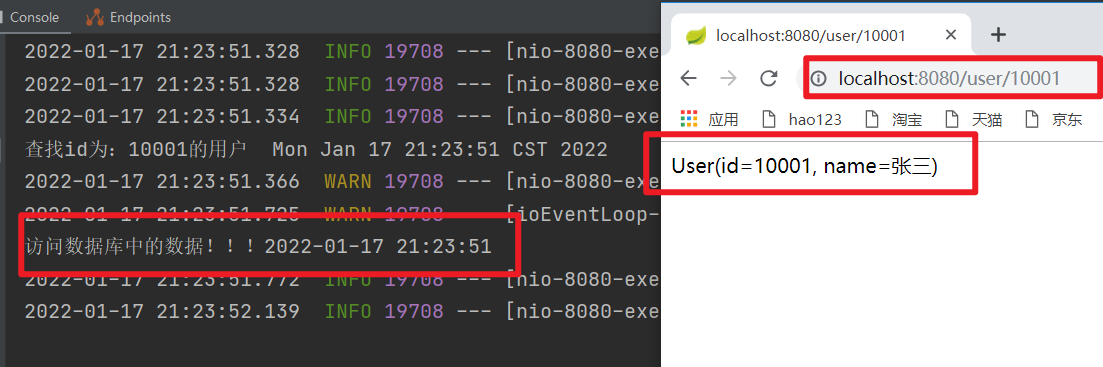
Redis 中也会加入数据

- 当我们在数据库中对数据进行了修改的时候,我们再来请求,当一级缓存过期 访问数据库中的数据 的时候,就会进行缓存中数据的更新,同时 二级缓存 Redis 中的数据也会进行更新
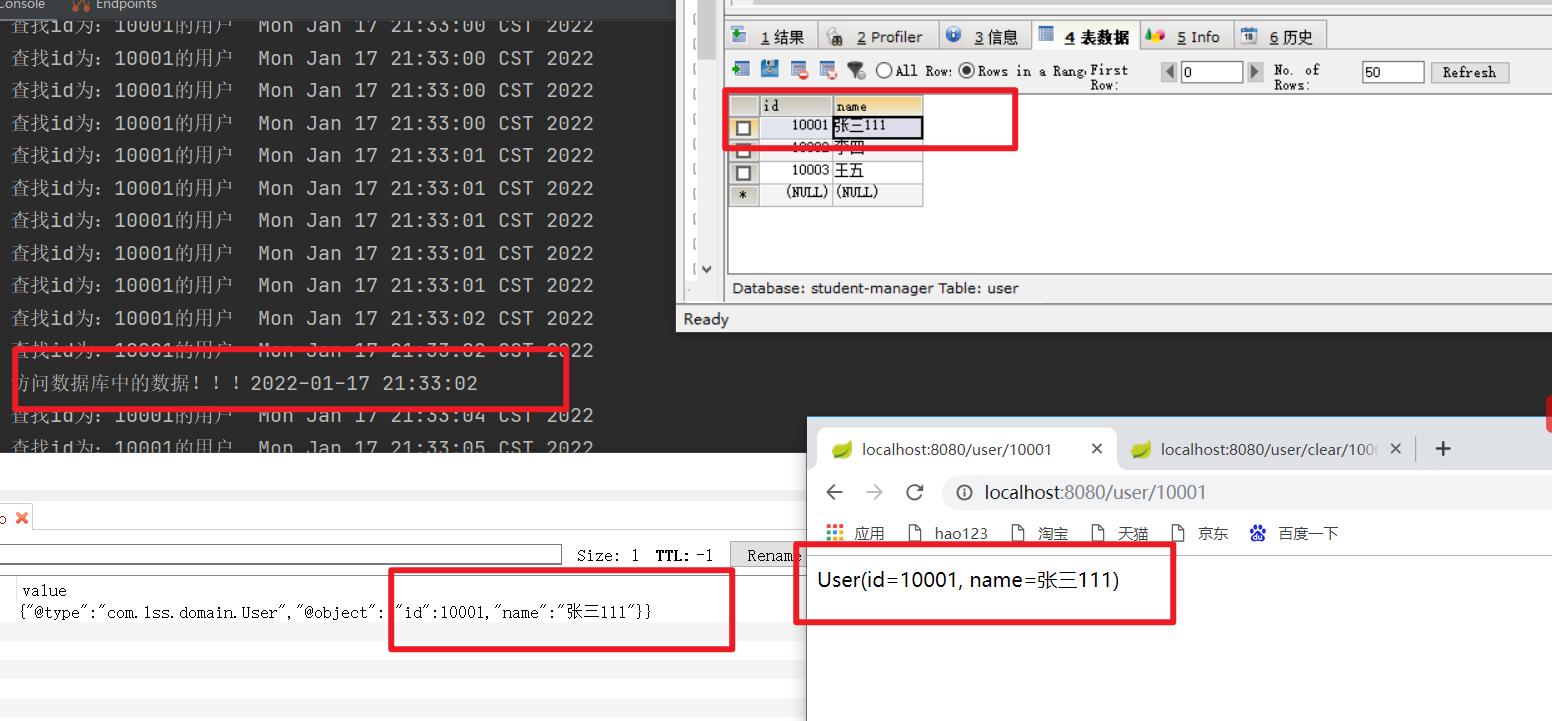
这里的测试写的比较乱,大家可以参考上面给出的官方网址进行自行测试,我这里只是一个demo!!!
有什么不对的地方欢迎大家留言


 603
603


 被折叠的 条评论
为什么被折叠?
被折叠的 条评论
为什么被折叠?
 到【灌水乐园】发言


