


本文章适合有一定win32基础的人,此项目在Windows7及以下系统运行时可能会失败
前言
分层窗口虽然对于大部分人来说比较生僻,但它的功能却非常强大,能轻易实现一些比较漂亮的UI界面。
UpdateLayeredWindow函数
UpdateLayeredWindow 函数 的作用是更新一个分层窗口,是分层窗口的核心,它的定义如下
//更新分层窗口的位置、大小、形状、内容和透明度
BOOL UpdateLayeredWindow(
  [in]           HWND          hWnd,
  [in, optional] HDC           hdcDst,
  [in, optional] POINT         *pptDst,
  [in, optional] SIZE          *psize,
  [in, optional] HDC           hdcSrc,
  [in, optional] POINT         *pptSrc,
  [in]           COLORREF      crKey,
  [in, optional] BLENDFUNCTION *pblend,
  [in]           DWORD         dwFlags
);
hWnd:分层窗口的句柄
hdcDst:屏幕 DC 的句柄
pptDst:分层窗口的位置
psize:分层窗口的新大小
hdcSrc:分层窗口的图面 DC 的句柄
pptSrc:指定层在设备上下文中的位置
crKey:指定要在组合分层窗口时使用的颜色键
pblend:指定要在组合分层窗口时使用的透明度值
dwFlags:此参数的取值可为下列值之一:
| 值 | 含义 |
|---|---|
| ULW_ALPHA 0x00000002 | 使用 pblend 作为混合函数。 如果显示模式为 256 种或更少颜色,则此值的效果与 ULW_OPAQUE的效果相同。 |
| ULW_COLORKEY 0x00000001 | 使用 crKey 作为透明度颜色。 |
| ULW_OPAQUE 0x00000004 | 绘制不透明的分层窗口。 |
| ULW_EX_NORESIZE 0x00000008 | 如果当前窗口大小与 psize 中指定的大小不匹配,则强制 UpdateLayeredWindowIndirect 函数失败。 |
如果没看懂没关系,下面举例子时就明白了。
我们不妨按试试去填写这个函数:首先需要一个分层窗口,为了方便我们可以先创建一个简单的win32窗口
#include <windows.h>

//注册窗口
void RegWindow(HINSTANCE hInstance, LPCWSTR lpClassName, WNDPROC wndProc, DWORD dwColor)
{
    WNDCLASS wnd;
    wnd.cbClsExtra = 0;
    wnd.cbWndExtra = 0;
    wnd.hbrBackground = (HBRUSH)(GetStockObject(dwColor));
    wnd.hCursor = LoadCursor(NULL, IDC_ARROW);
    wnd.hIcon = LoadCursor(NULL, IDI_APPLICATION);
    wnd.lpfnWndProc = wndProc;
    wnd.lpszClassName = lpClassName;
    wnd.lpszMenuName = NULL;
    wnd.style = CS_HREDRAW;
    wnd.hInstance = hInstance;
    RegisterClass(&wnd);
}
//窗口过程函数
LRESULT CALLBACK WindowProc(HWND hWnd, UINT Msg,
    WPARAM wParam, LPARAM lParam)
{
    switch (Msg)
    {
    case WM_DESTROY:
        PostQuitMessage(0);
        return 0;
    default:
        return DefWindowProc(hWnd, Msg, wParam, lParam);
    }
    return 0;
}

int WINAPI WinMain(HINSTANCE hInstance, HINSTANCE PrevhInstance, LPSTR lpCmdLine, int nCmdShow)
{
    //注册窗口                                  指定背景为白色
    RegWindow(hInstance, L"WINDOW", WindowProc, WHITE_BRUSH);
    //创建窗口
    HWND hWnd = CreateWindow(L"WINDOW", 0,
        WS_OVERLAPPEDWINDOW, 100, 100, 300, 300, NULL, NULL, hInstance, NULL);
    //                                  宽   高
    //显示窗口
    ShowWindow(hWnd, SW_SHOW);
    //更新窗口
    UpdateWindow(hWnd);
    //消息循环
    MSG msg;
    while (GetMessage(&msg, NULL, 0, 0))
    {
        TranslateMessage(&msg);
        DispatchMessage(&msg);
    }
    return 0;
}
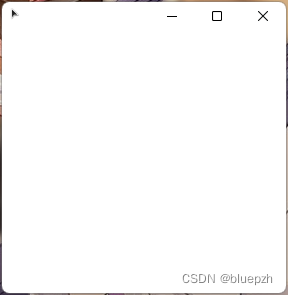
这样我们就创建了一个宽和高为300,背景为白色的普通窗口(左上角图标为本机鼠标)
接下来就是创建一个分层窗口,为了方便,可以直接在消息循环前创建。
创建分层窗口要用 CreateWindowExW 函数 ,比较简单,直接上代码
...
//更新窗口
UpdateWindow(hWnd);

//创建分层窗口//

//注册分层窗口
RegWindow(hInstance, L"LayeredWindow", WindowProc, BLACK_BRUSH);
//创建分层窗口
HWND hLayeredWindow = CreateWindowEx(WS_EX_LAYERED, L"LayeredWindow", 0,
    WS_POPUP | WS_BORDER, 0, 0, 100, 100, NULL, NULL, hInstance, NULL);
//将分层窗口设为本窗口的子窗口
SetParent(hLayeredWindow, hWnd);

//消息循环
MSG msg;
...
这样就创建了一个宽和高为100,背景为黑色的普通窗口。
但运行程序后会发现并没有什么黑色窗口,这是因为更新分层窗口需要用的函数是UpdateLayeredWindow函数,现在应该考虑怎么使用这个函数了。
...
//将分层窗口设为本窗口的子窗口
SetParent(hLayeredWindow, hWnd);

//更新分层窗口//

//创建分层窗口的DC
HDC hLayeredWindowDC = GetDC(hLayeredWindow);
HDC hCompatibleDC = CreateCompatibleDC(hLayeredWindowDC);
//填充BLENDFUNCTION结构
BLENDFUNCTION blend = { 0 };
blend.BlendOp = AC_SRC_OVER;
blend.SourceConstantAlpha = 255;
blend.AlphaFormat = AC_SRC_ALPHA;
//控制显示位置
POINT ptDst = { 0, 0 };
//控制窗口大小
SIZE sizeWnd = { 100, 100 };
//为0就行
POINT pSrc = { 0, 0 };
//更新分层窗口
UpdateLayeredWindow(hLayeredWindow, hLayeredWindowDC, &ptDst, &sizeWnd, hCompatibleDC, &pSrc, NULL, &blend, ULW_ALPHA);
//释放DC
DeleteDC(hLayeredWindowDC);
DeleteDC(hCompatibleDC);

//消息循环
MSG msg;
...它的第一个和第二个参数很简单,只需要填分层窗口的句柄和对应的DC就行了,对应的DC可以用GetDC函数 获取。第三个参数控制分层窗口显示位置,第四个参数控制分层窗口大小,第五个参数为用 CreateCompatibleDC 函数 获取的DC,第六个一般情况下填为零的POINT结构,第七个为NULL就行,第八个填 BLENDFUNCTION 结构 比较简单,最后一个参数填ULW_ALPHA,使窗口能设置透明度。
运行程序后发现窗口上并未出现一个黑色窗口,我们可以用 GetLastError 函数 查看错误代码。
...
//为0就行
POINT pSrc = { 0, 0 };
//更新分层窗口
int e1 = GetLastError();
UpdateLayeredWindow(hLayeredWindow, hLayeredWindowDC, &ptDst, &sizeWnd, hCompatibleDC, &pSrc, NULL, &blend, ULW_ALPHA);
int e2 = GetLastError();
//释放DC
DeleteDC(hLayeredWindowDC);
...
如果编写代码用的是visual studio,可以按f9打断点从而查看,也可以使用printf打印错误代码,要在win32窗口程序中显示cmd可以参考 在Win32应用程序中显示命令提示符(CMD)
运行程序后可以发现e1的值为0,就可以排除在更新分层窗口前发生错误的可能,e2的值为31,意为“连到系统上的设备没有发挥作用”

SetDIBits函数
为了解决上述问题,需要使用 setDIBits 函数 设置像素,它的定义如下
int SetDIBits(
  [in] HDC              hdc,
  [in] HBITMAP          hbm,
  [in] UINT             start,
  [in] UINT             cLines,
  [in] const VOID       *lpBits,
  [in] const BITMAPINFO *lpbmi,
  [in] UINT             ColorUse
);
它的功能是使用指定 DIB 中找到的颜色数据,在兼容的位图设置像素。说人话就是给一个Bitmap填充像素。
它的第一个参数是设备上下文的句柄,可直接填NULL;第二个参数是一个位图句柄,只需要创建一个位图传进去就行了;第三个参数直接填0,意为从0开始读取并填充;第四个参数填要显示的窗口的高度,如果以左上角为原点,此值需要为负数;第五个参数是RGB数组的指针,控制每个像素的颜色与透明度,第六个参数是一个 BITMAPINFO 结构 里面还有一个 BITMAPINFOHEADER 结构 都比较简单,最后一个参数参数必须是以下值之一
| 值 | 含义 |
|---|---|
| DIB_PAL_COLORS | 颜色表包含一个由 16 位索引组成的数组,该数组包含在 由 hdc 参数标识的设备上下文的逻辑调色板中 |
| DIB_RGB_COLORS | 提供颜色表并包含文本 RGB 值 |
接下来就可以直接上代码
...
//为0就行
POINT pSrc = { 0, 0 };

//创建一副与当前DC兼容的位图
HBITMAP hCustomBmp = NULL;
hCustomBmp = CreateCompatibleBitmap(hLayeredWindowDC, 100, 100);
//将hCustomBmp指定到hCompatibleDC中
SelectObject(hCompatibleDC, hCustomBmp);
//填充bmpInfo
BITMAPINFO bmpInfo = { 0 };
bmpInfo.bmiHeader.biSize = sizeof(BITMAPINFOHEADER);
bmpInfo.bmiHeader.biWidth = 100;
bmpInfo.bmiHeader.biHeight = -(int)100;
bmpInfo.bmiHeader.biPlanes = 1;
bmpInfo.bmiHeader.biCompression = BI_RGB;
bmpInfo.bmiHeader.biBitCount = 32;
//初始化位图
char* datas = new char[100 * 100 * 4];
ZeroMemory(datas, 100 * 100 * 4);
//填充像素
char* pdata = datas;
for (int i = 0; i < 100; i++)
{
    for (int j = 0; j < 100; j++)
    {
        //顺序并不是RGBA,而是BGRA
        *pdata = 233;   //Blue
        *(pdata + 1) = 222; //Ggeen
        *(pdata + 2) = 233; //Red
        *(pdata + 3) = 233; //Alpha
        pdata += 4;
    }
}
//设置位图中的像素
SetDIBits(NULL, hCustomBmp, 0, 100, datas, &bmpInfo, DIB_RGB_COLORS);

//更新分层窗口
...
现在运行程序就可以看到一个类似粉色的正方形在主窗口上了
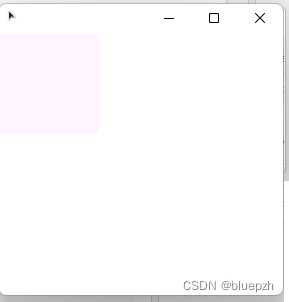
这样就实现了一个分层窗口的创建与显示。
接下来我们就要开始封装这个分层窗口的创建与显示功能,方便创建多个分层窗口。
HWND CreateLayeredWindow(HINSTANCE hInstance, HWND hWnd, int iWidth, int iHeight, int iPosX, int iPosY, COLORREF* colBGRA)
{

    //注册分层窗口
    RegWindow(hInstance, L"LayeredWindow", WindowProc, BLACK_BRUSH);
    //创建分层窗口
    HWND hLayeredWindow = CreateWindowEx(WS_EX_LAYERED, L"LayeredWindow", 0,
        WS_POPUP | WS_BORDER, 0, 0, iWidth, iHeight, NULL, NULL, hInstance, NULL);

    //将分层窗口设为本窗口的子窗口
    SetParent(hLayeredWindow, hWnd);

    //更新分层窗口//

    //创建分层窗口的DC
    HDC hLayeredWindowDC = GetDC(hLayeredWindow);
    HDC hCompatibleDC = CreateCompatibleDC(hLayeredWindowDC);
    //填充BLENDFUNCTION结构
    BLENDFUNCTION blend = { 0 };
    blend.BlendOp = AC_SRC_OVER;
    blend.SourceConstantAlpha = 255;
    blend.AlphaFormat = AC_SRC_ALPHA;
    //控制显示位置
    POINT ptDst = { iPosX, iPosY };
    //控制窗口大小
    SIZE sizeWnd = { iWidth, iHeight };
    //为0就行
    POINT pSrc = { 0, 0 };

    //创建一副与当前DC兼容的位图
    HBITMAP hCustomBmp = NULL;
    hCustomBmp = CreateCompatibleBitmap(hLayeredWindowDC, iWidth, iHeight);
    //将hCustomBmp指定到hCompatibleDC中
    SelectObject(hCompatibleDC, hCustomBmp);
    //填充bmpInfo
    BITMAPINFO bmpInfo = { 0 };
    bmpInfo.bmiHeader.biSize = sizeof(BITMAPINFOHEADER);
    bmpInfo.bmiHeader.biWidth = iWidth;
    bmpInfo.bmiHeader.biHeight = -iHeight;
    bmpInfo.bmiHeader.biPlanes = 1;
    bmpInfo.bmiHeader.biCompression = BI_RGB;
    bmpInfo.bmiHeader.biBitCount = 32;
    //设置位图中的像素
    SetDIBits(NULL, hCustomBmp, 0, iHeight, colBGRA, &bmpInfo, DIB_RGB_COLORS);
    //更新分层窗口
    UpdateLayeredWindow(hLayeredWindow, hLayeredWindowDC, &ptDst, &sizeWnd, hCompatibleDC, &pSrc, NULL, &blend, ULW_ALPHA);
    //释放DC
    DeleteDC(hLayeredWindowDC);
    DeleteDC(hCompatibleDC);

    return hLayeredWindow;
}
就算看不懂也没关系,只要会用就行了
hInstance:实例句柄
hWnd:主窗口句柄
iWidth/iHeight:窗口宽高
iPosX/iPosY:窗口位置
colBGRA:窗口每个像素点的信息
RGBA与BGRA
因为一些特性,SetDIBits函数中RGB数组的指针指向的内容顺序为BGRA而不是RGBA
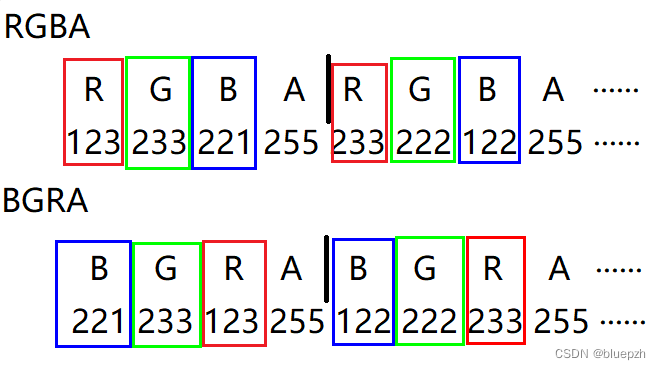
所以colBGRA内容顺序必须是BGRA。
如果你到现在都对RGBA和BGRA感觉陌生,那么接下来的例子也许会让你恍然大悟
//非win32窗口程序
#include <windows.h>

int main()
{
    //COLORREF就是存储RGBA的数据类型
    //Alpha默认为0
    //一个rgb
    COLORREF rgb = RGB(1,2,3);
    //bgr就是把rgb反过来
    COLORREF bgr = RGB(3,2,1);
    //colBGRA就是一个COLORREF数组,存储多个像素点的BGRA信息
    COLORREF bgrs[9];

    return 0;
}
如果你到现在都没看懂,那我建议先去熟悉一下win32 GDI。
RGB宏明显不能满足我们,因为RGB宏它无法改变透明度,所以我们就需要一个RGBA宏,它的定义如下
#define RGBA(r,g,b,a) (COLORREF)(((BYTE)(r) |((WORD)((BYTE)(g)) << 8)) |(((DWORD)((BYTE)(b)) << 16)) |(((DWORD)((BYTE)(a)) << 24)))不用去看它的原理,会用就行。
现在我们就可以试着去使用我们刚才封装的创建分层窗口函数,也算是展示一遍完整代码
#include <windows.h>

#define RGBA(r,g,b,a)          (COLORREF)(((BYTE)(r) |((WORD)((BYTE)(g)) << 8)) |(((DWORD)((BYTE)(b)) << 16)) |(((DWORD)((BYTE)(a)) << 24)))

//窗口过程函数
LRESULT CALLBACK WindowProc(HWND hWnd, UINT Msg,
    WPARAM wParam, LPARAM lParam)
{
    switch (Msg)
    {
    case WM_DESTROY:
        PostQuitMessage(0);
        return 0;
    default:
        return DefWindowProc(hWnd, Msg, wParam, lParam);
    }
    return 0;
}
//注册窗口函数
void RegWindow(HINSTANCE hInstance, LPCWSTR lpClassName, WNDPROC wndProc, DWORD dwColor)
{
    WNDCLASS wnd;
    wnd.cbClsExtra = 0;
    wnd.cbWndExtra = 0;
    wnd.hbrBackground = (HBRUSH)(GetStockObject(dwColor));
    wnd.hCursor = LoadCursor(NULL, IDC_ARROW);
    wnd.hIcon = LoadCursor(NULL, IDI_APPLICATION);
    wnd.lpfnWndProc = wndProc;
    wnd.lpszClassName = lpClassName;
    wnd.lpszMenuName = NULL;
    wnd.style = CS_HREDRAW;
    wnd.hInstance = hInstance;
    RegisterClass(&wnd);
}
//创建分层窗口
HWND CreateLayeredWindow(HINSTANCE hInstance, HWND hWnd, int iWidth, int iHeight, int iPosX, int iPosY, COLORREF* colBGRA)
{
    //创建分层窗口//

    //注册分层窗口
    RegWindow(hInstance, L"LayeredWindow", WindowProc, BLACK_BRUSH);
    //创建分层窗口
    HWND hLayeredWindow = CreateWindowEx(WS_EX_LAYERED, L"LayeredWindow", 0,
        WS_POPUP | WS_BORDER, 0, 0, iWidth, iHeight, NULL, NULL, hInstance, NULL);

    //将分层窗口设为本窗口的子窗口
    SetParent(hLayeredWindow, hWnd);

    //更新分层窗口//

    //创建分层窗口的DC
    HDC hLayeredWindowDC = GetDC(hLayeredWindow);
    HDC hCompatibleDC = CreateCompatibleDC(hLayeredWindowDC);
    //填充BLENDFUNCTION结构
    BLENDFUNCTION blend = { 0 };
    blend.BlendOp = AC_SRC_OVER;
    blend.SourceConstantAlpha = 255;
    blend.AlphaFormat = AC_SRC_ALPHA;
    //控制显示位置
    POINT ptDst = { iPosX, iPosY };
    //控制窗口大小
    SIZE sizeWnd = { iWidth, iHeight };
    //为0就行
    POINT pSrc = { 0, 0 };

    //创建一副与当前DC兼容的位图
    HBITMAP hCustomBmp = NULL;
    hCustomBmp = CreateCompatibleBitmap(hLayeredWindowDC, iWidth, iHeight);
    //将hCustomBmp指定到hCompatibleDC中
    SelectObject(hCompatibleDC, hCustomBmp);
    //填充bmpInfo
    BITMAPINFO bmpInfo = { 0 };
    bmpInfo.bmiHeader.biSize = sizeof(BITMAPINFOHEADER);
    bmpInfo.bmiHeader.biWidth = iWidth;
    bmpInfo.bmiHeader.biHeight = -iHeight;
    bmpInfo.bmiHeader.biPlanes = 1;
    bmpInfo.bmiHeader.biCompression = BI_RGB;
    bmpInfo.bmiHeader.biBitCount = 32;
    //设置位图中的像素
    SetDIBits(NULL, hCustomBmp, 0, iHeight, colRGBA, &bmpInfo, DIB_RGB_COLORS);
    //更新分层窗口
    UpdateLayeredWindow(hLayeredWindow, hLayeredWindowDC, &ptDst, &sizeWnd, hCompatibleDC, &pSrc, NULL, &blend, ULW_ALPHA);
    //释放DC
    DeleteDC(hLayeredWindowDC);
    DeleteDC(hCompatibleDC);

    return hLayeredWindow;
}

int WINAPI WinMain(HINSTANCE hInstance, HINSTANCE PrevhInstance, LPSTR lpCmdLine, int nCmdShow)
{
    //注册窗口
    RegWindow(hInstance, L"WINDOW", WindowProc, WHITE_BRUSH);
    //创建窗口
    HWND hWnd = CreateWindow(L"WINDOW", 0,
        WS_OVERLAPPEDWINDOW, 100, 100, 300, 300, NULL, NULL, hInstance, NULL);
    //显示窗口
    ShowWindow(hWnd, SW_SHOW);
    //更新窗口
    UpdateWindow(hWnd);

    //创建BGRA数据
    COLORREF* colBGRA = new COLORREF[100*100];
    //初始化
    ZeroMemory(colBGRA, 100 * 100 * sizeof(COLORREF));
    //填充半透明蓝色
    for (int i = 0; i < 100*100; i++)
    {
        //虽然用的是RGBA,但实际上是BGRA
        colBGRA[i] = RGBA(233, 0, 0, 128);
        //                 B    G    R   A
    }
    //创建分层窗口
    HWND hLW = CreateLayeredWindow(hInstance, hWnd, 100, 100, 0, 0, colBGRA);

    //消息循环
    MSG msg;
    while (GetMessage(&msg, NULL, 0, 0))
    {
        TranslateMessage(&msg);
        DispatchMessage(&msg);
    }
    return 0;
}
不出意外的话效果是这样
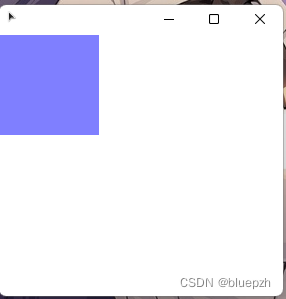
现在已经把最最基础的分层窗口的创建给讲完了,接下来所有操作都是基于本篇完成的。一些比较漂亮的UI实现就放到下篇文章讲吧


 2782
2782


 被折叠的 条评论
为什么被折叠?
被折叠的 条评论
为什么被折叠?
 到【灌水乐园】发言


