


springboot-员工管理系统
前言
这是一个基本的员工管理系统,有员工和老板两个成员,彼此实现的功能都是增删改查的操作。这个系统没有数据库,只是为管理系统提供一个思想。
准备工作
首先需要准备好我们的实体类和实现类。
实体类pojo
Department
package com.cjh.pojo;


import lombok.AllArgsConstructor;
import lombok.Data;
import lombok.NoArgsConstructor;

//部门表
@Data
@NoArgsConstructor
@AllArgsConstructor
public class Department {

    private Integer id;
    private String departmentName;
}
Employee
package com.cjh.pojo;

import lombok.AllArgsConstructor;
import lombok.Data;
import lombok.NoArgsConstructor;

import java.util.Date;

//员工表
@Data
@NoArgsConstructor
public class Employee {

    private Integer id;
    private  String lastName;
    private String email;
    private Integer gender; //0代表女,1代表男

    private Department department;
    private Date birth;

    public Employee(Integer id, String lastName, String email, Integer gender, Department department) {
        this.id = id;
        this.lastName = lastName;
        this.email = email;
        this.gender = gender;
        this.department = department;
        //默认日期实现
        this.birth = new Date();
    }
}
这里不能用lombok的原因是,我们需要把日期自动变成当前日期来显示出来,而不是通过我们手动进行赋值。
实现类
DepartmentDao
package com.cjh.Dao;

import com.cjh.pojo.Department;
import org.springframework.stereotype.Repository;

import java.util.Collection;
import java.util.HashMap;
import java.util.Map;

//部门dao
@Repository
public class DepartmentDao {

    //模拟数据库中的数据
    private static Map<Integer, Department> departments = null;
    static {
        departments = new HashMap<Integer, Department>();//创建一个部门表

        departments.put(101,new Department(101,"教学部"));
        departments.put(102,new Department(102,"后勤部"));
        departments.put(103,new Department(103,"市场部"));
        departments.put(104,new Department(104,"教研部"));
        departments.put(105,new Department(105,"运营部"));
    }

    //获得所有部门信息
    public Collection<Department> getDepartments(){
        return departments.values();
    }

    //通过id得到部门
    public Department getDepartmentsById(Integer id){
         return departments.get(id);
    }
}
EmployeeDao
package com.cjh.Dao;

import com.cjh.pojo.Department;
import com.cjh.pojo.Employee;
import org.springframework.beans.factory.annotation.Autowired;
import org.springframework.stereotype.Repository;

import java.util.Collection;
import java.util.HashMap;
import java.util.Map;

//员工Dao
@Repository
public class EmployeeDao {
    //模拟数据库中的数据
    private static Map<Integer, Employee> employees = null;
    //员工有所属的部门
    @Autowired
    private DepartmentDao departmentDao;
    static {
        employees = new HashMap<Integer, Employee>();//创建一个部门表

        employees.put(1001,new Employee(1001,"AA","23451313@qq.com",1,new Department(101,"后勤部")));
        employees.put(1002,new Employee(1002,"BB","23451313@qq.com",0,new Department(101,"教学部")));
        employees.put(1003,new Employee(1003,"CC","23451313@qq.com",1,new Department(101,"市场部")));
        employees.put(1004,new Employee(1004,"DD","23451313@qq.com",0,new Department(101,"运营部")));
        employees.put(1005,new Employee(1005,"EE","23451313@qq.com",1,new Department(101,"教研部")));

    }

    //主键自增
    private static Integer initId = 1006;
    //增加一个员工
    public void add(Employee employee){
        if(employee.getId()==null){
            employee.setId(initId++);
        }
        employee.setDepartment(departmentDao.getDepartmentsById(employee.getDepartment().getId()));
        employees.put(employee.getId(),employee);
    }

    //查询全部员工信息
    public Collection<Employee> getAll(){
        return employees.values();
    }

    //通过id查询员工
    public Employee getEmploteeById(Integer id){
        return employees.get(id);
    }

    //删除员工id
    public void delete(Integer id){
        employees.remove(id);
    }
}
这里我们不仅实现实体类的增删改查,并且模仿数据库直接给数据。
静态资源
https://gitee.com/xuzebin/springboot-view?_from=gitee_search
首页实现
这里我们有两种方法可以实现首页跳转。
第一种是通过controller来实现,我们编写一个IndexController
package com.cjh.controller;

import org.springframework.stereotype.Controller;
import org.springframework.web.bind.annotation.RequestMapping;

@Controller
public class IndexController {

    //在这里配置的话,会出现一个问题,就是静态资源没办法被加载出来,因此我们在配置类中进行请求转发
  @RequestMapping({"/","/index.html"})
    public String index(){
        return "index";


}
这样写,可以实现首页的跳转,但是会出现一个问题,那就是无法加载静态资源的问题。
解决:
我们编写一个springmvc的拓展配置类,继承WebMvcConfigurer,使用里面的addViewControllers方法,实现视图跳转。
MyMVCConfig
package com.cjh.config;

import org.springframework.context.annotation.Bean;
import org.springframework.context.annotation.Configuration;
import org.springframework.web.servlet.View;
import org.springframework.web.servlet.ViewResolver;
import org.springframework.web.servlet.config.annotation.ViewControllerRegistry;
import org.springframework.web.servlet.config.annotation.WebMvcConfigurer;

import java.util.Locale;


@Configuration
public class MyMVCConfig implements WebMvcConfigurer {

    @Override
    public void addViewControllers(ViewControllerRegistry registry) {
        registry.addViewController("/").setViewName("index");
        registry.addViewController("/index.html").setViewName("index");
    }
}
注意:所有的静态资源都需要交给thymeleaf来进行托管,这样有两个好处,可以自动帮你处理资源加载路径。
如何进行托管呢?
就是使用其命名空间,并且使用其相应的语法,具体可以看我关于模板引擎的推文。
模板引擎
页面国际化
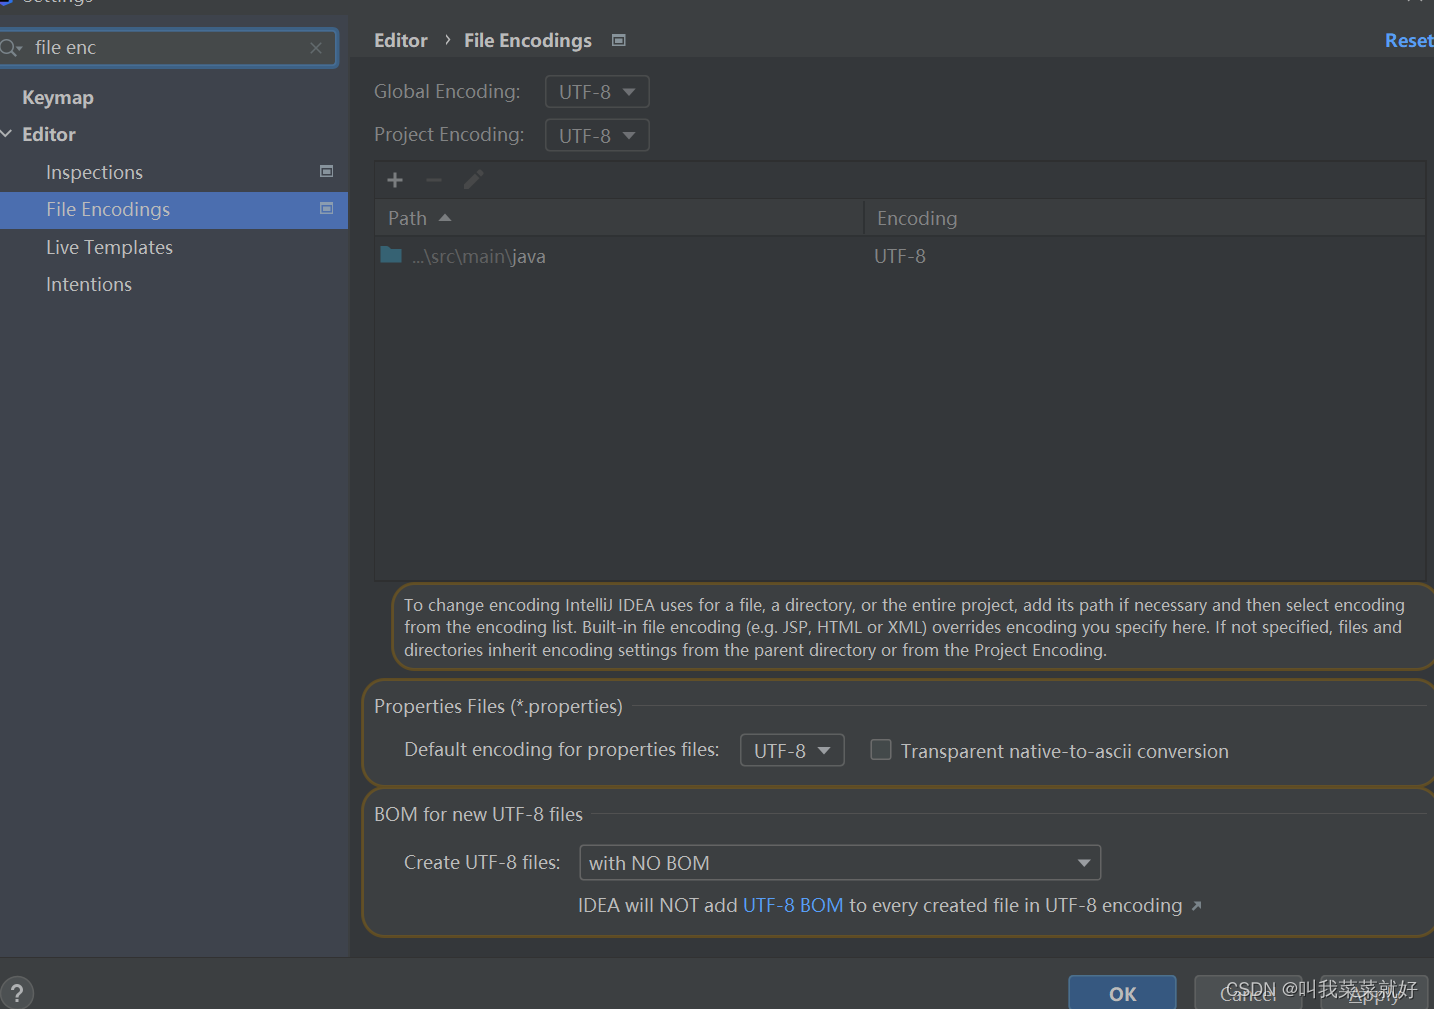
Idea编码设置
首先,先确保自己的Idea都是utf-8的编码格式,否则编写的代码都是乱码的。
i18n
在resources目录下面建一个 i18n文件夹,在里面写一个login.properties,和login_zh_CN.properties,中文配置
这个时候Idea会自动将这两个文件合并
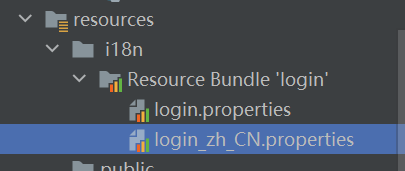
自动合并成Bundle文件

点击Add Property Files
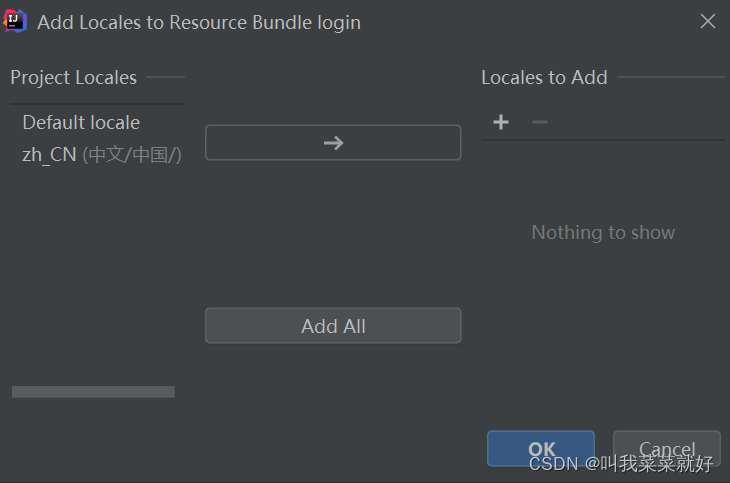
点击+

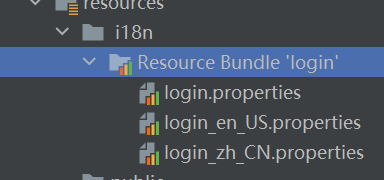
输入en_US,点击OK,添加英文配置。
注意:名字不要乱写
然后点击OK即可。
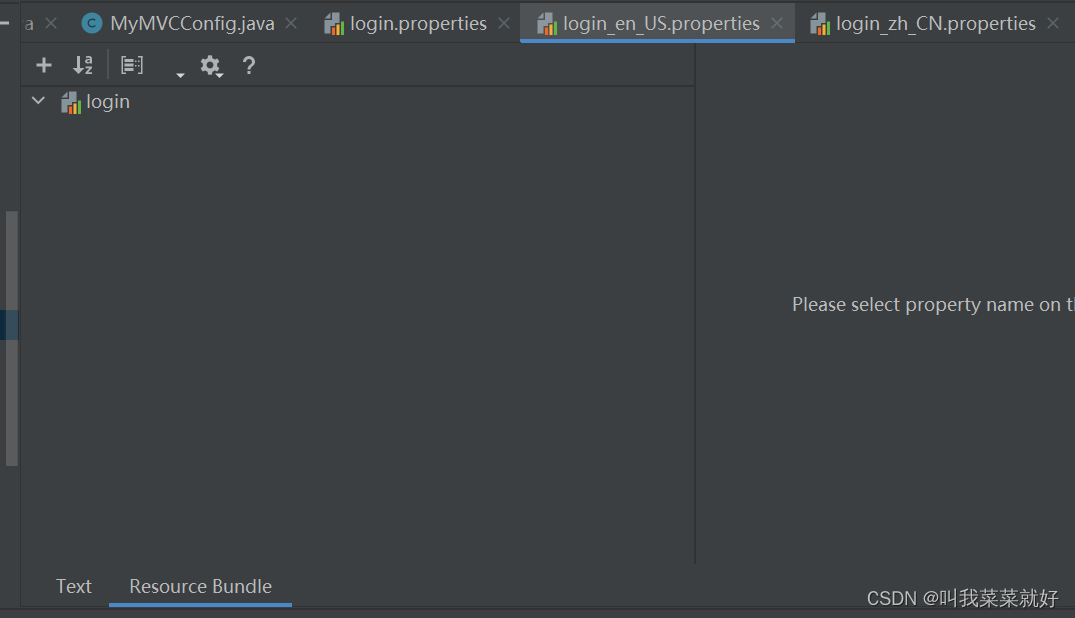
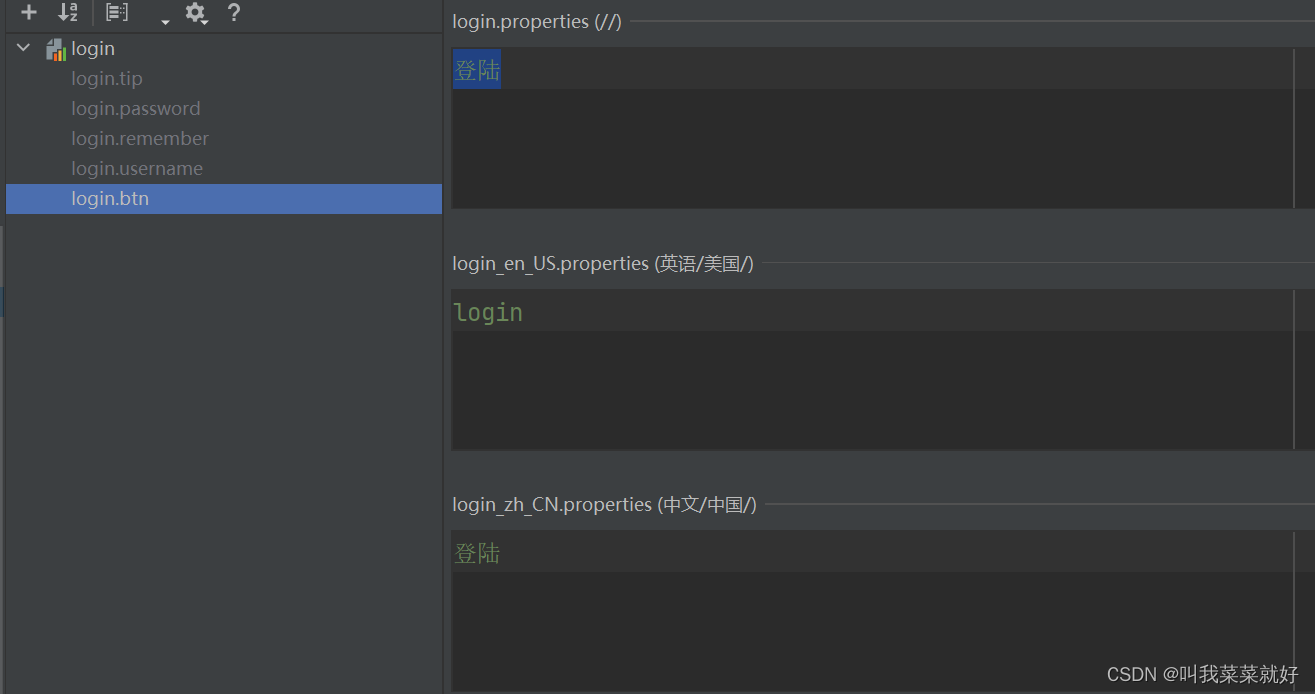
i18n配置
idea可以进行可视化操作,只需要点击Resource Bundle即可。
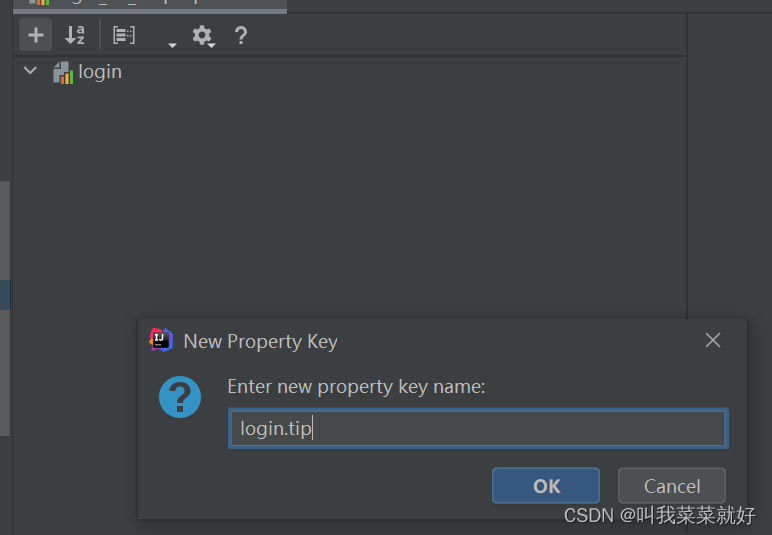
我们在这里新增一个键
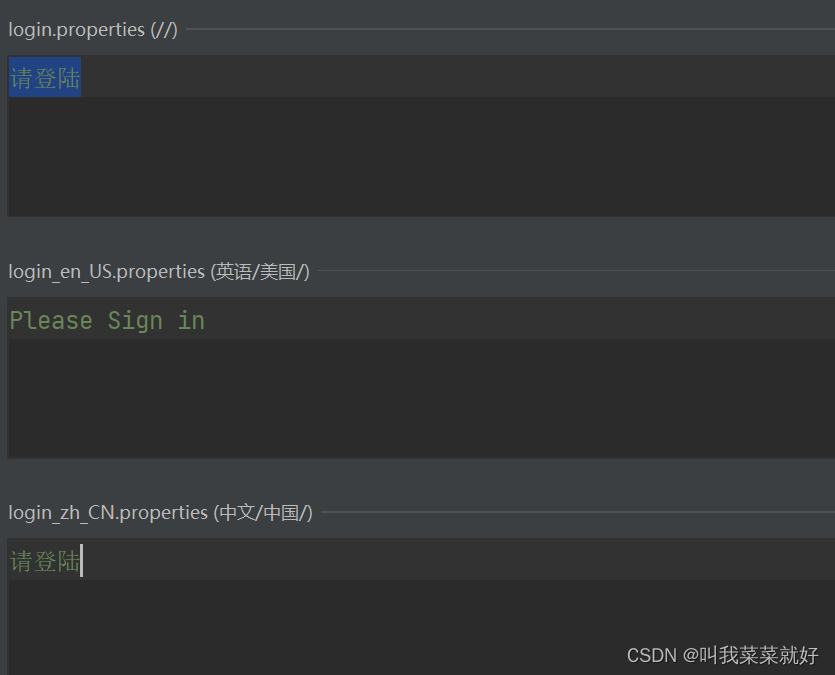
这个时候,右边会出现三个需要我们配置的
一个是默认编码,中文编码和英文编码

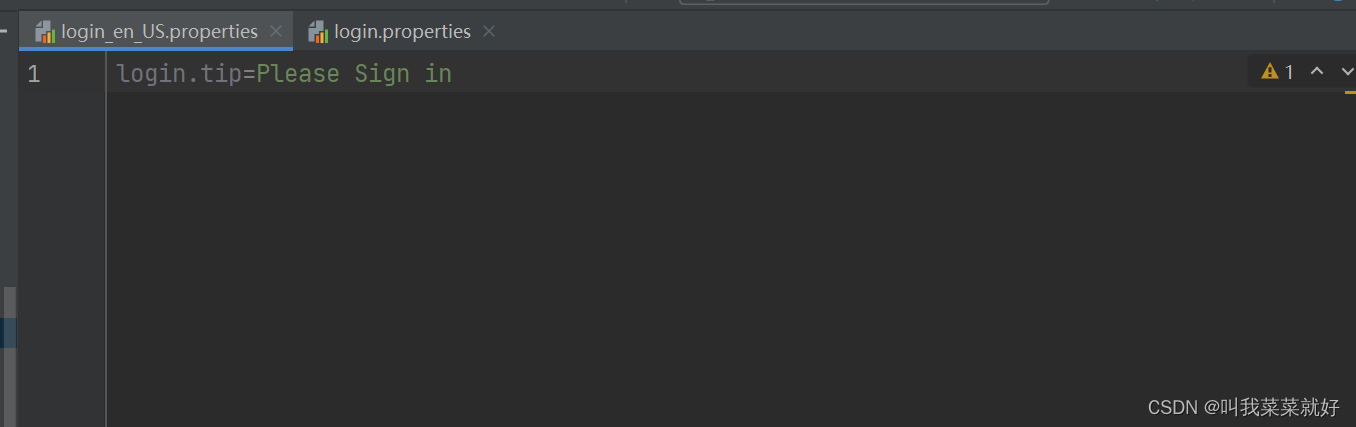
这个时候我们退出可视化的时候,会自动产生相应的代码
接下来,我们配置其他的键,键的名字可以任意
国际化识别
如何把我们配置的编码格式配置到项目中呢?
配置springboot配置文件
我们需要在application.properties,springboot的配置文件中进行配置
spring.messages.basename=i18n.login
把真实文件的位置绑定进来,我们的配置是放在了i18n下的login中。
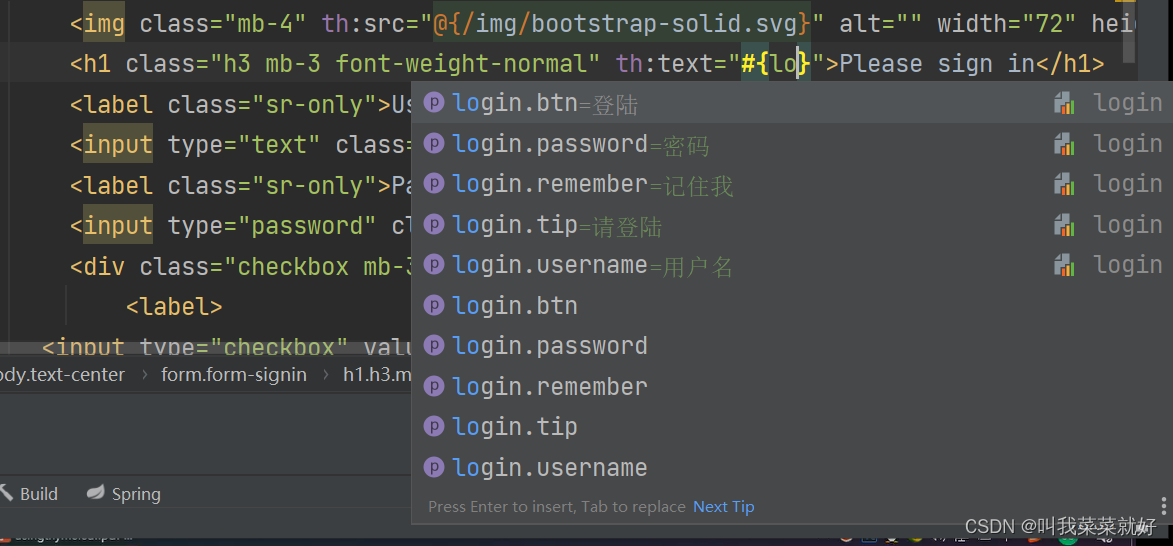
使用模板引擎语法
我们这里的消息是使用#{},才能被模板引擎托管
我们将对应需要转码的进行托管。
通过点击按钮来实现中英文切换
这个时候我自定义一个国际化类MYLocalResolver
他继承了LocaleResolver,地区分析器
package com.cjh.config;

import org.springframework.stereotype.Controller;
import org.springframework.web.servlet.LocaleResolver;
import org.thymeleaf.util.StringUtils;

import javax.servlet.http.HttpServletRequest;
import javax.servlet.http.HttpServletResponse;
import java.util.Locale;


public class MYLocalResolver implements LocaleResolver {


    //解析请求
    @Override
    public Locale resolveLocale(HttpServletRequest request) {

        //获取请求中的参数链接
        String language = request.getParameter("l");
        Locale locale = Locale.getDefault();  //如果没有就使用默认的

        //如果请求的链接携带了国际化的参数
        if(!StringUtils.isEmpty(language)){
            //zh_CN
            String[] split = language.split("_");
            //国家,地区
            locale = new Locale(split[0], split[1]);
        }
        return locale;
    }

    @Override
    public void setLocale(HttpServletRequest request, HttpServletResponse response, Locale locale) {

    }
}
我们在前端定义了一个跳转链接,把参数传进去
	<a class="btn btn-sm" th:href="@{/index.html(l='zh_CN')}">中文</a>
			<a class="btn btn-sm" th:href="@{/index.html(l='en_US')}">English</a>
这里让他都跳转index,但是携带的参数不同,通过解析器接收我们的参数来实现中英文的切换。
接着,把我们自定义的类放入到bean中,让springboot自动配置。
//自定义的国际化组件
    @Bean
    public MYLocalResolver localResolver(){
        return new MYLocalResolver();
    }
这样就实现的点击按钮,实现中英文的切换了。
登陆功能实现
Controlller
负责接收前端数据,并实现跳转
LoginController
package com.cjh.controller;

import org.springframework.stereotype.Controller;
import org.springframework.ui.Model;
import org.springframework.web.bind.annotation.RequestMapping;
import org.springframework.web.bind.annotation.RequestParam;
import org.thymeleaf.util.StringUtils;


@Controller
public class LoginController {

    @RequestMapping("/user/login")

    public  String login(@RequestParam("username") String username, @RequestParam("password")String password, Model model){

        //具体的业务:
        if(!StringUtils.isEmpty(username) && "123456".equals(password)){
            return "redirect:/main.html";
        }else {
            //告诉用户,登陆失败
            model.addAttribute("msg","用户名或者密码错误!");
            return "index";
        }
    }
}
index.html
<form class="form-signin" th:action="@{/user/login}">
MyMVCConfig
我们这里为了隐私,在拓展配置中设置重定向
registry.addViewController("/main.html").setViewName("dashboard");
拦截器实现
我们需要拦截没有登陆的请求
首先,自定义一个拦截器LoginHandlerInterceptor,需要实现HandlerInterceptor这个接口
然后我们重写HandlerInterceptor的方法
package com.cjh.config;

import org.springframework.web.servlet.HandlerInterceptor;
import org.springframework.web.servlet.ModelAndView;

import javax.servlet.http.HttpServletRequest;
import javax.servlet.http.HttpServletResponse;

public class LoginHandlerInterceptor implements HandlerInterceptor {
    @Override
    public boolean preHandle(HttpServletRequest request, HttpServletResponse response, Object handler) throws Exception {

        //登陆成功之后,应该有用户的session;如果存在session就是登陆成功,没有就是登陆失败了
        Object loginUser = request.getSession().getAttribute("loginUser");

        if(loginUser==null){//没有登陆
            request.setAttribute("msg","没有权限!,请先登陆");
            request.getRequestDispatcher("/index.html").forward(request,response);
            return false;
        }else {
            return true;
        }

    }

    @Override
    public void postHandle(HttpServletRequest request, HttpServletResponse response, Object handler, ModelAndView modelAndView) throws Exception {
        HandlerInterceptor.super.postHandle(request, response, handler, modelAndView);
    }

    @Override
    public void afterCompletion(HttpServletRequest request, HttpServletResponse response, Object handler, Exception ex) throws Exception {
        HandlerInterceptor.super.afterCompletion(request, response, handler, ex);
    }
}
这里的思想就是设置一个Session用来存放用户信息,然后在前端把用户信息放入这个Session中,如果Session存在,说明已经登陆成功,否则登陆失败。
然后我们把自定义的拦截器放入bean中
 //登陆拦截器
    @Override
    public void addInterceptors(InterceptorRegistry registry) {
        registry.addInterceptor(new LoginHandlerInterceptor()).addPathPatterns("/**").excludePathPatterns
                ("/index.html","/","/user/login","/css/*","/js/**","/img/**"); //拦截所有请求
    }
addPathPatterns:就是拦截所有请求
excludePathPatterns:不包括这些路径的请求
接着在LoginController中放入Session,用来接收前端的用户信息
package com.cjh.controller;

import org.springframework.stereotype.Controller;
import org.springframework.ui.Model;
import org.springframework.web.bind.annotation.RequestMapping;
import org.springframework.web.bind.annotation.RequestParam;
import org.thymeleaf.util.StringUtils;

import javax.servlet.http.HttpSession;


@Controller
public class LoginController {

    @RequestMapping("/user/login")

    public  String login(@RequestParam("username") String username, @RequestParam("password")String password,
                         Model model, HttpSession session){

        //具体的业务:
        if(!StringUtils.isEmpty(username) && "123456".equals(password)){
            session.setAttribute("loginUser",username);
            return "redirect:/main.html";
        }else {
            //告诉用户,登陆失败
            model.addAttribute("msg","用户名或者密码错误!");
            return "index";
        }
    }
}
如果想要实现退出,移除Session的话,使用session.removeAttribute即可。
注意:
如果登陆之后还是被拦截需要注意很可能是自定义拦截器的问题,注意addPathPatterns和
excludePathPatterns的拦截路径是否有缺失
如果登陆进去报了500的错误,很可能是跳转到的页面有语法问题,这里我写错了[[${session.loginUser}]],也报了500的错误,无法正常显示页面。
展示员工列表
提取公共页面
例如导航栏和侧边栏
这个时候我们可以把这些部分提取为公共部分
我们可以建立一个commons文件夹,可以把公共的部分放入到一个html中,再通过模板引擎统一进行管理。
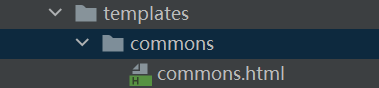
例如我们把导航栏和侧边栏都放进了commons.html中
<!DOCTYPE html>
<html lang="en" xmlns:th="http://www.thymeleaf.org">

<!--头部导航栏-->
<nav class="navbar navbar-dark sticky-top bg-dark flex-md-nowrap p-0" th:fragment="topbar">
  <a class="navbar-brand col-sm-3 col-md-2 mr-0" href="http://getbootstrap.com/docs/4.0/examples/dashboard/#">[[${session.loginUser}]]</a>
  <input class="form-control form-control-dark w-100" type="text" placeholder="Search" aria-label="Search">
  <ul class="navbar-nav px-3">
    <li class="nav-item text-nowrap">
      <a class="nav-link" href="http://getbootstrap.com/docs/4.0/examples/dashboard/#">注销</a>
    </li>
  </ul>
</nav>

<!--侧边栏-->

<nav class="col-md-2 d-none d-md-block bg-light sidebar" th:fragment="sidebar">
  <div class="sidebar-sticky">
    <ul class="nav flex-column">
      <li class="nav-item">
        <a th:class="${active=='main.html'?'nav-link active':'nav-link'}" th:href="@{/index.html}">
          <svg xmlns="http://www.w3.org/2000/svg" width="24" height="24" viewBox="0 0 24 24" fill="none" stroke="currentColor" stroke-width="2" stroke-linecap="round" stroke-linejoin="round" class="feather feather-home">
            <path d="M3 9l9-7 9 7v11a2 2 0 0 1-2 2H5a2 2 0 0 1-2-2z"></path>
            <polyline points="9 22 9 12 15 12 15 22"></polyline>
          </svg>
          首页 <span class="sr-only">(current)</span>
        </a>
      </li>
      <li class="nav-item">
        <a class="nav-link" href="http://getbootstrap.com/docs/4.0/examples/dashboard/#">
          <svg xmlns="http://www.w3.org/2000/svg" width="24" height="24" viewBox="0 0 24 24" fill="none" stroke="currentColor" stroke-width="2" stroke-linecap="round" stroke-linejoin="round" class="feather feather-file">
            <path d="M13 2H6a2 2 0 0 0-2 2v16a2 2 0 0 0 2 2h12a2 2 0 0 0 2-2V9z"></path>
            <polyline points="13 2 13 9 20 9"></polyline>
          </svg>
          Orders
        </a>
      </li>
      <li class="nav-item">
        <a class="nav-link" href="http://getbootstrap.com/docs/4.0/examples/dashboard/#">
          <svg xmlns="http://www.w3.org/2000/svg" width="24" height="24" viewBox="0 0 24 24" fill="none" stroke="currentColor" stroke-width="2" stroke-linecap="round" stroke-linejoin="round" class="feather feather-shopping-cart">
            <circle cx="9" cy="21" r="1"></circle>
            <circle cx="20" cy="21" r="1"></circle>
            <path d="M1 1h4l2.68 13.39a2 2 0 0 0 2 1.61h9.72a2 2 0 0 0 2-1.61L23 6H6"></path>
          </svg>
          Products
        </a>
      </li>
      <li class="nav-item">
        <a th:class="${active=='list.html'?'nav-link active':'nav-link'}" th:href="@{/emps}">
          <svg xmlns="http://www.w3.org/2000/svg" width="24" height="24" viewBox="0 0 24 24" fill="none" stroke="currentColor" stroke-width="2" stroke-linecap="round" stroke-linejoin="round" class="feather feather-users">
            <path d="M17 21v-2a4 4 0 0 0-4-4H5a4 4 0 0 0-4 4v2"></path>
            <circle cx="9" cy="7" r="4"></circle>
            <path d="M23 21v-2a4 4 0 0 0-3-3.87"></path>
            <path d="M16 3.13a4 4 0 0 1 0 7.75"></path>
          </svg>
          员工管理
        </a>
      </li>
      <li class="nav-item">
        <a class="nav-link" href="http://getbootstrap.com/docs/4.0/examples/dashboard/#">
          <svg xmlns="http://www.w3.org/2000/svg" width="24" height="24" viewBox="0 0 24 24" fill="none" stroke="currentColor" stroke-width="2" stroke-linecap="round" stroke-linejoin="round" class="feather feather-bar-chart-2">
            <line x1="18" y1="20" x2="18" y2="10"></line>
            <line x1="12" y1="20" x2="12" y2="4"></line>
            <line x1="6" y1="20" x2="6" y2="14"></line>
          </svg>
          Reports
        </a>
      </li>
      <li class="nav-item">
        <a class="nav-link" href="http://getbootstrap.com/docs/4.0/examples/dashboard/#">
          <svg xmlns="http://www.w3.org/2000/svg" width="24" height="24" viewBox="0 0 24 24" fill="none" stroke="currentColor" stroke-width="2" stroke-linecap="round" stroke-linejoin="round" class="feather feather-layers">
            <polygon points="12 2 2 7 12 12 22 7 12 2"></polygon>
            <polyline points="2 17 12 22 22 17"></polyline>
            <polyline points="2 12 12 17 22 12"></polyline>
          </svg>
          Integrations
        </a>
      </li>
    </ul>

    <h6 class="sidebar-heading d-flex justify-content-between align-items-center px-3 mt-4 mb-1 text-muted">
      <span>Saved reports</span>
      <a class="d-flex align-items-center text-muted" href="http://getbootstrap.com/docs/4.0/examples/dashboard/#">
        <svg xmlns="http://www.w3.org/2000/svg" width="24" height="24" viewBox="0 0 24 24" fill="none" stroke="currentColor" stroke-width="2" stroke-linecap="round" stroke-linejoin="round" class="feather feather-plus-circle"><circle cx="12" cy="12" r="10"></circle><line x1="12" y1="8" x2="12" y2="16"></line><line x1="8" y1="12" x2="16" y2="12"></line></svg>
      </a>
    </h6>
    <ul class="nav flex-column mb-2">
      <li class="nav-item">
        <a class="nav-link" href="http://getbootstrap.com/docs/4.0/examples/dashboard/#">
          <svg xmlns="http://www.w3.org/2000/svg" width="24" height="24" viewBox="0 0 24 24" fill="none" stroke="currentColor" stroke-width="2" stroke-linecap="round" stroke-linejoin="round" class="feather feather-file-text">
            <path d="M14 2H6a2 2 0 0 0-2 2v16a2 2 0 0 0 2 2h12a2 2 0 0 0 2-2V8z"></path>
            <polyline points="14 2 14 8 20 8"></polyline>
            <line x1="16" y1="13" x2="8" y2="13"></line>
            <line x1="16" y1="17" x2="8" y2="17"></line>
            <polyline points="10 9 9 9 8 9"></polyline>
          </svg>
          Current month
        </a>
      </li>
      <li class="nav-item">
        <a class="nav-link" href="http://getbootstrap.com/docs/4.0/examples/dashboard/#">
          <svg xmlns="http://www.w3.org/2000/svg" width="24" height="24" viewBox="0 0 24 24" fill="none" stroke="currentColor" stroke-width="2" stroke-linecap="round" stroke-linejoin="round" class="feather feather-file-text">
            <path d="M14 2H6a2 2 0 0 0-2 2v16a2 2 0 0 0 2 2h12a2 2 0 0 0 2-2V8z"></path>
            <polyline points="14 2 14 8 20 8"></polyline>
            <line x1="16" y1="13" x2="8" y2="13"></line>
            <line x1="16" y1="17" x2="8" y2="17"></line>
            <polyline points="10 9 9 9 8 9"></polyline>
          </svg>
          Last quarter
        </a>
      </li>
      <li class="nav-item">
        <a class="nav-link" href="http://getbootstrap.com/docs/4.0/examples/dashboard/#">
          <svg xmlns="http://www.w3.org/2000/svg" width="24" height="24" viewBox="0 0 24 24" fill="none" stroke="currentColor" stroke-width="2" stroke-linecap="round" stroke-linejoin="round" class="feather feather-file-text">
            <path d="M14 2H6a2 2 0 0 0-2 2v16a2 2 0 0 0 2 2h12a2 2 0 0 0 2-2V8z"></path>
            <polyline points="14 2 14 8 20 8"></polyline>
            <line x1="16" y1="13" x2="8" y2="13"></line>
            <line x1="16" y1="17" x2="8" y2="17"></line>
            <polyline points="10 9 9 9 8 9"></polyline>
          </svg>
          Social engagement
        </a>
      </li>
      <li class="nav-item">
        <a class="nav-link" href="http://getbootstrap.com/docs/4.0/examples/dashboard/#">
          <svg xmlns="http://www.w3.org/2000/svg" width="24" height="24" viewBox="0 0 24 24" fill="none" stroke="currentColor" stroke-width="2" stroke-linecap="round" stroke-linejoin="round" class="feather feather-file-text">
            <path d="M14 2H6a2 2 0 0 0-2 2v16a2 2 0 0 0 2 2h12a2 2 0 0 0 2-2V8z"></path>
            <polyline points="14 2 14 8 20 8"></polyline>
            <line x1="16" y1="13" x2="8" y2="13"></line>
            <line x1="16" y1="17" x2="8" y2="17"></line>
            <polyline points="10 9 9 9 8 9"></polyline>
          </svg>
          Year-end sale
        </a>
      </li>
    </ul>
  </div>
</nav>

</html>
并且分别把他们交给模板引擎托管,并且命名为topbar和sidebar。
th:fragment="topbar
th:fragment="sidebar
然后把他们插入到你需要的地方
<div th:insert="~{commons/commons.html::sidebar(active='list.html')}
<div th:insert="~{commons/commons.html::topbar}"></div>
用th:replace也可以,语法也是一样的。
如果要传递参数可以直接使用()传递参数
例如:
<div th:replace="~{commons/commons.html::sidebar(active='main.html')}
这里我传递了一个参数叫做active,它的值是main.html
拿到这个参数可以用$来取变量
<a th:class="${active=='main.html'?'nav-link active':'nav-link'}"
这里我拿到参数来判断是否高亮。
把数据放入前端
<tbody>
								<tr th:each="emp:${emps}">
									<td th:text="${emp.getId()}"></td>
									<td th:text="${emp.getLastName()}"></td>
									<td th:text="${emp.getEmail()}"></td>
									<td th:text="${emp.getGender()==0?'女':'男'}"></td>
									<td th:text="${emp.department.getDepartmentName()}"></td>
									<td th:text="${#dates.format(emp.getBirth(),'yyyy-MM-dd HH:mm:ss')}"></td>
									<td>
										<button class="btn btn-sm btn-primary">编辑</button>
										<button class="btn btn-sm btn-danger">删除</button>
									</td>
								</tr>
							</tbody>
通过th:each来循环取出。
增加员工实现
思路:获取前端数据,把前端的数据通过Controller接收进来,添加进数据库中,然后返回出来。
跳转表单
在list中,添加一个按钮,用来处理跳转
<h2><a class="btn btn-sm btn-success" th:href="@{/emp}">添加员工</a> </h2>
这里我们跳转到/emp中
这里我们采用的restful风格的方式,我们添加员工肯定先跳转的表单页面,因此是get请求
我们在Controller中接收get请求,用getmapping
    @GetMapping("/emp")
    public String toAddpage(Model model){
        //查出所有部门的信息
        Collection<Department> departments = departmentDao.getDepartments();
        model.addAttribute("departments",departments);
        return "add";
    }
我们这里为了显示出所有的部门信息,添加了一个model,把查询出来的部门信息都放入到model中,再把model的信息交给前端去显示出来,这个model叫departments
<option th:each="dept:${departments}" th:text="${dept.getDepartmentName()}" th:value="${dept.getId()}">
这样就可以把部门信息遍历出来
处理表单数据
我们写一个基本的表单
<form th:action="@{/emp}" method="post">
						<div class="form-group">
							<label>LastName</label>
							<input type="text" name="lastName"   class="form-control" placeholder="请输入姓名">
						</div>
						<div class="form-group">
							<label>Email</label>
							<input type="email" name="email"  class="form-control" placeholder="请输入邮箱">
						</div>
						<div class="form-group">
							<label>Gender</label><br>
							<div class="form-check form-check-inline">
								<input class="form-check-input" type="radio" name="gender" value="1">
								<label class="form-check-label">男</label>
							</div>
							<div class="form-check form-check-inline">
								<input class="form-check-input" type="radio" name="gender" value="0">
								<label class="form-check-label">女</label>
							</div>
						</div>
						<div class="form-group">
							<label>department</label>
							<select class="form-control" name="department.id">
								<!--我们在controller接收的是一个Employee,所以我们需要提交的就是其中一个属性!-->
								<option th:each="dept:${departments}" th:text="${dept.getDepartmentName()}" th:value="${dept.getId()}"></option>

							</select>
						</div>
						<div class="form-group">
							<label>Birth</label>
							<input type="text" name="birth" class="form-control" placeholder="日期">
						</div>
						<button type="submit" class="btn btn-primary">添加</button>
					</form>
我们设置为post请求,并把请求数据交给/emp去处理,但是这里虽然请求路径都一样,但是请求方法不一样,前面是get,这里是post请求,我们用postmapping即可区分
我们再Controller中处理请求
    @PostMapping("/emp")
    public String addEmp(Employee employee){
        System.out.println(employee);
        employeeDao.add(employee); //保存员工的信息
        //添加的操作  forword
        return "redirect:/emps";
    }
这里我们把前端的数据拿到之后,放入到employee中,并重定向到/emps中
我们在前面,设置了请求/emps会跳转到list.html,即可实现将数据返回给前端
   @RequestMapping("/emps")
    public String list(Model model){
        Collection<Employee> employees = employeeDao.getAll();
        model.addAttribute("emps",employees);
        return "list";
    }
修改员工信息
思路:
修改员工信息,首先需要通过点击按钮,然后把当前员工信息显示出来,然后把修改的信息交给后端处理并返回给前端。
跳转修改页面
我们在list.html的编辑按钮处,设置跳转,这个跳转需要添加当前id的参数
<a class="btn btn-sm btn-primary" th:href="@{/emp/{id}(id=${emp.getId()})}">编辑</a>
然后在Controller中接收并处理
//去员工的修改页面
    @GetMapping("/emp/{id}")
    public String  toUpdateEmp(@PathVariable("id") Integer id,Model model){
        //查出原来的数据
        Employee emploteeById = employeeDao.getEmploteeById(id);
        model.addAttribute("emp", emploteeById);
        //查询所有部门信息
        Collection<Department> departments = departmentDao.getDepartments();
        model.addAttribute("departments",departments);

        return "update";
    }
将后端数据返回给前端展示
上面可以把后端数据返回给update.html去显示出来。
<form th:action="@{/updateEmp}" method="post">
						<input type="hidden" name="id" th:value="${emp.getId()}">
						<div class="form-group">
							<label>LastName</label>
							<input th:value="${emp.getLastName()}" type="text" name="lastName"   class="form-control" placeholder="请输入姓名">
						</div>
						<div class="form-group">
							<label>Email</label>
							<input th:value="${emp.getEmail()}" type="email" name="email"  class="form-control" placeholder="请输入邮箱">
						</div>
						<div class="form-group">
							<label>Gender</label><br>
							<div class="form-check form-check-inline">
								<input th:checked="${emp.getGender()==1}" class="form-check-input" type="radio" name="gender" value="1">
								<label class="form-check-label">男</label>
							</div>
							<div class="form-check form-check-inline">
								<input th:checked="${emp.getGender()==0}" class="form-check-input" type="radio" name="gender" value="0">
								<label class="form-check-label">女</label>
							</div>
						</div>
						<div class="form-group">
							<label>department</label>
							<select class="form-control" name="department.id">
								<!--我们在controller接收的是一个Employee,所以我们需要提交的就是其中一个属性!-->
								<option th:selected="${dept.getId() == emp.getDepartment().getId()}" th:each="dept:${departments}" th:text="${dept.getDepartmentName()}" th:value="${dept.getId()}"></option>

							</select>
						</div>
						<div class="form-group">
							<label>Birth</label>
							<input  th:value="${#dates.format(emp.getBirth(),'yyyy-MM-dd HH:mm:ss')}" type="text" name="birth" class="form-control" placeholder="日期">
						</div>
						<button type="submit" class="btn btn-primary">修改</button>
					</form>
注意:我们这样修改信息,由于id是隐藏信息,并且我们设置自增,如果不去把id拿出来,那么修改之后只是新增数据,而不是修改原有数据
<input type="hidden" name="id" th:value="${emp.getId()}">
因此我们需要加入这句话,把id拿出来,再进行修改。
把修改后的数据返回给后端处理再返回出来
这里我们点击提交,交给Controller去接收
<form th:action="@{/updateEmp}" method="post">
    @PostMapping("/updateEmp")
    public String updateEmp(Employee employee){
        employeeDao.add(employee);
        return "redirect:/emps";
        }
我们把修改后的数据放入数据库中,并重定向回原来的表单页面。
删除员工信息以及404的处理和注销
接收前端数据
<a class="btn btn-sm btn-danger" th:href="@{/delemp/{id}(id=${emp.getId()})}">删除</a>
处理数据并返回
       //删除员工
    @GetMapping("/delemp/{id}")
    public String deleteEmp(@PathVariable("id") Integer id){
        employeeDao.delete(id);
        return "redirect:/emps";
    }
处理404
springboot处理404等其他错误变得非常简单,只需要在templates下面建立一个error文件夹,在error文件夹中放入我们的相关错误页面即可错误完成自动跳转。
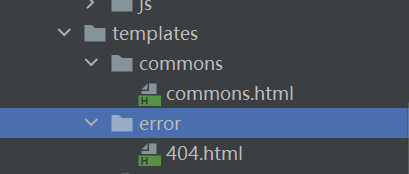
其他错误也是一样的,500错误就建一个500.html即可。
springboot的思想就是约束大于配置!
注销
思想:就是移除Session即可
    @RequestMapping("/user/logout")
    public String logout(HttpSession session){
        session.invalidate();
        return "redirect:/index.html";
    }


 1012
1012


 被折叠的 条评论
为什么被折叠?
被折叠的 条评论
为什么被折叠?
 到【灌水乐园】发言


