


Java:SpringBoot-员工管理系统
参考的代码和资源链接:https://blog.csdn.net/qq_45173404/article/details/108934414?spm=1001.2014.3001.5501
学习视频:B站 狂神说Java – https://www.bilibili.com/video/BV1PE411i7CV
SpringBoot回顾
SpringBoot其实就是去整合了Spring、spring mvc框架,整合了里面的配置信息,“约定大于配置”。
-
xxxAutoConfiguration 完成自动配置文件,给容器中导入非常多的自动配置类。即给容器中导入配置好的组件 bean信息。
使用时可以直接拿来使用,开箱即用。【不用再向原来mybatis、spring中那样写xml配置文件了】
-
内嵌了服务器,比如Tomcat、Jetty。简化了web项目开发,不用再自己启动配置tomcat
-
单体应用架构转化为微服务架构风格。
最重要的就是 SpringBoot自动装配原理了。
@SpringBootApplication
public class Springboot03WebApplication {
    public static void main(String[] args) {
        SpringApplication.run(Springboot03WebApplication.class, args);
    }
}
开启SpringBoot应用的注解是 @SpringBootApplication,它里面包括:
@Target(ElementType.TYPE)
@Retention(RetentionPolicy.RUNTIME)
@Documented
@Inherited
@SpringBootConfiguration
@EnableAutoConfiguration
@ComponentScan(excludeFilters = { @Filter(type = FilterType.CUSTOM, classes = TypeExcludeFilter.class),
		@Filter(type = FilterType.CUSTOM, classes = AutoConfigurationExcludeFilter.class) })
public @interface SpringBootApplication {
......
}
- @ComponentScan 的作用是指定包加入Spring IOC的包扫描,自动扫描并加载符合条件的bean 或组件。将bean定义加载到 IOC容器中。
- @SpringBootConfiguration 的作用是 表明这个类是springboot的配置类,里面保存的是配置信息,对应于spring中的xml配置文件
- @EnableAutoConfiguration :开启自动配置功能。原来我们需要自己去添加配置的东西,在SpringBoot中可以直接自动地帮我们配置。
配置文件:
-
自己定义 *.yaml 或者 *.properties 配置文件。然后可以去修改SpringBoot中默认的配置信息。
yaml语法:key: 空格 value
server: port: 8081 #选择要激活那个环境块 spring: profiles: active: prod --- server: port: 8082 spring: profiles: dev # 设置环境的名称 --- server: port: 8084 spring: profiles: prod # 设置环境的名称 person: name: alzn age: 18 happy: true birth: 2002/01/01 maps: {al: last name, zn: first name} lists: - learning - running - dancing dog: name: xiaohu age: 6- @ConfigurationProperties(加载配置文件的注解)对属性赋值
- **@PropertySource :**加载指定的配置文件;
-
利用注解开发自定义配置文件,
- 如mvc框架中的视图解析器:ViewResolver
- 将自定义的配置文件信息 注入到Bean中,由SpringBoot帮我们去装配,组合所有的配置信息
// 如果你想要 div 一些定制的功能,只要写这个组件,然后把它交给springboot,springboot就会帮我们装配
// 扩展 springmvc  围绕着核心 dispatchservlet
@Configuration
public class MyMvcConfig implements WebMvcConfigurer {

    // ViewResolver 实现了视图解析器接口的类。 我们就可以把这个当作视图解析器
    @Bean //放到bean中。通过方法注册一个bean,这里的返回值就Bean的类型,方法名就是bean的id!
    public ViewResolver myViewResolver(){
        return new MyViewResolver();
    }

    //我们写一个静态内部类,视图解析器就需要实现ViewResolver接口
    private static class MyViewResolver implements ViewResolver{
        @Override
        public View resolveViewName(String s, Locale locale) throws Exception {
            return null;
        }
    }
}
thymeleaf模板引擎:同样也是为了简化web开发,直接继承 thymeleaf模板引擎。
模板引擎的作用就是帮助我们写了一个页面模板,比如有些值是动态的,我们写一些表达式。而这些值,从哪来呢,就是我们在后台封装一些数据。然后把这个模板和这个数据交给我们模板引擎,模板引擎按照我们这个数据帮你把这表达式解析、填充到我们指定的位置,然后把这个数据最终生成一个我们想要的内容给我们写出去,这就是我们这个模板引擎,不管是jsp还是其他模板引擎,都是这个思想。
在使用SpringBoot进行开发的时候,自己要解决的、参与的工作是:
- 导入静态资源。配置资源文件:*.properties、 *.yaml
- jsp、thymeleaf模板引擎。便于简化开发,动态的资源数据信息,代码去提供。thymeleaf模板引擎提供一个固定的页面
- 装配和扩展 SpringMVC。自己定义的关于 WebMvcConfigurer 的mvcConfig配置信息;SpringBoot中包含的默认mvc配置信息。
@EnableWebMvc // 这个就是导入了一个类: DelegatingWebMvcConfiguration: 从容器中获取所有的 webmvcConfig
@EnableWebMvc 将 WebMvcConfigurationSupport 组件 导入进来了;而导入的 WebMvcConfigurationSupport 只是SpringMVC最基本的功能!此时我们全面接管SpringMVC。
SpringBoot:员工管理系统
SpringBoot web开发
jar:webapp
自动装配:
- 创建应用,选择模块
Springboot到底帮我们配置了什么? 我们能不能进行修改? 能修改哪些东西?能不能扩展?
-
xxxxAutoConfigurartion:自动配置类;给容器中添加组件
-
xxxxProperties: 封装配置文件中相关属性;
其实SpringBoot的东西用起来非常简单,因为SpringBoot最大的特点就是自动装配。
使用SpringBoot的步骤:
1、创建一个SpringBoot应用,选择我们需要的模块,SpringBoot就会默认将我们的需要的模块自动配置好
2、手动在配置文件中配置部分配置项目就可以运行起来了
3、专注编写业务代码,不需要考虑以前那样一大堆的配置了。
我们在利用 Springboot的时候,能够利用和修改哪些配置,以及增加配置文件呢? 如下所示,我们最终是要通过这两个去进行 环境配置:
- 向容器中自动配置组件 :xxxAutoconfiguration
- 自动配置类,封装配置文件的内容:xxxProperties
我们在进行 springboot web 开发要解决的问题:
- 导入静态资源
- 首页
- jsp、模板引擎Thymeleaf
- 装配扩展 SpringMVC
- 增删查改
- 拦截器
- 国际化
参考的代码和资源链接:https://blog.csdn.net/qq_45173404/article/details/108934414?spm=1001.2014.3001.5501
1、环境搭建
新建一个SpringBoot项目:springboot-03-system。
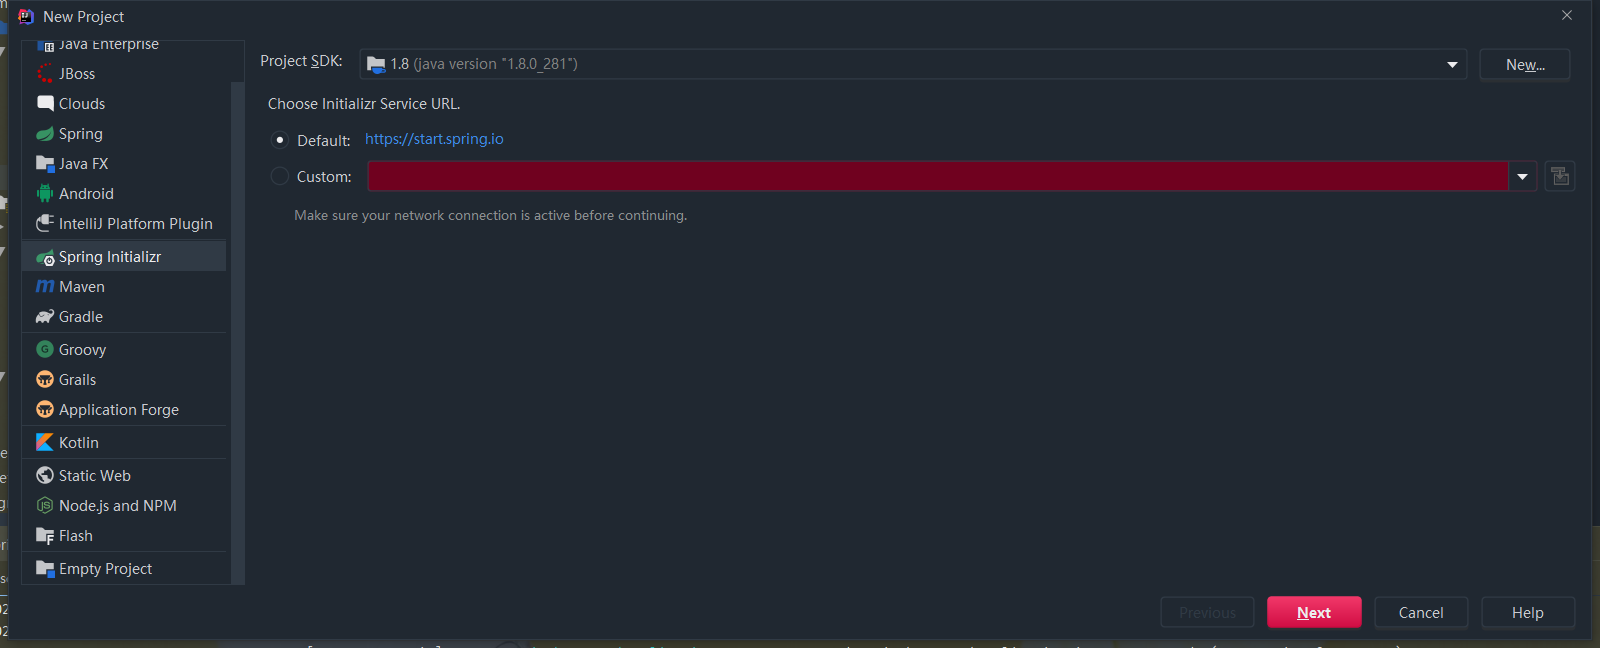
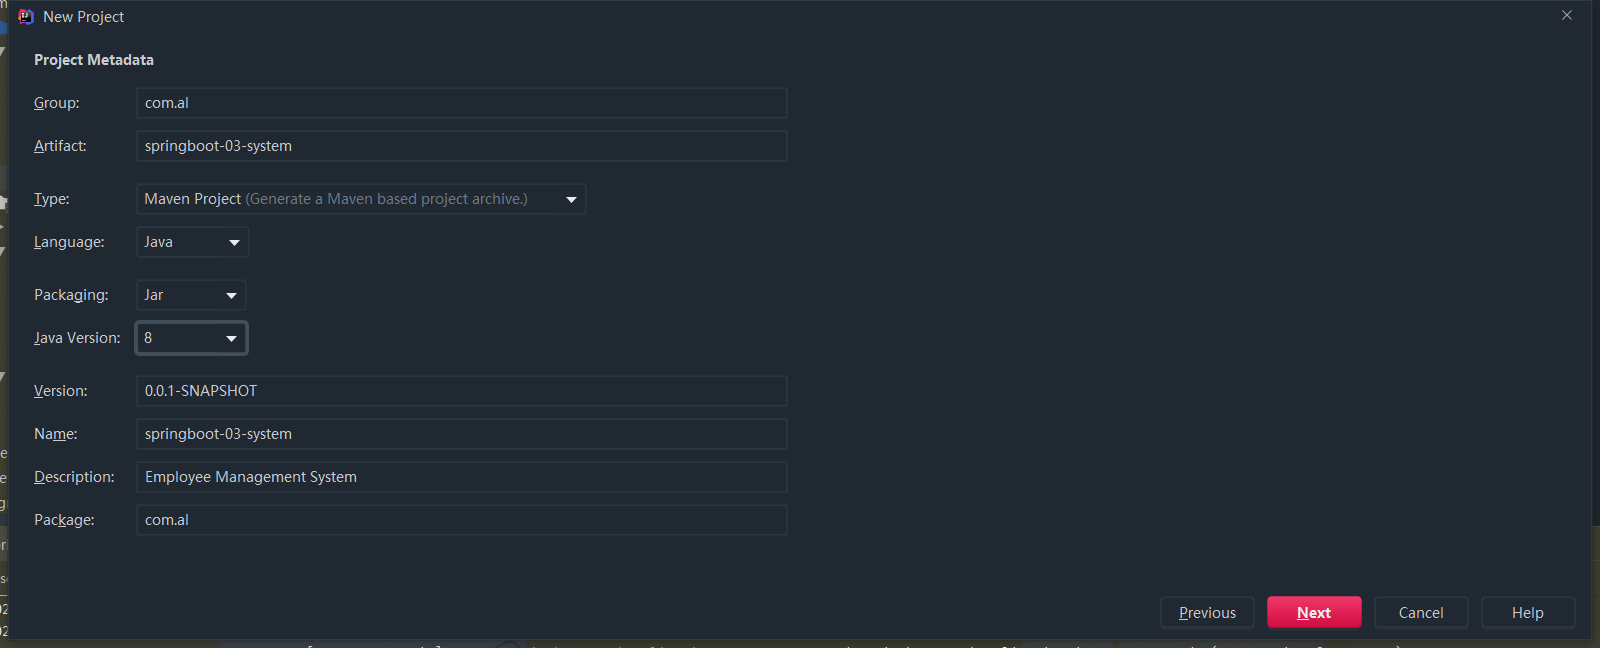
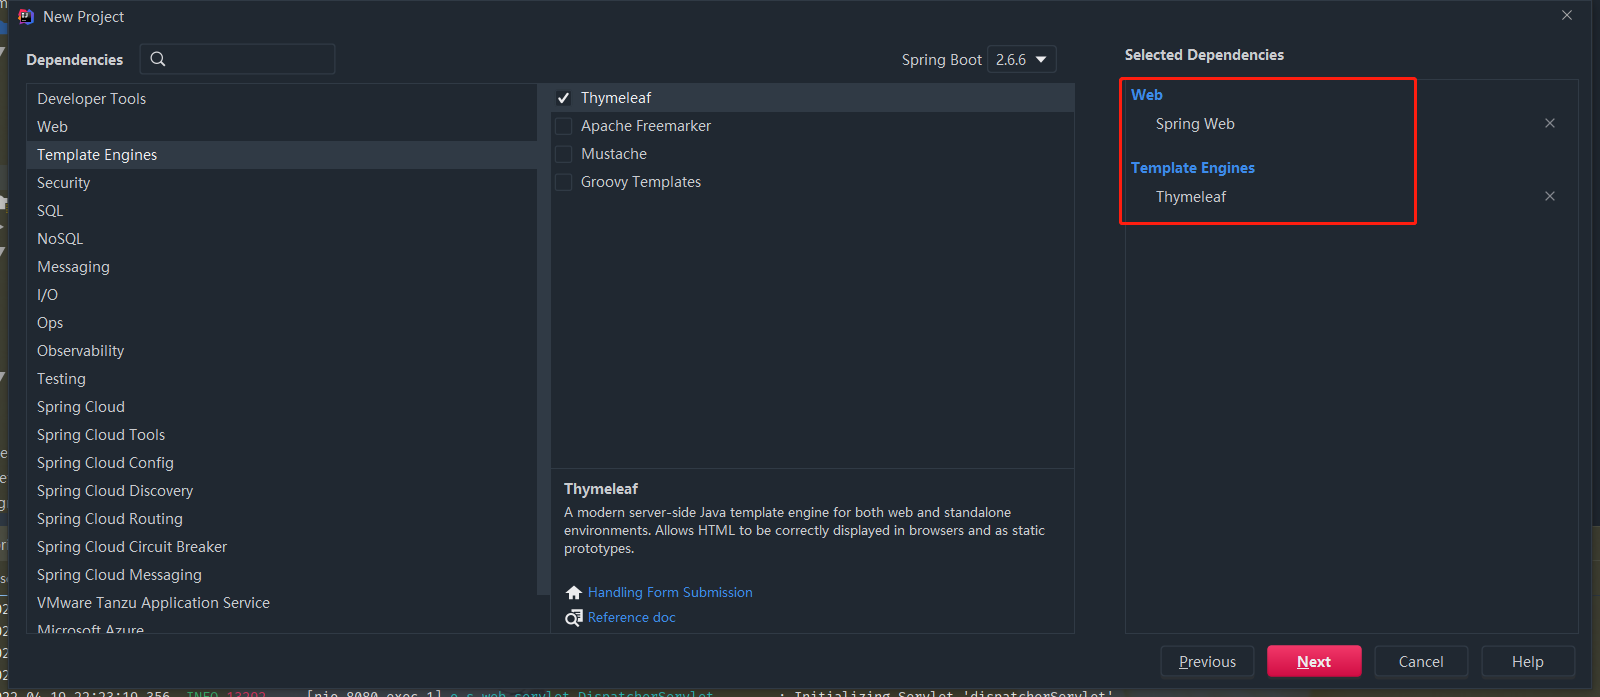
选择pom依赖文件:SpringWeb 和Thymeleaf模板引擎
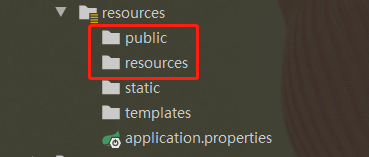
导入静态资源
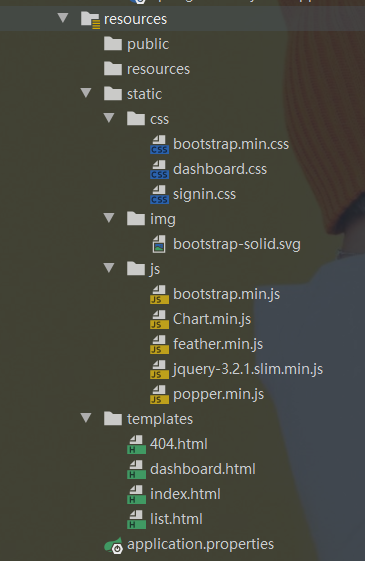
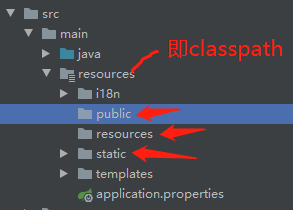
创建不存在的静态资源目录 public 和 resources,便于添加我们想要自定义的静态资源。
SpringBoot中的静态资源导入:【SpringBoot中,SpringMVC的web配置都在 WebMvcAutoConfiguration 这个配置类里面】
- 两种映射规则:“classpath:/META-INF/resources/”、“classpath:/resources/”、“classpath:/static/”、“classpath:/public/”
- 自定义静态资源路径
所有的 /webjars/** , 都需要去 classpath:/META-INF/resources/webjars/ 找对应的资源
静态资源文件:
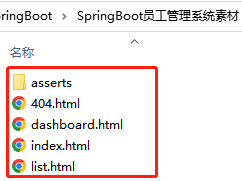
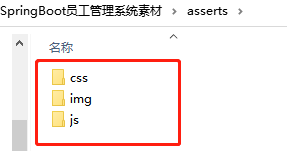
把静态资源文件导入到对应文件夹中:
- 将 html 静态资源放置 templates 目录下
- 将 asserts 目录下的 css、img、js 等静态资源放置 static 目录下
数据库的创建
创建一个伪数据库,进行数据库的模拟。
导入lombok,便于使用注解开发:
<dependency>
 <groupId>org.projectlombok</groupId>
 <artifactId>lombok</artifactId>
</dependency>
实体类:pojo
创建实体类:Department 部门表
package com.al.pojo;

import lombok.AllArgsConstructor;
import lombok.Data;
import lombok.NoArgsConstructor;

// 部门表
@Data
@AllArgsConstructor
@NoArgsConstructor
public class Department {
    private Integer id;
    private String departmentName;
}
员工表:
- 设置一对多和多对一。员工和部门的关系。
- 性别没有使用char类型,使用Integr
package com.al.pojo;

import lombok.Data;
import lombok.NoArgsConstructor;

import java.util.Date;

// 员工表
@Data
@NoArgsConstructor
public class Employee {
    private Integer id;
    private String lastName;
    private String email;
    private Integer gender; // 0:女  1:男。 用数字表示性别男女
    private Department department;
    private Date birth;

    public Employee(Integer id, String lastName, String email, Integer gender, Department department, Date birth) {
        this.id = id;
        this.lastName = lastName;
        this.email = email;
        this.gender = gender;
        this.department = department;
        // 默认的创建日期
        //this.birth = birth;
        this.birth = new Date();
    }
}
dao层
创建dao层:dao层,负责底层数据的操作。
Bean的注解开发:
@Component 通常是通过类路径扫描来⾃动侦测以及⾃动装配到Spring容器中。@Component 表明会将这个类交给 Spring管理装配,它与@Bean的不同之处在于,它作用在类上。注册一个类的实例到Spring IOC 容器。需要的时候,从里面去获取。
为了更好的进行分层,在 web 开发中,会按照 mvc 三层架构分层。Spring可以使用其它三个注解,功能一样,目前使用哪一个功能都一样。
- @Controller:web层
- @Service:service层
- @Repository:dao层
Bean的自动装配配置:
- @Autowired: 自动装配 通过类型,名字
- 如果@Autowired 不能唯一自动装配属性,则还需要通过 @Qualifier(value = “xxx”)
- @Nullable: 字段标注了这个注解,表示这个字段可以为 null
- @Resource:自动装配 通过名字, 类型。先去匹配byName,后去进行byType。
部门dao类:
DepartmentDao:将此类注入到Spring IOC容器中,dao层使用注解 @Repository。
-
模拟数据库中的部门数据。采用map表示。
-
Map<Integer, Department> departments; // Integer代替数据库表id,Department表示数据库表中部门的具体信息。
package com.al.dao;


import com.al.pojo.Department;
import org.springframework.stereotype.Repository;

import java.util.Collection;
import java.util.HashMap;
import java.util.Map;

// 部门dao
@Repository
public class DepartmentDao {

    // 模拟数据库表中的数据
    private static Map<Integer, Department> departments = null;
    static {
        // 创建一个部门表
        departments = new HashMap<>();
        departments.put(101, new Department(101, "户部"));
        departments.put(102, new Department(102, "兵部"));
        departments.put(103, new Department(103, "吏部"));
        departments.put(104, new Department(104, "刑部"));
        departments.put(105, new Department(105, "礼部"));
        departments.put(106, new Department(106, "工部"));
    }

    // 获取所有的部门信息
    public Collection<Department> getDepartments(){
        return departments.values();
    }

    // 通过id获取部门信息
    public Department getDepartmentById(Integer id){
        return departments.get(id);
    }
}
员工dao类:
EmployeeDao类:需要去继承DepartmentDao 这个部门dao,获取这样的一个类实例,所以
-
使用注解@Autowired 获取DapartmentDao的一个实例。
-
模拟数据库中的员工表数据。采用map表示:private static Map<Integer, Employee> employees = null;
package com.al.dao;

import com.al.pojo.Department;
import com.al.pojo.Employee;
import org.springframework.beans.factory.annotation.Autowired;
import org.springframework.stereotype.Repository;

import java.util.Collection;
import java.util.Date;
import java.util.HashMap;
import java.util.Map;

// 员工Dao
@Repository
public class EmployeeDao {
    // 模拟数据库表中的员工数据信息
    private static Map<Integer, Employee> employees = null;
    // 员工所属部门
    @Autowired
    private static DepartmentDao departmentDao;

    static {
        employees = new HashMap<>();
        employees.put(1001, new Employee(1001, "AAA", "1356207897@qq.com", 1, new Department(101, "户部"), new Date()));
        employees.put(1002, new Employee(1002, "BBB", "1356207897@qq.com", 0, new Department(102, "兵部"), new Date()));
        employees.put(1003, new Employee(1003, "CCC", "1356207897@qq.com", 1, new Department(103, "吏部"), new Date()));
        employees.put(1004, new Employee(1004, "DDD", "1356207897@qq.com", 0, new Department(104, "刑部"), new Date()));
        employees.put(1005, new Employee(1005, "EEE", "1356207897@qq.com", 1, new Department(105, "礼部"), new Date()));
    }

    // 主键自增
    private static Integer initId = 1006;

    // 增加一个员工
    public void addEmployee(Employee employee){
        if (employee.getId() == null){
            employee.setId(initId++);
        }
        employee.setDepartment(departmentDao.getDepartmentById(employee.getDepartment().getId()));
        employees.put(employee.getId(), employee);
    }

    // 查询所有员工信息
    public Collection<Employee> getAll(){
        return employees.values();
    }

    // 通过id查询员工信息
    public Employee getEmployeeById(Integer id){
        return employees.get(id);
    }

    //通过id删除员工
    public void deleteEmployeeByID(int id) {
        employees.remove(id);
    }
}
2、首页实现
首页实现:自定义配置类 MyMvcConfig
首页控制,使导入的templates中的静态资源有效。利用该自定义的静态资源,需要提供静态资源配置文件。
- 在 templates目录下的所有页面,只能通过 controller来跳转。这个需要模板引擎的支持。如 thymeleaf。
在控制器 controller中,进行首页控制,IndexController:
package com.al.controller;

import org.springframework.stereotype.Controller;
import org.springframework.web.bind.annotation.RequestMapping;

@Controller
public class IndexController {
    @RequestMapping({"/", "/index.html"}) //这是一个集合
    public String index(){
        return "index";
    }
}
不过最好我们采用这种方式去进行对根目录下的访问:【采用自定义配置 资源文件的方式】
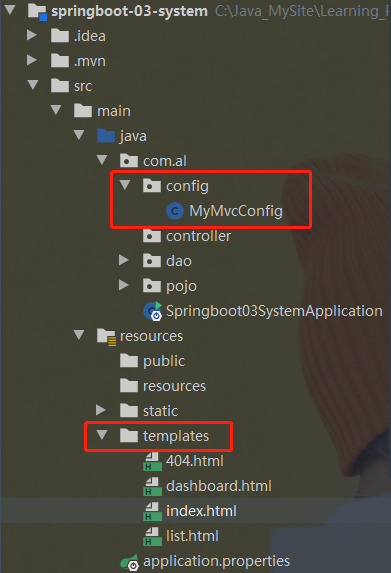
在主程序同级目录下新建 config 包用来存放自己的配置类:
- 新建自定义配置类 MyMvcConfig,进行视图跳转
package com.al.config;

import org.springframework.context.annotation.Configuration;
import org.springframework.web.servlet.config.annotation.ViewControllerRegistry;
import org.springframework.web.servlet.config.annotation.WebMvcConfigurer;

@Configuration
public class MyMvcConfig implements WebMvcConfigurer {

    @Override
    public void addViewControllers(ViewControllerRegistry registry) {
        registry.addViewController("/").setViewName("index");
        registry.addViewController("/index.html").setViewName("index");
    }
}
启动浏览器测试,观察界面:界面可以访问,但是不理想
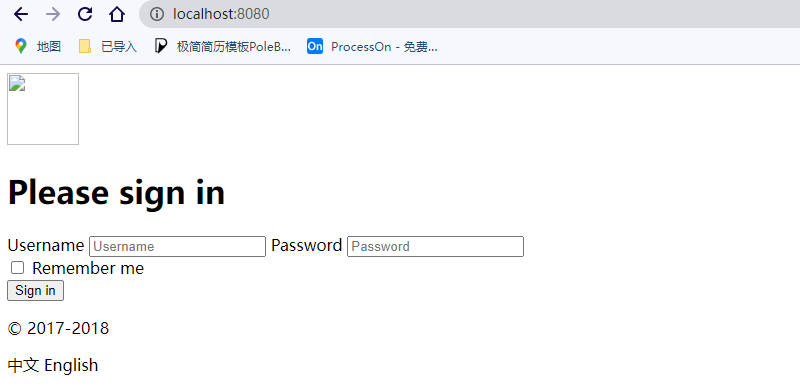
想要直接去访问 template 文件夹路径下的静态资源,需要引入模板引擎。这里采用 SpringBoot中的 thymeleaf 。
- 导入thymeleaf的依赖
- 在 index中就需要导入 thymeleaf
- 语法要使用thymeleaf语法,URL路径要用@{…}
回顾:静态资源映射规则
创建有效的静态资源路径 文件夹:而其中的classpath:/META-INF/resource/ 这个就对应着上面的那个webjars 资源路径。
"classpath:/META-INF/resources/"
"classpath:/resources/"
"classpath:/static/"
"classpath:/public/"
-
classpath对应的文件夹等级就是 resources 资源文件夹。
-
我们创建以下的几个文件夹,都能够存放我们的静态文件:【可以直接获取该路径下的静态资源文件】
首页实现:thymeleaf模板引擎
上述测试的时候,发现页面中的图片没有加载出来,且css和js的样式并没有显示。 这是因为 想要直接去访问 template 文件夹路径下的静态资源,需要引入模板引擎。
在SpringBoot中,推荐使用Thymeleaf作为模板引擎,我们将其中的语法改为Thymeleaf,所有页面的静态资源都需要使用模板引擎接管,里面的动态数据由后端提供。前面页面需要符合 thymeleaf语法。
Selection Variable Expressions: *{…}:选择表达式:和${}在功能上是一样;
Message Expressions: #{…}:获取国际化内容
Link URL Expressions: @{…}:定义URL;
Fragment Expressions: ~{…}:片段引用表达式
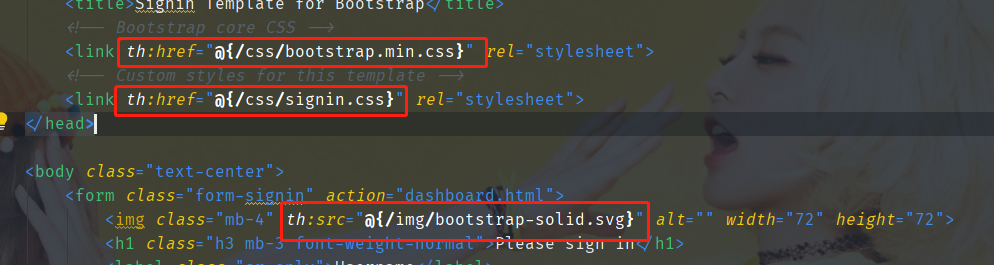
在index.html页面中:
-
引入thymeleaf:
<html lang="en" xmlns:th="http://www.thymeleaf.org"> -
第一个
/代表项目的classpath,也就是这里的resources目录。 直接获取 “classpath:/static/” 路径下的资源文件: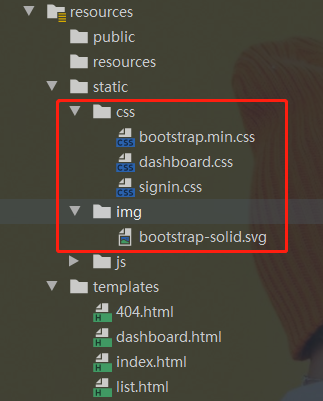
-
thymeleaf语法中 定义URL的方式:@{}
index.html:
<!DOCTYPE html>
<html lang="en" xmlns:th="http://www.thymeleaf.org">
	<head>
		<meta http-equiv="Content-Type" content="text/html; charset=UTF-8">
		<meta name="viewport" content="width=device-width, initial-scale=1, shrink-to-fit=no">
		<meta name="description" content="">
		<meta name="author" content="">
		<title>Signin Template for Bootstrap</title>
		<!-- Bootstrap core CSS -->
		<link th:href="@{/css/bootstrap.min.css}" rel="stylesheet">
		<!-- Custom styles for this template -->
		<link th:href="@{/css/signin.css}" rel="stylesheet">
	</head>

	<body class="text-center">
		<form class="form-signin" action="dashboard.html">
			<img class="mb-4" th:src="@{/img/bootstrap-solid.svg}" alt="" width="72" height="72">
			<h1 class="h3 mb-3 font-weight-normal">Please sign in</h1>
			<label class="sr-only">Username</label>
			<input type="text" class="form-control" placeholder="Username" required="" autofocus="">
			<label class="sr-only">Password</label>
			<input type="password" class="form-control" placeholder="Password" required="">
			<div class="checkbox mb-3">
				<label>
          <input type="checkbox" value="remember-me"> Remember me
        </label>
			</div>
			<button class="btn btn-lg btn-primary btn-block" type="submit">Sign in</button>
			<p class="mt-5 mb-3 text-muted">© 2017-2018</p>
			<a class="btn btn-sm">中文</a>
			<a class="btn btn-sm">English</a>
		</form>

	</body>

</html>
测试访问结果:
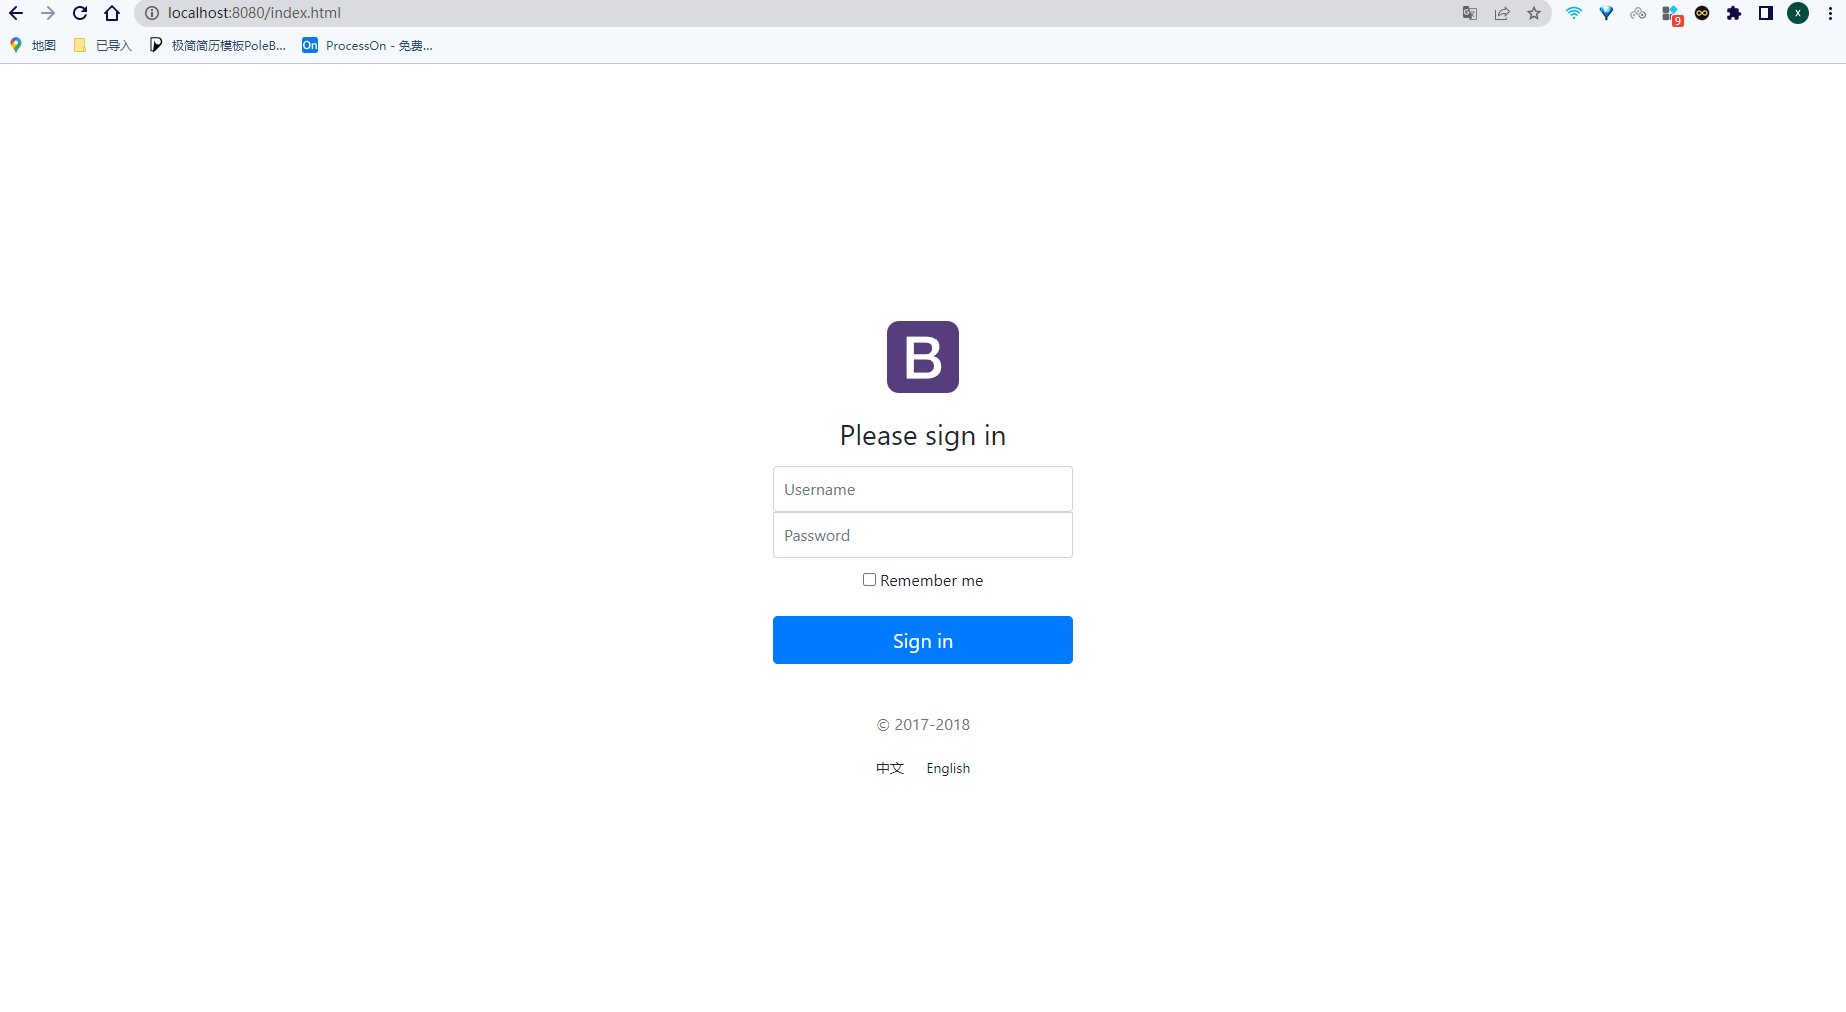
其它页面进行同样的修改。
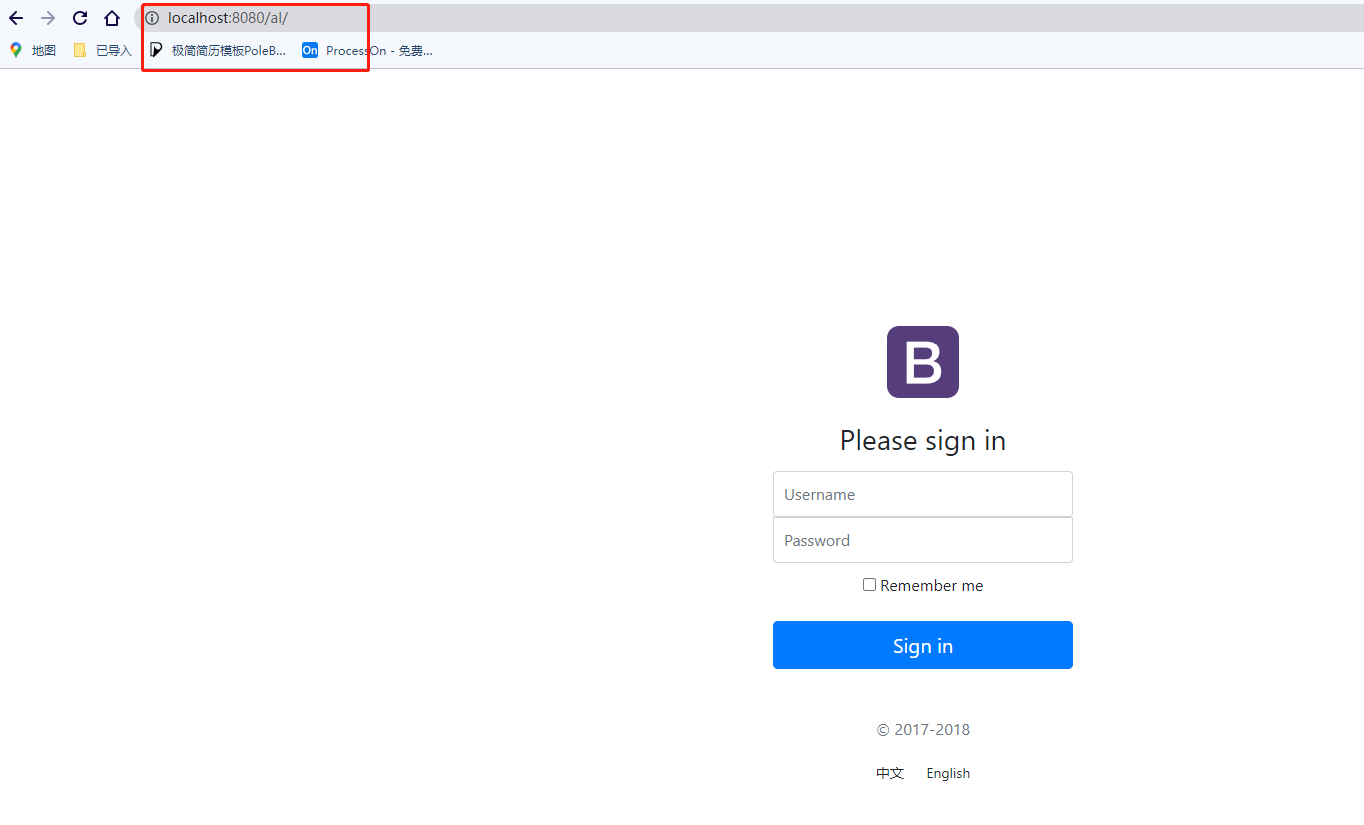
配置首页的时候:可以在这里自己自行定义 目录, 此时 localhost:8080失效,必须是 localhost:8080/al
- application.properties 配置资源文件:
server.servlet.context-path=/al
此时的测试结果:ulr请求路径必须是:http://localhost:8080/al/
3、页面国际化
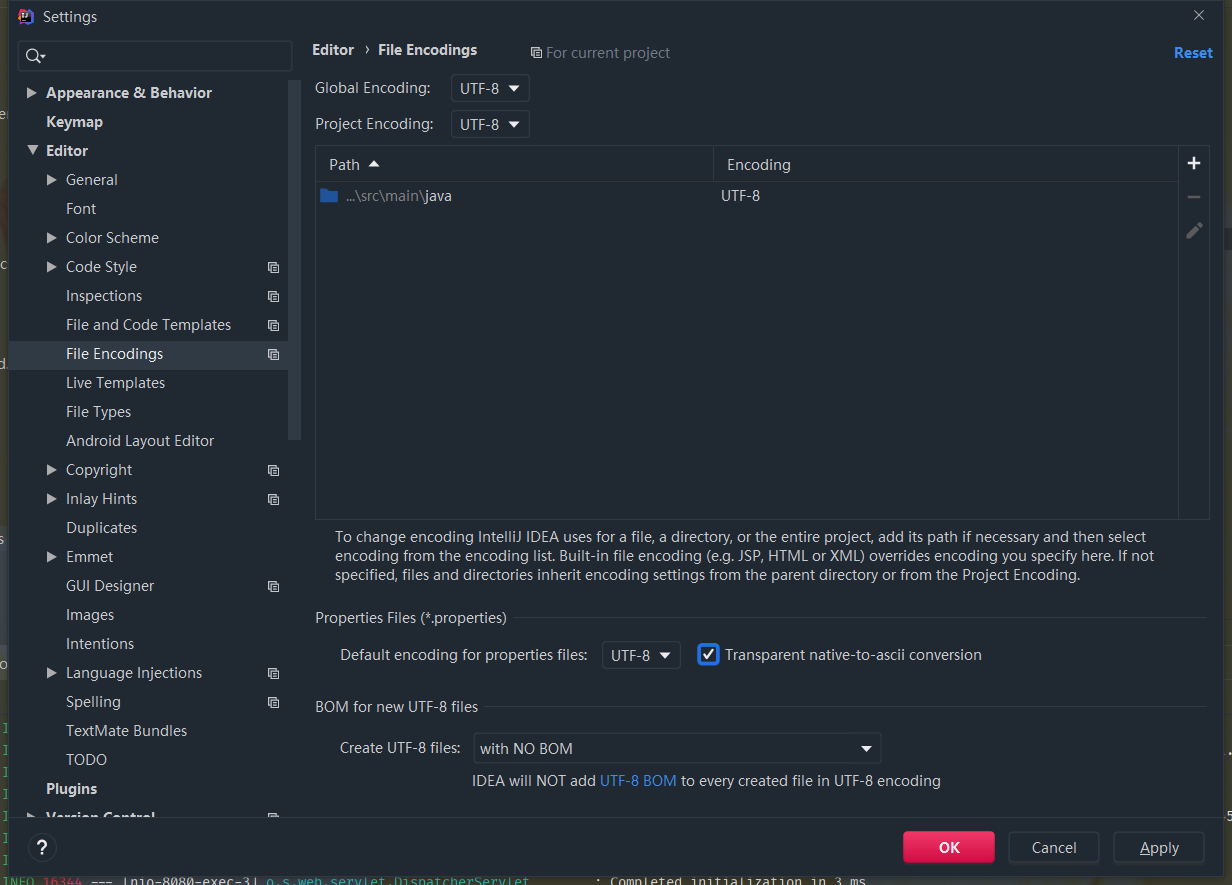
IDEA中编码设置:UTF-8
首先在 setting -> FileEncodings中 必须要确保编码为 UTF-8, 不然写的东西会乱码。
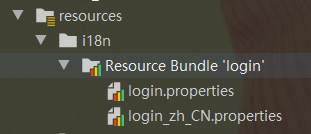
i18n国际化资源配置文件
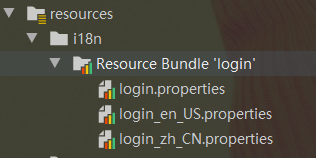
在静态资源中创建一个 i18n文件,国际化:
在这其中分别创建两个配置文件:
-
命名方式是下划线的组合:文件名
_语言_国家.properties;以此方式命名,IDEA会帮我们识别这是个国际化配置包,自动绑定在一起转换成如下的模式:
-
login.properties 和 login_zh_CN.properties, 然后IDEA会自动帮你合并:
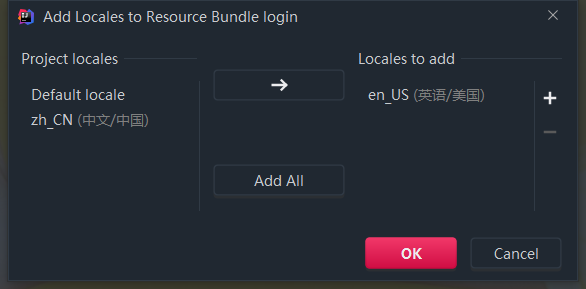
如果再添加其它配置文件:选择Resource Bundle ‘login’,右键点击添加即可:

此时只需要输入区域名即可创建成功,比如输入 en_US,就会自动识别
此时的i18n文件下的配置资源文件:
在编写login资源配置文件时:可以选择左下角的 Resource Bundle进行可视化编写:
- 进入到可视化编辑页面后,点击加号 + ,添加属性,首先新建一个 login.tip 代表首页中的提示
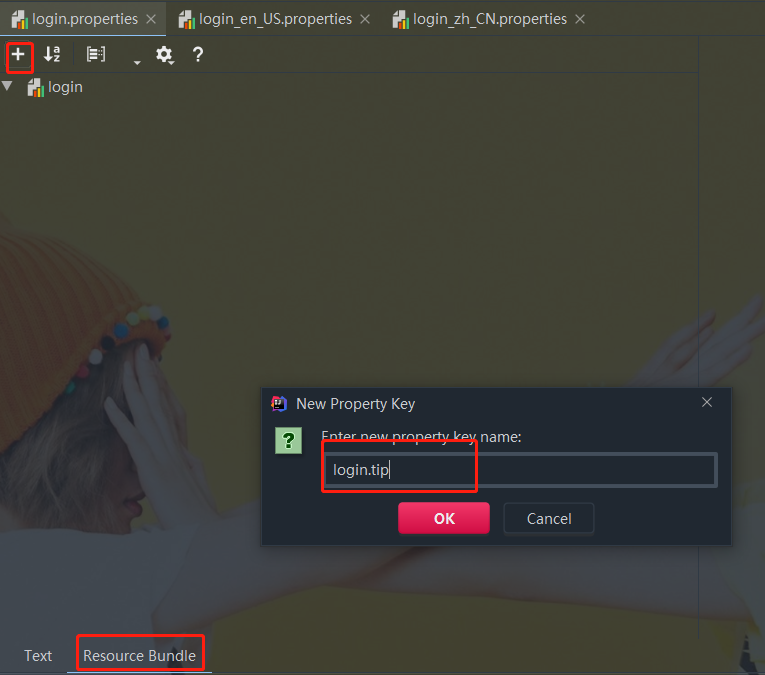
然后对这种提示,去分别做语言配置:在输入框中写入相应的语言提示
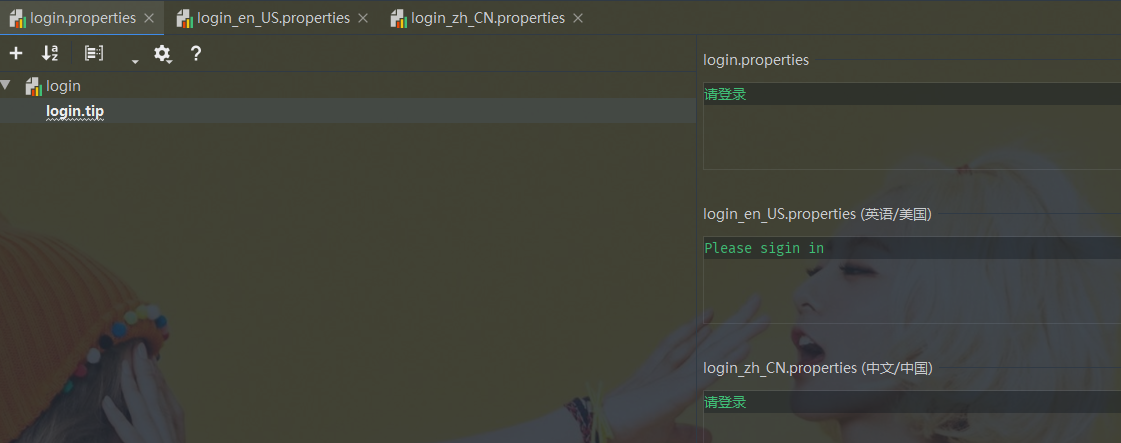
login.properties:
login.btn=登录
login.password=密码
login.remember=记住我
login.tip=请登录
login.username=用户名
login_zh_CN.properties:
login.btn=登录
login.password=密码
login.remember=记住我
login.tip=请登录
login.username=用户名
login_en_US.properties:
login.btn=login
login.password=password
login.remember=remember
login.tip=Please sigin in
login.username=suaername
那么如何让我们配置的这些生效呢?
-
在Spring程序中,国际化主要是通过ResourceBundleMessageSource这个类来实现的
-
Spring Boot通过MessageSourceAutoConfiguration为我们自动配置好了管理国际化资源文件的组件
查看源码MessageSourceAutoConfiguration,
- 寻找Meaasge, 找到它的前缀。@ConfigurationProperties(prefix = “spring.messages”)
@Configuration(proxyBeanMethods = false)
@ConditionalOnMissingBean(name = AbstractApplicationContext.MESSAGE_SOURCE_BEAN_NAME, search = SearchStrategy.CURRENT)
@AutoConfigureOrder(Ordered.HIGHEST_PRECEDENCE)
@Conditional(ResourceBundleCondition.class)
@EnableConfigurationProperties
public class MessageSourceAutoConfiguration {

	private static final Resource[] NO_RESOURCES = {};

	@Bean
	@ConfigurationProperties(prefix = "spring.messages")
	public MessageSourceProperties messageSourceProperties() {
		return new MessageSourceProperties();
	}

	@Bean
	public MessageSource messageSource(MessageSourceProperties properties) {
		ResourceBundleMessageSource messageSource = new ResourceBundleMessageSource();
		if (StringUtils.hasText(properties.getBasename())) {
			messageSource.setBasenames(StringUtils
					.commaDelimitedListToStringArray(StringUtils.trimAllWhitespace(properties.getBasename())));
		}
		if (properties.getEncoding() != null) {
			messageSource.setDefaultEncoding(properties.getEncoding().name());
		}
		messageSource.setFallbackToSystemLocale(properties.isFallbackToSystemLocale());
		Duration cacheDuration = properties.getCacheDuration();
		if (cacheDuration != null) {
			messageSource.setCacheMillis(cacheDuration.toMillis());
		}
		messageSource.setAlwaysUseMessageFormat(properties.isAlwaysUseMessageFormat());
		messageSource.setUseCodeAsDefaultMessage(properties.isUseCodeAsDefaultMessage());
		return messageSource;
	}
    ...
}
关于 messageSource 方法中的参数:MessageSourceProperties properties。
MessageSourceProperties 类:
public class MessageSourceProperties {
	/**
	 * Comma-separated list of basenames (essentially a fully-qualified classpath
	 * location), each following the ResourceBundle convention with relaxed support for
	 * slash based locations. If it doesn't contain a package qualifier (such as
	 * "org.mypackage"), it will be resolved from the classpath root.
	 */
	private String basename = "messages";
	/**
	 * Message bundles encoding.
	 */
	private Charset encoding = StandardCharsets.UTF_8;
    ...
}
注释的意思:
* 逗号分隔的基本名称列表(本质上是完全限定的类路径 location),每个都遵循 ResourceBundle 约定,并轻松支持
*基于斜线的位置。 如果它不包含包限定符(例如"org.mypackage"),它将从类路径根目录中解析。
意思是:如果你不在springboot配置文件中指定以.分隔开的国际化资源文件名称的话,它默认会去类路径下找messages.properties作为国际化资源文件。
自定义国际化资源文件,因此我们需要在SpringBoot配置文件application.properties中加入以下配置指定我们配置文件的名称
- 我们对配置文件的真实位置(i18n.login),修改后:
#自定义配置:国际化资源文件
spring.messages.basename=i18n.login
Message Expressions: #{…}:获取国际化内容
对于国际化 message如何写:thymeleaf 中 表示message 的语法为 #{…}
-
<label> <input type="checkbox" value="remember-me" th:text="#{login.remember}"> <input type="checkbox" value="remember-me"> [[#{login.remember}]] </label> -
修改的地方:【对应着前端页面显示的地方】
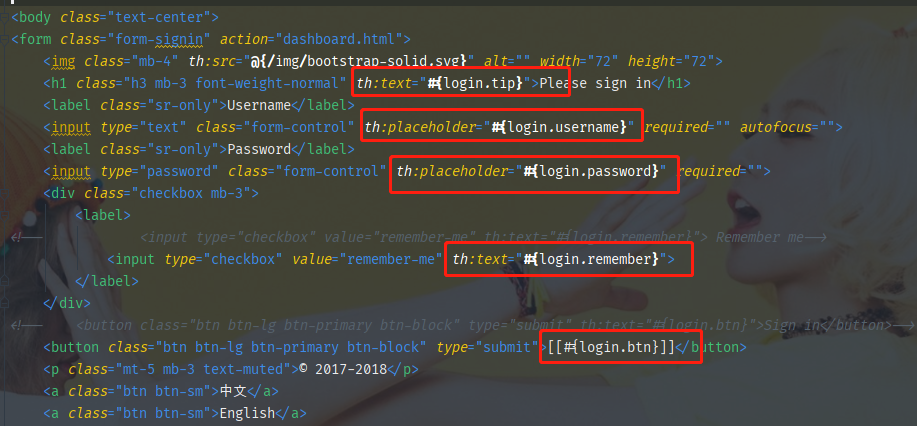
此时的index.html 代码:
<!DOCTYPE html>
<html lang="en" xmlns:th="http://www.thymeleaf.org">
<head>
    <meta http-equiv="Content-Type" content="text/html; charset=UTF-8">
    <meta name="viewport" content="width=device-width, initial-scale=1, shrink-to-fit=no">
    <meta name="description" content="">
    <meta name="author" content="">
    <title>Signin Template for Bootstrap</title>
    <!-- Bootstrap core CSS -->
    <link th:href="@{/css/bootstrap.min.css}" rel="stylesheet">
    <!-- Custom styles for this template -->
    <link th:href="@{/css/signin.css}" rel="stylesheet">
</head>

<body class="text-center">
<form class="form-signin" action="dashboard.html">
    <img class="mb-4" th:src="@{/img/bootstrap-solid.svg}" alt="" width="72" height="72">
    <h1 class="h3 mb-3 font-weight-normal" th:text="#{login.tip}">Please sign in</h1>
    <label class="sr-only">Username</label>
    <input type="text" class="form-control" th:placeholder="#{login.username}" required="" autofocus="">
    <label class="sr-only">Password</label>
    <input type="password" class="form-control" th:placeholder="#{login.password}" required="">
    <div class="checkbox mb-3">
        <label>
<!--            <input type="checkbox" value="remember-me" th:text="#{login.remember}"> Remember me-->
            <input type="checkbox" value="remember-me" th:text="#{login.remember}">
        </label>
    </div>
<!--    <button class="btn btn-lg btn-primary btn-block" type="submit" th:text="#{login.btn}">Sign in</button>-->
    <button class="btn btn-lg btn-primary btn-block" type="submit">[[#{login.btn}]]</button>
    <p class="mt-5 mb-3 text-muted">© 2017-2018</p>
    <a class="btn btn-sm">中文</a>
    <a class="btn btn-sm">English</a>
</form>

</body>

</html>
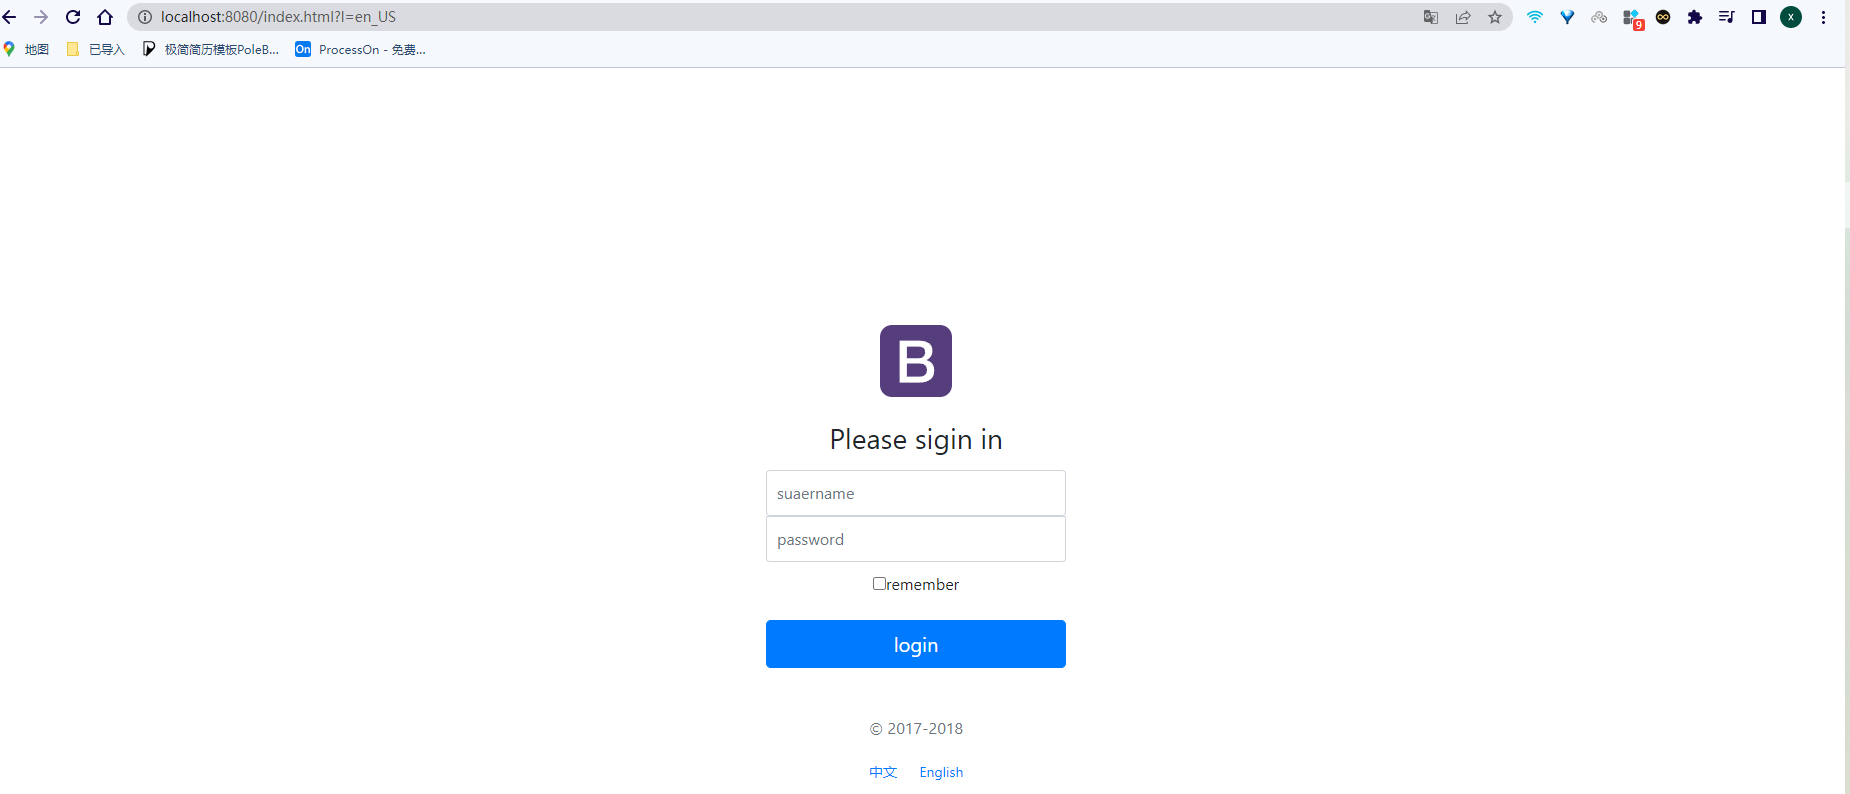
此时的测试:首页:
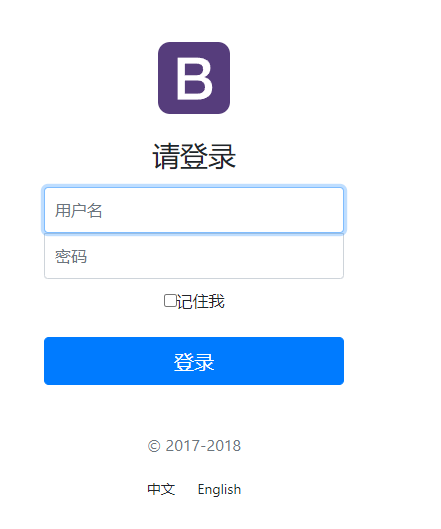
国际化组件的中英文切换
切换方式
如何通过按钮 进行中英文的转换?在index.html页面中可以看到两个标签:
    <a class="btn btn-sm">中文</a>
    <a class="btn btn-sm">English</a>
在标签中加入跳转链接,点击后进行响应跳转,获取对应的信息资源参数:
<!--这里传入参数不需要使用?使用key=value-->
<a class="btn btn-sm" th:href="@{/index.html(l='zh_CN')}">中文</a>
<a class="btn btn-sm" th:href="@{/index.html(l='en_US')}">English</a>
自定义地区解析组件
Spring源码中关于国际化的类有:
Locale:代表地区,每一个Locale对象都代表了一个特定的地理、政治和文化地区LocaleResolver:地区解析器
分析:
消息语言转换的类:AcceptHeaderLocaleResolver,实现接口 LocaleResolver
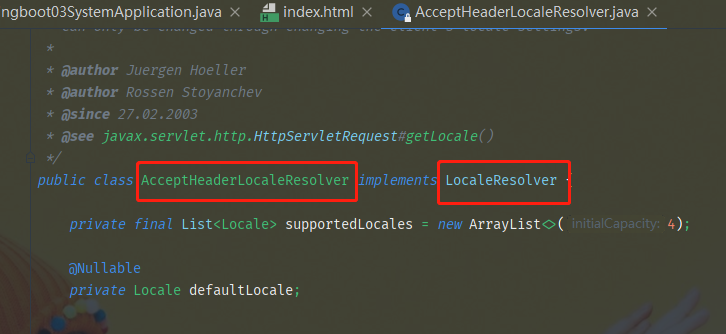
LocaleResolver:
public interface LocaleResolver {
	Locale resolveLocale(HttpServletRequest request);

	void setLocale(HttpServletRequest request, @Nullable HttpServletResponse response, @Nullable Locale locale);

}
在WebMvcAutoConfiguration 类中寻找 LocaleResolver:
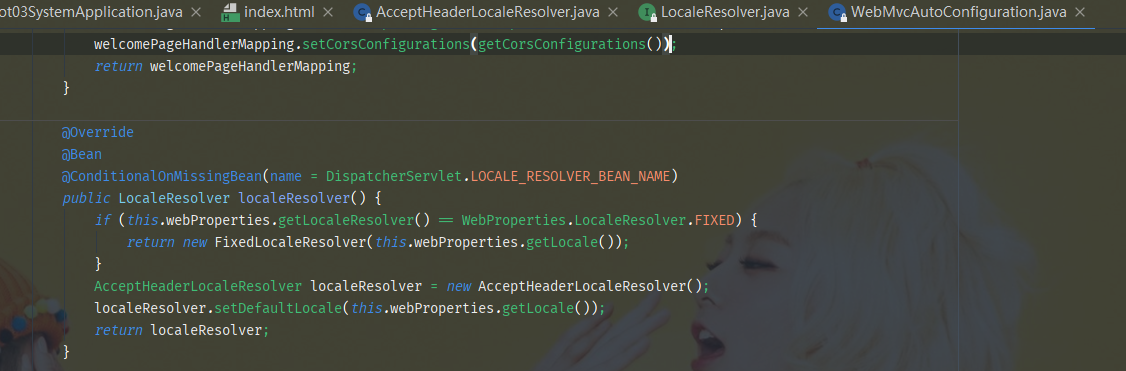
		@Override
		@Bean
		@ConditionalOnMissingBean(name = DispatcherServlet.LOCALE_RESOLVER_BEAN_NAME)
		public LocaleResolver localeResolver() {
            //如果用户配置了,则使用用户配置好的
			if (this.webProperties.getLocaleResolver() == WebProperties.LocaleResolver.FIXED) {
				return new FixedLocaleResolver(this.webProperties.getLocale());
			}
            //用户没有配置,则使用默认的
			AcceptHeaderLocaleResolver localeResolver = new AcceptHeaderLocaleResolver();
			localeResolver.setDefaultLocale(this.webProperties.getLocale());
			return localeResolver;
		}
经过寻找后发现只要完成了 接口实现类 LocalResolver,就能完成 地区语言转换。该方法就是获取LocaleResolver地区对象解析器:
- 如果用户配置了则使用用户配置的地区解析器;
- 如果用户没有配置,则使用默认的地区解析器
在消息语言转换的类 AcceptHeaderLocaleResolver中:
public class AcceptHeaderLocaleResolver implements LocaleResolver {

	private final List<Locale> supportedLocales = new ArrayList<>(4);

	@Nullable
	private Locale defaultLocale;
    ......
    @Override
	public Locale resolveLocale(HttpServletRequest request) {
		Locale defaultLocale = getDefaultLocale();
		if (defaultLocale != null && request.getHeader("Accept-Language") == null) {
			return defaultLocale;
		}
		Locale requestLocale = request.getLocale();
		List<Locale> supportedLocales = getSupportedLocales();
		if (supportedLocales.isEmpty() || supportedLocales.contains(requestLocale)) {
			return requestLocale;
		}
		Locale supportedLocale = findSupportedLocale(request, supportedLocales);
		if (supportedLocale != null) {
			return supportedLocale;
		}
		return (defaultLocale != null ? defaultLocale : requestLocale);
	}
    ......
    @Override
	public void setLocale(HttpServletRequest request, @Nullable HttpServletResponse response, @Nullable Locale locale) {
		throw new UnsupportedOperationException(
				"Cannot change HTTP accept header - use a different locale resolution strategy");
	}

}
我们自定义一个地区解析器,继承实现LocaleResolver 接口,使我们的自定义国际化资源生效。去实现,前端界面 Index.html中点击链接传递参数,使得按钮生效,完成中英文切换。
- 定义自己的地区配置解析器LocalResolver
- 前端页面的请求链接参数
index.html:
<a class="btn btn-sm" th:href="@{/index.html(l='zh_CN')}">中文</a>
<a class="btn btn-sm" th:href="@{/index.html(l='en_US')}">English</a>
自定义地区配置解析器:MyLocaleResolver,完成实现接口LocalResolver。
- 按照源码中那样编写, 我们要获取 index.html中的语言链接请求,然后进行对应的地区语言转换:
package com.al.config;

import org.springframework.util.StringUtils;
import org.springframework.web.servlet.LocaleResolver;

import javax.servlet.http.HttpServletRequest;
import javax.servlet.http.HttpServletResponse;
import java.util.Locale;

// 地区解析器:获取链接上携带的参数信息
public class MyLocaleResolver implements LocaleResolver {
    // 解析请求
    @Override
    public Locale resolveLocale(HttpServletRequest request) {
        // 获取请求中的国家化参数
        String language = request.getParameter("l");
        // 默认的地区
        Locale locale = Locale.getDefault();
        //如果请求的链接参数不为空,携带了国际化参数
        if (!StringUtils.isEmpty(language)) {
            String[] split = language.split("_");//zh_CN(语言_地区)
            locale = new Locale(split[0], split[1]);
        }
        return locale;
    }

    @Override
    public void setLocale(HttpServletRequest request, HttpServletResponse response, Locale locale) {

    }
}
我们的国际化 message 写完后, 为了使地区配置解析器的信息生效。该组件需要放入到 bean中。
-
在配置类 MvcConofig 中添加bean:
package com.al.config;

import org.springframework.context.annotation.Bean;
import org.springframework.context.annotation.Configuration;
import org.springframework.web.servlet.LocaleResolver;
import org.springframework.web.servlet.config.annotation.ViewControllerRegistry;
import org.springframework.web.servlet.config.annotation.WebMvcConfigurer;

@Configuration
public class MyMvcConfig implements WebMvcConfigurer {

    @Override
    public void addViewControllers(ViewControllerRegistry registry) {
        registry.addViewController("/").setViewName("index");
        registry.addViewController("/index.html").setViewName("index");
    }

    // 将自定义的国际化配置放入 Spring容器中,使组件生效
    @Bean
    public LocaleResolver localeResolver(){
        return new MyLocaleResolver();
    }
}
重启项目进行访问测试。
-
点击中文按钮,url路径为:http://localhost:8080/index.html?l=zh_CN
-
点击英文按钮,url路径为:http://localhost:8080/index.html?l=en_US
4、登录功能的实现
前端页面 index.html
在登录页面,即首页去实现登录, 实现跳转到 dashboard.html 页面。
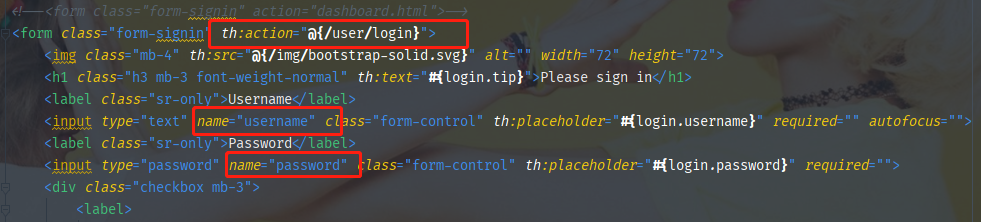
- 在 index.html页面, 使用 thymeleaf 语法,改写提交动作 submit 跳转路径到 /user/login
- 给定 username 名字和password密码时 添加
name属性,便于传参
<!DOCTYPE html>
<html lang="en" xmlns:th="http://www.thymeleaf.org">
<head>
    <meta http-equiv="Content-Type" content="text/html; charset=UTF-8">
    <meta name="viewport" content="width=device-width, initial-scale=1, shrink-to-fit=no">
    <meta name="description" content="">
    <meta name="author" content="">
    <title>Signin Template for Bootstrap</title>
    <!-- Bootstrap core CSS -->
    <link th:href="@{/css/bootstrap.min.css}" rel="stylesheet">
    <!-- Custom styles for this template -->
    <link th:href="@{/css/signin.css}" rel="stylesheet">
</head>

<body class="text-center">
<!--<form class="form-signin" action="dashboard.html">-->
<form class="form-signin" th:action="@{/user/login}">
    <img class="mb-4" th:src="@{/img/bootstrap-solid.svg}" alt="" width="72" height="72">
    <h1 class="h3 mb-3 font-weight-normal" th:text="#{login.tip}">Please sign in</h1>
    <label class="sr-only">Username</label>
    <input type="text" name="username" class="form-control" th:placeholder="#{login.username}" required="" autofocus="">
    <label class="sr-only">Password</label>
    <input type="password" name="password" class="form-control" th:placeholder="#{login.password}" required="">
    <p style="color: red" th:text="${msg}"></p>
    <div class="checkbox mb-3">
        <label>
<!--            <input type="checkbox" value="remember-me" th:text="#{login.remember}"> Remember me-->
            <input type="checkbox" value="remember-me" th:text="#{login.remember}">
        </label>
    </div>
<!--    <button class="btn btn-lg btn-primary btn-block" type="submit" th:text="#{login.btn}">Sign in</button>-->
    <button class="btn btn-lg btn-primary btn-block" type="submit">[[#{login.btn}]]</button>
    <p class="mt-5 mb-3 text-muted">© 2017-2018</p>
<!--    <a class="btn btn-sm">中文</a>-->
<!--    <a class="btn btn-sm">English</a>-->
    <!--这里传入参数不需要使用?使用key=value-->
    <a class="btn btn-sm" th:href="@{/index.html(l='zh_CN')}">中文</a>
    <a class="btn btn-sm" th:href="@{/index.html(l='en_US')}">English</a>

</form>

</body>

</html>
控制器Controller
我们创建一个控制器用于 响应这个请求 servlet,完成跳转。
LoginController 控制器:
package com.al.controller;


import org.springframework.stereotype.Controller;
import org.springframework.ui.Model;
import org.springframework.util.StringUtils;
import org.springframework.web.bind.annotation.RequestMapping;
import org.springframework.web.bind.annotation.RequestParam;

@Controller
public class LoginController {

    @RequestMapping("/user/login")
    public String login(@RequestParam("username") String username, @RequestParam("password") String password, Model model){
        if (!StringUtils.isEmpty(username) && "123456".equals(password)){
            return "dashboard";
        }else {
            model.addAttribute("msg", "用户名或密码错误");
            return "index";
        }
    }
}
然后我们在index.html首页中加一个标签用来显示controller返回的错误信息:
<p style="color: red" th:text="${msg}"></p>
测试结果:
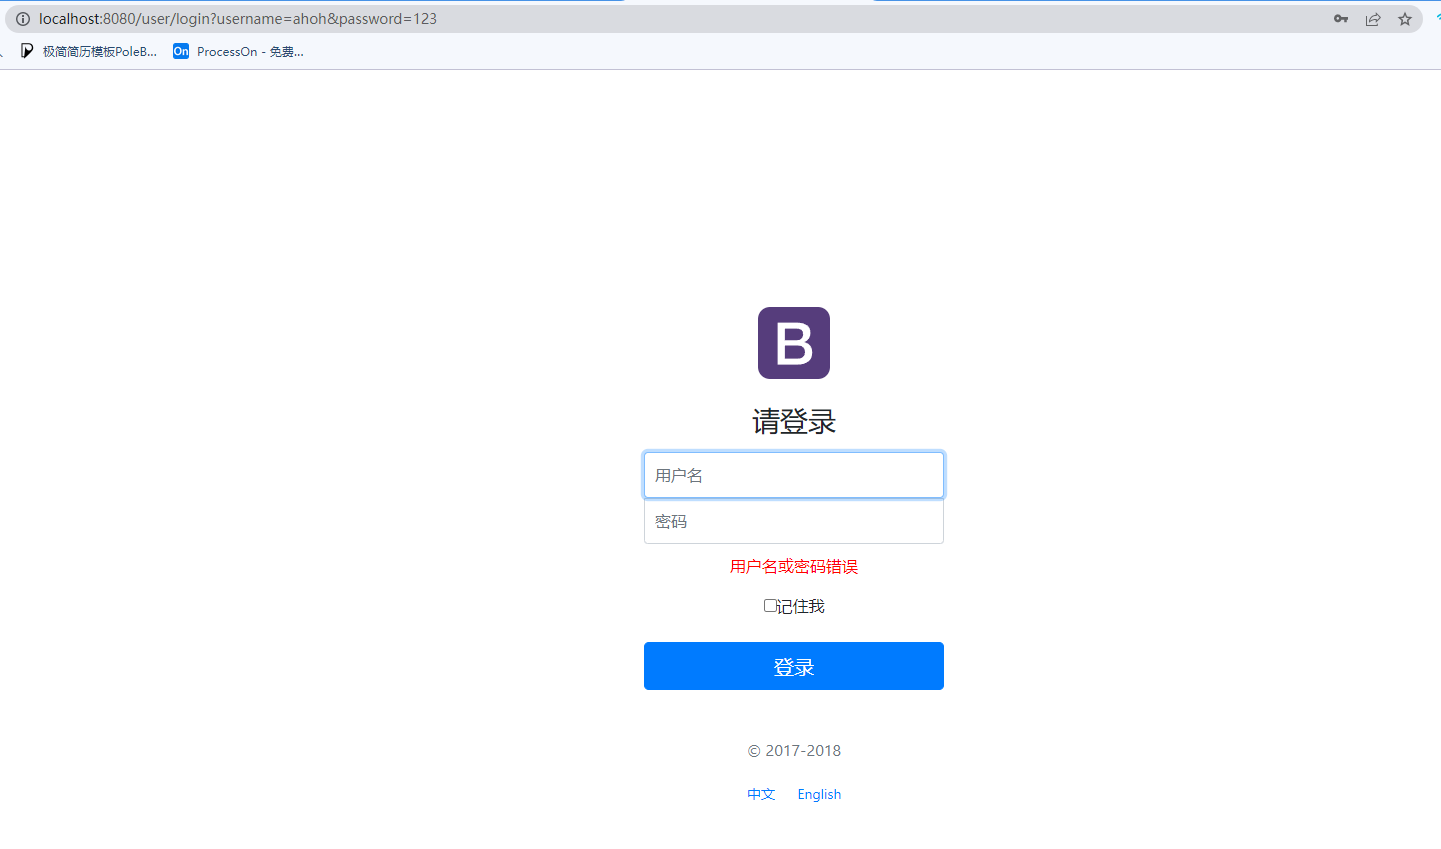
在密码不对的情况下:http://localhost:8080/user/login?username=ahoh&password=123
url路径里面显示了用户的名字和密码,这暴漏了用户的信息。我们编写一个映射 去解决这个问题。
-
在自定义的配置类MyMvcConfig 中添加映射。在url=/main.html时,页面为 登录后的页面 dashboard.html
@Configuration public class MyMvcConfig implements WebMvcConfigurer { @Override public void addViewControllers(ViewControllerRegistry registry) { registry.addViewController("/").setViewName("index"); registry.addViewController("/index.html").setViewName("index"); registry.addViewController("/main.html").setViewName("dashboard"); } // 将自定义的国际化配置放入 Spring容器中,使组件生效 @Bean public LocaleResolver localeResolver(){ return new MyLocaleResolver(); } } -
对应的,我们需要在 登录控制器 LoginController中进行重定向:redirect:/main.html
@Controller
public class LoginController {

    @RequestMapping("/user/login")
    public String login(@RequestParam("username") String username, @RequestParam("password") String password, Model model){
        if (!StringUtils.isEmpty(username) && "123456".equals(password)){
            return "redirect:/main.html";
        }else {
            model.addAttribute("msg", "用户名或密码错误");
            return "index";
        }
    }
}
测试:输入正确的用户名和密码登陆成功后,浏览器不再泄露信息。
但此时的结果虽然可以在登录后的后台界面进去了,但是你直接在url路径输入 /main.html 也能进去, 这就需要 拦截器了。
登录拦截器
创建一个登录拦截器 LoginHandlerInterceptor。
拦截器去完成登录拦截的功能:【用户登录后,后台会得到用户的信息;如果没有登录,则不会有任何的用户信息】。
- 重写拦截器接口 HandlerInterceptor的方法。有用户的 session 即用户信息()才让其允许通过。
- 在登录时的控制器 LoginController 中去加入用户的 session
LoginController控制器:
- 添加登录用户的session 信息
@Controller
public class LoginController {

    @RequestMapping("/user/login")
    public String login(@RequestParam("username") String username, @RequestParam("password") String password, Model model, HttpSession session){
        if (!StringUtils.isEmpty(username) && "123456".equals(password)){
            session.setAttribute("LoginUser", username);
            //return "dashboard";
            return "redirect:/main.html"; // 重定向
        }else {
            model.addAttribute("msg", "用户名或密码错误");
            return "index";
        }
    }
}
登录拦截器 LoginHandlerInterceptor:
编写一个自定义的登录拦截器 LoginHandlerInterceptor,继承HandlerInterceptor接口
- 去获取用户信息 session:如果没有,让其跳转到首页 index.html,且提示消息 msg;
- 如果不为空,放行
package com.al.config;

import org.springframework.web.servlet.HandlerInterceptor;

import javax.servlet.http.HttpServletRequest;
import javax.servlet.http.HttpServletResponse;

public class LoginHandlerInterceptor implements HandlerInterceptor {
    @Override
    public boolean preHandle(HttpServletRequest request, HttpServletResponse response, Object handler) throws Exception {
        // 用户如果登录成功了,应该获取到用户的 session 信息
        Object session = request.getSession().getAttribute("LoginUser");
        if (session == null) {
            request.setAttribute("msg", "权限不够,请先登录");
            request.getRequestDispatcher("/index.html").forward(request, response);
            return false;
        } else {
            return true;
        }
    }
}
注册拦截器 LoginHandlerInterceptor 到spring 容器中,Srping Boot配置中添加自定义配置资源
定义完拦截器后,我们需要进行在 bean中进行 注册配置:
-
在MyMvcConfig配置类中,重写关于拦截器的方法,添加自定义的拦截器
-
屏蔽:要拦截的以及不要拦截的 路径 资源,
-
需要放行的:.excludePathPatterns(“/index.html”, “/”, “/user/login”, “/css/", "/js/”, “/img/**”)。才能将页面完全导入进来,页面加载出来
package com.al.config;

import org.springframework.context.annotation.Bean;
import org.springframework.context.annotation.Configuration;
import org.springframework.web.servlet.LocaleResolver;
import org.springframework.web.servlet.config.annotation.InterceptorRegistry;
import org.springframework.web.servlet.config.annotation.ViewControllerRegistry;
import org.springframework.web.servlet.config.annotation.WebMvcConfigurer;

@Configuration
public class MyMvcConfig implements WebMvcConfigurer {

    @Override
    public void addViewControllers(ViewControllerRegistry registry) {
        registry.addViewController("/").setViewName("index");
        registry.addViewController("/index.html").setViewName("index");
        registry.addViewController("/main.html").setViewName("dashboard");
    }

    // 将自定义的国际化配置放入 Spring容器中,使组件生效
    @Bean
    public LocaleResolver localeResolver(){
        return new MyLocaleResolver();
    }

    @Override
    public void addInterceptors(InterceptorRegistry registry) {
        registry.addInterceptor(new LoginHandlerInterceptor())
                .addPathPatterns("/**")
                .excludePathPatterns("/index.html", "/", "/user/login", "/css/**", "/js/**", "/img/**");
    }
}
如果不放行静态资源,页面无法完全导入:
    @Override
    public void addInterceptors(InterceptorRegistry registry) {
        registry.addInterceptor(new LoginHandlerInterceptor())
                .addPathPatterns("/**")
                .excludePathPatterns("/index.html", "/", "/user/login");
    }

修改后测试:此时直接访问http://localhost:8080/main.html 显示权限不够:
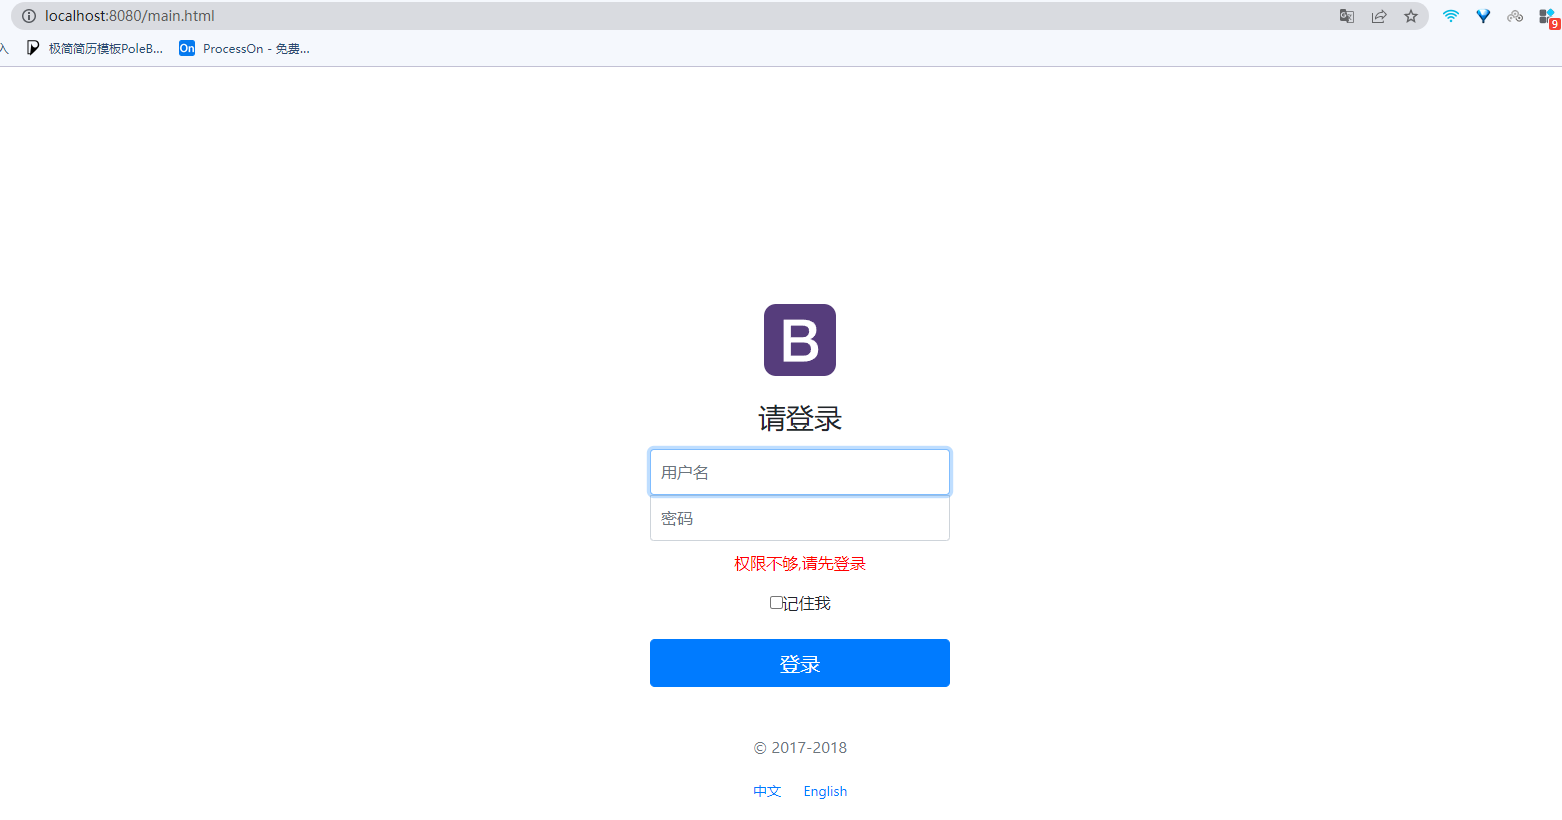
重新写入username 和password,进入到dashboard页面。
如果再重新直接访问 http://localhost:8080/main.html ,也可以直接进入。因为此时的 session 里面存入了用户的信息,拦截器会放行通过。
5、员工信息:增删改查
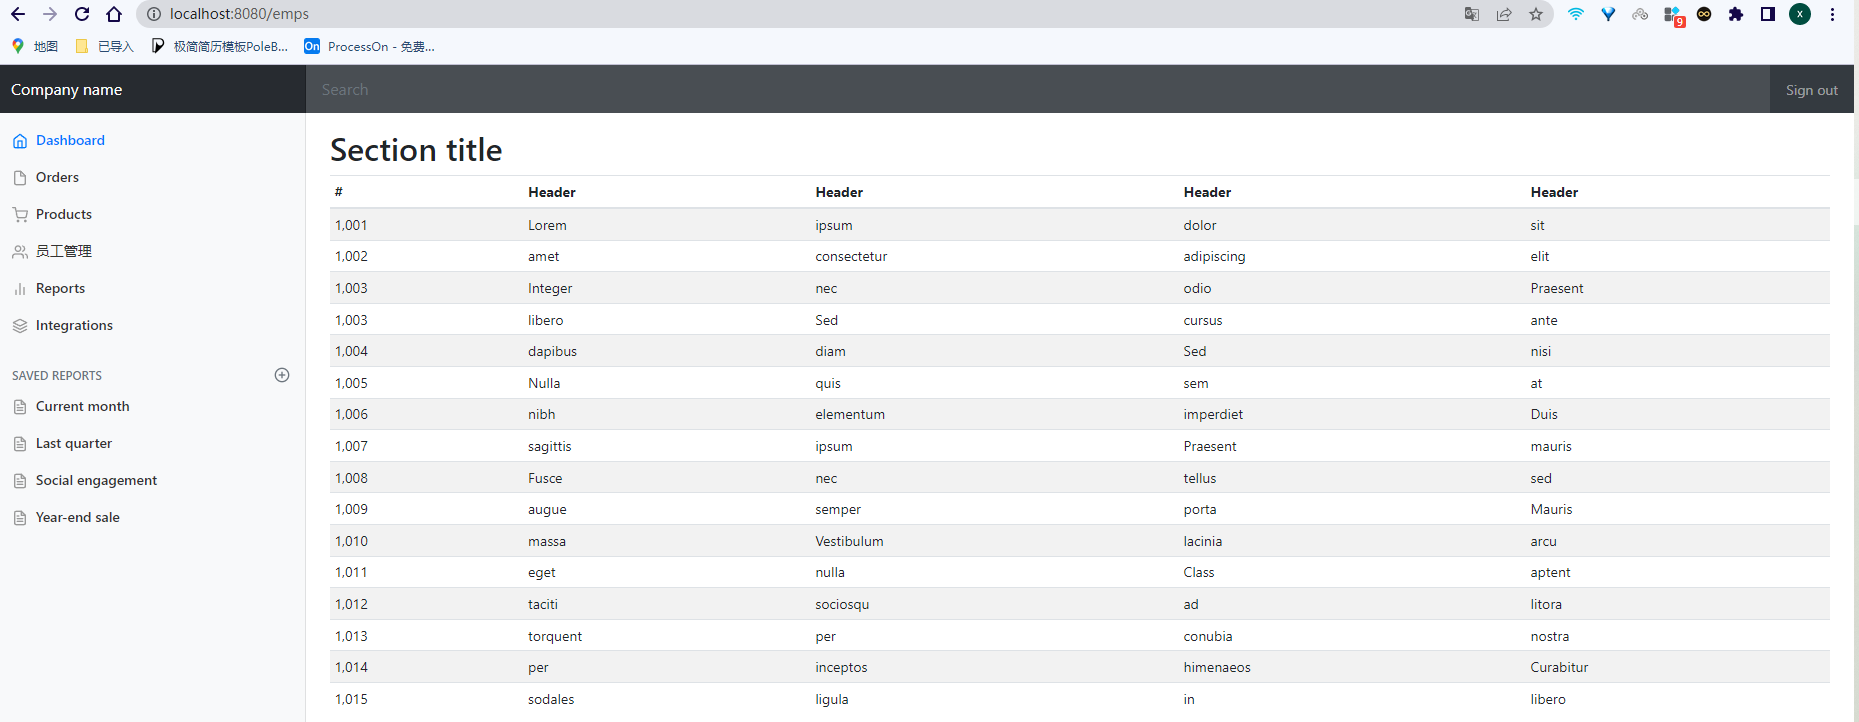
展示员工列表
实现Customers视图跳转
目标,功能:点击dashboard.html页面中的Customers 按钮跳转到 list.html列表,展示所有的员工信息。
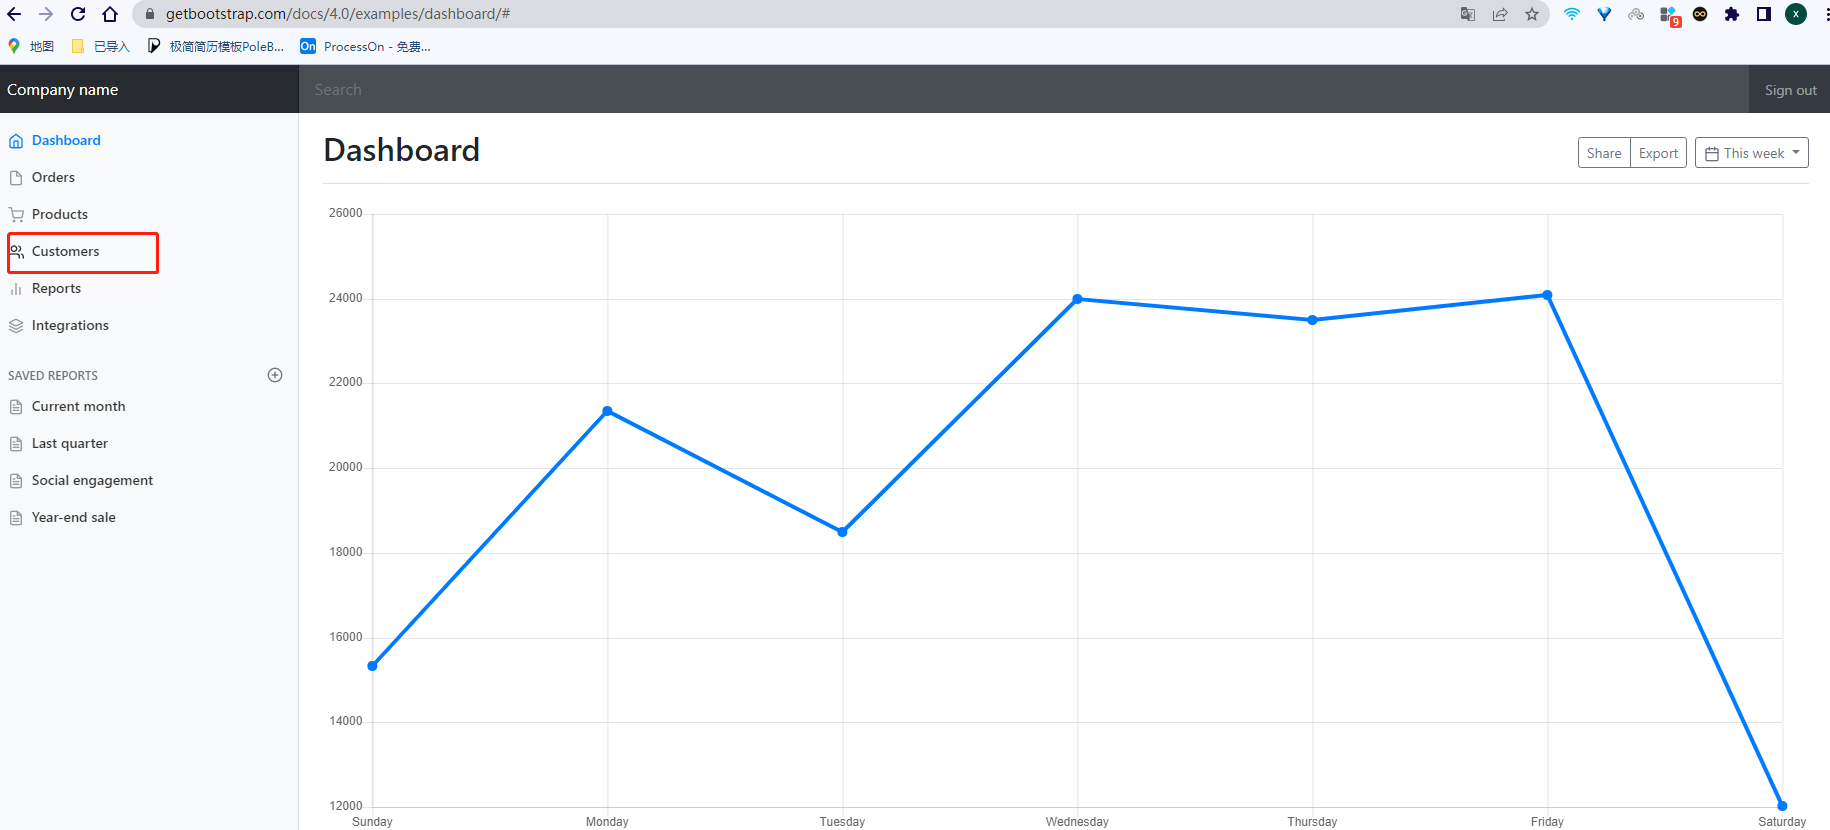
我们想要 点击员工管理,就去跳转到 员工管理的界面:
- 那么,我们把这个对应的员工管理点击 动作 对应的超链接改为 url地址就可以了:
- 员工管理展示信息列表的 url 请求响应后,对应的 controller 去控制这个请求 servlet: EmployeeController
- 可能随着项目扩展,员工变多, 所以将 list页面移动到 创建的 emp文件中,或许以后还有其它页面。
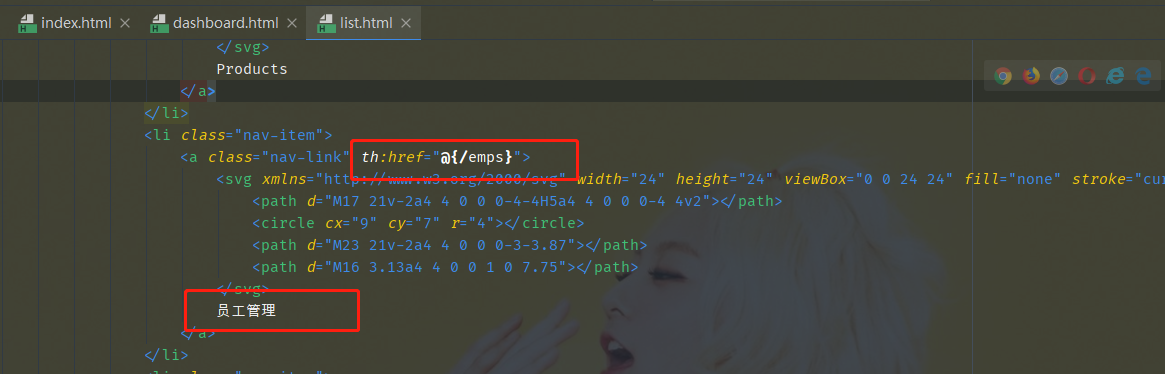
dashboard.html页面的代码修改:
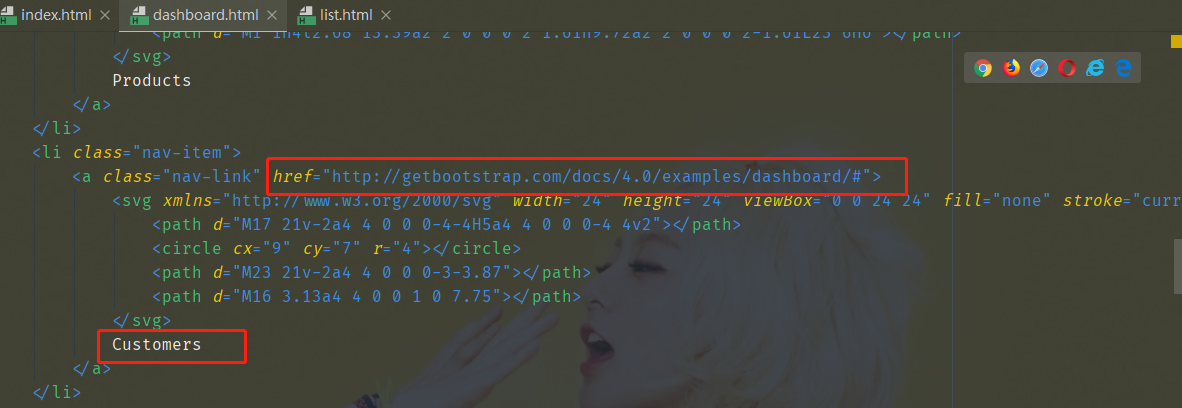
修改后:
					<li class="nav-item">
								<a class="nav-link" th:href="@{/emps}">
									<svg xmlns="http://www.w3.org/2000/svg" width="24" height="24" viewBox="0 0 24 24" fill="none" stroke="currentColor" stroke-width="2" stroke-linecap="round" stroke-linejoin="round" class="feather feather-users">
										<path d="M17 21v-2a4 4 0 0 0-4-4H5a4 4 0 0 0-4 4v2"></path>
										<circle cx="9" cy="7" r="4"></circle>
										<path d="M23 21v-2a4 4 0 0 0-3-3.87"></path>
										<path d="M16 3.13a4 4 0 0 1 0 7.75"></path>
									</svg>
									员工管理
								</a>
							</li>
同样修改list.html对应该的代码为上述代码:
-
我们在
templates目录下新建一个包emp,用来放所有关于员工信息的页面,我们将list.html页面移入该包中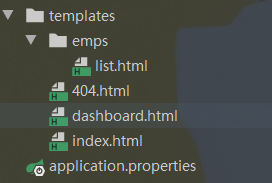
在这里插入图片描述
员工管理控制器:EmployeeController:
- 对于请求的controller,处理 /emps 这一url请求,在controller 包下,创建EmployeeController 类 去对 /emps 请求进行响应
package com.al.controller;

import com.al.dao.EmployeeDao;
import com.al.pojo.Employee;
import org.springframework.beans.factory.annotation.Autowired;
import org.springframework.stereotype.Controller;
import org.springframework.ui.Model;
import org.springframework.web.bind.annotation.RequestMapping;

import java.util.Collection;

// 员工管理信息 controller
@Controller
public class EmployeeController {

    @Autowired
    private EmployeeDao employeeDao;

    @RequestMapping("/emps")
    public String list(Model model){
        Collection<Employee> employees = employeeDao.getAll();
        model.addAttribute("emps",employees);
        return "emps/list"; // 返回到 list界面
    }
}
测试:点击Customers,成功跳转到/emps
改进的地方:
- 点击员工管理,我们想要实现高亮的效果
- 需要对侧边栏进行修改, 对应着员工管理这些选项。类似的,我们也将顶部导航栏 进行插入, 实现代码的复用:
提取页面公共部分:侧边栏、顶部栏
对于这些公共的地方, 我们创建一个 commons文件夹去进行存放, commons.html 实现代码复用。
commons.html
commons.html 公共部分的复用代码:顶部导航栏与侧边导航栏:
- 顶部导航栏,利用th:fragment提取出来,命名为topbar【th:fragment=“topbar”】
- 侧边栏,利用th:fragment提取出来,命名为sidebar【th:fragment=“siderbar”】
<!DOCTYPE html>
<html lang="en" xmlns:th="http://www.thymeleaf.org">

<!--顶部导航栏,利用th:fragment提取出来,命名为topbar-->
<nav class="navbar navbar-dark sticky-top bg-dark flex-md-nowrap p-0" th:fragment="topbar">
    <a class="navbar-brand col-sm-3 col-md-2 mr-0" href="http://getbootstrap.com/docs/4.0/examples/dashboard/#">Company
        name</a>
    <input class="form-control form-control-dark w-100" type="text" placeholder="Search" aria-label="Search">
    <ul class="navbar-nav px-3">
        <li class="nav-item text-nowrap">
            <a class="nav-link" href="http://getbootstrap.com/docs/4.0/examples/dashboard/#">Sign out</a>
        </li>
    </ul>
</nav>

<!--侧边栏,利用th:fragment提取出来,命名为sidebar-->
<nav class="col-md-2 d-none d-md-block bg-light sidebar" th:fragment="siderbar">
    <div class="sidebar-sticky">
        <ul class="nav flex-column">
            <li class="nav-item">
                <a class="nav-link active" href="http://getbootstrap.com/docs/4.0/examples/dashboard/#">
                    <svg xmlns="http://www.w3.org/2000/svg" width="24" height="24" viewBox="0 0 24 24"
                         fill="none" stroke="currentColor" stroke-width="2" stroke-linecap="round"
                         stroke-linejoin="round" class="feather feather-home">
                        <path d="M3 9l9-7 9 7v11a2 2 0 0 1-2 2H5a2 2 0 0 1-2-2z"></path>
                        <polyline points="9 22 9 12 15 12 15 22"></polyline>
                    </svg>
                    Dashboard <span class="sr-only">(current)</span>
                </a>
            </li>
            <li class="nav-item">
                <a class="nav-link" href="http://getbootstrap.com/docs/4.0/examples/dashboard/#">
                    <svg xmlns="http://www.w3.org/2000/svg" width="24" height="24" viewBox="0 0 24 24"
                         fill="none" stroke="currentColor" stroke-width="2" stroke-linecap="round"
                         stroke-linejoin="round" class="feather feather-file">
                        <path d="M13 2H6a2 2 0 0 0-2 2v16a2 2 0 0 0 2 2h12a2 2 0 0 0 2-2V9z"></path>
                        <polyline points="13 2 13 9 20 9"></polyline>
                    </svg>
                    Orders
                </a>
            </li>
            <li class="nav-item">
                <a class="nav-link" href="http://getbootstrap.com/docs/4.0/examples/dashboard/#">
                    <svg xmlns="http://www.w3.org/2000/svg" width="24" height="24" viewBox="0 0 24 24"
                         fill="none" stroke="currentColor" stroke-width="2" stroke-linecap="round"
                         stroke-linejoin="round" class="feather feather-shopping-cart">
                        <circle cx="9" cy="21" r="1"></circle>
                        <circle cx="20" cy="21" r="1"></circle>
                        <path d="M1 1h4l2.68 13.39a2 2 0 0 0 2 1.61h9.72a2 2 0 0 0 2-1.61L23 6H6"></path>
                    </svg>
                    Products
                </a>
            </li>
            <li class="nav-item">
                <a class="nav-link" th:href="@{/emps}">
                    <svg xmlns="http://www.w3.org/2000/svg" width="24" height="24" viewBox="0 0 24 24"
                         fill="none" stroke="currentColor" stroke-width="2" stroke-linecap="round"
                         stroke-linejoin="round" class="feather feather-users">
                        <path d="M17 21v-2a4 4 0 0 0-4-4H5a4 4 0 0 0-4 4v2"></path>
                        <circle cx="9" cy="7" r="4"></circle>
                        <path d="M23 21v-2a4 4 0 0 0-3-3.87"></path>
                        <path d="M16 3.13a4 4 0 0 1 0 7.75"></path>
                    </svg>
                    员工管理
                </a>
            </li>
            <li class="nav-item">
                <a class="nav-link" href="http://getbootstrap.com/docs/4.0/examples/dashboard/#">
                    <svg xmlns="http://www.w3.org/2000/svg" width="24" height="24" viewBox="0 0 24 24"
                         fill="none" stroke="currentColor" stroke-width="2" stroke-linecap="round"
                         stroke-linejoin="round" class="feather feather-bar-chart-2">
                        <line x1="18" y1="20" x2="18" y2="10"></line>
                        <line x1="12" y1="20" x2="12" y2="4"></line>
                        <line x1="6" y1="20" x2="6" y2="14"></line>
                    </svg>
                    Reports
                </a>
            </li>
            <li class="nav-item">
                <a class="nav-link" href="http://getbootstrap.com/docs/4.0/examples/dashboard/#">
                    <svg xmlns="http://www.w3.org/2000/svg" width="24" height="24" viewBox="0 0 24 24"
                         fill="none" stroke="currentColor" stroke-width="2" stroke-linecap="round"
                         stroke-linejoin="round" class="feather feather-layers">
                        <polygon points="12 2 2 7 12 12 22 7 12 2"></polygon>
                        <polyline points="2 17 12 22 22 17"></polyline>
                        <polyline points="2 12 12 17 22 12"></polyline>
                    </svg>
                    Integrations
                </a>
            </li>
        </ul>

        <h6 class="sidebar-heading d-flex justify-content-between align-items-center px-3 mt-4 mb-1 text-muted">
            <span>Saved reports</span>
            <a class="d-flex align-items-center text-muted"
               href="http://getbootstrap.com/docs/4.0/examples/dashboard/#">
                <svg xmlns="http://www.w3.org/2000/svg" width="24" height="24" viewBox="0 0 24 24" fill="none"
                     stroke="currentColor" stroke-width="2" stroke-linecap="round" stroke-linejoin="round"
                     class="feather feather-plus-circle">
                    <circle cx="12" cy="12" r="10"></circle>
                    <line x1="12" y1="8" x2="12" y2="16"></line>
                    <line x1="8" y1="12" x2="16" y2="12"></line>
                </svg>
            </a>
        </h6>
        <ul class="nav flex-column mb-2">
            <li class="nav-item">
                <a class="nav-link" href="http://getbootstrap.com/docs/4.0/examples/dashboard/#">
                    <svg xmlns="http://www.w3.org/2000/svg" width="24" height="24" viewBox="0 0 24 24"
                         fill="none" stroke="currentColor" stroke-width="2" stroke-linecap="round"
                         stroke-linejoin="round" class="feather feather-file-text">
                        <path d="M14 2H6a2 2 0 0 0-2 2v16a2 2 0 0 0 2 2h12a2 2 0 0 0 2-2V8z"></path>
                        <polyline points="14 2 14 8 20 8"></polyline>
                        <line x1="16" y1="13" x2="8" y2="13"></line>
                        <line x1="16" y1="17" x2="8" y2="17"></line>
                        <polyline points="10 9 9 9 8 9"></polyline>
                    </svg>
                    Current month
                </a>
            </li>
            <li class="nav-item">
                <a class="nav-link" href="http://getbootstrap.com/docs/4.0/examples/dashboard/#">
                    <svg xmlns="http://www.w3.org/2000/svg" width="24" height="24" viewBox="0 0 24 24"
                         fill="none" stroke="currentColor" stroke-width="2" stroke-linecap="round"
                         stroke-linejoin="round" class="feather feather-file-text">
                        <path d="M14 2H6a2 2 0 0 0-2 2v16a2 2 0 0 0 2 2h12a2 2 0 0 0 2-2V8z"></path>
                        <polyline points="14 2 14 8 20 8"></polyline>
                        <line x1="16" y1="13" x2="8" y2="13"></line>
                        <line x1="16" y1="17" x2="8" y2="17"></line>
                        <polyline points="10 9 9 9 8 9"></polyline>
                    </svg>
                    Last quarter
                </a>
            </li>
            <li class="nav-item">
                <a class="nav-link" href="http://getbootstrap.com/docs/4.0/examples/dashboard/#">
                    <svg xmlns="http://www.w3.org/2000/svg" width="24" height="24" viewBox="0 0 24 24"
                         fill="none" stroke="currentColor" stroke-width="2" stroke-linecap="round"
                         stroke-linejoin="round" class="feather feather-file-text">
                        <path d="M14 2H6a2 2 0 0 0-2 2v16a2 2 0 0 0 2 2h12a2 2 0 0 0 2-2V8z"></path>
                        <polyline points="14 2 14 8 20 8"></polyline>
                        <line x1="16" y1="13" x2="8" y2="13"></line>
                        <line x1="16" y1="17" x2="8" y2="17"></line>
                        <polyline points="10 9 9 9 8 9"></polyline>
                    </svg>
                    Social engagement
                </a>
            </li>
            <li class="nav-item">
                <a class="nav-link" href="http://getbootstrap.com/docs/4.0/examples/dashboard/#">
                    <svg xmlns="http://www.w3.org/2000/svg" width="24" height="24" viewBox="0 0 24 24"
                         fill="none" stroke="currentColor" stroke-width="2" stroke-linecap="round"
                         stroke-linejoin="round" class="feather feather-file-text">
                        <path d="M14 2H6a2 2 0 0 0-2 2v16a2 2 0 0 0 2 2h12a2 2 0 0 0 2-2V8z"></path>
                        <polyline points="14 2 14 8 20 8"></polyline>
                        <line x1="16" y1="13" x2="8" y2="13"></line>
                        <line x1="16" y1="17" x2="8" y2="17"></line>
                        <polyline points="10 9 9 9 8 9"></polyline>
                    </svg>
                    Year-end sale
                </a>
            </li>
        </ul>
    </div>
</nav>
</html>
list.html 和 dashboard.html
删除掉 list.html 和 dashboard.html 中的侧边栏和顶部导航栏的代码:
-
dashboard.html中删除后剩下的:
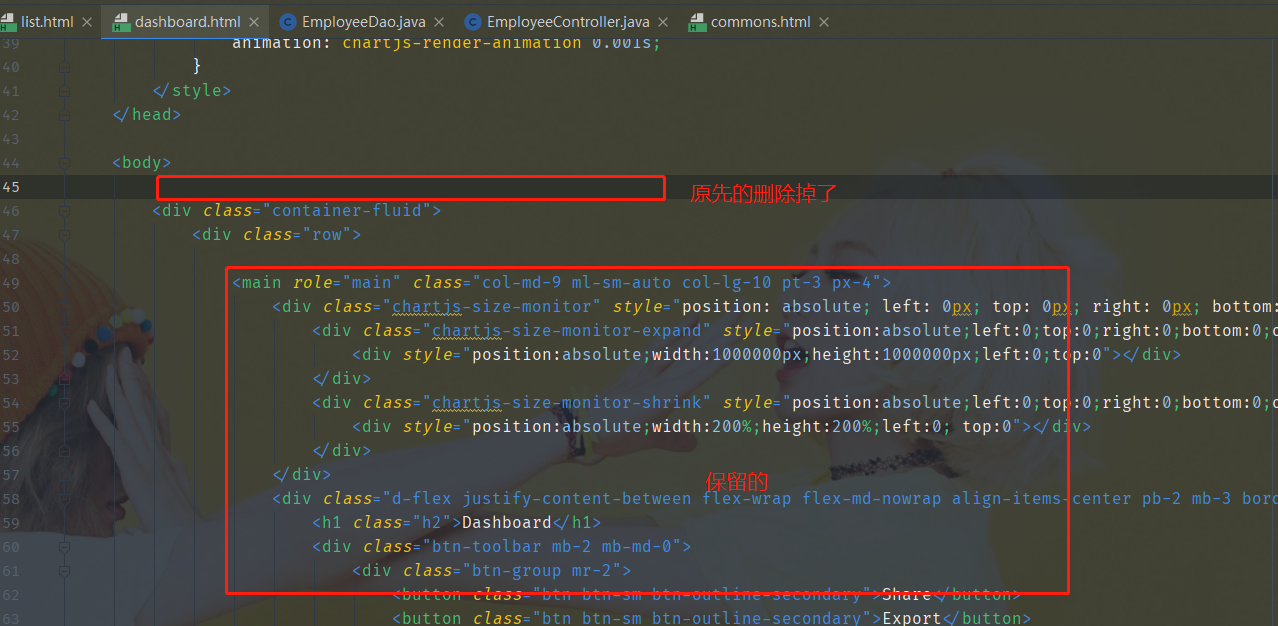
<!DOCTYPE html> <!-- saved from url=(0052)http://getbootstrap.com/docs/4.0/examples/dashboard/ --> <html lang="en" xmlns:th="http://www.thymeleaf.org"> <head> <meta http-equiv="Content-Type" content="text/html; charset=UTF-8"> <meta name="viewport" content="width=device-width, initial-scale=1, shrink-to-fit=no"> <meta name="description" content=""> <meta name="author" content=""> <title>Dashboard Template for Bootstrap</title> <!-- Bootstrap core CSS --> <link th:href="@{/css/bootstrap.min.css}" rel="stylesheet"> <!-- Custom styles for this template --> <link th:href="@{/css/dashboard.css}" rel="stylesheet"> <style type="text/css"> /* Chart.js */ @-webkit-keyframes chartjs-render-animation { from { opacity: 0.99 } to { opacity: 1 } } @keyframes chartjs-render-animation { from { opacity: 0.99 } to { opacity: 1 } } .chartjs-render-monitor { -webkit-animation: chartjs-render-animation 0.001s; animation: chartjs-render-animation 0.001s; } </style> </head> <body> <div class="container-fluid"> <div class="row"> <main role="main" class="col-md-9 ml-sm-auto col-lg-10 pt-3 px-4"> <div class="chartjs-size-monitor" style="position: absolute; left: 0px; top: 0px; right: 0px; bottom: 0px; overflow: hidden; pointer-events: none; visibility: hidden; z-index: -1;"> <div class="chartjs-size-monitor-expand" style="position:absolute;left:0;top:0;right:0;bottom:0;overflow:hidden;pointer-events:none;visibility:hidden;z-index:-1;"> <div style="position:absolute;width:1000000px;height:1000000px;left:0;top:0"></div> </div> <div class="chartjs-size-monitor-shrink" style="position:absolute;left:0;top:0;right:0;bottom:0;overflow:hidden;pointer-events:none;visibility:hidden;z-index:-1;"> <div style="position:absolute;width:200%;height:200%;left:0; top:0"></div> </div> </div> <div class="d-flex justify-content-between flex-wrap flex-md-nowrap align-items-center pb-2 mb-3 border-bottom"> <h1 class="h2">Dashboard</h1> <div class="btn-toolbar mb-2 mb-md-0"> <div class="btn-group mr-2"> <button class="btn btn-sm btn-outline-secondary">Share</button> <button class="btn btn-sm btn-outline-secondary">Export</button> </div> <button class="btn btn-sm btn-outline-secondary dropdown-toggle"> <svg xmlns="http://www.w3.org/2000/svg" width="24" height="24" viewBox="0 0 24 24" fill="none" stroke="currentColor" stroke-width="2" stroke-linecap="round" stroke-linejoin="round" class="feather feather-calendar"><rect x="3" y="4" width="18" height="18" rx="2" ry="2"></rect><line x1="16" y1="2" x2="16" y2="6"></line><line x1="8" y1="2" x2="8" y2="6"></line><line x1="3" y1="10" x2="21" y2="10"></line></svg> This week </button> </div> </div> <canvas class="my-4 chartjs-render-monitor" id="myChart" width="1076" height="454" style="display: block; width: 1076px; height: 454px;"></canvas> </main> </div> </div> <!-- Bootstrap core JavaScript ================================================== --> <!-- Placed at the end of the document so the pages load faster --> <script type="text/javascript" src="asserts/js/jquery-3.2.1.slim.min.js" ></script> <script type="text/javascript" src="asserts/js/popper.min.js" ></script> <script type="text/javascript" src="asserts/js/bootstrap.min.js" ></script> <!-- Icons --> <script type="text/javascript" src="asserts/js/feather.min.js" ></script> <script> feather.replace() </script> <!-- Graphs --> <script type="text/javascript" src="asserts/js/Chart.min.js" ></script> <script> var ctx = document.getElementById("myChart"); var myChart = new Chart(ctx, { type: 'line', data: { labels: ["Sunday", "Monday", "Tuesday", "Wednesday", "Thursday", "Friday", "Saturday"], datasets: [{ data: [15339, 21345, 18483, 24003, 23489, 24092, 12034], lineTension: 0, backgroundColor: 'transparent', borderColor: '#007bff', borderWidth: 4, pointBackgroundColor: '#007bff' }] }, options: { scales: { yAxes: [{ ticks: { beginAtZero: false } }] }, legend: { display: false, } } }); </script> </body> </html> -
list.html 中删除后剩下的:
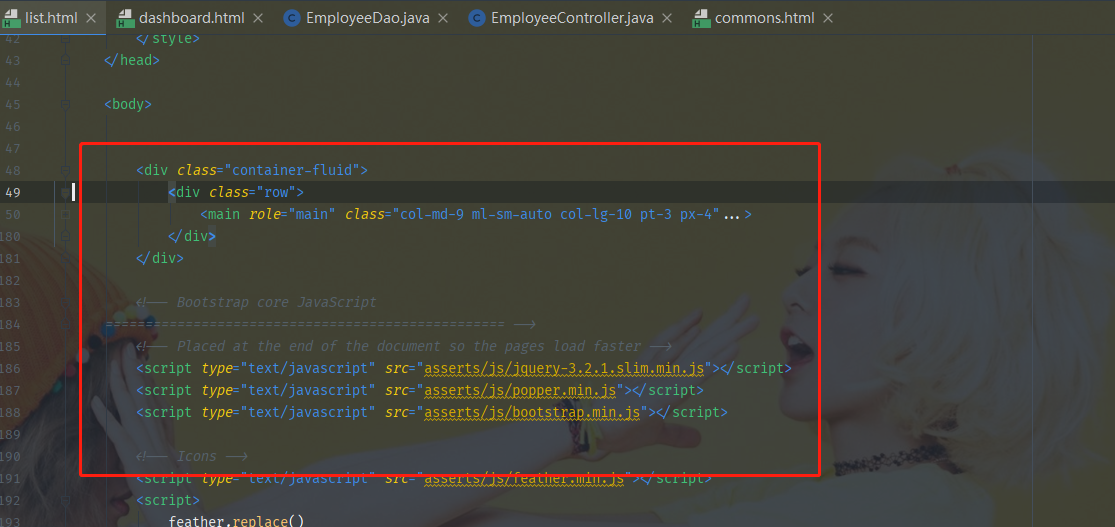
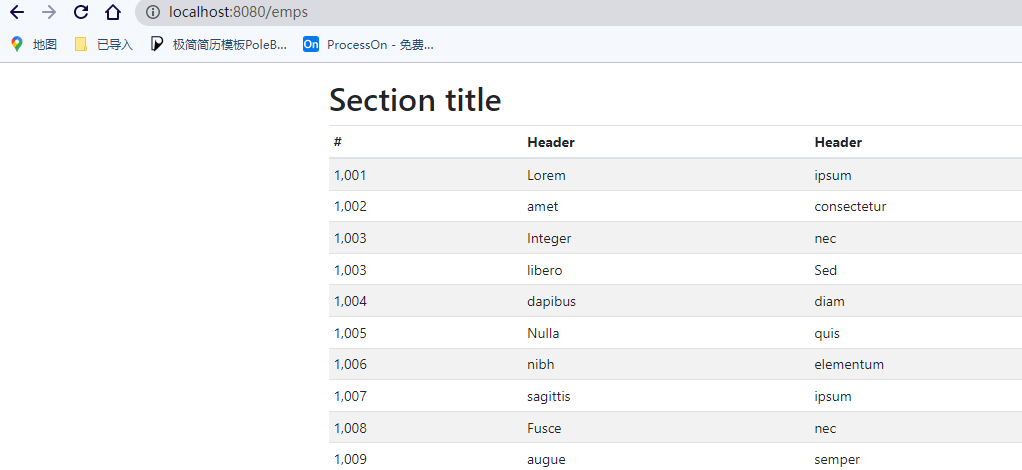
<!DOCTYPE html>
<!-- saved from url=(0052)http://getbootstrap.com/docs/4.0/examples/dashboard/ -->
<html lang="en" xmlns:th="http://www.thymeleaf.org">

	<head>
		<meta http-equiv="Content-Type" content="text/html; charset=UTF-8">
		<meta name="viewport" content="width=device-width, initial-scale=1, shrink-to-fit=no">
		<meta name="description" content="">
		<meta name="author" content="">

		<title>Dashboard Template for Bootstrap</title>
		<!-- Bootstrap core CSS -->
		<link th:href="@{/css/bootstrap.min.css}" rel="stylesheet">

		<!-- Custom styles for this template -->
		<link th:href="@{/css/dashboard.css}" rel="stylesheet">
		<style type="text/css">
			/* Chart.js */

			@-webkit-keyframes chartjs-render-animation {
				from {
					opacity: 0.99
				}
				to {
					opacity: 1
				}
			}

			@keyframes chartjs-render-animation {
				from {
					opacity: 0.99
				}
				to {
					opacity: 1
				}
			}

			.chartjs-render-monitor {
				-webkit-animation: chartjs-render-animation 0.001s;
				animation: chartjs-render-animation 0.001s;
			}
		</style>
	</head>

	<body>


		<div class="container-fluid">
			<div class="row">
				<main role="main" class="col-md-9 ml-sm-auto col-lg-10 pt-3 px-4">
					<h2>Section title</h2>
					<div class="table-responsive">
						<table class="table table-striped table-sm">
							<thead>
								<tr>
									<th>#</th>
									<th>Header</th>
									<th>Header</th>
									<th>Header</th>
									<th>Header</th>
								</tr>
							</thead>
							<tbody>
								<tr>
									<td>1,001</td>
									<td>Lorem</td>
									<td>ipsum</td>
									<td>dolor</td>
									<td>sit</td>
								</tr>
								<tr>
									<td>1,002</td>
									<td>amet</td>
									<td>consectetur</td>
									<td>adipiscing</td>
									<td>elit</td>
								</tr>
								<tr>
									<td>1,003</td>
									<td>Integer</td>
									<td>nec</td>
									<td>odio</td>
									<td>Praesent</td>
								</tr>
								<tr>
									<td>1,003</td>
									<td>libero</td>
									<td>Sed</td>
									<td>cursus</td>
									<td>ante</td>
								</tr>
								<tr>
									<td>1,004</td>
									<td>dapibus</td>
									<td>diam</td>
									<td>Sed</td>
									<td>nisi</td>
								</tr>
								<tr>
									<td>1,005</td>
									<td>Nulla</td>
									<td>quis</td>
									<td>sem</td>
									<td>at</td>
								</tr>
								<tr>
									<td>1,006</td>
									<td>nibh</td>
									<td>elementum</td>
									<td>imperdiet</td>
									<td>Duis</td>
								</tr>
								<tr>
									<td>1,007</td>
									<td>sagittis</td>
									<td>ipsum</td>
									<td>Praesent</td>
									<td>mauris</td>
								</tr>
								<tr>
									<td>1,008</td>
									<td>Fusce</td>
									<td>nec</td>
									<td>tellus</td>
									<td>sed</td>
								</tr>
								<tr>
									<td>1,009</td>
									<td>augue</td>
									<td>semper</td>
									<td>porta</td>
									<td>Mauris</td>
								</tr>
								<tr>
									<td>1,010</td>
									<td>massa</td>
									<td>Vestibulum</td>
									<td>lacinia</td>
									<td>arcu</td>
								</tr>
								<tr>
									<td>1,011</td>
									<td>eget</td>
									<td>nulla</td>
									<td>Class</td>
									<td>aptent</td>
								</tr>
								<tr>
									<td>1,012</td>
									<td>taciti</td>
									<td>sociosqu</td>
									<td>ad</td>
									<td>litora</td>
								</tr>
								<tr>
									<td>1,013</td>
									<td>torquent</td>
									<td>per</td>
									<td>conubia</td>
									<td>nostra</td>
								</tr>
								<tr>
									<td>1,014</td>
									<td>per</td>
									<td>inceptos</td>
									<td>himenaeos</td>
									<td>Curabitur</td>
								</tr>
								<tr>
									<td>1,015</td>
									<td>sodales</td>
									<td>ligula</td>
									<td>in</td>
									<td>libero</td>
								</tr>
							</tbody>
						</table>
					</div>
				</main>
			</div>
		</div>

		<!-- Bootstrap core JavaScript
    ================================================== -->
		<!-- Placed at the end of the document so the pages load faster -->
		<script type="text/javascript" src="asserts/js/jquery-3.2.1.slim.min.js"></script>
		<script type="text/javascript" src="asserts/js/popper.min.js"></script>
		<script type="text/javascript" src="asserts/js/bootstrap.min.js"></script>

		<!-- Icons -->
		<script type="text/javascript" src="asserts/js/feather.min.js"></script>
		<script>
			feather.replace()
		</script>

		<!-- Graphs -->
		<script type="text/javascript" src="asserts/js/Chart.min.js"></script>
		<script>
			var ctx = document.getElementById("myChart");
			var myChart = new Chart(ctx, {
				type: 'line',
				data: {
					labels: ["Sunday", "Monday", "Tuesday", "Wednesday", "Thursday", "Friday", "Saturday"],
					datasets: [{
						data: [15339, 21345, 18483, 24003, 23489, 24092, 12034],
						lineTension: 0,
						backgroundColor: 'transparent',
						borderColor: '#007bff',
						borderWidth: 4,
						pointBackgroundColor: '#007bff'
					}]
				},
				options: {
					scales: {
						yAxes: [{
							ticks: {
								beginAtZero: false
							}
						}]
					},
					legend: {
						display: false,
					}
				}
			});
		</script>

	</body>

</html>
测试,此时访问dashboard.html 或者 list.html(/emps)页面的结果:http://localhost:8080/emps
没有了侧边栏和顶部导航栏
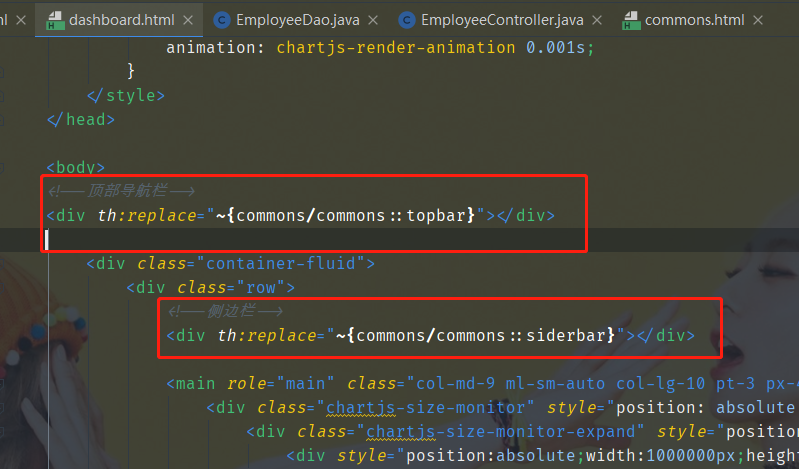
插入侧边栏和导航栏:
- 插入: 并注意使用 thymeleaf 语法 ~ 波浪号
<!--顶部导航栏-->
<div th:replace="~{commons/commons::topbar}"></div>

<!--侧边栏-->
<div th:replace="~{commons/commons::siderbar}"></div>
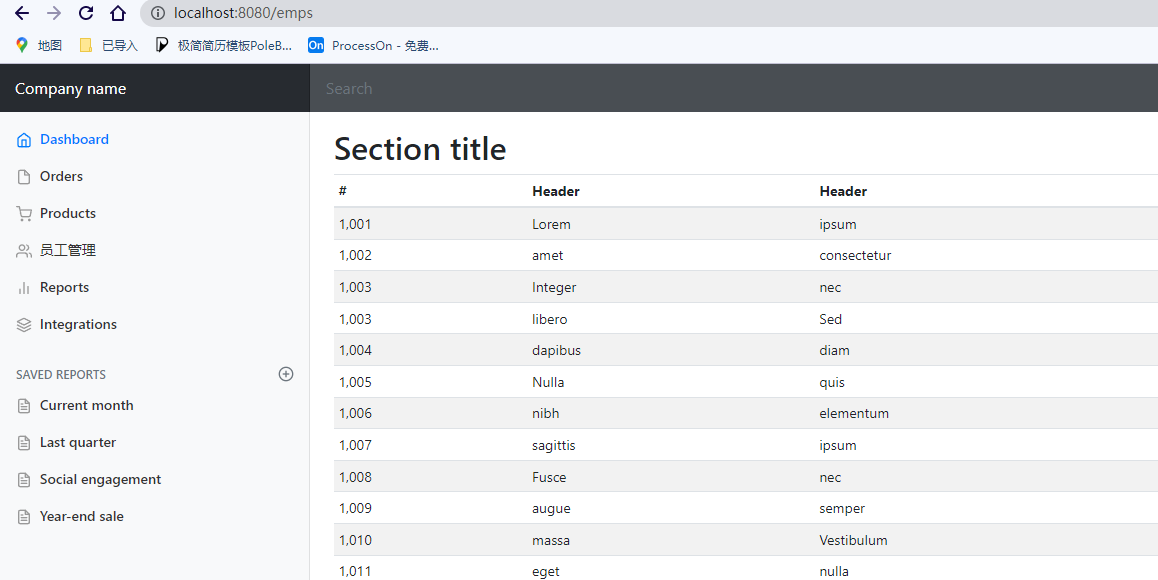
测试:登陆后,成功导入侧边栏和导航栏。
点击显示高亮
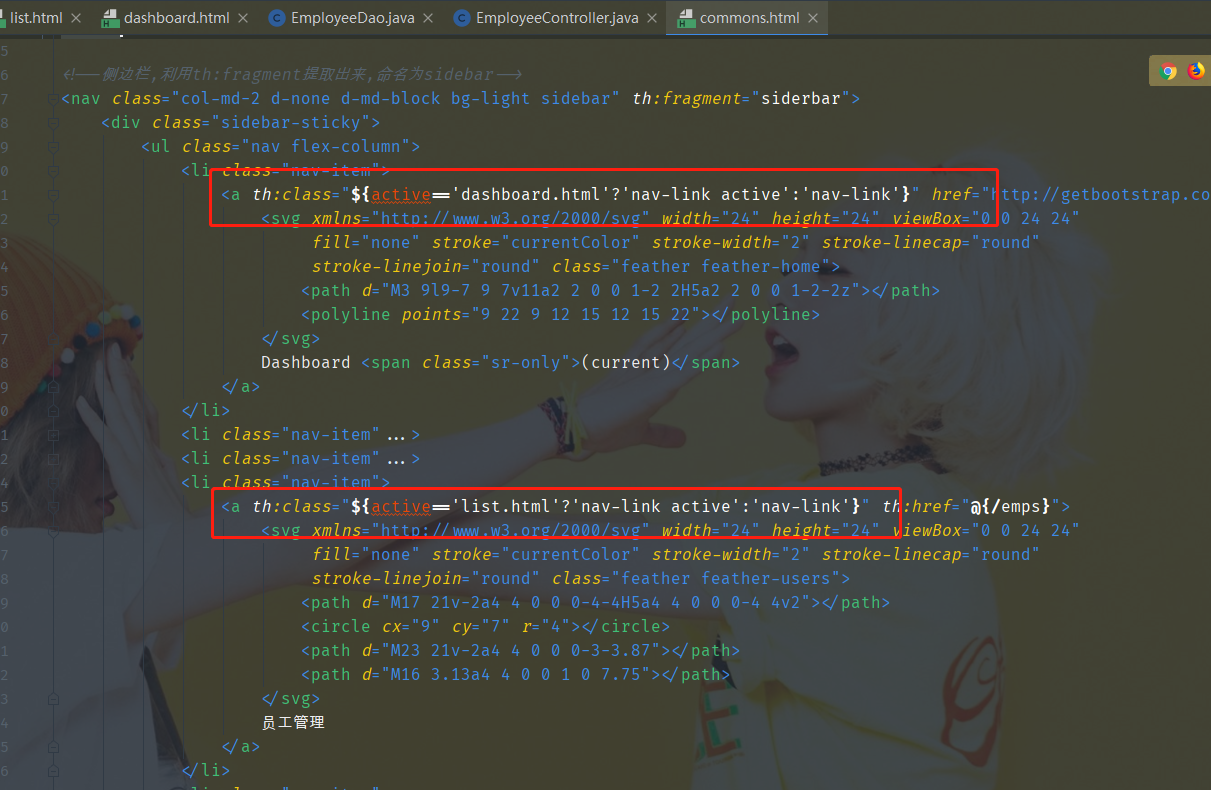
那么对于 高亮而言:就是 active 这里的动作:
commons页面:
- 在公共页面
commons.html相应标签部分利用thymeleaf接收参数active,利用三元运算符判断决定是否高亮
            <li class="nav-item">
                <a th:class="${active=='dashboard.html'?'nav-link active':'nav-link'}" href="http://getbootstrap.com/docs/4.0/examples/dashboard/#">
                    <svg xmlns="http://www.w3.org/2000/svg" width="24" height="24" viewBox="0 0 24 24"
                         fill="none" stroke="currentColor" stroke-width="2" stroke-linecap="round"
                         stroke-linejoin="round" class="feather feather-home">
                        <path d="M3 9l9-7 9 7v11a2 2 0 0 1-2 2H5a2 2 0 0 1-2-2z"></path>
                        <polyline points="9 22 9 12 15 12 15 22"></polyline>
                    </svg>
                    Dashboard <span class="sr-only">(current)</span>
                </a>
            </li>
...
            <li class="nav-item">
                <a th:class="${active=='list.html'?'nav-link active':'nav-link'}" th:href="@{/emps}">
                    <svg xmlns="http://www.w3.org/2000/svg" width="24" height="24" viewBox="0 0 24 24"
                         fill="none" stroke="currentColor" stroke-width="2" stroke-linecap="round"
                         stroke-linejoin="round" class="feather feather-users">
                        <path d="M17 21v-2a4 4 0 0 0-4-4H5a4 4 0 0 0-4 4v2"></path>
                        <circle cx="9" cy="7" r="4"></circle>
                        <path d="M23 21v-2a4 4 0 0 0-3-3.87"></path>
                        <path d="M16 3.13a4 4 0 0 1 0 7.75"></path>
                    </svg>
                    员工管理
                </a>
            </li>
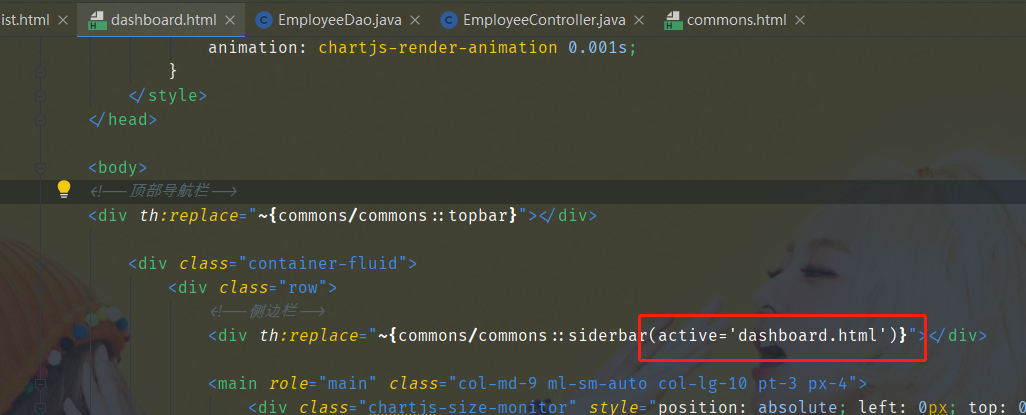
dashboard.html页面:
				<!--侧边栏-->
				<div th:replace="~{commons/commons::siderbar(active='dashboard.html')}"></div>
同样在list.html的侧边栏标签传递参数active为list.html:
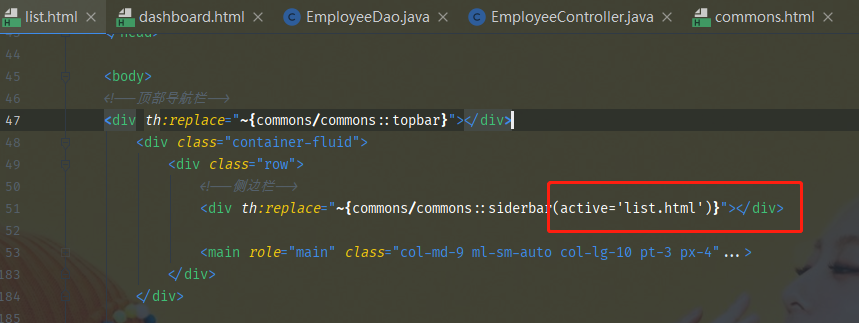
		<!--侧边栏-->
				<div th:replace="~{commons/commons::siderbar(active='list.html')}"></div>
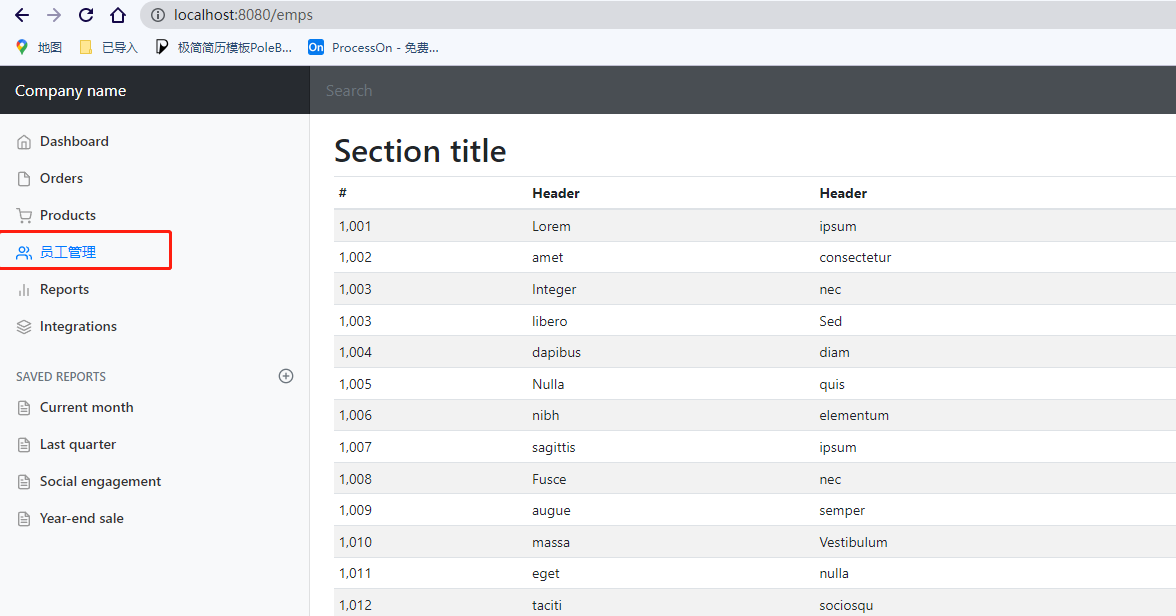
测试:
此时点击员工管理,员工管理高亮,成功。
显示员工信息
修改 list.html 页面,展示员工的信息。
员工管理控制器 EmployeeController:
- url请求 http://localhost:8080/emps 访问所有的员工信息。
- 返回结果 集合 employees 封装在 emps中,利用 Model 将数据传递到前端
package com.al.controller;

import com.al.dao.EmployeeDao;
import com.al.pojo.Employee;
import org.springframework.beans.factory.annotation.Autowired;
import org.springframework.stereotype.Controller;
import org.springframework.ui.Model;
import org.springframework.web.bind.annotation.RequestMapping;

import java.util.Collection;

// 员工管理信息 controller
@Controller
public class EmployeeController {

    @Autowired
    private EmployeeDao employeeDao;

    @RequestMapping("/emps")
    public String list(Model model){
        Collection<Employee> employees = employeeDao.getAll();
        model.addAttribute("emps",employees);
        return "emps/list"; // 返回到 list界面
    }
}
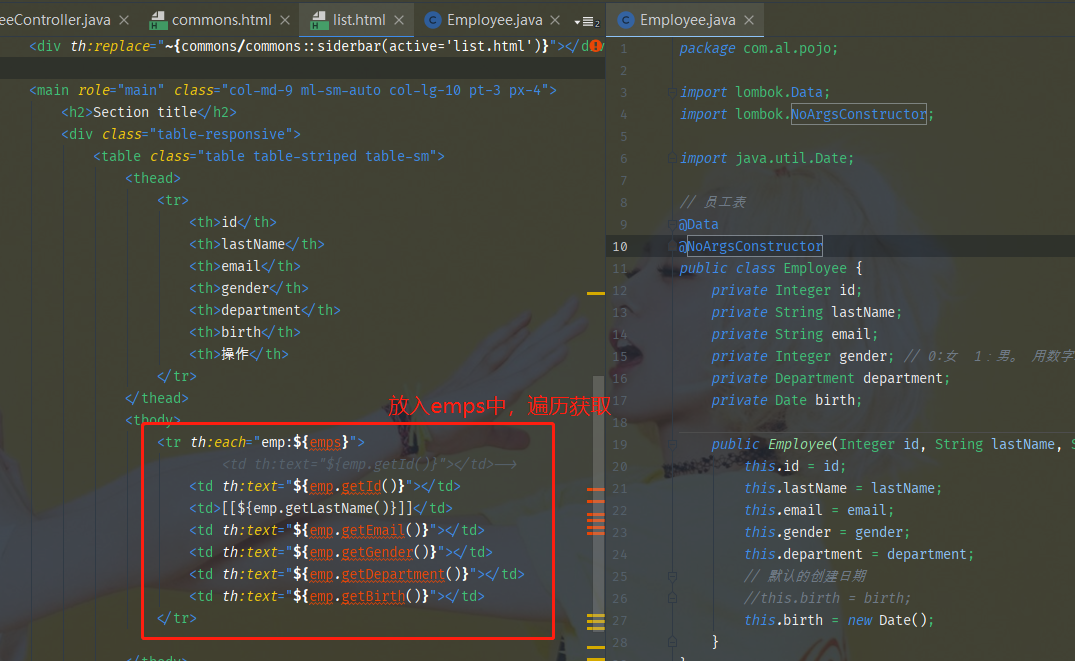
修改表格的展示信息:获取参数的信息表示:【从emps中获取,遍历表示】
-
<td th:text="${emp.getId()}"></td> -
<td>[[${emp.getLastName()}]]</td>
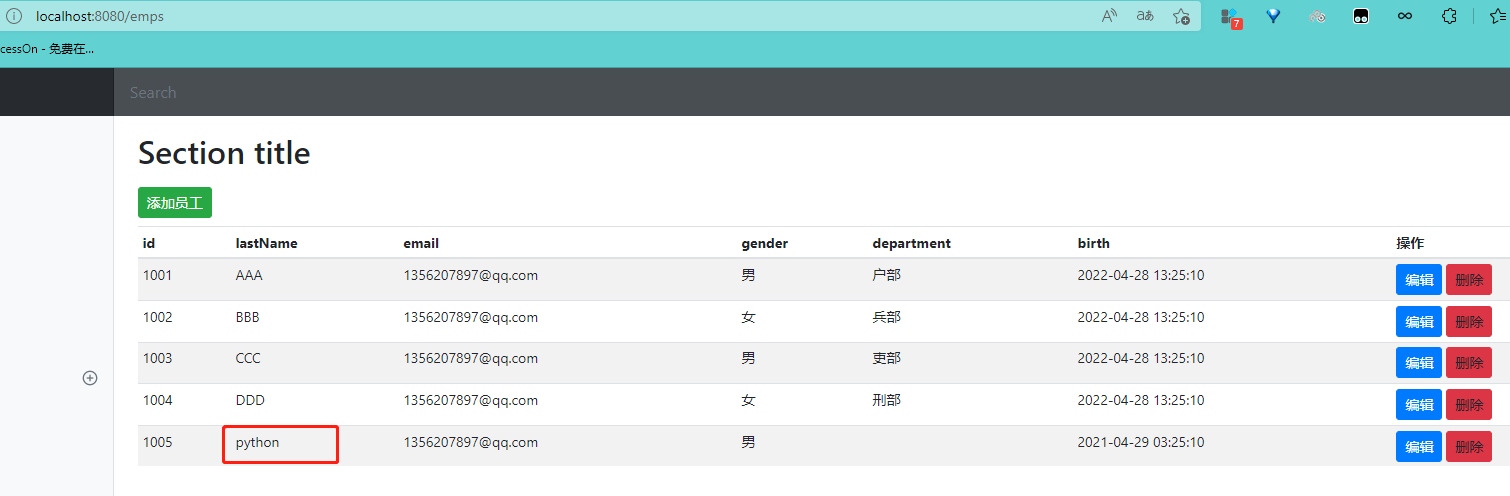
上述修改后,重新启动程序,可以展示员工的信息列表。不过此时的
- gender 性别显示的是 0 与 1,而不是男/女。需要进行修改。使用三元运算符解决。
- 且对于操作一栏,添加 编辑和删除的 按钮功能。
- 日期一栏的格式,修改为 yyyy-MM-dd HH:mm:ss 的形式
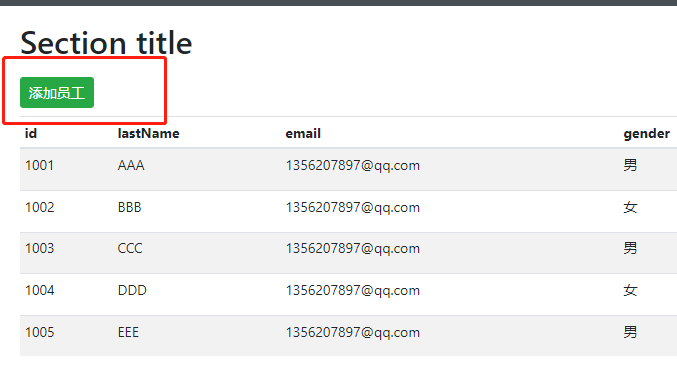
<main role="main" class="col-md-9 ml-sm-auto col-lg-10 pt-3 px-4">
					<h2>Section title</h2>
					<div class="table-responsive">
						<table class="table table-striped table-sm">
							<thead>
								<tr>
									<th>id</th>
									<th>lastName</th>
									<th>email</th>
									<th>gender</th>
									<th>department</th>
									<th>birth</th>
									<th>操作</th>
								</tr>
							</thead>
							<tbody>
								<tr th:each="emp:${emps}">
<!--									<td th:text="${emp.getId()}"></td>-->
									<td th:text="${emp.getId()}"></td>
									<td>[[${emp.getLastName()}]]</td>
									<td th:text="${emp.getEmail()}"></td>
									<td th:text="${emp.getGender()==0?'女':'男'}"></td>
									<td th:text="${emp.getDepartment().getDepartmentName()}"></td>
									<td th:text="${#dates.format(emp.getBirth(),'yyyy-MM-dd HH:mm:ss')}"></td>
									<td>
										<a class="btn btn-sm btn-primary">编辑</a>
										<a class="btn btn-sm btn-danger">删除</a>
									</td>
								</tr>
							</tbody>
						</table>
					</div>
				</main>
小结:
在登录过程中:
- 用户名和密码的判断,决定是否成功登录。
- 只有用户成功登录后,有了用户 session,才能进行访问特定界面。 拦截器【拦截请求,还需放行资源】
在展示员工列表的时候:
-
提取页面公共部分,代码复用。
<!--定义: 顶部导航栏,利用th:fragment提取出来,命名为topbar--> <nav class="navbar navbar-dark sticky-top bg-dark flex-md-nowrap p-0" th:fragment="topbar"> <!-- 插入: 顶部导航栏--> <div th:replace="~{commons/commons::topbar}"></div> -
员工信息在列表中循环/遍历获取 进行展示。
增加员工实现
员工管理的增加:
- 在员工管理界面 添加 员工增加的请求url,按钮选项。
- add 添加员工这一请求servlet 对应的控制器 controller。跳转到 add.html页面,进行添加
- 创建 添加页面:add.html
添加员工选项
在员工信息展示列表 list.html 界面中添加 员工增加(add)选项,和对应的url请求路径:
<h2><a class="btn btn-sm btn-success" th:href="@{/add}">添加员工</a></h2>

效果:
EmployeeController 控制器
编写 add 添加员工这一请求的 controller。
- 通过Get方式提交,返回add.html页面(在该页面完成员工信息添加)
    @GetMapping("/add")
    public String toAddPage(Model model) {
        //查出所有的部门信息,添加到departments中,用于前端接收
        Collection<Department> departments = departmentDao.getDepartments();
        model.addAttribute("departments", departments);
        return "emps/add";//返回到添加员工页面
    }
在这里,toAddPage函数传递 部门信息给前端,便于在添加员工信息时 去选择所在部门信息。
- model.addAttribute(“departments”, departments);
增加员工信息界面:add.html
此时的department 信息 传递给前端, 在前端显示出来所有部门的信息。 add.thml 页面的修改:
add.html :
- 复制
list.html中的内容,把员工表格信息展示的部分修改为:
<!--顶部导航栏-->
<div th:replace="~{commons/commons::topbar}"></div>
<div class="container-fluid">
<div class="row">
<!--侧边栏-->
<div th:replace="~{commons/commons::siderbar(active='list.html')}"></div>
<main role="main" class="col-md-9 ml-sm-auto col-lg-10 pt-3 px-4">
<div class="form-group">
<label>LastName</label>
<input type="text" name="lastName" class="form-control" placeholder="lastname:zsr">
</div>
<div class="form-group">
<label>Email</label>
<input type="email" name="email" class="form-control" placeholder="email:xxxxx@qq.com">
</div>
<div class="form-group">
<label>Gender</label><br/>
<div class="form-check form-check-inline">
<input class="form-check-input" type="radio" name="gender" value="1">
<label class="form-check-label">男</label>
</div>
<div class="form-check form-check-inline">
<input class="form-check-input" type="radio" name="gender" value="0">
<label class="form-check-label">女</label>
</div>
</div>
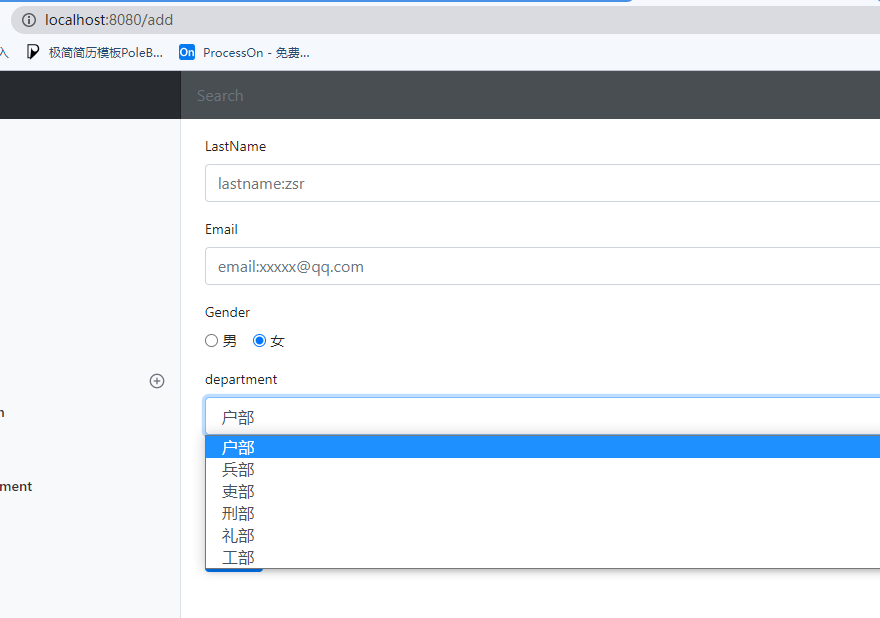
<div class="form-group">
<label>department</label>
<!--注意这里的name是department.id,因为传入的参数为id-->
<select class="form-control" name="department.id">
<option th:each="department:${departments}" th:text="${department.getDepartmentName()}" th:value="${department.getId()}"></option>
</select>
</div>
<div class="form-group">
<label>Birth</label>
<!--springboot默认的日期格式为yy/MM/dd-->
<input type="text" name="date" class="form-control" placeholder="birth:yyyy/MM/dd">
</div>
<button type="submit" class="btn btn-primary">添加</button>
</main>
</div>
</div>
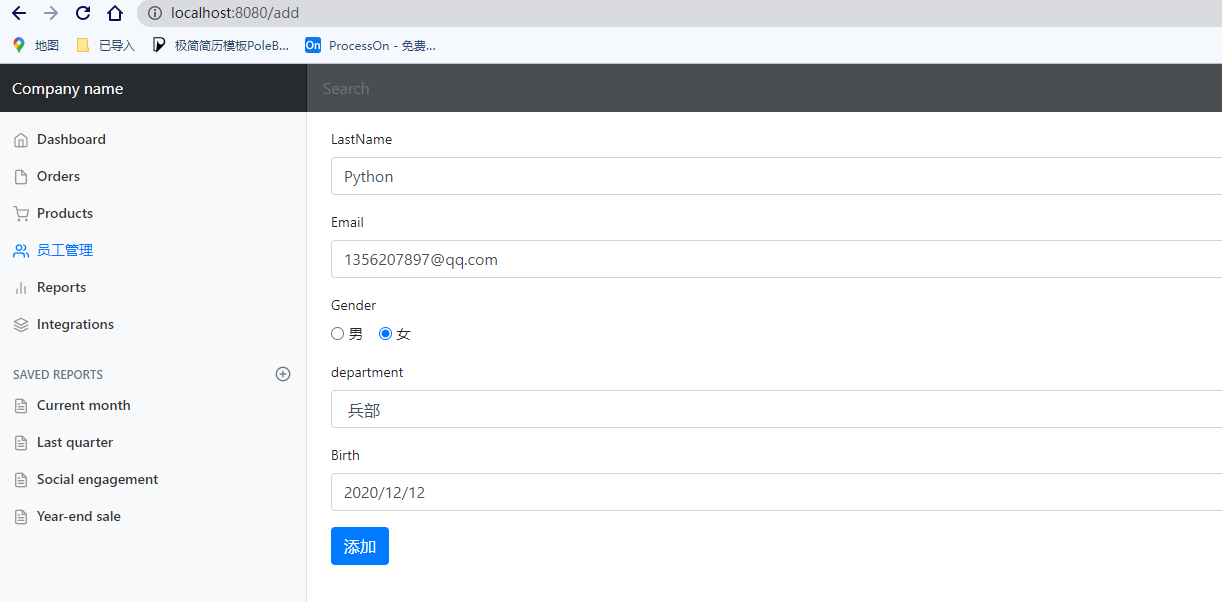
点击添加员工,成功跳转到add.html页面:
add.html页面完成员工信息添加功能
在前面增加员工实现的功能,已经完成了:
- 在list.html这一员工信息展示列表 添加了 增加员工 选项,以及响应 增加员工请求(/add) 的控制器 controller
- 员工控制器EmployeeController 中添加 toAddPage 方法,前往增加员工界面 add.html,且传递 部门信息
- 增加员工界面 add.html 的代码编写,展示员工的 lastName、email、department、gender的信息,且添加 ‘name’ 属性,便于将相应的属性值由前端传递给后端,添加数据到底层。这里是添加到 模拟数据库表中的员工数据信息的 Map<Integer, Employee> employees 中。
那么增加员工实现 功能完成后,跳转页面到 list.html中,展示所有的员工信息。
- 增加选项动作提交时的url响应。这里也同样使用 /add 请求路径,不过请求方式改为 Post。【使用Resful风格】
- 编写对应的 controller,并在该控制器中 获取此时的员工map,传递给 list.html界面,展示添加员工后的 员工信息列表。
add.html:
<!--顶部导航栏-->
<div th:replace="~{commons/commons::topbar}"></div>
<div class="container-fluid">
<div class="row">
<!--侧边栏-->
<div th:replace="~{commons/commons::siderbar(active='list.html')}"></div>
<main role="main" class="col-md-9 ml-sm-auto col-lg-10 pt-3 px-4">
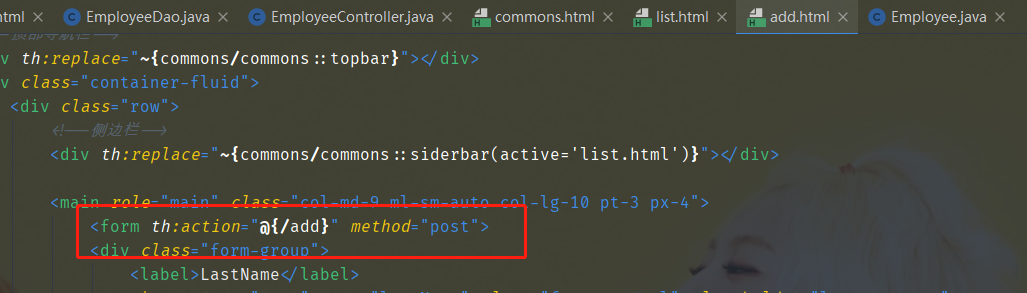
<form th:action="@{/add}" method="post">
<div class="form-group">
<label>LastName</label>
<input type="text" name="lastName" class="form-control" placeholder="lastname:zsr">
</div>
<div class="form-group">
<label>Email</label>
<input type="email" name="email" class="form-control" placeholder="email:xxxxx@qq.com">
</div>
<div class="form-group">
<label>Gender</label><br/>
<div class="form-check form-check-inline">
<input class="form-check-input" type="radio" name="gender" value="1">
<label class="form-check-label">男</label>
</div>
<div class="form-check form-check-inline">
<input class="form-check-input" type="radio" name="gender" value="0">
<label class="form-check-label">女</label>
</div>
</div>
<div class="form-group">
<label>department</label>
<!--注意这里的name是department.id,因为传入的参数为id-->
<select class="form-control" name="department.id">
<option th:each="department:${departments}" th:text="${department.getDepartmentName()}" th:value="${department.getId()}"></option>
</select>
</div>
<div class="form-group">
<label>Birth</label>
<!--springboot默认的日期格式为yy/MM/dd-->
<input type="text" name="date" class="form-control" placeholder="birth:yyyy/MM/dd">
</div>
<button type="submit" class="btn btn-primary">添加</button>
</form>
</main>
</div>
</div>
编写对应的controller,同样在EmployeeController中添加一个方法addEmp用来处理点击添加按钮的操作
package com.al.controller;

import com.al.dao.DepartmentDao;
import com.al.dao.EmployeeDao;
import com.al.pojo.Department;
import com.al.pojo.Employee;
import org.springframework.beans.factory.annotation.Autowired;
import org.springframework.stereotype.Controller;
import org.springframework.ui.Model;
import org.springframework.web.bind.annotation.GetMapping;
import org.springframework.web.bind.annotation.PostMapping;
import org.springframework.web.bind.annotation.RequestMapping;

import java.util.Collection;

// 员工管理信息 controller
@Controller
public class EmployeeController {

    @Autowired
    private EmployeeDao employeeDao;
    @Autowired
    private DepartmentDao departmentDao;

    @RequestMapping("/emps")
    public String list(Model model){
        Collection<Employee> employees = employeeDao.getAll();
        model.addAttribute("emps",employees);
        return "emps/list"; // 返回到 list界面
    }

    @GetMapping("/add")
    public String toAddPage(Model model) {
        //查出所有的部门信息,添加到departments中,用于前端接收
        Collection<Department> departments = departmentDao.getDepartments();
        model.addAttribute("departments", departments);
        return "emps/add";//返回到添加员工页面
    }

    @PostMapping("/add")
    public String addEmp(Employee employee){
        System.out.println("save=>" +employee);
        employeeDao.addEmployee(employee); //添加一个员工
        return "redirect:/emps";//重定向到/emps,刷新列表,返回到list页面
    }
}
重启程序,进行测试,选择添加员工进入到 add.html界面:【注意:此时的日期是yyyy/MM/dd 的形式】
点击添加选项,url请求 /add,resful风格的 Post请求提交方式,响应的控制器是 addEmp,完成员工信息添加,跳转到list.html界面。展示的所有员工信息为:这时候,发现错误,无法跳转到 list.html界面。错误的原因:

在dao层的 EmployeeDao 发生了错误:
- 增加员工时的:employee.setDepartment(departmentDao.getDepartmentById(employee.getDepartment().getId())); 不正确
    // 增加一个员工
    public void addEmployee(Employee employee){
        if (employee.getId() == null){
            employee.setId(initId++);
        }
        employee.setDepartment(departmentDao.getDepartmentById(employee.getDepartment().getId()));
        employees.put(employee.getId(), employee);
        System.out.println(employee);
    }
经过测试发现:
- employee.getDepartment().getId() 没有问题,获取的是 department部门的id 102
- departmentDao.getDepartmentById(102) 这里出错了
关于 departmentDao 中的方法无法调用。???错误还没解决掉
但是如果有问题的话,在EmployeeController 控制器 中的 toAddPage里面的
Collection<Department> departments = departmentDao.getDepartments();
model.addAttribute("departments", departments);
这两行代码应该生效才对。 还是不对劲。…
修改员工信息
界面中,关于员工信息列表展示的时候,操作栏添加了 编辑 和 删除 的选项。同样的,对于编辑选项:【和添加员工信息的步骤类似】
- 对于编辑选项,添加请求路径,url: /emp/{id} ,请求的时候携带员工id,便于查询对应的员工信息,进行展示 和修改
- /emp/{id} 这一请求 servlet 对应的控制器 controller,跳转到更新界面 update.html
- 在 update.html 点击 修改 按钮的一瞬间,我们需要返回到list页面,更新员工信息,因此我们需要添加 href 属性,实现点击按钮时发起一个请求 /edit
list.html界面中的编辑选项
点击编辑选项,
- 增加 url 请求路径。
- 且前端需要传递给后端的参数:携带员工id
<a class="btn btn-sm btn-primary" th:href="@{/emp/{id}(id=${emp.getId()})}">编辑</a>
EmployeeController 控制器
响应 url请求,获取前端传递过来的员工 id 信息,跳转到 update.html 页面,展示员工 目前的信息:
    @GetMapping("/emp/{id}")
    public String toUpdatePage(@PathVariable("id")Integer id, Model model){
        //查出原来的数据
        Employee employee = employeeDao.getEmployeeById(id);
        model.addAttribute("emp", employee);
        //查出所有部门的信息
        Collection<Department> departments = departmentDao.getDepartments();
        model.addAttribute("departments", departments);
        return "emps/update";
    }
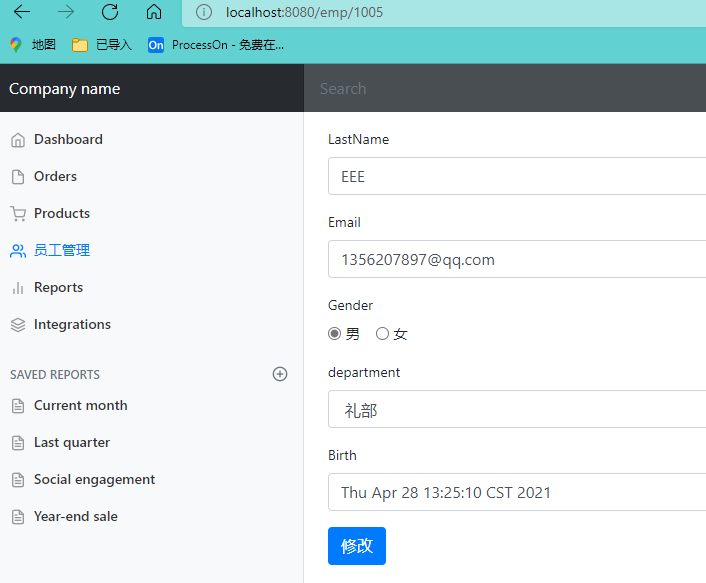
updat.html 页面
这里的信息展示 和 add.html页面类似,复制进行修改:
-
不能每次修改一次员工信息,就让id+1, 需要id隐藏域标签
<input type="hidden" name="id" th:value="${emp.getId()}"> -
显示员工的原有部门信息,以及所有的部门信息
<select class="form-control" name="department.id"> <option th:selected="${emp.getDepartment().getId() == department.getId()}" th:each="department:${departments}" th:text="${department.getDepartmentName()}" th:value="${department.getId()}"></option> </select> -
规定一下显示的日期格式
<input th:value="${#dates.format(emp.getBirth(),'yyyy-MM-dd HH:mm:ss')}" type="text" name="birth" class="form-control" placeholder="birth:yyyy/MM/dd">
update.html:
<!--顶部导航栏-->
<div th:replace="~{commons/commons::topbar}"></div>
<div class="container-fluid">
    <div class="row">
        <!--侧边栏-->
        <div th:replace="~{commons/commons::siderbar(active='list.html')}"></div>

        <main role="main" class="col-md-9 ml-sm-auto col-lg-10 pt-3 px-4">
            <form th:action="@{/updateEmp}" method="post">
                <input type="hidden" name="id" th:value="${emp.getId()}">
                <div class="form-group">
                    <label>LastName</label>
                    <input th:value="${emp.getLastName()}" type="text" name="lastName" class="form-control" placeholder="lastname:zsr">
                </div>
                <div class="form-group">
                    <label>Email</label>
                    <input th:value="${emp.getEmail()}" type="email" name="email" class="form-control" placeholder="email:xxxxx@qq.com">
                </div>
                <div class="form-group">
                    <label>Gender</label><br/>
                    <div class="form-check form-check-inline">
                        <input th:checked="${emp.getGender()==1}" class="form-check-input" type="radio" name="gender" value="1">
                        <label class="form-check-label">男</label>
                    </div>
                    <div class="form-check form-check-inline">
                        <input th:checked="${emp.getGender()==0}"class="form-check-input" type="radio" name="gender" value="0">
                        <label class="form-check-label">女</label>
                    </div>
                </div>
                <div class="form-group">
                    <label>department</label>
                    <!--注意这里的name是department.id,因为传入的参数为id-->
                    <select class="form-control" name="department.id">
                        <option th:selected="${emp.getDepartment().getId() == department.getId()}" th:each="department:${departments}" th:text="${department.getDepartmentName()}" th:value="${department.getId()}"></option>
                    </select>
                </div>
                <div class="form-group">
                    <label>Birth</label>
                    <!--springboot默认的日期格式为yy/MM/dd-->
<!--                    <input th:value="${emp.getBirth()}" type="text" name="birth" class="form-control" placeholder="birth:yyyy/MM/dd"> -->
<!--                    <input th:value="${#dates.format(emp.getBirth(),'yyyy-MM-dd HH:mm')}" type="text" name="birth" class="form-control" placeholder="birth:yyyy/MM/dd">-->
                    <input th:value="${#dates.format(emp.getBirth(),'yyyy-MM-dd HH:mm:ss')}" type="text" name="birth" class="form-control" placeholder="birth:yyyy/MM/dd">
                </div>
                <button type="submit" class="btn btn-primary">修改</button>
            </form>
        </main>
    </div>
</div>
update.html页面完成员工信息修改功能
员工信息修改后, 需要重新跳转 或者重定向到 员工列表的页面。
在 update.html 这个修改员工信息页面完成后, 提交动作需要执行 发送 更新页面完成这个请求, 然后才能重定向到员工列表页面:
update.html:
<form th:action="@{/updateEmp}" method="post">
对应的控制器 Controller:
- 处理点击
修改按钮的请求。同样在EmployeeController中添加一个方法EditEmp用来处理edit页面点击添加的操作
    @PostMapping("/updateEmp")
    public String updataEmp(Employee employee){
        employeeDao.addEmployee(employee);//添加一个员工
        return "redirect:/emps";//添加完成重定向到/emps,刷新列表
    }
进行测试,进入添加页面,填写相关信息
点击修改,返回list.html页面:【我取消掉关于employeeDao中增加员工中的departmentDao 才有如下结果】
同样的错误:?????????????????????????????
- employee.getDepartment().getId() 没有问题,获取的是 department部门的id 102
- departmentDao.getDepartmentById(102) 这里出错了
关于 departmentDao 中的方法无法调用。???错误还没解决掉
但是如果有问题的话,在EmployeeController 控制器 中的 toAddPage里面的
Collection<Department> departments = departmentDao.getDepartments();
model.addAttribute("departments", departments);
这两行代码应该生效才对。 还是不对劲。…
删除员工信息
对于操作栏的删除,响应删除请求,url请求对应的controller,直接返回list.html界面。
删除选项增加超链接:【和编辑选项类似,超链接属性 href,且传递参数应携带员工id】
<a class="btn btn-sm btn-danger" th:href="@{/delemp/{id}(id=${emp.getId()})}">删除</a>
EmployeeController 控制器:
响应url请求 /delemp/{id},移除员工信息,返回重定向到 list.html 页面。
    @GetMapping("/delemp/{id}")
    public String deleteEmp(@PathVariable("id")Integer id, Model model){
        employeeDao.deleteEmployeeByID(id);
        return "redirect:/emps";//添加完成重定向到/emps,刷新列表
    }
测试,成功删除。
6、404页面定制和注销操作
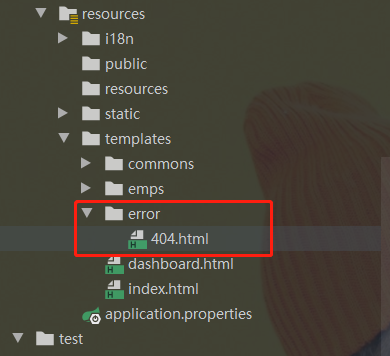
404页面定制
只需要在templates目录下新建一个error包,然后将404.html放入其中,报错SpringBoot就会自动找到这个页面。
注销操作
员工管理系统进行注销,即移除掉 session。
注销的功能在 commons.html文件中:
- 顶部导航栏处中的标签添加
href属性,实现点击发起请求/user/logout
<li class="nav-item text-nowrap">
    <a class="nav-link" th:href="@{/user/logout}">Sign out</a>
</li>
控制器controller,响应 /user/logout 请求,在LoginController中编写对应的方法,清除session,并重定向到首页。
    @RequestMapping("/user/logout")
    public String logout(HttpSession session) {
        session.invalidate();
        return "redirect:/index.html";
    }
测试,重启程序,成功注销。
如何写一个网站呢?
-
前端
- 模板:利用别人写好的,进行改写成自己想要的
- 框架:去进行拼接。Bootstrap,layui,semantic-ui。 完成 栅格系统,导航栏,侧边栏,表单等
-
设计数据库【数据库表的设计、持久性、保护、备份】
-
后端操作数据库。【事务、设计模式,提高开发效率的】
-
后端和前端的数据交互。数据接口对接:json,对象 all in one
SpringBoot: 整合Mybatis-员工管理系统
对于这个员工管理系统,整合mybatis去完成对数据库操作。
创建数据库表
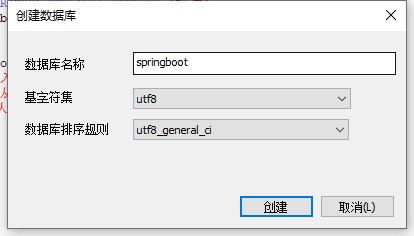
数据库排序规则:
- utf8_general_ci 不区分大小写
- utf8_general_cs 区分大小写
建立的数据库表:
department 部门表:
SHOW CREATE DATABASE school;
create table `department`(
`id` int(4) not null auto_increment comment'部门id',
`departmentName` VARCHAR(30) NOT NULL DEFAULT '机密部门' COMMENT '姓名',
primary key(`id`)
)ENGINE=INNODB DEFAULT CHARSET=utf8

insert into `department`(`id`,`departmentName`)
values(101,'户部'),(102,'兵部'),(103,'吏部'),(104,'刑部'),(105,'礼部'),(106,'工部')
外键
概念:如果公共关键字在一个关系中是主关键字,那么这个公共关键字被称为另一个关系的外键。由此可见,外键表示了两个关系之间的相关联系。以另一个关系的外键作主关键字的表被称为主表,具有此外键的表被称为主表的从表。
在实际操作中,将一个表的值放入第二个表来表示关联,所使用的值是第一个表的主键值(在必要时可包括复合主键值)。此时,第二个表中保存这些值的属性称为外键(foreign key)。
作用:保持数据一致性,完整性,主要目的是控制存储在外键表中的数据,约束。使两张表形成关联,外键只能引用外表中的列的值或使用空值。
创建表的时候指定外键的约束:
方式一:在创建表的时候,增加约束(麻烦,复杂) CREATE TABLE IF NOT EXISTS `school`.`grade` ( `gradeid` INT(10) NOT NULL auto_increment COMMENT '年级编号', `gradename` VARCHAR(10) not null COMMENT '年级名字', PRIMARY KEY(`gradeid`) )ENGINE=INNODB DEFAULT CHARSET=utf8 CREATE TABLE if not EXISTS`student` ( `id` int(4) unsigned zerofill NOT NULL AUTO_INCREMENT COMMENT '学号', `name` varchar(20) NOT NULL DEFAULT '匿名' COMMENT '姓名', `pwd` varchar(20) NOT NULL DEFAULT '123456' COMMENT '密码', `sex` varchar(2) NOT NULL DEFAULT '男' COMMENT '性别', `gradeid` INT(10) NOT NULL auto_increment COMMENT '年级编号', `birthday` datetime DEFAULT NULL COMMENT '出生日期', `address` varchar(60) DEFAULT NULL COMMENT '住址', `email` varchar(50) DEFAULT NULL COMMENT '邮箱', PRIMARY KEY (`id`), KEY `FK_gradeid` (`gradeid`), CONSTRAINT `FK_gradeid` FOREIGN KEY (`gradeid`) REFERENCES `grade` (`gradeid`) ) ENGINE=InnoDB DEFAULT CHARSET=utf8创建表之后再去修改:
方式二:创建表之后再创建外键关系

alter table `student`
add constraint `FK_gradeid` foreign key(`gradeid`) references `grade` (`gradeid`);
-- alter table `表名`
-- add constraint `约束名` foreign key(作为外键的列) references 哪个表(哪个字段);
删除有外键关系的表的时候,必须要先删除引用别人的表(从表),再删除自己的表()。即先删除子表,再删除主表。
以上的操作都是物理外键,数据库级别的外键,,我们不建议使用,避免数据库过多造成困扰。
最佳实践
- 数据库就是单纯的表,只用来存数据,只有行和列
- 我们想使用多张表的数据,想使用外键,程序去实现
员工表:employee
create table `employee`(
`id` INT(4) NOT NULL AUTO_INCREMENT COMMENT'员工id',
`lastName` VARCHAR(30) NOT NULL COMMENT '姓名',
`email` VARCHAR(30) NOT NULL DEFAULT '*.com' COMMENT '邮箱',
`gender` INT(4) NOT NULL DEFAULT '0' COMMENT '性别',
`department` INT(4) NOT NULL COMMENT '部门id',
`birth`DATETIME DEFAULT NULL COMMENT '生日',
primary key(`id`),
key `FK_id`(`department`),
constraint `FK_id` foreign key(`department`) references `department`(`id`)
)ENGINE=INNODB DEFAULT CHARSET=utf8

insert into `employee`(`id`,`lastName`,`email`,`gender`,`department`,`birth`)
values(1001,'AAA','1356207897@qq.com',0,101,'2020-04-05'),(1002,'BBB','1356207897@qq.com',0,102,'2020-04-06'),
(1003,'CCC','1356207897@qq.com',1,103,'2020-05-05'),(1004,'DDD','1356207897@qq.com',1,104,'2020-10-05'),
(1005,'EEE','1356207897@qq.com',1,103,'2020-11-05'),(1006,'FFF','1356207897@qq.com',0,106,'2021-04-05')
数据库表成功创建后的结果:


创建SpringBoot项目
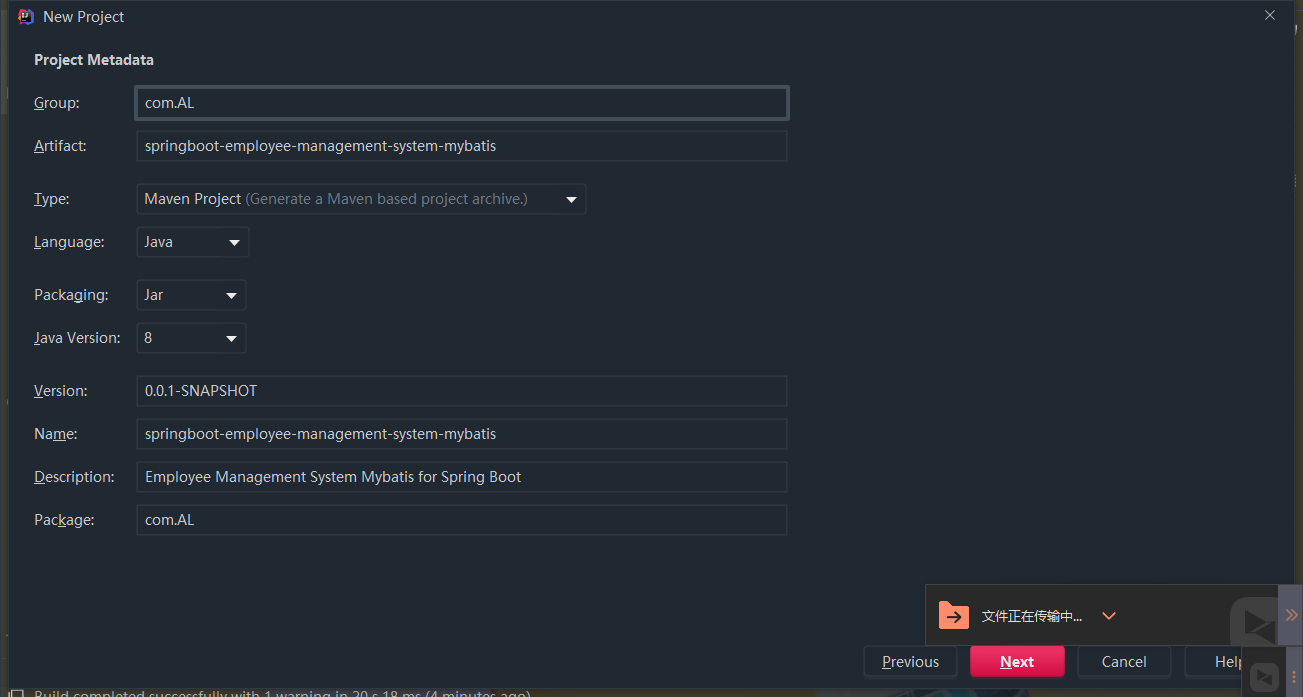
新建一个SpringBoot项目:springboot-employee-management-system-mybatis。
选择的springBoot配置有 web、JDBC、MySQL的:
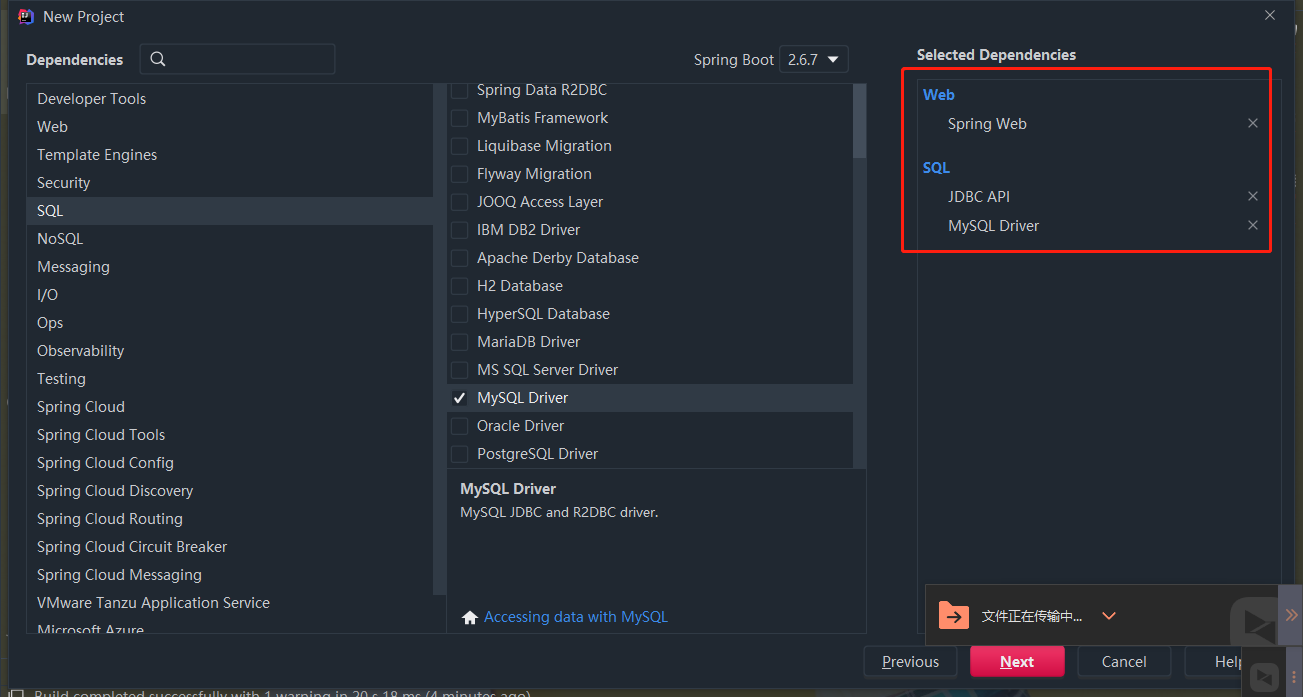
注意:我们需要导入 thymeleaf 模板引擎的maven依赖:
       <!--thymeleaf. 我们都是基于 3.x 开发的-->
        <dependency>
            <groupId>org.springframework.boot</groupId>
            <artifactId>spring-boot-starter-thymeleaf</artifactId>
        </dependency>
项目建立之后,将原来的静态资源文件,导入到现在的这个项目中。
建立数据库连接
对数据库配置文件进行连接的时候,导入 JDBC、mysql、Mybatis的maven依赖。
- mybatis 的依赖
- 静态资源导出的依赖
pom.xml :
<?xml version="1.0" encoding="UTF-8"?>
<project xmlns="http://maven.apache.org/POM/4.0.0" xmlns:xsi="http://www.w3.org/2001/XMLSchema-instance"
         xsi:schemaLocation="http://maven.apache.org/POM/4.0.0 https://maven.apache.org/xsd/maven-4.0.0.xsd">
    <modelVersion>4.0.0</modelVersion>
    <parent>
        <groupId>org.springframework.boot</groupId>
        <artifactId>spring-boot-starter-parent</artifactId>
        <version>2.6.7</version>
        <relativePath/> <!-- lookup parent from repository -->
    </parent>
    <groupId>com.AL</groupId>
    <artifactId>springboot-employee-management-system-mybatis</artifactId>
    <version>0.0.1-SNAPSHOT</version>
    <name>springboot-employee-management-system-mybatis</name>
    <description>Employee Management System Mybatis for Spring Boot</description>
    <properties>
        <java.version>1.8</java.version>
    </properties>
    <dependencies>
        <dependency>
            <groupId>org.springframework.boot</groupId>
            <artifactId>spring-boot-starter-jdbc</artifactId>
        </dependency>
        <dependency>
            <groupId>org.springframework.boot</groupId>
            <artifactId>spring-boot-starter-web</artifactId>
        </dependency>

        <dependency>
            <groupId>mysql</groupId>
            <artifactId>mysql-connector-java</artifactId>
            <scope>runtime</scope>
        </dependency>
        <dependency>
            <groupId>org.springframework.boot</groupId>
            <artifactId>spring-boot-starter-test</artifactId>
            <scope>test</scope>
        </dependency>
        <dependency>
            <groupId>org.projectlombok</groupId>
            <artifactId>lombok</artifactId>
        </dependency>
        <!--thymeleaf. 我们都是基于 3.x 开发的-->
        <dependency>
            <groupId>org.springframework.boot</groupId>
            <artifactId>spring-boot-starter-thymeleaf</artifactId>
        </dependency>
        <!--mybatis的maven依赖-->
        <dependency>
        <groupId>org.mybatis.spring.boot</groupId>
        <artifactId>mybatis-spring-boot-starter</artifactId>
        <version>2.2.2</version>
        </dependency>
        <!-- Druid数据源-->
        <dependency>
            <groupId>com.alibaba</groupId>
            <artifactId>druid</artifactId>
            <version>1.1.21</version>
        </dependency>
        <!-- log4j日志-->
        <dependency>
            <groupId>log4j</groupId>
            <artifactId>log4j</artifactId>
            <version>1.2.17</version>
        </dependency>
    </dependencies>

    <build>
        <plugins>
            <plugin>
                <groupId>org.springframework.boot</groupId>
                <artifactId>spring-boot-maven-plugin</artifactId>
            </plugin>
        </plugins>
        <!--静态资源导出问题-->
        <resources>
            <resource>
                <directory>src/main/java</directory>
                <includes>
                    <include>**/*.properties</include>
                    <include>**/*.xml</include>
                </includes>
                <filtering>false</filtering>
            </resource>
            <resource>
                <directory>src/main/resources</directory>
                <includes>
                    <include>**/*.properties</include>
                    <include>**/*.xml</include>
                </includes>
                <filtering>false</filtering>
            </resource>
        </resources>
    </build>

</project>
数据库配置资源文件:
我使用 application.properties 去进行数据信息配置 。
application.properties 资源配置文件:
# 自定义ul请求目录
#server.servlet.context-path=/al

#自定义配置:国际化资源文件
spring.messages.basename=i18n.login

# 数据库配置信息
spring.datasource.driver-class-name=com.mysql.cj.jdbc.Driver
spring.datasource.username=root
spring.datasource.password=123456
spring.datasource.url=jdbc:mysql://localhost:3306/springboot?serverTimezone=UTC&useUnicode=true&characterEncoding=utf-8
进行测试,建立数据库连接成功。
测试类文件:
package com.AL;

import org.junit.jupiter.api.Test;
import org.springframework.beans.factory.annotation.Autowired;
import org.springframework.boot.test.context.SpringBootTest;

import javax.sql.DataSource;
import java.sql.Connection;
import java.sql.SQLException;

@SpringBootTest
class SpringbootEmployeeManagementSystemMybatisApplicationTests {

    // DI 注入数据源。从spring IOC 容器中获取数据配置信息
    @Autowired
    DataSource dataSource;

    @Test
    void contextLoads() throws SQLException {
        // 查看默认的数据源: com.zaxxer.hikari.HikariDataSource
        System.out.println(dataSource.getClass());
        // 获得数据库连接:
        Connection connection = dataSource.getConnection()
        System.out.println(connection); // HikariProxyConnection@522082506 wrapping com.mysql.cj.jdbc.ConnectionImpl@57f847af

        //DruidDataSource druidDataSource = (DruidDataSource) dataSource;
        //System.out.println("druidDataSource 数据源最大连接数:" + druidDataSource.getMaxActive());
        //System.out.println("druidDataSource 数据源初始化连接数:" + druidDataSource.getInitialSize());

        connection.close(); // 关闭连接
    }

}
显示出了默认的数据源:

pojo层
创建实体类:Department 和 Employee 类。
Department:
package com.AL.pojo;

import lombok.AllArgsConstructor;
import lombok.Data;
import lombok.NoArgsConstructor;

// 部门表
@Data
@AllArgsConstructor
@NoArgsConstructor
public class Department {
    private Integer id;
    private String departmentName;
}
Employee:
package com.AL.pojo;

import lombok.Data;
import lombok.NoArgsConstructor;

import java.util.Date;

// 员工表
@Data
@NoArgsConstructor
public class Employee {
    private Integer id;
    private String lastName;
    private String email;
    private Integer gender; // 0:女  1:男。 用数字表示性别男女
    private Department department;
    private Date birth;

    public Employee(Integer id, String lastName, String email, Integer gender, Department department, Date birth) {
        this.id = id;
        this.lastName = lastName;
        this.email = email;
        this.gender = gender;
        this.department = department;
        // 默认的创建日期
        //this.birth = birth;
        this.birth = new Date();
    }
}
dao层
在这里,为了和上面的区分开来,创建Mapper目录以及对应Mapper接口、Mapper接口映射文件,完成对数据库的操作。
DepartmentMapper.java
package com.AL.mapper;

import com.AL.pojo.Department;
import org.apache.ibatis.annotations.Mapper;
import org.springframework.stereotype.Repository;

import java.util.List;

//@Mapper : 表示本类是一个 MyBatis 的 Mapper
@Mapper
@Repository
public interface DepartmentMapper {

    // 获取所有部门信息
    List<Department> getDepartments();

    // 通过id获得部门
    Department getDepartment(Integer id);

}
DepartmentMapper.xml:关于DepartmentMapper 接口的映射文件,实现类。 完成对数据库的操作。
<?xml version="1.0" encoding="UTF-8" ?>
<!DOCTYPE mapper
        PUBLIC "-//mybatis.org//DTD Mapper 3.0//EN"
        "http://mybatis.org/dtd/mybatis-3-mapper.dtd">
<!--namespace= 绑定一个对应的Dao/Mapper接口
<mapper namespace="org.mybatis.example.BlogMapper">
    <select id="selectBlog" resultType="Blog">
    select * from Blog where id = #{id}
-->
<mapper namespace="com.AL.mapper.DepartmentMapper">

    <select id="getDepartments" resultType="com.al.pojo.Department">
       select * from department;
    </select>

    <select id="getDepartment" resultType="Department" parameterType="int">
       select * from department where id = #{id};
    </select>

</mapper>
整合Myabtis
在配置文件中,整合myabtis。绑定关于dao层的接口和接口实现类 映射文件:
application.properties:
# 数据库配置信息
spring.datasource.driver-class-name=com.mysql.cj.jdbc.Driver
spring.datasource.username=root
spring.datasource.password=123456
spring.datasource.url=jdbc:mysql://localhost:3306/springboot?serverTimezone=UTC&useUnicode=true&characterEncoding=utf-8

# 整合mybatis
mybatis.type-aliases-package=com.AL.pojo
mybatis.mapper-locations=classpath:mybatis/mapper/*.xml
Controller层
关于DepartmentController 的代码:
package com.AL.controller;

import com.AL.mapper.DepartmentMapper;
import com.AL.pojo.Department;
import org.springframework.beans.factory.annotation.Autowired;
import org.springframework.web.bind.annotation.GetMapping;
import org.springframework.web.bind.annotation.PathVariable;
import org.springframework.web.bind.annotation.RestController;

import java.util.List;

@RestController
public class DepartmentController {
    @Autowired
    DepartmentMapper departmentMapper;

    // 查询全部部门
    @GetMapping("/getDepartments")
    public List<Department> getDepartments(){
        return departmentMapper.getDepartments();
    }

    // 查询全部部门
    @GetMapping("/getDepartment/{id}")
    public Department getDepartment(@PathVariable("id") Integer id){
        return departmentMapper.getDepartment(id);
    }
}
启动主程序进行测试,发现错误:
org.thymeleaf.exceptions.TemplateInputException: Error resolving template [index], template might not exist or might not be accessible by any of the configured Template Resolvers
检查后,错误的原因是 thymeleaf 的依赖重复了,写了两遍。
在新建项目之后,去进行关于 controller 层的测试,发现了错误:
org.springframework.beans.factory.UnsatisfiedDependencyException: Error creating bean with name 'departmentController': Unsatisfied dependency expressed through field 'departmentMapper';
错误的意思是:创建名为“departmentController”的bean时出错:通过字段“departmentMapper”表示的依赖关系不满足;
检查发现,是我的DepartmentMapper.xml中的代码写错了,修改后:
<?xml version="1.0" encoding="UTF-8" ?>
<!DOCTYPE mapper
        PUBLIC "-//mybatis.org//DTD Mapper 3.0//EN"
        "http://mybatis.org/dtd/mybatis-3-mapper.dtd">
<!--namespace= 绑定一个对应的Dao/Mapper接口
<mapper namespace="org.mybatis.example.BlogMapper">
    <select id="selectBlog" resultType="Blog">
    select * from Blog where id = #{id}
-->
<mapper namespace="com.AL.mapper.DepartmentMapper">

    <select id="getDepartments" resultType="com.AL.pojo.Department">
       select * from department;
    </select>

    <select id="getDepartment" resultType="com.AL.pojo.Department" parameterType="int">
       select * from department where id = #{id};
    </select>

</mapper>
启动主程序,进行测试:http://localhost:8080/getDepartments

对于根据 id 访问部门信息:http://localhost:8080/getDepartment/102

员工 Employee
那么对于员工信息Employee 的CRUD操作,同样和部门信息类似,去建立dao层、controller进行测试,完成相关的操作。
Mapper层
EmployeeMapper:
package com.AL.mapper;


import com.AL.pojo.Employee;
import org.apache.ibatis.annotations.Mapper;
import org.springframework.stereotype.Repository;

import java.util.List;

//@Mapper : 表示本类是一个 MyBatis 的 Mapper
@Mapper
@Repository
public interface EmployeeMapper {

    // 获取所有员工信息
    List<Employee> getEmployees();

    // 新增一个员工
    int addEmployee(Employee employee);

    // 通过id获得员工信息
    Employee getEmployeeById(Integer id);

    // 通过id删除员工
    int deleteEmployeeByID(Integer id);

}
EmployeeMapper.xml:
<?xml version="1.0" encoding="UTF-8" ?>
<!DOCTYPE mapper
        PUBLIC "-//mybatis.org//DTD Mapper 3.0//EN"
        "http://mybatis.org/dtd/mybatis-3-mapper.dtd">
<!--namespace= 绑定一个对应的Dao/Mapper接口
<mapper namespace="org.mybatis.example.BlogMapper">
    <select id="selectBlog" resultType="Blog">
    select * from Blog where id = #{id}
-->
<mapper namespace="com.AL.mapper.EmployeeMapper">
    <select id="getEmployees" resultType="com.AL.pojo.Employee">
        select * from employee
    </select>
    <delete id="deleteEmployeeByID" parameterType="int">
        delete from employee where id=#{id}
    </delete>

</mapper>
Controller层
package com.AL.controller;


import com.AL.mapper.EmployeeMapper;
import com.AL.pojo.Employee;
import org.springframework.beans.factory.annotation.Autowired;
import org.springframework.web.bind.annotation.GetMapping;
import org.springframework.web.bind.annotation.PathVariable;
import org.springframework.web.bind.annotation.RestController;

import java.util.List;

@RestController
public class EmployeeController {

    @Autowired
    EmployeeMapper employeeMapper;

    // 获取所有员工信息
    @GetMapping("/getEmployees")
    public List<Employee> getEmployees(){
        return employeeMapper.getEmployees();
    }

    // 通过id删除员工
    @GetMapping("/delete/{id}")
    public int delete(@PathVariable("id") Integer id){
        return employeeMapper.deleteEmployeeByID(id);
    }

}
测试,访问 http://localhost:8080/getEmployees ,获取的所有 员工信息列表为:

[{"id":1001,"lastName":"AAA","email":"1356207897@qq.com","gender":0,"department":101,"birth":"2020-04-05T00:00:00.000+00:00"},{"id":1002,"lastName":"BBB","email":"1356207897@qq.com","gender":0,"department":102,"birth":"2020-04-06T00:00:00.000+00:00"},{"id":1003,"lastName":"CCC","email":"1356207897@qq.com","gender":1,"department":103,"birth":"2020-05-05T00:00:00.000+00:00"},{"id":1004,"lastName":"DDD","email":"1356207897@qq.com","gender":1,"department":104,"birth":"2020-10-05T00:00:00.000+00:00"},{"id":1005,"lastName":"EEE","email":"1356207897@qq.com","gender":1,"department":103,"birth":"2020-11-05T00:00:00.000+00:00"},{"id":1006,"lastName":"FFF","email":"1356207897@qq.com","gender":0,"department":106,"birth":"2021-04-05T00:00:00.000+00:00"}]
可以发现,能够成功的显示员工所有的信息。不过 我们会想要的是关于部门的具体信息,而不仅仅是部门id。对于这种的解决方法,可以采用resultMap,映射的方法去解决。
resultMap
在这里修改的时候发现,为了更好的 方便的展示信息,需要在实体类 Employee 中绑定部门Department 类的信息。如下所示:
Employee:
package com.AL.pojo;

import lombok.AllArgsConstructor;
import lombok.Data;
import lombok.NoArgsConstructor;

import java.util.Date;

// 员工表
@Data
@NoArgsConstructor
@AllArgsConstructor
public class Employee {
    private Integer id;
    private String lastName;
    private String email;
    private Integer gender; // 0:女  1:男。 用数字表示性别男女
    private Integer department; //原有的属性,对应数据库的 department id, 但对应的想要的是一个表
    private Date birth;
    private Department eDepartment; // 冗余设计

}
按照查询嵌套处理
多对一: 关联。 一对多:集合。
如何让员工表格和 部门表格去建立连接, 关联 起来。 需要用到map 以及 association。
思路:
1.查询所有的员工信息
2.根据查询出来的员工信息的 department(即部门id),寻找对应的部门信息
<?xml version="1.0" encoding="UTF-8" ?>
<!DOCTYPE mapper
        PUBLIC "-//mybatis.org//DTD Mapper 3.0//EN"
        "http://mybatis.org/dtd/mybatis-3-mapper.dtd">
<!--namespace= 绑定一个对应的Dao/Mapper接口
<mapper namespace="org.mybatis.example.BlogMapper">
    <select id="selectBlog" resultType="Blog">
    select * from Blog where id = #{id}
-->
<mapper namespace="com.AL.mapper.EmployeeMapper">
    <!--查询员工信息: 单纯的 department id-->
<!--    <select id="getEmployees" resultType="com.AL.pojo.Employee">-->
<!--        select * from employee-->
<!--    </select>-->
<resultMap id="EmployeeDepartment" type="Employee">
    <result property="id" column="id"/>
    <result property="lastName" column="LastName"/>
    <result property="email" column="email"/>
    <result property="gender" column="gender"/>
    <result property="birth" column="birth"/>
    <!--复杂的属性:我们需要单独处理 对象:association    集合:collection-->
    <!--复杂的属性:我们需要单独处理
对象 关联:association    集合:collection
association : 关联,多对一
column : 数据库对应的列名
property : 对应属性名
javaType : 多对一 字段对应的Java类型
select : 关联一个语句
-->
    <association property="eDepartment" column="department" javaType="Department" select="getDepartment"/>
</resultMap>
    <select id="getDepartment" resultType="Department">
        select * from department where id = #{id}
    </select>
        <select id="getEmployees" resultMap="EmployeeDepartment">
        select * from employee
    </select>

    <delete id="deleteEmployeeByID" parameterType="int">
        delete from employee where id=#{id}
    </delete>

</mapper>
这时,重新启动程序进行测试,成功显示 department的所有信息。

分析:
association property=“eDepartment” column=“department” javaType=“Department” select=“getDepartment” 在这里面的 property 对应实体类中的属性,column对应数据库表中的字段名,javaType表示多对一(该字段对应的Java类型)。从这里去绑定部门 Department 的信息。
按照结果嵌套处理
将查询到的结果进行封装到对象的属性中,重新进行展示。
<!-- <!–结果封装,将查询出来的列封装到对象属性中–>-->
<resultMap id="EmployeeDepartment2" type="Employee">
<result property="id" column="eid"/>
<result property="lastName" column="lastName"/>
<result property="email" column="email"/>
<result property="gender" column="gender"/>
<result property="birth" column="birth"/>
    <association property="eDepartment" javaType="Department">
        <result property="id" column="did"/>
        <result property="departmentName" column="dname"/>
    </association>
</resultMap>
<select id="getEmployees" resultMap="EmployeeDepartment2">
select e.id as eid,lastName,email,gender,birth,d.id as did,d.departmentName as dname
from department d,employee e
where d.id = e.department
</select>
启动程序,进行测试,可以成功的查询到所有员工的信息以及对应的部门id和部门名称。
[{"id":1001,"lastName":"AAA","email":"1356207897@qq.com","gender":0,"birth":"2020-04-05T00:00:00.000+00:00","edepartment":{"id":101,"departmentName":"户部"}},{"id":1002,"lastName":"BBB","email":"1356207897@qq.com","gender":0,"birth":"2020-04-06T00:00:00.000+00:00","edepartment":{"id":102,"departmentName":"兵部"}},{"id":1003,"lastName":"CCC","email":"1356207897@qq.com","gender":1,"birth":"2020-05-05T00:00:00.000+00:00","edepartment":{"id":103,"departmentName":"吏部"}},{"id":1004,"lastName":"DDD","email":"1356207897@qq.com","gender":1,"birth":"2020-10-05T00:00:00.000+00:00","edepartment":{"id":104,"departmentName":"刑部"}},{"id":1005,"lastName":"EEE","email":"1356207897@qq.com","gender":1,"birth":"2020-11-05T00:00:00.000+00:00","edepartment":{"id":103,"departmentName":"吏部"}},{"id":1006,"lastName":"FFF","email":"1356207897@qq.com","gender":0,"birth":"2021-04-05T00:00:00.000+00:00","edepartment":{"id":106,"departmentName":"工部"}}]
分析:【自己的理解】
在这里的
<association property="eDepartment" javaType="Department">
<result property="id" column="did"/>
<result property="departmentName" column="dname"/>
</association>
里面的 eDepartment 是Employee实体类的一个属性,这个属性对应的其实是多个字段(一个类Department)。 那么在这种 resulMap的map映射里面,将这些查询到的结果 字段值 重新封装到一个对应的表里面,对应着 想要的对象属性,然后去进行展示。
Employee的完善
对于剩下的CRUD操作代码的完善。
EmployeeMapper.xml:
<?xml version="1.0" encoding="UTF-8" ?>
<!DOCTYPE mapper
PUBLIC "-//mybatis.org//DTD Mapper 3.0//EN"
"http://mybatis.org/dtd/mybatis-3-mapper.dtd">
<!--namespace= 绑定一个对应的Dao/Mapper接口
<mapper namespace="org.mybatis.example.BlogMapper">
<select id="selectBlog" resultType="Blog">
select * from Blog where id = #{id}
-->
<mapper namespace="com.AL.mapper.EmployeeMapper">
<!--查询员工信息: 单纯的 department id-->
<!-- <select id="getEmployees" resultType="com.AL.pojo.Employee">-->
<!-- select * from employee-->
<!-- </select>-->
<!--按照查询嵌套处理-->
<!--<resultMap id="EmployeeDepartment" type="Employee">-->
<!-- <result property="id" column="id"/>-->
<!-- <result property="lastName" column="LastName"/>-->
<!-- <result property="email" column="email"/>-->
<!-- <result property="gender" column="gender"/>-->
<!-- <result property="birth" column="birth"/>-->
<!-- <!–复杂的属性:我们需要单独处理 对象:association 集合:collection–>-->
<!-- <!–复杂的属性:我们需要单独处理-->
<!--对象 关联:association 集合:collection-->
<!--association : 关联,多对一-->
<!--column : 数据库对应的列名-->
<!--property : 对应属性名-->
<!--javaType : 多对一 字段对应的Java类型-->
<!--select : 关联一个语句-->
<!--–>-->
<!-- <association property="eDepartment" column="department" javaType="Department" select="getDepartment"/>-->
<!--</resultMap>-->
<!-- <select id="getDepartment" resultType="Department">-->
<!-- select * from department where id = #{id}-->
<!-- </select>-->
<!-- <select id="getEmployees" resultMap="EmployeeDepartment">-->
<!-- select * from employee-->
<!-- </select>-->
<!-- <!–结果封装,将查询出来的列封装到对象属性中–>-->
<resultMap id="EmployeeDepartment2" type="Employee">
<result property="id" column="eid"/>
<result property="lastName" column="lastName"/>
<result property="email" column="email"/>
<result property="gender" column="gender"/>
<result property="birth" column="birth"/>
<association property="eDepartment" javaType="Department">
<result property="id" column="did"/>
<result property="departmentName" column="dname"/>
</association>
</resultMap>
<select id="getEmployees" resultMap="EmployeeDepartment2">
select e.id as eid,lastName,email,gender,birth,d.id as did,d.departmentName as dname
from department d,employee e
where d.id = e.department
</select>
<insert id="addEmployee" parameterType="Employee">
insert into employee (lastName,email,gender,department,birth)
values (#{lastName},#{email},#{gender},#{department},#{birth});
</insert>
<!--select * from employee where id = #{id}-->
<select id="getEmployeeById" parameterType="int" resultMap="EmployeeDepartment2">
select e.id as eid,lastName,email,gender,birth,d.id as did,d.departmentName as dname
from department d,employee e
where d.id = e.department and e.id = #{id}
</select>
<delete id="deleteEmployeeByID" parameterType="int">
delete from employee where id=#{id}
</delete>
</mapper>
EmployeeController:
package com.AL.controller;


import com.AL.mapper.DepartmentMapper;
import com.AL.mapper.EmployeeMapper;
import com.AL.pojo.Employee;
import org.springframework.beans.factory.annotation.Autowired;
import org.springframework.web.bind.annotation.GetMapping;
import org.springframework.web.bind.annotation.PathVariable;
import org.springframework.web.bind.annotation.RestController;

import java.util.Date;
import java.util.List;

@RestController
public class EmployeeController {

    @Autowired
    EmployeeMapper employeeMapper;

    @Autowired
    DepartmentMapper departmentMapper;

    // 获取所有员工信息
    @GetMapping("/getEmployees")
    public List<Employee> getEmployees(){
        return employeeMapper.getEmployees();
    }

    @GetMapping("/add")
    public int save(){
        Employee employee = new Employee();
        employee.setLastName("alzn");
        employee.setEmail("hhhhhh@qq.com");
        employee.setGender(1);
        employee.setEDepartment(departmentMapper.getDepartment(101));
        employee.setBirth(new Date());
        return employeeMapper.addEmployee(employee);
    }

    // 通过id获得员工信息
    @GetMapping("/get/{id}")
    public Employee getById(@PathVariable("id") Integer id){
        return employeeMapper.getEmployeeById(id);
    }

    // 通过id删除员工
    @GetMapping("/delete/{id}")
    public int delete(@PathVariable("id") Integer id){
        return employeeMapper.deleteEmployeeByID(id);
    }

}
重新启动程序,进行测试,成功展示员工的信息以及对应的部门信息。
整合前端界面
将前面的项目里面的资源配置文件复制到此时项目里面:
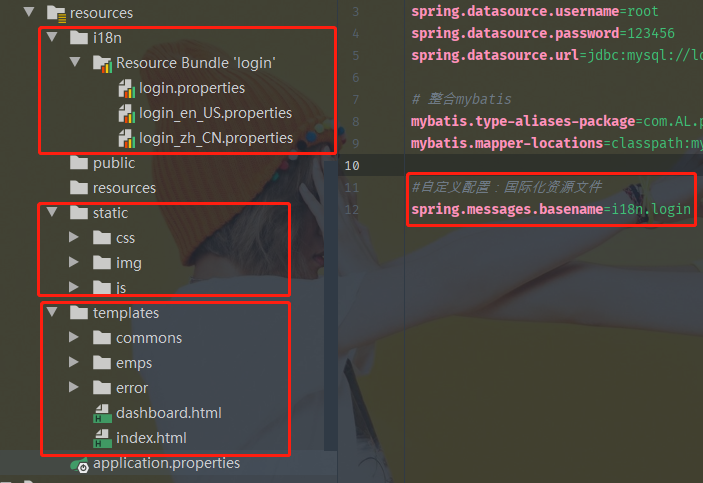
关于url请求拦截、静态资源放行的配置文件和用户登录验证的控制器、首页显示控制器:
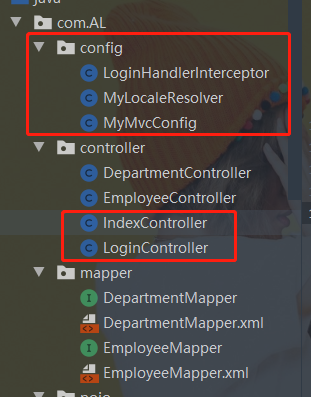
登录首页实现
首页显示控制器:
- 所有的访问界面需要从 index.html 界面进行登录。直接跳转到该界面
@Controller
public class IndexController {
    @RequestMapping({"/", "/index.html"}) //这是一个集合
    public String index(){
        return "index";
    }
}
去测试,看能否访问到该页面信息,去让用户进行登录。
错误信息:
 Cannot find template location: classpath:/templates/ (please add some templates or check your Thymeleaf configuration)

     org.thymeleaf.exceptions.TemplateInputException: Error resolving template [index], template might not exist or might not be accessible by any of the configured Template Resolvers
可以发现编译后的 targets里面没有我们的静态资源配置文件 templates:
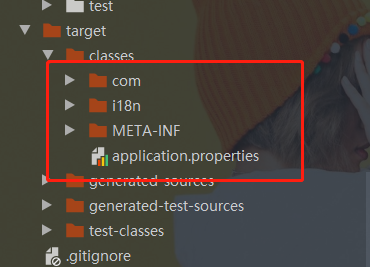
这属于静态资源导出时的问题,我们查找后,对pom.xml 配置资源文件进行修改:
- 加入**/*.html 配置和其它的
- src/main/resources **/.yml **/.properties **/.xml **/.html false
        <!--静态资源导出问题-->
        <resources>
            <resource>
                <directory>src/main/java</directory>
                <includes>
                    <include>**/*.properties</include>
                    <include>**/*.xml</include>
                </includes>
                <filtering>false</filtering>
            </resource>
            <resource>
                <directory>src/main/resources</directory>
                <includes>
                    <include>**/*.properties</include>
                    <include>**/*.yaml</include>
                    <include>**/*.xml</include>
                    <include>**/*.html</include>
                    <include>**/*.js</include>
                    <include>**/*.css</include>
                </includes>
                <filtering>false</filtering>
            </resource>
        </resources>
我们使静态资源能够导出,此时再进行测试的结果:

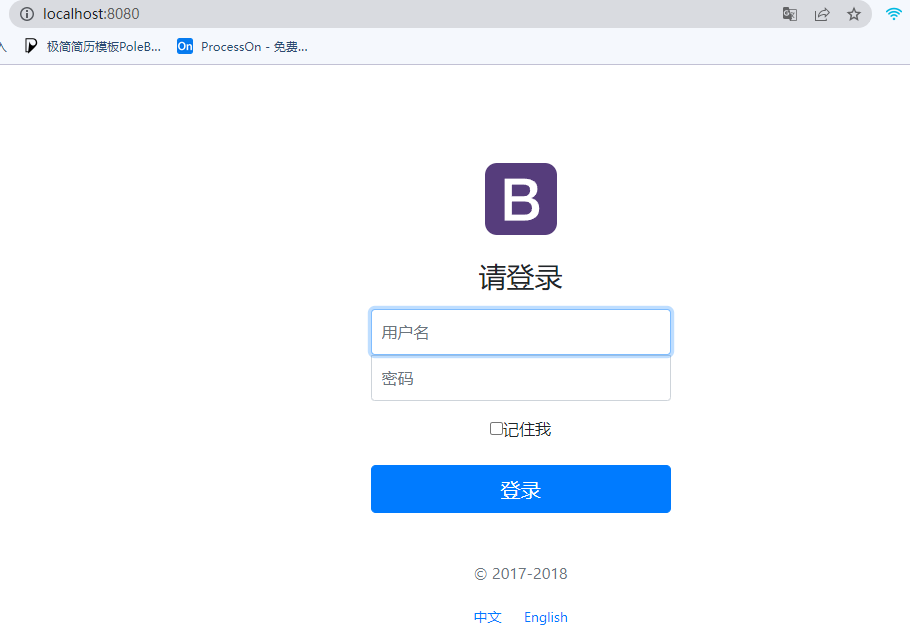
登录功能的实现
用户登录控制器和拦截器配置:
- LoginController:
package com.Al.controller;


import org.springframework.stereotype.Controller;
import org.springframework.ui.Model;
import org.springframework.util.StringUtils;
import org.springframework.web.bind.annotation.RequestMapping;
import org.springframework.web.bind.annotation.RequestParam;

import javax.servlet.http.HttpSession;

@Controller
//@RestController
public class LoginController {

    @RequestMapping("/user/login")
    public String login(@RequestParam("username") String username, @RequestParam("password") String password, Model model, HttpSession session){
        if (!StringUtils.isEmpty(username) && "123456".equals(password)){
            session.setAttribute("LoginUser", username);
            //return "dashboard";
            return "redirect:/main.html"; // 重定向
        }else {
            model.addAttribute("msg", "用户名或密码错误");
            return "index";
        }
    }

    @RequestMapping("/user/logout")
    public String logout(HttpSession session) {
        session.invalidate();
        return "redirect:/index.html";
    }
}
- 登录时的拦截器:LoginHandlerInterceptor
package com.AL.config;

import org.springframework.web.servlet.HandlerInterceptor;

import javax.servlet.http.HttpServletRequest;
import javax.servlet.http.HttpServletResponse;

public class LoginHandlerInterceptor implements HandlerInterceptor {
    @Override
    public boolean preHandle(HttpServletRequest request, HttpServletResponse response, Object handler) throws Exception {
        // 用户如果登录成功了,应该获取到用户的 session 信息
        Object session = request.getSession().getAttribute("LoginUser");
        if (session == null) {
            request.setAttribute("msg", "权限不够,请先登录");
            request.getRequestDispatcher("/index.html").forward(request, response);
            return false;
        } else {
            return true;
        }
    }
}
地域解析器配置:
package com.AL.config;

import org.springframework.util.StringUtils;
import org.springframework.web.servlet.LocaleResolver;

import javax.servlet.http.HttpServletRequest;
import javax.servlet.http.HttpServletResponse;
import java.util.Locale;

// 地区解析器:获取链接上携带的参数信息
public class MyLocaleResolver implements LocaleResolver {
    // 解析请求
    @Override
    public Locale resolveLocale(HttpServletRequest request) {
        // 获取请求中的国家化参数
        String language = request.getParameter("l");
        // 默认的地区
        Locale locale = Locale.getDefault();
        //如果请求的链接参数不为空,携带了国际化参数
        if (!StringUtils.isEmpty(language)) {
            String[] split = language.split("_");//zh_CN(语言_地区)
            locale = new Locale(split[0], split[1]);
        }
        return locale;
    }

    @Override
    public void setLocale(HttpServletRequest request, HttpServletResponse response, Locale locale) {

    }
}
MVC配置信息:
package com.AL.config;

import org.springframework.context.annotation.Bean;
import org.springframework.context.annotation.Configuration;
import org.springframework.web.servlet.LocaleResolver;
import org.springframework.web.servlet.config.annotation.InterceptorRegistry;
import org.springframework.web.servlet.config.annotation.ViewControllerRegistry;
import org.springframework.web.servlet.config.annotation.WebMvcConfigurer;

@Configuration
public class MyMvcConfig implements WebMvcConfigurer {

    @Override
    public void addViewControllers(ViewControllerRegistry registry) {
        registry.addViewController("/").setViewName("index");
        registry.addViewController("/index.html").setViewName("index");
        registry.addViewController("/main.html").setViewName("dashboard");
    }

    // 将自定义的国际化配置放入 Spring容器中,使组件生效
    @Bean
    public LocaleResolver localeResolver(){
        return new MyLocaleResolver();
    }

    @Override
    public void addInterceptors(InterceptorRegistry registry) {
        registry.addInterceptor(new LoginHandlerInterceptor())
                .addPathPatterns("/**")
                .excludePathPatterns("/index.html", "/", "/user/login", "/css/**", "/js/**", "/img/**");
    }
}
启动程序,进行测试,发现能够成功登录,且也可以进行拦截没有用户session的url请求。
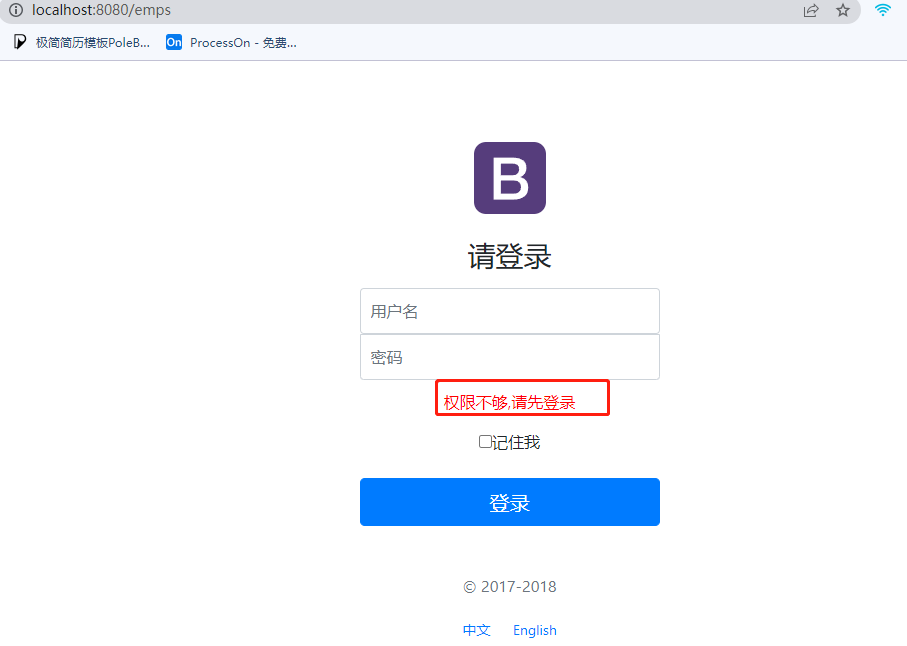
控制器修改
在整合mybatis时测试的控制器,直接返回json形式的数据。只管展示。
在这里,为了和原先模拟数据库显示前端界面,需要对控制器中后端传递给前端数据 的代码进行修改。
查询:员工信息列表展示
在controller包下创建 EmployeeControllerDemo02 控制器。查询员工所有的信息,后端程序将结果封装在 Model 中的 emps 中,传递给前端。前端的emps 进行foreach 进行展示员工的信息。
EmployeeControllerDemo02:
package com.AL.controller;

import com.AL.mapper.DepartmentMapper;
import com.AL.mapper.EmployeeMapper;
import com.AL.pojo.Employee;
import org.springframework.beans.factory.annotation.Autowired;
import org.springframework.stereotype.Controller;
import org.springframework.ui.Model;
import org.springframework.web.bind.annotation.RequestMapping;

import java.util.List;

// 员工管理信息
@Controller
public class EmployeeControllerDemo02 {
    @Autowired
    EmployeeMapper employeeMapper;

    @Autowired
    DepartmentMapper departmentMapper;

    @RequestMapping("/emps")
    public String list(Model model){
        List<Employee> employeeList = employeeMapper.getEmployees();
        model.addAttribute("emps",employeeList);
        return "emps/list"; // 返回到 list界面
    }
}
前端界面显示 员工的信息。
- 需要注意的是,在这里,我们的实体类pojo中的 Employee 的属性为:
public class Employee {
    private Integer id;
    private String lastName;
    private String email;
    private Integer gender; // 0:女  1:男。 用数字表示性别男女
    private Integer department; //原有的属性,对应数据库的 department id, 但对应的想要的是一个表
    private Date birth;
    private Department eDepartment; // 冗余设计
}
- 对应的数据库表 employee 的字段为:
create table `employee`(
`id` INT(4) NOT NULL AUTO_INCREMENT COMMENT'员工id',
`lastName` VARCHAR(30) NOT NULL COMMENT '姓名',
`email` VARCHAR(30) NOT NULL DEFAULT '*.com' COMMENT '邮箱',
`gender` INT(4) NOT NULL DEFAULT '0' COMMENT '性别',
`department` INT(4) NOT NULL COMMENT '部门id',
`birth`DATETIME DEFAULT NULL COMMENT '生日',
primary key(`id`),
key `FK_id`(`department`),
constraint `FK_id` foreign key(`department`) references `department`(`id`)
)ENGINE=INNODB DEFAULT CHARSET=utf8
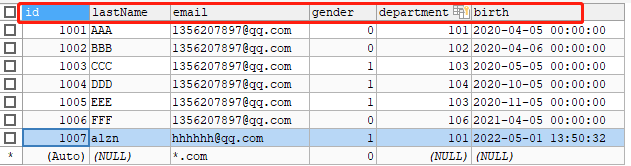
而前面的,我们编写的dao层中的 EmployeeMapper.xml中查询所有的员工信息,返回的结果为:
<resultMap id="EmployeeDepartment2" type="Employee">
    <result property="id" column="eid"/>
    <result property="lastName" column="lastName"/>
    <result property="email" column="email"/>
    <result property="gender" column="gender"/>
    <result property="birth" column="birth"/>
    <association property="eDepartment" javaType="Department">
        <result property="id" column="did"/>
        <result property="departmentName" column="dname"/>
    </association>
</resultMap>
<select id="getEmployees" resultMap="EmployeeDepartment2">
    select e.id as eid,lastName,email,gender,birth,d.id as did,d.departmentName as dname
    from department d,employee e
    where d.id = e.department
</select>
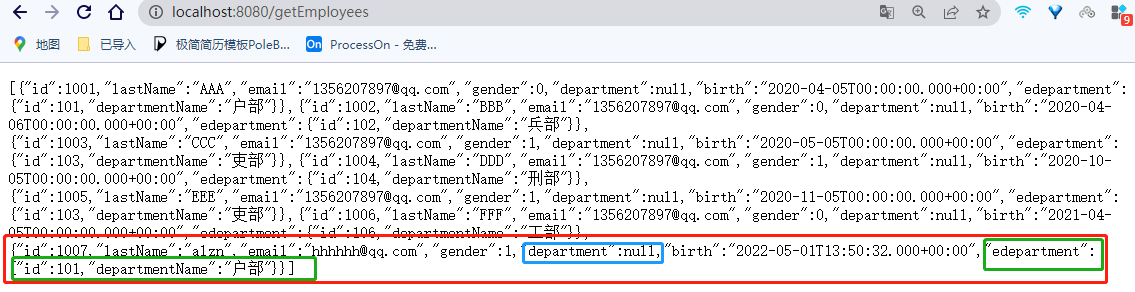
我们需要在前端中修改的部分就是关于 获取部门信息 重新进行展示的部分。如下所示:
list.html :
<tr th:each="emp:${emps}">
<!--									<td th:text="${emp.getId()}"></td>-->
    <td th:text="${emp.getId()}"></td>
    <td>[[${emp.getLastName()}]]</td>
    <td th:text="${emp.getEmail()}"></td>
    <td th:text="${emp.getGender()==0?'女':'男'}"></td>
<!--									<td th:text="${emp.getDepartment().getDepartmentName()}"></td>-->
    <td th:text="${emp.getEDepartment().getDepartmentName()}"></td>
    <td th:text="${#dates.format(emp.getBirth(),'yyyy-MM-dd HH:mm:ss')}"></td>
    <td>
        <a class="btn btn-sm btn-primary" th:href="@{/emp/{id}(id=${emp.getId()})}">编辑</a>
        <a class="btn btn-sm btn-danger" th:href="@{/delemp/{id}(id=${emp.getId()})}">删除</a>
    </td>
</tr>
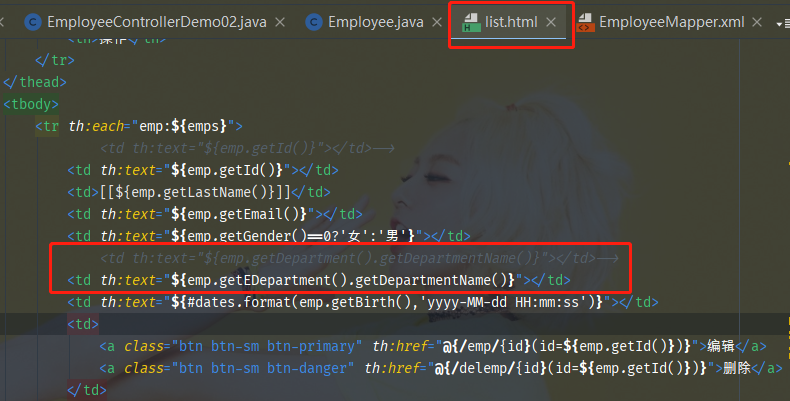
测试,访问员工管理界面,查看是否成功显示所有的 员工信息。
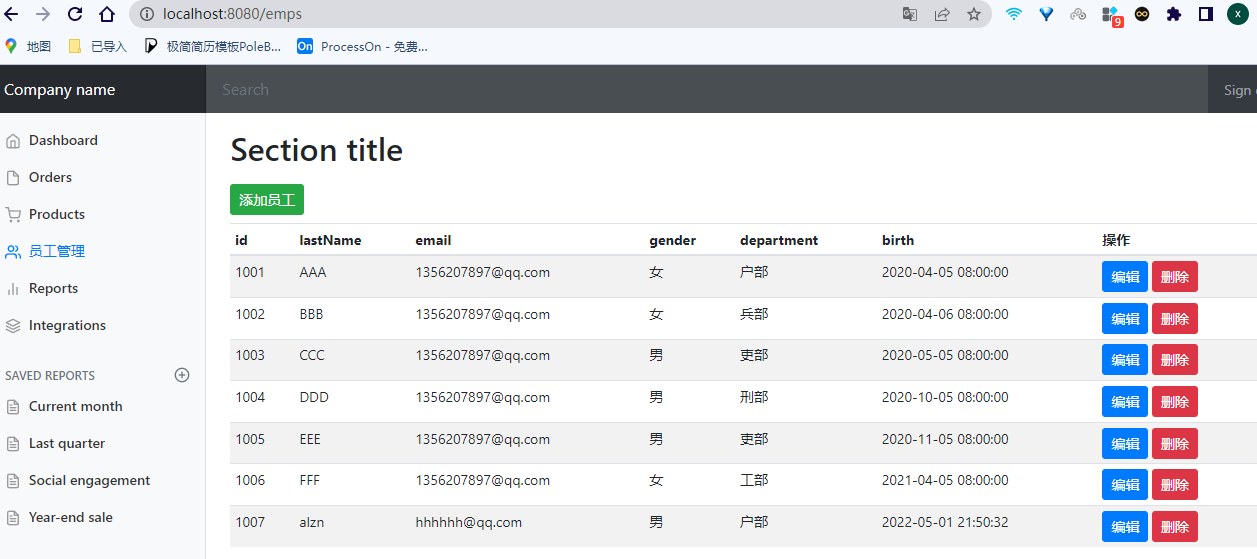
增加员工
增加员工实现的步骤:
- 在list.html前端界面添加 员工增加的 选项及其超链接,响应url请求,跳转到toAddPage页面
- toAdd控制器,响应 /add 这一url请求。后端需要传递前端一个部门信息(部门id、name名称),注意add.html显示部门选项 option
- add.html 员工信息添加页面展示,尤其注意部门选项option这一部分的东西
- 员工的信息添加完成后,重定向到 list.html页面,显示所有的员工信息。
EmployeeControllerDemo02:控制器中的 toadd 和add 方法,去响应对应着请求url
    @GetMapping("/add")
    public String toAddPage(Model model) {
        //查出所有的部门信息,添加到departments中,用于前端接收
        Collection<Department> departments = departmentMapper.getDepartments();
        model.addAttribute("departments", departments);
        return "emps/add";//返回到添加员工页面
    }
    @PostMapping("/add")
    public String addEmp(Employee employee){
        System.out.println("save=>" +employee);
        employeeMapper.addEmployee(employee); //添加一个员工
        return "redirect:/emps";//重定向到/emps,刷新列表,返回到list页面
    }
add.html:员工信息添加,重点注意的是 部门信息展示
- 注意: 我将这里的属性 name 值设置成了department,这样才和 employee中的属性对应:select class=“form-control” name=“department”
- option中显示的信息是 部门的名称,所以 th:text=“${department.getDepartmentName()}”
- 传递的是部门id,所以是 th:value=“${department.getId()}” 对应着name=“department” 传递给前端
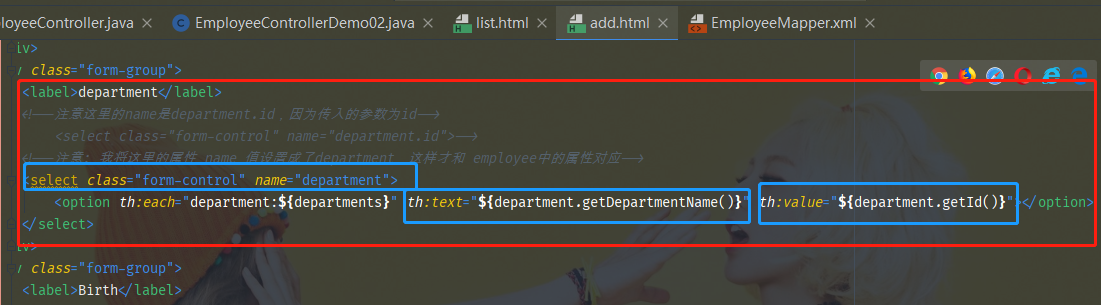
            <form th:action="@{/add}" method="post">
            <div class="form-group">
                <label>LastName</label>
                <input type="text" name="lastName" class="form-control" placeholder="lastname:zsr">
            </div>
            <div class="form-group">
                <label>Email</label>
                <input type="email" name="email" class="form-control" placeholder="email:xxxxx@qq.com">
            </div>
            <div class="form-group">
                <label>Gender</label><br/>
                <div class="form-check form-check-inline">
                    <input class="form-check-input" type="radio" name="gender" value="1">
                    <label class="form-check-label">男</label>
                </div>
                <div class="form-check form-check-inline">
                    <input class="form-check-input" type="radio" name="gender" value="0">
                    <label class="form-check-label">女</label>
                </div>
            </div>
            <div class="form-group">
                <label>department</label>
                <!--注意这里的name是department.id,因为传入的参数为id-->
<!--                <select class="form-control" name="department.id">-->
                <!--注意: 我将这里的属性 name 值设置成了department,这样才和 employee中的属性对应-->
                <select class="form-control" name="department">
                    <option th:each="department:${departments}" th:text="${department.getDepartmentName()}" th:value="${department.getId()}"></option>
                </select>
            </div>
            <div class="form-group">
                <label>Birth</label>
                <!--springboot默认的日期格式为yy/MM/dd-->
                <input type="text" name="birth" class="form-control" placeholder="birth:yyyy/MM/dd">
            </div>
            <button type="submit" class="btn btn-primary">添加</button>
            </form>
测试,查看跳转到 添加员工界面:

点击添加选项,成功重定向到 list.html页面,展示所有员工信息:
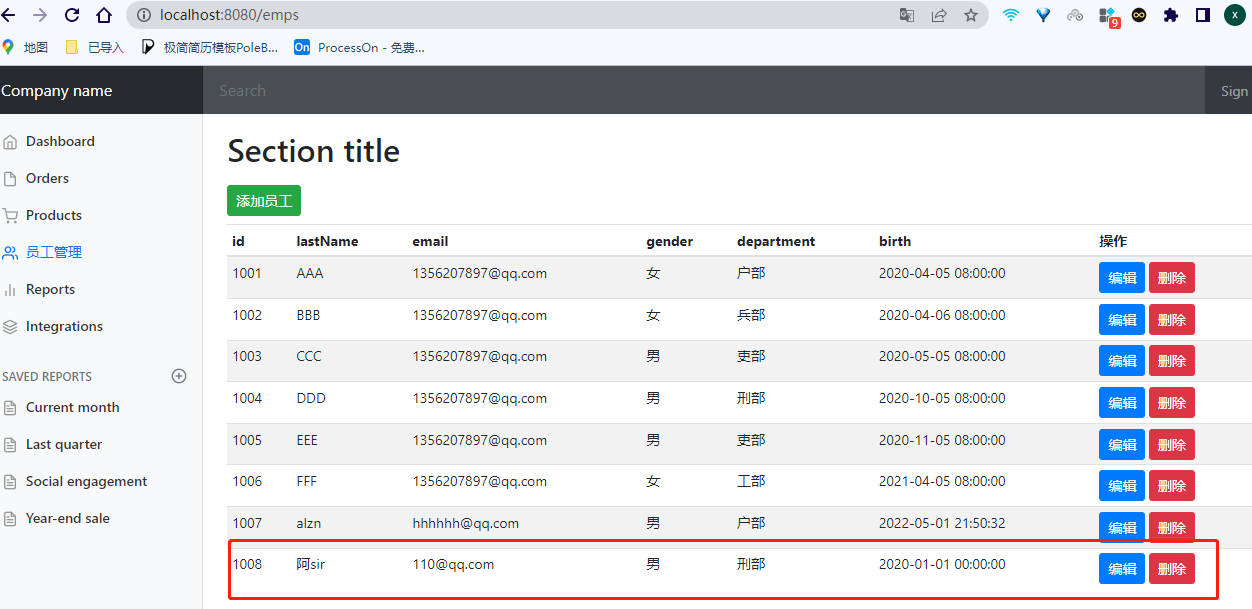
解决了这里的之后,那么在前面的那里,员工添加 信息 出错的原因,是不是也是这个呢?
我需要对springboot-03-system 项目中的add.html 的前端传递部门信息进行修改。查看这个问题
修改员工
修改员工的信息:和增加员工信息的步骤类似。
EmployeeControllerDemo02:
    @GetMapping("/emp/{id}")
    public String toUpdatePage(@PathVariable("id")Integer id, Model model){
        //查出原来的数据
        Employee employee = employeeMapper.getEmployeeById(id);
        model.addAttribute("emp", employee);
        //查出所有部门的信息
        Collection<Department> departments = departmentMapper.getDepartments();
        model.addAttribute("departments", departments);
        return "emps/update";
    }
    @PostMapping("/updateEmp")
    public String updataEmp(Employee employee){
        employeeMapper.addEmployee(employee);//添加一个员工
        return "redirect:/emps";//添加完成重定向到/emps,刷新列表
    }
update.html:
- 重要的同样是 部门信息展示的部分。我自己修改的部门信息
<div class="form-group">
    <label>department</label>
    <!--注意这里的name是department.id,因为传入的参数为id-->
<!--                    <select class="form-control" name="department.id">-->
    <select class="form-control" name="department">
<!--                        <option th:selected="${emp.getDepartment().getId() == department.getId()}" th:each="department:${departments}" th:text="${department.getDepartmentName()}" th:value="${department.getId()}"></option>-->
        <option th:selected="${emp.getEDepartment().getId() == department.getId()}" th:each="department:${departments}" th:text="${department.getDepartmentName()}" th:value="${department.getId()}"></option>
    </select>
</div>
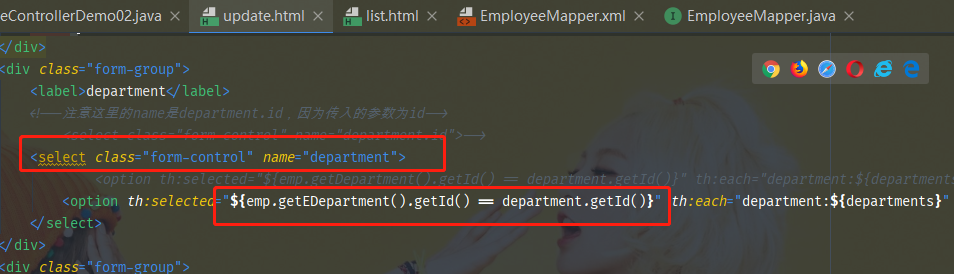
进行测试,查看是否能够修改员工信息:
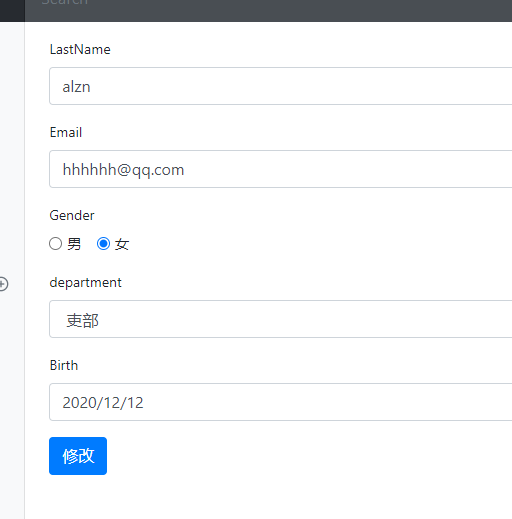
修改后重定向到 list.html 页面:
- 发现有两个该员工。检查后,发现自己在这里使用的方法里面是 addEmployee,所以导致增加了一个员工信息。
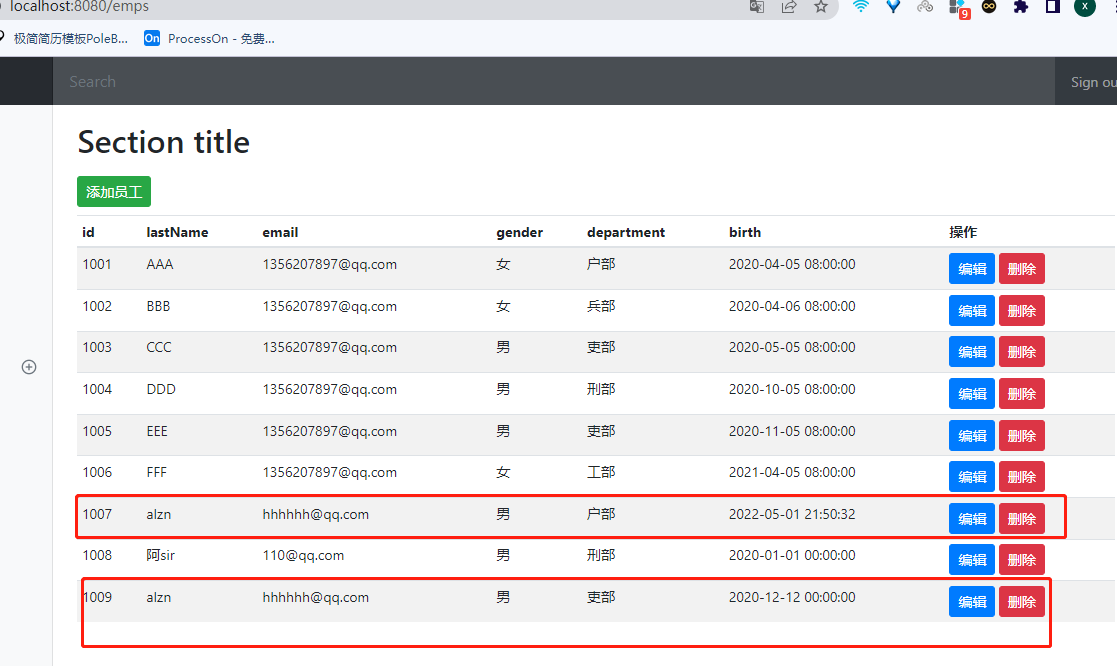
删除员工
直接删除员工信息,重定向到 list.html页面。
EmployeeControllerDemo02:
    @GetMapping("/delemp/{id}")
    public String deleteEmp(@PathVariable("id")Integer id, Model model){
        employeeMapper.deleteEmployeeByID(id);
        return "redirect:/emps";//添加完成重定向到/emps,刷新列表
    }
测试,删除员工。成功完成。
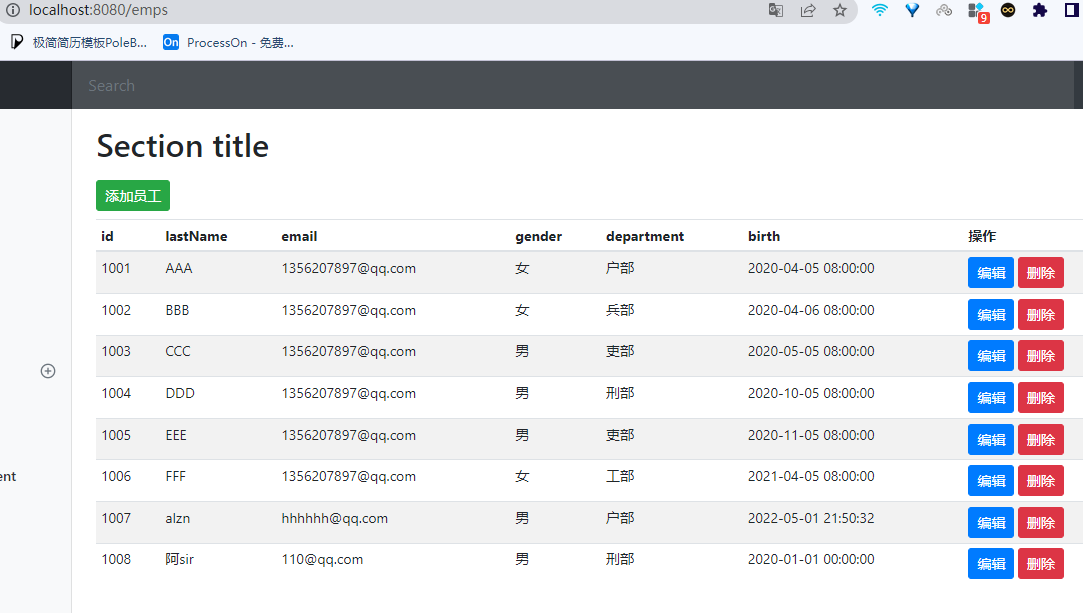


 1294
1294


 被折叠的 条评论
为什么被折叠?
被折叠的 条评论
为什么被折叠?
 到【灌水乐园】发言


