


1.运行

2.头+尾
\documentclass[11pt]{article}

\usepackage{algorithm, algpseudocode}
\usepackage{amsmath,amssymb,amsthm}
\usepackage{mathrsfs}% huaxie zimu
\textwidth 16cm\textheight 22cm\oddsidemargin=0cm\evensidemargin=\oddsidemargin

\usepackage{undertilde} %for the subsolution i.e., $\utilde{u}$
\usepackage{subfig}
\usepackage{color} %for the color,
\usepackage{graphicx}
\setlength{\textwidth}{6.2in} \setlength{\textheight}{8.7in}
\setlength{\oddsidemargin}{0.25in}
\setlength{\evensidemargin}{.25in} \setlength{\topmargin}{0pt}
\setlength{\baselineskip}{20pt} \vspace{0.6cm}
\renewcommand{\baselinestretch}{1.2}
\renewcommand{\thefootnote}{\fnsymbol{\footnote}}
\renewcommand{\figurename}{Fig.}
\newtheorem{lemma}{Lemma}[section]
\newtheorem{Defi}{Definition}[section]
\newtheorem{them}[lemma]{Theorem}
\newtheorem{lm}[lemma]{Lemma}
\newtheorem{coro}[lemma]{Corollary}
\newtheorem{Algm}{Algorithm}
\newtheorem{rem}{Remark}
\newtheorem{cor}{Corollary}
\newtheorem{Con}{Conjecture}
\newcommand{\tabincell}[2]{\begin{tabular}{@{}#1@{}}#2\end{tabular}}
\begin{document}


\end{document}
3.tips
3.1公式
3.1.1 行内公式+行间公式


//行间公式另起一行
3.1.2 各种符号
(11条消息) CTEX 各种命令、符号_woniuxyy的博客-CSDN博客
3.1.3 矩阵
https://www.cnblogs.com/solvit/p/11345482.html
如何用latex编写矩阵(包括各类复杂、大型矩阵)? - 知乎 (zhihu.com)
3.2 部分操作表示
\qquad空格
\noindent 用于段落不缩进
3.2.1 标注
- 粗体:\textbf{粗体内容}
- 斜体:\textit{斜体内容}
- 下划线:\underline{下划线内容}
- 强调斜体:\emph{强调斜体的内容},在都是斜体字的状态下,可以恢复原字体。
4.参考文献
\begin{thebibliography}{22}


\end{thebibliography}(11条消息) LaTeX基本命令使用说明书-小白版_MLgreenhand的博客-CSDN博客
3.3 插入图片
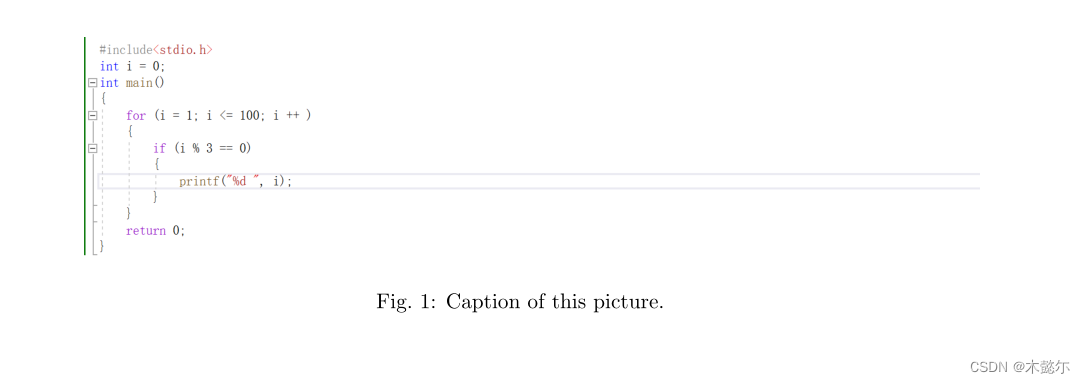
\begin{figure}[h]%插入图片
\centering%图片居中显示
\includegraphics[scale=0.7]{pmjt.png}%花括号内为图片相对路径
\caption{Caption of this picture.}%图片标题
\label{fig0}%图片label,便于文中引用
\end{figure}
代码说明:
\usepackage{graphicx} 为插入图片所需引入的宏包;
[htbp] 为调整图片排版位置选项,说明如下:
[h]当前位置。将图形放置在正文文本中给出该图形环境的地方。如果本页所剩的页面不够,这一参数将不起作用。
[t]顶部。将图形放置在页面的顶部。
[b]底部。将图形放置在页面的底部。
[p]浮动页。将图形放置在一只允许有浮动对象的页面上。上一条中,图片位置为latex自动排版,如若我们一定要指定图片在当前位置,仅使用 [h] 命令是达不到效果的,此时方法如下:
a) 引入float宏包;
b) 将\begin{figure}[htbp]改为\begin{figure}[H],注意是大写的H。\centering 为图片居中命令;
\includegraphics{1.eps} 用于插入图片,可用 ‘’[ ]’’ 添加图片尺寸,例如\includegraphics[width=9.5cm,height=8cm]{1.eps};花括号中为图片相对路径,通常应将图片放在与latex文档相同的路径下,图片格式采用.eps矢量格式会更清晰;
\caption命令用于插入图注,其应用在\includegraphics的下方即将图注插在图片下方,反之亦然。
(11条消息) LaTeX基本命令使用说明书-小白版_MLgreenhand的博客-CSDN博客
1.插入一张图片
2.插入多张,子图形式
\begin{figure}[h]
\centering   %图片居中排列
\subfloat[]{%前面中括号里面的a是子图标题
\begin{minipage}[h]{0.3\textwidth}%每个图形大小
   \centering
   \includegraphics[width=3cm,height=2.5cm]{pmjt.png}%插入图片,括号里面是图片路径
\end{minipage}
}
\subfloat[]{
\begin{minipage}[h]{0.3\textwidth}
   \centering
   \includegraphics[width=3cm,height=2.5cm]{pmjt.png}
\end{minipage}
}
\subfloat[]{
\begin{minipage}[h]{0.3\textwidth}
   \centering
   \includegraphics[width=3cm,height=2.5cm]{pmjt.png}
\end{minipage}
}
\end{figure}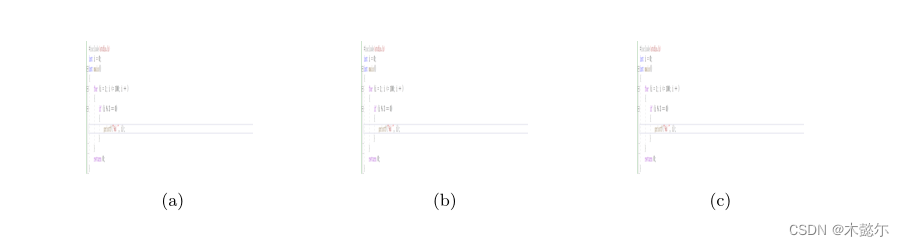
3.4 插入公式
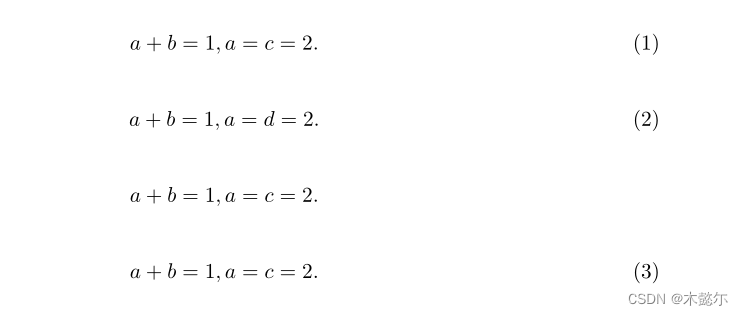
\begin{equation}
a+b=1, \\a=c=2.
\end{equation}

\begin{equation}
a+b=1, \\a=d=2.
\end{equation}

\begin{equation*}
a+b=1, \\a=c=2.
\end{equation*}

\begin{equation}
a+b=1, \\a=c=2.
\end{equation}
3.5 定义&定理&引用
\begin{them}\label{Basic1}
savage is a good song
\end{them}
we need to prove the prove of ~\ref{Basic1}

\begin{lemma}\label{Basic3}
savage is a new song
\end{lemma}
we need to prove the prove of ~\ref{Basic3}

\begin{proof}\label{Basic3}
savage is a new song
\end{proof}

\newtheorem{definition}{Definition}
\begin{definition}
    come back
\end{definition}


 2341
2341


 被折叠的 条评论
为什么被折叠?
被折叠的 条评论
为什么被折叠?
 到【灌水乐园】发言


