


MyBatisPlus代码生成器
1.首先需要通过逆向工程基于 t_user 表生产对应的POJO、Mapper、Service、ServiceImpl、Controller
等类,项目中使用了MybatisPlus,所以逆向工程也是用了MybatisPlus提供的AutoGenerator,代码如
下。具体可去官网查看
2.直接上代码
package com.xxxx.generator;


import com.baomidou.mybatisplus.core.exceptions.MybatisPlusException;
import com.baomidou.mybatisplus.core.toolkit.StringPool;
import com.baomidou.mybatisplus.core.toolkit.StringUtils;
import com.baomidou.mybatisplus.generator.AutoGenerator;
import com.baomidou.mybatisplus.generator.InjectionConfig;
import com.baomidou.mybatisplus.generator.config.*;
import com.baomidou.mybatisplus.generator.config.po.TableInfo;
import com.baomidou.mybatisplus.generator.config.rules.DateType;
import com.baomidou.mybatisplus.generator.config.rules.NamingStrategy;
import com.baomidou.mybatisplus.generator.engine.FreemarkerTemplateEngine;

import java.util.*;

/**
 * 执行 main 方法控制台输入模块表名回车自动生成对应项目目录中
 *
 * @author zhoubin
 * @since 1.0.0
 */
public class CodeGenerator {
 /**
 * <p>
 * 读取控制台内容
 * </p>
 */
  public static String scanner(String tip) {
    Scanner scanner = new Scanner(System.in);
    StringBuilder help = new StringBuilder();
    help.append("请输入" + tip + ":");
    System.out.println(help.toString());
    if (scanner.hasNext()) {
      String ipt = scanner.next();
      if (StringUtils.isNotBlank(ipt)) {
         return ipt;
      }
    }
    throw new MybatisPlusException("请输入正确的" + tip + "!");
  }

 public static void main(String[] args) {
       // 代码生成器
       AutoGenerator mpg = new AutoGenerator();
       // 全局配置
       GlobalConfig gc = new GlobalConfig();
       String projectPath = System.getProperty("user.dir");
       gc.setOutputDir(projectPath + "/src/main/java");
       //作者
       gc.setAuthor("zhoubin");
       //打开输出目录
       gc.setOpen(false);
       //xml开启 BaseResultMap
       gc.setBaseResultMap(true);
       //xml 开启BaseColumnList
       gc.setBaseColumnList(true);
       //日期格式,采用Date
  gc.setDateType(DateType.ONLY_DATE);
      mpg.setGlobalConfig(gc);
      // 数据源配置
      DataSourceConfig dsc = new DataSourceConfig();
      dsc.setUrl("jdbc:mysql://localhost:3306/seckill? useUnicode=true&characterEncoding=UTF-8&serverTimezone=Asia"+ "/Shanghai");
      dsc.setDriverName("com.mysql.jdbc.Driver");
      dsc.setUsername("root");
      dsc.setPassword("root");
      mpg.setDataSource(dsc);
      // 包配置
      PackageConfig pc = new PackageConfig();
     pc.setParent("com.xxxx.seckill")
       .setEntity("pojo")
       .setMapper("mapper")
       .setService("service")
       .setServiceImpl("service.impl")
       .setController("controller");
     mpg.setPackageInfo(pc);
     // 自定义配置
     InjectionConfig cfg = new InjectionConfig() {
      @Override
      public void initMap() {
        // to do nothing
        Map<String,Object> map = new HashMap<>();
        map.put("date1","1.0.0");
   this.setMap(map);
   }
  };
    // 如果模板引擎是 freemarker
    String templatePath = "/templates/mapper.xml.ftl";
    // 如果模板引擎是 velocity
    // String templatePath = "/templates/mapper.xml.vm";
    // 自定义输出配置
    List<FileOutConfig> focList = new ArrayList<>();
    // 自定义配置会被优先输出
    focList.add(new FileOutConfig(templatePath) {
     @Override
     public String outputFile(TableInfo tableInfo) {
     // 自定义输出文件名 , 如果你 Entity 设置了前后缀、此处注意 xml 的名称会跟着发生变化!!
    return projectPath + "/src/main/resources/mapper/" +
            tableInfo.getEntityName() + "Mapper" + StringPool.DOT_XML; }
    });
      cfg.setFileOutConfigList(focList);
      mpg.setCfg(cfg);
      // 配置模板
      TemplateConfig templateConfig = new TemplateConfig()
       .setEntity("templates/entity2.java")
       .setMapper("templates/mapper2.java")
       .setService("templates/service2.java")
       .setServiceImpl("templates/serviceImpl2.java")
       .setController("templates/controller2.java");
      templateConfig.setXml(null);
      mpg.setTemplate(templateConfig);

     // 策略配置
     StrategyConfig strategy = new StrategyConfig();
     //数据库表映射到实体的命名策略
     strategy.setNaming(NamingStrategy.underline_to_camel);
     //数据库表字段映射到实体的命名策略
     strategy.setColumnNaming(NamingStrategy.underline_to_camel);
     //lombok模型
     strategy.setEntityLombokModel(true);
     //生成 @RestController 控制器
     // strategy.setRestControllerStyle(true);
     strategy.setInclude(scanner("表名,多个英文逗号分割").split(","));
     strategy.setControllerMappingHyphenStyle(true);
     //表前缀
     strategy.setTablePrefix("t_");
     mpg.setStrategy(strategy);
     mpg.setTemplateEngine(new FreemarkerTemplateEngine());
     mpg.execute();
  }


}
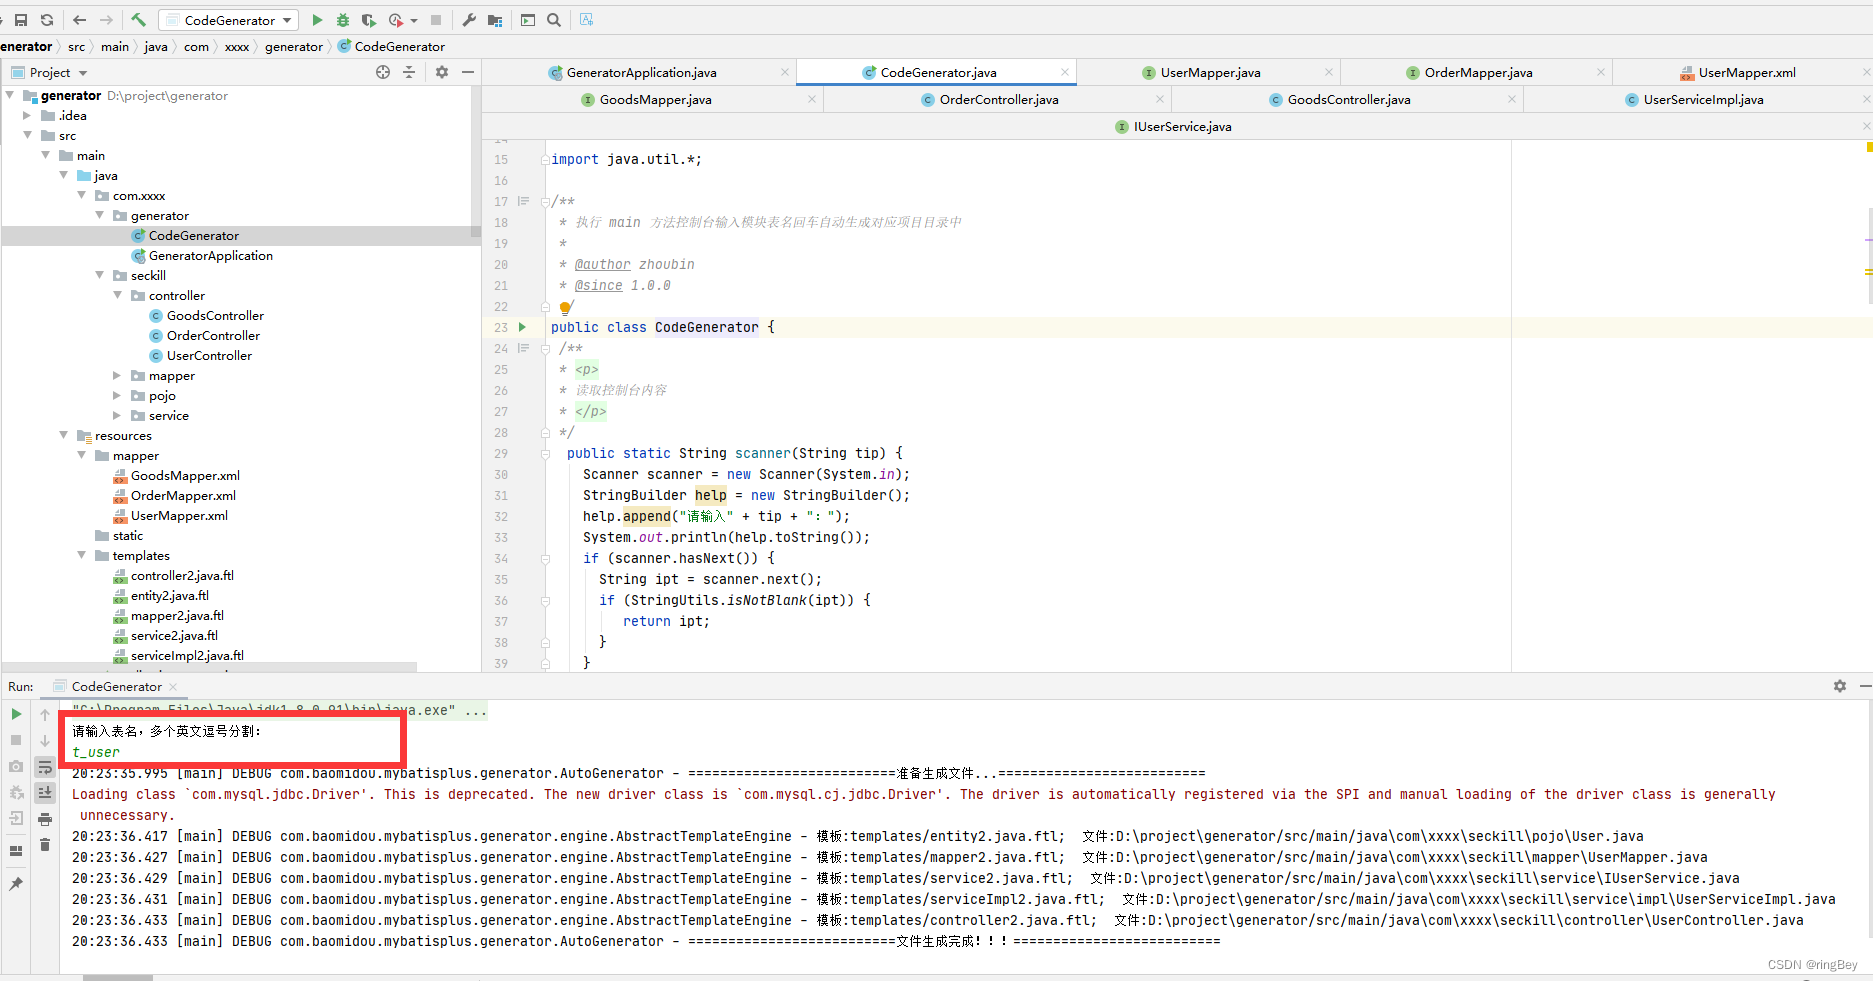
3.按图操作就行


 1527
1527


 被折叠的 条评论
为什么被折叠?
被折叠的 条评论
为什么被折叠?
 到【灌水乐园】发言


