


项目依赖
Spring整合mybatis需要用到的包
1、导入相关jar包
- junit
<dependency>
   <groupId>junit</groupId>
   <artifactId>junit</artifactId>
   <version>4.12</version>
</dependency>
- mybatis
<dependency>
   <groupId>org.mybatis</groupId>
   <artifactId>mybatis</artifactId>
   <version>3.5.2</version>
</dependency>
- mysql-connector-java
<dependency>
   <groupId>mysql</groupId>
   <artifactId>mysql-connector-java</artifactId>
   <version>5.1.47</version>
</dependency>
- spring相关的包spring-webmvc和spring-jdbc
<dependency>
   <groupId>org.springframework</groupId>
   <artifactId>spring-webmvc</artifactId>
   <version>5.1.10.RELEASE</version>
</dependency>
<dependency>
   <groupId>org.springframework</groupId>
   <artifactId>spring-jdbc</artifactId>
   <version>5.1.10.RELEASE</version>
</dependency>
- aspectJ AOP 织入器 aspectjweaver
<!-- https://mvnrepository.com/artifact/org.aspectj/aspectjweaver -->
<dependency>
   <groupId>org.aspectj</groupId>
   <artifactId>aspectjweaver</artifactId>
   <version>1.9.4</version>
</dependency>
- mybatis-spring整合包 核心
<dependency>
   <groupId>org.mybatis</groupId>
   <artifactId>mybatis-spring</artifactId>
   <version>2.0.2</version>
</dependency>
回顾mybatis
- 编写实体类
package com.wcy.pojo;

public class User {
    private Integer id;
    private String name;
    private String pwd;

    public Integer getId() {
        return id;
    }

    public void setId(Integer id) {
        this.id = id;
    }

    public String getName() {
        return name;
    }

    public void setName(String name) {
        this.name = name;
    }

    public String getPwd() {
        return pwd;
    }

    public void setPwd(String pwd) {
        this.pwd = pwd;
    }

    @Override
    public String toString() {
        return "User{" +
                "id=" + id +
                ", name='" + name + '\'' +
                ", pwd='" + pwd + '\'' +
                '}';
    }
}
- 编写业务接口mapper
package com.wcy.mapper;

import com.wcy.pojo.User;

import java.util.List;

public interface UserMapper {
    List<User> getUserList();
}
- 编写业务接口对应的mapper.xml
配置数据库信息
并注册mapper.xml
<?xml version="1.0" encoding="UTF-8" ?>
<!DOCTYPE mapper
        PUBLIC "-//mybatis.org//DTD Config 3.0//EN"
        "http://mybatis.org/dtd/mybatis-3-mapper.dtd">
<mapper namespace="com.wcy.mapper.UserMapper">
    <select id="getUserList" resultType="User">
        select * from user
    </select>
</mapper>
- 编写mybatis-config.xml
<?xml version="1.0" encoding="UTF-8" ?>
<!DOCTYPE configuration
PUBLIC "-//mybatis.org//DTD Config 3.0//EN"
"http://mybatis.org/dtd/mybatis-3-config.dtd">
<configuration>
<typeAliases>
<typeAlias type="com.wcy.pojo.User" alias="User"/>
</typeAliases>
<environments default="development">
<environment id="development">
<transactionManager type="JDBC"/>
<dataSource type="POOLED">
<property name="driver" value="com.mysql.cj.jdbc.Driver"/>
<!-- &需要转义 -> & -->
<property name="url" value="jdbc:mysql://localhost:3306/mybatis?useSSL=true&useUnicode=true&characterEncoding=utf8"/>
<property name="username" value="root"/>
<property name="password" value="root"/>
</dataSource>
</environment>
</environments>
<!-- 自己编写的Mapper接口对应的mapper.xml -->
<mappers>
<mapper class="com.wcy.mapper.UserMapper"/>
<!-- <mapper resource="com/wcy/mapper/UserMapper.xml"/>-->
</mappers>
</configuration>
- 测试
public class MyTest {
public static void main(String[] args) throws IOException {
String resource = "mybatis-config.xml";
InputStream is = Resources.getResourceAsStream(resource);
SqlSessionFactory sqlSessionFactory = new SqlSessionFactoryBuilder().build(is);
SqlSession sqlSession = sqlSessionFactory.openSession();
UserMapper mapper = sqlSession.getMapper(UserMapper.class);
List<User> userList = mapper.getUserList();
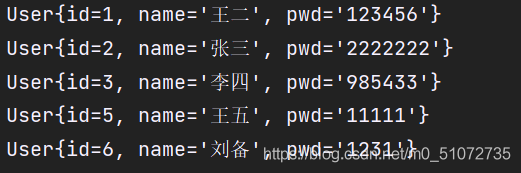
for (User user : userList) {
System.out.println(user);
}
sqlSession.close();
}
}
出现错误。。。。。。。。。。
- 配置Maven静态资源过滤问题
<!--  maven导出错误问题 添加可以避免   -->
    <build>
        <resources>
            <resource>
                <directory>src/main/java</directory>
                <includes>
                    <include>**/*.properties</include>
                    <include>**/*.xml</include>
                </includes>
                <filtering>false</filtering>
            </resource>
            <resource>
                <directory>src/main/resources</directory>
                <includes>
                    <include>**/*.properties</include>
                    <include>**/*.xml</include>
                </includes>
                <filtering>false</filtering>
            </resource>
        </resources>
    </build>
重新测试,ok
Mybatis-Spring
什么是 MyBatis-Spring?
MyBatis-Spring 会帮助你将 MyBatis 代码无缝地整合到 Spring 中。
它将允许 MyBatis 参与到 Spring 的事务管理之中,创建映射器 mapper 和 SqlSession 并注入到 bean 中,以及将 Mybatis 的异常转换为 Spring 的 DataAccessException。
最终,可以做到应用代码不依赖于 MyBatis,Spring 或 MyBatis-Spring。
MyBatis-Spring 需要以下版本:

安装
要使用 MyBatis-Spring 模块,只需要在类路径下包含 mybatis-spring-2.0.6.jar 文件和相关依赖即可。
如果使用 Maven 作为构建工具,仅需要在 pom.xml 中加入以下代码即可:
<dependency>
  <groupId>org.mybatis</groupId>
  <artifactId>mybatis-spring</artifactId>
  <version>2.0.6</version>
</dependency>
基础
要和 Spring 一起使用 MyBatis,需要在 Spring 应用上下文中定义至少两样东西:一个 SqlSessionFactory 和至少一个数据映射器类。
在基础的 MyBatis 用法中,是通过 SqlSessionFactoryBuilder 来创建 SqlSessionFactory的。
在 MyBatis-Spring 中,可使用SqlSessionFactoryBean来创建 SqlSessionFactory。 要配置这个工厂 bean,只需要把下面代码放在 Spring 的 XML 配置文件中:
<bean id="sqlSessionFactory" class="org.mybatis.spring.SqlSessionFactoryBean">
  <property name="dataSource" ref="dataSource" />
</bean>
或者使用javaConfig
@Configuration
public class MyBatisConfig {
  @Bean
  public SqlSessionFactory sqlSessionFactory() throws Exception {
    SqlSessionFactoryBean factoryBean = new SqlSessionFactoryBean();
    factoryBean.setDataSource(dataSource());
    return factoryBean.getObject();
  }
}
SqlSessionFactory 需要一个 DataSource(数据源)。这可以是任意的 DataSource,只需要和配置其它 Spring 数据库连接一样配置它就可以了。这些代码是固定的
<!--配置数据源:数据源有非常多,可以使用第三方的,也可使使用Spring的-->
<bean id="dataSource" class="org.springframework.jdbc.datasource.DriverManagerDataSource">
<property name="driverClassName" value="com.mysql.cj.jdbc.Driver"/>
<property name="url" value="jdbc:mysql://localhost:3306/mybatis?useSSL=true&useUnicode=true&characterEncoding=utf8"/>
<property name="username" value="root"/>
<property name="password" value="root"/>
</bean>
在 MyBatis 中,你可以使用 SqlSessionFactory 来创建 SqlSession。一旦你获得一个 session 之后,你可以使用它来执行映射了的语句,提交或回滚连接,最后,当不再需要它的时候,你可以关闭 session。
<bean id="sqlSession" class="org.mybatis.spring.SqlSessionTemplate">
 <constructor-arg index="0" ref="sqlSessionFactory" />
</bean>
SqlSessionTemplate 是 MyBatis-Spring 的核心。作为 SqlSession 的一个实现,这意味着可以使用它无缝代替你代码中已经在使用的 SqlSession。
整合方式一
- 创建spring配置文件 spring-config.xml
<?xml version="1.0" encoding="UTF-8"?>
<beans xmlns="http://www.springframework.org/schema/beans"
      xmlns:xsi="http://www.w3.org/2001/XMLSchema-instance"
      xsi:schemaLocation="http://www.springframework.org/schema/beans
       http://www.springframework.org/schema/beans/spring-beans.xsd">
</beans>
- 在 spring-config.xml中配置数据源
<!--配置数据源:数据源有非常多,可以使用第三方的,也可使使用Spring的-->
<bean id="dataSource" class="org.springframework.jdbc.datasource.DriverManagerDataSource">
<property name="driverClassName" value="com.mysql.cj.jdbc.Driver"/>
<property name="url" value="jdbc:mysql://localhost:3306/mybatis?useSSL=true&useUnicode=true&characterEncoding=utf8"/>
<property name="username" value="root"/>
<property name="password" value="root"/>
</bean>
- 配置SqlSessionFactory,并关联MyBatis
<!--配置SqlSessionFactory-->
<bean id="sqlSessionFactory" class="org.mybatis.spring.SqlSessionFactoryBean">
   <property name="dataSource" ref="dataSource"/>
   <!--关联Mybatis-->
   <property name="configLocation" value="classpath:mybatis-config.xml"/>
   <property name="mapperLocations" value="classpath:com/wcy/dao/*.xml"/>
</bean>
- 注册sqlSessionTemplate , 关联sqlSessionFactory
<!--注册sqlSessionTemplate , 关联sqlSessionFactory-->
<bean id="sqlSession" class="org.mybatis.spring.SqlSessionTemplate">
   <!--利用构造器注入-->
   <constructor-arg index="0" ref="sqlSessionFactory"/>
</bean>
- 实现dao中的业务接口,并私有化一个SqlSessionTemplate属性,即为我们之前mybatis使用的sqlSession
public class UserMapperImpl implements UserMapper{
    private SqlSessionTemplate sqlSession;

    public void setSqlSession(SqlSessionTemplate sqlSession) {
        this.sqlSession = sqlSession;
    }

    @Override
    public List<User> getUserList() {
        UserMapper mapper = sqlSession.getMapper(UserMapper.class);
        return mapper.getUserList();
    }
}
- 在spring-config中注册实现的接口,并注入sqlSession
<!--注册userMapper的实现类,并注入sqlSession-->
<bean id="userMapper" class="com.wcy.dao.UserMapperImpl">
    <property name="sqlSession" ref="sqlSession"/>
</bean>
- 配置完成 现在完整配置为
spring-config
<?xml version="1.0" encoding="UTF-8"?>
<beans xmlns="http://www.springframework.org/schema/beans"
xmlns:xsi="http://www.w3.org/2001/XMLSchema-instance"
xsi:schemaLocation="http://www.springframework.org/schema/beans
http://www.springframework.org/schema/beans/spring-beans.xsd
">
<!--配置数据源:数据源有非常多,可以使用第三方的,也可使使用Spring的-->
<bean id="dataSource" class="org.springframework.jdbc.datasource.DriverManagerDataSource">
<property name="driverClassName" value="com.mysql.cj.jdbc.Driver"/>
<property name="url" value="jdbc:mysql://localhost:3306/mybatis?useSSL=true&useUnicode=true&characterEncoding=utf8"/>
<property name="username" value="root"/>
<property name="password" value="root"/>
</bean>
<!--配置SqlSessionFactory-->
<bean id="sqlSessionFactory" class="org.mybatis.spring.SqlSessionFactoryBean">
<property name="dataSource" ref="dataSource"/>
<!--关联Mybatis-->
<property name="configLocation" value="classpath:mybatis-config.xml"/>
<property name="mapperLocations" value="classpath:com/wcy/dao/*.xml"/>
</bean>
<!--注册sqlSessionTemplate , 关联sqlSessionFactory-->
<bean id="sqlSession" class="org.mybatis.spring.SqlSessionTemplate">
<!--利用构造器注入-->
<constructor-arg index="0" ref="sqlSessionFactory"/>
</bean>
<!--注册userMapper的实现类,并注入sqlSession-->
<bean id="userMapper" class="com.wcy.dao.UserMapperImpl">
<property name="sqlSession" ref="sqlSession"/>
</bean>
</beans>
mybatis-config
<?xml version="1.0" encoding="UTF-8" ?>
<!DOCTYPE configuration
        PUBLIC "-//mybatis.org//DTD Config 3.0//EN"
        "http://mybatis.org/dtd/mybatis-3-config.dtd">
<configuration>

    <typeAliases>
        <typeAlias type="com.wcy.pojo.User" alias="User"/>
    </typeAliases>

</configuration>
UserMapper
<?xml version="1.0" encoding="UTF-8" ?>
<!DOCTYPE mapper
        PUBLIC "-//mybatis.org//DTD Config 3.0//EN"
        "http://mybatis.org/dtd/mybatis-3-mapper.dtd">
<mapper namespace="com.wcy.dao.UserMapper">
    <select id="getUserList" resultType="User">
        select * from user
    </select>
</mapper>
可以发现mybatis中空空如也,全部整合到了spring-config中
- 测试
@Test
public void test(){
    ApplicationContext context = new ClassPathXmlApplicationContext("spring-config.xml");
    UserMapper userMapper = context.getBean("userMapper", UserMapper.class);
    List<User> userList = userMapper.getUserList();
    for (User user : userList) {
        System.out.println(user);
    }
}
输出成功!
至此完成了所有的配置
接下来再优化一下
我们为项目创建一个总的配置文件applicationContext.xml
导入spring-config
在这个文件中注册我们的userMapper
这样就可以将spring-config作为一个工具使用,我们根本不需要改动
<?xml version="1.0" encoding="UTF-8"?>
<beans xmlns="http://www.springframework.org/schema/beans"
       xmlns:xsi="http://www.w3.org/2001/XMLSchema-instance"
       xsi:schemaLocation="http://www.springframework.org/schema/beans
       http://www.springframework.org/schema/beans/spring-beans.xsd
       ">
    <import resource="spring-config.xml"/>

    <!--注册userMapper的实现类,并注入sqlSession-->
    <bean id="userMapper" class="com.wcy.dao.UserMapperImpl">
        <property name="sqlSession" ref="sqlSession"/>
    </bean>
</beans>
整合方式二
方式二只是在方式一的基础上稍微简化了一点
在上面的步骤5中我们私有化了一个sqlSession属性
接下来我们用另一种方式来简化一下
- 实现UserMapper接口
继承了一个SqlSessionDaoSupport 类
该类的getSqlSession方法可以直接放回一个sqlSession对象
用法一样
public class UserMapperImpl02 extends SqlSessionDaoSupport implements UserMapper{
    @Override
    public List<User> getUserList() {
        return this.getSqlSession().getMapper(UserMapper.class).getUserList();
    }
}
- 注册该类,传入sqlSessionFactory
<!--  使用继承SqlSessionDaoSupport的方式无需传入sqlSession,只需直接传入sqlSessionFactory即可  -->
<bean id="userMapper02" class="com.wcy.dao.UserMapperImpl02">
    <property name="sqlSessionFactory" ref="sqlSessionFactory"/>
</bean>
这样就完成了,我们无需注册sqlSession这一步,变得更加的简单
测试一下,结果一样
@Test
public void test(){
    ApplicationContext context = new ClassPathXmlApplicationContext("applicationContext.xml");
    UserMapper userMapper = context.getBean("userMapper02", UserMapper.class);
    List<User> userList = userMapper.getUserList();
    for (User user : userList) {
        System.out.println(user);
    }
}


 146
146


 被折叠的 条评论
为什么被折叠?
被折叠的 条评论
为什么被折叠?
 到【灌水乐园】发言


