


 本文讲述了作者在安装FaceChain项目时遇到的挑战,如版本冲突、环境变量设置等,并分享了逐步解决这些问题的方法。
1.cmd进入你想安装的路径
输入git clone https://github.com/modelscope/facechain.git
等待下载(可能需要魔法)
2.创建环境(阅读文档,先创建环境)
命令行输入conda create -n facechain python=3.8
上来就报错:
CustomValidationError: Parameter channel_priority = 'strict' declared in <<merged>> is invalid.
The value 'strict' cannot be boolified.
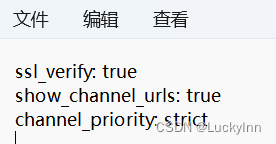
解决方法:
打开C盘用户路径下的.condarc,里面有三行,最后一行的strict改为flexible、disabled都还是不行
直接把第三行注释掉,ok 解决了
创建成功:
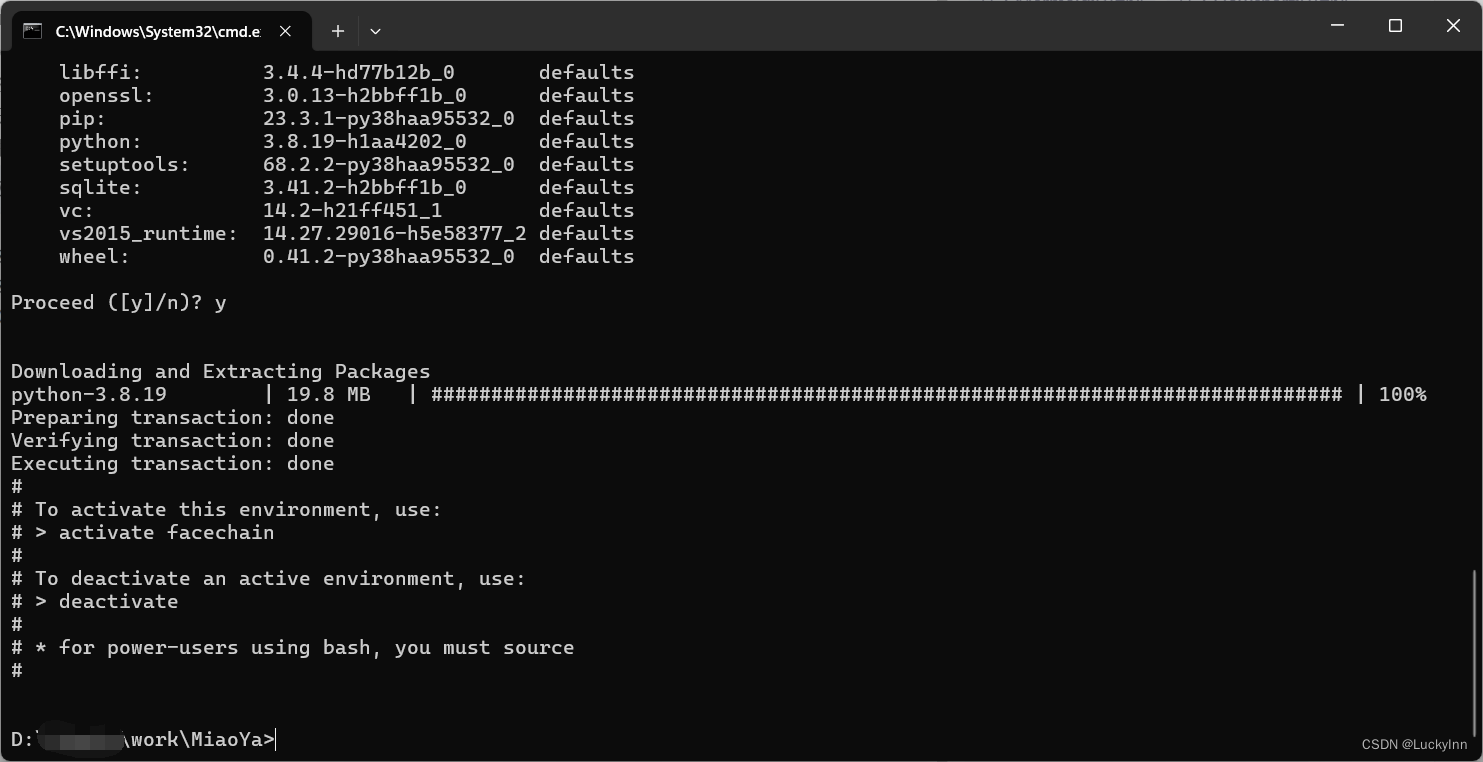
接着按照命令执行就可:
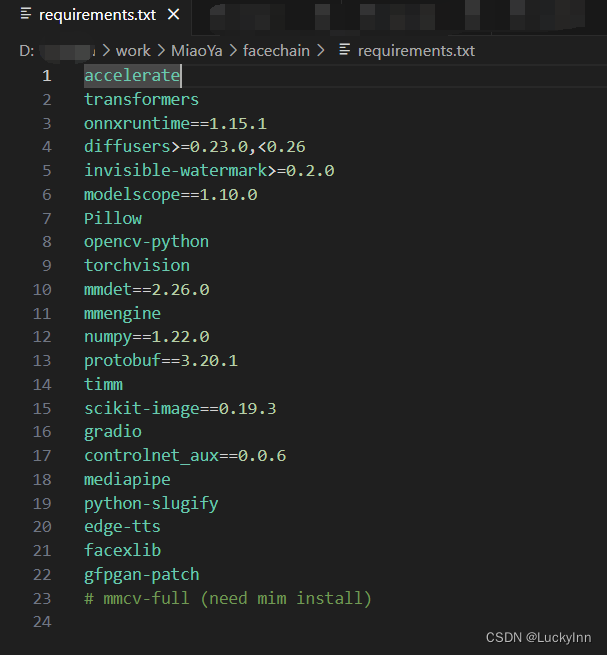
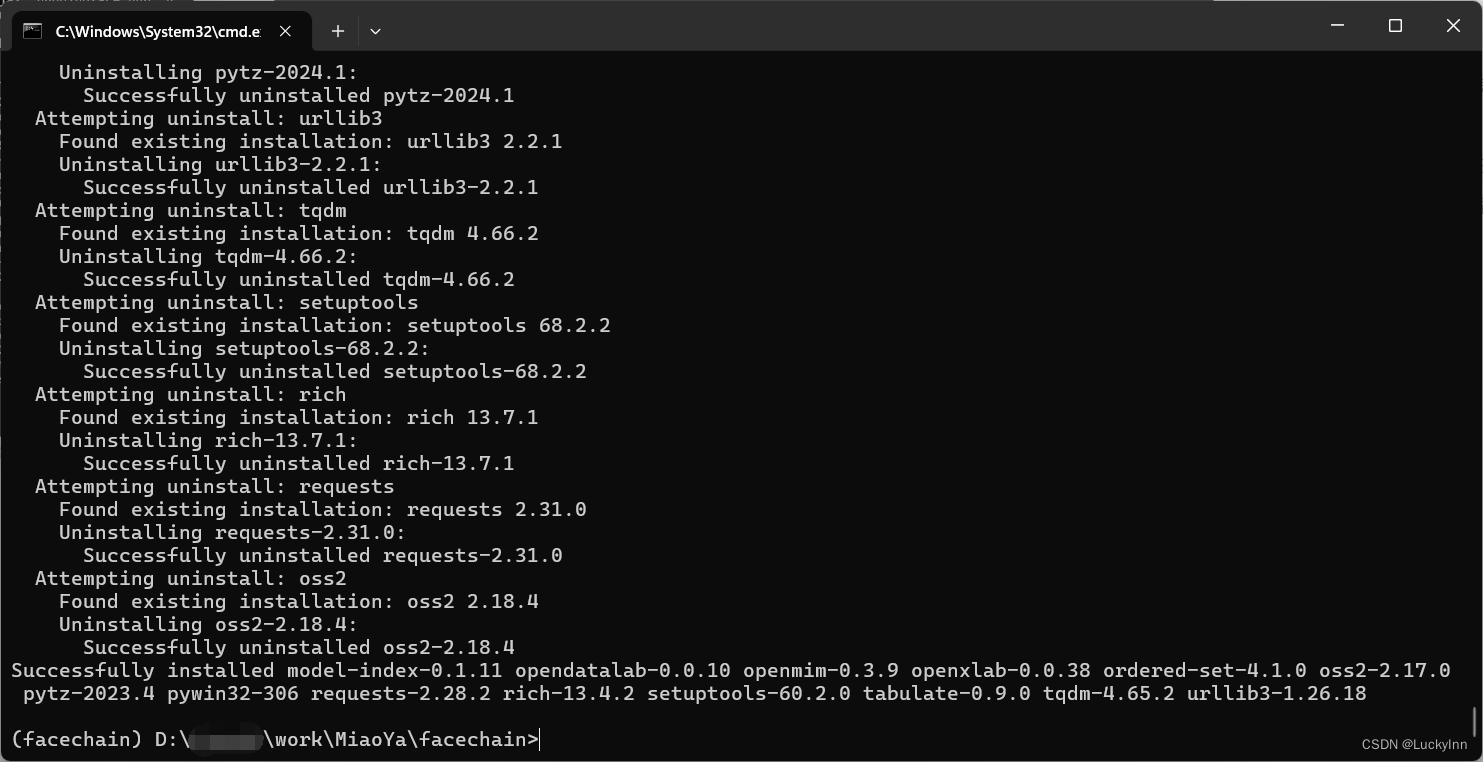
执行pip3 install -r requirements.txt
过程中卡了一会儿,之后一直在下载,全程接近一个小时
当前的版本要下载的东西太多了,慢慢等吧
下载结束:

继续进行下一步:pip3 install -U openmim,很快就好了
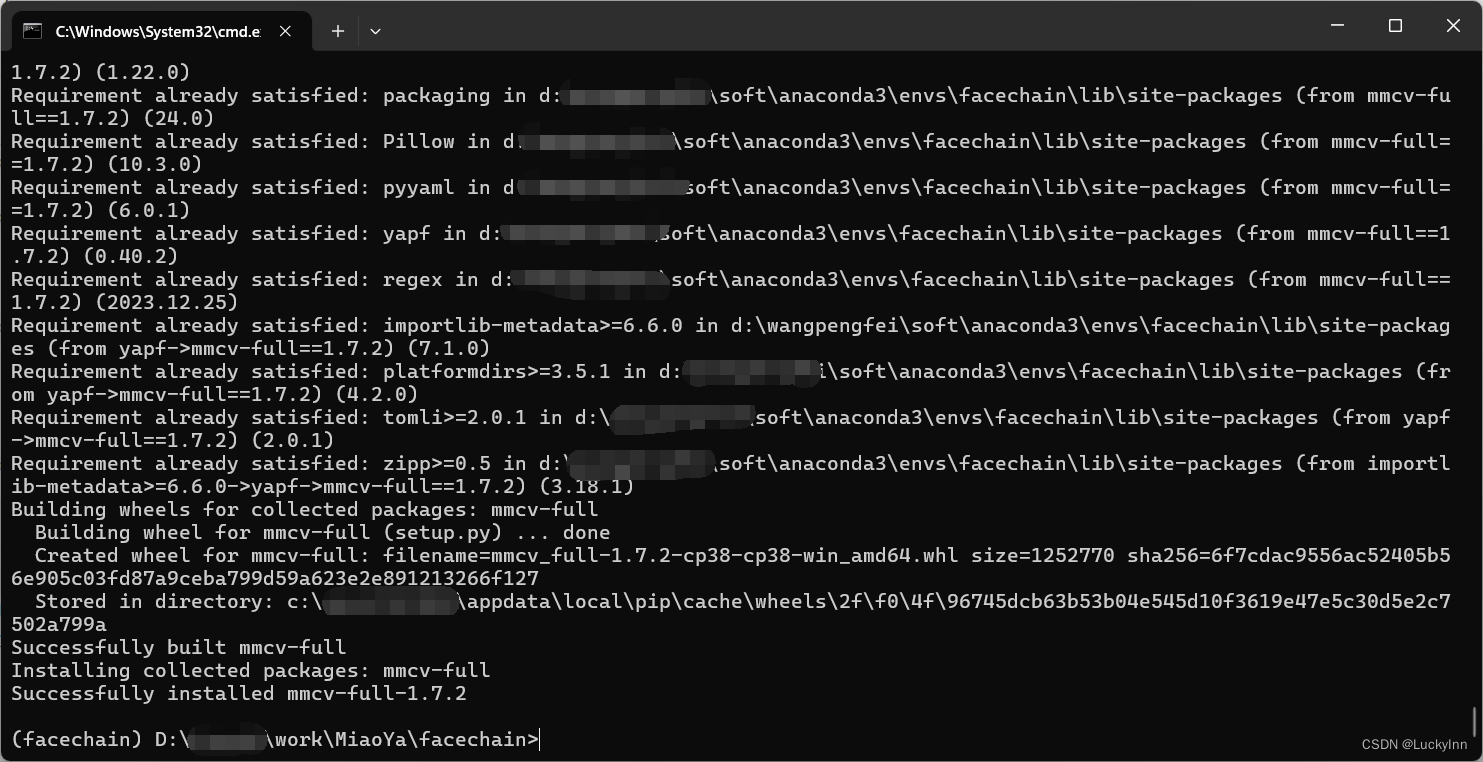
继续 :mim install mmcv-full==1.7.2
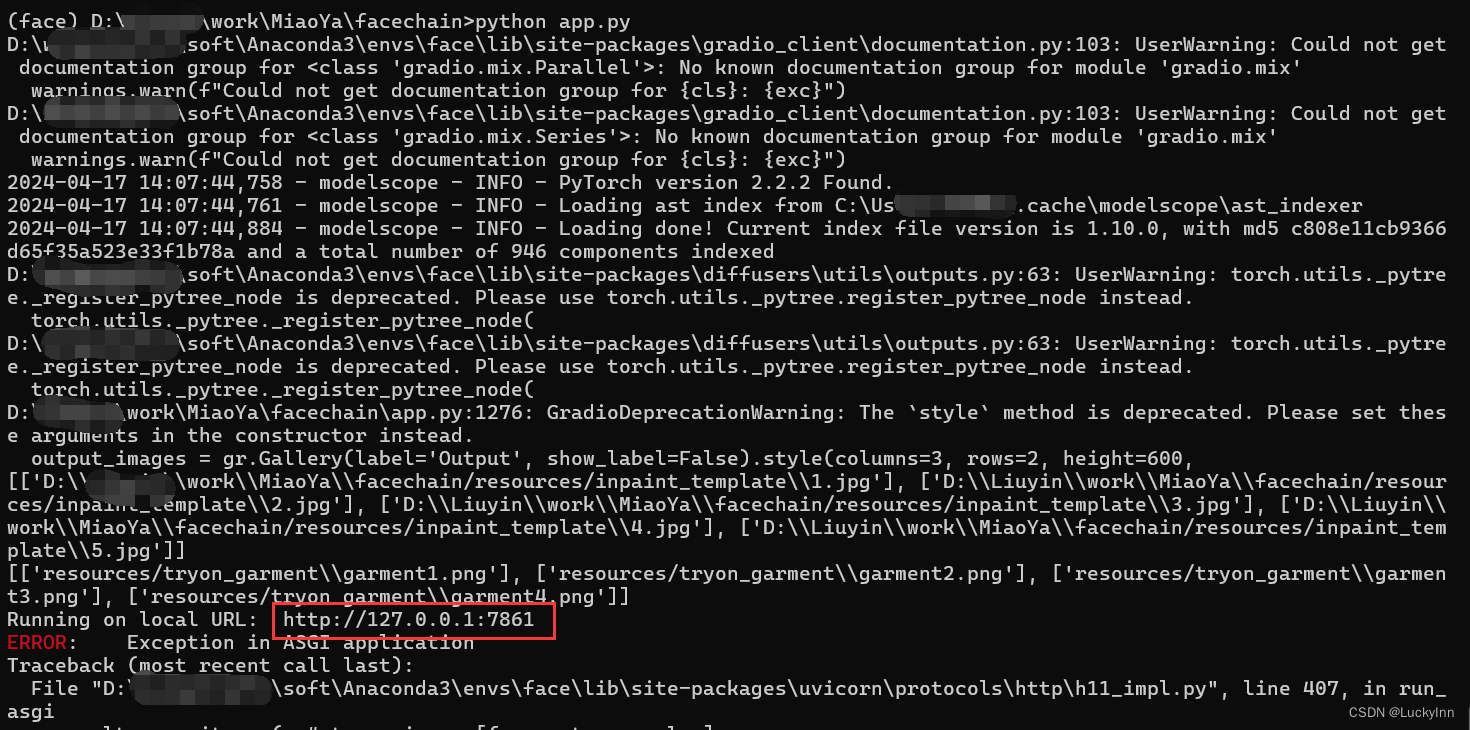
继续执行python3 app.py,无返回结果,使用python app.py
运行过程报错
这个错误 我试了很多办法,最后都不起作用,第二天决定直接从头再来!
创建环境名face,(第一次创建使用的python3.8,这次改成3.10了)
conda create -n face python=3.10
之后重复上面的步骤。
最后运行python app.py
报错:AttributeError: module 'gradio' has no attribute 'Box'
解决办法:gradio 版本不对,卸载装新的:
pip uninstall gradio
pip install gradio==3.4
重新执行python app.py
报错:
TypeError: AsyncConnectionPool.init() got an unexpected keyword
argument ‘socket_options’
解决办法,pip install -U httpx==0.24.1
再次执行python app.py:
报错
AttributeError: module ‘gradio’ has no attribute ‘SelectData’
还是gradio的错误,把gradio又重装了好几个版本,还是不行,最后在github找到一个解决办法
pip install -i https://pypi.org/simple gradio==3.25.0
原来的错误解决了,继续python app.py,又报错:
types = api_info.get(“serialized_input”, [api_info[“info”][“type”]] *
2) # type: ignore KeyError: ‘type’
真搞笑,gradio版本还不对,再次卸载了,装3.36.1版本的
pip install gradio==3.36.1
再次执行python app.py !!! 终于出来网址了!!!
但仍然有报错:
Please check your internet connection. This can happen if your antivirus software blocks the download of this file. You can install manually by following these steps:

按照提示1 2 3去下载文件frpc_windows amd64.exe,并且放到指定文件夹下,重命名一下
重启app.py
真的醉了,还是不行,发现windows一直有弹窗提示,打开之后赋个权限,接下来还是不对
后来去问了一下AI,恍然大悟!!!
这个文件直接命名为frpc_windows_amd64_v0.2,不要有.exe

接下来继续python app.py
!!!报错没有了!!!

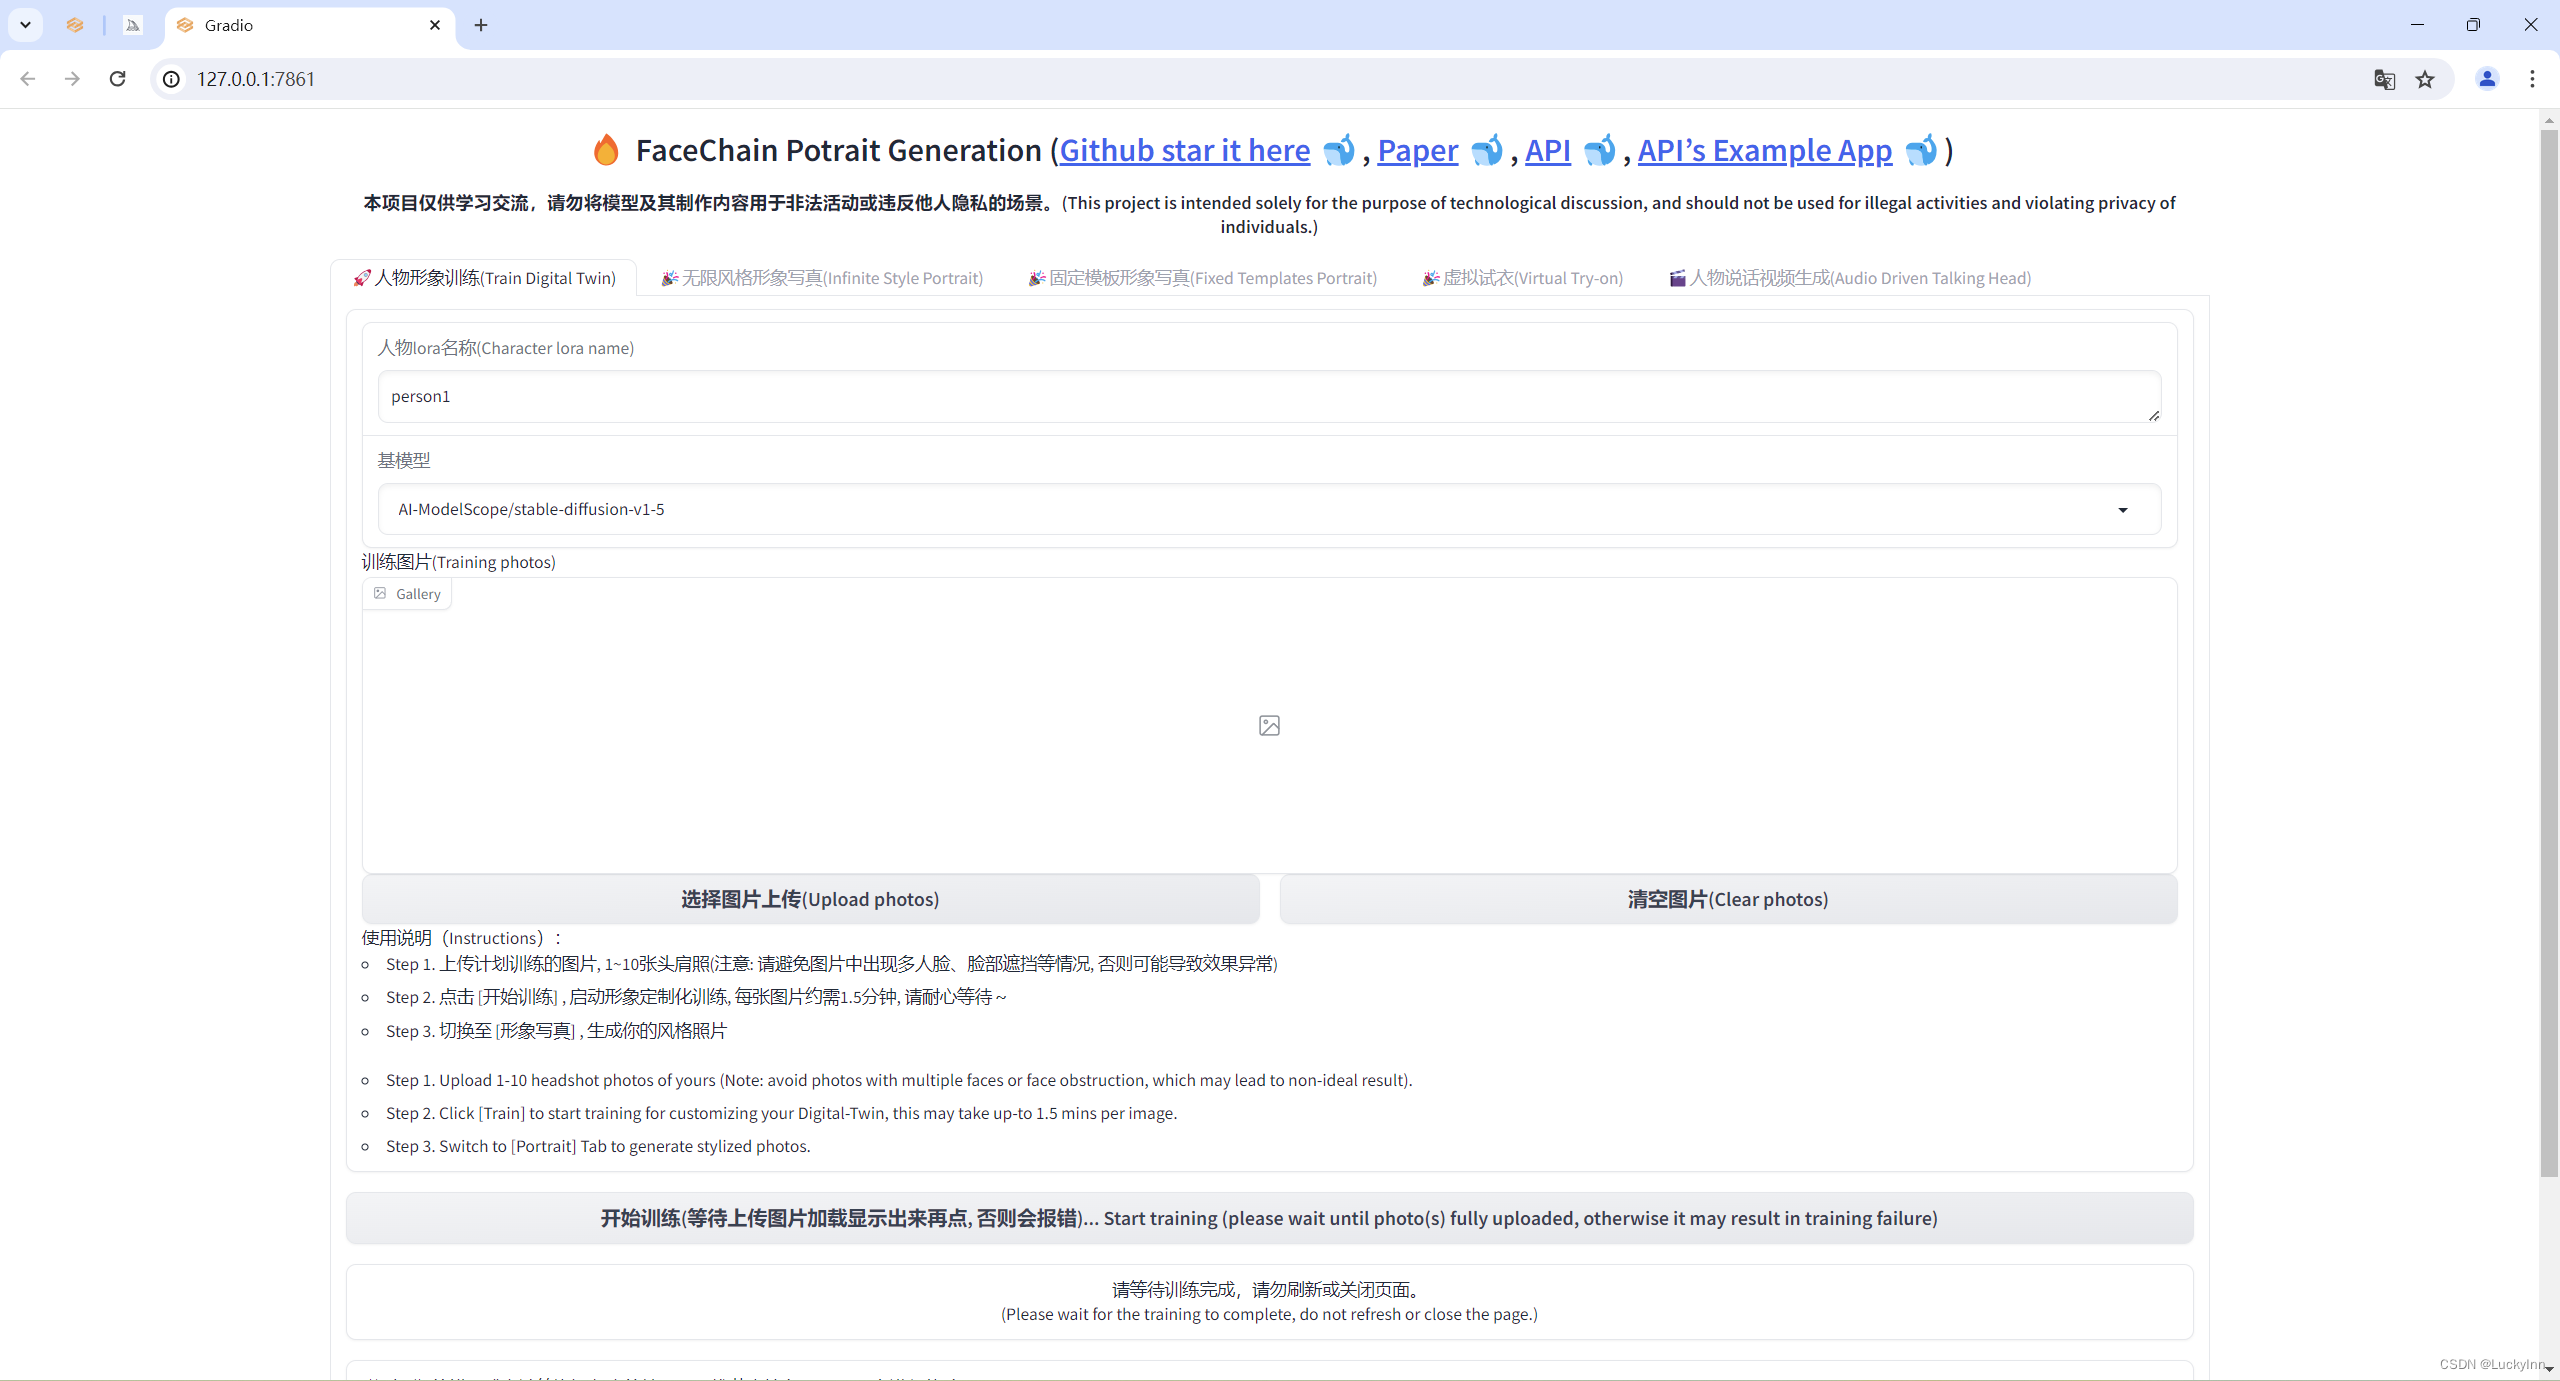
点击跳转网页:
长这个样:
问题它又来了,此时点击上传图片没反应,百度了一下,可能还是gradio版本的问题。。。
于是我又卸载了gradio 3.36.1,下载 pip install gradio ==3.50.2
OK 了!!
终于能上传图片了!!!!!
下一步,开始训练,点击开始训练,终端报错:
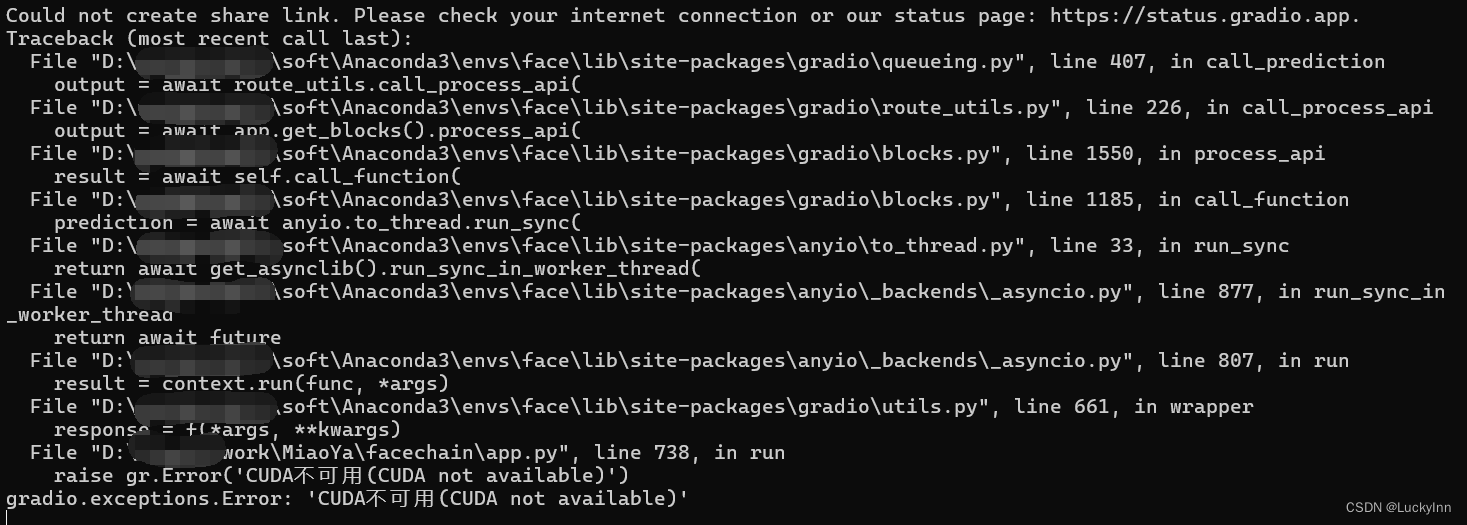
CUDA不可用,好 我去下载一个

时隔一天,OK,cuda安装好了,继续python app.py
又报错
ModuleNotFoundError: No module named ‘chardet’
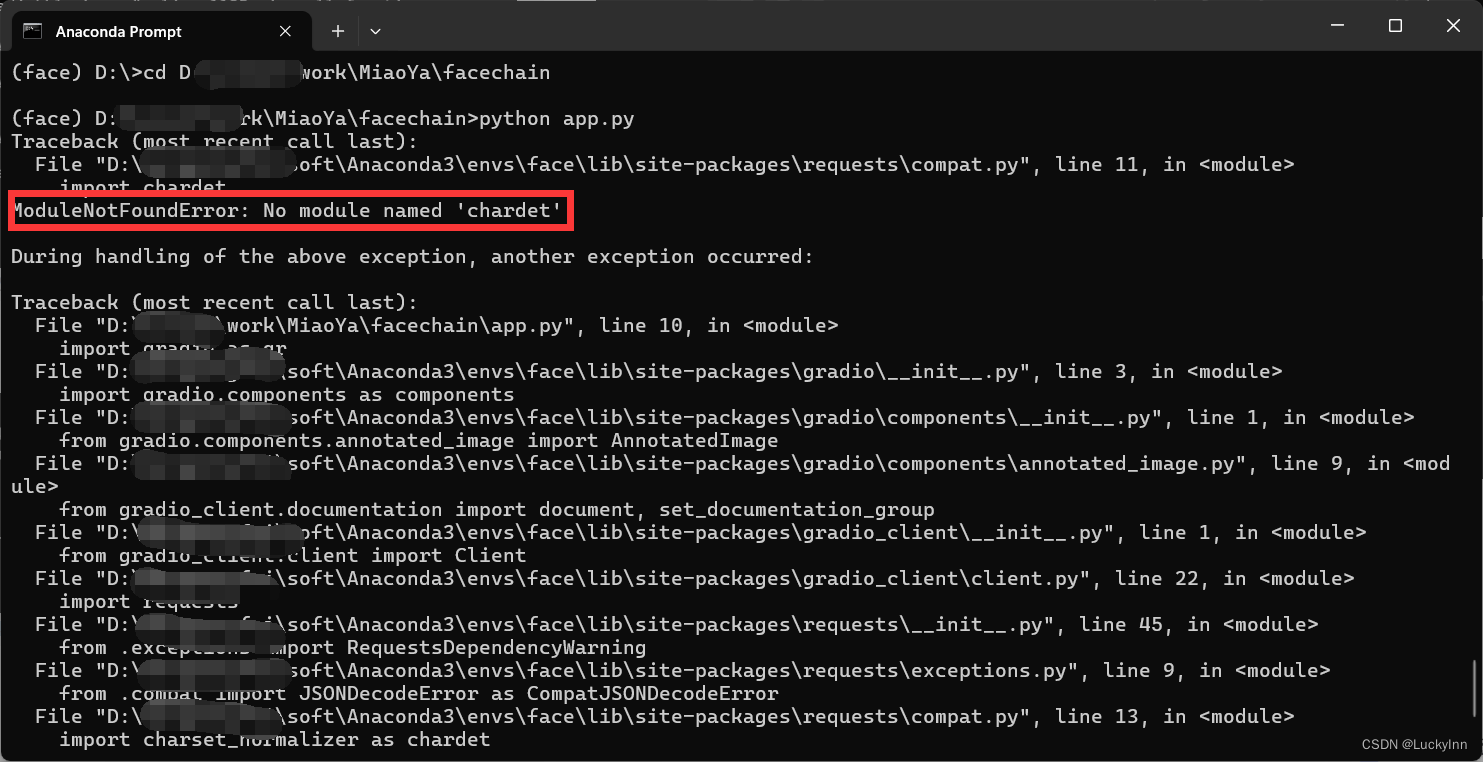
没有就去下载:pip install chardet,下载成功接着python app.py
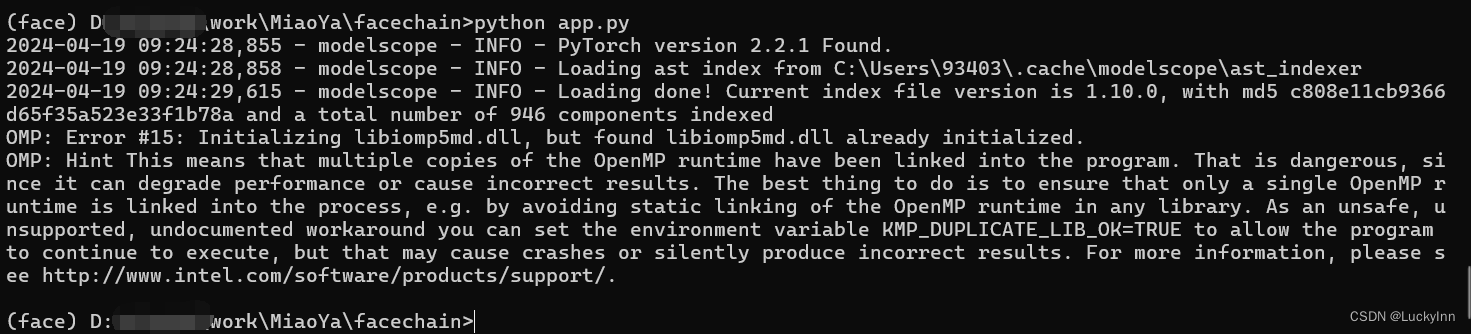
还是不对,时隔一天,咋网址都出不来了。。。
OMP: Error #15: Initializing libiomp5md.dll, but found libiomp5md.dll already initialized.
OMP: Hint This means that multiple copies of the OpenMP runtime have been linked into the program. That is dangerous,since it can degrade performance or cause incorrect results. The best thing to do is to ensure that only a single OpenMP runtime is linked into the process, e.g. by avoiding static linking of the OpenMP runtime in any library. As an unsafe, unsupported, undocumented workaround you can set the environment variable KMP_DUPLICATE_LIB_OK=TRUE to allow the program to continue to execute, but that may cause crashes or silently produce incorrect results. For more information, please see http://www.intel.com/software/products/support/.
解决办法:打开app.py编辑一下在 全文开头加上下面这两句,ok 解决了
import os
os.environ["KMP_DUPLICATE_LIB_OK"]="TRUE"
继续执行python app.py
又报错:
SyntaxError: Non-UTF-8 code starting with ‘\xe5’ in file D:\Liuyin\work\MiaoYa\facechain\app.py on line 252, but no encoding declared; see https://python.org/dev/peps/pep-0263/ for details
是不是感觉似曾相识(因为在第一次安装时也遇到过,忘记记录下来了,因为实在解决不了开头的那个问题就直接重装了)
解决办法:打开app.py再加上# coding=gb2312
继续执行!好啦!网址出来了

进来了!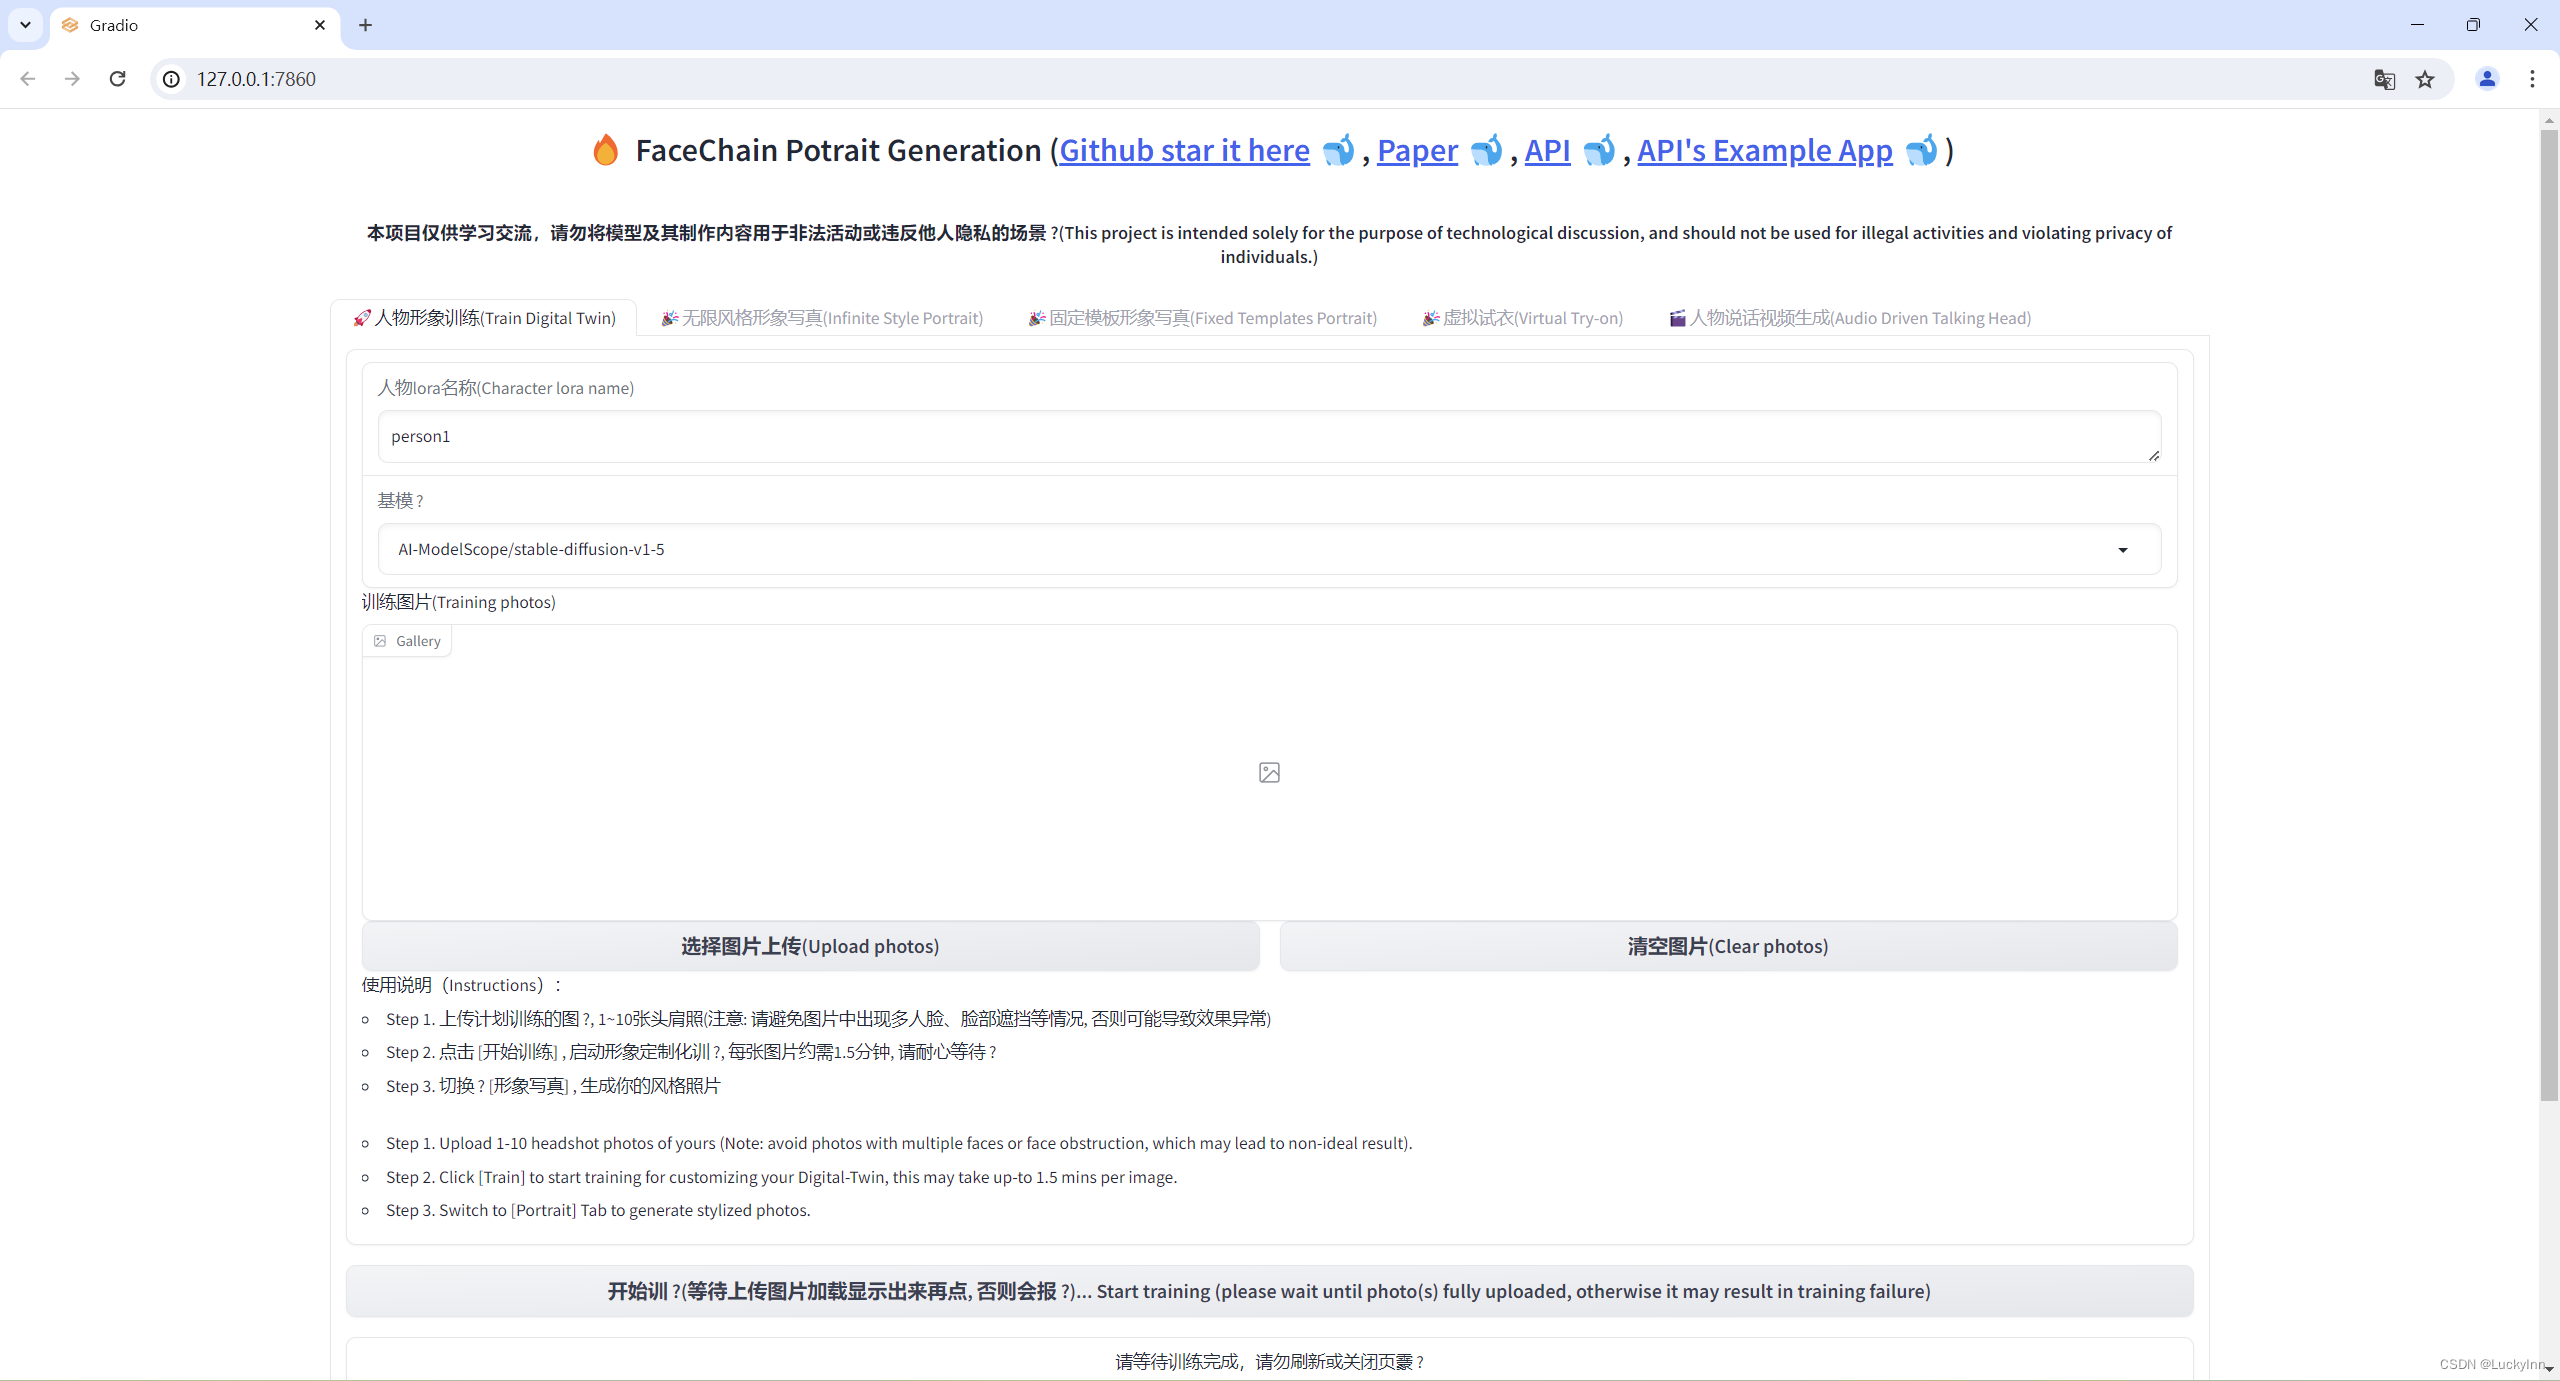
上传图片,点击开始训练,查看终端,开始训练了,接下来就是等待了!!!
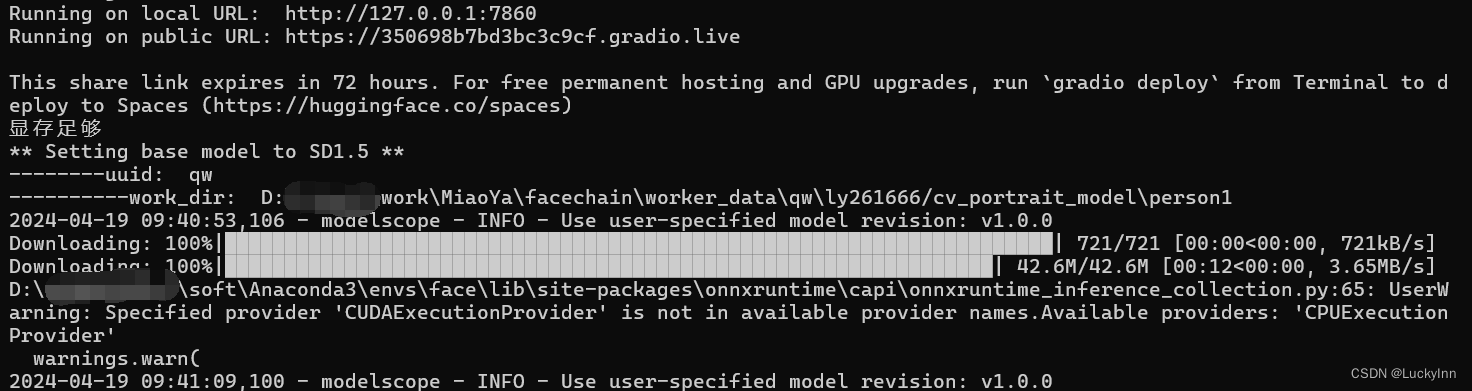
下面有一些failed 暂时没有error,先等一下 再说
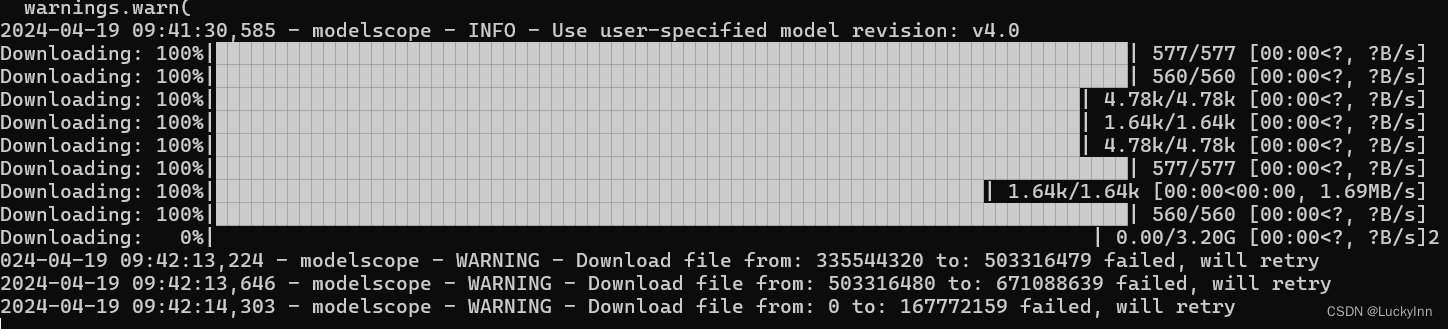
要下载好多东西:

下载结束之后,又有问题–且训练失败:
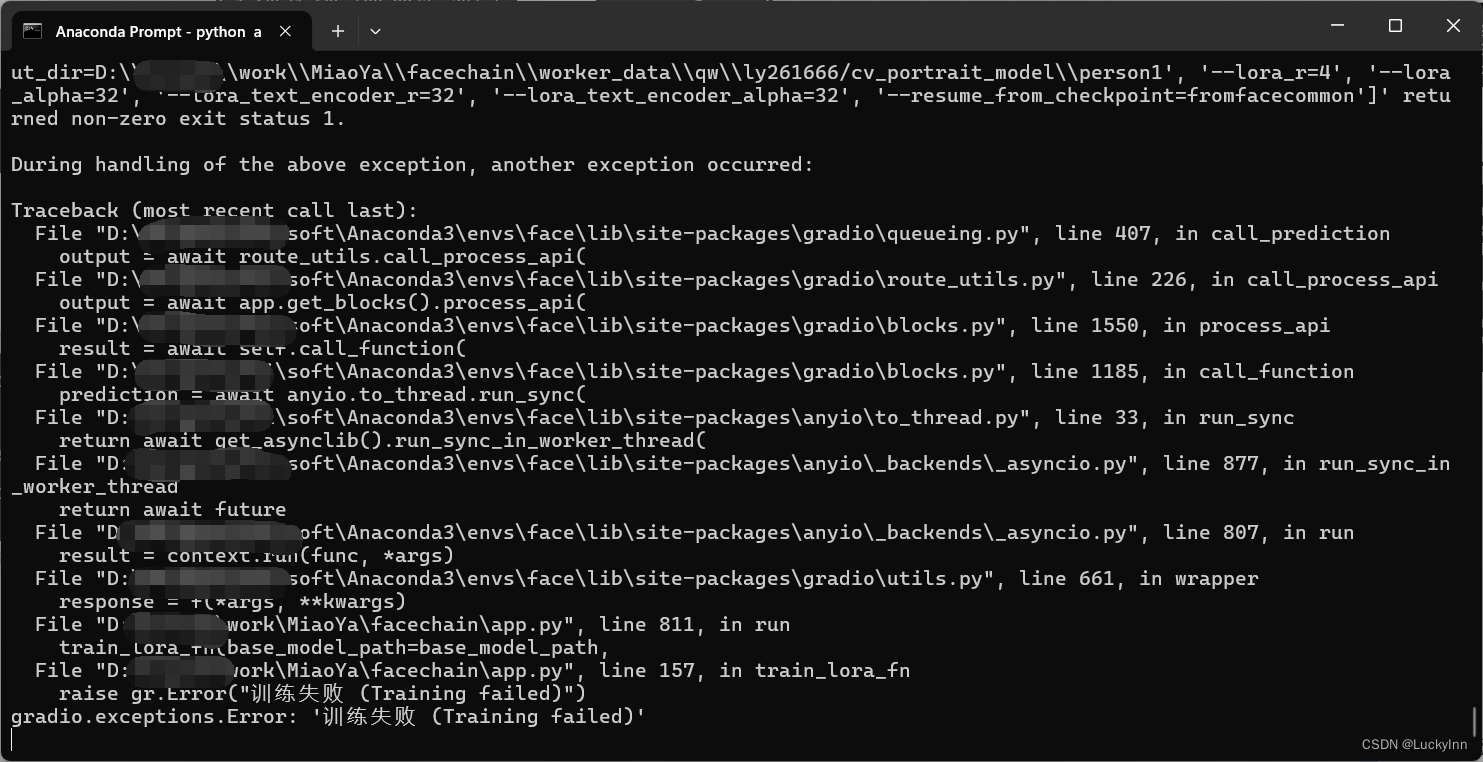
这个时候我有点蒙了,于是重新开始训练person2看是否会发生同样的错误,仍然报错
之后我重启了一下app.py
再次进行person3的训练,这时候报错不同了,变成了
ModuleNotFoundError: DamoFdDetect: No module named ‘mmcv’
好吧,那就退出下载:
pip install mmcv-full
下载报错:
  OSError: CUDA_HOME environment variable is not set. Please set it to your CUDA install root.
  [end of output]
没有配置CUDA的环境变量
好 我去配置

配置好了,重新下载mmcv-full
继续python app.py
进入网页,上传图片并开始训练:

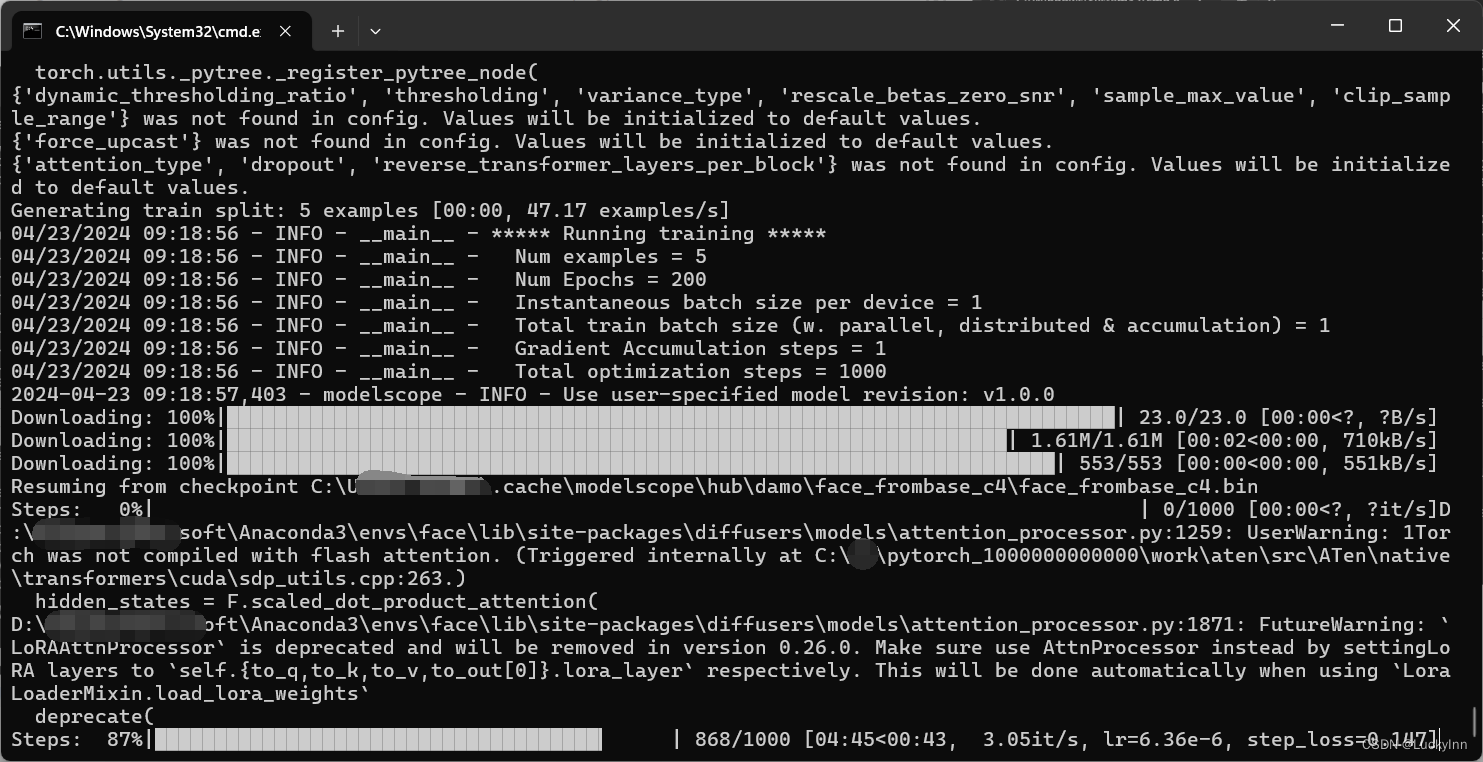
就在我以为他还是会报错的时候,他出来了!step!!出来了!!!,那我就等等吧 哈哈哈哈哈哈

训练好啦!好快的!这个只有3M的BIN文件,就是他了

接下来,进入网页端,选择无限风格形象写真:
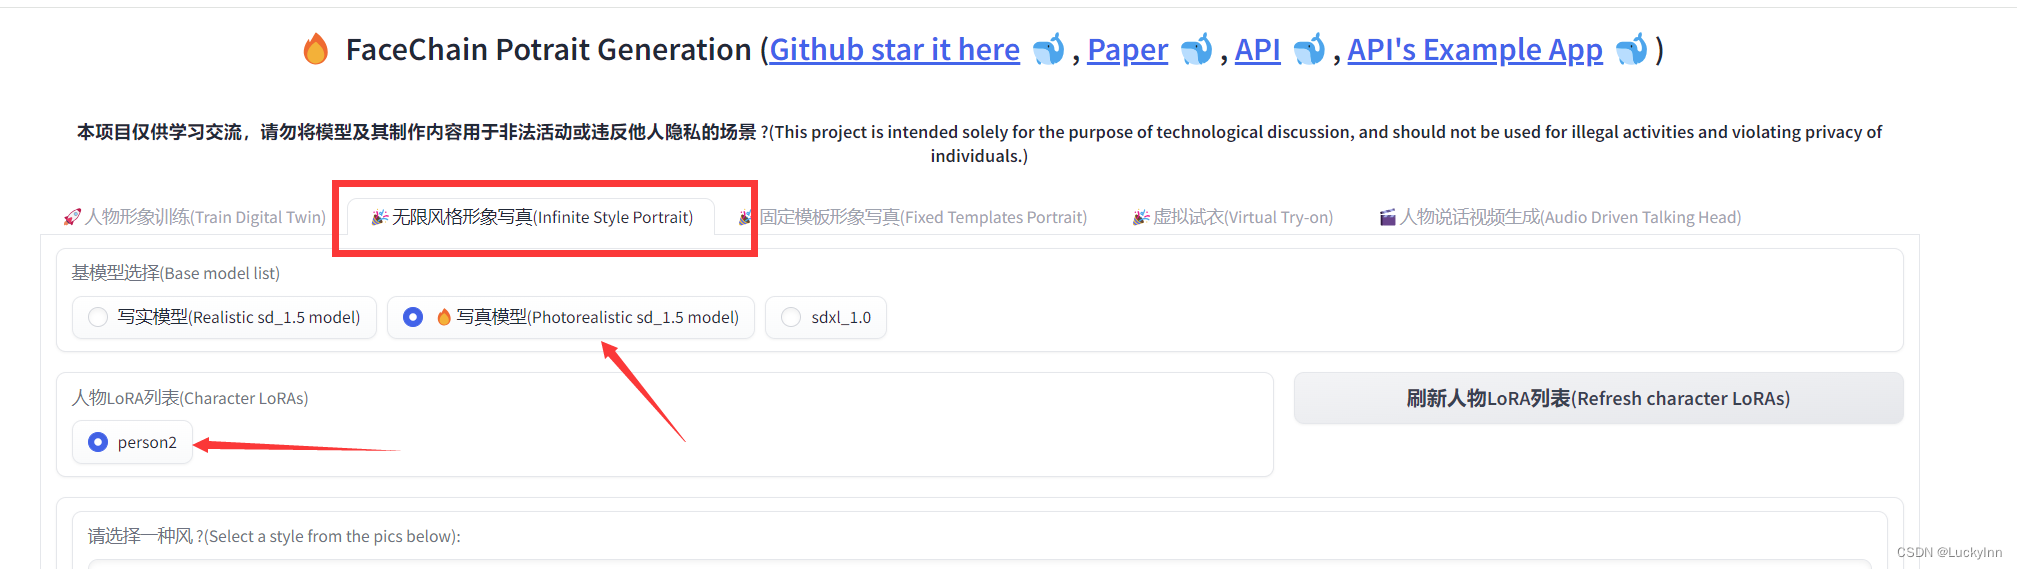
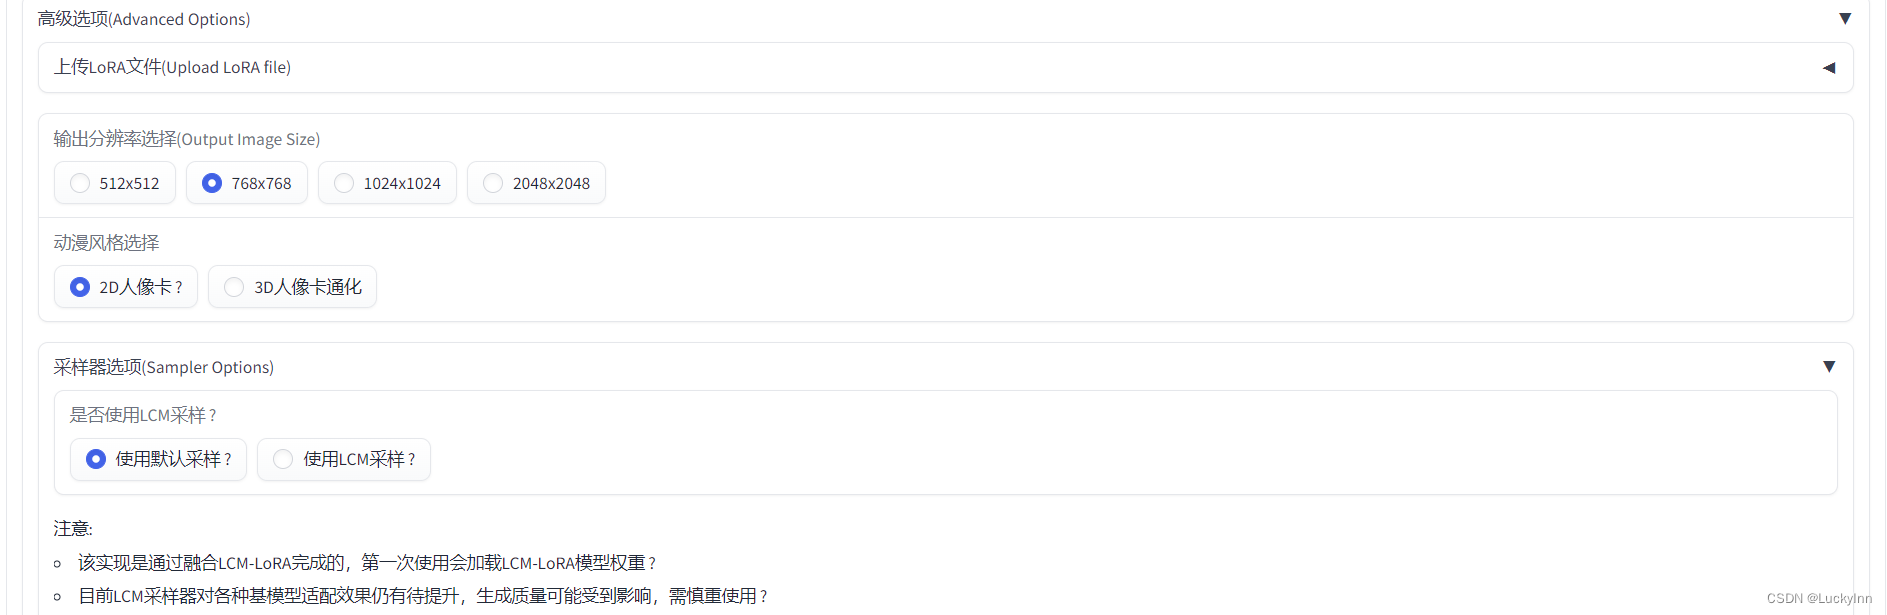
有一些是默认的,先不去改
先生成3张图片试一下
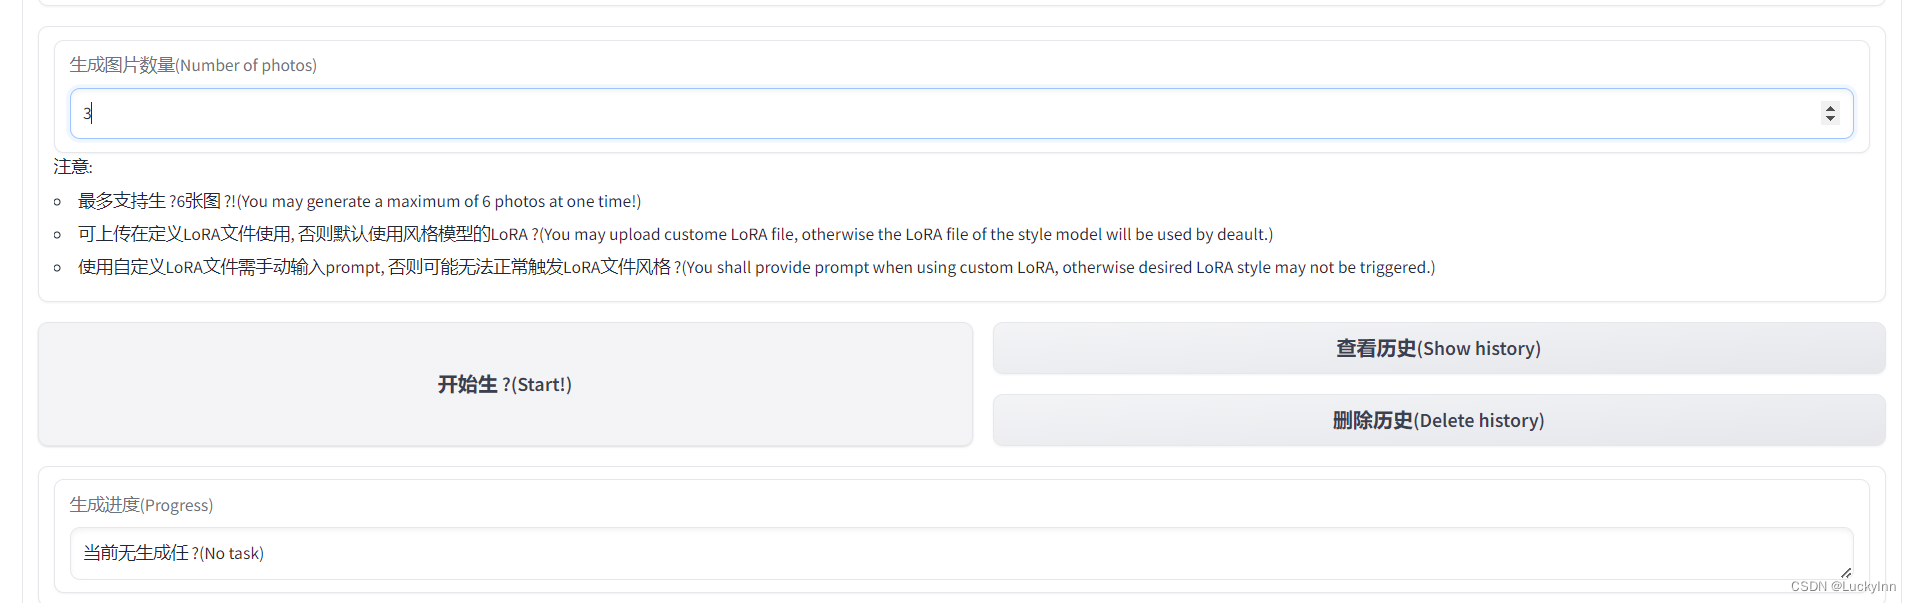
要等一会,会下载很多东西:

下载的快慢跟网络有很大关系
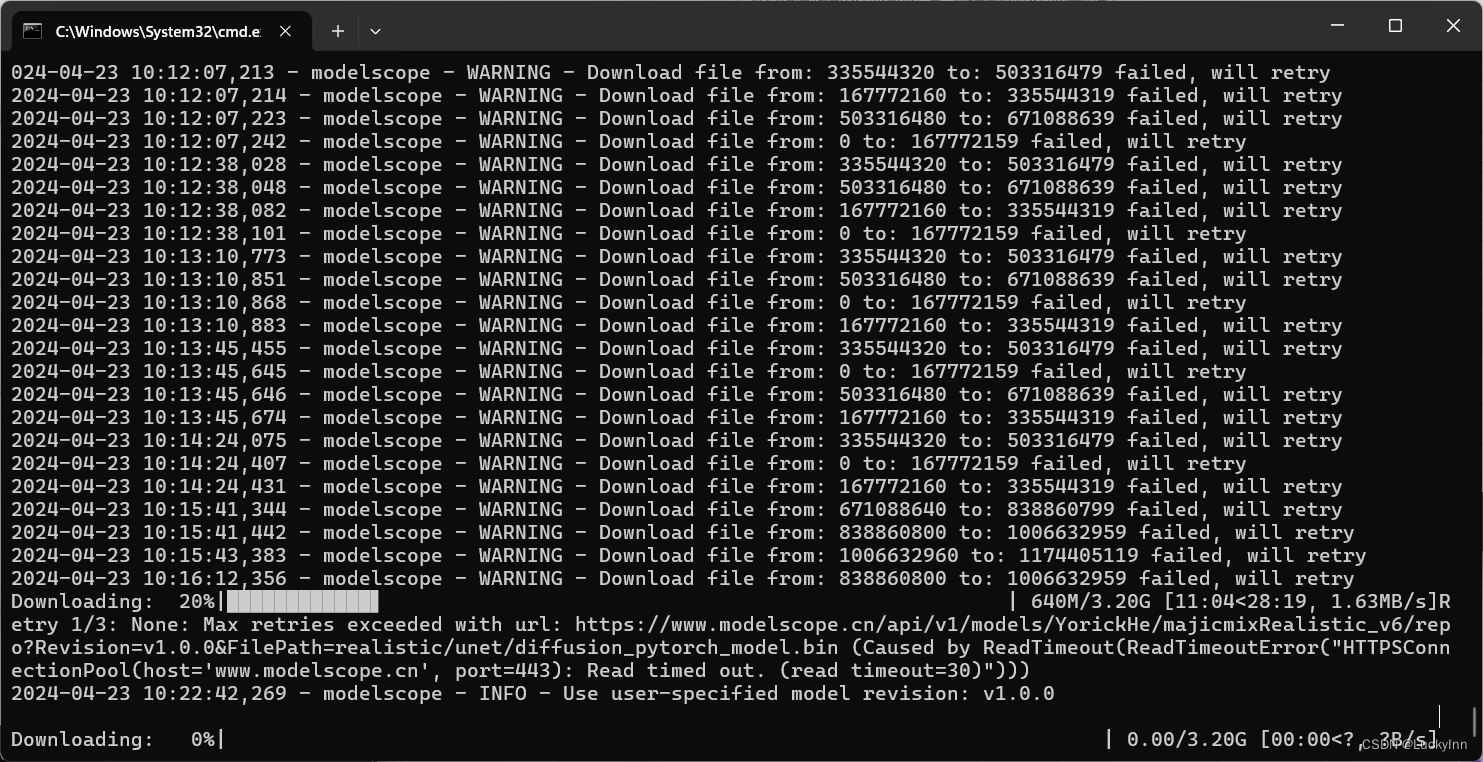
等了好久,报错了,应该是没有tensorflow,好吧 去下载一下pip install tensorflow
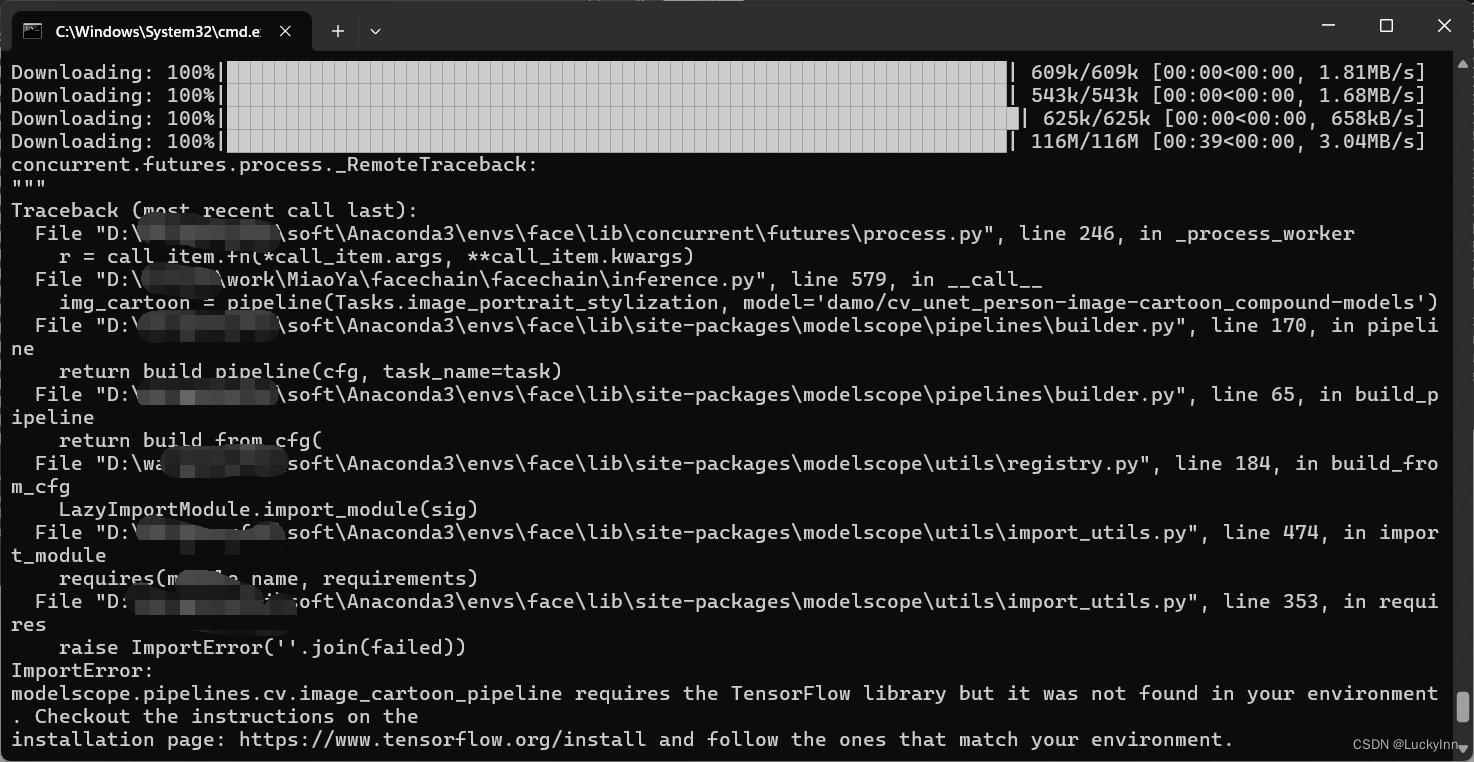
下载好之后又报了个错:
ERROR: pip’s dependency resolver does not currently take into account all the packages that are installed. This behaviour is the source of the following dependency conflicts.
mediapipe 0.10.11 requires protobuf<4,>=3.11, but you have protobuf 4.25.3 which is incompatible.
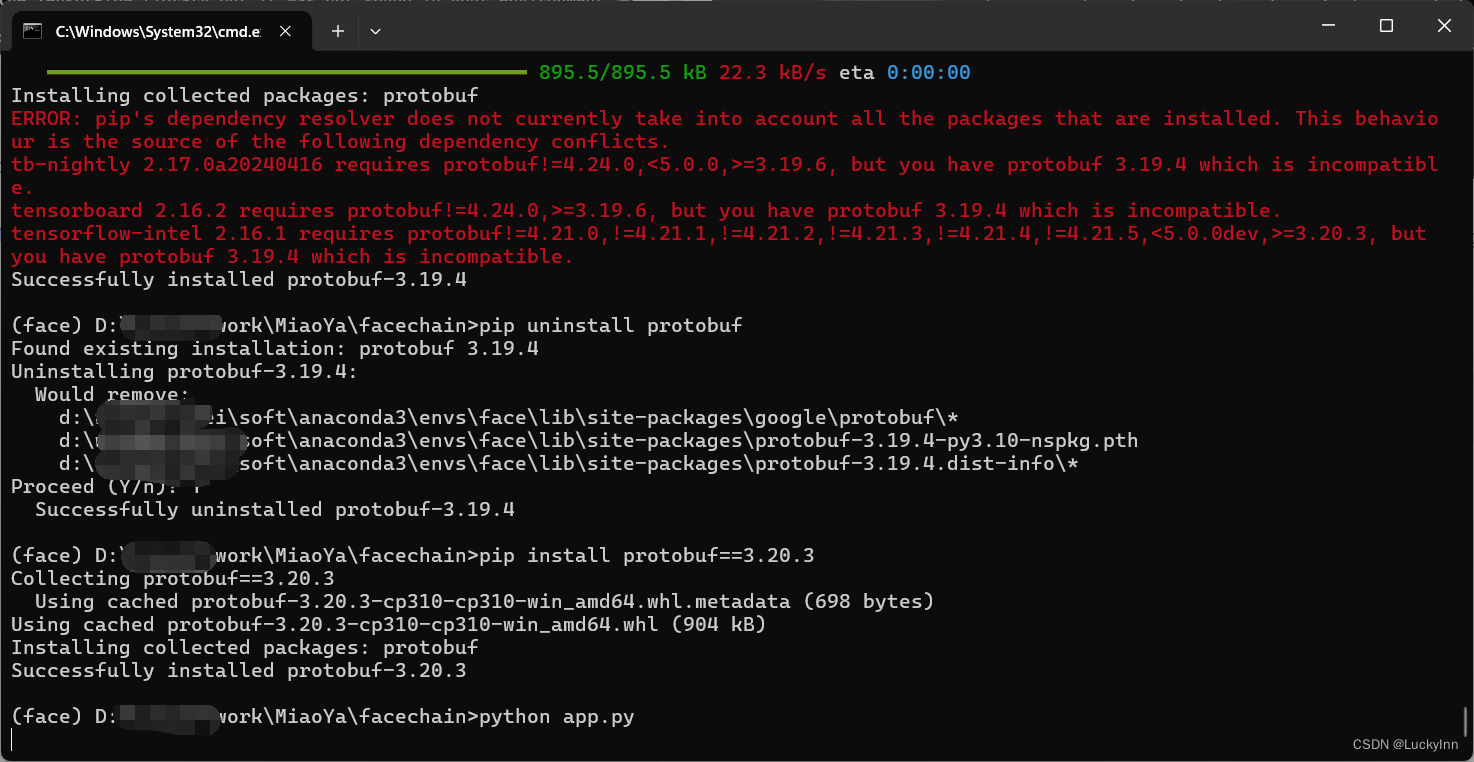
解决办法:
pip uninstall protobuf
pip install protobuf==3.20.3
安装好之后,继续python app.py
进入网页,按上面的步骤开始训练!成功生成图片(有一种神似的感觉,虽然不是特别像吧)
OK!完结撒花!!!🌸🌸🌸


 5万+
5万+


 被折叠的 条评论
为什么被折叠?
被折叠的 条评论
为什么被折叠?
 到【灌水乐园】发言


