


在前面的介绍中,虽然实现了绘制流程图,然后将流程图存储到数据库中,然后从数据库中获取流程信息,并部署和启动流程,但是部署的流程绘制器是在tomcat中部署的,可能在部分的项目中,需要我们将流程设计器,设置到自己的项目中,这样部署项目就相当于部署了流程设计器,下面对SpringBoot项目集成flowable流程设计器进行简单介绍。
一、项目整合
在前面部署flowable-ui后可以看到,ui界面分为了任务应用程序、建模器应用程序、管理员应用程序和身份管理应用程序。
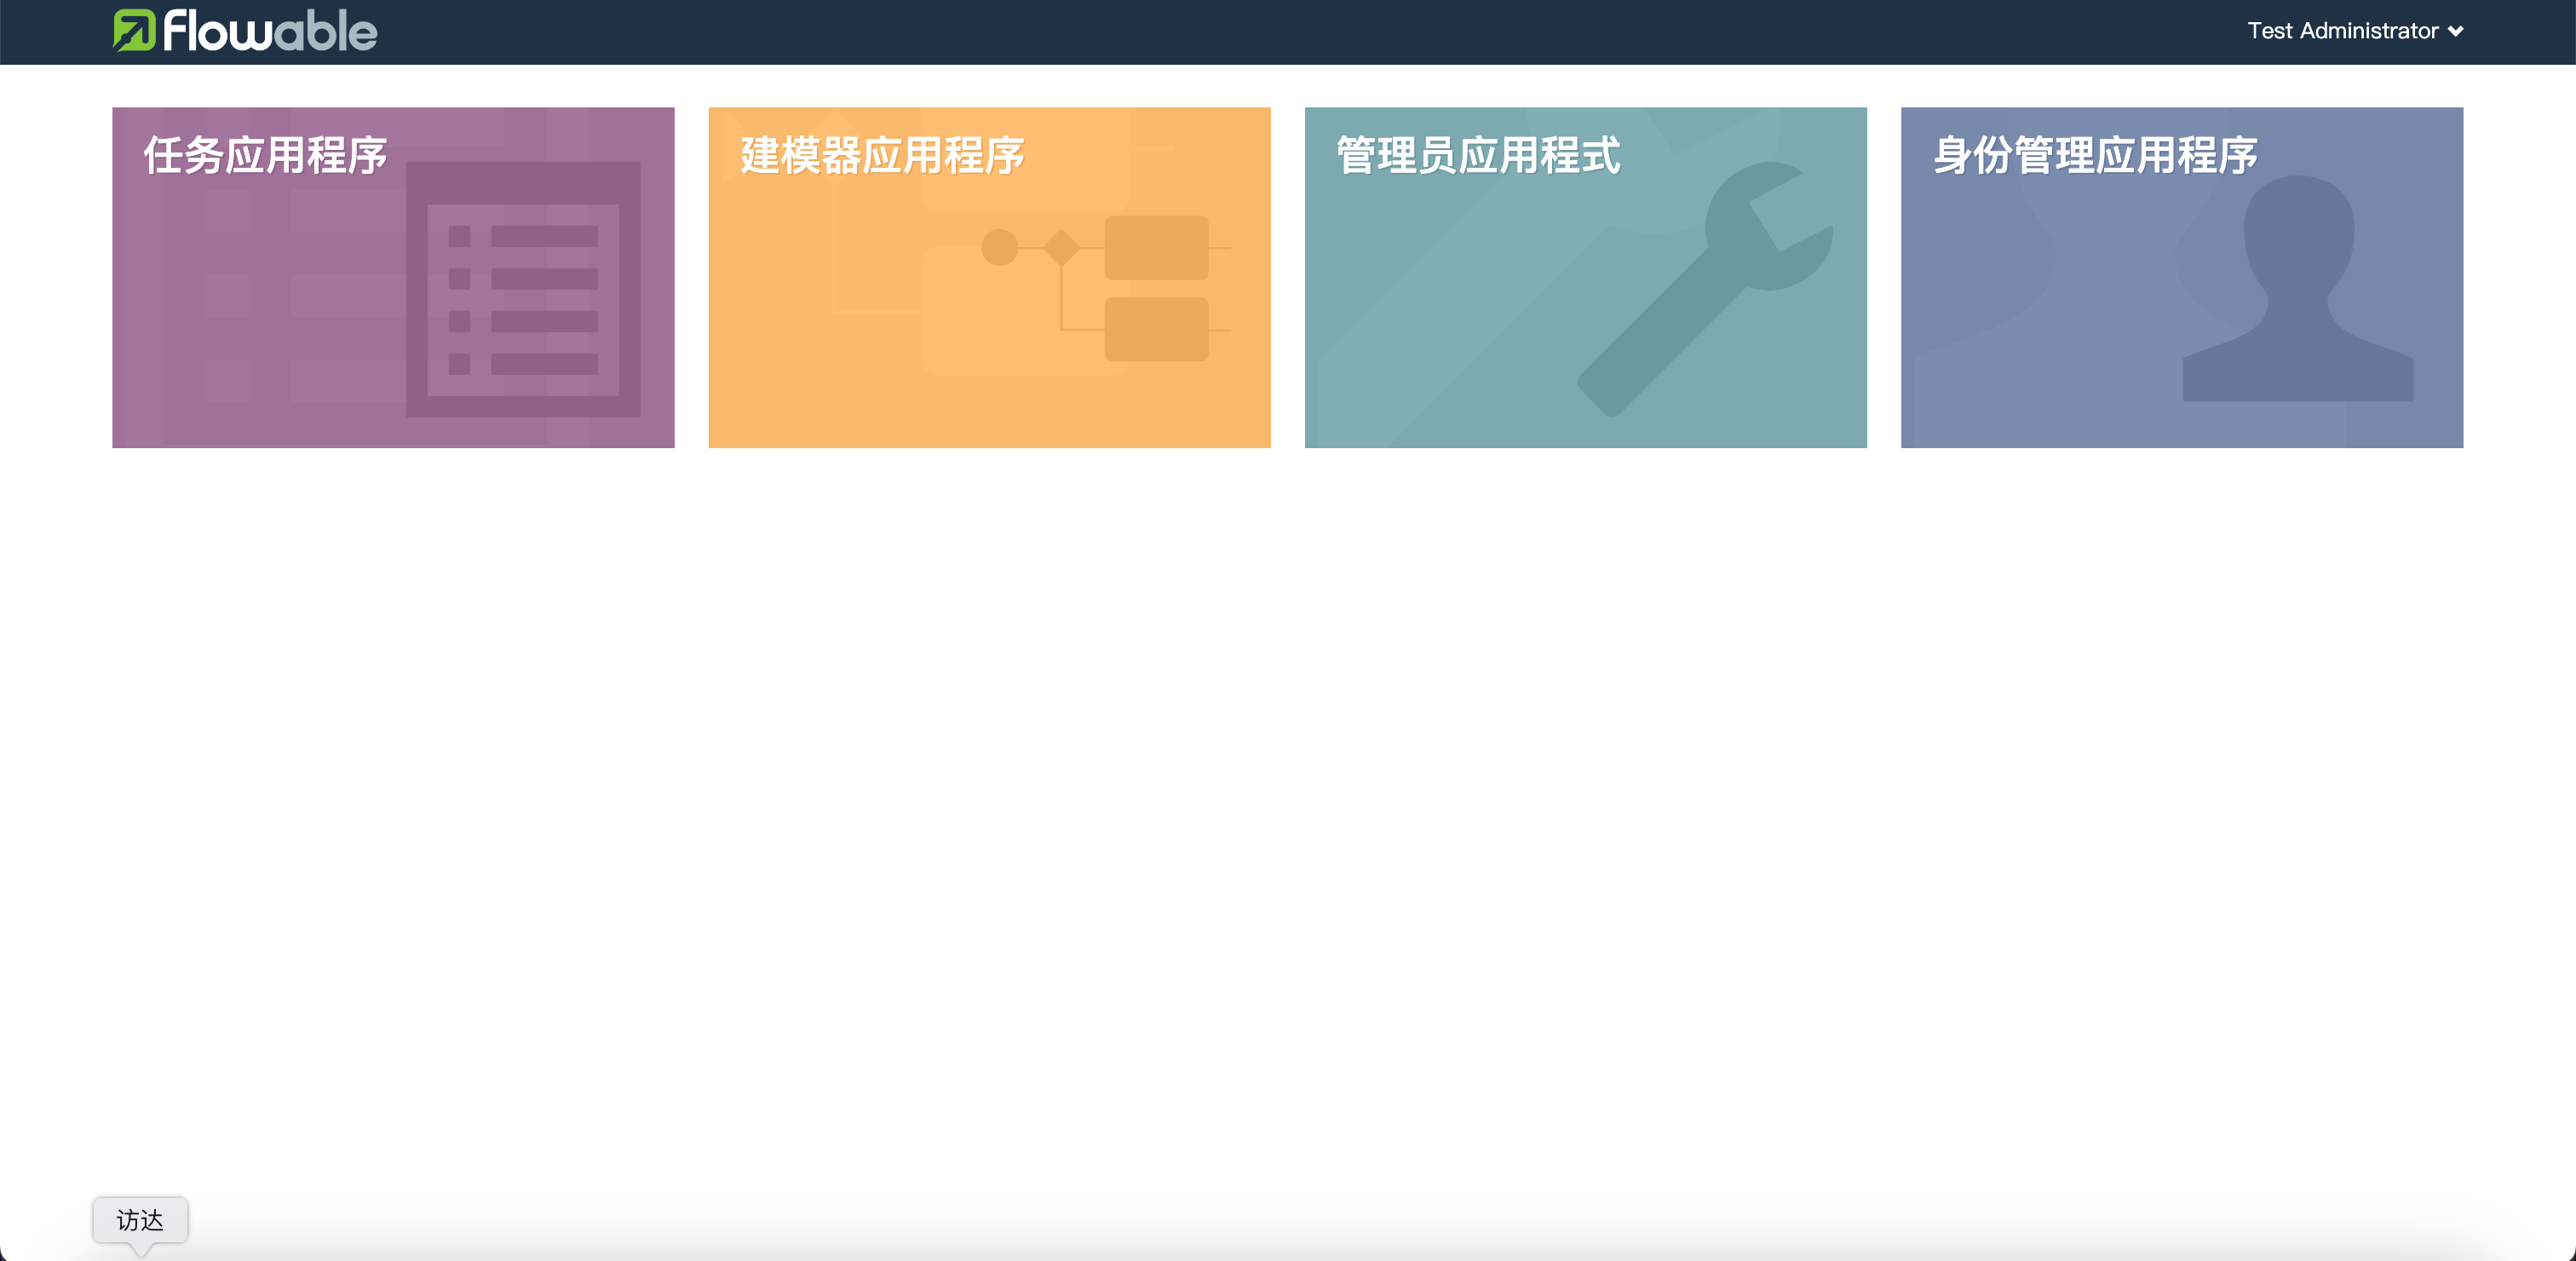
在这几个应用中,最重要的就是建模器应用程序(flowable-modeler),它主要是用来绘制流程图和流程定义信息,因此,在这里我们是在项目中集成了建模器应用程序,实现在自己的项目中使用flowable-ui官方的建模器具绘制流程图,并将其保存到mysql数据库中。
环境:flowable版本:6.7.2 MySQL版本:5.7
- 下载源码
在这里下载对应版本的flowable-ui的源码。
Release Flowable 6.7.2 release · flowable/flowable-engine · GitHub
6.7.2版本的源码:
flowable-engine-flowable-6.7.2.zip
- flowable引擎基础配置
由于是 spring-boot 项目,因此直接选择 flowable-spring-boot-starter,里面提供了齐全的 REST API
<!--Flowable的核心依赖-->
<dependency>
  <groupId>org.flowable</groupId>
  <artifactId>flowable-spring-boot-starter-process</artifactId>
  <version>${flowable.version}</version>
</dependency>
<dependency>
  <groupId>org.flowable</groupId>
  <artifactId>flowable-spring-boot-starter</artifactId>
  <version>${flowable.version}</version>
</dependency>
<dependency>
  <groupId>org.flowable</groupId>
  <artifactId>flowable-json-converter</artifactId>
  <version>${flowable.version}</version>
</dependency>
<dependency>
  <groupId>org.flowable</groupId>
  <artifactId>flowable-bpmn-layout</artifactId>
  <version>${flowable.version}</version>
</dependency>
添加yml配置:
# flowable config
flowable:
  # 关闭定时任务JOB
  async-executor-activate: true
  # 将databaseSchemaUpdate设置为true。当Flowable发现库与数据库表结构不一致时,会自动将数据库表结构升级至新版本。
  database-schema-update: true
  check-process-definitions: false
  db-history-used: true
  history-level: full
日志配置:
注意:Flowable 使用 SLF4J 作为内部日志框架,所以我们使用 log4j 作为 SLF4J 的实现
添加依赖:
<!--日志-->
<dependency>
  <groupId>org.slf4j</groupId>
  <artifactId>slf4j-api</artifactId>
  <version>1.7.21</version>
</dependency>
<dependency>
  <groupId>org.slf4j</groupId>
  <artifactId>slf4j-log4j12</artifactId>
  <version>1.7.21</version>
</dependency>
resource 目录下新建文件 log4j.properties
log4j.rootLogger=DEBUG, CA

log4j.appender.CA=org.apache.log4j.ConsoleAppender
log4j.appender.CA.layout=org.apache.log4j.PatternLayout
log4j.appender.CA.layout.ConversionPattern= %d{hh:mm:ss,SSS} [%t] %-5p %c %x - %m%n- 集成 flowable-modeler 前端
这里为了方便我们开发,将官方的flowable-modeler前端项目直接集成到了后端中。
从刚刚下载的源码中获取flowable-modeler的statci文件,6.7.2版本的目录在:
flowable-engine-flowable-6.7.2\modules\flowable-ui\flowable-ui-modeler-frontend\src\main\resources复制包中 resources\static 下所有前端代码文件,复制到我们自己的项目static 文件夹下,项目没有static就在resource目录下新建static文件夹。
添加依赖:
<!--通过下方的配置,加上官方源码中的静态文件,就可以将建模器应用程序集成到项目中-->
<dependency>
  <groupId>org.flowable</groupId>
  <artifactId>flowable-ui-modeler-rest</artifactId>
  <version>${flowable.version}</version>
  <exclusions>
    <exclusion>
      <groupId>org.mybatis</groupId>
      <artifactId>mybatis</artifactId>
    </exclusion>
  </exclusions>
</dependency>
<dependency>
  <groupId>org.flowable</groupId>
  <artifactId>flowable-ui-modeler-conf</artifactId>
  <version>${flowable.version}</version>
</dependency>
<dependency>
  <groupId>org.flowable</groupId>
  <artifactId>flowable-ui-modeler-logic</artifactId>
  <version>${flowable.version}</version>
</dependency>

<dependency>
  <groupId>org.liquibase</groupId>
  <artifactId>liquibase-core</artifactId>
  <version>4.4.0</version>
</dependency>
配置文件:
在新版本的flowable-modeler中,需要配置idm,身份认证的相关配置,因此,在配置文件中添加:
# flowable config
flowable:
  # 关闭定时任务JOB
  async-executor-activate: true
  # 将databaseSchemaUpdate设置为true。当Flowable发现库与数据库表结构不一致时,会自动将数据库表结构升级至新版本。
  database-schema-update: true
  check-process-definitions: false
  db-history-used: true
  history-level: full
  common:
    app:
      idm-url: http://localhost:8099/flowable-idm
      idm-admin:
        user: admin
        password: admin
自定义配置类:
DatabaseAutoConfiguration.java
Flowable 是基于 liquibase 进行数据库自动管理与追踪的,因此需要加一个 liquibase 的配置类(可以把org.flowable.ui.modeler.conf.DatabaseConfiguration下的复制下来改一改)
import liquibase.Liquibase;
import liquibase.database.Database;
import liquibase.database.DatabaseConnection;
import liquibase.database.DatabaseFactory;
import liquibase.database.jvm.JdbcConnection;
import liquibase.exception.DatabaseException;
import liquibase.resource.ClassLoaderResourceAccessor;
import org.flowable.ui.common.service.exception.InternalServerErrorException;
import org.slf4j.Logger;
import org.slf4j.LoggerFactory;
import org.springframework.context.annotation.Bean;
import org.springframework.context.annotation.Configuration;
import javax.sql.DataSource;

@Configuration
public class DatabaseAutoConfiguration {

    private static final Logger LOGGER = LoggerFactory.getLogger(DatabaseAutoConfiguration.class);

    protected static final String LIQUIBASE_CHANGELOG_PREFIX = "ACT_DE_";

    @Bean
    public Liquibase liquibase(DataSource dataSource) {
        LOGGER.info("Configuring Liquibase");
        Liquibase liquibase = null;
        try {
            DatabaseConnection connection = new JdbcConnection(dataSource.getConnection());
            Database database = DatabaseFactory.getInstance().findCorrectDatabaseImplementation(connection);
            database.setDatabaseChangeLogTableName(LIQUIBASE_CHANGELOG_PREFIX + database.getDatabaseChangeLogTableName());
            database.setDatabaseChangeLogLockTableName(LIQUIBASE_CHANGELOG_PREFIX + database.getDatabaseChangeLogLockTableName());

            liquibase = new Liquibase("META-INF/liquibase/flowable-modeler-app-db-changelog.xml", new ClassLoaderResourceAccessor(), database);
            liquibase.update("flowable");
            return liquibase;
        } catch (Exception e) {
            throw new InternalServerErrorException("Error creating liquibase database", e);
        } finally {
            closeDatabase(liquibase);
        }
    }

    private void closeDatabase(Liquibase liquibase) {
        if (liquibase != null) {
            Database database = liquibase.getDatabase();
            if (database != null) {
                try {
                    database.close();
                } catch (DatabaseException e) {
                    LOGGER.warn("Error closing database", e);
                }
            }
        }
    }
}
之后还需要添加mybatis-plus的相关配置:需要配置扫描 classpath:/META-INF/modeler-mybatis-mappings/*.xml
mybatis-plus:
  mapper-locations: classpath:/mapper/*Mapper.xml, classpath:/META-INF/modeler-mybatis-mappings/*.xml
  configuration:
    map-underscore-to-camel-case: true
    jdbc-type-for-null: null
  # 参数配置
  configuration-properties:
    # 配置流程引擎参数,详情可见 DatabaseConfiguration
    blobType: BLOB
    boolValue: TRUE
    # 不要设置库名,否则会出现双库名 bug
    prefix: ''
汉化配置:
StencilSetResource.java
在源码中找到这俩文件:
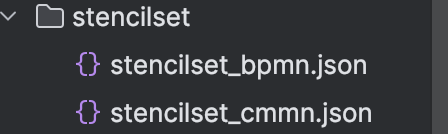
在resource下新建stencilset文件夹,将源码中的两个汉化文件放入该文件夹中。
添加类配置,在这里新建类的时候,名称不能为StencilSetResource,会与官方的jar包中的bean冲突,因此,我们新建FlowableStencilSetResource.java。
import com.fasterxml.jackson.databind.JsonNode;
import com.fasterxml.jackson.databind.ObjectMapper;
import org.flowable.ui.common.service.exception.InternalServerErrorException;
import org.slf4j.Logger;
import org.slf4j.LoggerFactory;
import org.springframework.beans.factory.annotation.Autowired;
import org.springframework.web.bind.annotation.RequestMapping;
import org.springframework.web.bind.annotation.RequestMethod;
import org.springframework.web.bind.annotation.RestController;

/**
 * 汉化 配置
 */
@RestController
@RequestMapping("/app")
public class FlowableStencilSetResource {

    private static final Logger LOGGER = LoggerFactory.getLogger(FlowableStencilSetResource.class);

    @Autowired
    protected ObjectMapper objectMapper;

    @RequestMapping(value = "/rest/stencil-sets/editor", method = RequestMethod.GET, produces = "application/json")
    public JsonNode getStencilSetForEditor() {
        try {
            JsonNode stencilNode = objectMapper.readTree(this.getClass().getClassLoader().getResourceAsStream("stencilset/stencilset_bpmn.json"));
            return stencilNode;
        } catch (Exception e) {
            LOGGER.error("Error reading bpmn stencil set json", e);
            throw new InternalServerErrorException("Error reading bpmn stencil set json");
        }
    }

    @RequestMapping(value = "/rest/stencil-sets/cmmneditor", method = RequestMethod.GET, produces = "application/json")
    public JsonNode getCmmnStencilSetForEditor() {
        try {
            JsonNode stencilNode = objectMapper.readTree(this.getClass().getClassLoader().getResourceAsStream("stencilset/stencilset_cmmn.json"));
            return stencilNode;
        } catch (Exception e) {
            LOGGER.error("Error reading bpmn stencil set json", e);
            throw new InternalServerErrorException("Error reading bpmn stencil set json");
        }
    }
}
SecurityUtils配置
注意因为源码中引用了这个类,因此我们在配置的时候,路径需要与源码中的路径保持一致,也就是:org.flowable.ui.common.security 这样在 Jar 中的方法在调用时会覆盖原 Jar 里的工具类

下方的类为6.7.2版本的配置,如果是低版本的配置,可能不同,在旧版本中,flowable使用了FlowableAppUser,但是在新版本的依赖中,转而是:SecurityScope,因此这个配置需要根据自己的flowable版本配置。
import java.util.ArrayList;
import java.util.List;
import org.flowable.common.engine.api.FlowableIllegalStateException;
import org.flowable.idm.api.User;
import org.flowable.ui.common.model.RemoteUser;
import org.springframework.security.core.Authentication;
import org.springframework.security.core.context.SecurityContext;
import org.springframework.security.core.context.SecurityContextHolder;

/**
 * 重构流程编辑器获取用户信息
 */
public class SecurityUtils {

  private static User assumeUser;

  private static SecurityScopeProvider securityScopeProvider = new FlowableSecurityScopeProvider();

  private SecurityUtils() {
  }

  /**
   * Get the login of the current user.
   */
  public static String getCurrentUserId() {
    User user = getCurrentUserObject();
    if (user != null) {
      return user.getId();
    }
    return null;
  }

  /**
   * @return the {@link User} object associated with the current logged in user.
   */
  public static User getCurrentUserObject() {
    if (assumeUser != null) {
      return assumeUser;
    }

    RemoteUser user = new RemoteUser();
    user.setId("admin");
    user.setDisplayName("admin");
    user.setFirstName("admin");
    user.setLastName("admin");
    user.setEmail("admin@flowable.com");
    user.setPassword("123456");
    List<String> pris = new ArrayList<>();
    pris.add(DefaultPrivileges.ACCESS_MODELER);
    pris.add(DefaultPrivileges.ACCESS_IDM);
    pris.add(DefaultPrivileges.ACCESS_ADMIN);
    pris.add(DefaultPrivileges.ACCESS_TASK);
    pris.add(DefaultPrivileges.ACCESS_REST_API);
    user.setPrivileges(pris);
    return user;
  }

    public static void setSecurityScopeProvider(SecurityScopeProvider securityScopeProvider) {
        SecurityUtils.securityScopeProvider = securityScopeProvider;
    }

    public static SecurityScope getCurrentSecurityScope() {
        SecurityContext securityContext = SecurityContextHolder.getContext();
        if (securityContext != null && securityContext.getAuthentication() != null) {
            return getSecurityScope(securityContext.getAuthentication());
        }
        return null;
    }

    public static SecurityScope getSecurityScope(Authentication authentication) {
        return securityScopeProvider.getSecurityScope(authentication);
    }

    public static SecurityScope getAuthenticatedSecurityScope() {
        SecurityScope currentSecurityScope = getCurrentSecurityScope();
        if (currentSecurityScope != null) {
            return currentSecurityScope;
        }
        throw new FlowableIllegalStateException("User is not authenticated");
    }

  public static void assumeUser(User user) {
    assumeUser = user;
  }

  public static void clearAssumeUser() {
    assumeUser = null;
  }
}
认证请求配置
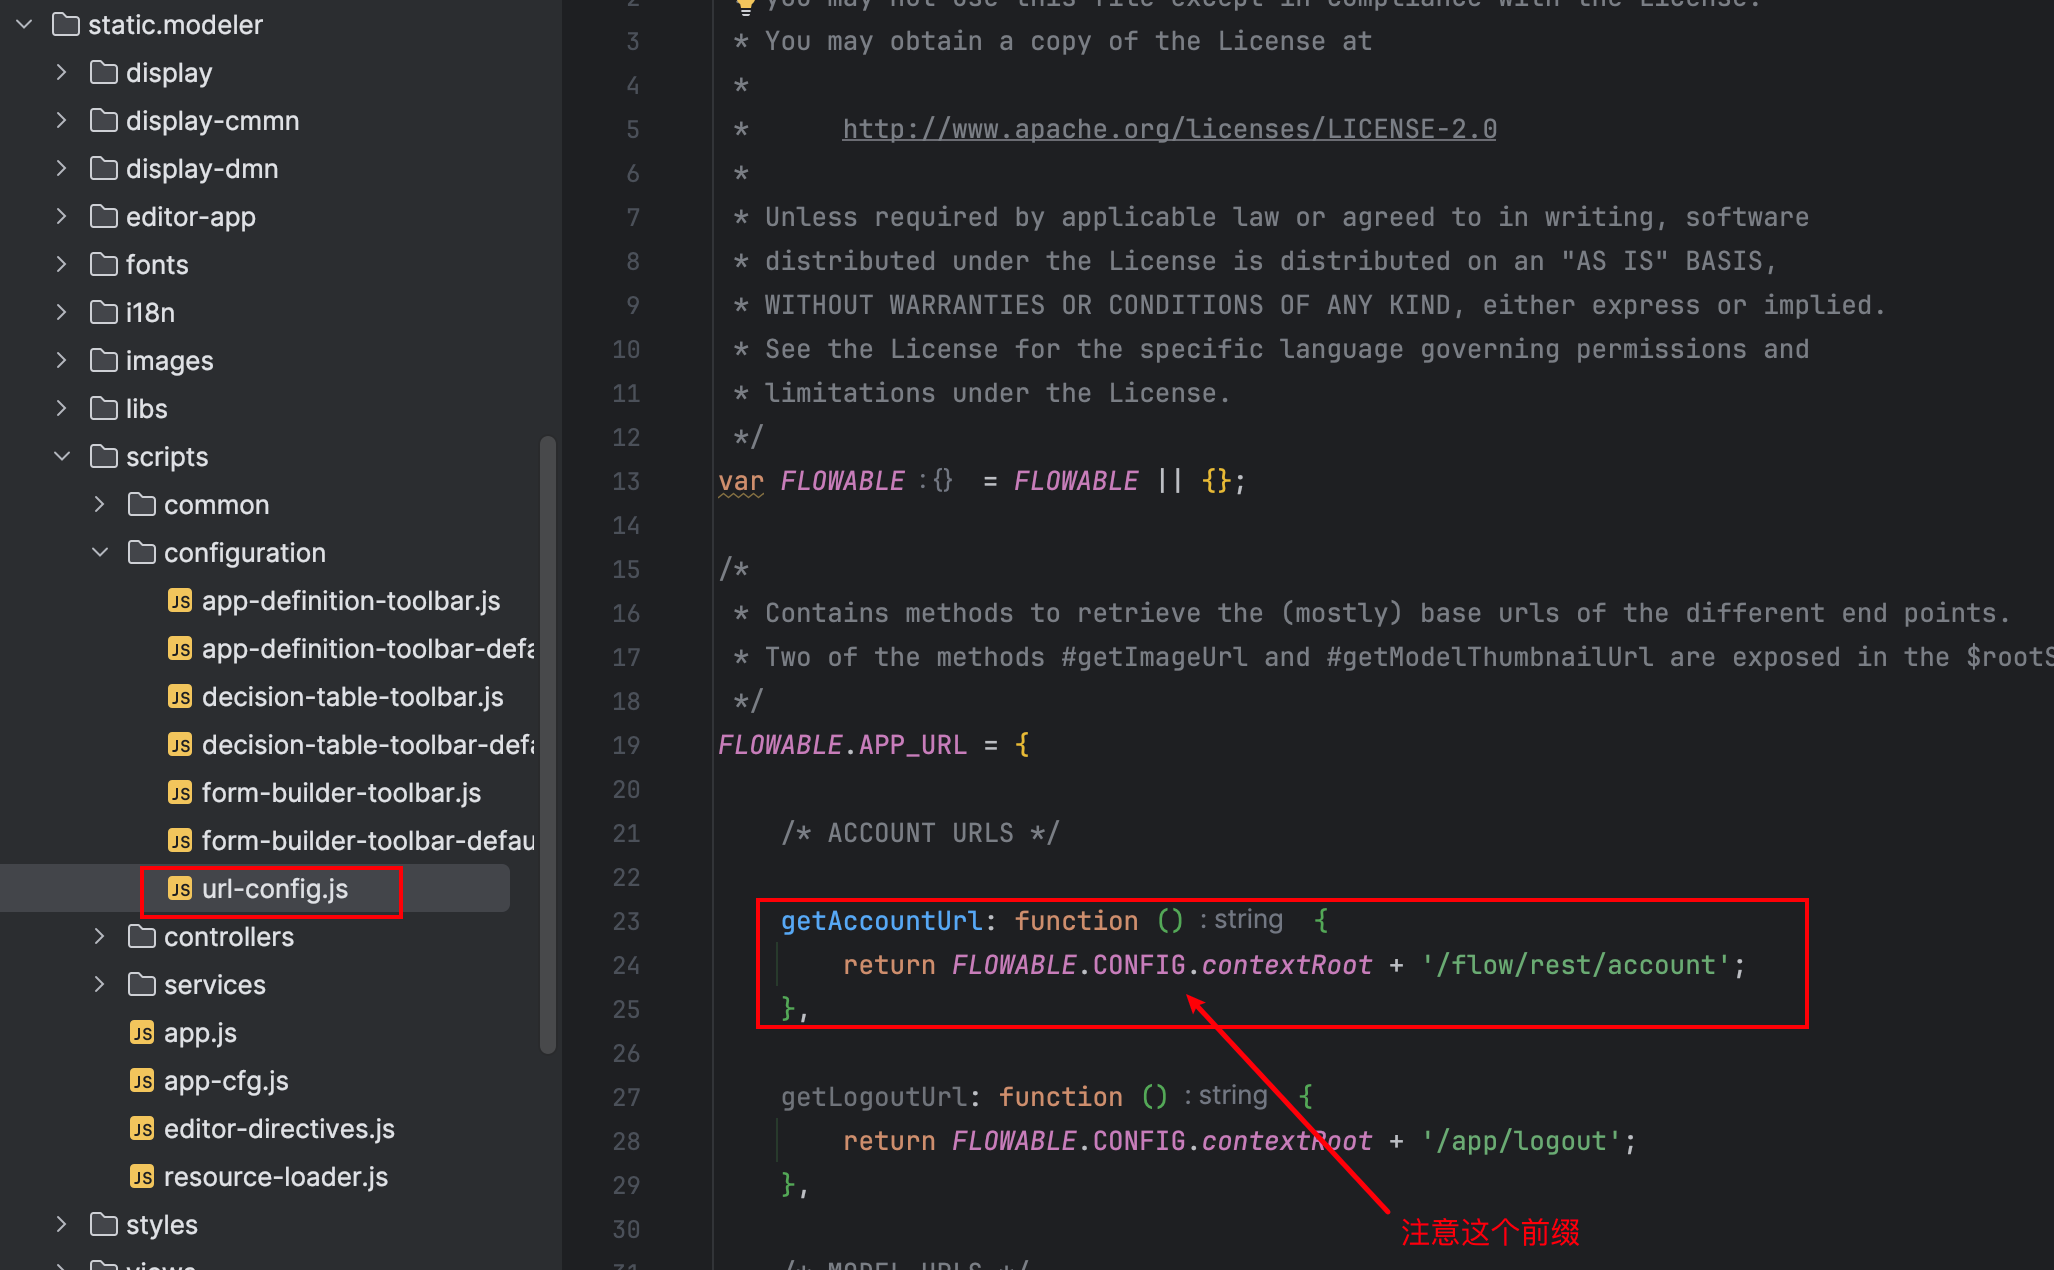
前端 url-config.js 修改
路径:resource\static\scripts\configuration\url-conf.js
将 getAccountUrl 的路径改为上面自己的 getAccount 接口的路径,我们让他使用我们自己的认证
后端添加Controller
添加一个登录认证的FlowModelerController
/**
 * flowable-modeler获取默认的管理员信息
 *
 * @Author: yichangqiao
 * @Date: 2024/4/19 16:11
 */
@Slf4j
@RestController
public class FlowModelerController {

    /**
     * 获取默认的管理员信息
     * @return
     */
    @RequestMapping(value = "/flow/rest/account", method = RequestMethod.GET, produces = "application/json")
    public UserRepresentation getAccount() {
        UserRepresentation userRepresentation = new UserRepresentation();
        userRepresentation.setId("admin");
        userRepresentation.setEmail("admin@flowable.org");
        userRepresentation.setFullName("Administrator");
        userRepresentation.setLastName("Administrator");
        userRepresentation.setFirstName("Administrator");
        List<String> privileges = new ArrayList<>();
        privileges.add(DefaultPrivileges.ACCESS_MODELER);
        privileges.add(DefaultPrivileges.ACCESS_IDM);
        privileges.add(DefaultPrivileges.ACCESS_ADMIN);
        privileges.add(DefaultPrivileges.ACCESS_TASK);
        privileges.add(DefaultPrivileges.ACCESS_REST_API);
        userRepresentation.setPrivileges(privileges);
        log.info("login init success ..... ");
        return userRepresentation;
    }
}
mybatis-plus配置
因为flowable自己使用了一个sqlsessionfactory创建SQL会话,但是我们自己的项目中又需要使用mybatis-plus的sqlsessionfactory,在mybatis-plus加载sqlsessionfactory默认是单例的,因此我们需要配置默认的回话连接:
import com.baomidou.mybatisplus.annotation.DbType;
import com.baomidou.mybatisplus.extension.plugins.MybatisPlusInterceptor;
import com.baomidou.mybatisplus.extension.plugins.inner.PaginationInnerInterceptor;
import org.mybatis.spring.annotation.MapperScan;
import org.springframework.context.annotation.Bean;
import org.springframework.context.annotation.Configuration;

@Configuration
@MapperScan(basePackages = {"com.flowable.mapper"},
        sqlSessionFactoryRef = "sqlSessionFactory",
        sqlSessionTemplateRef = "sqlSessionTemplate")
public class MybatisPlusConfig {
    @Bean
    public MybatisPlusInterceptor mybatisPlusInterceptor() {
        MybatisPlusInterceptor interceptor = new MybatisPlusInterceptor();
        interceptor.addInnerInterceptor(new PaginationInnerInterceptor(DbType.MYSQL));
        return interceptor;
    }
}
配置security
这里我们需要跳过flowable的权限校验,而是使用我们自己的认证框架,因此,需要在项目中配置:
import org.flowable.ui.common.security.SecurityConstants;
import org.springframework.context.annotation.Configuration;
import org.springframework.core.annotation.Order;
import org.springframework.security.config.annotation.web.builders.HttpSecurity;
import org.springframework.security.config.annotation.web.configuration.WebSecurityConfigurerAdapter;

@Configuration
public class SecurityConfiguration {

    @Configuration(proxyBeanMethods = false)//所以这个地方-1让该配置项在FlowableUiSecurityAutoConfiguration中对应配置项前加载,以跳过授权
    @Order(SecurityConstants.FORM_LOGIN_SECURITY_ORDER - 1)
    public static class FormLoginWebSecurityConfigurerAdapter extends WebSecurityConfigurerAdapter {
        @Override
        protected void configure(HttpSecurity http) throws Exception {
            http
                    //必须要将csrf设置为disable,不然后面发送POST请求时会报403错误
                    .csrf().disable()
                    //为了简单起见,简单粗暴方式直接放行modeler下面所有请求
                    .authorizeRequests().antMatchers("/**").permitAll();
        }
    }

}
修改Application启动类配置
让spring加载我们自定义的配置bean:FlowableStencilSetResource.class、DatabaseAutoConfiguration.class
import com.yichangqiao.flowable.config.DatabaseAutoConfiguration;
import com.yichangqiao.flowable.config.FlowableStencilSetResource;
import lombok.extern.slf4j.Slf4j;
import org.flowable.ui.common.security.ApiHttpSecurityCustomizer;
import org.flowable.ui.common.security.FlowableUiSecurityAutoConfiguration;
import org.mybatis.spring.annotation.MapperScan;
import org.springframework.boot.SpringApplication;
import org.springframework.boot.autoconfigure.SpringBootApplication;
import org.springframework.boot.autoconfigure.security.servlet.SecurityAutoConfiguration;
import org.springframework.context.annotation.ComponentScan;
import org.springframework.context.annotation.Import;
import java.time.LocalDateTime;
@Slf4j
//启用全局异常拦截器
@Import(value = {
FlowableStencilSetResource.class,
// 引入 DatabaseConfiguration 表更新转换,
DatabaseAutoConfiguration.class
})
@ComponentScan(basePackages = {"com.flowable.*"})
@SpringBootApplication(exclude = {SecurityAutoConfiguration.class})
public class MasterYiFlowableApplication {
public static void main(String[] args) {
SpringApplication.run(MasterYiFlowableApplication.class, args);
log.info("flowable模块加载成功 ================> {}", LocalDateTime.now());
}
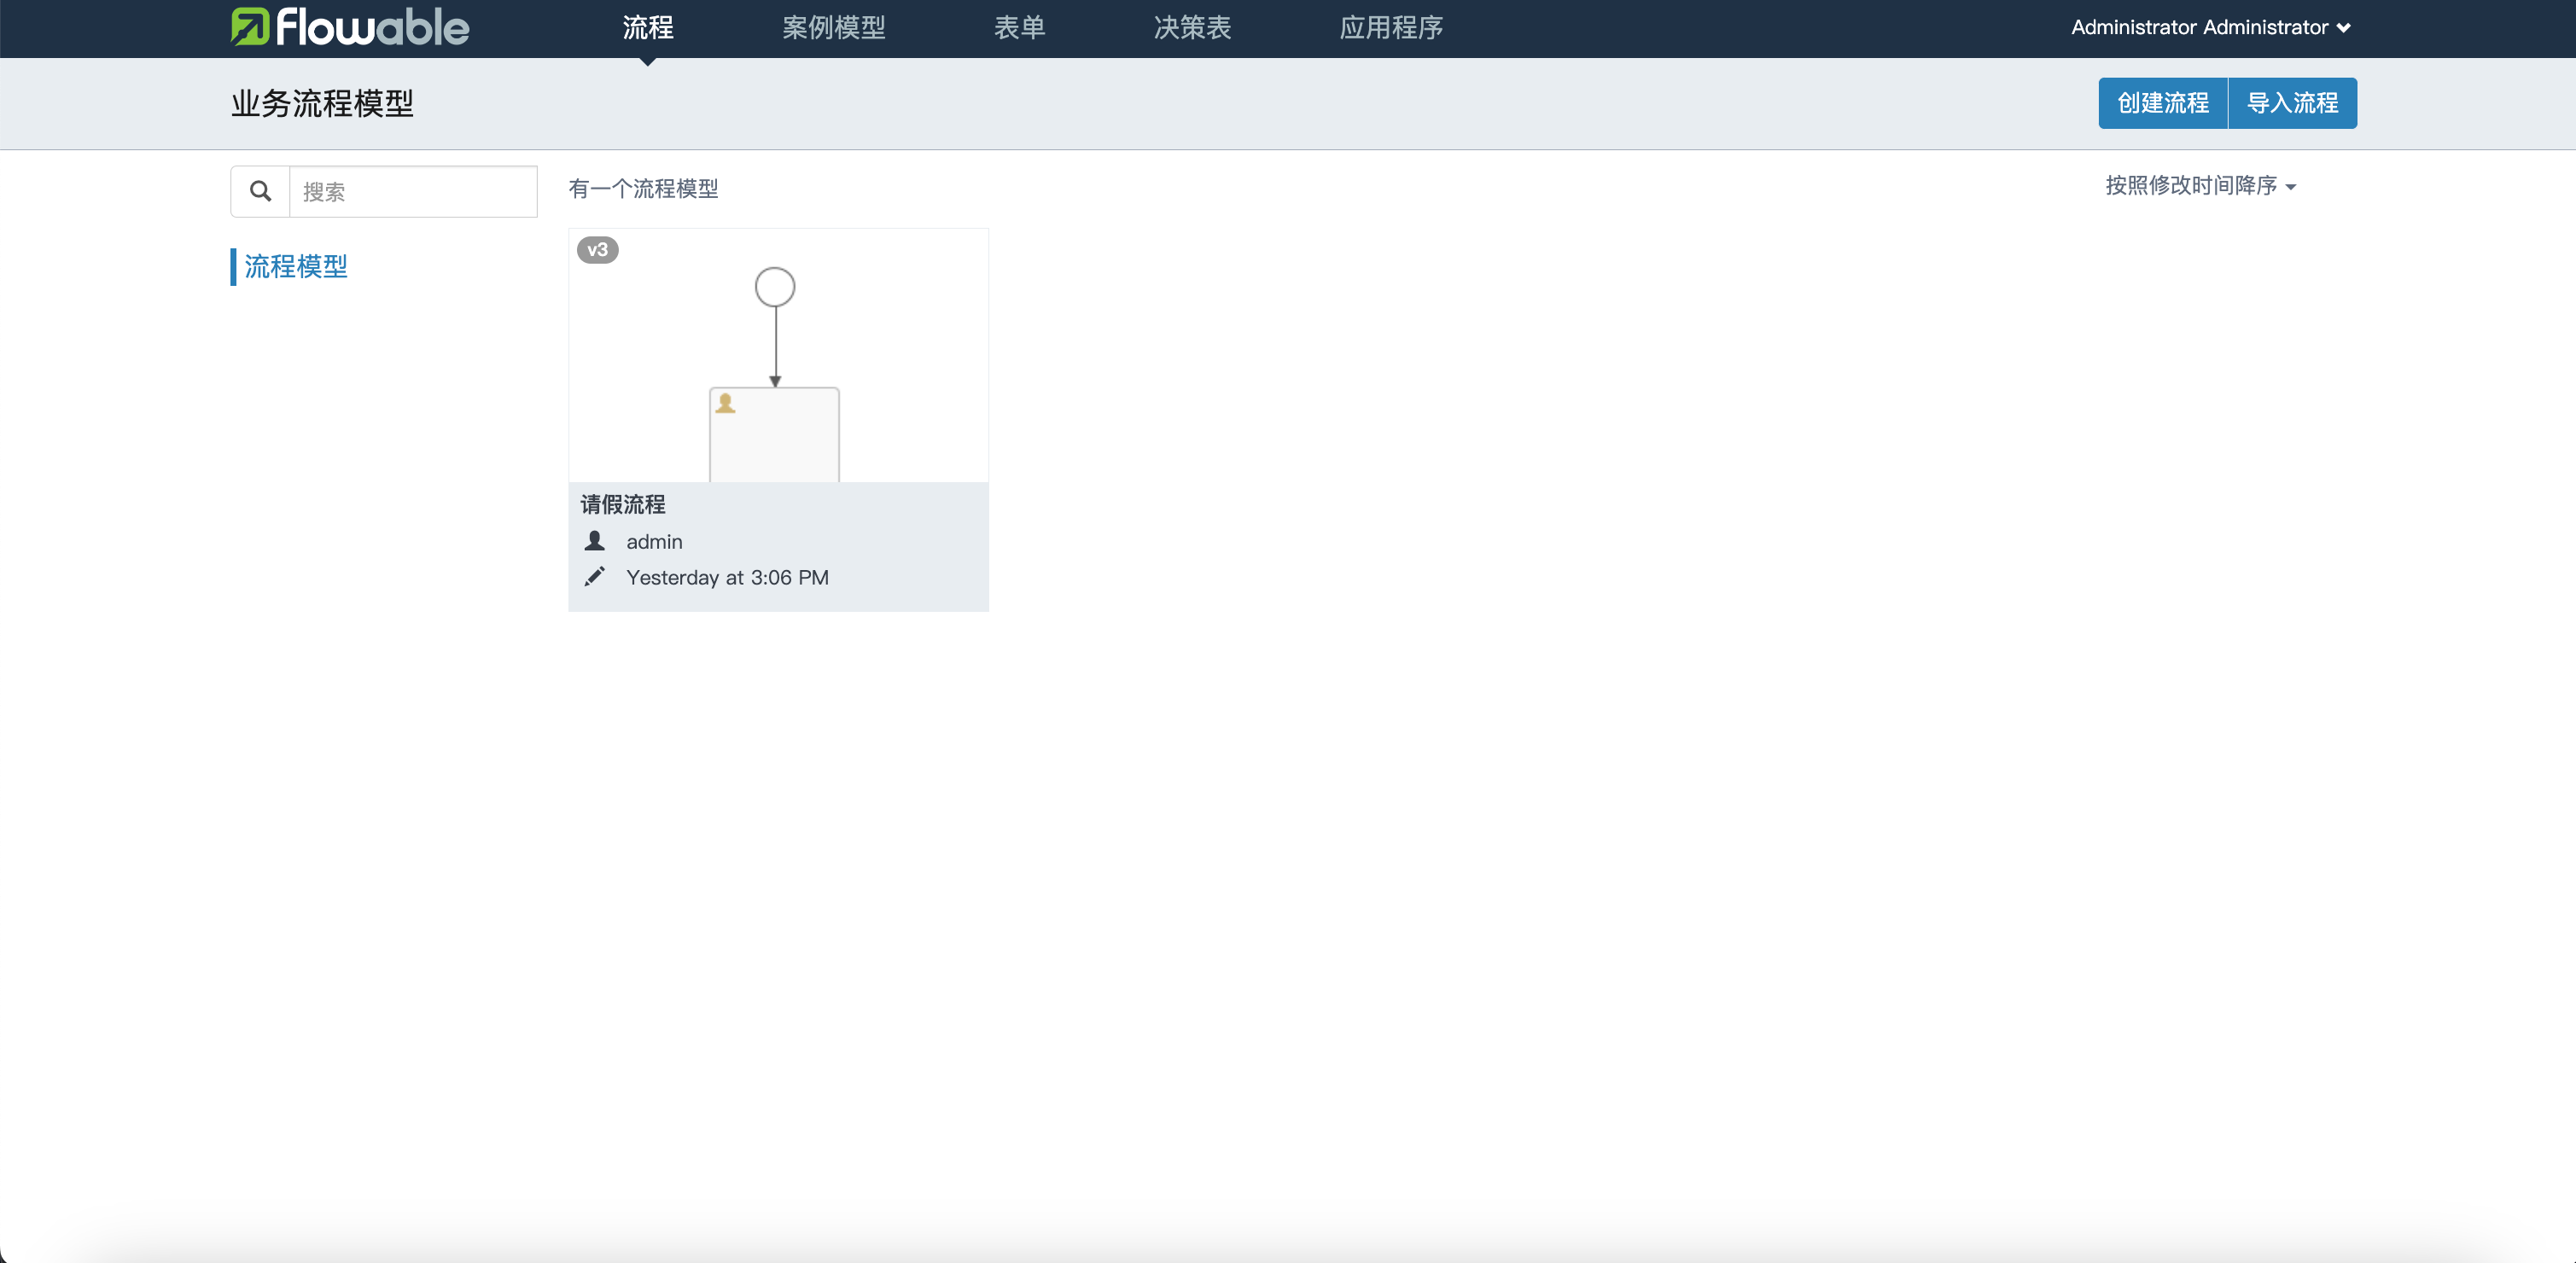
}启动项目
启动项目后,访问项目地址:127.0.0.1:端口,就可以访问到我们本地项目中的flowable-modeler了。
三、结语
实际整合过程中,可能存在版本、环境、依赖等影响,导致出现报错,但是大体的思路如上,可以参考整合。
下一节:flowable-整合系统角色人员 Flowable-整合系统角色人员-CSDN博客


 2160
2160

 被折叠的 条评论
为什么被折叠?
被折叠的 条评论
为什么被折叠?
 到【灌水乐园】发言


