


目录
前言
最近学习maven时,在idea中创建servlet时,每次总是有些错误,在这里我简单记录一下创建的过程
一、Maven是什么?
Maven项目对象模型(POM),可以通过一小段描述信息来管理项目的构建,报告和文档的项目管理工具软件。
Maven 除了以程序构建能力为特色之外,还提供高级项目管理工具。由于 Maven 的缺省构建规则有较高的可重用性,所以常常用两三行 Maven 构建脚本就可以构建简单的项目。由于 Maven 的面向项目的方法,许多 Apache Jakarta 项目发文时使用 Maven,而且公司项目采用 Maven 的比例在持续增长。(百度百科)
二、创建步骤
1.进入创建maven
点击文件 =》项目目录 =》

点击Modules后,点击+
在Add点击New Module,进入下面
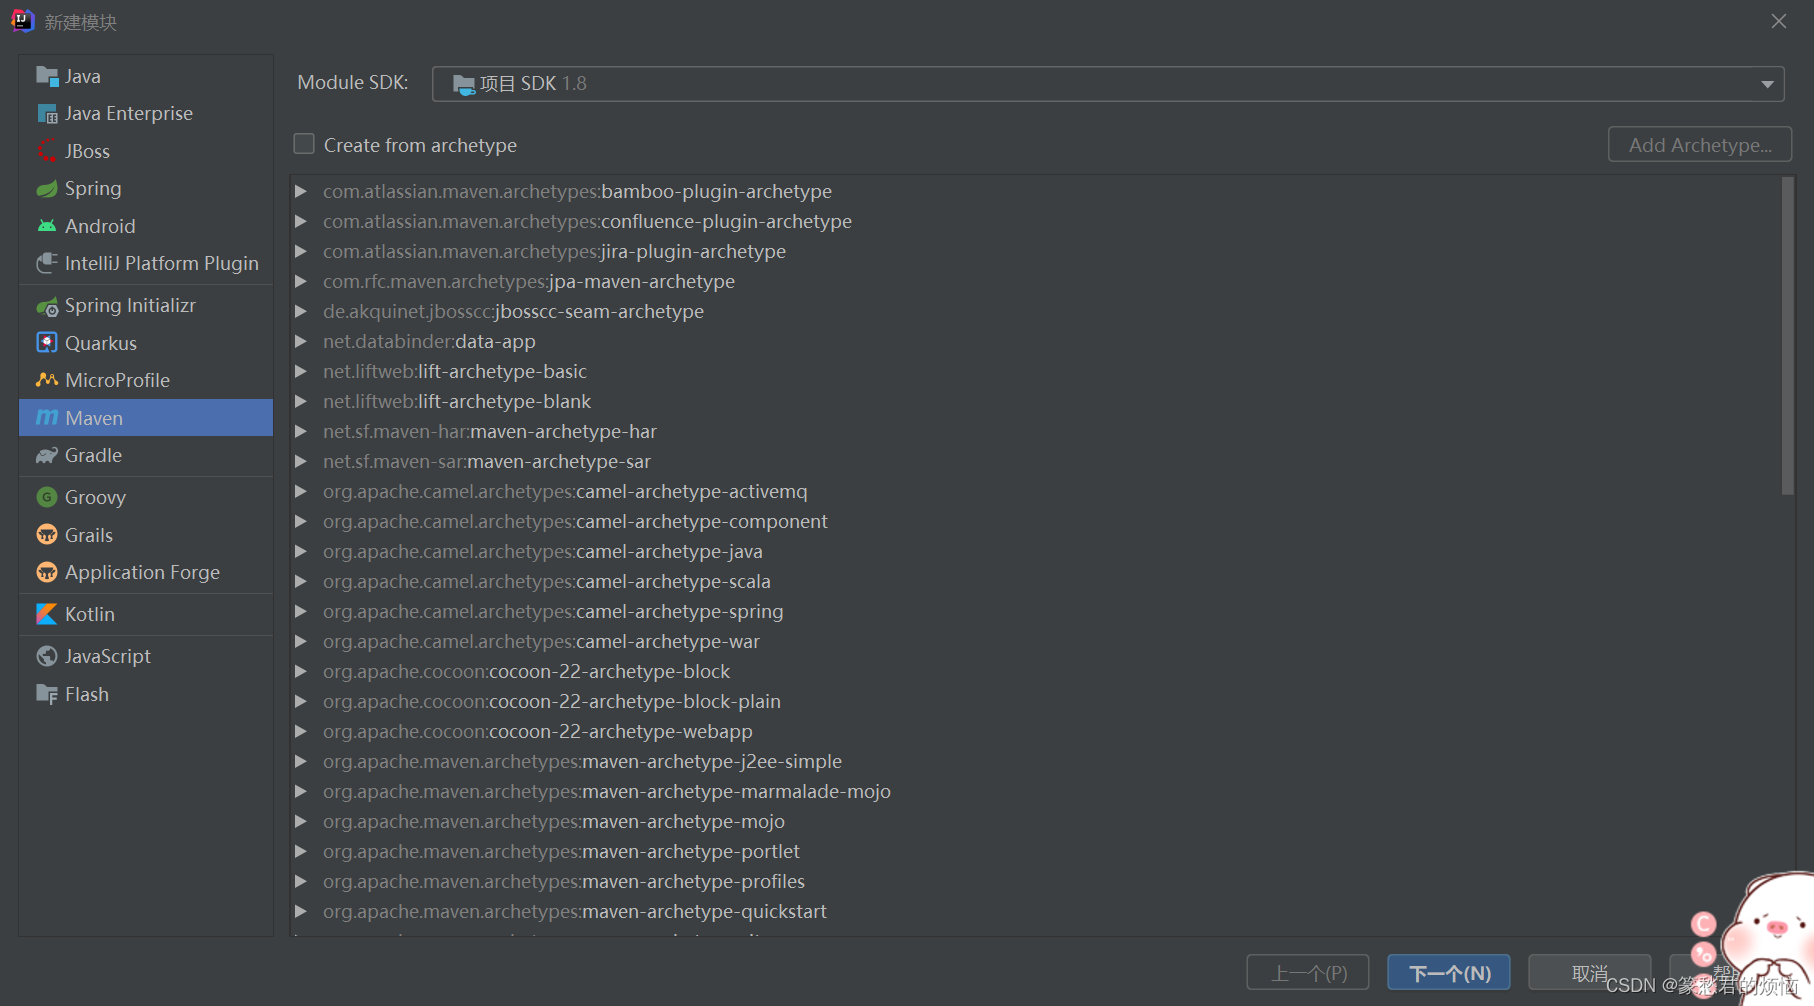
然后选择模板,或者直接创建,这里我建议选择模板,直接创建给的东西太少了,对于web
这里我只讲选择模板的

点一下那个选框,然后你可以直接找有webapp的
或者,像我一样,随便点击一下下面的目录,然后直接输webapp,就能直接查找到了,记住别双击,这就直接选中到下一步了

点击后,选择下一个,或者双击也可以到一下步
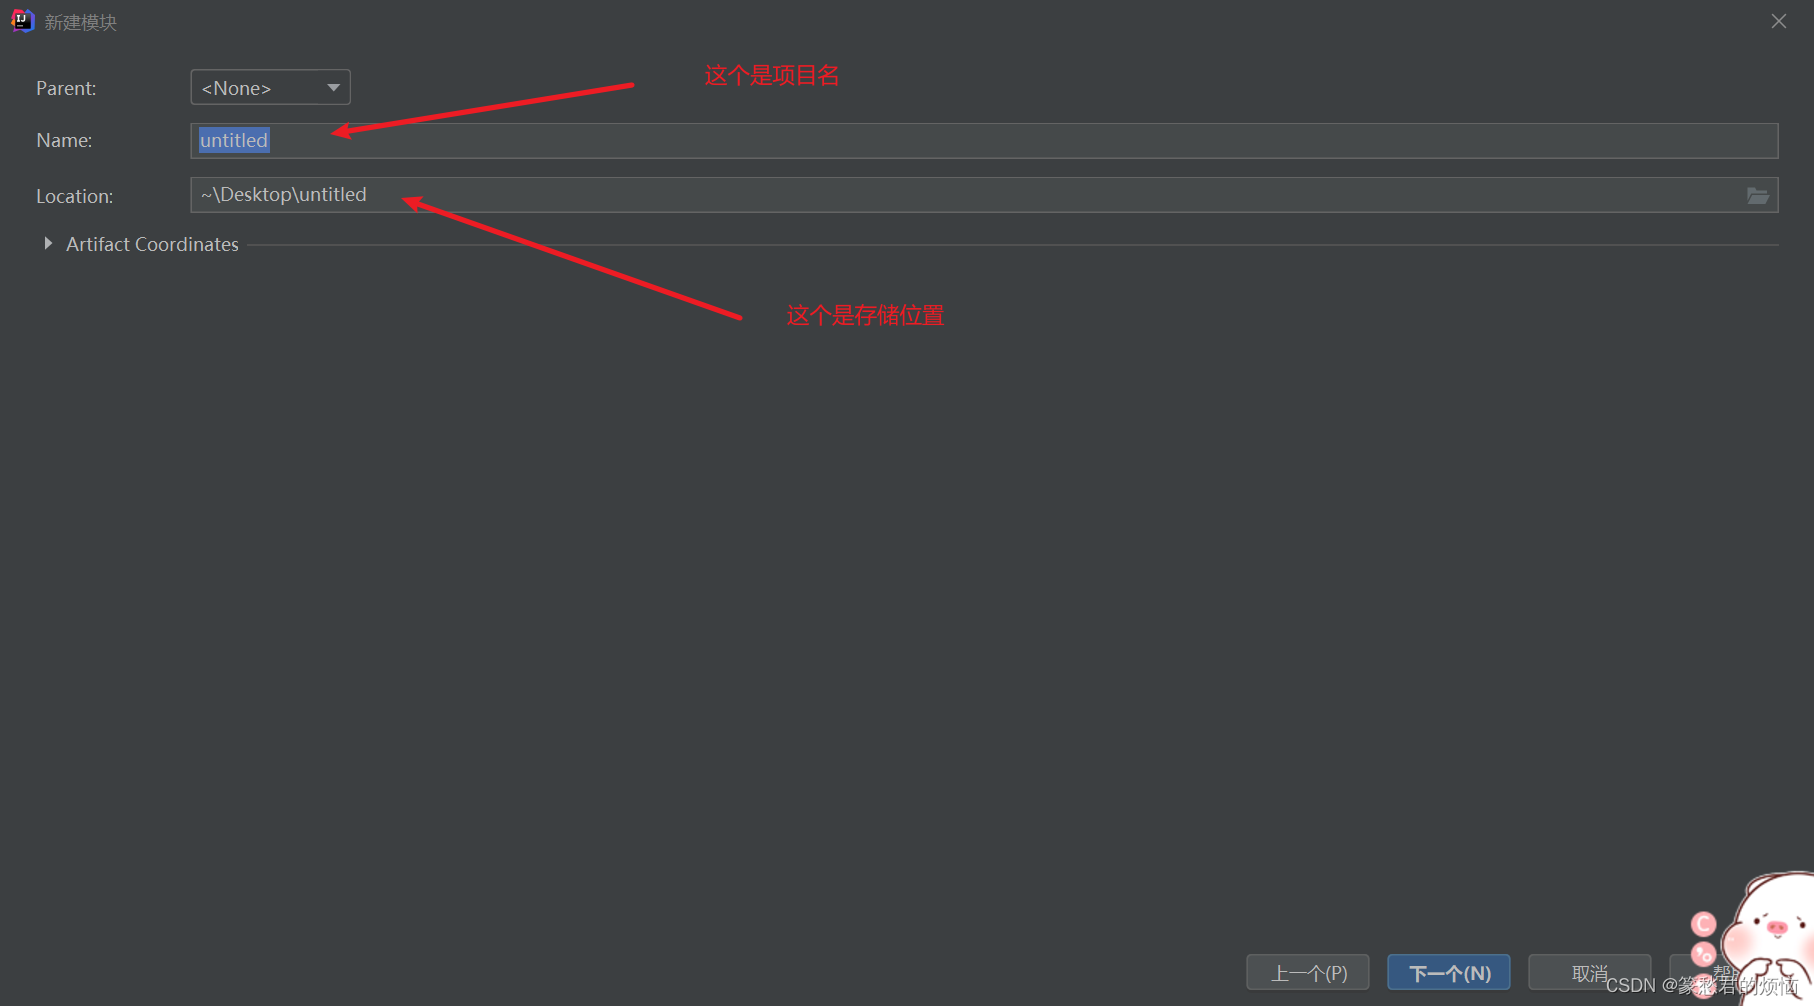
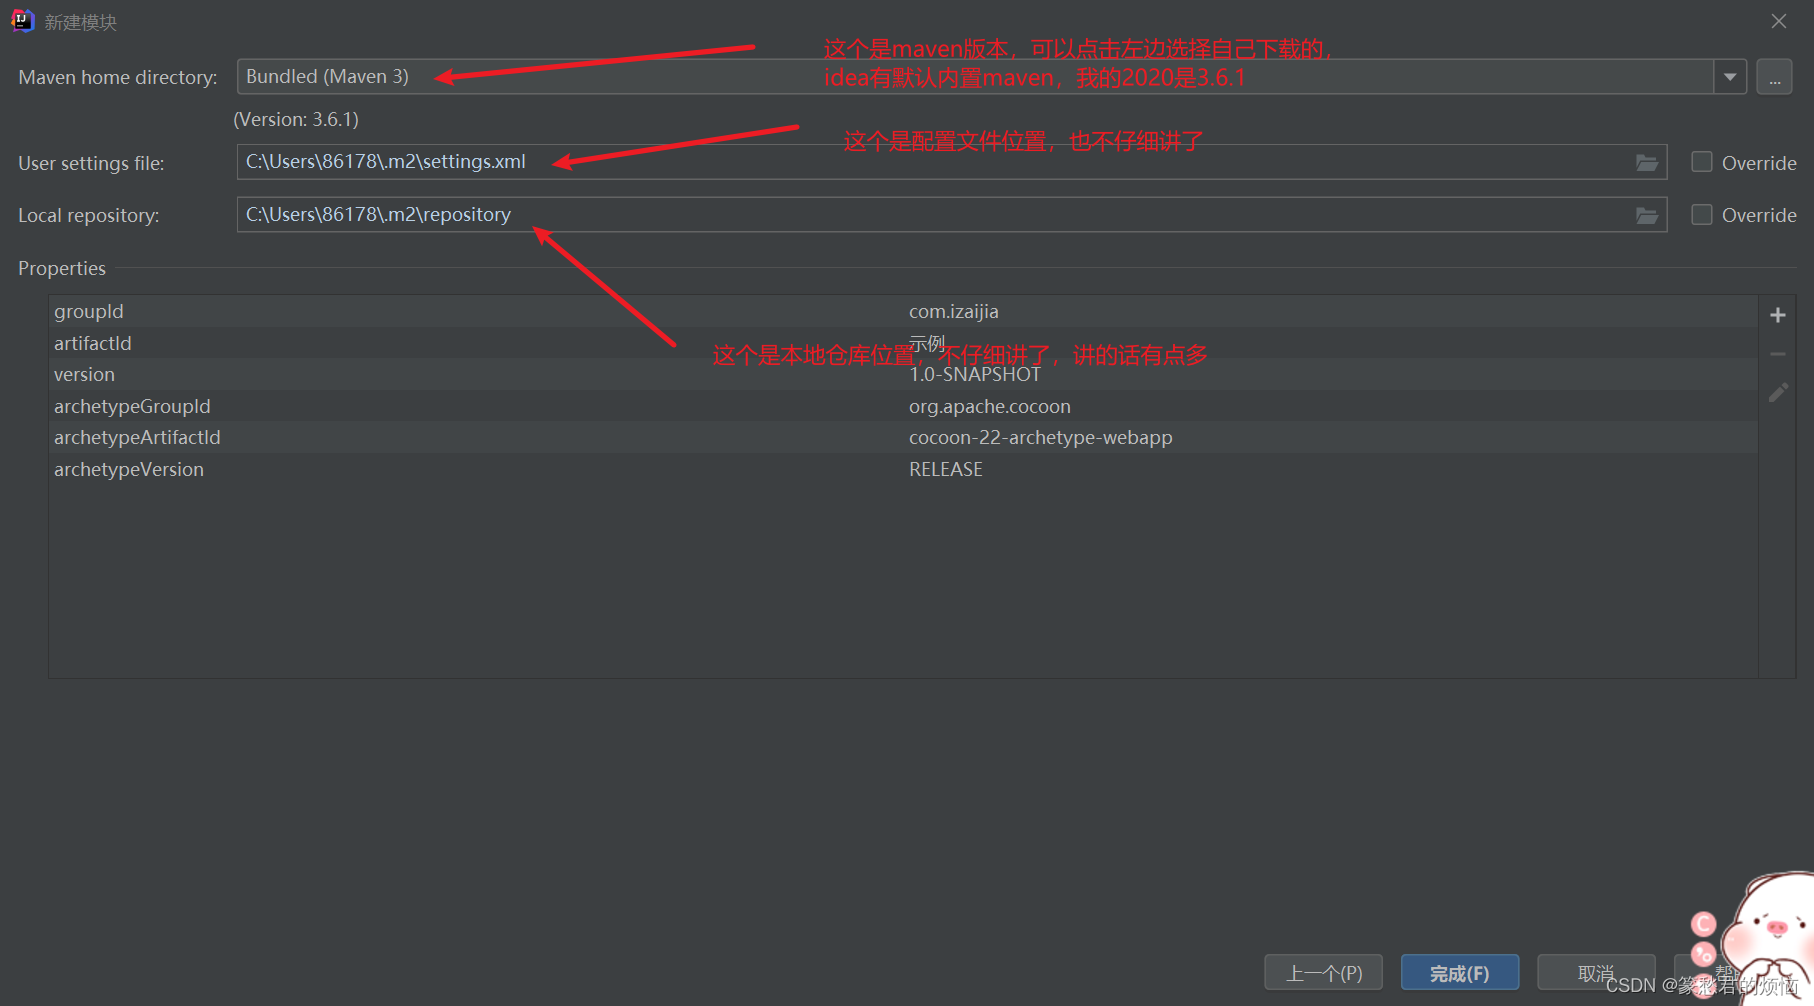
点开Artifact Coordates

根据 Maven – POM Reference ,我们找到artifact,groupId,version的简介
- groupId: This is generally unique amongst an organization or a project. For example, all core Maven artifacts do (well, should) live under the groupId
org.apache.maven. Group ID's do not necessarily use the dot notation, for example, the junit project. Note that the dot-notated groupId does not have to correspond to the package structure that the project contains. It is, however, a good practice to follow. When stored within a repository, the group acts much like the Java packaging structure does in an operating system. The dots are replaced by OS specific directory separators (such as '/' in Unix) which becomes a relative directory structure from the base repository. In the example given, theorg.codehaus.mojogroup lives within the directory$M2_REPO/org/codehaus/mojo.- artifactId: The artifactId is generally the name that the project is known by. Although the groupId is important, people within the group will rarely mention the groupId in discussion (they are often all be the same ID, such as the MojoHaus project groupId:
org.codehaus.mojo). It, along with the groupId, creates a key that separates this project from every other project in the world (at least, it should :) ). Along with the groupId, the artifactId fully defines the artifact's living quarters within the repository. In the case of the above project,my-projectlives in$M2_REPO/org/codehaus/mojo/my-project.- version: This is the last piece of the naming puzzle.
groupId:artifactIddenotes a single project but they cannot delineate which incarnation of that project we are talking about. Do we want thejunit:junitof 2018 (version 4.12), or of 2007 (version 3.8.2)? In short: code changes, those changes should be versioned, and this element keeps those versions in line. It is also used within an artifact's repository to separate versions from each other.my-projectversion 1.0 files live in the directory structure$M2_REPO/org/codehaus/mojo/my-project/1.0.翻译结果:
groupId:这在一个组织或项目中通常是唯一的。例如,所有核心Maven工件都存在于(嗯,应该存在于)groupId org.apache.maven下。请注意,用点号表示的groupId不必与项目包含的包结构相对应。然而,这是一个值得遵循的好习惯。当存储在存储库中时,组的行为很像操作系统中的Java打包结构。点由特定于操作系统的目录分隔符(如Unix中的“/”)代替,它成为基本存储库的相对目录结构。在给出的例子中,org.codehaus.mojo组位于目录$M2_REPO/org/codehaus/mojo中。
artifactid:artifactid通常是项目的名称。虽然groupId很重要,但是组内的人在讨论中很少会提到groupId(他们经常都是同一个Id,比如MojoHaus项目groupId: org.codehaus.mojo)。它和groupId一起创建了一个键,将这个项目与世界上的其他项目区分开来(至少,它应该是:)。与groupId一起,artifactId完整地定义了工件在存储库中的位置。在上面的项目中,我的项目位于$ M2 _ REPO/org/code Haus/mojo/my-project中。
版本:这是命名难题的最后一块。groupId:artifactId表示一个单独的项目,但是他们不能描述我们正在谈论的那个项目的具体表现。我们想要2018年的junit:junit(版本4.12),还是2007年的junit(版本3.8.2)?简而言之:代码改变,那些改变应该被版本化,并且这个元素保持那些版本一致。它还用于工件的存储库中,以将版本相互分离。我的项目1.0版文件位于目录结构$ M2 _ REPO/org/code Haus/mojo/我的项目/1.0中。
这三个属性主要看我加粗字体的部分,简单了解就好,
接下来,继续点下一个
这个的内容比用我们填,如果想要仔细了解的,建议去黑马程序员Maven全套教程,maven项目管理从基础到高级,Java项目开发必会管理工具maven_哔哩哔哩_bilibili
如果是第一次创建:和上面的类似
2.引用
在这里主要引入两个
在plugins写入
<plugin>
        <groupId>org.apache.tomcat.maven</groupId>
        <artifactId>tomcat7-maven-plugin</artifactId>
        <version>2.2</version>
      </plugin>
在dependencies里写入
<dependency>
      <groupId>javax.servlet</groupId>
      <artifactId>servlet-api</artifactId>
      <version>2.5</version>
      <scope>provided</scope>
    </dependency>
这里的scop是范围的意思,就是在四个运行时在哪个时间起作用
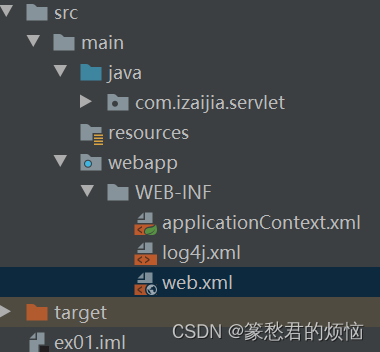
可以在WEB-INF中看到这三个文件

这里大致讲一下
applicationContext.xml:这个是spring相关的xml 可前往了解applicationContext.xml配置简介_originations的博客-CSDN博客_applicationcontext.xml
log4j.xml:这个是日志相关的xml 可前往了解Log4J.xml配置详解_欣怡的博客-CSDN博客_log4j.xml
web.xml:这个是对Filter,Servlet等的配置web.xml详解 - 百度文库
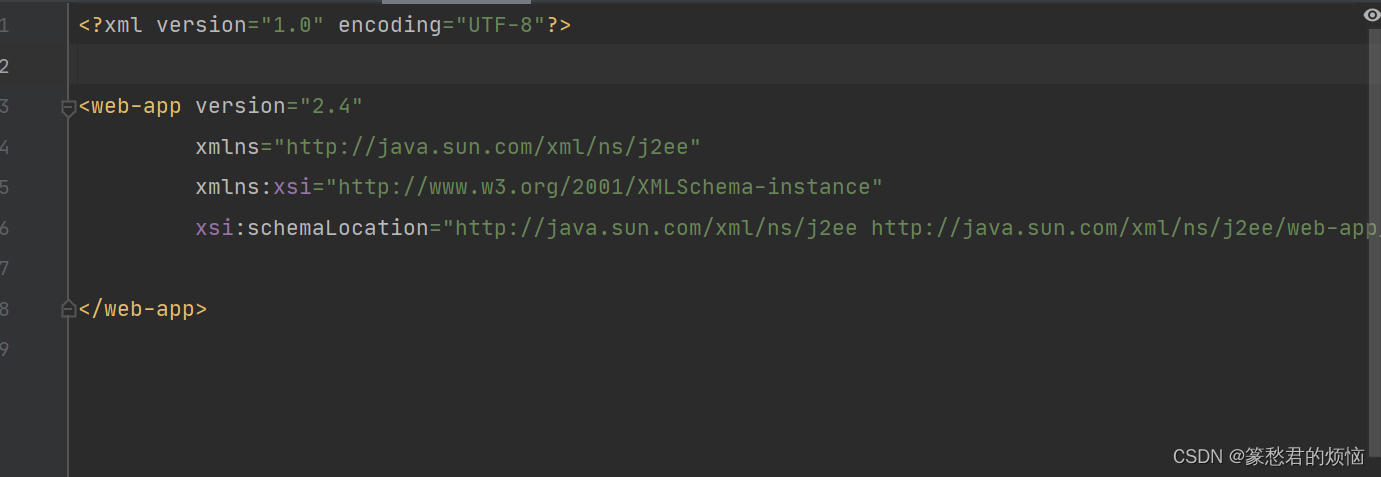
咱们这里用的web.xml有很多自动生成,但我们暂时用不到的东西,在最基础的文件里
可以删去大部分,可以点开看一下有很多报错的

删除成这个下面样子
3、创建Servlet
在java源码文件夹内创建几个包,或者不创建,在这里因为内容比较简单,不创建也没啥
右键点击包 =》新建 =》Create New Servlet

这里我不多说了,选择填写类名和包名,最后的Class会随前两个变化而变化
因为我的版本比较低,这里我只讲servlet在web.xml的配置用法(老版本),那个新的@WebServlet("/Servlet"),映射不就不讲了
创建好之后,大概就是下面这个样子,servlet中的多个方法如service,destory等,生命周期我就不仔细说了,有兴趣可以去
黑马程序员最新版JavaWeb基础教程,Java web从入门到企业实战完整版_哔哩哔哩_bilibili
package com.izaijia.servlet;

import javax.servlet.ServletException;
import javax.servlet.http.HttpServlet;
import javax.servlet.http.HttpServletRequest;
import javax.servlet.http.HttpServletResponse;
import java.io.IOException;

public class Servlet1 extends HttpServlet {
    protected void doPost(HttpServletRequest request, HttpServletResponse response) throws ServletException, IOException {


    }

    protected void doGet(HttpServletRequest request, HttpServletResponse response) throws ServletException, IOException {


    }
}
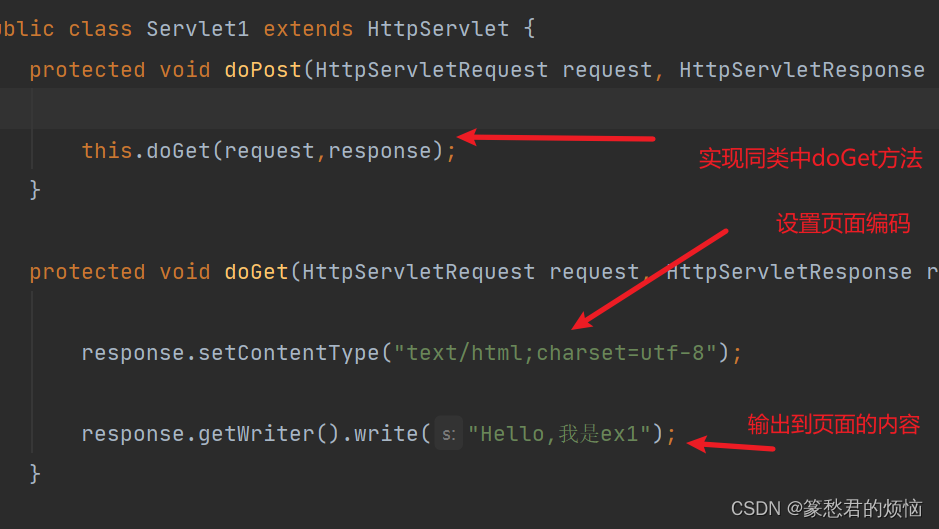
简单修改 后
package com.izaijia.servlet;

import javax.servlet.ServletException;
import javax.servlet.http.HttpServlet;
import javax.servlet.http.HttpServletRequest;
import javax.servlet.http.HttpServletResponse;
import java.io.IOException;

public class Servlet1 extends HttpServlet {
    protected void doPost(HttpServletRequest request, HttpServletResponse response) throws ServletException, IOException {

        this.doGet(request,response);
    }

    protected void doGet(HttpServletRequest request, HttpServletResponse response) throws ServletException, IOException {

        response.setContentType("text/html;charset=utf-8");

        response.getWriter().write("Hello,我是ex1");
    }
}
简单讲一下,修改的内容
4、web.xml的配置
因为这里一个简单的Servlet,所以配置起来也是比较简单
在web.xml内添加
<servlet>
        <servlet-name>S</servlet-name>
        <servlet-class>com.izaijia.servlet.Servlet1</servlet-class>
    </servlet>
    <servlet-mapping>
        <servlet-name>S</servlet-name>
        <url-pattern>/Servlet1</url-pattern>
</servlet-mapping> 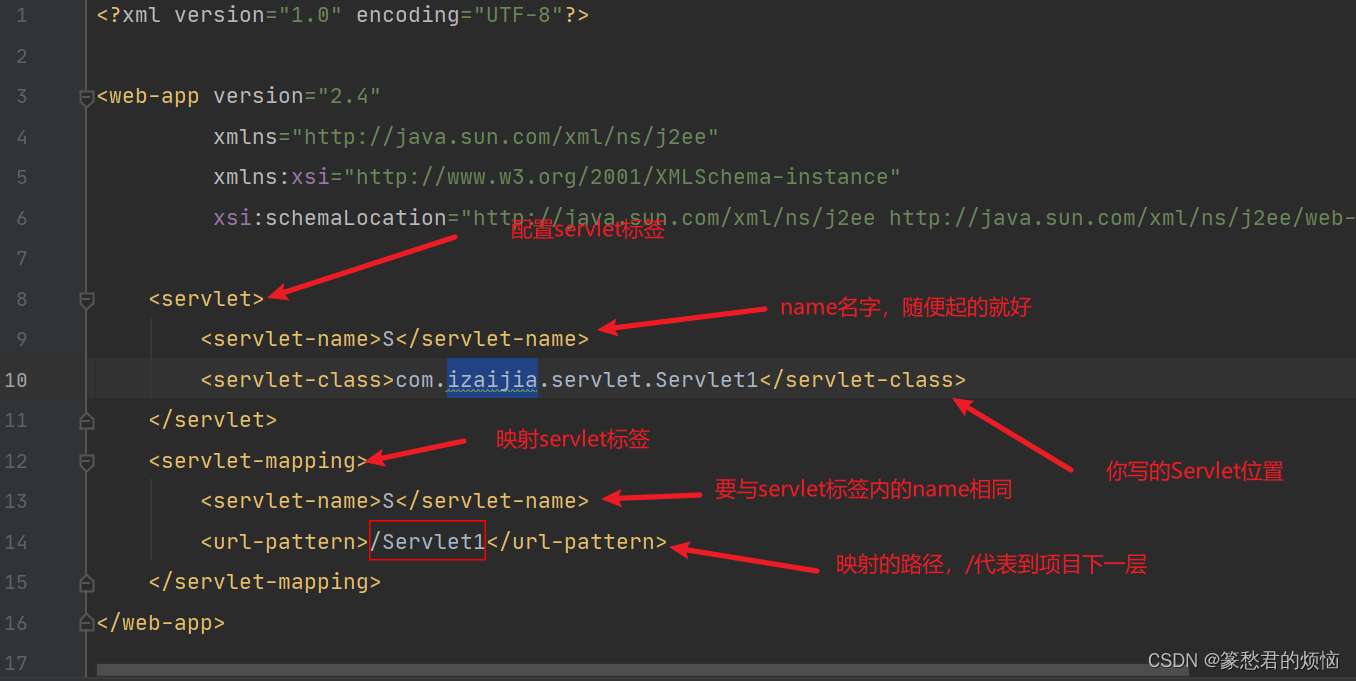
5、运行
这里我将两种最常见的运行方法
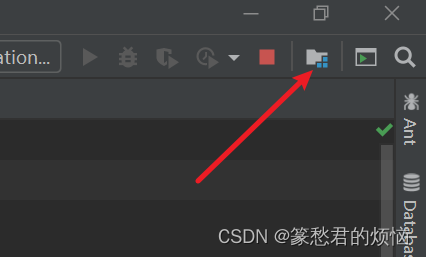
1、Add Configuration
点击下面图片位置

进入到下页面
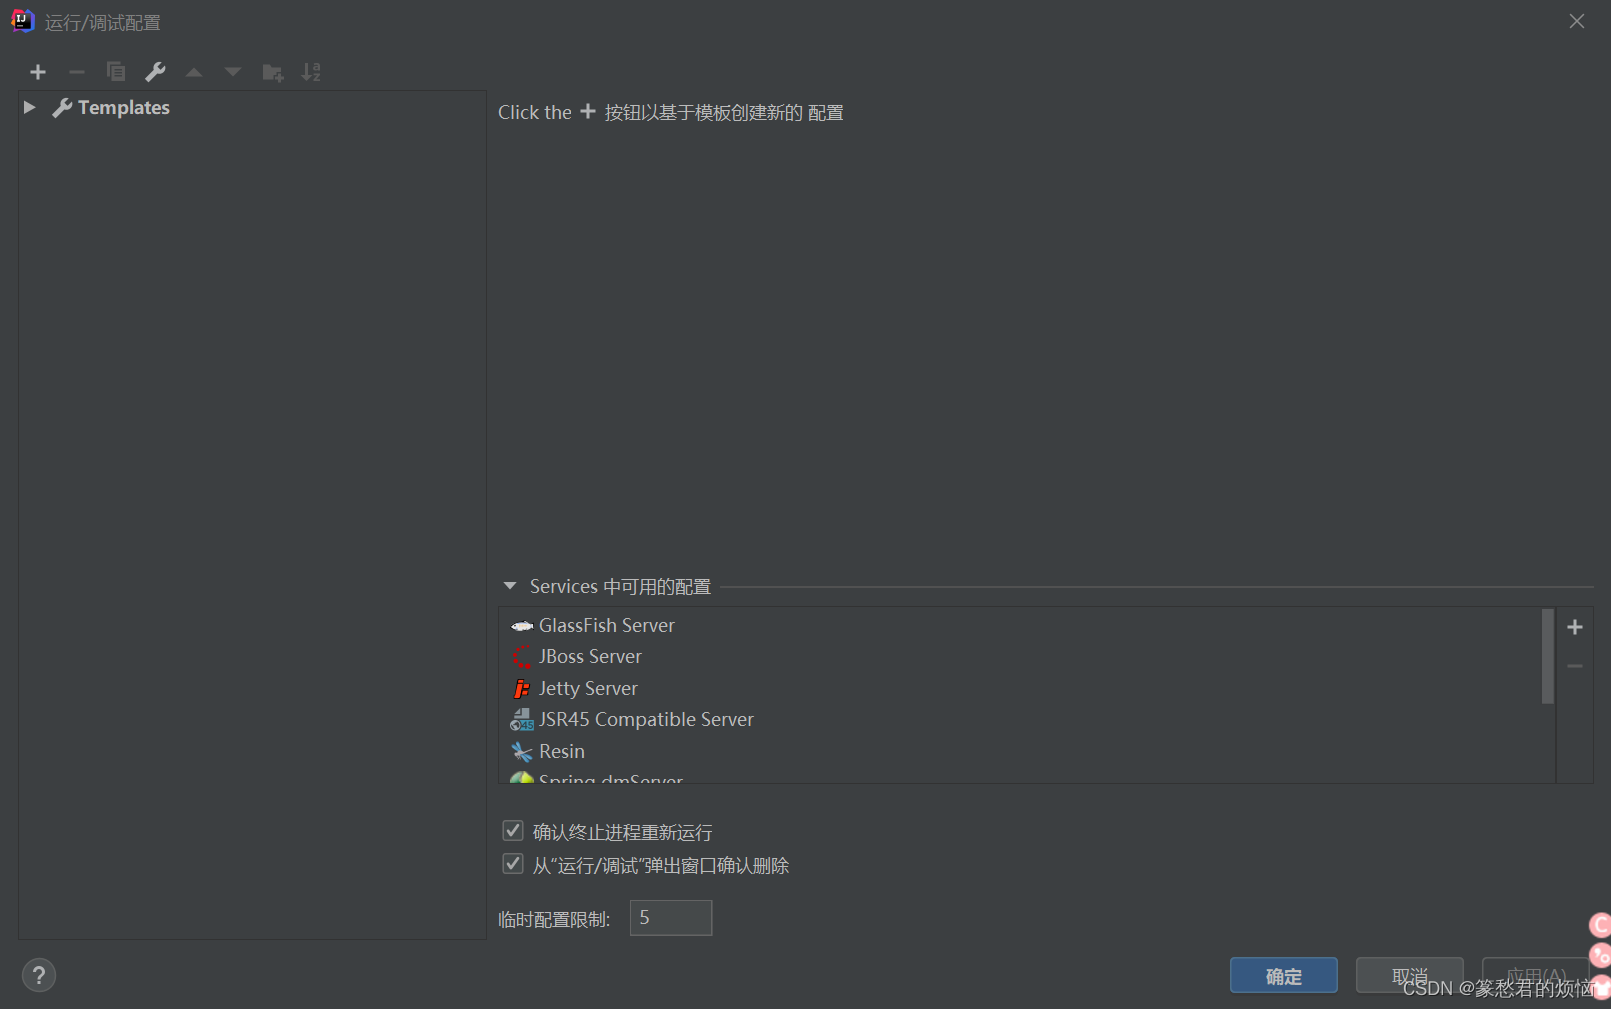
点击+ ,在添加新配置中,选择Tomcat Server =》Local,进入下页面
配置这个需要自己下载tomcatApache Tomcat® - Welcome!
推荐去官网下载
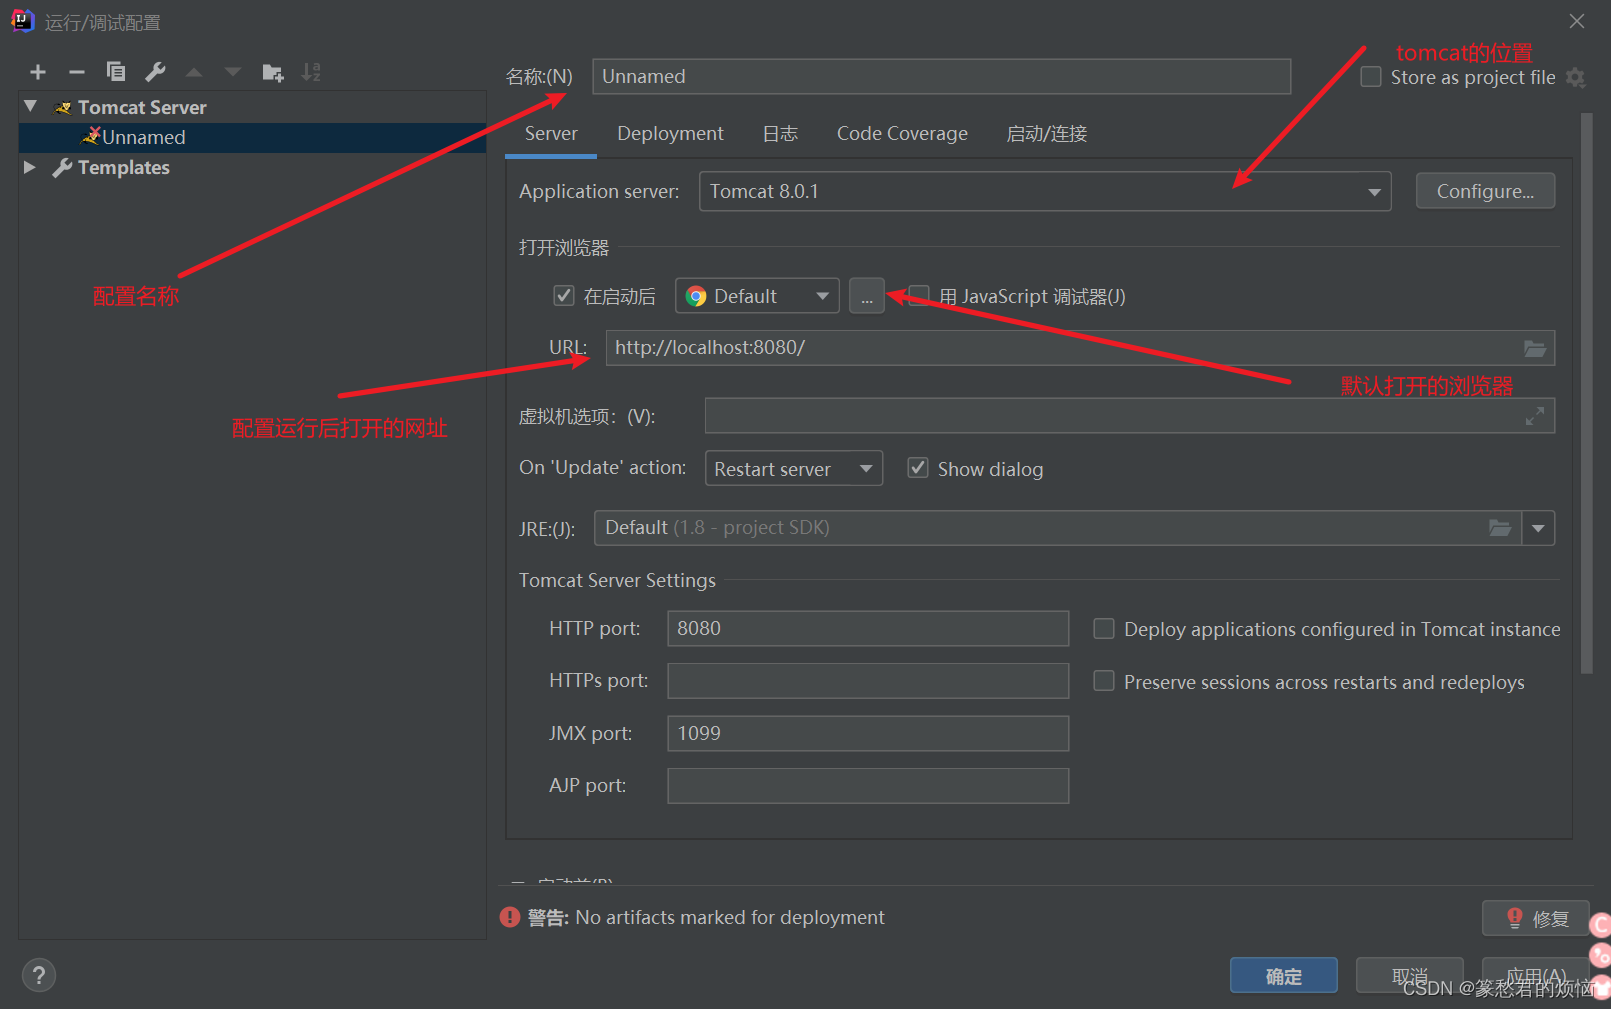
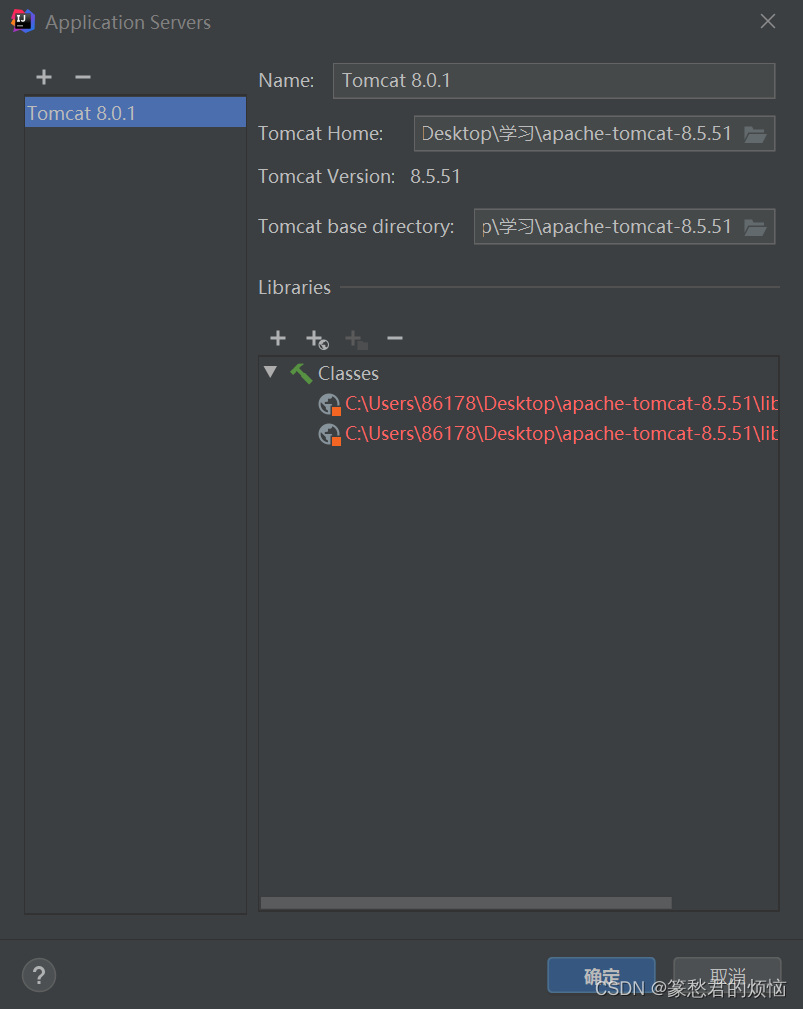
点击Configure后,可以配置位置
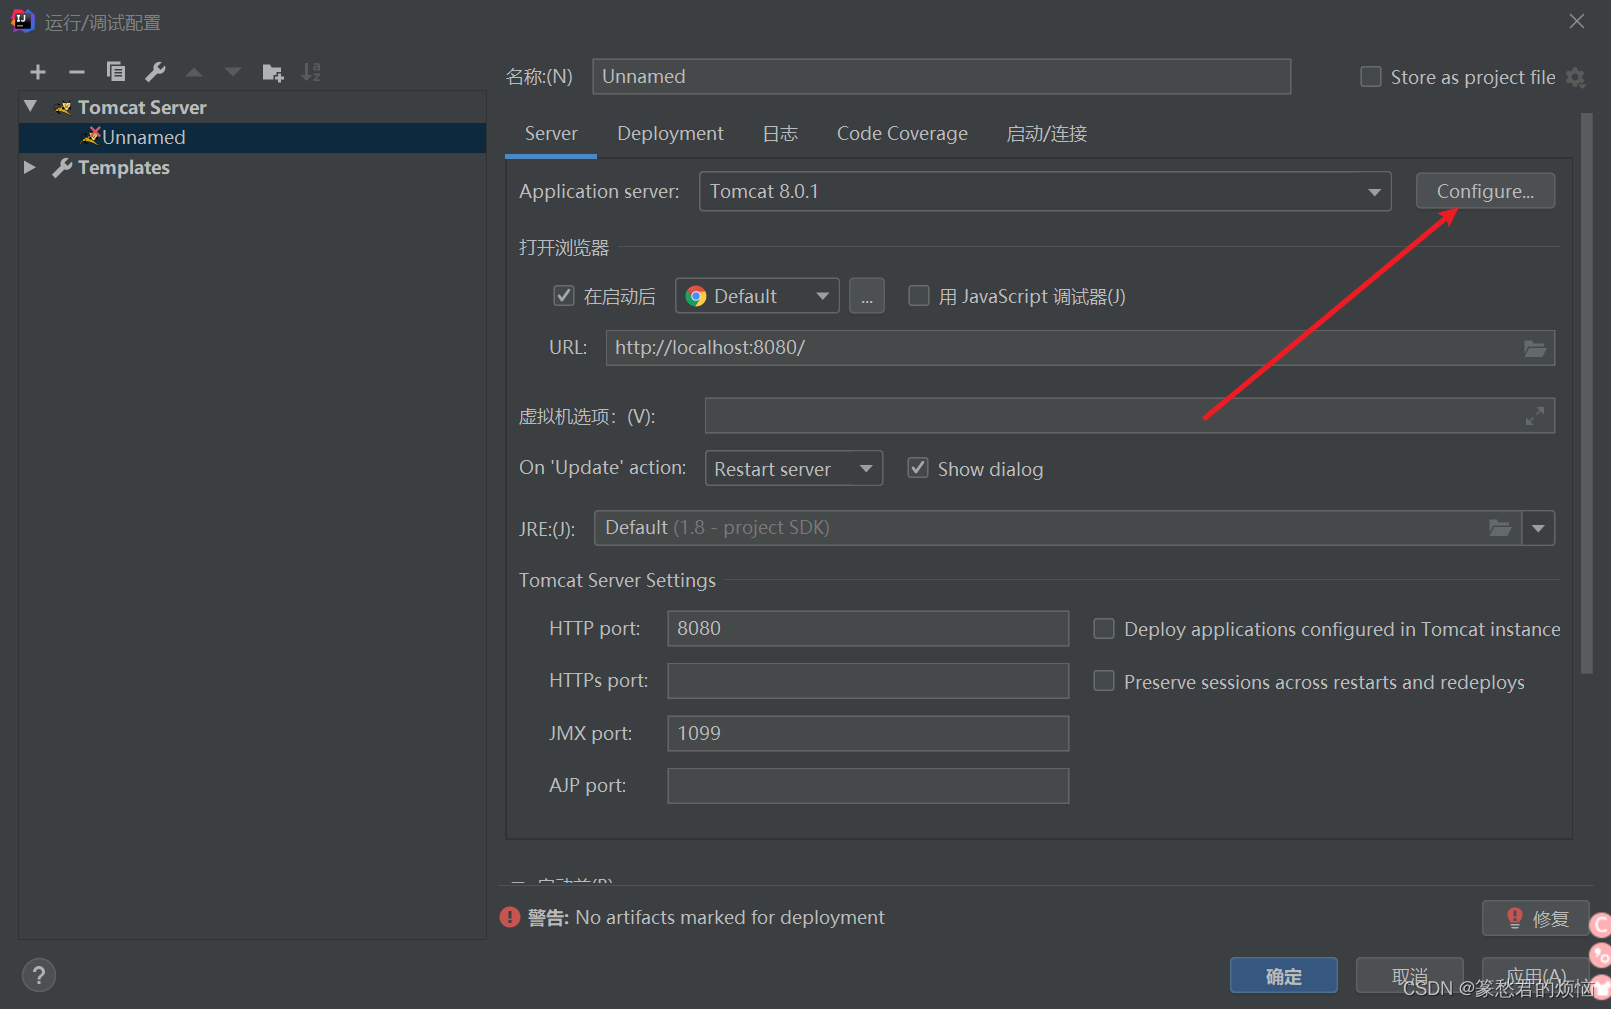
点击后
你可能会发现在最下面有一个错误提示
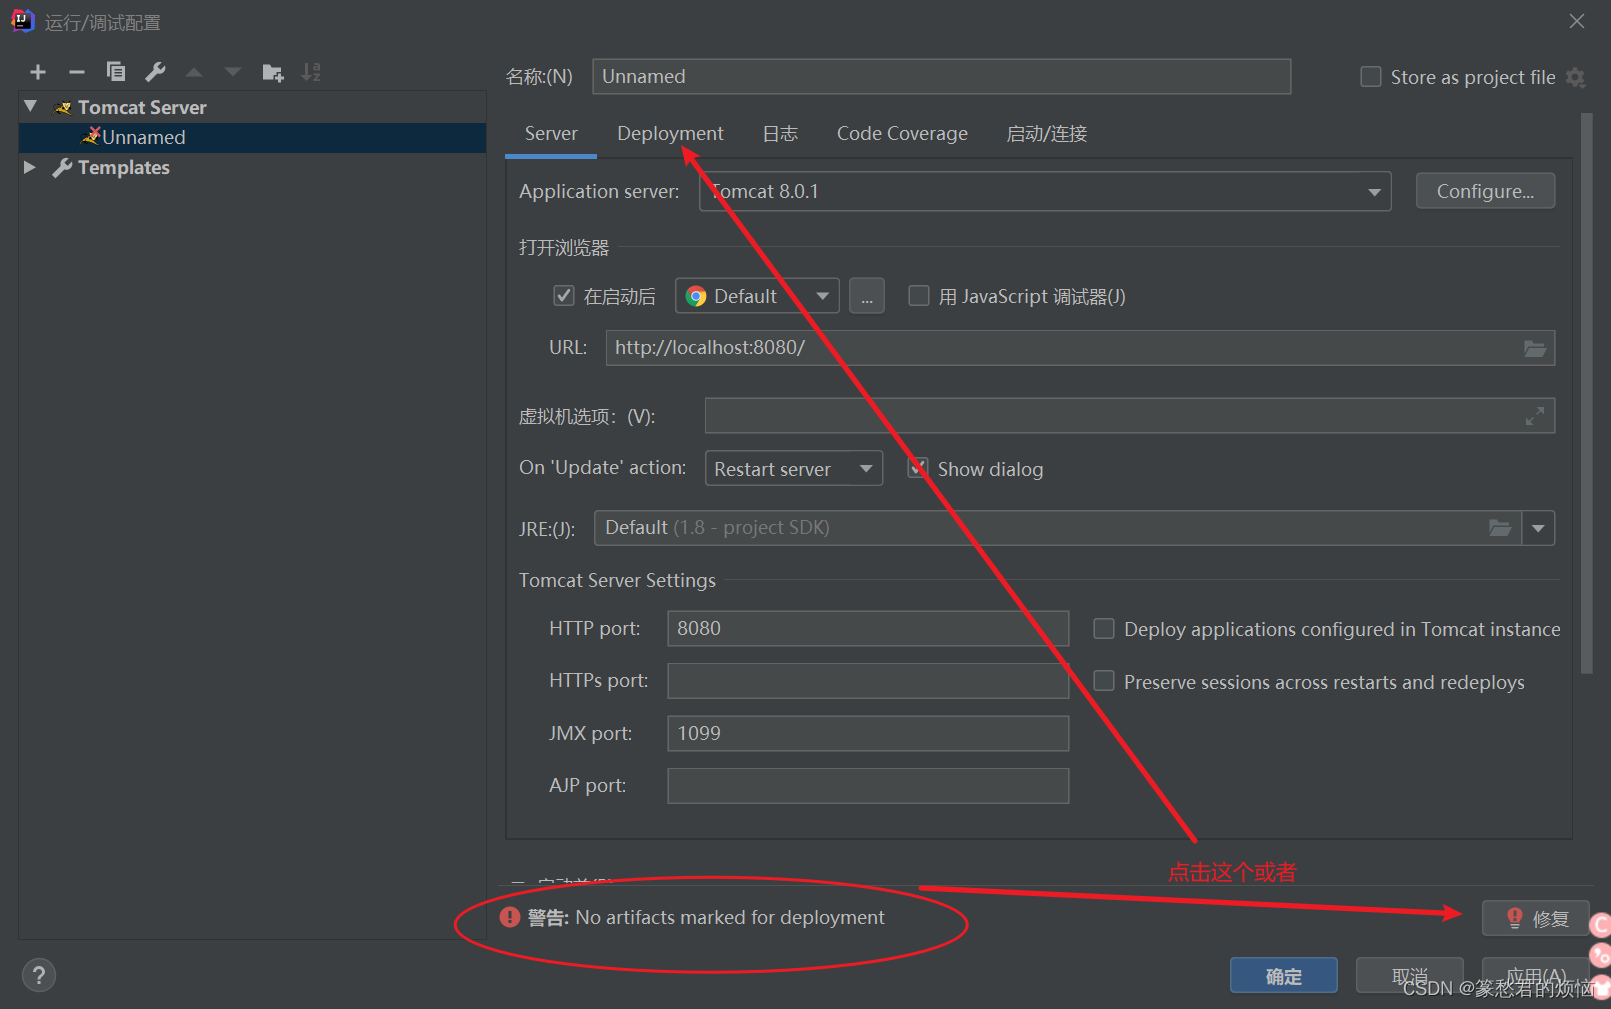
点击之后选择与项目相同的war或者war_exploded,这两个的效果是一样的,具体的区别,请去war和war exploded的区别_19921106的博客-CSDN博客_war_exploded
也可以直接去点击上图的Deployment中点击 + => artifact进行选择,和上一个方法结果是一样的
最后点击确认(应用-》确认)
配置好之后,会在页面显示,点击
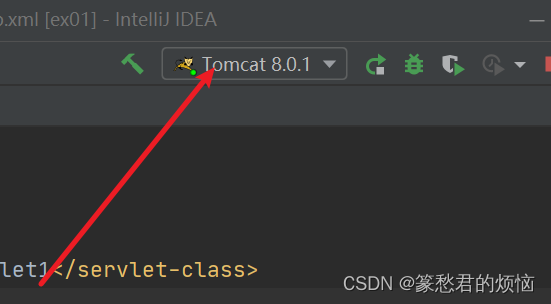
idea下面会弹出
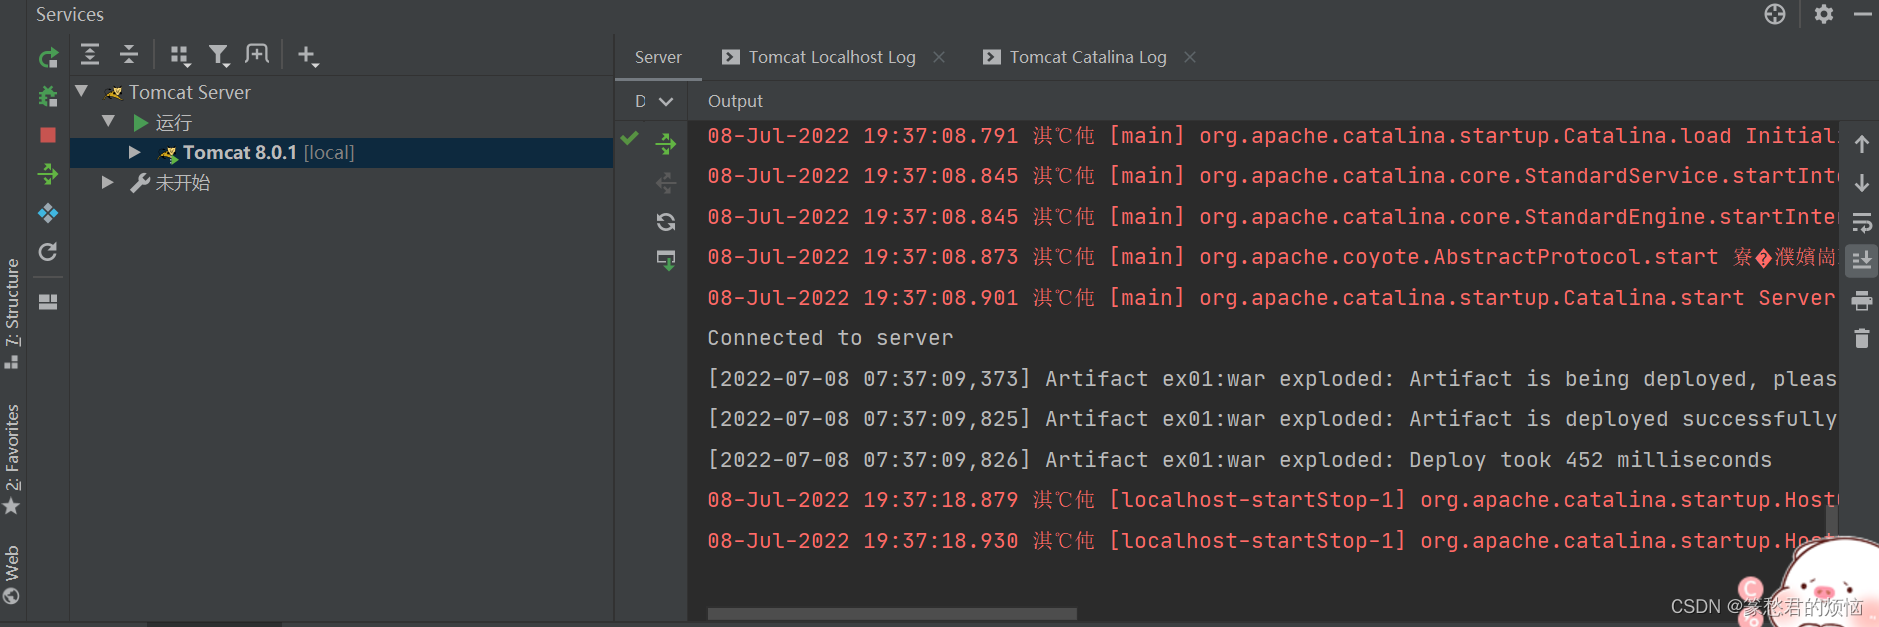
然后自动打开浏览器
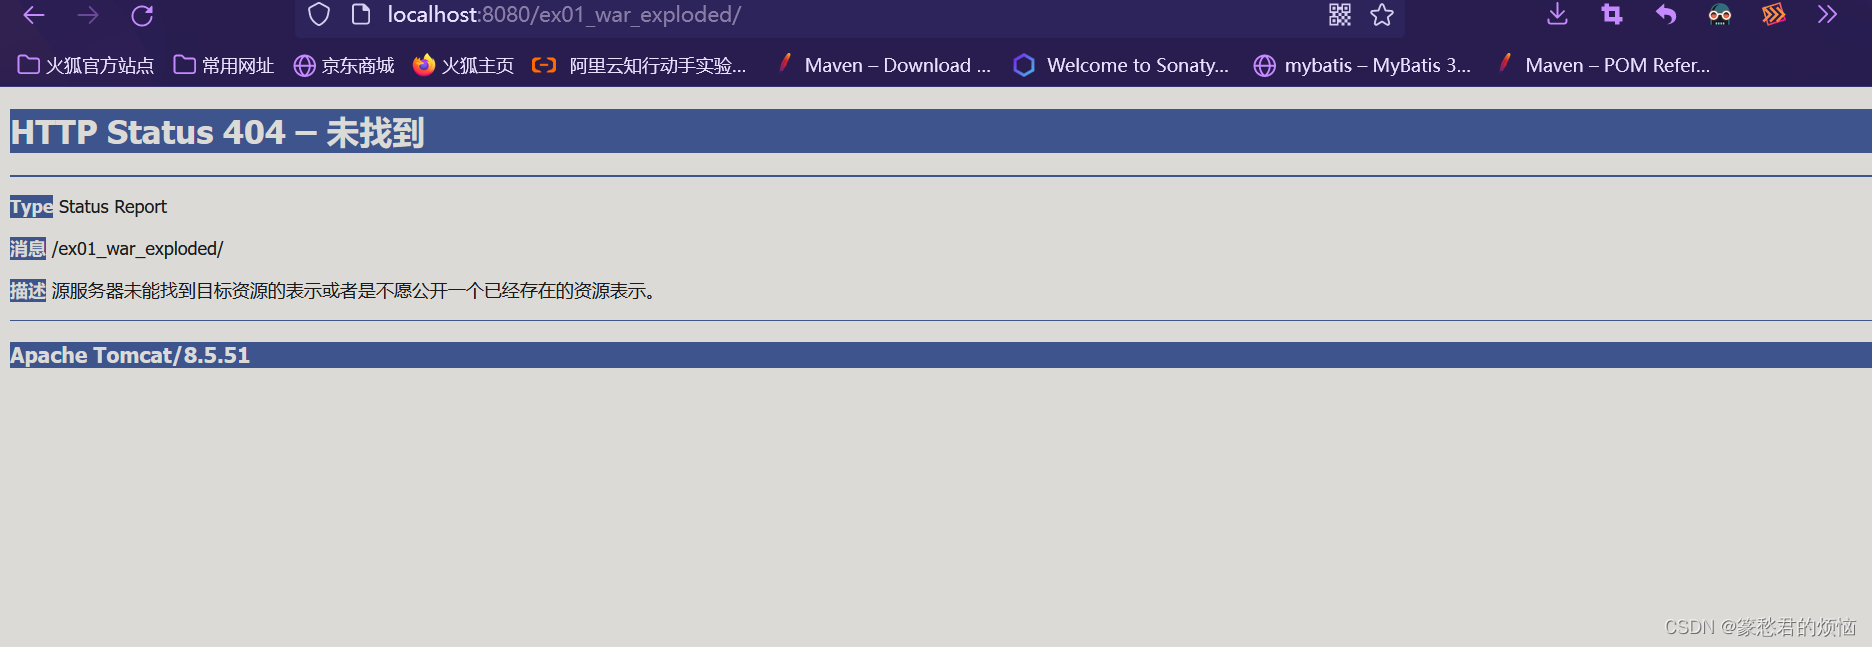
将页面的地址改为http://localhost:8080/ex01_war_exploded/Servlet1
最后的Servlet1是我们在web.xml配置好的

2、maven插件
选择 文件 =》设置
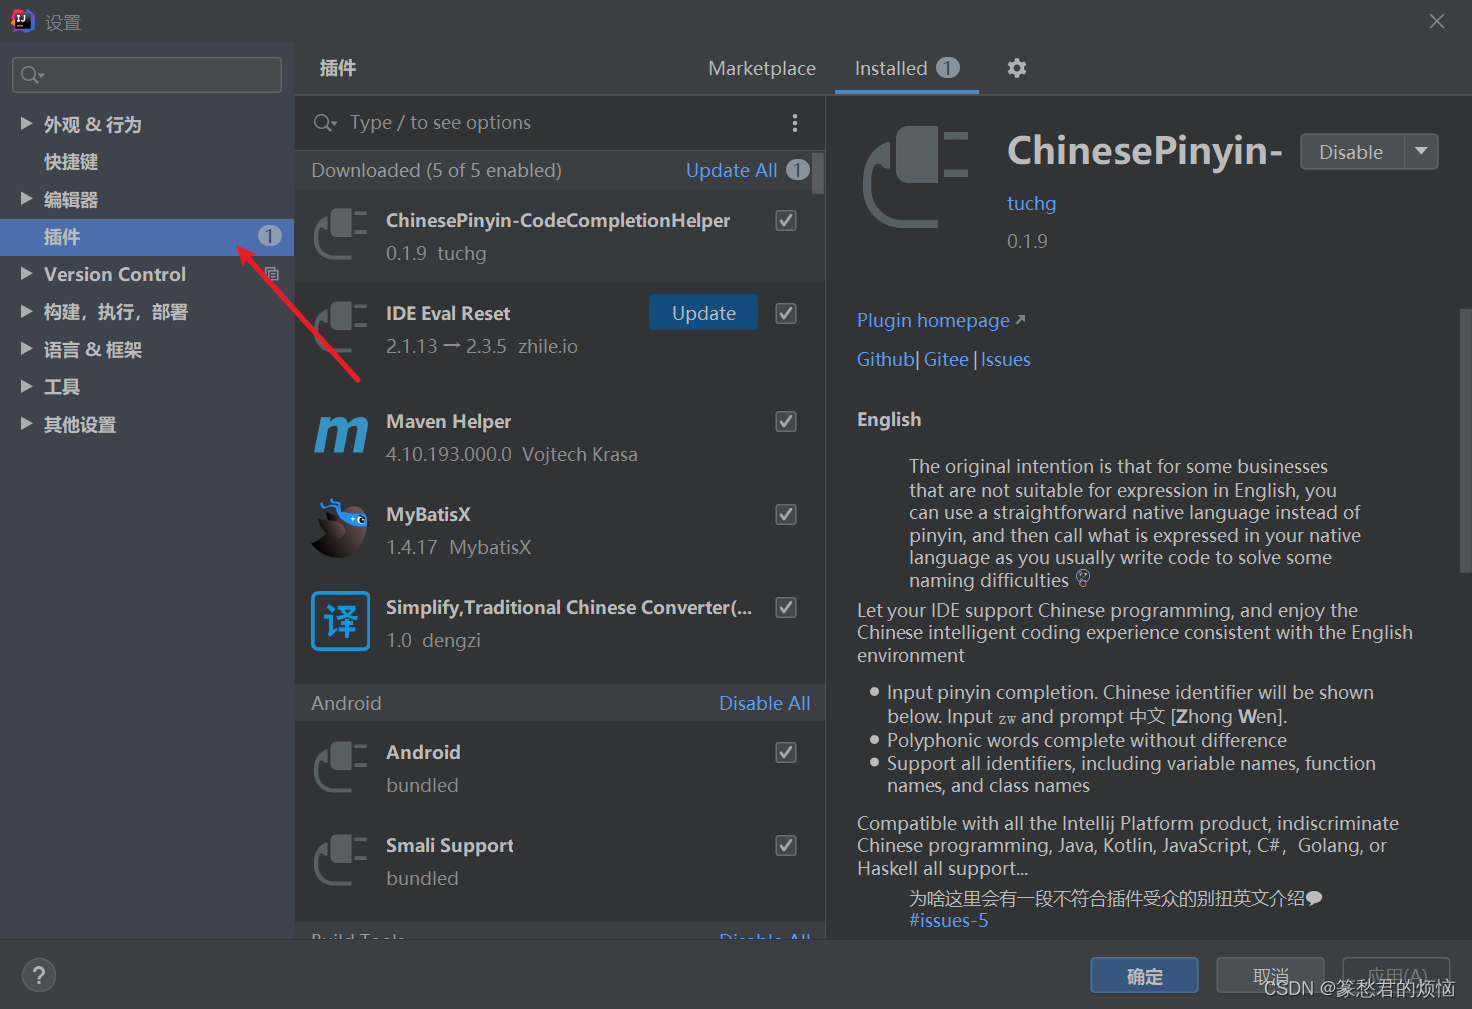
点击插件
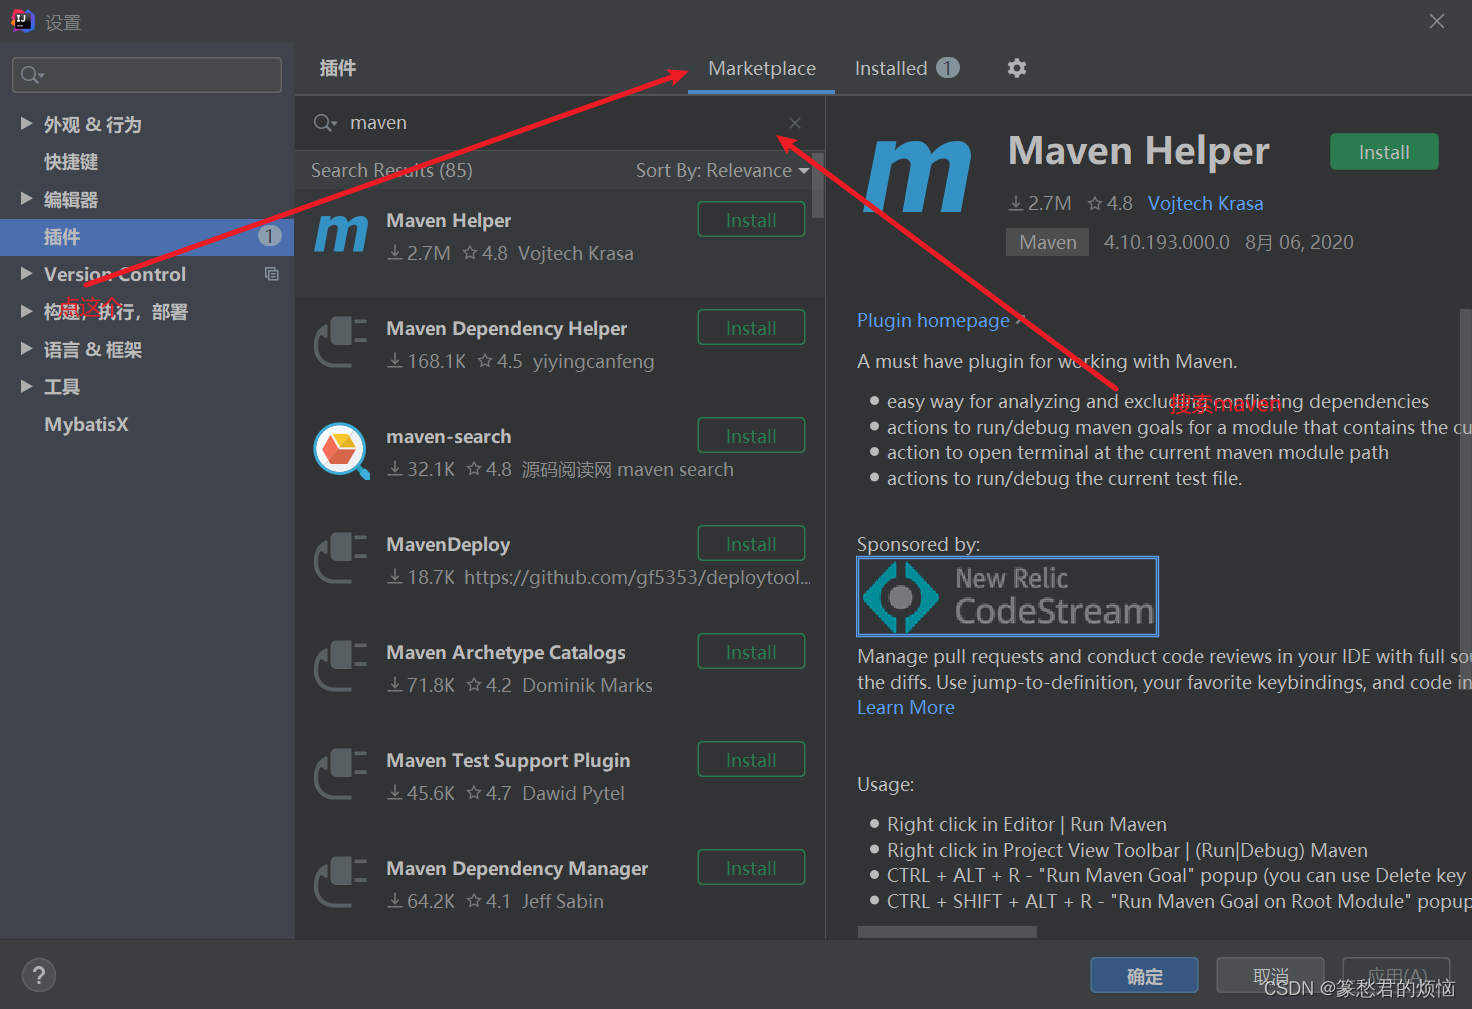
选择第一个,Maven Helper,下载

下载成功,选择应用=》确认
再次右键点击项目,会多出几个选择

上面几个是生命周期的,最下面那个tomcat7:run就是我们之前在pom.xml里配置的
选中tomcat7:run ,会跳出

和上一个方法一样,将地址改一下后可以看到Servlet的显示

总结
这里我简单总结了一下idea创建servlet的过程,以免自己以后忘了,整个过程总的来看,并不难,但是,步骤不少,需要留心的地方也很多,希望大家注意


 3680
3680


 被折叠的 条评论
为什么被折叠?
被折叠的 条评论
为什么被折叠?
 到【灌水乐园】发言


