


03-结算-对话框组件封装
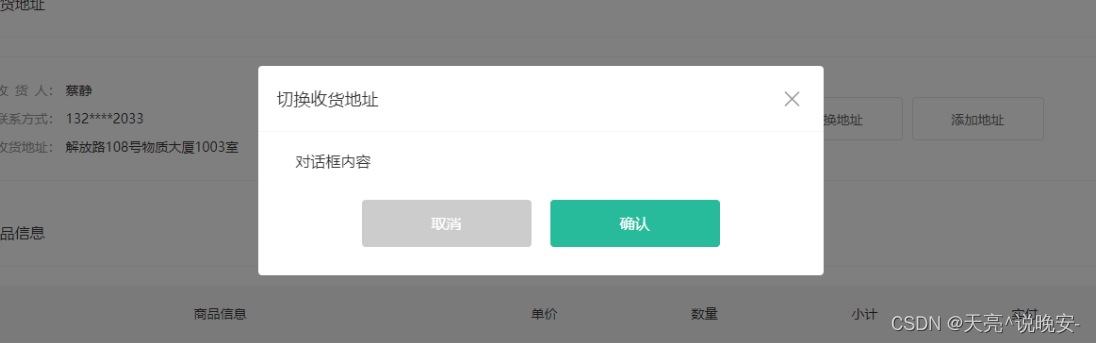
目的:实现一个对话框组件可设置标题,动态插入内容,动态插入底部操作按钮,打开关闭功能。
大致步骤:
- 参照xtx-confirm定义一个基础布局
- 实现设置标题
- 实现插入内容
- 实现插入底部操作按钮
- 实现打开关闭功能
落的代码:
1.参照xtx-confirm定义一个基础布局
src/components/library/xtx-dialog.vue 定义组件
<template>
  <div class="xtx-dialog" :class="{fade}">
    <div class="wrapper" :class="{fade}">
      <div class="header">
        <h3>切换收货地址</h3>
        <a href="JavaScript:;" class="iconfont icon-close-new"></a>
      </div>
      <div class="body">
        对话框内容
      </div>
      <div class="footer">
        <XtxButton type="gray" style="margin-right:20px">取消</XtxButton>
        <XtxButton type="primary">确认</XtxButton>
      </div>
    </div>
  </div>
</template>
<script>
import { ref, onMounted } from 'vue'
export default {
  name: 'XtxDialog',
  setup () {
    const fade = ref(false)
    onMounted(() => {
      // 结构和样式同时加上无过度效果,需要些延时。
      setTimeout(() => {
        fade.value = true
      }, 0)
    })
    return { fade }
  }
}
</script>
<style scoped lang="less">
.xtx-dialog {
  position: fixed;
  left: 0;
  top: 0;
  width: 100%;
  height: 100%;
  z-index: 8887;
  background: rgba(0,0,0,0);
  &.fade {
    transition: all 0.4s;
    background: rgba(0,0,0,.5);
  }
  .wrapper {
    width: 600px;
    background: #fff;
    border-radius: 4px;
    position: absolute;
    top: 50%;
    left: 50%;
    transform: translate(-50%,-60%);
    opacity: 0;
    &.fade {
      transition: all 0.4s;
      transform: translate(-50%,-50%);
      opacity: 1;
    }
    .body {
      padding: 20px 40px;
      font-size: 16px;
      .icon-warning {
        color: @priceColor;
        margin-right: 3px;
        font-size: 16px;
      }
    }
    .footer {
      text-align: center;
      padding: 10px 0 30px 0;
    }
    .header {
      position: relative;
      height: 70px;
      line-height: 70px;
      padding: 0 20px;
      border-bottom: 1px solid #f5f5f5;
      h3 {
        font-weight: normal;
        font-size: 18px;
      }
      a {
        position: absolute;
        right: 25px;
        top: 25px;
        font-size: 24px;
        width: 20px;
        height: 20px;
        line-height: 20px;
        text-align: center;
        color: #999;
        &:hover {
          color: #666;
        }
      }
    }
  }
}
</style>
src/views/member/pay/components/checkout-address.vue 使用组件
<XtxDialog />
2.实现设置标题
src/components/library/xtx-dialog.vue 定义组件
  props: {
    title: {
      type: String,
      default: ''
    }
  },
      <div class="header">
        <h3>{{title}}</h3>
        <a href="JavaScript:;" class="iconfont icon-close-new"></a>
      </div>
src/views/member/pay/components/checkout-address.vue 使用组件
<XtxDialog title="切换收货地址" />
3.实现插入内容
src/components/library/xtx-dialog.vue 定义组件
      <div class="body">
+        <slot />
      </div>
src/views/member/pay/components/checkout-address.vue 使用组件
<XtxDialog title="切换收货地址" >
  对话框内容
</XtxDialog>
4.实现插入底部操作按钮
src/components/library/xtx-dialog.vue 定义组件
      <div class="footer">
+        <slot name="footer" />
      </div>
src/views/member/pay/components/checkout-address.vue 使用组件
    <XtxDialog title="切换收货地址">
      对话框内容
      <!-- vue3.0 仅支持v-slot+template写法 -->
      <template v-slot:footer>
        <XtxButton type="gray" style="margin-right:20px">取消</XtxButton>
        <XtxButton type="primary">确认</XtxButton>
      </template>
    </XtxDialog>
5.实现打开关闭功能
- 1.打开关闭通过v-model来实现
- 2.动画根据打开关闭状态来控制
src/components/library/xtx-dialog.vue 定义组件
<div class="xtx-dialog" :class="{fade}" v-show="visible">
import { ref, watch } from 'vue'
export default {
  name: 'XtxDialog',
  props: {
    title: {
      type: String,
      default: ''
    },
    visible: {
      type: Boolean,
      default: false
    }
  },
  setup (props, { emit }) {
    const fade = ref(true)
    // 改造动画执行时机
    watch(() => props.visible, () => {
      setTimeout(() => {
        fade.value = props.visible
      }, 0)
    }, { immediate: true })
    // 关闭的时候通知父组件
    const close = () => {
      emit('update:visible', false)
    }
    return { fade, close }
  }
}
src/views/member/pay/components/checkout-address.vue 使用组件
    <div class="action">
+      <XtxButton @click="dialogVisible=true" class="btn">切换地址</XtxButton>
      <XtxButton class="btn">添加地址</XtxButton>
    </div>
+    <XtxDialog title="切换收货地址" v-model:visible="dialogVisible">
      对话框内容
      <template v-slot:footer>
+        <XtxButton @click="dialogVisible=false" type="gray" style="margin-right:20px">取消</XtxButton>
+        <XtxButton @click="dialogVisible=false" type="primary">确认</XtxButton>
      </template>
    </XtxDialog>
    // 对话框显示隐藏
    const dialogVisible = ref(false)
    return { dialogVisible }
04-结算-收货地址-切换
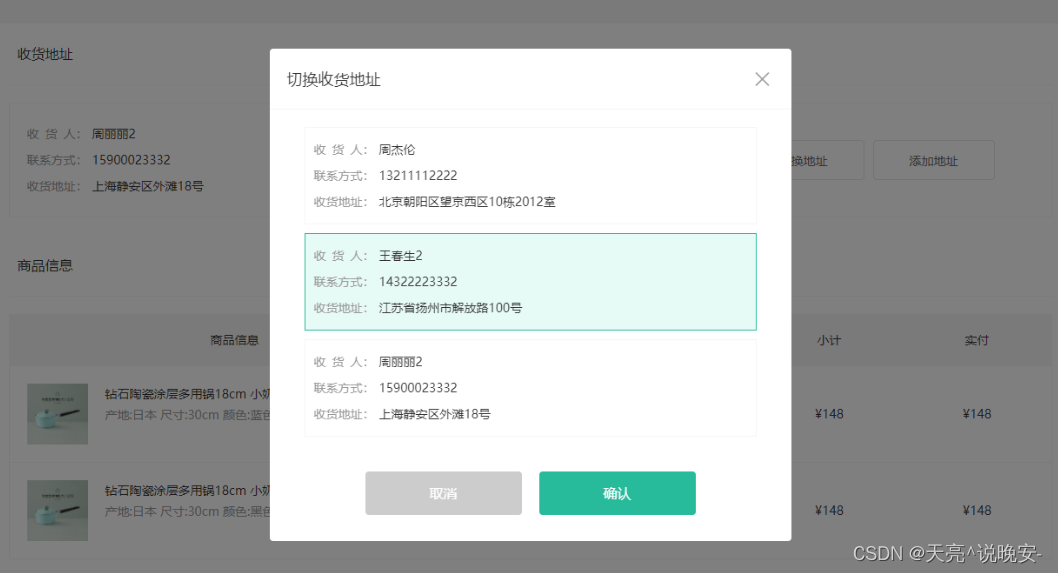
目的:能够切换当前显示的地址,且通知结算组件当前地址ID用于提交订单使用。
大致步骤:
- 组件初始化的时候需要得到一个默认的地址ID通知给结算组件
- 对话框中渲染一个地址列表
- 实现可以选中的效果,点击确认后变更显示地址,通知结算组件地址ID
落地代码:
1.组件初始化的时候需要得到一个默认的地址ID通知给结算组件
地址组件 components/checkout-address.vue
   // 对话框显示隐藏
    const dialogVisible = ref(false)
+    // 默认通知一个地址ID给父
+    emit('change', showAddress.value?.id)
    return { showAddress, dialogVisible }
  // 1. 在拥有根元素的组件中,触发自定义事件,有没有emits选项无所谓
  // 2. 如果你的组件渲染的代码片段,vue3.0规范,需要在emits中申明你所触发的自定义事件
  // 3. 提倡:你发了自定义事件,需要在emits选项申明下,代码可读性很高
  emits: ['change'],
结算组件 checkout.vue
    // 需要提交的字段
    const requestParams = reactive({
      addressId: null
    })
    // 切换地址
    const changeAddress = (id) => {
      requestParams.addressId = id
    }
    return { checkoutInfo, changeAddress }
<CheckoutAddress @change="changeAddress" :list="checkoutInfo.userAddresses" />
2.对话框中渲染一个地址列表
地址组件 components/checkout-address.vue
    <XtxDialog title="切换收货地址" v-model:visible="dialogVisible">
+      <div class="text item" v-for="item in list" :key="item.id">
+        <ul>
+          <li><span>收<i/>货<i/>人:</span>{{item.receiver}}</li>
+          <li><span>联系方式:</span>{{item.contact}}</li>
+          <li><span>收货地址:</span>{{item.fullLocation.replace(/ /g,'')+item.address}}</li>
+        </ul>
+      </div>
      <template v-slot:footer>
.xtx-dialog {
  .text {
    flex: 1;
    min-height: 90px;
    display: flex;
    align-items: center;
    &.item {
      border: 1px solid #f5f5f5;
      margin-bottom: 10px;
      cursor: pointer;
      &.active,&:hover {
        border-color: @xtxColor;
        background: lighten(@xtxColor,50%);
      }
      > ul {
        padding: 10px;
        font-size: 14px;
        line-height: 30px;
      }
    }
  }
}
3.实现可以选中的效果,点击确认后变更显示地址,通知结算组件地址ID
地址组件 components/checkout-address.vue
  // 对话框显示隐藏
    const dialogVisible = ref(false)
    // 打开对话框
    const openDialog = () => {
      dialogVisible.value = true
      selectedAddress.value = null
    }
    // 确认地址
    const confirmAddress = () => {
      dialogVisible.value = false
      showAddress.value = selectedAddress.value
      // 默认通知一个地址ID给父
      emit('change', showAddress.value?.id)
    }
    // 选择的地址
    const selectedAddress = ref(null)
    return { showAddress, dialogVisible, selectedAddress, openDialog, confirmAddress }
    <XtxDialog title="切换收货地址" v-model:visible="dialogVisible">
      <div
        class="text item"
+        :class="{active:selectedAddress&&item.id===selectedAddress.id}"
+        @click="selectedAddress=item"
        v-for="item in list"
        :key="item.id">
        <ul>
<XtxButton @click="openDialog()" class="btn">切换地址</XtxButton>
<XtxButton @click="confirmAddress()" type="primary">确认</XtxButton>


 2295
2295


 被折叠的 条评论
为什么被折叠?
被折叠的 条评论
为什么被折叠?
 到【灌水乐园】发言


