


一、什么是“热部署”
看下图 :
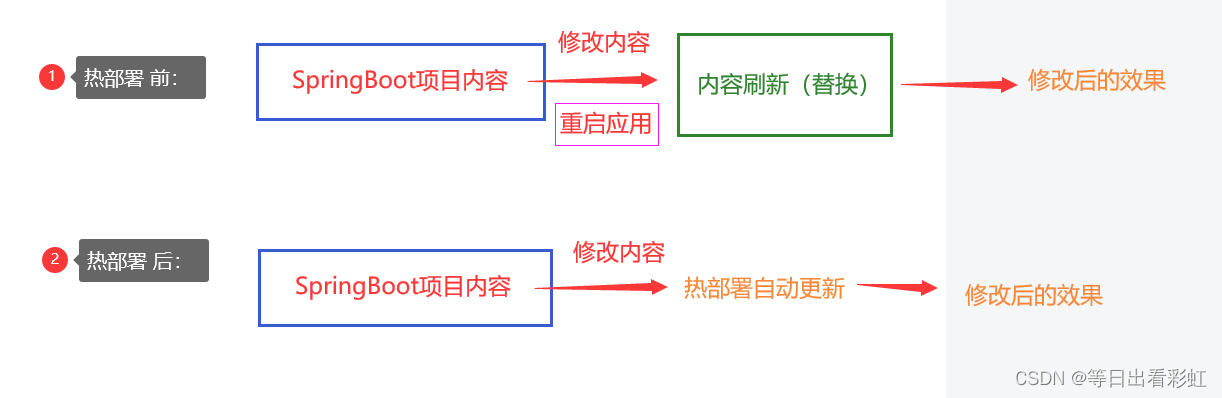
“热部署”,即在应用正在运行的时候升级软件(内容变动),不需要重新启动应用。

二、SpringBoot 热部署
对于 Java 应用程序来说,热部署就是 “ 在运行时更新Java类文件 ”。
基于热部署概念,SpringBoot热部署就是指 “ 修改SpringBoot 中Java类文件/静态资源内容” 时,不需要每一次都重启项目才能达到我们需要的效果。看下图:
三、SpringBoot热部署方法
1. 在SpringBoot项目的 pom.xml 文件中导入spring-boot-devtools依赖。
<dependencies>
        <dependency>
            <groupId>org.springframework.boot</groupId>
            <artifactId>spring-boot-starter-web</artifactId>
        </dependency>
        <dependency>
            <groupId>org.springframework.boot</groupId>
            <artifactId>spring-boot-starter-tomcat</artifactId>
        </dependency>
        <dependency>
            <groupId>junit</groupId>
            <artifactId>junit</artifactId>
            <version>3.8.1</version>
            <scope>test</scope>
        </dependency>


        <!-- 开启热部署 -->
        <dependency>
            <groupId>org.springframework.boot</groupId>
            <artifactId>spring-boot-devtools</artifactId>
            <!-- 设置为true 热部署才有效 -->
            <optional>true</optional>
            <scope>true</scope>
        </dependency>


    </dependencies>
    <build>
        <plugins>
            <plugin>
                <groupId>org.springframework.boot</groupId>
                <artifactId>spring-boot-maven-plugin</artifactId>
                <configuration>
                    <fork>true</fork>
                    <addResources>true</addResources>
                </configuration>
            </plugin>
        </plugins>
    </build>
2.在项目的 application.properties 配置文件中设置启动热部署
#配置项目热部署
spring.devtools.restart.enabled=true

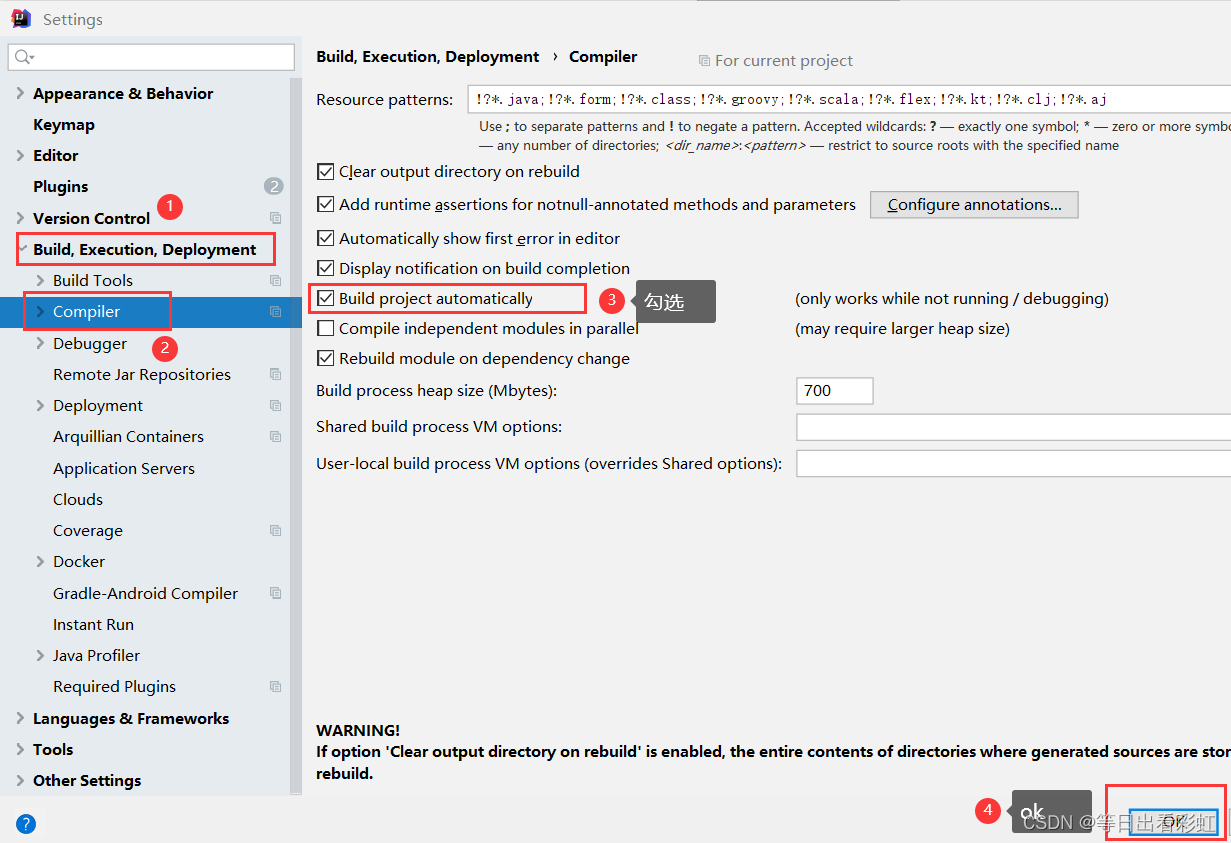
3. 点击 File --->> Settings --->> Build,Execution,Deployment --->> Compiler --->> 勾选 Build project automatically ,如下图所示。
4.按下键盘 " Ctrl + Shift + Alt + / " (必须都按下才会弹出弹窗),
点击 Registry… ( 即:打开注册表)选项。
5.在 Registry 面板上 找到 并 勾选 "compiler.automake.allow.when.app.running " 后,点击Close关闭,如下图。

6.测试是否热部署成功
(1)未修改前内容
package com.example.springboot;

import org.springframework.web.bind.annotation.RequestMapping;
import org.springframework.web.bind.annotation.RestController;

//测试 SpringBoot热部署

@RestController
@RequestMapping("/Hello")
public class HelloController{

    @RequestMapping("/index")
    public String index() {
        return "HelloWorld!"; //这是未进行热部署前的输出内容
    }
}

(2)修改输出的内容
package com.example.springboot;

import org.springframework.web.bind.annotation.RequestMapping;
import org.springframework.web.bind.annotation.RestController;

@RestController
@RequestMapping("/hello")
public class HelloController{

    @RequestMapping("/index")
    public String index() {

        //我们只是将 输出内容修改,测试热部署是否能帮我们自动更新内容
        return "Hello! Monster";

    }
}

7. 综上内容:SpringBoot热部署内容我们已经完成。


 4691
4691


 被折叠的 条评论
为什么被折叠?
被折叠的 条评论
为什么被折叠?
 到【灌水乐园】发言


