


前言
等待学位证发放的时间入坑了k210芯片,经过了一段时间学习,现在拿出来分享。如题目所示我会将这些部分总结。非常感谢这个k210项目 ,本文大体上是对这个项目的一些延申。
训练部分
环境配置
首先必须假设你有一些相应的基础(包括学习过maixpy文档,对常见目标检测算法训练有过了解,对linux命令行有过了解等等基础)。
本文主要训练平台为autodl环境配置如下
确保安装了tensorflow2.3以上版本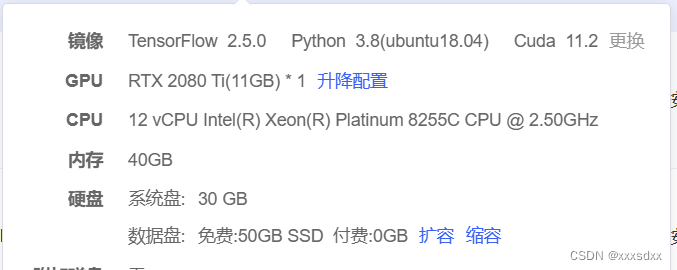
本文使用了相关的k210项目,项目地址如下:
yolo k210
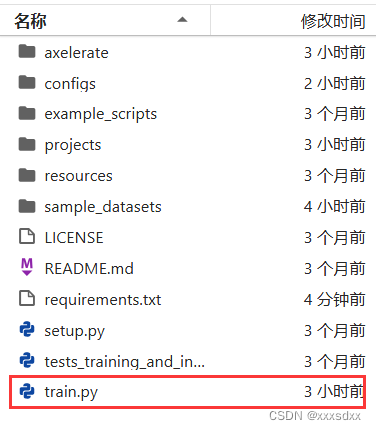
下载解压后进入主目录
首先需要修改requirements.txt文件
numpy==1.19.2
scikit-learn
imgaug==0.4
opencv-python~=4.5
matplotlib~=3.4
tqdm
pascal_voc_writer
tf2onnx
运行(建议一个一个运行)
pip install -r requirements.txt
如果环境报错建议查阅文档。
为了方便使用将axelerate目录下的train.py放到主目录
数据集划分
将训练集与测试集的图片与标签放在sample_datasets/detector文件夹中,这里的标签格式是voc格式,具体如下:
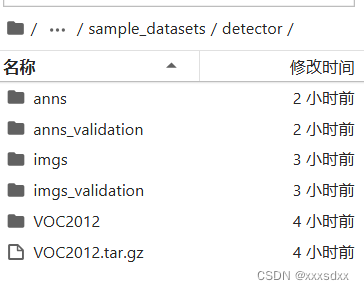
anns与imgs中放入训练集,anns_validation与imgs_validation中放入测试集(这里测试集与验证集合一了)。VOC2012是总的还没有分开的数据集,这里通过split.py进行数据集划分
import os
import shutil
import random

# 设置源文件夹和目标文件夹
src_img_dir = r'/root/autodl-tmp/aXeleRate-master/sample_datasets/detector/VOC2012/JPEGImages'
src_label_dir = r'/root/autodl-tmp/aXeleRate-master/sample_datasets/detector/VOC2012/Annotations'
dst_train_img_dir = r'/root/autodl-tmp/aXeleRate-master/sample_datasets/detector/imgs'
dst_train_label_dir = r'/root/autodl-tmp/aXeleRate-master/sample_datasets/detector/anns'
dst_val_img_dir = r'/root/autodl-tmp/aXeleRate-master/sample_datasets/detector/imgs_validation'
dst_val_label_dir = r'/root/autodl-tmp/aXeleRate-master/sample_datasets/detector/anns_validation'

# 创建目标文件夹
for dir_path in [dst_train_img_dir, dst_train_label_dir, dst_val_img_dir, dst_val_label_dir]:
    if not os.path.exists(dir_path):
        os.makedirs(dir_path)

# 获取所有图片和标签文件名
img_files = os.listdir(src_img_dir)
label_files = os.listdir(src_label_dir)

# 创建图片和标签的映射关系
img_label_map = {}
for img_file in img_files:
    base_name = os.path.splitext(img_file)[0]
    for label_file in label_files:
        if os.path.splitext(label_file)[0] == base_name:
            img_label_map[img_file] = label_file
            break

# 确保图片和标签一一对应
assert len(img_label_map) == len(img_files) == len(label_files)

# 将数据划分为训练集和验证集
num_samples = len(img_label_map)
val_ratio = 0.2  # 验证集占总样本的比例
val_size = int(num_samples * val_ratio)
img_files = list(img_label_map.keys())
random.shuffle(img_files)

val_img_files = img_files[:val_size]
train_img_files = img_files[val_size:]

# 移动图片和标签到目标文件夹
for img_file in val_img_files:
    src_img_path = os.path.join(src_img_dir, img_file)
    src_label_path = os.path.join(src_label_dir, img_label_map[img_file])
    dst_img_path = os.path.join(dst_val_img_dir, img_file)
    dst_label_path = os.path.join(dst_val_label_dir, img_label_map[img_file])
    shutil.move(src_img_path, dst_img_path)
    shutil.move(src_label_path, dst_label_path)

for img_file in train_img_files:
    src_img_path = os.path.join(src_img_dir, img_file)
    src_label_path = os.path.join(src_label_dir, img_label_map[img_file])
    dst_img_path = os.path.join(dst_train_img_dir, img_file)
    dst_label_path = os.path.join(dst_train_label_dir, img_label_map[img_file])
    shutil.move(src_img_path, dst_img_path)
    shutil.move(src_label_path, dst_label_path)

print(f"Data split complete. {val_size} samples in validation set, {num_samples - val_size} samples in training set.")
划分后得到了训练集和测试集,接下来要修改配置文件
修改json配置文件
在configs目录下新建一个.json文件用于配置训练时候的参数,configs文件中有许多json配置文件,建议参考。
{

    "model" : {
    	#网络功能(Detector表示检测)也有分类与分割
        "type":                 "Detector",
        #使用的backbone模型,['Full Yolo', 'Tiny Yolo', 'MobileNet1_0', 'MobileNet7_5', 'MobileNet5_0', 'MobileNet2_5', 'SqueezeNet', 'NASNetMobile', 'ResNet50', 'DenseNet121']
        "architecture":         "MobileNet7_5",
        #输入尺寸 这里需要注意如果你的k210板子摄像头像素320x240
        #建议修改为   "input_size": [224, 320]
        "input_size":           224,
        # anchor部分,如果想要yolo最后输出两个通道,那么建议设置为2x3x2的维度,也就是六个anchor坐标
        "anchors":              [[[0.76120044, 0.57155991], [0.6923348, 0.88535553], [0.47163042, 0.34163313]]],
        # 类别部分,与数据集类别对应
        "labels":               ["person", "bird", "cat", "cow", "dog", "horse", "sheep", "aeroplane", "bicycle", "boat", "bus", "car", "motorbike", "train","bottle", "chair", "diningtable", "pottedplant", "sofa", "tvmonitor"],
        # 一些置信度 iou 之类的参数,调参使用
        "obj_thresh" : 		    0.5,
        "iou_thresh" : 		    0.5,
        "coord_scale" : 		2.0,
        "object_scale" : 		2.0,
        "no_object_scale" : 	1.0
    },
    # 预训权重,full表示整个网络的,如果没有可以不填,如果有可以换上权重目录
    # backend 表示backbone部分的权重,部分模型没有,如果有的话在训练时会自动联网下载,也可以提前下载下来
    "weights" : {
        "full":   				"",
        "backend":              "imagenet"
    },
    "train" : {
    	# actual_epoch训练批次
        "actual_epoch":         100,
        # 训练集与验证集的目录
        "train_image_folder":   "/root/autodl-tmp/aXeleRate-master/sample_datasets/detector/imgs",
        "train_annot_folder":   "/root/autodl-tmp/aXeleRate-master/sample_datasets/detector/anns",
        # 这个参数建议看源码
        "train_times":          1,
        "valid_image_folder":   "/root/autodl-tmp/aXeleRate-master/sample_datasets/detector/imgs_validation",
        "valid_annot_folder":   "/root/autodl-tmp/aXeleRate-master/sample_datasets/detector/anns_validation",
        "valid_times":          1,
        # 注意这里每个模型的valid_metric不一样,建议参考例子json,或者训练时候打印一下valid_metric
        "valid_metric":         "recall",
        #batchsize
        "batch_size":           32,
        #学习率
        "learning_rate":        1e-3,
        # 保存的目录
        "saved_folder":   		"pascal",
        # 没用
        "first_trainable_layer": "",
        # 是否图像强化
        "augmentation":		true,
        # 应该是不训练只检测,没试过
        "is_only_detect" : 		false
    },
    "converter" : {
    	#这里如果要生成.tflite与kmodel需要加上,因为k210需要烧录.kmodel文件
        "type":   				["k210", "tflite"]
    }
}
修改完后就可以训练了
训练
上面已经将train.py放到了主目录,运行
python3 train.py -c configs/你的json文件.json
或者修改train.py文件中的
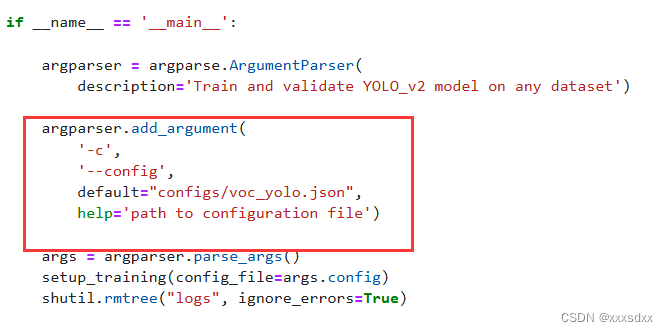
改为你的json文件
运行后会下载一些东西,例如ncc与一些预训练权重,需要等待一下。然后就可以看到训练过程了
如果报错
AttributeError: module ‘tensorflow.keras.optimizers’ has no attribute ‘legacy’
可能由于tensorflow库函数变动,建议删除legacy部分
例如
tf.keras.optimizers.legacy.Adam
改为
tf.keras.optimizers.Adam
然后等待训练完成
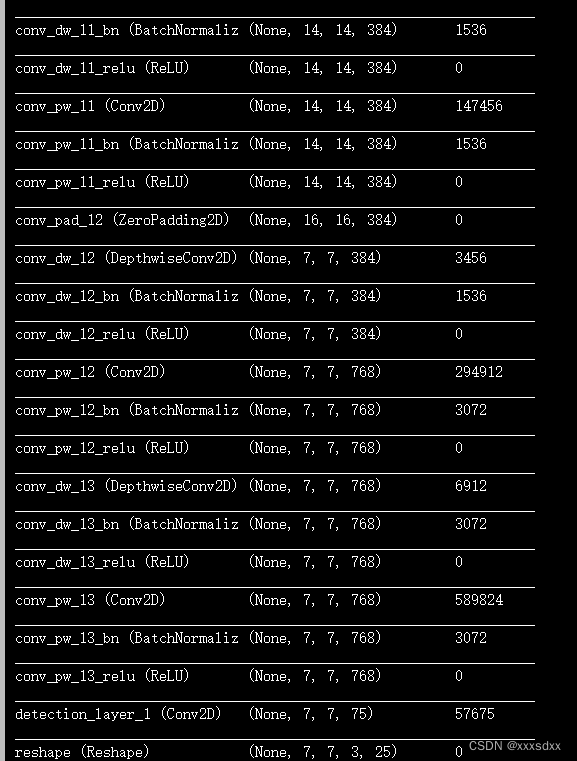
注意要记录一下网络结构图,也就是训练一开始弹出的
可以在终端中看到训练过程中损失之类的变化

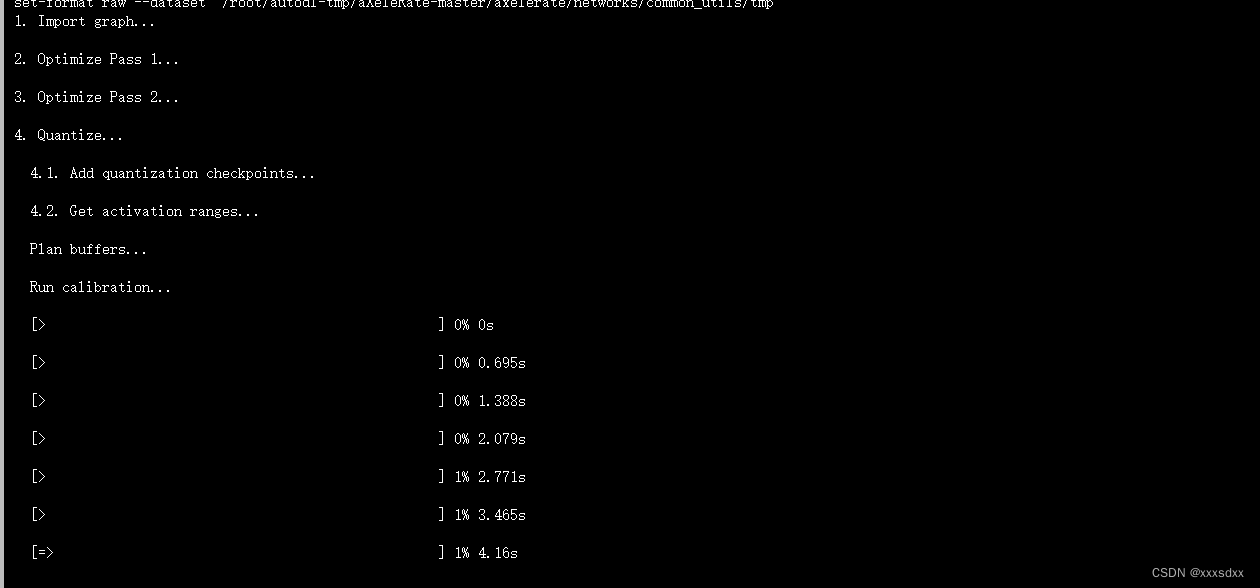
训练完成或者ctrl+c结束会自动调用ncc生成kmodel文件,等待kmodel生成。
结束后会在projects目录下生成.kmodel文件
将kmodel文件下载下来即可
部署部分
烧录固件
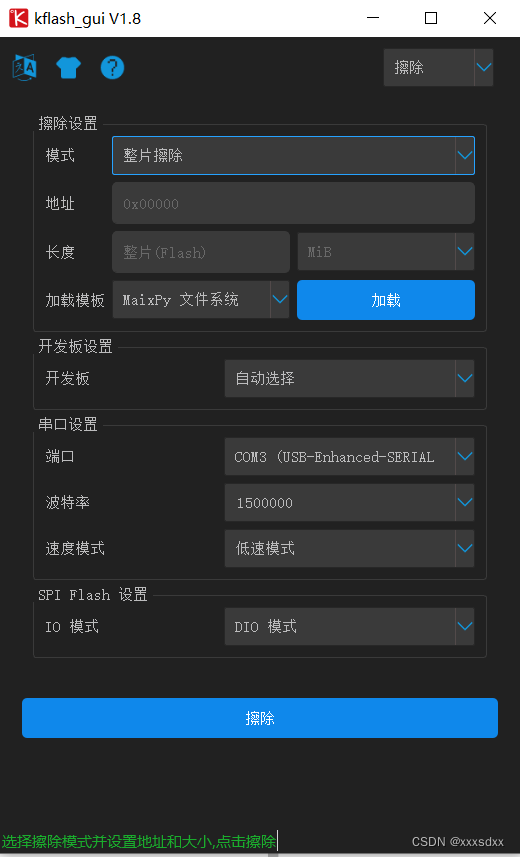
还是默认已经知道怎么使用k210开发板了,这里使用了项目作者的一个固件库而不使用官方提供的(官方的经过修改应该也可以,但我没试过,如果是官方的建议使用mini版本,因为完整版太大运行占用很多内存)maixpy.bin
使用kflash擦除并且烧录maixpy.bin
在.kmodel文件目录下新建一个json文件,描述模型的地址

json文件内容为模型的地址,一半为0x500000或者0x300000
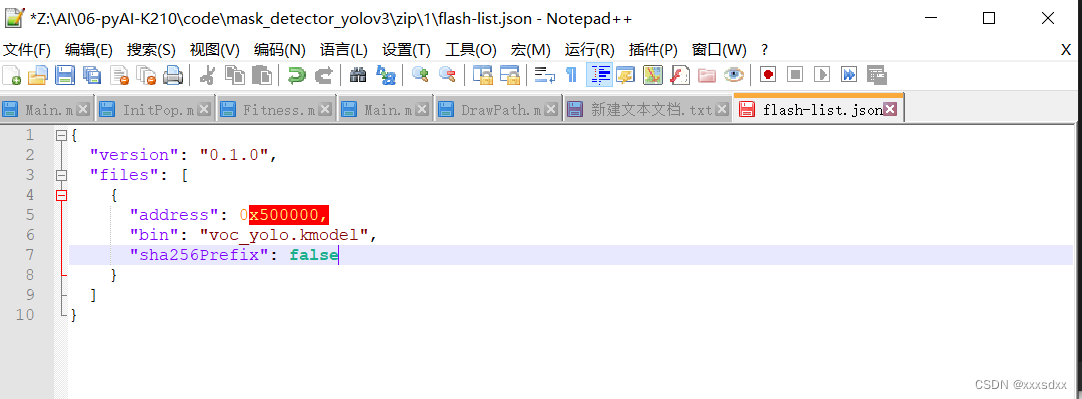
将两个文件一起压缩为zip格式,然后修改后缀名为kfpkg
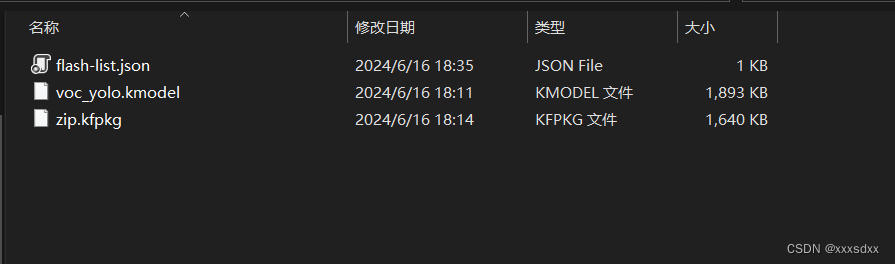
使用kflash烧录该kfpkg文件
运行模型
项目提供的固件支持IDE,所以本文使用MaixPY IDE进行运行,或者可以采用其他方式,maixpy文档中有介绍。运行代码如下
#tested with frimware 5-0.22
import sensor,image,lcd
import KPU as kpu

lcd.init()
#lcd.rotation(2)
sensor.reset()
sensor.set_pixformat(sensor.RGB565)
sensor.set_framesize(sensor.QVGA)
sensor.set_vflip(1)
sensor.run(1)

classes = ["person", "bird", "cat", "cow", "dog", "horse", "sheep", "aeroplane", "bicycle", "boat", "bus", "car", "motorbike", "train","bottle", "chair", "diningtable", "pottedplant", "sofa", "tvmonitor"]
task = kpu.load(0x500000) #change to "/sd/name_of_the_model_file.kmodel" if loading from SD card
a = kpu.set_outputs(task, 0, 7, 7, 75) #the actual shape needs to match the last layer shape of your model(before Reshape)
#a = kpu.set_outputs(task, 0, 14, 14, 75) #the actual shape needs to match the last layer shape of your model(before Reshape)
anchor = (0.76120044, 0.57155991, 0.6923348, 0.88535553, 0.47163042, 0.34163313)

a = kpu.init_yolo3(task, 0.3, 0.3, 3,1, anchor) #tweak the second parameter if you're getting too many false positives

while(True):
    img = sensor.snapshot()
    img_copy = img.resize(224,224)
    a = img_copy.pix_to_ai()
    code = kpu.run_yolo3(task, img_copy)
    if code:
        for i in code:
            a = img.draw_rectangle(i.rect(),color = (0, 255, 0))
            a = img.draw_string(i.x(), i.y() - 22, classes[i.classid()], color=(255,0,0), scale=1.5)
        a = lcd.display(img)
    else:
        a = lcd.display(img)
a = kpu.deinit(task)
现在来详细介绍这个代码中需要注意的事项
1、该部分修改为你烧录的地址,也就是json文件中的
task = kpu.load(0x500000) #change to "/sd/name_of_the_model_file.kmodel" if loading from SD card
2、特征层输出
a = kpu.set_outputs(task, 0, 7, 7, 75)
这里为重中之重,这里的五个参数分别为
task: 模型地址
0:表示第几个输出,这里0表示输出0
7:模型的宽(这里也就是上面的网络结构图中最终输出的宽高)
7:模型的高
==如果是224x224 那宽高都为7,如果为[224, 320]那么需要修改为a = kpu.set_outputs(task, 0, 10, 8, 21) ==
75:通道数,计算方法(类别数量+5)*anchor数量,例如这里类别20,anchor为3,那么(20+5)*3=75
3、该部分为类别数量
classes = ["person", "bird", "cat", "cow", "dog", "horse", "sheep", "aeroplane", "bicycle", "boat", "bus", "car", "motorbike", "train","bottle", "chair", "diningtable", "pottedplant", "sofa", "tvmonitor"]
4、该部分为anchor
anchor = (0.76120044, 0.57155991, 0.6923348, 0.88535553, 0.47163042, 0.34163313)
5、注意这里使用的是init_yolo3并且参数与官方的init_yolo2不同
a = kpu.init_yolo3(task, 0.3, 0.3, 3,1, anchor) #tweak the second parameter if you're getting too many false positives
6、这里要注意,如果你的模型训练时候设置输入格式为224x224则需要下面两行代码,如果为[224, 320]则不需要并且修改code = kpu.run_yolo3(task, img_copy)中的img_copy为img
    img_copy = img.resize(224,224)
    a = img_copy.pix_to_ai()
7、也是注意这里与官方不同
code = kpu.run_yolo3(task, img_copy)
运行即可得到结果
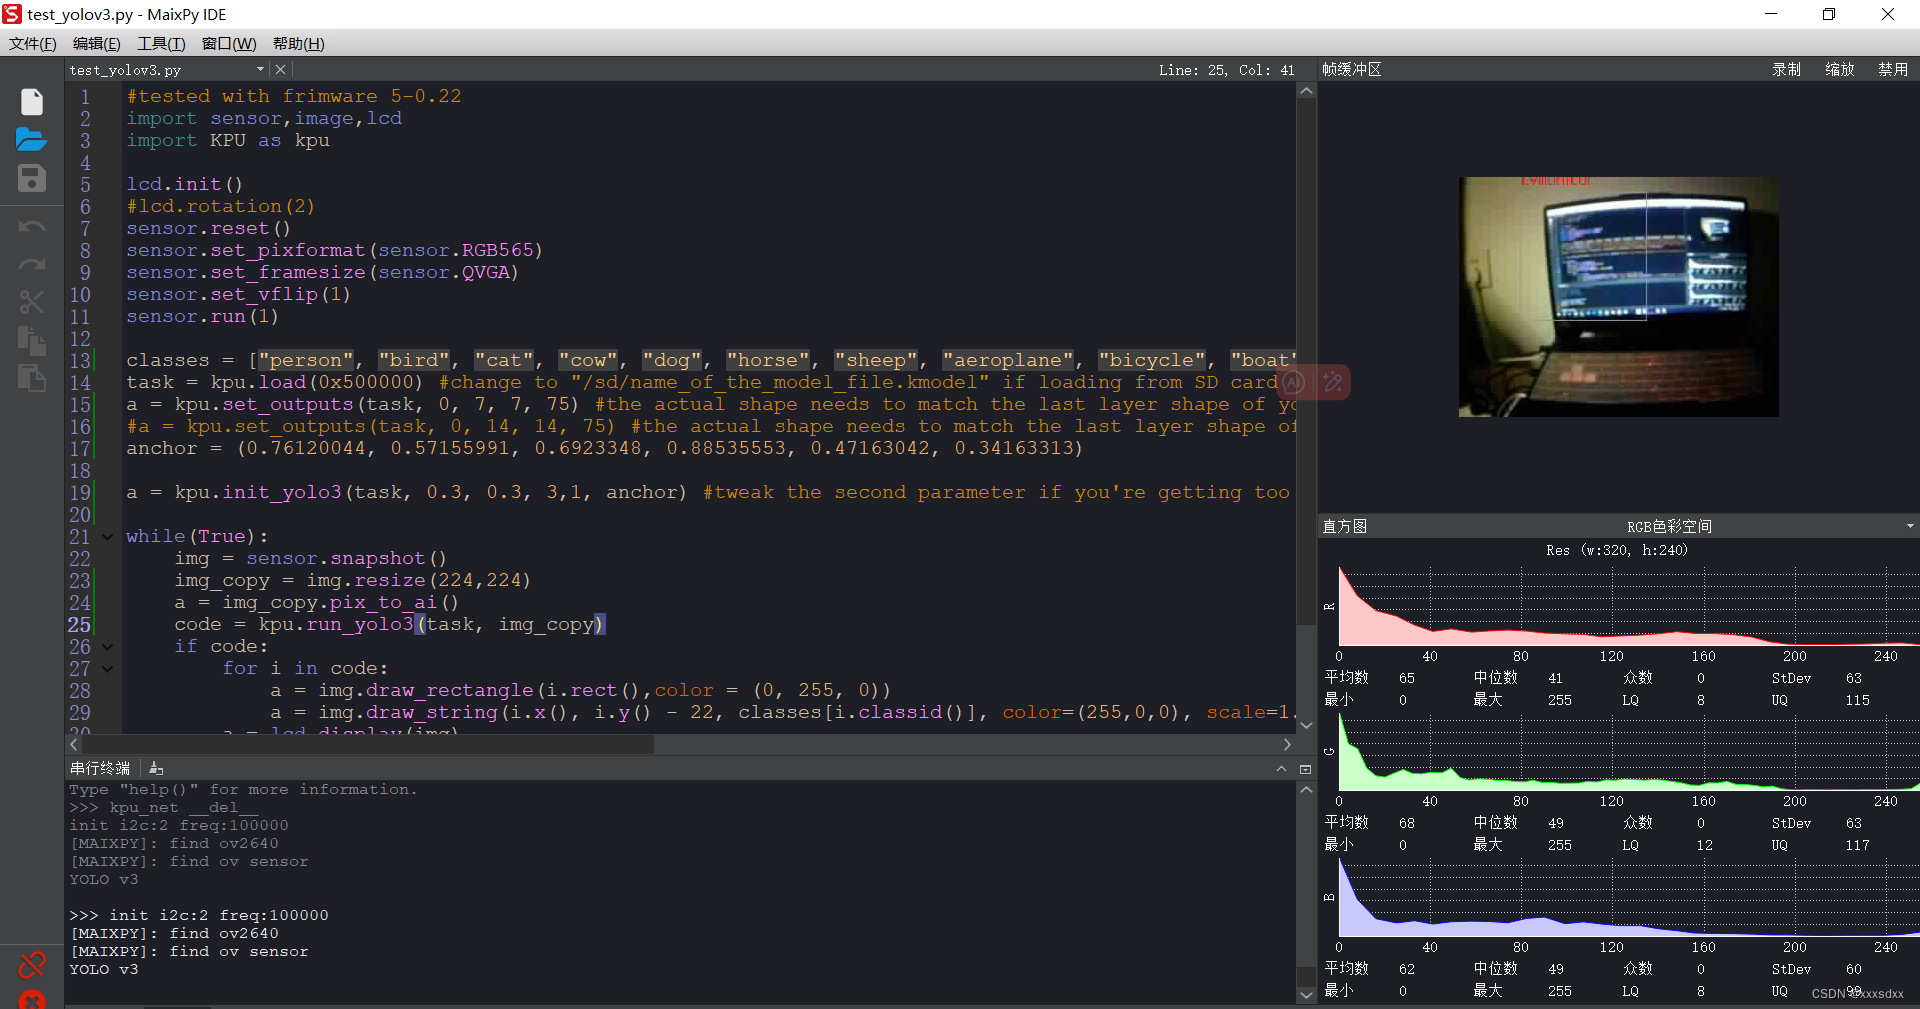
可以看到运行没问题,只是我这里训练的批次有点少,所以检测精度较差
一些小贴士
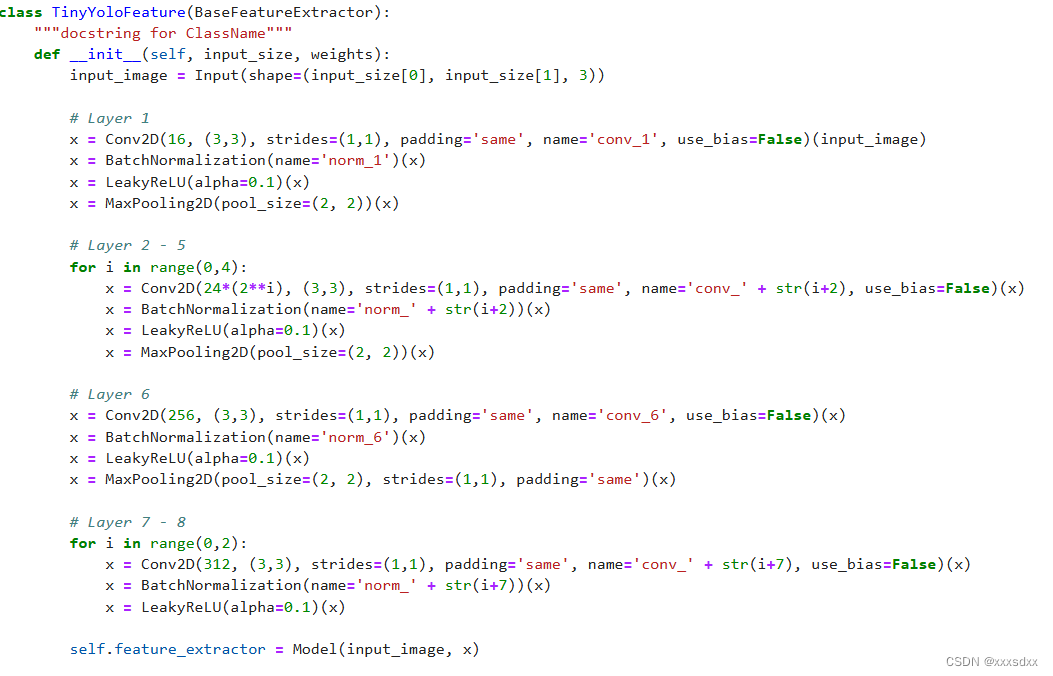
网络魔改
如果你想修改其中的网络结构那么可以修改axelerate\networks\common_utils\feature.py部分,其中有许多模块进行修改即可(做过网络魔改的应该懂)
输出部分
众所周知,yolo大多是三个输出,这里实际上只用到了一个输出,从anchor中也能看出,上面也提到了如果将anchor设置成2x3x2维度即可两个输出,至于三个输出估计占用内存太大,不太适合。如果是两个输出那么IDE中的程序需要进行修改为
a = kpu.set_outputs(task, 0, 7, 7, 75)
a = kpu.set_outputs(task, 1, 14, 14, 75)
anchor与init_yolo3也要进行修改
a = kpu.init_yolo3(task, 0.3, 0.3, 3,1, anchor)
改为a = kpu.init_yolo3(task, 0.3, 0.3, 3,2, anchor)
后记
以上就是我对k210的一些理解,可能语言组织的不好也请见谅。k210也就玩到这里了,如果有人想要二手的k210开发板可以在咸鱼上联系我咸鱼网址,接下来可能会实时rk3588


 7957
7957


 被折叠的 条评论
为什么被折叠?
被折叠的 条评论
为什么被折叠?
 到【灌水乐园】发言


