


由于尚硅谷的视频是通过Eclipse软件来做的,其中有些操作与IDEA上有所区别,所以我在这里将IDEA区别于Eclipse的操作、操作过程中涉及的源码(与视频的源码略有出入)以及大家可能遇到的种种问题分享给大家,这些源码在我这里均是通过测试的,仅供参考!
1 SpringSecurity环境搭建
修改parent\pom.xml
<properties>
        <!-- 声明属性, 对 Spring 的版本进行统一管理 -->
        <!-- spring.version是别名,随便起,但要跟dependences标签中一致 -->
        <spring.version>5.2.11.RELEASE</spring.version>
        <!-- 声明属性, 对 SpringSecurity 的版本进行统一管理 -->
        <spring.security.version>5.4.2</spring.security.version>
        <maven.compiler.source>1.8</maven.compiler.source>
        <maven.compiler.target>1.8</maven.compiler.target>
    </properties>
<!-- SpringSecurity 对 Web 应用进行权限管理 -->
<!-- https://mvnrepository.com/artifact/org.springframework.security/spring-security-web -->
<dependency>
    <groupId>org.springframework.security</groupId>
    <artifactId>spring-security-web</artifactId>
    <version>4.2.10.RELEASE</version>
</dependency>
<!-- SpringSecurity 配置 -->
<!-- https://mvnrepository.com/artifact/org.springframework.security/spring-security-config -->
<dependency>
    <groupId>org.springframework.security</groupId>
    <artifactId>spring-security-config</artifactId>
    <version>4.2.10.RELEASE</version>
</dependency>
<!-- SpringSecurity 标签库 -->
<!-- https://mvnrepository.com/artifact/org.springframework.security/spring-security-taglibs -->
<dependency>
    <groupId>org.springframework.security</groupId>
    <artifactId>spring-security-taglibs</artifactId>
    <version>4.2.10.RELEASE</version>
</dependency>
修改component\pom.xml
<dependency>
    <groupId>org.springframework.security</groupId>
    <artifactId>spring-security-web</artifactId>
</dependency>
<dependency>
    <groupId>org.springframework.security</groupId>
    <artifactId>spring-security-config</artifactId>
</dependency>
<dependency>
    <groupId>org.springframework.security</groupId>
    <artifactId>spring-security-taglibs</artifactId>
</dependency>
修改webui\src\main\webapp\WEB-INF\web.xml
<!-- SpringSecurity 的配置,filter-name必须是springSecurityFilterChain -->
<filter>
    <filter-name>springSecurityFilterChain</filter-name>
    <filter-class>org.springframework.web.filter.DelegatingFilterProxy</filter-class>
</filter>
<filter-mapping>
    <filter-name>springSecurityFilterChain</filter-name>
    <url-pattern>/*</url-pattern>
</filter-mapping>
新建component\src\main\java\com\atguigu\crowd\mvc\config\WebAppSecurityConfig.java
package com.atguigu.security.config;

import org.springframework.context.annotation.Configuration;
import org.springframework.security.config.annotation.web.configuration.EnableWebSecurity;
import org.springframework.security.config.annotation.web.configuration.WebSecurityConfigurerAdapter;

@Configuration
@EnableWebSecurity
public class WebApplicationConfig extends WebSecurityConfigurerAdapter {
}
2 SSM与SpringSecurity整合
新建component\src\main\java\org\springframework\web\filter\DelegatingFilterProxy.java
package org.springframework.web.filter;

//
// Source code recreated from a .class file by IntelliJ IDEA
// (powered by FernFlower decompiler)
//

import java.io.IOException;
import javax.servlet.*;

import org.springframework.context.ConfigurableApplicationContext;
import org.springframework.lang.Nullable;
import org.springframework.util.Assert;
import org.springframework.web.context.WebApplicationContext;
import org.springframework.web.context.support.WebApplicationContextUtils;
import org.springframework.web.servlet.FrameworkServlet;

public class DelegatingFilterProxy extends GenericFilterBean {
    @Nullable
    private String contextAttribute;
    @Nullable
    private WebApplicationContext webApplicationContext;
    @Nullable
    private String targetBeanName;
    private boolean targetFilterLifecycle;
    @Nullable
    private volatile Filter delegate;
    private final Object delegateMonitor;

    public DelegatingFilterProxy() {
        this.targetFilterLifecycle = false;
        this.delegateMonitor = new Object();
    }

    public DelegatingFilterProxy(Filter delegate) {
        this.targetFilterLifecycle = false;
        this.delegateMonitor = new Object();
        Assert.notNull(delegate, "Delegate Filter must not be null");
        this.delegate = delegate;
    }

    public DelegatingFilterProxy(String targetBeanName) {
        this(targetBeanName, (WebApplicationContext)null);
    }

    public DelegatingFilterProxy(String targetBeanName, @Nullable WebApplicationContext wac) {
        this.targetFilterLifecycle = false;
        this.delegateMonitor = new Object();
        Assert.hasText(targetBeanName, "Target Filter bean name must not be null or empty");
        this.setTargetBeanName(targetBeanName);
        this.webApplicationContext = wac;
        if (wac != null) {
            this.setEnvironment(wac.getEnvironment());
        }

    }

    public void setContextAttribute(@Nullable String contextAttribute) {
        this.contextAttribute = contextAttribute;
    }

    @Nullable
    public String getContextAttribute() {
        return this.contextAttribute;
    }

    public void setTargetBeanName(@Nullable String targetBeanName) {
        this.targetBeanName = targetBeanName;
    }

    @Nullable
    protected String getTargetBeanName() {
        return this.targetBeanName;
    }

    public void setTargetFilterLifecycle(boolean targetFilterLifecycle) {
        this.targetFilterLifecycle = targetFilterLifecycle;
    }

    protected boolean isTargetFilterLifecycle() {
        return this.targetFilterLifecycle;
    }

    @Override
    protected void initFilterBean() throws ServletException {
        synchronized(this.delegateMonitor) {
            if (this.delegate == null) {
                if (this.targetBeanName == null) {
                    this.targetBeanName = this.getFilterName();
                }

//                WebApplicationContext wac = this.findWebApplicationContext();
//                if (wac != null) {
//                    this.delegate = this.initDelegate(wac);
//                }
            }

        }
    }

    @Override
    public void doFilter(ServletRequest request, ServletResponse response, FilterChain filterChain)
            throws ServletException, IOException {

        // Lazily initialize the delegate if necessary.
        Filter delegateToUse = this.delegate;
        if (delegateToUse == null) {
            synchronized (this.delegateMonitor) {
                delegateToUse = this.delegate;
                if (delegateToUse == null) {
                    // 把原来的查找 IOC 容器的代码注释掉
                    // WebApplicationContext wac = findWebApplicationContext();

                    // 按我们自己的需要重新编写
                    // 1.获取 ServletContext 对象
                    ServletContext sc = this.getServletContext();

                    // 2.拼接 SpringMVC 将 IOC 容器存入 ServletContext 域的时候使用的属性名
                    String servletName = "springDispatcherServlet";
                    String attrName = FrameworkServlet.SERVLET_CONTEXT_PREFIX + servletName;

                    // 3.根据 attrName 从 ServletContext 域中获取 IOC 容器对象
                    WebApplicationContext wac = (WebApplicationContext)sc.getAttribute(attrName);

                    if (wac == null) {
                        throw new IllegalStateException("No WebApplicationContext found: " +
                                "no ContextLoaderListener or DispatcherServlet registered?");
                    }
                    delegateToUse = initDelegate(wac);
                }
                this.delegate = delegateToUse;
            }
        }

        // Let the delegate perform the actual doFilter operation.
        invokeDelegate(delegateToUse, request, response, filterChain);
    }

    public void destroy() {
        Filter delegateToUse = this.delegate;
        if (delegateToUse != null) {
            this.destroyDelegate(delegateToUse);
        }

    }

    @Nullable
    protected WebApplicationContext findWebApplicationContext() {
        if (this.webApplicationContext != null) {
            if (this.webApplicationContext instanceof ConfigurableApplicationContext) {
                ConfigurableApplicationContext cac = (ConfigurableApplicationContext)this.webApplicationContext;
                if (!cac.isActive()) {
                    cac.refresh();
                }
            }

            return this.webApplicationContext;
        } else {
            String attrName = this.getContextAttribute();
            return attrName != null ? WebApplicationContextUtils.getWebApplicationContext(this.getServletContext(), attrName) : WebApplicationContextUtils.findWebApplicationContext(this.getServletContext());
        }
    }

    protected Filter initDelegate(WebApplicationContext wac) throws ServletException {
        String targetBeanName = this.getTargetBeanName();
        Assert.state(targetBeanName != null, "No target bean name set");
        Filter delegate = (Filter)wac.getBean(targetBeanName, Filter.class);
        if (this.isTargetFilterLifecycle()) {
            delegate.init(this.getFilterConfig());
        }

        return delegate;
    }

    protected void invokeDelegate(Filter delegate, ServletRequest request, ServletResponse response, FilterChain filterChain) throws ServletException, IOException {
        delegate.doFilter(request, response, filterChain);
    }

    protected void destroyDelegate(Filter delegate) {
        if (this.isTargetFilterLifecycle()) {
            delegate.destroy();
        }

    }
}
3 SpringSecurity配置
3.1 放行登录页和静态资源
修改component\src\main\java\com\atguigu\crowd\mvc\config\WebAppSecurityConfig.java
@Override
    protected void configure(HttpSecurity security) throws Exception {

        security
                .authorizeRequests()                            // 对请求进行授权
                .antMatchers("/admin/to/login/page.html")  // 针对登录页进行设置
                .permitAll()
                .antMatchers("/bootstrap/**")       // 针对静态资源进行设置, 无条件访问
                .permitAll()
                .antMatchers("/css/**")
                .permitAll()
                .antMatchers("/fonts/**")
                .permitAll()
                .antMatchers("/img/**")
                .permitAll()
                .antMatchers("/jquery/**")
                .permitAll()
                .antMatchers("/js/**")
                .permitAll()
                .antMatchers("/layer/**")
                .permitAll()
                .antMatchers("/script/**")
                .permitAll()
                .antMatchers("/ztree/**")
                .permitAll()
                .anyRequest()
                .authenticated();

    }
测试结果为可以正常登录http://localhost:8080/atcrowdfunding02_admin_webui_war_exploded/admin/to/login/page.html即可
3.2 提交登录表单做内存认证
修改webui\src\main\webapp\WEB-INF\admin-login.jsp
<form action="security/do/login.html" method="post" class="form-signin" role="form">
    <h2 class="form-signin-heading"><i class="glyphicon glyphicon-log-in"></i>管理员登录</h2>
    <p>${requestScope.exception.message}</p>
    <p>${SPRING_SECURITY_LAST_EXCEPTION.message }</p>
    <div class="form-group has-success has-feedback">
        <input type="text" name="loginAcct" class="form-control" id="inputSuccess4" placeholder="请输入登录账号" autofocus>
        <span class="glyphicon glyphicon-user form-control-feedback"></span>
    </div>
    <div class="form-group has-success has-feedback">
        <input type="text" name="userPswd" class="form-control" id="inputSuccess5" placeholder="请输入登录密码" style="margin-top:10px;">
        <span class="glyphicon glyphicon-lock form-control-feedback"></span>
    </div>
    <button type="submit" class="btn btn-lg btn-success btn-block">登录</button>
</form>
修改component\src\main\java\com\atguigu\crowd\mvc\config\WebAppSecurityConfig.java
@Override protected void configure(AuthenticationManagerBuilder builder) throws Exception {
    // 临时使用内存版登录的模式测试代码
    builder.inMemoryAuthentication().withUser("tom").password("123123").roles("ADMIN");
}
.and()
    .csrf()
    .disable()                               // 关闭防跨站请求伪造
    .formLogin()                                    // 开启表单登录功能
    .loginPage("/admin/to/login/page.html")                // 指定登录页面
    .loginProcessingUrl("/security/do/login.html")    // 指定处理登录请求的地址
    .defaultSuccessUrl("/admin/to/main.html")         // 指定登录成功后前往的地址
    .usernameParameter("loginAcct")                 // 账号的请求参数名称
    .passwordParameter("userPswd")                  // 密码的请求参数名称
注册拦截器关闭:修改webui\src\main\resources\spring-web-mvc.xml
<!-- <!–注册拦截器–>-->
<!-- <mvc:interceptors>-->
<!-- <mvc:interceptor>-->
<!-- <!– mvc:mapping配置要拦截的资源–>-->
<!-- <!– /*对应一层路径,比如:/aaa –>-->
<!-- <!– /**对应多层路径,比如:/aaa/bbb或/aaa/bbb/ccc或/aaa/bbb/ccc/ddd –>-->
<!-- <mvc:mapping path="/**"/>-->
<!-- <!– mvc:exclude-mapping配置不拦截的资源 –>-->
<!-- <mvc:exclude-mapping path="/admin/to/login/page.html"/>-->
<!-- <mvc:exclude-mapping path="/admin/do/login.html"/>-->
<!-- <mvc:exclude-mapping path="/admin/do/logout.html"/>-->
<!-- <!–配置拦截器类–>-->
<!-- <bean class="com.atguigu.crowd.mvc.interceptor.LoginInterceptor"/>-->
<!-- </mvc:interceptor>-->
<!-- </mvc:interceptors>-->
测试结果为可以正常登录http://localhost:8080/atcrowdfunding02_admin_webui_war_exploded/admin/to/main.html即可
3.3 退出登录
修改component\src\main\java\com\atguigu\crowd\mvc\config\WebAppSecurityConfig.java
.and()
    .logout()                                       // 退出登录功能
    .logoutUrl("/security/do/logout.html")
    .logoutSuccessUrl("/security/do/login.html")
修改webui\src\main\webapp\WEB-INF\include-nav.jsp
<li><a href="security/do/logout.do"><i class="glyphicon glyphicon-off"></i> 退出系统</a></li>
测试结果在进入main界面后右上角可以退出到login-page界面即可
3.4 把内存登录改成数据库登录
修改component\src\main\java\com\atguigu\crowd\service\api\AuthService.java
List<String> getAssignedAuthNameByAdminId(Integer adminId);
修改component\src\main\java\com\atguigu\crowd\service\impl\AuthServiceImpl.java
@Override
public List<String> getAssignedAuthNameByAdminId(Integer adminId) {

    return authMapper.selectAssignedAuthNameByAdminId(adminId);
}
并新增selectAssignedAuthNameByAdminId()方法
修改webui\src\main\resources\mybatis\mapper\AuthMapper.xml
<select id="selectAssignedAuthNameByAdminId" resultType="string">
    select distinct t_auth.name
    from t_auth
    left join inner_role_auth on t_auth.id=inner_role_auth.auth_id
    left join inner_admin_role iar on inner_role_auth.role_id = iar.role_id
    where iar.admin_id=#{adminId} AND t_auth.name != "" AND t_auth.name IS NOT NULL;
</select>
新建component\src\main\java\com\atguigu\crowd\mvc\config\SecurityAdmin.java
package com.atguigu.crowd.mvc.config;

import com.atguigu.crowd.entity.Admin;
import org.springframework.security.core.GrantedAuthority;
import org.springframework.security.core.userdetails.User;

import java.util.List;

// config包下
public class SecurityAdmin extends User {

    private static final long serialVersionUID = 1L;

    // 原始的 Admin 对象, 包含 Admin 对象的全部属性
    private Admin originalAdmin;

    public SecurityAdmin(Admin originalAdmin, List<GrantedAuthority> authorities) {
        super(originalAdmin.getLoginAcct(), originalAdmin.getUserPswd(), authorities);
        this.originalAdmin = originalAdmin;
    }

    // 对外提供的获取原始 Admin 对象的 getXxx()方法
    public Admin getOriginalAdmin() {
        return originalAdmin;
    }
}
修改component\src\main\java\com\atguigu\crowd\service\api\AdminService.java
Admin getAdminByLoginAcct(String username);
修改component\src\main\java\com\atguigu\crowd\service\impl\AdminServiceImpl.java
@Override
public Admin getAdminByLoginAcct(String username) {

    AdminExample example = new AdminExample();

    AdminExample.Criteria criteria = example.createCriteria();

    criteria.andLoginAcctEqualTo(username);

    return adminMapper.selectByExample(example).get(0);

}
修改component\src\main\java\com\atguigu\crowd\mvc\config\WebAppSecurityConfig.java
@Autowired
private UserDetailsService userDetailsService;

@Override protected void configure(AuthenticationManagerBuilder builder) throws Exception {
    //        // 临时使用内存版登录的模式测试代码
    //        builder.inMemoryAuthentication().withUser("tom").password("123123").roles("ADMIN");
    // 正式功能中使用基于数据库的认证
    builder.userDetailsService(userDetailsService);
}
并将数据库中MD5加密的密码暂时改回来:

测试结果为可以正常登录http://localhost:8080/atcrowdfunding02_admin_webui_war_exploded/admin/to/main.html即可
3.5 密码加密
在SQLyog中修改t_admin表格:
ALTER TABLE t_admin MODIFY user_pswd CHAR(100) NOT NULL;
修改webui\src\main\resources\spring-persist-tx.xml
<!-- 配置 BCryptPasswordEncoder -->
<bean id="passwordEncoder" class="org.springframework.security.crypto.bcrypt.BCryptPasswordEncoder"/>
修改component\src\main\java\com\atguigu\crowd\mvc\config\WebAppSecurityConfig.java
@Autowired
private PasswordEncoder passwordEncoder;

@Override
protected void configure(AuthenticationManagerBuilder builder) throws Exception {
    //        // 临时使用内存版登录的模式测试代码
    //        builder.inMemoryAuthentication().withUser("tom").password("123123").roles("ADMIN");
    // 正式功能中使用基于数据库的认证
    builder
        .userDetailsService(userDetailsService)
        .passwordEncoder(passwordEncoder);
}
修改component\src\main\java\com\atguigu\crowd\service\impl\AdminServiceImpl.java
@Autowired
private BCryptPasswordEncoder passwordEncoder;

@Override
public void saveAdmin(Admin admin) {
    // 1 密码加密
    String userPswd = admin.getUserPswd();
    //        userPswd = CrowdUtil.md5(userPswd);
    userPswd = passwordEncoder.encode(userPswd);
    admin.setUserPswd(userPswd);
}
将t_admin密码改为盐值加密的密码:

测试结果为可以正常登录http://localhost:8080/atcrowdfunding02_admin_webui_war_exploded/admin/to/main.html即可
3.6 在页面上显示用户昵称
修改webui\src\main\webapp\WEB-INF\include-nav.jsp
<%@taglib prefix="security" uri="http://www.springframework.org/security/tags" %>
<%--${sessionScope.loginAdmin.userName}--%>
<security:authentication property="principal.originalAdmin.userName"/>
测试结果为登录http://localhost:8080/atcrowdfunding02_admin_webui_war_exploded/admin/to/main.html后在右上角成功显示用户昵称即可
3.7 密码的擦除
修改component\src\main\java\com\atguigu\crowd\mvc\config\SecurityAdmin.java
public SecurityAdmin(Admin originalAdmin, List<GrantedAuthority> authorities) {

    // 调用父类构造器
    super(originalAdmin.getLoginAcct(), originalAdmin.getUserPswd(), authorities);

    // 给本类的 this.originalAdmin 赋值
    this.originalAdmin = originalAdmin;

    // 将原始 Admin 对象中的密码擦除,密码已经传给父类User构造器,因此这里擦除不影响
    this.originalAdmin.setUserPswd(null);
}
3.8 权限控制
在SQLyog中修改t_auth表格:
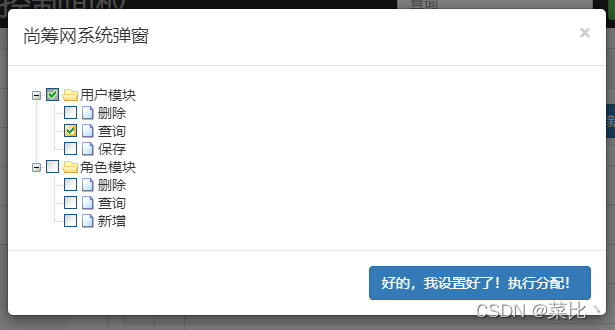
INSERT INTO t_auth(id,`name`,title,category_id) VALUES(8,'user:save','保存',1);
并按照视频要求分配好admin和role的关系(见第六章)
3.8.1 访问 Admin 分页功能时具备“经理” 角色
修改component\src\main\java\com\atguigu\crowd\mvc\config\WebAppSecurityConfig.java
.antMatchers("/admin/get/page.html")
.hasRole("经理")
.anyRequest()                                   // 其它任意请求
.authenticated()                                // 认证登录后访问
测试:当使用roleOperator进入用户维护时,会显示

3.8.2 访问 Role 的分页功能时具备“部长” 角色
修改component\src\main\java\com\atguigu\crowd\mvc\config\WebAppSecurityConfig.java
@Configuration // 当前类为配置类
@EnableWebSecurity  // 启用Web环境下权限控制功能
@EnableGlobalMethodSecurity(prePostEnabled = true) // 启用全局方法权限控制功能, 并且设置 prePostEnabled = true。 保证@PreAuthority、@PostAuthority、 @PreFilter、 @PostFilter 生效
public class WebAppSecurityConfig extends WebSecurityConfigurerAdapter {}
修改component\src\main\java\com\atguigu\crowd\mvc\handler\RoleHandler.java
// @ResponseBody
@PreAuthorize("hasRole('部长')")
@RequestMapping("/role/get/page/info.json")
public ResultEntity<PageInfo<Role>> getPageInfo(@RequestParam(value = "pageNum", defaultValue = "1") Integer pageNum,
                                                @RequestParam(value = "pageSize", defaultValue = "5") Integer pageSize,
                                                @RequestParam(value = "keyword", defaultValue = "") String keyword) {}
修改component\src\main\java\com\atguigu\crowd\mvc\config\CrowdExceptionResolver.java
@ExceptionHandler(value = Exception.class)
public ModelAndView resolveException(Exception exception,
                                     HttpServletRequest request,
                                     HttpServletResponse response) throws IOException {
    String viewName = "admin-login";
    return commonResolveException(viewName,exception,request,response);
}
测试:当使用adminOperator进入角色维护时,会显示

3.8.3 访问 Admin 保存功能时具备 user:save 权限
修改component\src\main\java\com\atguigu\crowd\mvc\handler\AdminHandler.java
// 新增成员
@PreAuthorize("hasAuthority('user:save')")
@RequestMapping("/admin/save.html")
public String save(Admin admin) {
    adminService.saveAdmin(admin);
    return "redirect:/admin/get/page.html?pageNum="+Integer.MAX_VALUE;
}
3.8.4 访问 Admin 分页功能时具备“经理” 角色或“user:get” 权限二者之一
修改component\src\main\java\com\atguigu\crowd\mvc\config\WebAppSecurityConfig.java
.antMatchers("/admin/get/page.html")
    .access("hasRole('经理') OR hasAuthority('user:get')")
    //                .hasRole("经理")
    .anyRequest()
测试:使用roleOperator账号登录,进入角色维护,修改部长的权限:
重启服务器,可以通过roleOperator账号进入用户维护界面:

3.9 页面元素的权限控制
修改webui\src\main\webapp\WEB-INF\admin-main.jsp
<%@taglib uri="http://www.springframework.org/security/tags" prefix="security" %>
<security:authorize access="hasRole('经理')">
    <div class="col-xs-6 col-sm-3 placeholder">
        <img data-src="holder.js/200x200/auto/sky" class="img-responsive" alt="Generic placeholder thumbnail">
        <h4>Label</h4>
        <span class="text-muted">Something else</span>
    </div>
</security:authorize>
新建component\src\main\java\org\springframework\security\taglibs\authz\AbstractAuthorizeTag.java,并将源码复制过来,再修改:
    private SecurityExpressionHandler<FilterInvocation> getExpressionHandler() throws IOException {
        // ApplicationContext appContext = SecurityWebApplicationContextUtils.findRequiredWebApplicationContext(getServletContext());

        // 1.获取 ServletContext 对象
        ServletContext servletContext = getServletContext();

        // 2.拼接 SpringMVC 在 ServletContext 域中的属性名
        String attrName = FrameworkServlet.SERVLET_CONTEXT_PREFIX + "springDispatcherServlet";

        // 3.从 ServletContext 域中获取 IOC 容器对象
        ApplicationContext appContext = (ApplicationContext)servletContext.getAttribute(attrName);

        Map<String, SecurityExpressionHandler> handlers = appContext.getBeansOfType(SecurityExpressionHandler.class);
        Iterator var3 = handlers.values().iterator();

        SecurityExpressionHandler h;
        do {
            if (!var3.hasNext()) {
                throw new IOException("No visible WebSecurityExpressionHandler instance could be found in the application context. There must be at least one in order to support expressions in JSP 'authorize' tags.");
            }

            h = (SecurityExpressionHandler)var3.next();
        } while(!FilterInvocation.class.equals(GenericTypeResolver.resolveTypeArgument(h.getClass(), SecurityExpressionHandler.class)));

        return h;
    }
测试:登录roleOperator账号:

而登录adminOperator账号:


 1138
1138


 被折叠的 条评论
为什么被折叠?
被折叠的 条评论
为什么被折叠?
 到【灌水乐园】发言


