


目录
SqlSessionFactoryBuilder、SqlSessionFactory对象作用域
了解myBatis
myBatis本质是对JDBC的封装,通过MyBatis完成CRUD(CRUD是指在做计算处理时的增加(Create)、读取查询(Retrieve)、更新(Update)和删除(Delete)几个单词的首字母简写)属于持久层框架
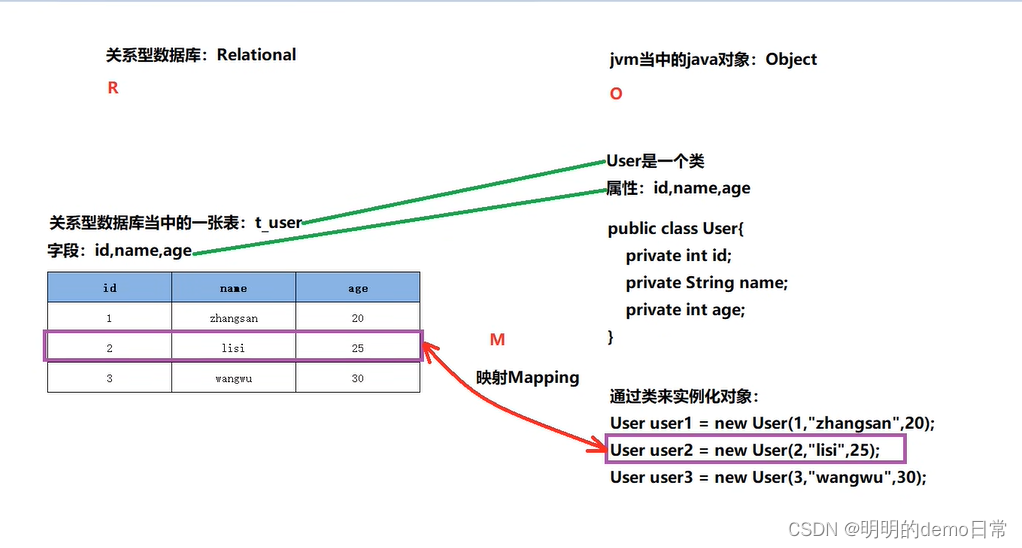
myBatis一种思想(掌握):ORM(对象关系映射)
O(object):JVM中的java对象
R(Relational):关系型数据库
M(Mapping):映射
看图:
表名对应java中的一个类
字段对应java属性
把一条数据转换成java对象或将Java对象转换成一条数据这就叫做映射
myBatis是半自动化的ORM,因为SQL语句需要程序员自己编写
myBatis可以干嘛:将Java对象和数据库表中的数据进行相互转换
myBatis入门程序步骤
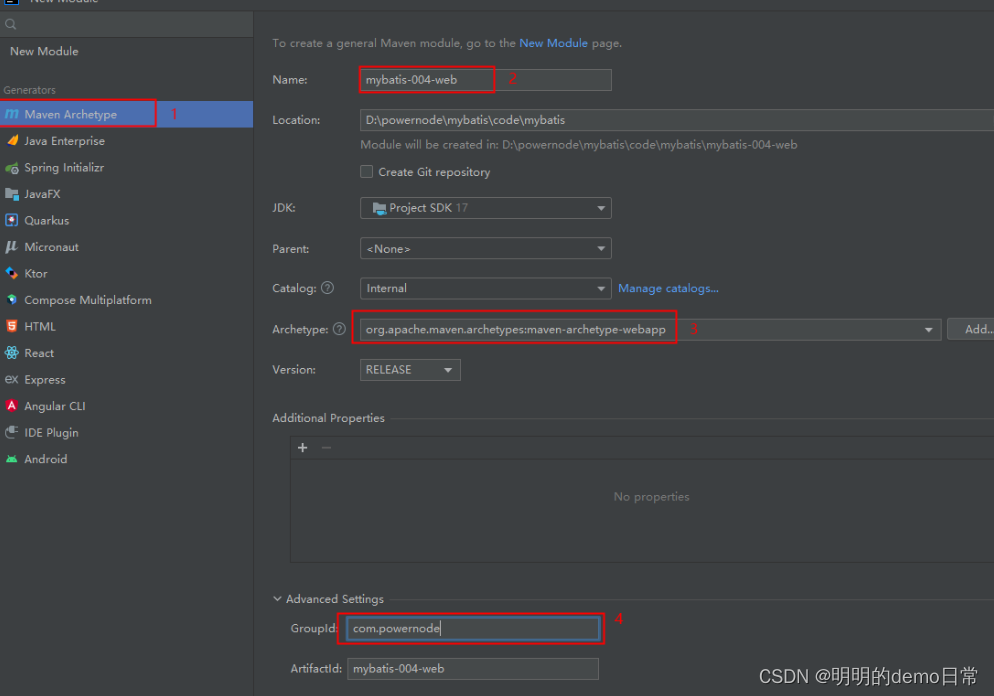
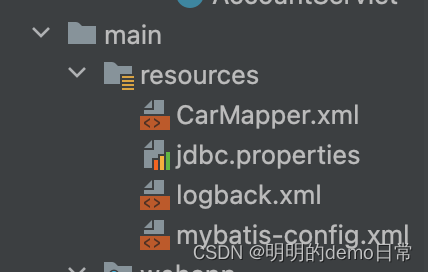
一、创建一个maven项目,在resources目录中防止资源文件,它相当于类的根路径。
二、开发步骤
第一步:规定打包方式为jar
  <groupId>com.jmm</groupId>
  <artifactId>mybatis-001-introduction</artifactId>
  <version>1.0.0</version>
  <packaging>jar</packaging>
第二步:引入依赖
-myBatis依赖和mysql依赖
<dependency>
<groupId>org.mybatis</groupId>
<artifactId>mybatis</artifactId>
<version>3.5.10</version>
</dependency>
<dependency>
<groupId>mysql</groupId>
<artifactId>mysql-connector-java</artifactId>
<version>8.0.30</version>
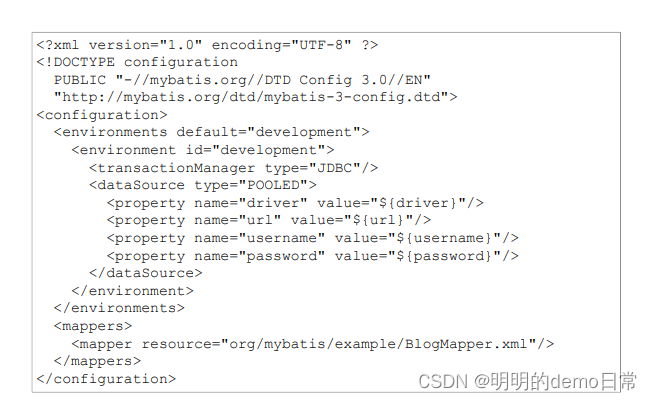
</dependency>第三步:编写mybatis核心配置文件:mybatis-config.xml
mybatis-config.xml:这个名字不是固定的但是普遍使用该名字,一般情况下将它放在根路径下。该代码段在下载的mybatis压缩文件中有一个PDF(或者搜索:mybatis中文文档),里面有相应的代码,虽然现在不理解代码意思,没关系先让代码跑起来,下边会解释。里边的driver-URL-username-password换成自己的数据库信息
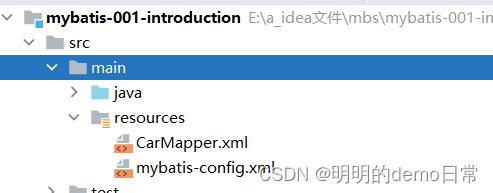
第四步:编写XxxxMapper.xml文件
这个配置文件是用来编写SQL语句的,命名规则:一般情况你写的是t_student表,起名StudentMapper.xml,我这里是t_car的所以这里起名CarMapper.xml.
该文件的位置是随意的,我这里将他放在了根目录下,也就是resources下
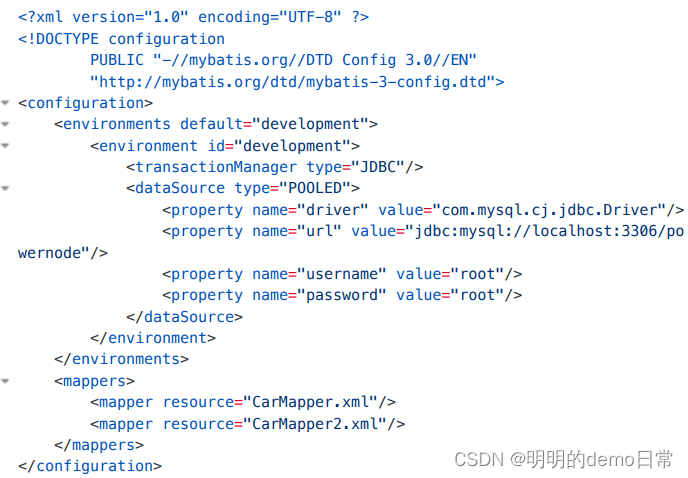
第五步:在mybatis-config.xml文件中指定XxxxMapper.xml文件的路径:
    <mappers>
<!--        指定xxxMapper.xml文件的路径 resource属性会从类的根路径下开始查找资源-->
        <mapper resource="CarMapper.xml"/>
    </mappers>
注意:resource属性会自动葱类的根路径下开始查找资源
第六步:编写mybatis程序(使用mybatis的类库,编写陈旭连接数据库做增删改查)
在mybatis中,负责执行SQL语句的对象叫:SqlSession
该对象是专门用来执行SQL语句的,是一个Java程序和数据库之间的一次对话
但想要获取该对象,需要先获取SqlSessionFactory对象,通过SqlSessionFactor有工厂来生产该对象,那怎样获取这个工厂呢?
需要通过SqlSessionFactoryBuilder对象,通过他的build的方法获取这个工厂
整体顺序:SqlSessionFactoryBuilder-->SqlSessionFactor-->SqlSession
整体代码
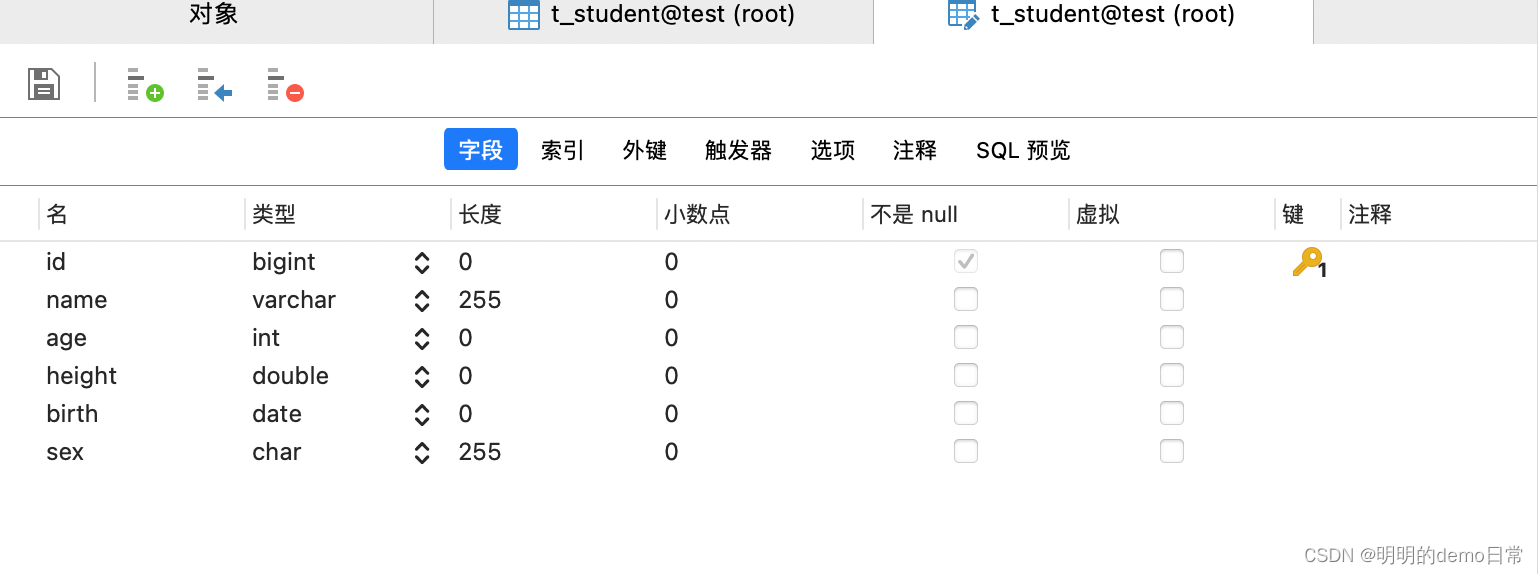
数据库:

pom.xml:规定打包方式和引入依赖
<?xml version="1.0" encoding="UTF-8"?>

<project xmlns="http://maven.apache.org/POM/4.0.0" xmlns:xsi="http://www.w3.org/2001/XMLSchema-instance"
  xsi:schemaLocation="http://maven.apache.org/POM/4.0.0 http://maven.apache.org/xsd/maven-4.0.0.xsd">
  <modelVersion>4.0.0</modelVersion>

  <groupId>com.jmm</groupId>
  <artifactId>mybatis-001-introduction</artifactId>
  <version>1.0.0</version>
  <packaging>jar</packaging>

  <name>mybatis-001-introduction</name>
  <!-- FIXME change it to the project's website -->
  <url>http://www.example.com</url>

  <properties>
    <project.build.sourceEncoding>UTF-8</project.build.sourceEncoding>
    <maven.compiler.source>1.7</maven.compiler.source>
    <maven.compiler.target>1.7</maven.compiler.target>
  </properties>

  <dependencies>
    <dependency>
      <groupId>junit</groupId>
      <artifactId>junit</artifactId>
      <version>4.11</version>
      <scope>test</scope>
    </dependency>

    <dependency>
      <groupId>org.mybatis</groupId>
      <artifactId>mybatis</artifactId>
      <version>3.5.10</version>
    </dependency>

    <dependency>
      <groupId>mysql</groupId>
      <artifactId>mysql-connector-java</artifactId>
      <version>8.0.30</version>
    </dependency>
  </dependencies>

  <build>
    <pluginManagement><!-- lock down plugins versions to avoid using Maven defaults (may be moved to parent pom) -->
      <plugins>
        <!-- clean lifecycle, see https://maven.apache.org/ref/current/maven-core/lifecycles.html#clean_Lifecycle -->
        <plugin>
          <artifactId>maven-clean-plugin</artifactId>
          <version>3.1.0</version>
        </plugin>
        <!-- default lifecycle, jar packaging: see https://maven.apache.org/ref/current/maven-core/default-bindings.html#Plugin_bindings_for_jar_packaging -->
        <plugin>
          <artifactId>maven-resources-plugin</artifactId>
          <version>3.0.2</version>
        </plugin>
        <plugin>
          <artifactId>maven-compiler-plugin</artifactId>
          <version>3.8.0</version>
        </plugin>
        <plugin>
          <artifactId>maven-surefire-plugin</artifactId>
          <version>2.22.1</version>
        </plugin>
        <plugin>
          <artifactId>maven-jar-plugin</artifactId>
          <version>3.0.2</version>
        </plugin>
        <plugin>
          <artifactId>maven-install-plugin</artifactId>
          <version>2.5.2</version>
        </plugin>
        <plugin>
          <artifactId>maven-deploy-plugin</artifactId>
          <version>2.8.2</version>
        </plugin>
        <!-- site lifecycle, see https://maven.apache.org/ref/current/maven-core/lifecycles.html#site_Lifecycle -->
        <plugin>
          <artifactId>maven-site-plugin</artifactId>
          <version>3.7.1</version>
        </plugin>
        <plugin>
          <artifactId>maven-project-info-reports-plugin</artifactId>
          <version>3.0.0</version>
        </plugin>
      </plugins>
    </pluginManagement>
  </build>
</project>
mybatis-config.xml:文件放置位置
看到这里,代码语句或许有疑惑,先别急先让程序跑起来后面会解释。
<?xml version="1.0" encoding="UTF-8" ?>
<!DOCTYPE configuration
PUBLIC "-//mybatis.org//DTD Config 3.0//EN"
"http://mybatis.org/dtd/mybatis-3-config.dtd">
<configuration>
<environments default="development">
<environment id="development">
<transactionManager type="JDBC"/>
<dataSource type="POOLED">
<!-- 这里放置自己的数据库信息-->
<property name="driver" value="com.mysql.cj.jdbc.Driver"/>
<property name="url" value="jdbc:mysql://localhost:3306/powernode?useUnicode=true&characterEncoding=utf8&serverTimezone=GMT"/>
<property name="username" value="root"/>
<property name="password" value="123456"/>
</dataSource>
</environment>
</environments>
<mappers>
<!-- 指定xxxMapper.xml文件的路径 resource属性会从类的根路径下开始查找资源-->
<mapper resource="CarMapper.xml"/>
</mappers>
</configuration>CarMapper.xml:主要编写SQL语句,注意格式
<?xml version="1.0" encoding="UTF-8" ?>
<!DOCTYPE mapper
        PUBLIC "-//mybatis.org//DTD Mapper 3.0//EN"
        "http://mybatis.org/dtd/mybatis-3-mapper.dtd">

<mapper namespace="org.mybatis.example.BlogMapper">

<!--       这里面主要编写SQL语句-->
<!--    zhege id 就代表了这条SQL语句-->
    <insert id="insertCar">
        insert into t_car(id,car_num,brand,guide_price,produce_time,car_type)
        value (null,'1003','丰田霸道',30.0,'2000-10-11','燃油车')
    </insert>

</mapper>
MyBatisintrodyctiojTest
public class MyBatisCompleteTest {

    public static void main(String[] args) {
        SqlSession sqlSession =null;
        try {
            //        获取SqlSessionFactoryBuilder对象
            SqlSessionFactoryBuilder sqlSessionFactoryBuilder = new SqlSessionFactoryBuilder();
            //        获取SqlSessionFactory对象
//        Resources.getResourceAsStream():获取文件路径
//        Resources.getResourceAsStream默认从根路径下找资源,这里"mybatis-config.xml"直接放到了根路径下,所以直接写
            //        一个数据库对应一个SqlSessionFactory对象
            SqlSessionFactory sqlSessionFactory = sqlSessionFactoryBuilder.build(Resources.getResourceAsStream("mybatis-config.xml"));
//     获取SqlSession对象,开启回话,底层开启事务
            sqlSession = sqlSessionFactory.openSession();
            //        执行SQL语句
            int count = sqlSession.insert("insertCar");
            System.out.println("输入条数="+count);
//            没有异常提交事务
            sqlSession.commit();
        } catch (Exception e) {
//            发生异常回滚事务
            if(sqlSession!=null){
                sqlSession.rollback();
            }
            e.printStackTrace();
        }finally {
//            关闭回话释放资源
            if(sqlSession!=null){
                sqlSession.close();
            }
        }
    }
刷新数据库表
myBatis日志集成框架logback
引⼊⽇志框架的⽬的是为了看清楚mybatis执⾏的具体sql。
这个是myBatis自带的,是标准⽇志组件,只需要在mybatis-config.xml⽂件中添加以下配置:
<settings>
<setting name="logImpl" value="STDOUT_LOGGING"/>
</settings>
也可以集成其他的⽇志组件,例如:log4j,logback等。
第⼀步:引⼊logback和log4j相关依赖
<dependency>
<groupId>ch.qos.logback</groupId>
<artifactId>logback-classic</artifactId>
<version>1.2.3</version>
</dependency>
<dependency>
<groupId>log4j</groupId>
<artifactId>log4j</artifactId>
<version>1.2.17</version>
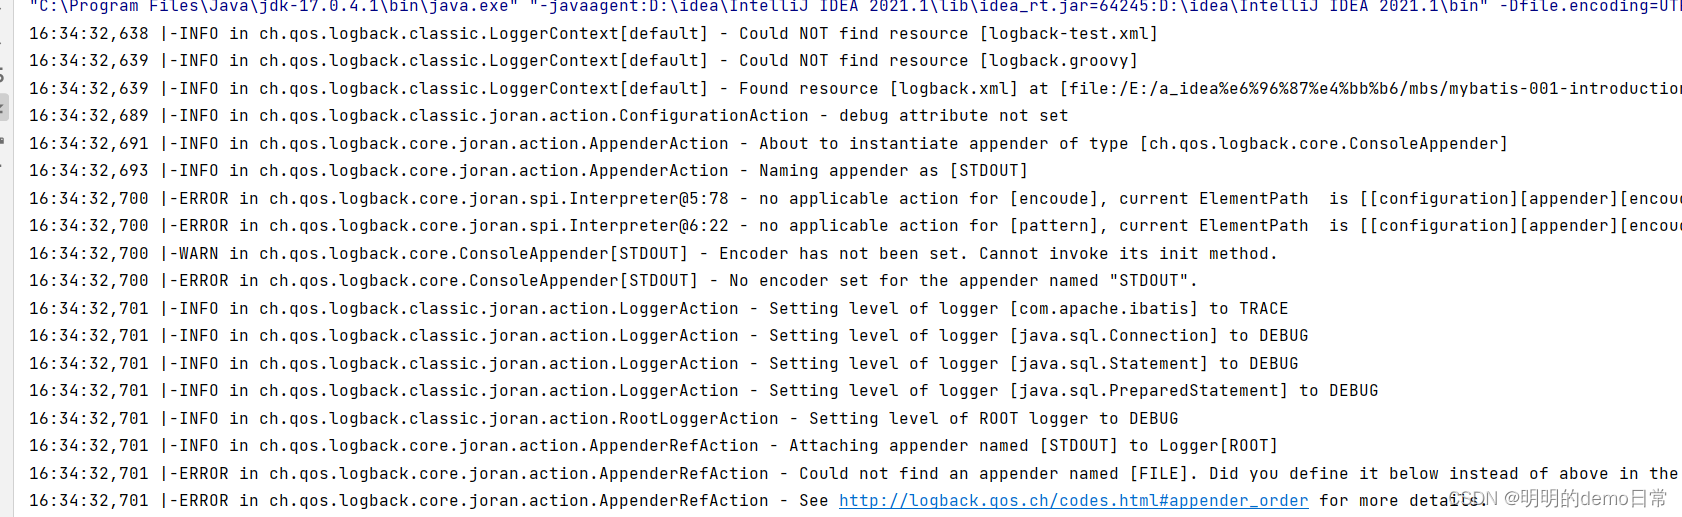
</dependency>第⼆步:引⼊logback相关配置⽂件(⽂件名叫做logback.xml或logback-test.xml,放到类路径当中)这个文件名称必须叫logback.xml,放在根目录文件下。这个文件可直接复制
<?xml version="1.0" encoding="UTF-8" ?>
<configuration debug="false">
<!--    控制台输出-->
    <appender name="STDOUT" class="ch.qos.logback.core.ConsoleAppender">
        <encoude class="ch.qos.logback.classic.encoder.PatternLayoutEncoder">
<!--            %d表示日期 %thread标示线程名 %5level表示级别从左到右显示5个字符宽度-->
            <pattern>%d{yyyy-MM-dd HH:mm:ss.SSS} [%thread] %-5level %logger{50} -%msg%n</pattern>
        </encoude>
    </appender>

<!--    配置mybatis 只要一触碰到name后面的组建就会触发日志-->
    <logger name="com.apache.ibatis" level="TRACE"></logger>
    <logger name="java.sql.Connection" level="DEBUG"></logger>
    <logger name="java.sql.Statement" level="Debug"></logger>
    <logger name="java.sql.PreparedStatement" level="DEBUG"></logger>

<!--    日志输出级别:TRACE<DEBUG<INFO<WARE<ERROR-->
<!--    日志级别越高输出信息越少-->
    <root level="DEBUG">
        <appender-ref ref="STDOUT"></appender-ref>
        <appender-ref ref="FILE"></appender-ref>
    </root>
</configuration>
可以配置也可以配置
<settings>
<setting name="logImpl" value="LOG4J"/>
</settings>
结果:
使用myBatis完成CRUD(增删改查)
什么是CRUD
c:Create增
R:Retrieve查
u:update改
D:delete删
上述案例我们的SQL语句中字段值是写死的,这种在实际开发是不推荐的。
    <insert id="insertCar">
        insert into t_car(id,car_num,brand,guide_price,produce_time,car_type)
        value (null,'1003','丰田霸道',30.0,'2000-10-11','燃油车')
    </insert>
在JDBC中我们使用?占位符传值,那马仔mybatis中我们使用和?等效的#{} 作为占位符
首先我先写了一个工具类,避免写测试写的多时要写一些重复的代码
public class SqlSessionUtil {

//    工具类的构造方法一般都是私有化的
//    工具类中所有的方法都是静态的,直接采用类名即可调用,不需要new对象
//    为了防止new对象构造方法私有化
    private SqlSessionUtil(){}
    private static SqlSessionFactory sqlSessionFactory;
//    因为一个sqlSessionFactory对应一个数据库,对单个数据库操作时只需创建一个即可
    static{
        try {
            sqlSessionFactory = new SqlSessionFactoryBuilder().
                    build(Resources.getResourceAsStream("mybatis-config.xml"));
        } catch (Exception e) {
            e.printStackTrace();
        }
    }
    public static SqlSession openSession(){
        return sqlSessionFactory.openSession();
    }
}
增:
通过map集合给一个SQL语句传值
public class CarMapperTest {
    @Test
    public void testInsertCar(){

        SqlSession sqlSession = SqlSessionUtil.openSession();
        Map<String,Object> map=new HashMap<>();
        map.put("k1","1111");
        map.put("k2","比亚迪");
        map.put("k3",10.0);
        map.put("k4","2020-11-11");

        int count = sqlSession.insert("insertCar",map);
        System.out.println(count);

        sqlSession.commit();
        sqlSession.close();
    }
}
<mapper namespace="org.mybatis.example.BlogMapper">
<!-- 这里面主要编写SQL语句-->
<!-- zhege id 就代表了这条SQL语句-->
<insert id="insertCar">
insert into t_car(id,car_num,brand,guide_price,produce_time,car_type)
value (null,#{k1},#{k2},#{k3},#{k4},#{k5})
</insert>
</mapper>
通过POJO(又称bean类)对象给一个SQL语句传值
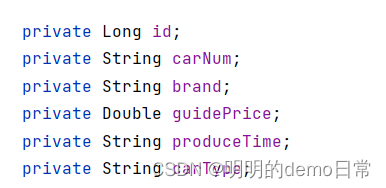
首先根据数据库字段创建POJO包下的类,并生成相应的构造、get、set、tostring方法
public class Car {
//    数据库表中的字段应该和破击类的属性一一对应
//    建议使用包装类,这样可以防止null的问题

    private Long id;
    private String carNum;
    private String brand;
    private Double guidePrice;
    private String produceTime;
    private String carType;
测试类
public class CarMapperTest {
    @Test
    public void testInsertCarPOJO(){
        SqlSession sqlSession = SqlSessionUtil.openSession();
        Car car = new Car(null,"3333","比亚迪秦",30.0,"2022-01-11","新能源");
    int count = sqlSession.insert("insertCar",car);
        System.out.println(count);

        sqlSession.commit();
        sqlSession.close();
    }
SQL语句格式(与POJO类里的属性相对应)
   <insert id="insertCar">
        insert into t_car(id,car_num,brand,guide_price,produce_time,car_type)
        value (null,#{carNum},#{brand},#{guidePrice},#{produceTime},#{carType})
    </insert>
删:
        <!--当只有一个站位服饰#{这里的内容可以随便写,但不能为空}-->
        <delete id="a">
            delete from t_car where id=#{id}
        </delete>
@Test
public void testDeleteCar(){
SqlSession sqlSession =SqlSessionUtil.openSession();
int count= sqlSession.delete("a",9);
System.out.println(count);
sqlSession.commit();
sqlSession.close();
}改:
<update id="updataById">
            update t_car set car_num=#{carNum},brand=#{brand},guide_price=#{guidePrice},produce_time=#{produceTime},car_type=#{carType} where id=#{id}
        </update>
@Test
public void testUpdateById(){
SqlSession sqlSession= SqlSessionUtil.openSession();
Car car = new Car(4L,"9999","凯美瑞",30.3,"1999-01-19","燃油车");
int count = sqlSession.update("updataById",car);
System.out.println(count);
sqlSession.commit();
sqlSession.close();
}查询
注意:查询是会产生一个结果集的,一起看一下mybatis是怎样处理查询结果集的
对于⼀个查询语句来说,你需要指定它的“结果类型”或者“结果映射
<!--resultType="指定结果集要封装的java对象类型并告诉mybatis,这里放的是全限定类名封装成Car类型"-->
查询一条数据
<select id="selectCarById"  resultType="com.java.pojo.Car">
select * from t_car where id = #{id}
</select>
测试类
    @Test
    public void testSelectById(){
        SqlSession sqlSession = SqlSessionUtil.openSession();
        Object car = sqlSession.selectOne("selectById",1);
        System.out.println(car);
        sqlSession.close();
}查询结果:注意看后面几个字段都是null值,但是在数据库这些字段都是有值的
![]()
原因是:查询结果的字段名和java类的属性名对应不上的
数据库字段名和属性类名

解决方法:可以采用暗色关键字起别名,当然还有其他方法别着急,我们慢慢看。
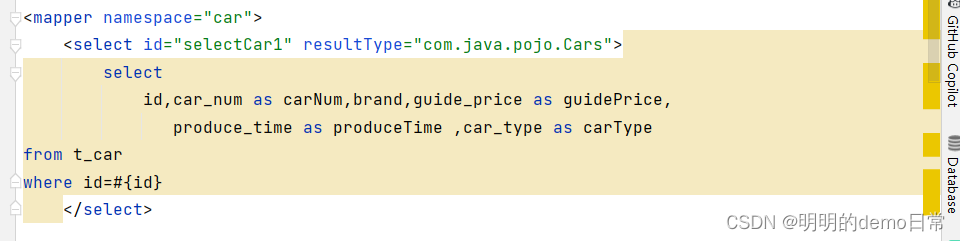
更改后的查询语句
   <select id="selectById" resultType="com.java.pojo.Car">
        select
            id,car_num as carNum,brand,guide_price as guidePrice,
            produce_time as produceTime,car_type as carType
        from t_car
        where id=#{id}
</select> ![]()
查询所有数据(List集合)
<!--    查询所有-->
    <select id="selectAll" resultType="com.java.pojo.Car">
        select
            id,car_num as carNum,brand,guide_price as guidePrice,
            produce_time as produceTime,car_type as carType
        from t_car

    </select>
测试类
@Test
    public  void testSelectAll(){
        SqlSession sqlSession = SqlSessionUtil.openSession();
        List<Object> cars = sqlSession.selectList("selectAll");
        cars.forEach( car -> System.out.println(car));
        sqlSession.close();
    }
到这里增删改查内容已结束,有个知识点没提及,就是CarMapper.xml文件中美好的 namespace
他称作命名空间,主要是用来解决SQLid冲突的。
当你有两个XxxxMapper.xml文件时,里面select的id都是“selectCar1”,此时测试文件文件调用select语句会不知道调用那个文件的select,会报错
解决方法:测试文件中的id写成“namespace.id”
Listcars = sqlSession.selectList("car2.selectCarAll");
增删改查阶段结束了,只是直到配置文件格式怎么写,但是配置文件各行代码还是 不明确,没关系下面就开始分析配置文件语句。
MyBatis核⼼配置⽂件详解
将mybatis-config.xml文件先拿过来
- configuration:他是跟标签,表示配置信息,一般一个配置文件只有一个该标签
- environments:表示多个环境,mybatis可以配置多个数据源。default属性:表示默认使用那个环境,default后面填写的是enviroment的id。default的值只需要和enviorment的id值一致即可。
- enviorment:具体的环境配置(事务管理器的配置+数据源的配置)他的id代表当前环境的唯一标识,和enviorments后面的default值一样。当有多个enviorment时,enviorments的default后面填写的其中一个,就代表整个id的enviorment是默认环境。一个enviroment代表一个数据库,对应一个SqlSessionFactory对象。
- transactionManager:配置事务管理器 type属性:指定事务管理器具体是用什么方式(JDBC:有事务、MANAGED:无事务)
- dataSource:指定数据源 ,它的作用主要是给程序员提供Connection接口 type属性:用来指定具体的数据库连接池策略 ,type=“”[UNPOOLED|POOLED|JNDI] UNPOOLED:不使用数据库连接池技术,每一次请求过来之后,都是创建的新的Collection对象 POOLED:采用mybatis自己的数据库连接池 JDNI:继承第三方数据库连接池,他是一套规范,大部分的eb容器都实现该规范,如Tomcat、jettry等后期会使用Tomcat实现,首先需要将druid、c3p0、dbcp等数据库连接池集成到Tomcat中
- mappers:在mappers标签中可以配置多个SQL映射文件路径
- mapper:配置某个SQL映射文件的路径 resource属性:使用相对路径的资源引用方式
SqlSessionFactoryBuilder、SqlSessionFactory对象作用域
- SqlSessionFactoryBuilder:一旦创建了SqlSessionFactory就不必再需要他,不需要一直保留着它
- SqlSessionFactory:一旦创建就应该在运行期间一直存在,没有任何理由丢弃它或者创建另一个实例,除非有多个数据库
- SqlSession:每个线程都应该有自己的SqlSession实例,SqlSession的实例是不安全的,因此不能被共享。因为一个线程duiyingyigeshiwu,所以在这个鬼事物里SqlSession应该始终是同一个,所以将它放在ThreadLocal 中,它是线程的局部变量,这些变量只能在这个线程内被读写,在其他线程内是无法访问的。 ThreadLocal 定义的通常是与线程关联的私有静态字段。下面转账案例中就会使用
properties 标签的配置
引入properties文件,使数据库信息修改时可以不再代码内部处理
创建properties文件
jdbc.driver=com.mysql.cj.jdbc.Driver
jdbc.url=jdbc:mysql://localhost:3306/test
jdbc.username=root
jdbc.password=12345678
在mybatis- config.xml引入配置文件
<?xml version="1.0" encoding="UTF-8" ?>
<!DOCTYPE configuration
        PUBLIC "-//mybatis.org//DTD Config 3.0//EN"
        "http://mybatis.org/dtd/mybatis-3-config.dtd">
<configuration>

    <properties resource="jdbc.properites"></properties>
    <environments default="development">
        <environment id="development">
            <transactionManager type="JDBC"/>
            <dataSource type="POOLED">
            <property name="driver" value="${jdbc.driver}"/>
                <property name="url" value="${jdbc.url}"/>
                <property name="username" value="${jdbc.username}"/>
                <property name="password" value="${jdbc.password}"/>
            </dataSource>

        </environment>
    </environments>
    <mappers>
        <mapper resource="CarMapper.xml"></mapper>
    </mappers>
</configuration>
在WEB中应用MyBatis(用MVC架构)
以银行转账为例
适用技术:HTML+Servlet+MyBatis
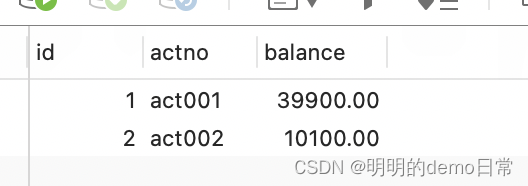
一、数据库准备

二、创建项目
将为web.xml文件版本改为高版本
<web-app xmlns="https://jakarta.ee/xml/ns/jakartaee"
         xmlns:xsi="http://www.w3.org/2001/XMLSchema-instance"
         xsi:schemaLocation="https://jakarta.ee/xml/ns/jakartaee
                      https://jakarta.ee/xml/ns/jakartaee/web-app_5_0.xsd"
         version="5.0"
         metadata-complete="false">

</web-app>
Pom.xml 打包方式为war
引入依赖
<project xmlns="http://maven.apache.org/POM/4.0.0" xmlns:xsi="http://www.w3.org/2001/XMLSchema-instance"
  xsi:schemaLocation="http://maven.apache.org/POM/4.0.0 http://maven.apache.org/maven-v4_0_0.xsd">
  <modelVersion>4.0.0</modelVersion>
  <groupId>com.test</groupId>
  <artifactId>mybatis-002-web</artifactId>
  <packaging>war</packaging>
  <version>1.0</version>

  <name>mybatis-002-web Maven Webapp</name>
  <url>http://maven.apache.org</url>

  <properties>
  <project.bubild.sourceEncoding>UTF-8</project.bubild.sourceEncoding>
  <maven.compiler.source>17</maven.compiler.source>
  <maven.compiler.target>17</maven.compiler.target>
  </properties>

  <dependencies>
    <dependency>
      <groupId>org.mybatis</groupId>
      <artifactId>mybatis</artifactId>
      <version>3.5.1</version>
    </dependency>
    <dependency>
      <groupId>mysql</groupId>
      <artifactId>mysql-connector-java</artifactId>
      <version>5.1.9</version>
    </dependency>
    <dependency>
      <groupId>ch.qos.logback</groupId>
      <artifactId>logback-classic</artifactId>
      <version>1.2.11</version>
    </dependency>
    <dependency>
      <groupId>jakarta.servlet</groupId>
      <artifactId>jakarta.servlet-api</artifactId>
      <version>5.0.0</version>
      <scope>provided</scope>
    </dependency>
  </dependencies>
  <build>
    <finalName>mybatis-002-web</finalName>
    <pluginManagement>
      <plugins>
        <plugin>
          <artifactId>maven-clean-plugin</artifactId>
          <version>3.1.0</version>
        </plugin>
        <plugin>
          <artifactId>maven-resources-plugin</artifactId>
          <version>3.0.2</version>
        </plugin>
        <plugin>
          <artifactId>maven-compiler-plugin</artifactId>
          <version>3.8.0</version>
        </plugin>
        <plugin>
          <artifactId>maven-surefire-plugin</artifactId>
          <version>2.22.1</version>
        </plugin>
        <plugin>
          <artifactId>maven-war-plugin</artifactId>
          <version>3.2.2</version>
        </plugin>
        <plugin>
          <artifactId>maven-install-plugin</artifactId>
          <version>2.5.2</version>
        </plugin>
        <plugin>
          <artifactId>maven-deploy-plugin</artifactId>
          <version>2.8.2</version>
        </plugin>
      </plugins>
    </pluginManagement>
  </build>
</project>
编写相关配置文件:
jdbc.properties
jdbc.driver=com.mysql.cj.jdbc.Driver
jdbc.url=jdbc:mysql://localhost:3306/test?useSSL=false&serverTimezone=UTC&characterEncoding=utf-8&autoReconnect=true

jdbc.username=root
jdbc.password=12345678
mybatis-config.xml
<?xml version="1.0" encoding="UTF-8" ?>
<!DOCTYPE configuration
        PUBLIC "-//mybatis.org//DTD Config 3.0//EN"
        "http://mybatis.org/dtd/mybatis-3-config.dtd">
<configuration>

    <properties resource="jdbc.properties"/>
    <environments default="development">
        <environment id="development">
            <transactionManager type="JDBC"/>
            <dataSource type="POOLED">
                <property name="driver" value="${jdbc.driver}"/>
                <property name="url" value="${jdbc.url}"/>
                <property name="username" value="${jdbc.username}"/>
                <property name="password" value="${jdbc.password}"/>
            </dataSource>

        </environment>
    </environments>
    <mappers>
        <mapper resource="com/test/mapper/carMapper.xml"/>
    </mappers>
</configuration>
CarMapper.xml(这个文件应该等到编写了dao里边定义的数据库方法后在编写,我只是将它放到这里)
<?xml version="1.0" encoding="UTF-8" ?>
<!DOCTYPE mapper
        PUBLIC "-//mybatis.org//DTD Mapper 3.0//EN"
        "http://mybatis.org/dtd/mybatis-3-mapper.dtd">
<mapper namespace="com.test.dao.AccountDao">
<select id="selectByActno" resultType="com.test.pojo.Account">

    select * from t_act where actno = #{actno}
</select>
    <update id="updatByActno">
        update t_act set balance = #{balance} where actno=#{actno}
    </update>
</mapper>
log可以引用前面的,到这里就该编写前端界面
<!DOCTYPE html>
<html lang="en">
<head>
    <meta charset="UTF-8">
    <title>银行转账账户</title>
</head>
<body>
<form action="/transfer"method="post">
  转出账户:<input type="text" name="fromActno"><br>
  转入账户:<input type="text" name="toAxtno"><br>
  装账金额:<input type="text" name="money"><br>
  <input type="submit" value="转账">
</form>
</body>
</html>
到这里要编写具体的转账实现
首先搭好MVC架子,准备包
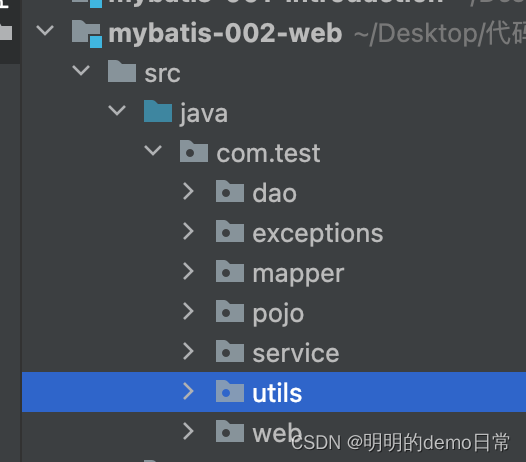
定义pojo类Account
package com.test.pojo;

/**
 * 账户类
 * @acount 老杜
 * @version 1.0
 * @since 1.0
 */
public class Account {
    private Long id;
//    账户号
    private String actno;
//    余e
    private Double balance;

    public Account() {
    }

    public Account(Long id, String actno, Double balance) {
        this.id = id;
        this.actno = actno;
        this.balance = balance;
    }

    public Long getID() {
        return id;
    }

    public void setID(Long ID) {
        this.id = ID;
    }

    public String getActno() {
        return actno;
    }

    public void setActno(String actno) {
        this.actno = actno;
    }

    public Double getBalance() {
        return balance;
    }

    public void setBalance(Double balance) {
        this.balance = balance;
    }

    @Override
    public String toString() {
        return "Account{" +
                "ID=" + id +
                ", actno='" + actno + '\'' +
                ", balance=" + balance +
                '}';
    }
}
准备工具类
package com.test.utils;

import org.apache.ibatis.io.Resources;
import org.apache.ibatis.session.SqlSession;
import org.apache.ibatis.session.SqlSessionFactory;
import org.apache.ibatis.session.SqlSessionFactoryBuilder;

import java.io.IOException;

public class SqlSessionUtil {

    private static SqlSessionFactory sqlSessionFactory;

    static {
        try {
            sqlSessionFactory = new SqlSessionFactoryBuilder().
                    build(Resources.getResourceAsStream("mybatis-config.xml"));
        } catch (IOException e) {
            throw new RuntimeException(e);
        }
    }
//    ThreadLocal用来存放当前线程的副本是AccountServiceImpl里创建的sqlsession
    private  static  ThreadLocal<SqlSession> local = new ThreadLocal<>();
    public static SqlSession openSession(){
//        返回当前线程局部变量的副本
        SqlSession sqlSession = local.get();
        if (sqlSession == null){
           sqlSession = sqlSessionFactory.openSession();
//           将sqlsession对象绑定在当前线程也就是将当前线程局部变量的副本设置为指定的值
            local.set(sqlSession);
        }
        return sqlSession;
    }
/**
 * 关闭sqksession对象
 *
 */
public  static void close(SqlSession sqlSession){
    if(sqlSession!=null){
        sqlSession.close();
//        移除sqlsession对象和当前现成的绑定关系应为tomcat支持线程池,因为用过线程T1,可能下一次还会用到T1
//        也就是删除此线程局部变量副本设置的指定值
        local.remove();
    }
}
}
编写dao里的AccountDao接口和AccountDaoImpl实现类
- 需要有查询余额的方法:selectByActno
- 转账后 更新各个账户的方法
import com.test.pojo.Account;
import org.apache.ibatis.annotations.Mapper;

/**
 * 账户的dao对象负责t_cat标中数据的增删改查
 *
 */

public interface AccountDao {

    /**
     * 根据账号查询账户信息
     *
     * @param actno 账号
     * @return
     */
    Account selectByActno(String actno);

    /**
     * 更新账户信息
     * 因为要更新账户所以要吧整个账户对象Account传进来
     * @param act 被更新的账户对象
     * @return 1 更新成功 其他失败
     */
    int updateActno(Account act);
}
package com.test.dao.impl;
import com.test.dao.AccountDao;
import com.test.pojo.Account;
import com.test.utils.SqlSessionUtil;
import org.apache.ibatis.session.SqlSession;
public class AccountDaoImpl implements AccountDao {
@Override
public Account selectByActno(String actno) {
// 因为AccountServiceImpl里创建了sqlsession对象,所以在调用openSession方法时不走if,因为创建过一次不为空所以他们是一个sqlsession对象
SqlSession sqlSession = SqlSessionUtil.openSession();
Account account = sqlSession.selectOne("selectByActno",actno);
return account;
}
@Override
public int updateActno(Account act) {
SqlSession sqlSession = SqlSessionUtil.openSession();
int count = sqlSession.update("updatByActno", act);
return count;
}
}
编写AccountService接口和AccountServiceimpl
package com.test.service;

import com.test.exceptions.MoneyNotEnoughException;
import com.test.exceptions.TransferException;

import javax.xml.transform.TransformerException;

/**
 * 账户业务类
 * @author :老杜
 * @version 1.0
 * @since 1.0
 * 之所以要有接口,是因为层与层之间要用借口链接,降低耦合
 * 业务类中的每个方法起名时要见明知意
 */
public interface AccountService {
    /**
     * 账户转账业务
     * @param fromActno 转出账号
     * @param toActno 转入账号
     * @param money 转账金额
     */
    void transfer(String fromActno,String toActno,double money)
            throws MoneyNotEnoughException,TransferException;
}
package com.test.service.impl;
import com.test.dao.AccountDao;
import com.test.dao.impl.AccountDaoImpl;
import com.test.exceptions.MoneyNotEnoughException;
import com.test.exceptions.TransferException;
import com.test.pojo.Account;
import com.test.service.AccountService;
import com.test.utils.SqlSessionUtil;
import org.apache.ibatis.session.SqlSession;
/**
* fromAct:转出账户
* toActno:转入账户
* money:转账金额
* balance:余额
*/
public class AccountServiceImpl implements AccountService {
private final AccountDao account = new AccountDaoImpl();
@Override
public void transfer(String fromActno, String toActno, double money) throws MoneyNotEnoughException,TransferException {
SqlSession sqlSession = SqlSessionUtil.openSession();
// 1.判断转出账户余额是否充足
Account fromAct = account.selectByActno(fromActno);
// 2。如果余额不足提示用户
if(fromAct.getBalance()<money){
throw new MoneyNotEnoughException("对不起余额不足");
}
// 如果余额充足,更新转出账户
Account toAct = account.selectByActno(toActno);
fromAct.setBalance(fromAct.getBalance()-money);
toAct.setBalance(toAct.getBalance()+money);
// 更新转入账户余额
int count = account.updateActno(fromAct);
String s = null;
s.toString();
// 此事涉及到数据库操作转dao包
count +=account.updateActno(toAct);
if(count !=2){
throw new TransferException("转账异常,未知原因");
}
sqlSession.commit();
SqlSessionUtil.close(sqlSession);
}
}编写web包下的AccountServlet
该类主要用于接收前端传过来的文本框信息 和调用成功与异常应反悔的界面,不必事先具体的事物
package com.test.service.impl;

import com.test.dao.AccountDao;
import com.test.dao.impl.AccountDaoImpl;
import com.test.exceptions.MoneyNotEnoughException;
import com.test.exceptions.TransferException;
import com.test.pojo.Account;
import com.test.service.AccountService;
import com.test.utils.SqlSessionUtil;
import org.apache.ibatis.session.SqlSession;

/**
 * fromAct:转出账户
 * toActno:转入账户
 * money:转账金额
 * balance:余额
 */
public class AccountServiceImpl implements AccountService {


    private final AccountDao account = new AccountDaoImpl();
    @Override
    public void transfer(String fromActno, String toActno, double money) throws MoneyNotEnoughException,TransferException {
        SqlSession sqlSession = SqlSessionUtil.openSession();

        //        1.判断转出账户余额是否充足
        Account fromAct = account.selectByActno(fromActno);

        //        2。如果余额不足提示用户
        if(fromAct.getBalance()<money){
            throw new MoneyNotEnoughException("对不起余额不足");
        }

//        如果余额充足,更新转出账户
        Account toAct = account.selectByActno(toActno);
        fromAct.setBalance(fromAct.getBalance()-money);
        toAct.setBalance(toAct.getBalance()+money);

//        更新转入账户余额

        int count = account.updateActno(fromAct);
      //  String s = null;
     //   s.toString();
//        此事涉及到数据库操作转dao包
        count +=account.updateActno(toAct);
        if(count !=2){
            throw  new TransferException("转账异常,未知原因");
        }
        sqlSession.commit();
        SqlSessionUtil.close(sqlSession);
    }
}
是用Javassist生成DaoImpl
使用Javassist可以只写接口不写接口实现类,Javassist可以帮你实现接口实现类的实现和对象的创建,比如转账项目不再写AccountDaoImpl,直接加上Javassist语句
 private AccountDao account =
SqlSessionUtil.openSession().getMapper(AccountDao.class);
完整代码
public class AccountServiceImpl implements AccountService {


    //private final AccountDao account = new AccountDaoImpl();
    private AccountDao account = SqlSessionUtil.openSession().getMapper(AccountDao.class);
    @Override
    public void transfer(String fromActno, String toActno, double money) throws MoneyNotEnoughException,TransferException {
        SqlSession sqlSession = SqlSessionUtil.openSession();

        //        1.判断转出账户余额是否充足
        Account fromAct = account.selectByActno(fromActno);

        //        2。如果余额不足提示用户
        if(fromAct.getBalance()<money){
            throw new MoneyNotEnoughException("对不起余额不足");
        }

//        如果余额充足,更新转出账户
        Account toAct = account.selectByActno(toActno);
        fromAct.setBalance(fromAct.getBalance()-money);
        toAct.setBalance(toAct.getBalance()+money);

//        更新转入账户余额

        int count = account.updateActno(fromAct);
      //  String s = null;
      //  s.toString();
//        此事涉及到数据库操作转dao包
        count +=account.updateActno(toAct);
        if(count !=2){
            throw  new TransferException("转账异常,未知原因");
        }
        sqlSession.commit();
        SqlSessionUtil.close(sqlSession);
    }
}
mybatis小技巧
#{}和${}区别
首先看一个查询之间的区别
<select id="selectAllByAscOrDesc" resultType="car">
        select
            id,
            car_num as carNum,
            brand,
            guide_price as guidePrice,
            produce_time as produceTime,
            car_type as carType
        from
            t_car
        where car_type=#{cartype}
    </select>
我们领查询的条件carType=新能源 #{}的执行结果:[main] DEBUG c.p.mybatis.mapper.CarMapper.selectByCarType - ==> Preparing: select id, car_num as carNum, brand, guide_price as guidePrice, produce_time as produceTime, car_type as carType from t_car where car_type = ? [main] DEBUG c.p.mybatis.mapper.CarMapper.selectByCarType - ==> Parameters: 新能源(String) [main] DEBUG c.p.mybatis.mapper.CarMapper.selectByCarType - <== Total: 2${}的执行结果:[main] DEBUG c.p.mybatis.mapper.CarMapper.selectByCarType - ==> Preparing: select id, car_num as carNum, brand, guide_price as guidePrice, produce_time as produceTime, car_type as carType from t_car where car_type = 新能源 [main] DEBUG c.p.mybatis.mapper.CarMapper.selectByCarType - ==> Parameters:注意看where car_type = 后面的区别,#{}:where car_type =? ${}:where car_type =新能源。
    #{}: 底层使用PreparedStatement。特点:先进行SQL语句的编译,然后给SQL语句的占位符问号?传值。可以避免SQL注入的风险。
    ${}:底层使用Statement。特点:先进行SQL语句的拼接,然后再对SQL语句进行编译。存在SQL注入的风险。
    优先使用#{},这是原则。避免SQL注入的风险。
Sql注入是指web应用程序对用户输入数据的合法性没有判断或过滤不严,攻击者可以在web应用程序中事先定义好的查询语句的结尾上添加额外的SQL语句,在管理员不知情的情况下实现非法操作,从而进一步得到相应的数据信息。
那么问题来了我们什么时候使用${}呢
先看下面的查询代码
   <select id="selectAllByAscOrDesc" resultType="car">
        select
            id,
            car_num as carNum,
            brand,
            guide_price as guidePrice,
            produce_time as produceTime,
            car_type as carType
        from
            t_car
        order by
<!--  ascOrDesc,是前端传来的asc:升序 或desc:降序  -->
produce_time ${ascOrDesc}
    </select>
   <select id="selectAllByAscOrDesc" resultType="car">
        select
            id,
            car_num as carNum,
            brand,
            guide_price as guidePrice,
            produce_time as produceTime,
            car_type as carType
        from
            t_car
        order by
            produce_time ${ascOrDesc}
    </select>
#{}的执行结果:
Preparing: select
id, car_num as carNum, brand, guide_price as guidePrice, produce_time as produceTime, car_type as carType
from t_car order by produce_time ?
Parameters: asc(String)
将它转换一下:
select
id, car_num as carNum, brand, guide_price as guidePrice, produce_time as produceTime, car_type as carType
from t_car order by produce_time 'asc'
${}的执行结果:
Preparing:
select id, car_num as carNum, brand, guide_price as guidePrice, produce_time as produceTime, car_type as carType
from t_car order by produce_time asc
Parameters:1.这种我们需要将关键字放进sql语句中,只能使用${},因为#{}是以值的形式放到SQL语句当中的而不是关键字。
2.向sql语句中拼接表名时,使用${}
比如,在业务中,如果数据量较大的话,会存在分表情况
日志表:如果只有一张表,这张表每天都会产生很多log,漫漫的这个表中的数据就会很多,此时我们可以让他每天生成一个新表。以每天的日期命名:t_log_20221016. t_log_20221017......
想知道某一天的信息,对其拼串即可(因为要把表名作为关键字,而不是具体参数,所以使用${})
批量删除:
对应的SQL语句:
delete from t_car where id=1 or id=2;

delete from t_car where id in(1,2,3)
假设使用in,前段传来1,2,3 这时该用${}
模糊查询:like
需求:根据汽车品牌进行模糊查询
select * from t_car where brand like '%奔驰%';
select * from t_car where brand like '%比亚迪%';第一种方案:
'%${brand}%'
第二种方案:concat函数,这个是mysql数据库当中的一个函数,专门进行字符串拼接
concat('%',#{brand},'%')
第三种方案:比较鸡肋了。可以不算。
concat('%','${brand}','%')
第四种方案:(常用)
"%"#{brand}"%"5. 关于MyBatis中别名机制:
<typeAliases>
<!--别名自己指定的-->
<typeAlias type="com.powernode.mybatis.pojo.Car" alias="aaa"/>
<typeAlias type="com.powernode.mybatis.pojo.Log" alias="bbb"/><!--采用默认的别名机制-->
<typeAlias type="com.powernode.mybatis.pojo.Car"/>
<typeAlias type="com.powernode.mybatis.pojo.Log"/><!--包下所有的类自动起别名。使用简名作为别名。-->(常用)
<package name="com.powernode.mybatis.pojo"/>
</typeAliases>所有别名不区分大小写。
namespace不能使用别名机制。
6. mybatis-config.xml文件中的mappers标签。
<mapper resource="CarMapper.xml"/> 要求类的根路径下必须有:CarMapper.xml
<mapper url="file:///d:/CarMapper.xml"/> 要求在d:/下有CarMapper.xml文件
<mapper class="全限定接口名,带有包名"/>mapper标签的属性可以有三个:
resource:这种方式是从类的根路径下开始查找资源。采用这种方式的话,你的配置文件需要放到类路径当中才行。
url: 这种方式是一种绝对路径的方式,这种方式不要求配置文件必须放到类路径当中,哪里都行,只要提供一个绝对路径就行。这种方式使用极少,因为移植性太差。
class: 这个位置提供的是mapper接口的全限定接口名,必须带有包名的。
思考:mapper标签的作用是指定SqlMapper.xml文件的路径,指定接口名有什么用呢?
<mapper class="com.powernode.mybatis.mapper.CarMapper"/>
如果你class指定是:com.powernode.mybatis.mapper.CarMapper
那么mybatis框架会自动去com/powernode/mybatis/mapper目录下查找CarMapper.xml文件。
注意:也就是说:如果你采用这种方式,那么你必须保证CarMapper.xml文件和CarMapper接口必须在同一个目录下。并且名字一致。CarMapper.xml文件是在resource文件下,CarMapper接口在Java文件下 ,所以只需要在resources目录下创建一个和CarMapper接口的报名一样的目录即可。
CarMapper接口-> CarMapper.xml
LogMapper接口-> LogMapper.xml
....提醒!!!!!!!!!!!!!!!!!!!!!!!
在IDEA的resources目录下新建多重目录的话,必须是这样创建:
com/powernode/mybatis/mapper
不能这样:
com.powernode.mybatis.mapper但如果class较多的话,可以写cheng包的方式
<mappers>
<mapper name = "com.test.mybatis.mapper"/>
<mappers>
小技巧之typeAliases
我们先来看看CarMapper.xml文件
<?xml version="1.0" encoding="UTF-8" ?>
<!DOCTYPE mapper
        PUBLIC "-//mybatis.org//DTD Mapper 3.0//EN"
        "http://mybatis.org/dtd/mybatis-3-mapper.dtd">
<mapper namespace="com.test.mybatis.mapper.CarMapper">

    </select>
    <select id="selectAll" resultType="com.test.mybatis.pojo.Car">
        select
            id,
            car_num as carNum,
            brand,
            guide_price as guidePrice,
            produce_time as produceTime,
            car_type as carType
        from powernode
    </select>
</mapper>
我们可以看到resulType属性是用来制定查询结果集封装类型的,但这个名字太长,硬刺我们可以给他起个别名,我们可以在mybatis-config.xml中使用typeAliases
第一种:该段代码应该放在envorments标签上,配置文件引用下边
<typeAliases>
<typeAlias type="com.test.mybatis.pojo.Car" alias="aaa"/>
</typealiases>
type:指定给哪个类起别名
alias:别名(不区分大小写)
虽然这样一定程度上减少了代码书写的复杂度,但如果有100行代码要写resultType,那么就要写100行<typeAlias type="com.test.mybatis.pojo.Car" alias="aaa"/>
所以有了第二种,也是最常用的一种
第二种:只需要指定包名,该包下的所有勒都会起别名,(别名为类名)不区分大小写
<typeAliases>
  <package name="com.test.mybatis.pojo"/>
<typeAlisases>
CarMapper.xml: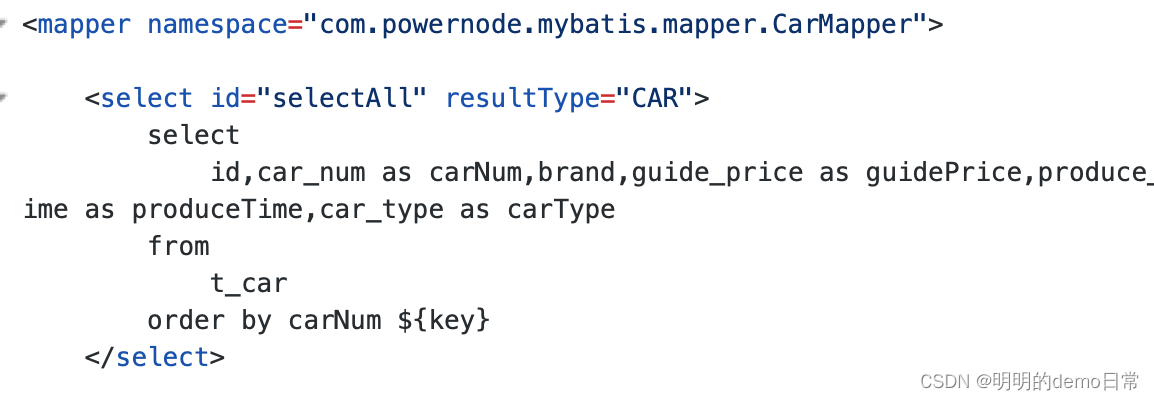
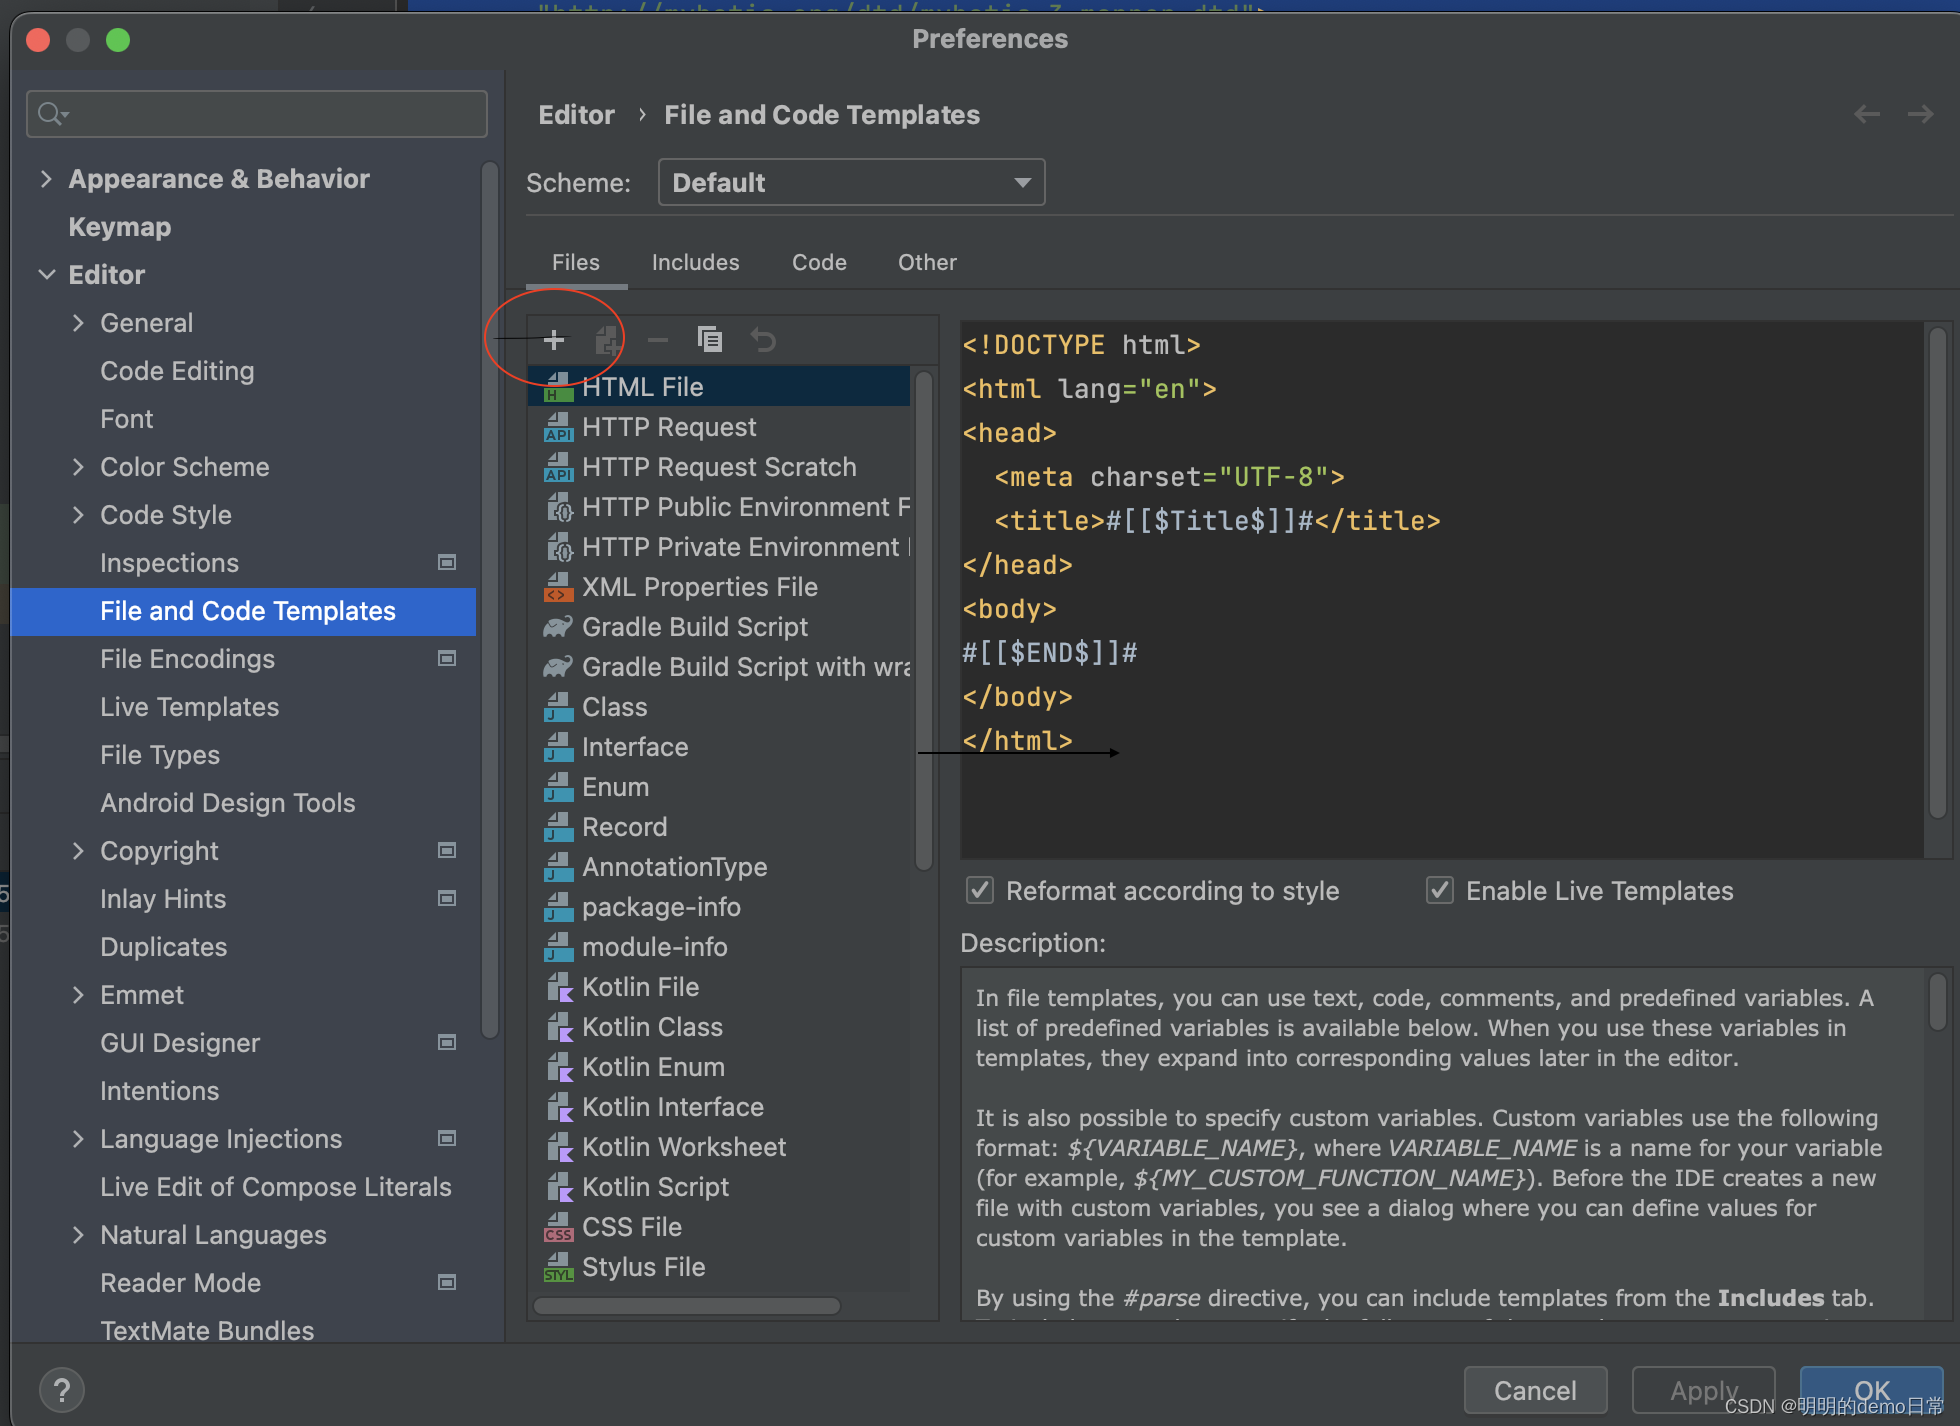
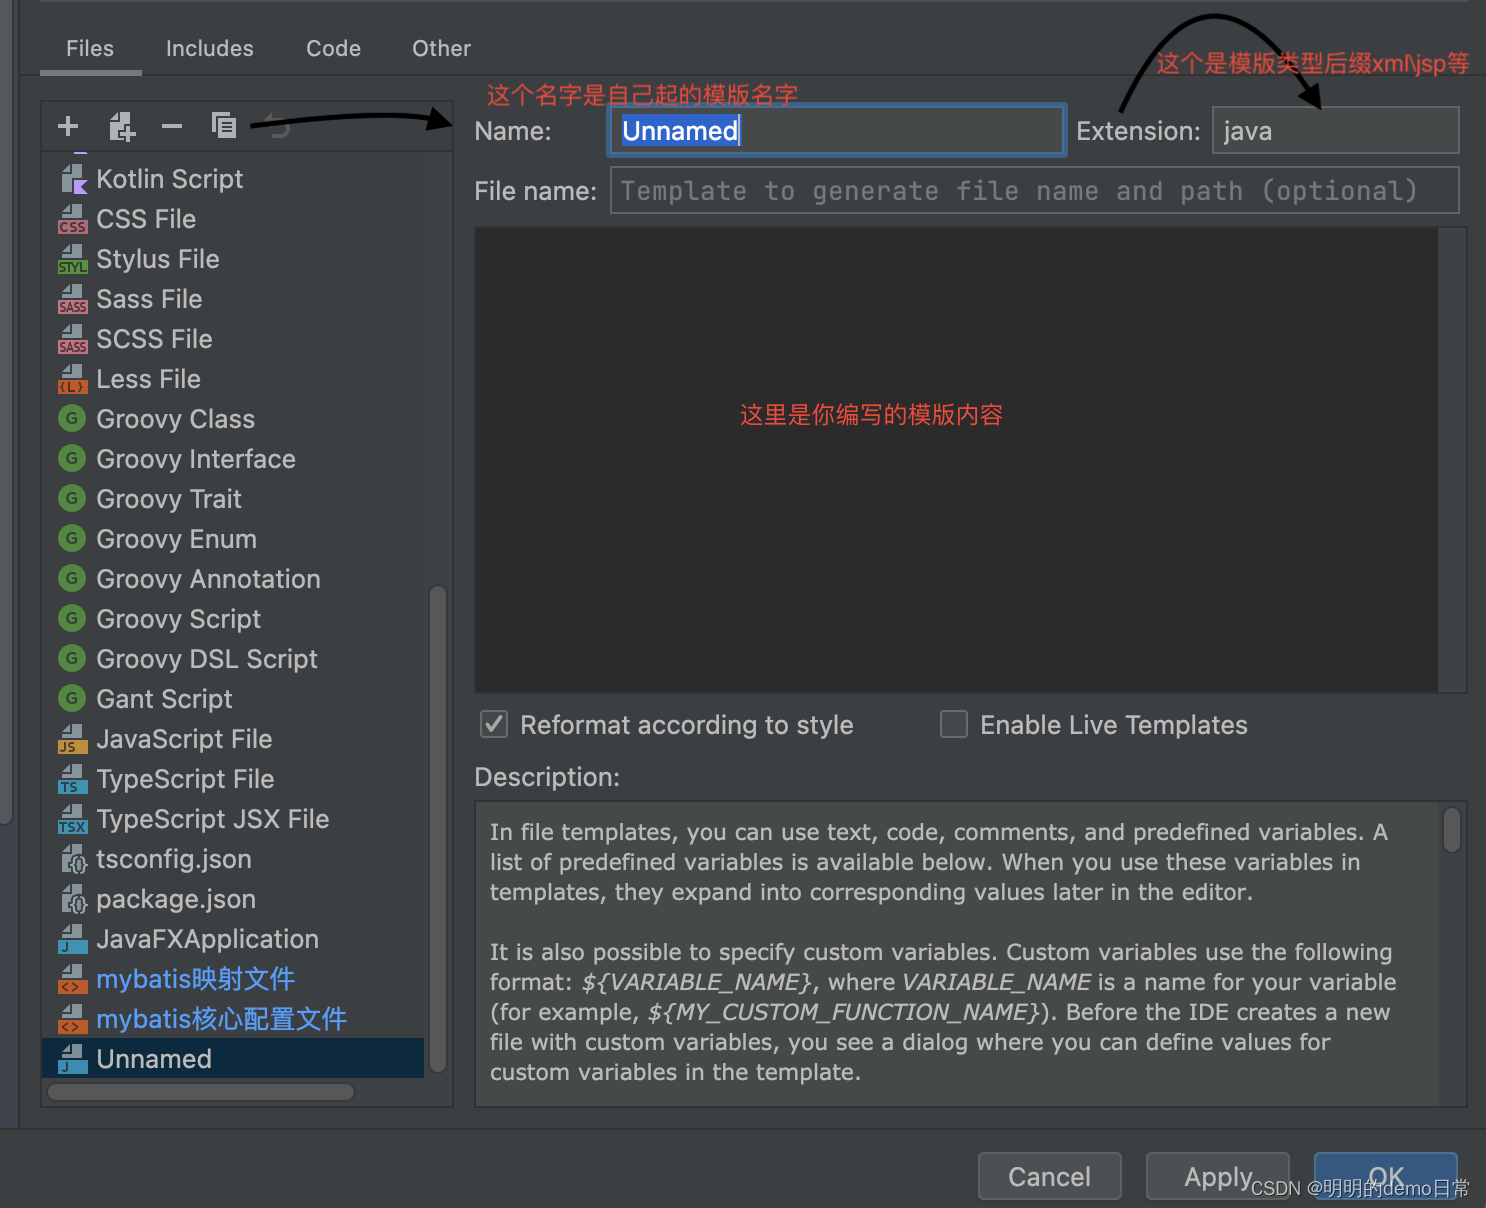
idea配置文件模版
插入数据时获取自动生成的主键
两个属性:useGeneratedkeys=“true”:使用自动生成的主建值
keyProperty=“ID”指定主建值赋值给对象的那个属性
<insert id =insert useGeneratedKey="true keyProperty="id>
insert into t_car values(null.#{carNum}
</insert>
这里id是null,但输出id是有结果的
mybatis参数处理
单个简单参数类型
简单类型包括:
- byte、short、int、long、double、char
- Byte、Short、Integer、Float、Double、Character
- String
- Java.util.Date
- java.sql.Date
建表
 需求根据接口中四种类型进行查询
注意date类型和Charsert类型
StudentMapper.java
public interface StudentMapper {

    List<Student> selectById(Long id);
    List<Student> selectByName(String name);
    List<Student> selectByBirth(Date birth);
    List<Student> selectBySex(Character sex);
}
StudentMapper.xml
<?xml version="1.0" encoding="UTF-8" ?>
<!DOCTYPE mapper
        PUBLIC "-//mybatis.org//DTD Mapper 3.0//EN"
        "http://mybatis.org/dtd/mybatis-3-mapper.dtd">
<mapper namespace="com.test.mybatis.mapper.StudentMapper">
    <select id="selectById" resultType="student">
        select * from t_student  where id= #{id}
    </select>

    <select id="selectByName" resultType="student">
        select * from t_student where name=#{name};
    </select>

    <select id="selectByBirth" resultType="student">
        select * from t_student where birth = #{birth}
    </select>

    <select id="selectBySex" resultType="student">
        select * from t_student where sex= #{sex};
    </select>
</mapper>
studentMapperTest.java:注意看日期类型的和Character类型(第三个和第四个)
public class StudentMapperTest {
@Test
    public void testselectById(){
        SqlSession sqlSession = SqlSessionUtil.openSession();
        StudentMapper mapper = sqlSession.getMapper(StudentMapper.class);
    List<Student> students = mapper.selectById(1L);
    students.forEach(student -> System.out.println(student));
        sqlSession.close();
    }

@Test
    public void testSelectByName(){
        SqlSession sqlSession = SqlSessionUtil.openSession();
        StudentMapper mapper = sqlSession.getMapper(StudentMapper.class);
        List<Student> students = mapper.selectByName("张三");
        students.forEach(student -> System.out.println(student));
        sqlSession.close();
    }

    @Test
    public void testSelectByBirth() throws ParseException {
        SqlSession sqlSession = SqlSessionUtil.openSession();
        StudentMapper mapper = sqlSession.getMapper(StudentMapper.class);
        SimpleDateFormat sdf = new SimpleDateFormat("yyyy-MM-dd");
        Date birth = sdf.parse("1980-10-11");
        List<Student> students = mapper.selectByBirth(birth);
        students.forEach(student -> System.out.println(student));
        sqlSession.close();
    }
@Test
    public void testSelectBySex(){
        SqlSession sqlSession = SqlSessionUtil.openSession();
        StudentMapper mapper = sqlSession.getMapper(StudentMapper.class);
        Character sex = Character.valueOf('男');
        List<Student> students = mapper.selectBySex(sex);
        students.forEach(student -> System.out.println(student));
        sqlSession.close();

    }
}
Map参数类型 处理
这种方式是手动封装Map集合,将每个条件以key和value的形式存在集合中。
接口格式
int insertStudentByMap (Map<String,Object> map);
 <insert id="insertStudentByMap">
        insert into t_student(id,name,age,height,sex,birth)
values (null,#{姓名},#{年龄},#{身高},#{性别},#{生日})
    </insert>
@Test
public void testinsertStudentByMap(){
SqlSession sqlSession = SqlSessionUtil.openSession();
StudentMapper mapper = sqlSession.getMapper(StudentMapper.class);
Map<String,Object> map = new HashMap<>();
map.put("姓名","赵六");
map.put("年龄",20);
map.put("身高",1.81);
map.put("性别",'男');
map.put("生日",new Date());
mapper.insertStudentByMap(map);
sqlSession.commit();
sqlSession.close();
}实体类参数
int insertStudentByPOJO(Student student);
 <insert id="insertStudentByPOJO">
        insert into t_student(id,name,age,height,sex,birth)
        values (null,#{name},#{age},#{height},#{sex},#{birth})
    </insert>
@Test
public void testtestinsertStudentByPOJO(){
SqlSession sqlSession = SqlSessionUtil.openSession();
StudentMapper mapper = sqlSession.getMapper(StudentMapper.class);
Student student = new Student();
student.setName("张飞");
student.setAge(22);
student.setHeight(1.90);
student.setSex('男');
student.setBirth(new Date());
mapper.insertStudentByPOJO(student);
sqlSession.commit();
sqlSession.close();
}多个参数传递分两种情况
第一种
* 多参数
* 这种情况mybatis会自动创建一个Map集合 并且参数形式如下
* map.put("arg0",name}
* map.put("arg1",name}
* map.put("param1",name}
* map.put("param2",name}
代码
List<Student> selectByNameAndSex(String name,Character sex)
 <select id="selectByNameAndSex"  resultType="student">
         select  * from t_student where name=#{arg0} and sex = #{arg1}
    </select>
public void testselectByNameAndSex(){
SqlSession sqlSession = SqlSessionUtil.openSession();
StudentMapper mapper = sqlSession.getMapper(StudentMapper.class);
List<Student> students = mapper.selectByNameAndSex("张三", '男');
students.forEach(student -> System.out.println(student));
sqlSession.close();
}第二种常用
* Param注解:底层是一个map集合
* mybatis框架的底层实现原理
* map.Put(""name",name)
* map.put("sex",sex)
*
* @Param name 类型 name
* @Param sex   类型 sex
List<Student> selectByNameAndSex2(@Param("name") String name,@Param("sex") Character sex);
   <select id="selectByNameAndSex2" resultType="student">
        select * from t_student where name=#{name} and sex=#{sex}
    </select>
@Test
public void testselectByNameAndSex2(){
SqlSession sqlSession = SqlSessionUtil.openSession();
StudentMapper mapper = sqlSession.getMapper(StudentMapper.class);
List<Student> students = mapper.selectByNameAndSex2("张三",'男');
students.forEach(student -> System.out.println(student));
sqlSession.close();
}查询专题之返回
根据id查询car信息,这里只能返回一条数据。 其他的写法和上百遍的一样这里不不不在详细写
Car selectById(Long id);获取所有的car,需要一个list集合
List<Car> selectAll();根据品牌进行模糊查询 这里的模糊查询的结果有一个,如果有多条结果会报错
如果要返回多条使用list即可
Car selectBByBrandLike(String brand);


List<Car>selectById2(String  brand);
<select id="selectBByBrandLike" resultType="car">
    select * from powernode where
                                brand like "%"#{brand}"%"
</select>
@Test
public void selectBByBrandLike(){
SqlSession sqlSession = SqlSessionUtil.openSession();
CarMapper mapper = sqlSession.getMapper(CarMapper.class);
Car car = mapper.selectBByBrandLike("大众");
System.out.println(car);
sqlSession.close();
}* 根据id获取汽车信息。将汽车信息放到Map集合中。 * 注意 这里是返回Map,并不是返回某个实体类 * 但这种只能返回一条,看下面map对应的 * | id | car_num | brand | guide_price | produce_time | car_type | * * +-----+---------+----------+-------------+--------------+----------+ * * | 158 | 1111 | 比亚迪汉 | 3.00 | 2000-10-10 | 新能源 | * * +-----+---------+----------+-------------+--------------+----------+ * * * * Map<String, Object> * * k v * * ----------------------- * * "id" 158 * * "car_num" 1111 * * "brand" 比亚迪汉
Map<String,Object> selectByIdRetMap(String brand);应为返回的map集合,没有对应的实体类,所以这里的type应该是java.util.Map
 <select id="selectAllRetListMap" resultType="map">
        select * from powernode
    </select>
<select id="selectByIdRetMap" resultType="map">
select * from powernode where brand = #{brand}
</select> @Test
public void testselectByIdRetMap(){
SqlSession sqlSession = SqlSessionUtil.openSession();
CarMapper mapper = sqlSession.getMapper(CarMapper.class);
Map<String,Object> car = mapper.selectByIdRetMap("大众");
System.out.println(car);
sqlSession.close();
}如果要返回多条map集合可以使用list
List<Map<String,Object>> selectAllRetListMap();<select id="selectAllRetListMap" resultType="map">
select * from powernode
</select> @Test
public void testselectAllRetListMap(){
SqlSession sqlSession = SqlSessionUtil.openSession();
CarMapper mapper = sqlSession.getMapper(CarMapper.class);
List<Map<String,Object>> maps = mapper.selectAllRetListMap();
maps.forEach(map -> System.out.println(map));
sqlSession.close();
}查询所有的car,返回一个大Map集合
* Map集合的key是每条记录的主建值,这里是id
* map集合的value是每条记录所有值,这种的好处
跟上边比查询效率高
比如:你需要查询ID=3的,上边需要便利三个{}才能找到id=3
er这种只需要根据key=3快速找到* {
* 1={...}
* 2={...}
* }
    @MapKey("id")//将查询结果的id值作为整个大Map集合的key。
    Map<Long,Map<String,Object>> selectAllRetMap();
<select id="selectAllRetMap" resultType="map">
select * from powernode
</select>
@Test
    public void testSelectAllRetMap(){
        SqlSession sqlSession = SqlSessionUtil.openSession();
        CarMapper mapper = sqlSession.getMapper(CarMapper.class);
         Map<Long,Map<String,Object>> maps = mapper.selectAllRetMap();
    System.out.println(maps);
        sqlSession.close();
    }
还记得我们结果列名和Java属性名对不上我们怎么处理的吗
我们选择了起别名
现在我们有了更好的机制
使用resultMap进行结果映射或者使用驼峰命名映射,我们一个一个来看
resultMap
List<Car> selectAllByResultMap();
注意下面书写格式
<resultMap id="carResultMap" type="Car">

    <!--如果数据库表中有主键,一般都是有主键,要不然不符合数据库设计第一范式。-->
    <!--如果有主键,建议这里配置一个id标签,注意:这不是必须的。但是官方的解释是什么呢?这样的配置可以让mybatis提高效率。-->
    <id property="id" column="id"></id>
    <!--property后面填写POJO类的属性名-->
    <!--column后面填写数据库表的字段名-->
    <result property="carNum" column="car_num" javaType="string" jdbcType="VARCHAR"></result>
    <!--如果column和property是一样的,这个可以省略。-->
    <!--<result property="brand" column="brand"/>-->
    <result property="guidePrice" column="guide_price"/>
    <result property="produceTime" column="produce_time"/>
    <result property="carType" column="car_type" javaType="string" jdbcType="VARCHAR"/>
</resultMap>
    <!--select标签的resultMap属性,用来指定使用哪个结果映射。
    resultMap后面的值是resultMap的id  定义后 所有的SQL语句resultMap相照应都可以不使用别名-->
    <select id="selectAllByResultMap" resultMap="carResultMap">
        select * from powernode
    </select>
@Test
public void testSelectAllByResultMap(){
SqlSession sqlSession = SqlSessionUtil.openSession();
CarMapper mapper = sqlSession.getMapper(CarMapper.class);
List<Car> cars = mapper.selectAllByResultMap();
cars.forEach(car -> System.out.println(car));
sqlSession.close();
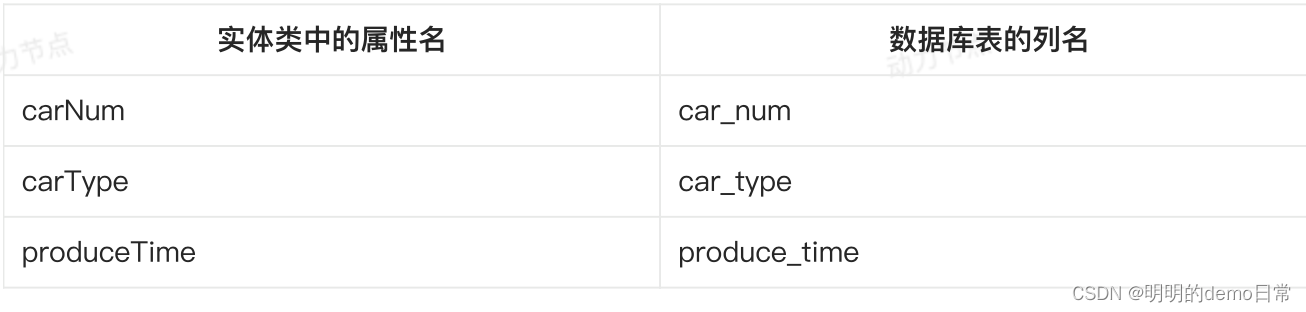
}驼峰命名前提:
属性名遵寻Java命名规范:首字母小写,后面每个单词首字母大写
数据库列名遵循sql命名规范:全部小写,单词之间采用下划线分割
在mybatis-config中配置:
 <settings>
        <setting name="mapUnderscoreToCamelCase" value="true"/>
    </settings>
List<Car> selectAllByMapUnderscoreToCamelCase(); <select id="selectAllByMapUnderscoreToCamelCase" resultType="Car">
select * from powernode
</select>
@Test
    public void testSelectAllByMapUnderscoreToCamelCase(){
        SqlSession sqlSession = SqlSessionUtil.openSession();
        CarMapper mapper = sqlSession.getMapper(CarMapper.class);
        List<Car> cars = mapper.selectAllByMapUnderscoreToCamelCase();
        cars.forEach(car-> System.out.println(car));
        sqlSession.close();

    }
查询总记录条数
Long selectTotal();<!-- 注意接口返回java.lang.Long-->
<select id="selectTotal" resultMap="long">
select count(*) from powernode
</select> @Test
public void testSelectTotal(){
SqlSession sqlSession = SqlSessionUtil.openSession();
CarMapper mapper = sqlSession.getMapper(CarMapper.class);
Long total = mapper.selectTotal();
System.out.println("总记录条数:" + total);
sqlSession.close();
}动态SQL(重要)
开发中 很多业务场景都会使用到SQL语句进行动态拼接:
-
批量删除,插入等
-
多条件更新
下面我们介绍他的标签和用法吧
if标签
使用场景:多条件查询
需求:根据 brand 品牌 guidePrice 指导价 carType 汽车类型三个条件查询相应信息
编写接口
    List<Car> selectByMultiCondition(@Param("brand") String brand,
                                     @Param("guidePrice") Double guidePrice,
                                     @Param("carType") String carType);
具体SQL语句编写
这里加1=1 是恒成立的意思,只有加上这个条件,当三个条件都为null,也就是三个if都不走也不会报错
否则日志上的语句是select * from powernode where ,where子句后面什么都没有会报错-
if标签中test属性是必必须的 if标签中test的属性是false和true 如果test是true ,则if标签中的SQL语句会进行拼接,反之并不会 当使用了@param注解,那么test中要出现@param注解指定的参数名。 @param("brand")那么test这里只能使用brand 没有使用注解时 test要出现的是:param1或 agr0 当时用了POJO中的实体类时test使用的是POJO属性名 在mybatis只能使用and拼接
<select id="selectByMultiCondition" resultType="car">

    select * from powernode where 1=1

    <if test="brand != null and brand !=''">
        and brand like "%"#{brand}"%"
    </if>
    <if test="guidePrice !=null and guidePrice !=''  ">
        and guide_price>#{guidePrice}
    </if>
    <if test="carType != null and carType !=''">
        and car_type = #{carType}
    </if>
</select>
</mapper>
测试
  @Test
    public void testSelectByMultiCondition(){
        SqlSession sqlSession = SqlSessionUtil.openSession();
        CarMapper mapper = sqlSession.getMapper(CarMapper.class);
    //   List<Car> cars =  mapper.selectByMultiCondition("凯美瑞",3.0,"新能源");
        //List<Car> cars = mapper.selectByMultiCondition("", null, "");
        List<Car> cars = mapper.selectByMultiCondition("凯美瑞", null, "");
       // List<Car> cars = mapper.selectByMultiCondition("", 2.0, "新能源");
       cars.forEach(car -> System.out.println(car));
sqlSession.close();
    }
where标签
所有条件都为空时,where标签保证不会生成where子句
会自动去除某些田间前面多余的and和or
接口
 List<Car> selectByMultiConditionWithWhere(@Param("brand") String brand,
                                              @Param("guidePrice") Double guidePrice,
                                              @Param("carType") String carType);
这里使用了where表情不用再加恒成立的语句
<select id="selectByMultiConditionWithWhere" resultType="car">
    select * from powernode
--         注意这里的and标签只能在橘子前面拼接并不能在后面
 <where>
     <if test="brand != null and brand !=''">
         and brand like "%"#{brand}"%"
     </if>
     <if test="guidePrice !=null and guidePrice !=''  ">
         and guide_price>#{guidePrice}
     </if>
     <if test="carType != null and carType !=''">
         and car_type = #{carType}
     </if>
 </where>
</select>
@Test
public void testSelectByMultiConditionWithWhere(){
SqlSession sqlSession = SqlSessionUtil.openSession();
CarMapper mapper = sqlSession.getMapper(CarMapper.class);
List<Car> cars = mapper.selectByMultiConditionWithWhere("凯美瑞",3.0,"新能源");
//List<Car> cars = mapper.selectByMultiConditionWithWhere("", null, "");
// List<Car> cars = mapper.selectByMultiConditionWithWhere("比亚迪", null, "");
// List<Car> cars = mapper.selectByMultiConditionWithWhere("", 2.0, "新能源");
cars.forEach(car -> System.out.println(car));
sqlSession.close();
}trim标签
他可以动态的管理前后缀
四个属性
prefix:加前缀
suffix:加后缀
prefixOverrides:删除前缀
suffixOverrides:删除后缀
List<Car> selectByMultiConditionWithTrim (@Param("brand") String brand,
                                          @Param("guidePrice") Double guidePrice,
                                          @Param("carType") String carType);
    /**
<select id="selectByMultiConditionWithTrim" resultType="Car">
select * from powernode
<!--prefix="where" 是在trim标签所有内容的前面添加 where-->
<!--suffixOverrides="and|or" 把trim标签中内容的后缀and或or去掉-->
<trim prefix="where" suffixOverrides="and|or">
<if test="brand != null and brand != ''">
brand like "%"#{brand}"%" and
</if>
<if test="guidePrice != null and guidePrice != ''">
guide_price > #{guidePrice} and
</if>
<if test="carType != null and carType != ''">
car_type = #{carType}
</if>
</trim>
</select> @Test
public void testSelectByMultiConditionWithTrim(){
SqlSession sqlSession = SqlSessionUtil.openSession();
CarMapper mapper = sqlSession.getMapper(CarMapper.class);
List<Car> cars = mapper.selectByMultiConditionWithTrim("凯美瑞",3.0,"新能源");
//List<Car> cars = mapper.selectByMultiConditionWithTrim("", null, "");
// List<Car> cars = mapper.selectByMultiConditionWithTrim("比亚迪", null, "");
// List<Car> cars = mapper.selectByMultiConditionWithTrim("", 2.0, "新能源");
cars.forEach(car -> System.out.println(car));
sqlSession.close();
}set标签
主要是用在update语句中,用该关键字去掉多余的“,” 以及只更改需要的值时其他字段不会为null
int updateBySet(Car car);sql语句中如果我们使用以前的方式编写
    <update id="updateById" >
update powernode
set
      car_num = #{carNum},
       brand = #{brand},
       guide_price = #{guidePrice},
       produce_time = #{produceTime},
       car_type = #{carType}
        where id = #{id}
    </update>
当我们更改这条语句
Car car = new Car(12L,null,"霸道",null,null,"燃油)
本来数据库
执行完后:其他字段为null![]() 但使用set标签不会出现这种情况
但使用set标签不会出现这种情况
    <update id="updateBySet">
        update powernode
<set>
    <if test="carNum !=null and carNum !=''">
        car_num =#{carNum},
    </if>
    <if test="brand !=null and brand !=''">
        brand =#{brand},
    </if>
    <if test="guidePrice !=null and guidePrice !=''">
        guide_price =#{guidePrice},
    </if>
    <if test="produceTime !=null and produceTime !=''">
        produce_time =#{produceTime},
    </if>
    <if test="carType !=null and carType !=''">
        car_type =#{carType},
    </if>
</set>
            where
id =#{id}
    </update>
测试:还是那条数据我们将他恢复成都有数据后将它品牌改为大众
 public void testUpdateById(){
        SqlSession sqlSession = SqlSessionUtil.openSession();
        CarMapper mapper = sqlSession.getMapper(CarMapper.class);
        Car car = new Car(12L,null,"大众",null,null,"燃油车");
        mapper.updateById(car);
        sqlSession.commit();
        sqlSession.close();
    }
![]()
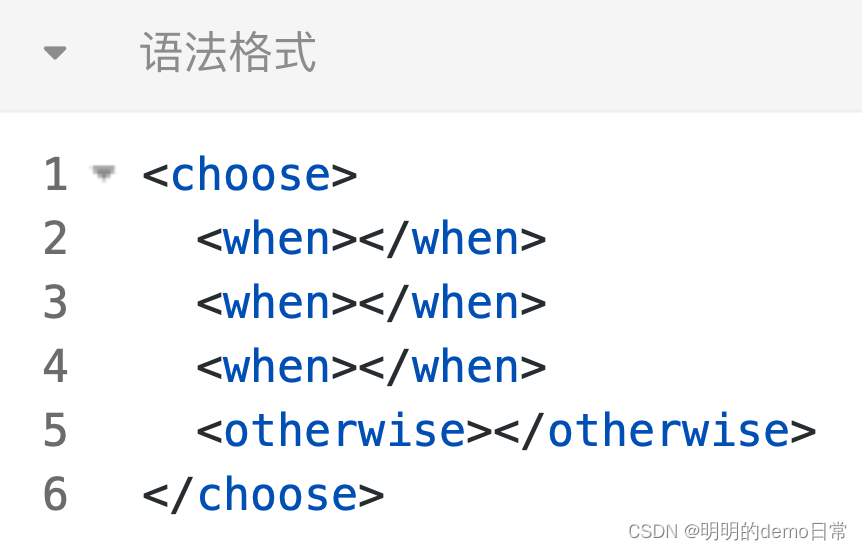
choose when otherwise 标签
注意:这三个标签是一起用的
它等同于if else :只会有一个分支被执行

  List<Car> selectByChoose(@Param("brand") String brand,
                             @Param("guidePrice")Double guidePrice,
                             @Param("carType") String carType);
<select id="selectByChoose" resultType="car">
select * from powernode
<where>
<choose>
<when test="brand !=null and brand !=''">
brand =#{brand}
</when>
<when test="guidePrice !=null and guidePrice !=''">
guide_price >#{guidePrice}
</when>
<otherwise>
car_type = #{carType}
</otherwise>
</choose>
</where>
</select> public void testSelectByChoose(){
SqlSession sqlSession = SqlSessionUtil.openSession();
CarMapper mapper = sqlSession.getMapper(CarMapper.class);
List<Car> cars = mapper.selectByChoose("丰田霸道",1.0,"新能源");
cars.forEach(car -> System.out.println(car));
sqlSession.close();
}批量删除
需要使用到foreach标签,来便利数组和集合
foreach标签的属性:
    collection:指定数组或者集合
    item:代表数组或集合中的元素
    separator:循环之间的分隔符
    open: foreach循环拼接的所有sql语句的最前面以什么开始。
    close: foreach循环拼接的所有sql语句的最后面以什么结束。

collection="ids" 第一次写这个的时候报错了,错误信息是:[array, arg0]
什么意思?
    map.put("array", 数组);
    map.put("arg0", 数组);
使用in关键字来删除
int deleteByIds(@Param("ids") Long[] ids); <delete id="deleteByIds" >
delete from powernode where id in(
<foreach collection="ids" item="id" separator=",">
#{id}
</foreach>
)
</delete> public void testDeleteByIds(){
SqlSession sqlSession = SqlSessionUtil.openSession();
CarMapper mapper = sqlSession.getMapper(CarMapper.class);
Long[] ids = {1L,2L};
int count = mapper.deleteByIds(ids);
System.out.println(count);
sqlSession.commit();
sqlSession.close();
}使用or关键字批量删除
int deleteByIds2(@Param("ids") Long[]ids); <delete id="deleteByIds2">
delete from powernode where(
<foreach collection="ids" item="id" separator="or">
id=#{id}
</foreach>
)
</delete> public void testDeleteByIds2(){
SqlSession sqlSession = SqlSessionUtil.openSession();
CarMapper mapper = sqlSession.getMapper(CarMapper.class);
Long[] ids = {3L,4L};
int count = mapper.deleteByIds2(ids);
System.out.println(count);
sqlSession.commit();
sqlSession.close();
}批量插入
int insertBatch(@Param("cars") List<Car>cars);<insert id="insertBatch">
insert into powernode values
<foreach collection="cars" item="car" separator=",">
(
null,#{car.carNum},#{car.brand},
#{car.guidePrice},#{car.produceTime},#{car.carType}
)
</foreach>
</insert> public void testInsertBatch(){
SqlSession sqlSession = SqlSessionUtil.openSession();
CarMapper mapper = sqlSession.getMapper(CarMapper.class);
Car car1 = new Car(null,"1000","雪弗莱",10.0,"2021-11-11","燃油车");
Car car2 = new Car(null,"1001","雪弗莱",10.0,"2021-11-11","燃油车");
Car car3 = new Car(null,"1002","雪弗莱",10.0,"2021-11-11","燃油车");
List<Car>cars = new ArrayList<>();
cars.add(car1);
cars.add(car2);
cars.add(car3);
mapper.insertBatch(cars);
sqlSession.commit();
sqlSession.close();
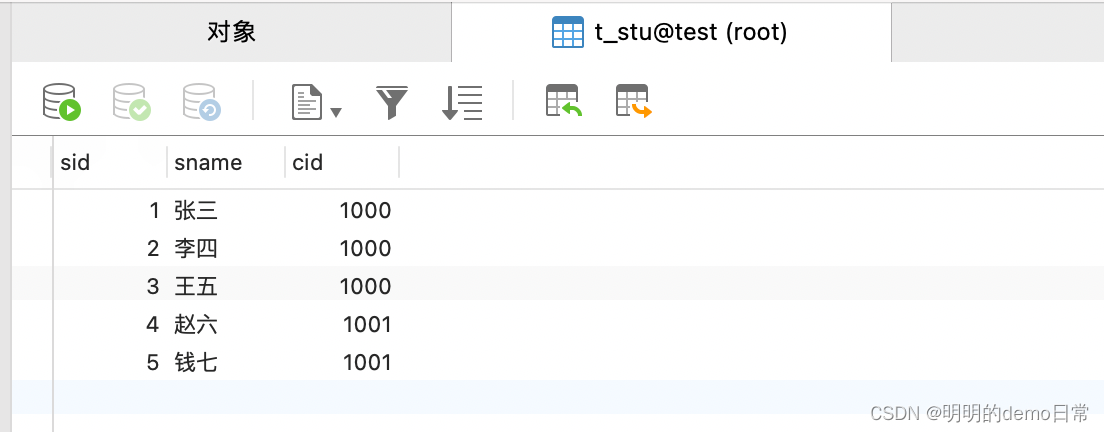
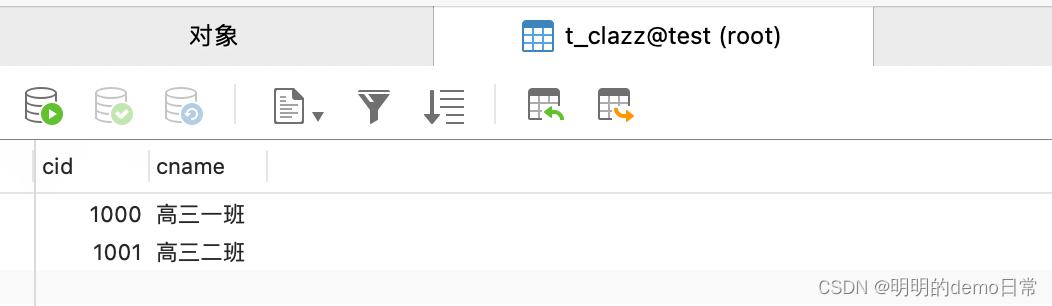
}mybatis高级映射及延迟加载
数据表:这两张表存在多对一和一对一的关系
多对一:多个学生对应一个班级
一对多:一个班级对应多个学生
那在两种关系中怎样分那个是主表呢?
那个在前那个就是:多对一:多在前,学生表是主表
一对多:一在前半集是主表
学生表
班级表
多对一
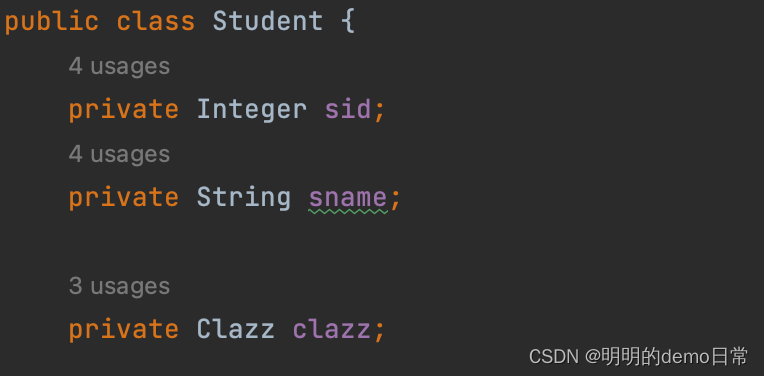
首先我们先构建学生实体类和班级实体类
由于多个学生对应一个班级,那么学生类中应该有Clazz 的属性字段
一个班级对应多个学生那么班级类中应该有学生类的集合
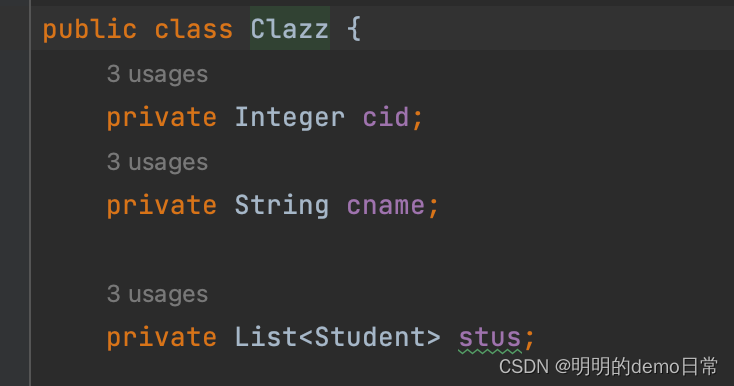
多对一实现有三种方式:
- 级联属性映射
- association
- 分布查询(常用)
级联属性映射
需求:
根据id获取学生信息,同时获取学生关联的班级信息
Student selectById(Integer id);
    <resultMap id="studentResultMap" type="Student">
        <id property="sid" column="sid"/>
        <result property="sname" column="sname"/>
<!--        字段名clazz属于Clazz类 而这个类里有cid cname-->
        <result property="clazz.cid" column="cid"/>
        <result property="clazz.cname" column="cname"/>
    </resultMap>
<!--    下面select查询出来的结果回映射到上面resultMap各个字段上-->
    <select id="selectById" resultMap="studentResultMap">
        select
            s.sid,s.sname,c.cid,c.cname
        from
            t_stu s left join t_clazz c on s.cid = c.cid
        where
            s.sid = #{sid}
    </select>
public void testSelectById(){
SqlSession sqlSession = SqlSessionUtil.openSession();
StudentMapper mapper = sqlSession.getMapper(StudentMapper.class);
Student student = mapper.selectById(3);
System.out.println(student);
sqlSession.close();
}association实现
Student selectByIdAssociation(Integer id);
  association :翻译为关联,一个Student对象关联一个Clazz对象
        property:提供要要映射的pojo类的属性
        javaType:用来zhiding要映射的Java类型
  <resultMap id="studentResultMapAssociation" type="Student">
        <id property="sid" column="sid"/>
        <result property="sname" column="sname"/>

        <association property="clazz" javaType="Clazz">
            <id property="cid" column="cid"/>
            <result property="cname" column="cname"/>
        </association>
    </resultMap>
    <select id="selectByIdAssociation" resultMap="studentResultMapAssociation">
        select
            s.sid ,s.sname,c.cid,c.cname
        from
            t_stu s left join t_clazz c on s.cid = c.cid
        where
            s.sid = #{sid}

    </select>
public void testSelectByIdAssociation(){
SqlSession sqlSession = SqlSessionUtil.openSession();
StudentMapper mapper = sqlSession.getMapper(StudentMapper.class);
Student student = mapper.selectByIdAssociation(3);
System.out.println(student);
sqlSession.close();分布查询(常用)
分布查询优点:复用性强可以重复利用 就比如下边的可以只获取学生表信息 也可以只获取班级表信息 也可以将两张表连接起来获取信息
分布查询可以充分利用他们的延迟加载/懒加载机制
  延迟加载的核心:用的时候在查询不用的时候不查询
  作用:提高性能。尽可能的不查或少查提高效率就下面的来说 我不需要第二部通过cid获取班级信息时我就不会执行这部分语句
  如果我没事用关键字开启延迟加载 那么不管你巡捕不需要获取班级变信息时 他都会查询
  怎样开启延迟加载
  association标签中添加fetchType="lazy"
  但我们在现实开发中一般不用这种方式,因为他是局部的只针对当前association关联的sql语句起作用。
  我们需要在config。xml配置setting来开启,这种是开启全局的
    <setting name="lazyLoadingEnabled" value="true"/>
    </settings>
    那么如果我有一部分要求不不不使用延迟加载怎么办
    我们可以让fetchType="eager"  这样与当前association关联的sql语句就不会有延迟加载
第一步:根据学生id查询学生信息
第二步:根据班级编号获取班级信息
延迟加载的全局开关
 <setting name="lazyLoadingEnabled" value="true"/>
    </settings>
StudentMapper接口
Student selectByIdStep1(Integer sid);ClazzMapper接口
Clazz selectByStep1(Integer cid);StudentMapper.xml
<resultMap id="studentResultMapByStep" type="Student">
        <id property="sid" column="sid"/>
        <result property="sname" column="sname"/>
<!--        clazz:是属性名 select 是C啦转账累的SQL语句对应的接口路径-->
        <association property="clazz"
                     select="com.test.mybatis.mapper.ClazzMapper.selectByIdStep2"
                     column="cid"
                     fetchType="lazy"/>
    </resultMap>

    <select id="selectByIdStep1" resultMap="studentResultMapByStep">
        select sid,sname,cid from t_stu where sid = #{sid}
    </select>
ClazzMapper.xml
<select id="selectByStep1" resultType="Clazz">
    select cid,cname from t_clazz  where cid = #{cid}
</select>
public void testSelectByIdStep1(){
SqlSession sqlSession = SqlSessionUtil.openSession();
StudentMapper mapper = sqlSession.getMapper(StudentMapper.class);
Student student = mapper.selectByIdStep1(5);
// System.out.println(student);
System.out.println(student.getSname());
// System.out.println(student.getClazz().getCname());
sqlSession.close();
}一对多
通常是在一方中有list集合
第一种collection
根据班级编号查询班级信息
Clazz selectByCollection(Integer cid);跟多对一中 association用法相似值哦是这里使用的是collection关键字
 <resultMap id="clazzResultMapStep" type="Clazz">
        <id property="cid" column="cid"/>
        <result property="cname" column="cname"/>
        <collection property="stus"
                    select="com.powernode.mybatis.mapper.StudentMapper.selectByCidStep2"
                    column="cid" fetchType="eager" />
    </resultMap>

    <select id="selectByStep1" resultMap="clazzResultMapStep">
        select cid,cname from t_clazz where cid = #{cid}
    </select>
public void testSelectByCollection(){
SqlSession sqlSession = SqlSessionUtil.openSession();
ClazzMapper mapper = sqlSession.getMapper(ClazzMapper.class);
Clazz clazz = mapper.selectByCollection(1000);
System.out.println(clazz);
sqlSession.close();
}分步查询
第一步:根据班级编号获取班级信息。
第二部:根据班级编号查询学生信息
ClazzMapper。java
Clazz selectByStep1(Integer cid);StudentMapper。java
List<Student> selectByCidStep2(Integer cid);
ClazzMapper。xml
 <resultMap id="clazzResultMapStep" type="Clazz">
        <id property="cid" column="cid"/>
        <result property="cname" column="cname"/>
        <collection property="stus"
                    select="com.powernode.mybatis.mapper.StudentMapper.selectByCidStep2"
                    column="cid" fetchType="eager" />
    </resultMap>

    <select id="selectByStep1" resultMap="clazzResultMapStep">
        select cid,cname from t_clazz where cid = #{cid}
    </select>
StudentMapper。xml
 <select id="selectByCidStep2" resultType="Student">
        select * from t_stu where cid = #{cid}
    </select>
@Test
public void testSelectByStep1(){
SqlSession sqlSession = SqlSessionUtil.openSession();
ClazzMapper mapper = sqlSession.getMapper(ClazzMapper.class);
Clazz clazz = mapper.selectByStep1(1000);
//System.out.println(clazz);
// 只访问班级名字。
System.out.println(clazz.getCname());
// 只有用到的时候才会去执行第二步SQL
//System.out.println(clazz.getStus());
sqlSession.close();
}mybatis缓存
一般我们从磁盘上取数据,需要一定的时间。但如果我们取加载过一次的数据,将他第一次加载后放入jvm内存中,第二次直接从内存中去会快很多,这个在jvm内存放加载数据的过程就叫缓存。
mybatis缓存:将那个select语句查询结果放入内存中,下一次还是这条select语句的话,直接从缓存好的数据中取,不再查数据库提高效率。
mybatis缓存有
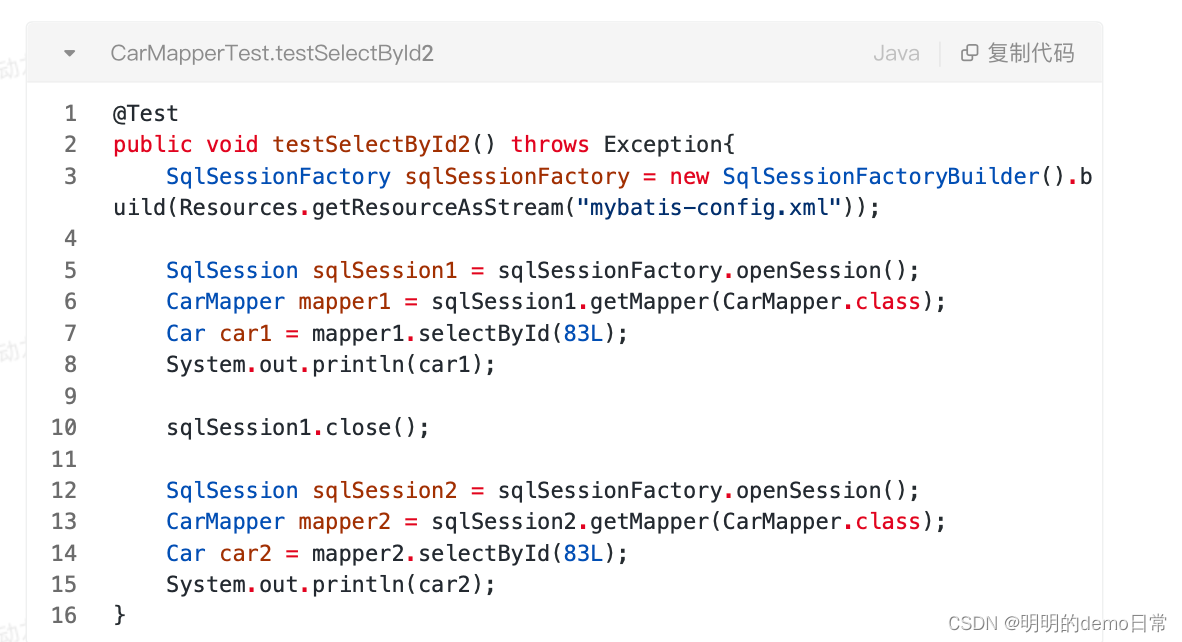
- 一级缓存:只在当前会话中(Sqlsession)
- 二级缓存:将查询到的数据存到SqlsessionFactory中
- 第三方缓存:EhCache Mecache等
一级缓存:默认开启,不需要任何配置
二级缓存满足条件

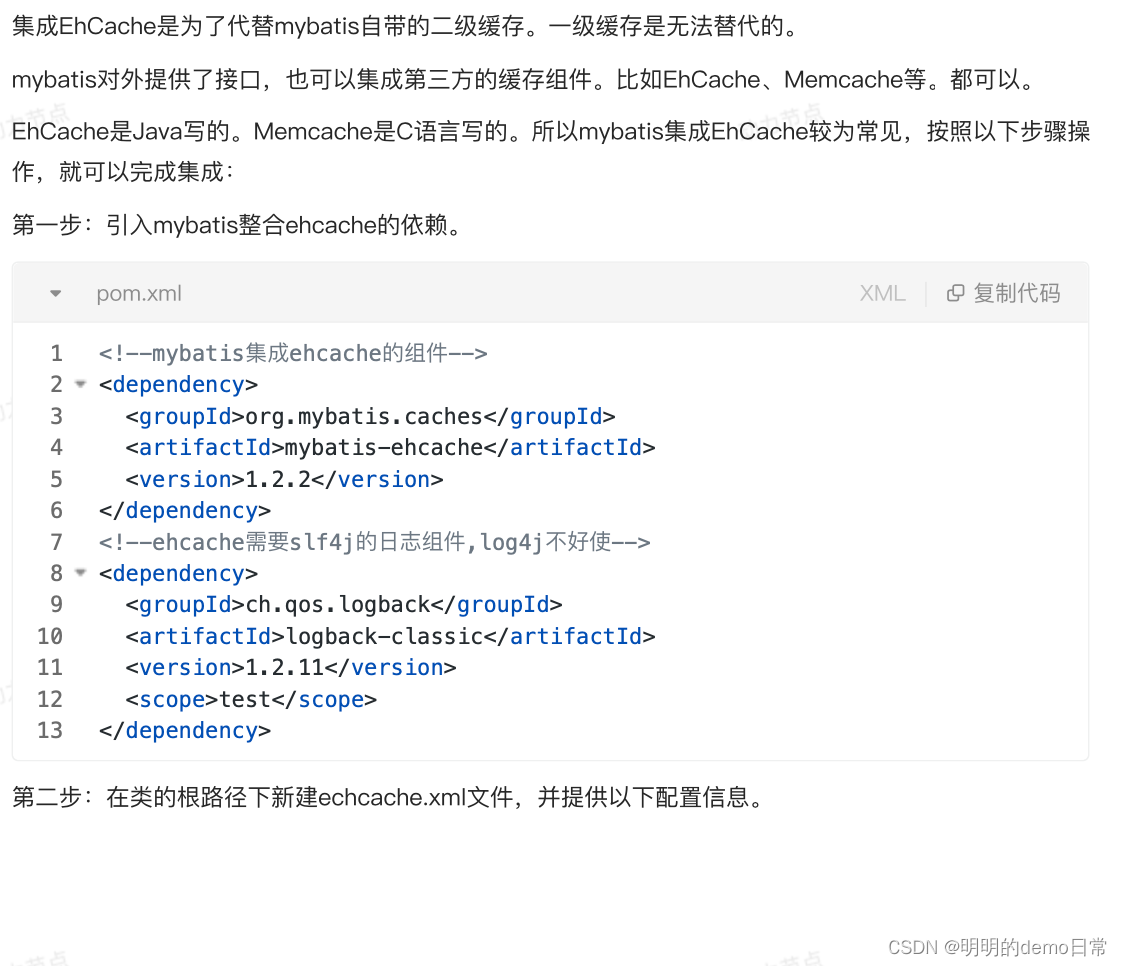
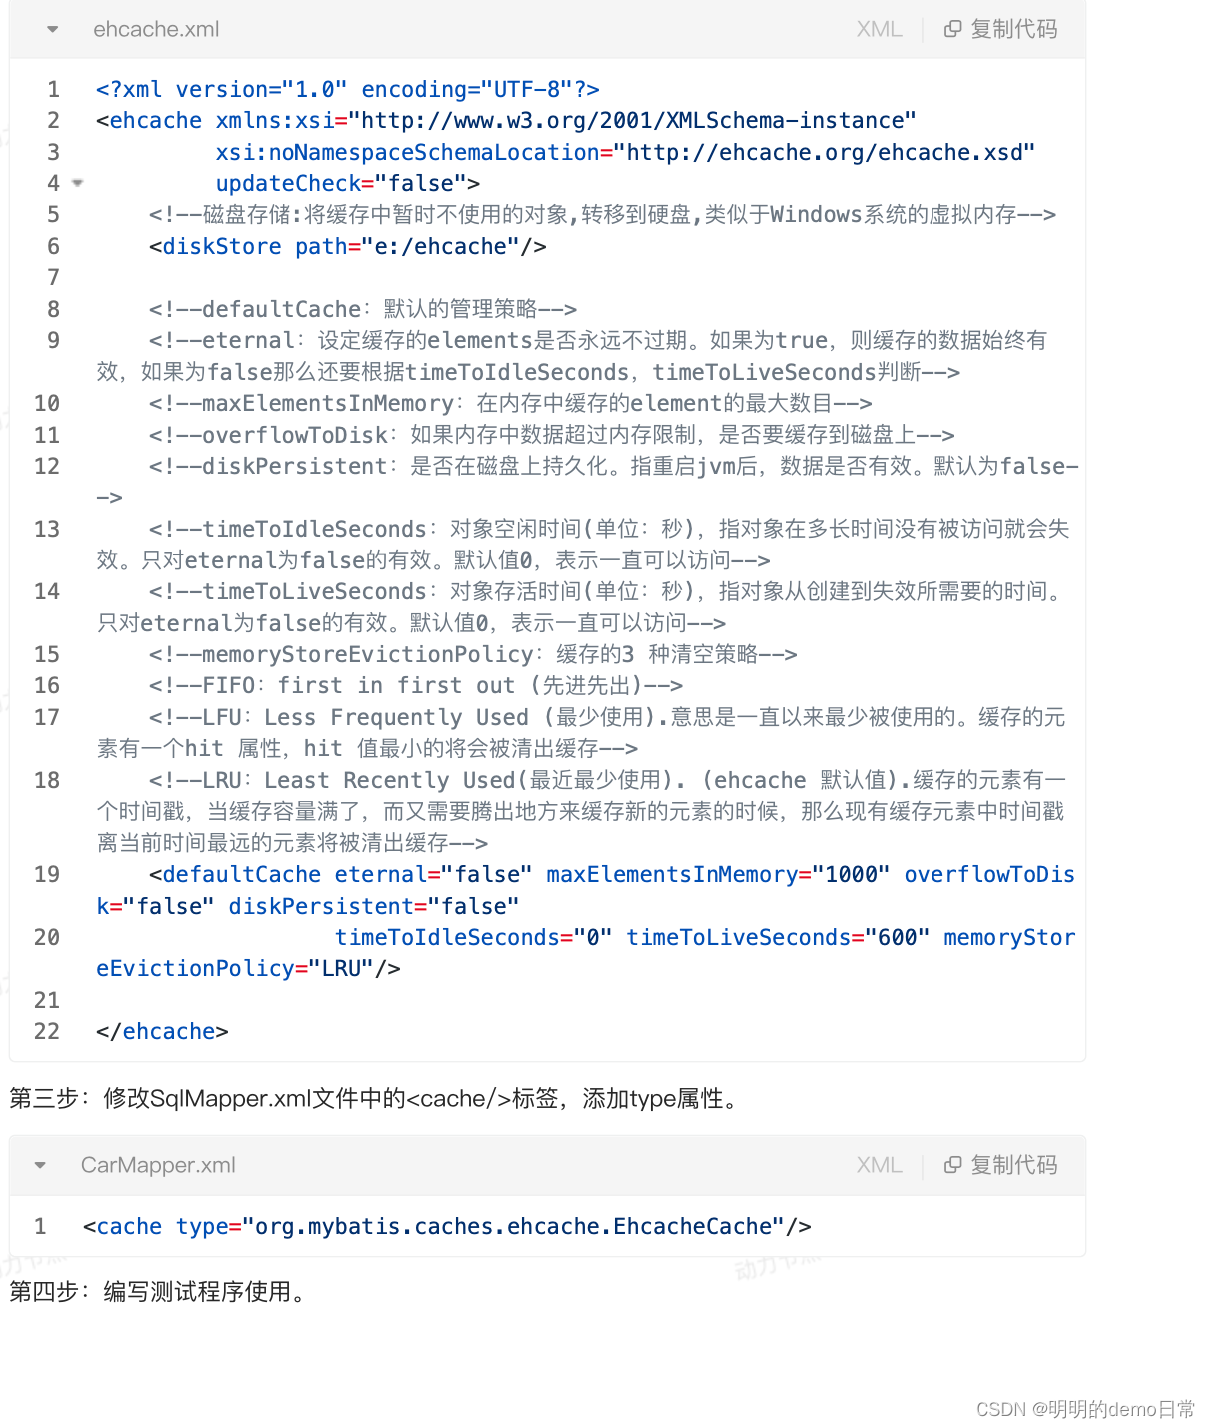
第三方缓存EhCache
按照以下步骤来即可
mybatis逆向工程
正向指:Java连接数据库
逆向:根据数据库表生成pojo类sqlMapper.xml文件 一节Mapper接口文件
具体做法:借助插件
首先要明白:插件是别人写好的,别人写的时候不会知道你的数据库信息,所以要提供以下数据
- pojo类名 包名 以及生成位置
- sqlMapper.xml文件名以及生成位置
- 连接数据库的信息
- 指定哪些数据库表参与逆向工程
具体配置,按照步骤来即可
添加插件
 <!--配置mybatis逆向工程的插件-->
    <!--定制构建过程-->
    <build>
        <!--可配置多个插件-->
        <plugins>
            <!--其中的一个插件:mybatis逆向工程插件-->
            <plugin>
                <!--插件的GAV坐标-->
                <groupId>org.mybatis.generator</groupId>
                <artifactId>mybatis-generator-maven-plugin</artifactId>
                <version>1.4.1</version>
                <!--允许覆盖-->
                <configuration>
                    <overwrite>true</overwrite>
                </configuration>
                <!--插件的依赖-->
                <dependencies>
                    <!--mysql驱动依赖-->
                    <dependency>
                        <groupId>mysql</groupId>
                        <artifactId>mysql-connector-java</artifactId>
                        <version>8.0.30</version>
                    </dependency>
                </dependencies>
            </plugin>
        </plugins>
    </build>
配置generatorConfig.xml
这个文件只能放在跟路径resources下,且名字固定
根据里面的提示信息配置自己的数据库和包名等
<?xml version="1.0" encoding="UTF-8"?>
<!DOCTYPE generatorConfiguration
        PUBLIC "-//mybatis.org//DTD MyBatis Generator Configuration 1.0//EN"
        "http://mybatis.org/dtd/mybatis-generator-config_1_0.dtd">

<generatorConfiguration>
    <!--
        targetRuntime有两个值:
            MyBatis3Simple:生成的是基础版,只有基本的增删改查。
            MyBatis3:生成的是增强版,除了基本的增删改查之外还有复杂的增删改查。
    -->
    <context id="DB2Tables" targetRuntime="MyBatis3Simple">
        <!--防止生成重复代码-->
        <plugin type="org.mybatis.generator.plugins.UnmergeableXmlMappersPlugin"/>

        <commentGenerator>
            <!--是否去掉生成日期-->
            <property name="suppressDate" value="true"/>
            <!--是否去除注释-->
            <property name="suppressAllComments" value="true"/>
        </commentGenerator>

        <!--连接数据库信息-->
        <jdbcConnection driverClass="com.mysql.cj.jdbc.Driver"
                        connectionURL="jdbc:mysql://localhost:3306/test"
                        userId="root"
                        password="12345678">
        </jdbcConnection>

        <!-- 生成pojo包名和位置 -->
        <javaModelGenerator targetPackage="com.test.mybatis.pojo" targetProject="src/main/java">
            <!--是否开启子包-->
            <property name="enableSubPackages" value="true"/>
            <!--是否去除字段名的前后空白-->
            <property name="trimStrings" value="true"/>
        </javaModelGenerator>

        <!-- 生成SQL映射文件的包名和位置 -->
        <sqlMapGenerator targetPackage="com.test.mybatis.mapper" targetProject="src/main/resources">
            <!--是否开启子包-->
            <property name="enableSubPackages" value="true"/>
        </sqlMapGenerator>

        <!-- 生成Mapper接口的包名和位置 -->
        <javaClientGenerator
                type="xmlMapper"
                targetPackage="com.test.mybatis.mapper"
                targetProject="src/main/java">
            <property name="enableSubPackages" value="true"/>
        </javaClientGenerator>

        <!-- 表名和对应的实体类名-->
        <table tableName="powernode" domainObjectName="Car"/>

    </context>
</generatorConfiguration>
运行插件
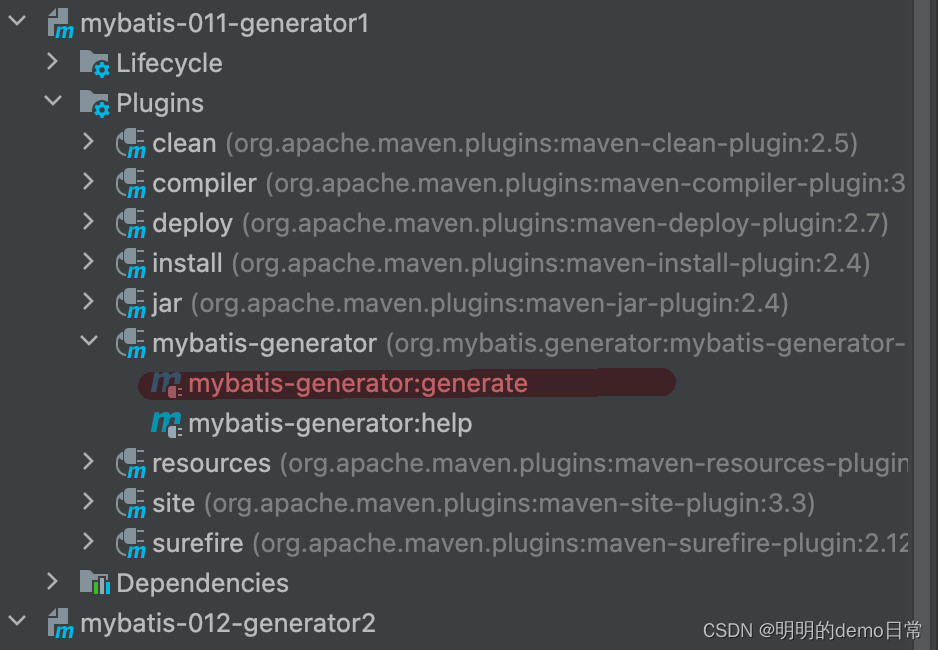
插件成功后,生成CarMapper.xml CarMapper.java 以及pojo下的实体类
其他的类还是需要自己创建,这个只能运行简单的增删改查
分页插件PageHelper
在数据库中我们使用limit关键字进行分页
limit(startIndex,pageSize)
startIndex:起始下标,默认为0
pageSize:每页显示的记录条数
假设已知pageNum页码和pageSizebiankeyou以下公式
startIndex=(pageNum-1)*pageSize
那么mybatis怎么分页呢
借助插件PageHelper
通过代码我们一起看一下具体使用方法
首先先把项目大架子搭起来(创建好包和配置文件)
第一步:引入依赖
<dependency>
        <groupId>com.github.pagehelper</groupId>
        <artifactId>pagehelper</artifactId>
        <version>5.1.10</version>
    </dependency>
第二步:在mybatis-config.xml中配置以下属性,注意<plugins>必须放在<typeAliases>标签后面
  <plugins>
        <plugin interceptor="com.github.pagehelper.PageInterceptor"></plugin>
    </plugins>
第三步:写CarMapper.xml
<select id="selectAll" resultType="car">
    select  * from powernode
</select>
有没有好奇,这里没有使用分页关键字怎么做到分页,关键来了测试文件
   @Test
    public void testSelectAll(){
        SqlSession sqlSession = SqlSessionUtil.openSession();
        CarMapper mapper = sqlSession.getMapper(CarMapper.class);
        // 显示第几页:页码
        int pageNum = 2;
        // 获取每页显示的记录条数
        int pageSize = 3;
        PageHelper.startPage(pageNum, pageSize);

        List<Car> cars = mapper.selectAll();
      //cars.forEach(car -> System.out.println(car));
        PageInfo<Car> carPageInfo = new PageInfo<>(cars,3);
        System.out.println(carPageInfo);

        sqlSession.close();
/**
 *PageInfo对象信息  pageNum:页码  pageSize:没页条数 size:结果数 startRow:开始下标 endRow:结束下标   total:数据库表总条数  pages:共几页
 * PageInfo{pageNum=2, pageSize=3, size=3, startRow=4, endRow=6, total=9, pages=3,
 * list=Page{count=true, pageNum=2, pageSize=3, startRow=3, endRow=6, total=9, pages=3,
 * reasonable=false, pageSizeZero=false}
 * Car{id=9, carNum='0002', brand='凯美瑞', guidePrice=3.0, produceTime='2020-02-02', carType='新能源'},
 * Car{id=12, carNum='1111', brand='大众', guidePrice=50.0, produceTime='2022-09-09', carType='燃油车'},
 * Car{id=19, carNum='1000', brand='雪弗莱', guidePrice=10.0, produceTime='2021-11-11', carType='燃油车'}],
 * prePage=1, nextPage=3, isFirstPage=false, isLastPage=false, hasPreviousPage=true, hasNextPage=true, navigatePages=3, navigateFirstPage=1, navigateLastPage=3, navigatepageNums=[1, 2, 3]}
 */
mybatis注解
注解可以简化我们的代码,但是并不是注解永远是最好的,简单的单表增删改查可以使用注解,这样省去了写配置文件sqlMapper.xml文件。但是复杂的语句会让本就复杂的sql语句更加混乱不堪
使用方法:在定义的接口方法上加注解并加上SQL语句,详细看代码
@Delete
    @Delete("delete from powernode where id=#{id}")
    int deleteById(Long id);
public void testDeleteById(){
SqlSession sqlSession = SqlSessionUtil.openSession();
CarMapper mapper = sqlSession.getMapper(CarMapper.class);
int count = mapper.deleteById(7L);
System.out.println(count);
sqlSession.commit();
sqlSession.close();
}@Insert
  @Insert("insert into powernode values(null,#{carNum}," +
            "#{brand},#{guidePrice},#{produceTime},#{carType})")
    int insert(Car car);ar);
@Test
public void testInsert(){
SqlSession sqlSession = SqlSessionUtil.openSession();
CarMapper mapper = sqlSession.getMapper(CarMapper.class);
Car car = new Car(null,"6666","丰田霸道",32.0,"2020-11-11","燃油车");
int count = mapper.insert(car);
System.out.println(count);
sqlSession.commit();
sqlSession.close();
}@Update
  @Test
    public void testUpdate(){
        SqlSession sqlSession = SqlSessionUtil.openSession();
        CarMapper mapper = sqlSession.getMapper(CarMapper.class);
        Car car = new Car(12L,"6666","丰田霸道",32.0,"2020-11-11","燃油车");

        int count = mapper.update(car);
        System.out.println(count);
        sqlSession.commit();
        sqlSession.close();}
@Update("update powernode set car_num=#{carNum}," +
"brand=#{brand},guide_price=#{guidePrice}," +
"produce_time=#{produceTime}," +
"car_type=#{carType} where id=#{id}")
int update(Car car);@Select
@Select("select * from powernode where id = #{id}")
//    Results当你没有配置驼峰命名时加上他  建议开启驼峰
    @Results({
            @Result(property = "id", column = "id"),
            @Result(property = "carNum", column = "car_num"),
            @Result(property = "brand", column = "brand"),
            @Result(property = "guidePrice", column = "guide_price"),
            @Result(property = "produceTime", column = "produce_time"),
            @Result(property = "carType", column = "car_type")
    })

    Car select (Long id);
@Test
public void testSelect(){
SqlSession sqlSession = SqlSessionUtil.openSession();
CarMapper mapper = sqlSession.getMapper(CarMapper.class);
Car car = mapper.select(12L);
System.out.println(car);
sqlSession.close();
}


 229
229


 被折叠的 条评论
为什么被折叠?
被折叠的 条评论
为什么被折叠?
 到【灌水乐园】发言


