


背景
之前我们在写ssm前后端不分离的项目时,登录验证主要使用的是session和cookie。但是现在vue+ssm前后端分离,后端创建使用的session显然和前端创建的session是不一样的,简单的说就是一般正常情况下,前端vue是无法获取到后端创建的session的。传统的Session模式鉴权也不再适合这种架构(或者需要额外写很多的代码来专门适配)。故这里使用token进行登陆验证。
token简介
token是一个令牌,是一种服务端无状态的认证方式。token的本质就是一个唯一标识符的字符串,可以有UUID生成,也可以有用户ID根据算法进行加密生成,取到token之后在进行解密,取出用户的ID。
开始操作
一、导入依赖jar包 java-jwt
<dependency>
    <groupId>com.auth0</groupId>
    <artifactId>java-jwt</artifactId>
    <version>3.18.2</version>
</dependency>
二、编写工具类——TokenUtils
package com.hmy.utils;

import com.auth0.jwt.JWT;
import com.auth0.jwt.algorithms.Algorithm;
import com.auth0.jwt.exceptions.JWTDecodeException;
import com.auth0.jwt.interfaces.DecodedJWT;
import com.auth0.jwt.interfaces.JWTVerifier;
import java.util.Date;
import java.util.HashMap;
import java.util.Map;

public class TokenUtils {

    /**
     * 过期时间一天,
     * TODO 正式运行时修改为15分钟
     */
    private static final long EXPIRE_TIME = 24 * 60 * 60 * 1000;
    /**
     * token私钥
     */
    private static final String TOKEN_SECRET = "f26e587c28064d0e855e72c0a6a0e618";

    /**
     * 校验token是否正确
     *
     * @param token 密钥
     * @return 是否正确
     */
    public static boolean verify(String token) {
        try {
            Algorithm algorithm = Algorithm.HMAC256(TOKEN_SECRET);
            JWTVerifier verifier = JWT.require(algorithm)
                    .build();
            DecodedJWT jwt = verifier.verify(token);
            return true;
        } catch (Exception exception) {
            return false;
        }
    }

    /**
     * 获得token中的信息无需secret解密也能获得
     *
     * @return token中包含的用户登录信息
     */
    public static String getUsername(String token) {
        try {
            DecodedJWT jwt = JWT.decode(token);
            return jwt.getClaim("loginName").asString();
        } catch (JWTDecodeException e) {
            return null;
        }
    }

    /**
     * 获取登陆用户密码
     * @param token
     * @return
     */
    public static String getUserId(String token) {
        try {
            DecodedJWT jwt = JWT.decode(token);
            return jwt.getClaim("userPwd").asString();
        } catch (JWTDecodeException e) {
            return null;
        }
    }

    /**
     * 生成签名,15min后过期
     *
     * @param userName 用户名
     * @return 加密的token
     */
    public static String sign(String userName,String userPwd) {
        Date date = new Date(System.currentTimeMillis() + EXPIRE_TIME);// 私钥及加密算法
        Algorithm algorithm = Algorithm.HMAC256(TOKEN_SECRET);
        // 设置头部信息
        Map header = new HashMap<>(2);
        header.put("typ", "JWT");
        header.put("alg", "HS256");
        // 附带username,userId信息,生成签名
        return JWT.create()
                .withHeader(header)
                .withClaim("loginName", userName)
                .withClaim("userPwd",userPwd)
                .withExpiresAt(date)
                .sign(algorithm);
    }
}
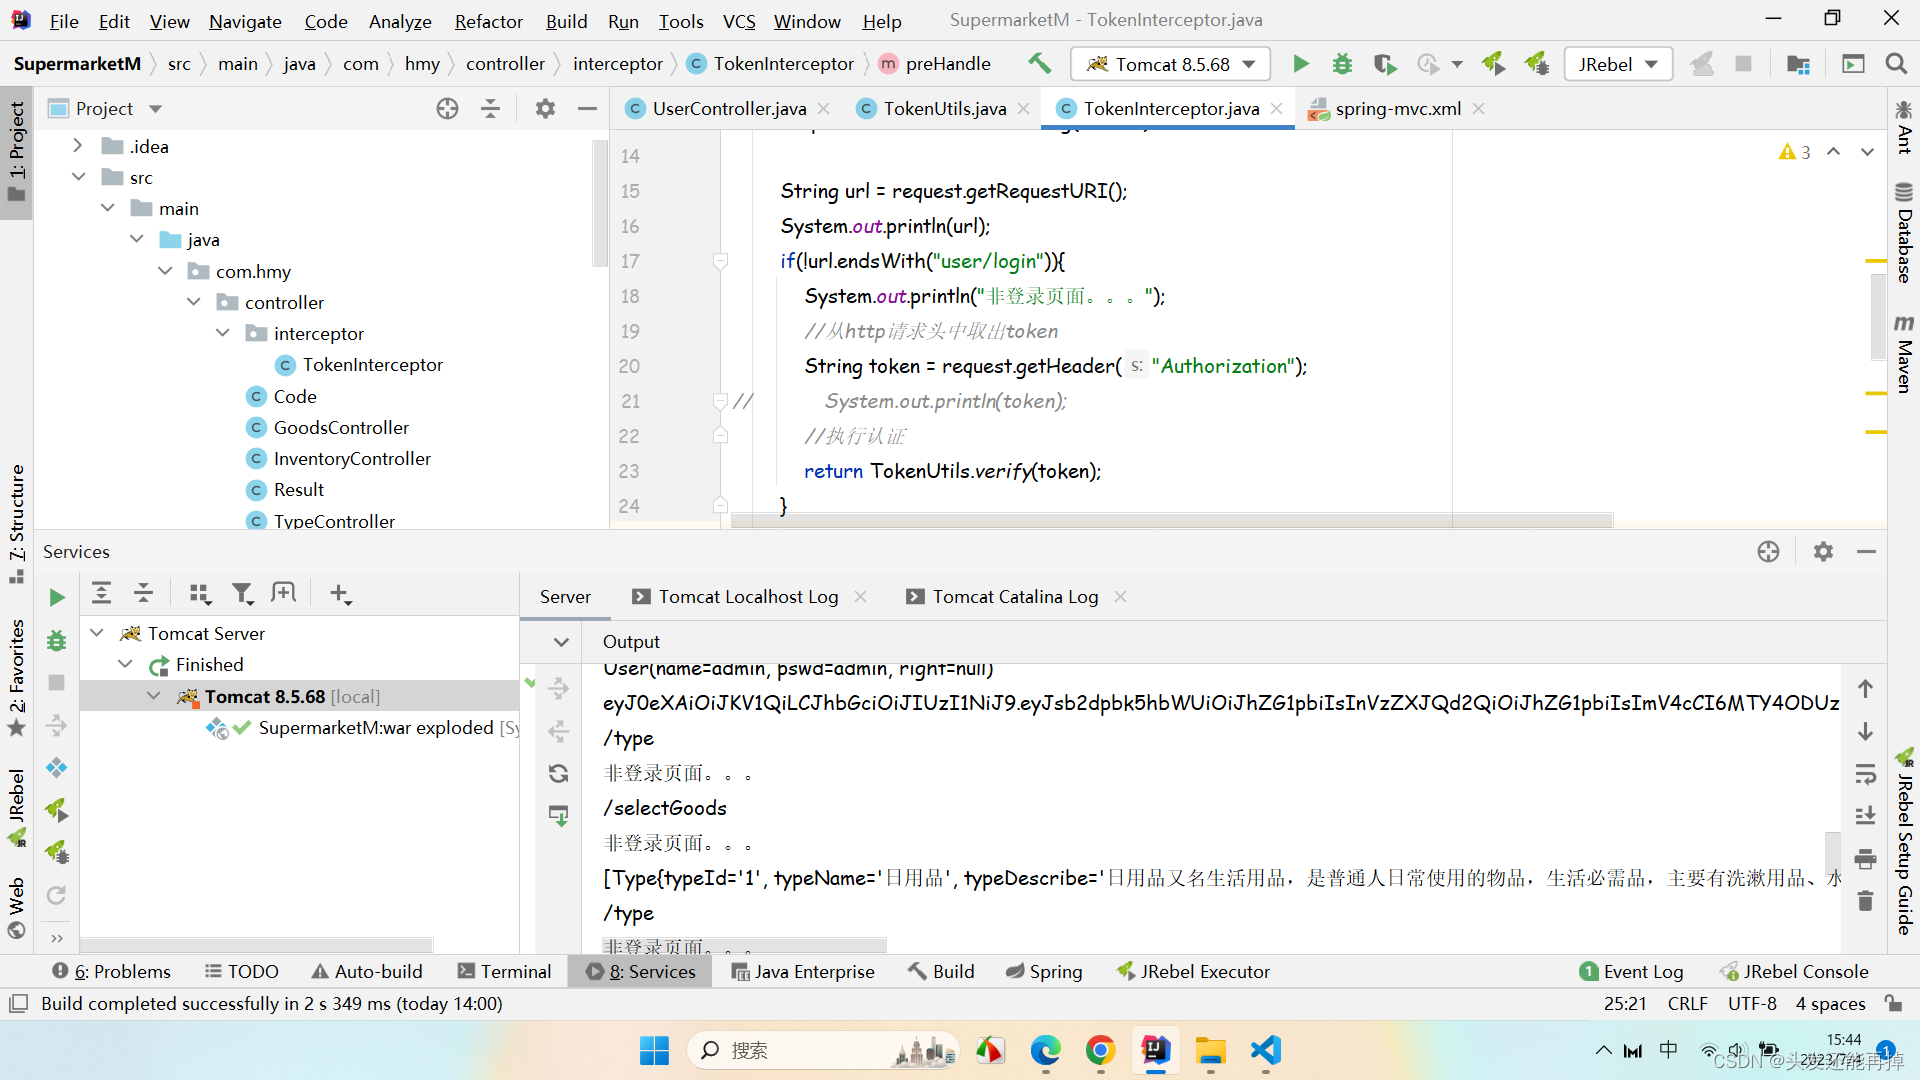
三、配置过滤器
package com.hmy.controller.interceptor;

import com.hmy.utils.TokenUtils;
import org.springframework.web.servlet.HandlerInterceptor;
import org.springframework.web.servlet.ModelAndView;

import javax.servlet.http.HttpServletRequest;
import javax.servlet.http.HttpServletResponse;

public class TokenInterceptor implements HandlerInterceptor {
    @Override
    public boolean preHandle(HttpServletRequest request, HttpServletResponse response, Object handler) throws Exception {
        response.setCharacterEncoding("utf-8");

        String url = request.getRequestURI();
        System.out.println(url);
        if(!url.endsWith("user/login")){
            System.out.println("非登录页面。。。");
            //从http请求头中取出token(后面前端会将token内容存入Headers中)
            String token = request.getHeader("Authorization");
//            System.out.println(token);
            //执行认证
            return TokenUtils.verify(token);
        }
        return true;
    }

    @Override
    public void postHandle(HttpServletRequest request, HttpServletResponse response, Object handler, ModelAndView modelAndView) throws Exception {

    }

    @Override
    public void afterCompletion(HttpServletRequest request, HttpServletResponse response, Object handler, Exception ex) throws Exception {

    }


}
springMvc配置过滤器
<mvc:interceptors>
	<mvc:interceptor>
		<mvc:mapping path="/**"/>
		<mvc:exclude-mapping path="/user/login"/>
		<bean class="com.hmy.controller.interceptor.TokenInterceptor"/>
	</mvc:interceptor>
</mvc:interceptors>
四、登录控制层
package com.hmy.controller;

import com.hmy.domain.User;
import com.hmy.service.UserService;
import com.hmy.utils.TokenUtils;
import org.springframework.beans.factory.annotation.Autowired;
import org.springframework.web.bind.annotation.*;

import javax.servlet.http.HttpSession;

@RestController
@ResponseBody
@CrossOrigin
@RequestMapping("/user")
public class UserController {
    @Autowired
    private UserService userService;

    @PostMapping("/login")
    @CrossOrigin
    @ResponseBody
    Result login(@RequestBody User userp, HttpSession session){
        System.out.println(userp);
        String token="";
        User user=userService.login(userp.getName(), userp.getPswd());
        boolean flag= user != null;
        if (flag){
            //生产签名,发送给前端
            token= TokenUtils.sign(user.getName(),user.getPswd());
        }
        Integer code=flag ? Code.GET_OK : Code.GET_ERR;
        String msg=flag ? "登陆成功!":"账号或密码错误!";
        System.out.println(token);
        return new Result(token,code,msg,flag);
    }
}
五、前端部分
1、前端登录界面核心js代码
在登录时,先将后端放回的token信息存入session中
login() {
      // console.log(this.formDataLogin);
      axios.post("/user/login", this.formDataLogin).then((res) => {
        if (res.data.success) {
          console.log(res.data.data)
          window.sessionStorage.setItem("token",res.data.data)
          this.$message({
            message: res.data.msg,
            type: "success",
          });
          this.$router.push("/main");
        } else {
          this.$message.error(res.data.msg);
        }
      }).catch((res)=>{

      })
},
2、将token数据放入请求头,保证每次向后端发送请求都会携带token信息,token信息请求头键为Authorization,后端获取 String token = request.getHeader("Authorization");
import axios from 'axios'

Vue.config.productionTip = false

//将token数据放入请求头
axios.interceptors.request.use(config =>{
  if(window.sessionStorage.getItem('token')!=null){
    config.headers.Authorization = window.sessionStorage.getItem('token')
  }
  return config
})
3、路由拦截 给需要登录权限的组件页面添加meta: {auth:true,requireAuth: true }, 后面根据meta.auto(核心)来判断拦截页面
// 避免重复点击路由报错,在路由内重写push或replace方法
let originPush = VueRouter.prototype.push
let originReplace = VueRouter.prototype.replace
VueRouter.prototype.push = function push(location) {
    return originPush.call(this, location).catch(err => err)
}
VueRouter.prototype.replace = function push(location) {
    return originReplace.call(this, location).catch(err => err)
}


//创建router实例对象,去管理一组一组的路由规则
const router= new VueRouter({
    routes: [
        {
            path: '/',
            component: Login,
            name:'login',
        },
        {
            path: '/main',
            name:'main',
            component: Layout,
            meta: {
                auth:true,
				requireAuth: true
			},
            children: [
                {
                    path: 'mymain',
                    component: MyMain,
                    meta: {
                        auth:true,
                        requireAuth: true
                    },
                },
                {
                    path: 'goodsInfo',
                    component: Goods,
                },
                {
                    path: 'goodsType',
                    component: Type,
                },
                {
                    path: 'inventory',
                    component: Inventory,
                },
                {
                    path: 'supplier',
                    component: Supplier,
                },
                {
                    path: 'userInfo',
                    component: UserInfo,
                },
                {
                    path: 'log',
                    component: Log,
                },
            ]
        }
    ]
})

// 路由守卫
router.beforeEach((to,from,next)=>{
    // to要跳转到的路径
    // from从哪个路径来
    // next往下执行的回调
    // 在localStorage中获取token
    let token=window.sessionStorage.getItem('token')

    //用户已登录直接进入主页面
    if(to.name==='login'){
        if(token!=null){
            next({path:'/main'})
        }
    }

    // 判断该页面是否需要登录
    if(to.meta.auth){
        // 如果token存在直接跳转
        if(token!=null){
            next()
        }else{
            // 否则跳转到login登录页面
            next({
                path:'/',
                // 跳转时传递参数到登录页面,以便登录后可以跳转到对应页面
                query:{
                    redirect:to.fullPath
                }
            })
        }
    }else{
        // 如果不需要登录,则直接跳转到对应页面
        next()
    }
})

export default router;
六、结果


 2556
2556


 被折叠的 条评论
为什么被折叠?
被折叠的 条评论
为什么被折叠?
 到【灌水乐园】发言


