


SpringBoot+mybatis+mp+vue+elementui+swagger2整合
0、数据库表
/*
Navicat MySQL Data Transfer
Source Server : localhost_3306
Source Server Version : 50729
Source Host : localhost:3306
Source Database : restudy
Target Server Type : MYSQL
Target Server Version : 50729
File Encoding : 65001
Date: 2023-03-08 11:27:28
*/
SET FOREIGN_KEY_CHECKS=0;
-- ----------------------------
-- Table structure for `emp`
-- ----------------------------
DROP TABLE IF EXISTS `emp`;
CREATE TABLE `emp` (
`EMPNO` int(10) NOT NULL,
`ENAME` varchar(255) DEFAULT NULL,
`JOB` varchar(255) DEFAULT NULL,
`MGR` int(10) DEFAULT NULL,
`HIREDATE` date DEFAULT NULL,
`SAL` double(255,2) DEFAULT NULL,
`COMM` double(255,2) DEFAULT NULL,
`DEPTNO` int(10) DEFAULT NULL,
`STATUS` int(10) DEFAULT '1' COMMENT '状态值',
PRIMARY KEY (`EMPNO`)
) ENGINE=InnoDB DEFAULT CHARSET=utf8;
-- ----------------------------
-- Records of emp
-- ----------------------------
INSERT INTO `emp` VALUES ('7369', 'SMITH', 'CLERK', '7902', '1980-12-17', '800.00', null, '20', '1');
INSERT INTO `emp` VALUES ('7499', 'ALLEN', 'SALESMAN', '7698', '1981-02-20', '1600.00', '300.00', '30', '1');
INSERT INTO `emp` VALUES ('7521', 'WARD', 'SALESMAN', '7698', '1981-02-22', '1250.00', '500.00', '30', '1');
INSERT INTO `emp` VALUES ('7566', 'JONES', 'MANAGER', '7839', '1981-04-02', '2975.00', null, '20', '2');
INSERT INTO `emp` VALUES ('7782', 'CLARK', 'MANAGER', '7839', '1981-06-09', '2450.00', null, '10', '2');
INSERT INTO `emp` VALUES ('7788', 'SCOTT', 'ANALYST', '7566', '1987-04-19', '3000.00', null, '20', '1');
INSERT INTO `emp` VALUES ('7839', 'KING', 'PRESIDENT', null, '1981-11-17', '5000.00', null, '10', '1');
INSERT INTO `emp` VALUES ('7844', 'TURNER', 'SALESMAN', '7698', '1981-09-08', '1500.00', '0.00', '30', '1');
INSERT INTO `emp` VALUES ('7876', 'ADAMS', 'CLERK', '7788', '1987-05-23', '1100.00', null, '20', '1');
INSERT INTO `emp` VALUES ('7900', 'JAMES', 'CLERK', '7698', '1981-12-03', '950.00', null, '30', '1');
INSERT INTO `emp` VALUES ('7902', 'FORD', 'ANALYST', '7566', '1981-12-03', '3000.00', null, '20', '1');
INSERT INTO `emp` VALUES ('7934', 'MILLER', 'CLERK', '7782', '1982-01-23', '1300.00', null, '10', '1');
/*
Navicat MySQL Data Transfer
Source Server : localhost_3306
Source Server Version : 50729
Source Host : localhost:3306
Source Database : restudy
Target Server Type : MYSQL
Target Server Version : 50729
File Encoding : 65001
Date: 2023-03-08 11:27:34
*/
SET FOREIGN_KEY_CHECKS=0;
-- ----------------------------
-- Table structure for `dept`
-- ----------------------------
DROP TABLE IF EXISTS `dept`;
CREATE TABLE `dept` (
`DEPTNO` int(10) NOT NULL,
`DNAME` varchar(255) DEFAULT NULL,
`LOC` varchar(255) DEFAULT NULL,
PRIMARY KEY (`DEPTNO`)
) ENGINE=InnoDB DEFAULT CHARSET=utf8;
-- ----------------------------
-- Records of dept
-- ----------------------------
INSERT INTO `dept` VALUES ('10', 'ACCOUNTING', 'NEW YORX');
INSERT INTO `dept` VALUES ('20', 'RESEARCH', 'DALLAS');
INSERT INTO `dept` VALUES ('30', 'SALES', 'CHICAGO');
INSERT INTO `dept` VALUES ('40', 'OPERATIONS', 'BOSTON');
1、新建工程并添加依赖
<?xml version="1.0" encoding="UTF-8"?>
<project xmlns="http://maven.apache.org/POM/4.0.0" xmlns:xsi="http://www.w3.org/2001/XMLSchema-instance"
xsi:schemaLocation="http://maven.apache.org/POM/4.0.0 https://maven.apache.org/xsd/maven-4.0.0.xsd">
<modelVersion>4.0.0</modelVersion>
<parent>
<groupId>org.springframework.boot</groupId>
<artifactId>spring-boot-starter-parent</artifactId>
<!--更改版本号为2.3.12.RELEASE-->
<version>2.3.12.RELEASE</version>
<relativePath/> <!-- lookup parent from repository -->
</parent>
<groupId>com.example</groupId>
<artifactId>review</artifactId>
<version>0.0.1-SNAPSHOT</version>
<name>review</name>
<description>review</description>
<properties>
<java.version>1.8</java.version>
</properties>
<dependencies>
<dependency>
<groupId>org.springframework.boot</groupId>
<artifactId>spring-boot-starter-web</artifactId>
</dependency>
<!--对应2.7.9版本SpringBoot使用的mysql驱动-->
<!-- <dependency>-->
<!-- <groupId>com.mysql</groupId>-->
<!-- <artifactId>mysql-connector-j</artifactId>-->
<!-- <scope>runtime</scope>-->
<!-- </dependency>-->
<!-- 对应2.3.12RELEASE版本SpringBoot使用的mysql驱动-->
<dependency>
<groupId>mysql</groupId>
<artifactId>mysql-connector-java</artifactId>
<version>8.0.31</version>
</dependency>
<dependency>
<groupId>org.projectlombok</groupId>
<artifactId>lombok</artifactId>
<optional>true</optional>
</dependency>
<dependency>
<groupId>org.springframework.boot</groupId>
<artifactId>spring-boot-starter-test</artifactId>
<scope>test</scope>
</dependency>
<!--MybatisPlus的依赖-->
<dependency>
<groupId>com.baomidou</groupId>
<artifactId>mybatis-plus-boot-starter</artifactId>
<version>3.4.1</version>
</dependency>
</dependencies>
</project>2、配置类文件(application.properties)
server.port=8083
#sql配置
spring.datasource.driver-class-name=com.mysql.cj.jdbc.Driver
spring.datasource.url=jdbc:mysql://localhost:3306/restudy?serverTimezone=Asia/Shanghai&useUnicode=true&characterEncoding=utf-8
spring.datasource.username=root
spring.datasource.password=密码
#sql日志
mybatis-plus.configuration.log-impl=org.apache.ibatis.logging.stdout.StdOutImpl
3、实体类(entity)
@Data
@TableName(value = "dept")
public class Dept implements Serializable {
@TableId(value = "deptno",type = IdType.AUTO)
private Integer deptno;
private String dname;
private String loc;
}
@Data
@TableName(value = "emp") //标明表名,以免对不上表名
public class Emp implements Serializable {
//标明主键和主键的自增策略
@TableId(value = "empno",type = IdType.AUTO)
private Integer empno;
private String ename;
private String job;
private Integer mgr;
//规范时间格式
@JsonFormat(pattern = "yyyy-MM-dd",timezone = "GMT+8")
private Date hiredate;
//对于浮点类型的数据,声明实体类时不能使用double或者float,因为会产生精度丢失,应该使用BigDecimal(大的浮点数)
private BigDecimal sal;
private BigDecimal comm;
private Integer deptno;
//对于多对一的对应关系,一的一方在多的一方应该以实体类的形式进行声明
@TableField(exist = false) //使用该注解,在进行单表操作时将该字段忽略
private Dept dept;
}4、dao层
dao层也叫持久化层,持久化层使用的框架是mybatis
public interface DeptDao extends BaseMapper<Dept> {
}
public interface EmpDao extends BaseMapper<Emp> {
}5、service层
统一操作对象
package com.example.review.vo;
import lombok.AllArgsConstructor;
import lombok.Data;
import lombok.NoArgsConstructor;
/**
* 各种实体类的差别
* pojo entity:简单的实体类对象
* vo(view object):视图对象,接收和响应给前端的实体类
* dto(data transmit object):数据传输对象,服务与服务之间传递的数据类型。(比如微服务之间的信息传递)
*/
@Data
@AllArgsConstructor
@NoArgsConstructor
//@Accessors:用于级联调用
public class Result<T> {
private Integer code;
private String msg;
private T t;
}
service接口
public interface EmpService {
/**
* 分页查询所有的数据
*/
public Result<Page<Emp>> listByPage(Integer currentPage,Integer pageSize);
}
service实现类
@Service
public class EmpServiceImpl implements EmpService {
@Resource
private EmpDao empDao;
@Override
public Result<Page<Emp>> listByPage(Integer currentPage, Integer pageSize) {
Page<Emp> page = new Page<>(currentPage,pageSize);
//有where条件就创建queryWrapper对象
Page<Emp> empPage = empDao.selectPage(page, null);
return new Result<>(200,"操作成功",empPage);
}
}6、controller层
@RestController
@RequestMapping("/emp")
public class EmpController {

    @Resource
    private EmpService empService;

    /**
     * 分页查询所有员工信息
     */
    @PostMapping("getAll/{currentPage}/{pageSize}")
    public Result<Page<Emp>> getAll(@PathVariable Integer currentPage,@PathVariable Integer pageSize){
        return empService.listByPage(currentPage, pageSize);
    }

}
7、启动类配置
@SpringBootApplication
@MapperScan(basePackages = "com.example.review.dao")
public class ReviewApplication {

    public static void main(String[] args) {
        SpringApplication.run(ReviewApplication.class, args);
    }

}
8、跨域请求
package com.example.review.config;


import org.springframework.context.annotation.Bean;
import org.springframework.context.annotation.Configuration;
import org.springframework.web.cors.CorsConfiguration;
import org.springframework.web.cors.UrlBasedCorsConfigurationSource;
import org.springframework.web.filter.CorsFilter;

@Configuration
public class CrossOriginConfig {

    /**
     *全局跨域请求和局部跨域请求写一个即可
     *全局跨域请求可以写在启动类中,也可以单独写一个类
     *如果是单独写一个类,那么启动类和跨域请求类 只需要写一个@MapperScan注解
     */

    @Bean
    public CorsFilter corsFilter() {
        final UrlBasedCorsConfigurationSource source = new UrlBasedCorsConfigurationSource();
        final CorsConfiguration corsConfiguration = new CorsConfiguration();
//        corsConfiguration.setAllowCredentials(true);
        corsConfiguration.addAllowedHeader("*");// 允许所有的头
        corsConfiguration.addAllowedOrigin("*");// 允许所有源发出的请求
        corsConfiguration.addAllowedMethod("*");// 允许所有的方法  如果不写的话默认是允许GET POST
        source.registerCorsConfiguration("/**", corsConfiguration);// 所有的路径,这里写完就不用再Controller中写跨域请求
        return new CorsFilter(source);
    }
}
9、mp分页插件拦截器
也可以直接把两个bean添加到启动类中

//如果启动类已经添加了@MapperScan注解,那么这里就不用再添加
@Configuration
public class MybatisPlusConfig {

    /**
     * 新的分页插件,一缓和二缓遵循mybatis的规则,需要设置 MybatisConfiguration#useDeprecatedExecutor = false 避免缓存出现问题(该属性会在旧插件移除后一同移除)
     */
    @Bean
    public MybatisPlusInterceptor mybatisPlusInterceptor() {
        MybatisPlusInterceptor interceptor = new MybatisPlusInterceptor();
        //这里使用的数据库是mysql,不是H2
        interceptor.addInnerInterceptor(new PaginationInnerInterceptor(DbType.MYSQL));
        return interceptor;
    }

    @Bean
    public ConfigurationCustomizer configurationCustomizer() {
        return configuration -> configuration.setUseDeprecatedExecutor(false);
    }
}
10、swagger2
10.1 添加依赖
<!--swagger2的坐标:版本过高会导致后面在排除错误的接口文档时发生错误-->
        <dependency>
            <groupId>com.spring4all</groupId>
            <artifactId>swagger-spring-boot-starter</artifactId>
            <version>1.9.1.RELEASE</version>
        </dependency>
        <!--swagger图形化界面-->
        <dependency>
            <groupId>com.github.xiaoymin</groupId>
            <artifactId>swagger-bootstrap-ui</artifactId>
            <version>1.7.8</version>
        </dependency>
10.2 配置对应的配置类
package com.example.review.config;

import org.springframework.context.annotation.Bean;
import org.springframework.context.annotation.Configuration;
import springfox.documentation.spi.DocumentationType;
import springfox.documentation.spring.web.plugins.Docket;
import springfox.documentation.swagger2.annotations.EnableSwagger2;

/**
 * 封装了一个Docket类,完成swagger功能
 */
@Configuration
@EnableSwagger2  //使用1.9.1 的依赖,不添加此注解,可能会是空页面,2.0.2版本依赖没有这个问题
public class SwaggerConfig {
    @Bean
    public Docket docket(){
        /**
         * DocumentationType.SWAGGER_2:代表使用的是swagger2
         * DocumentationType.SWAGGER_12:代表使用的是swagger1
         *
         * 如果报错:Multiple Dockets with the same group name are not supported, The following duplicate groups were discovered. default
         *      1、可能是swagger版本过高,换个版本再试试即可
         *      2、也可以添加一个组名
         */
        Docket docket = new Docket(DocumentationType.SWAGGER_2).groupName("160review");
        return docket;
    }
}
10.3 访问图形化界面
然后在浏览器进行访问
localhost:8083/doc.html
或者是localhost:8083/swagger-ui.html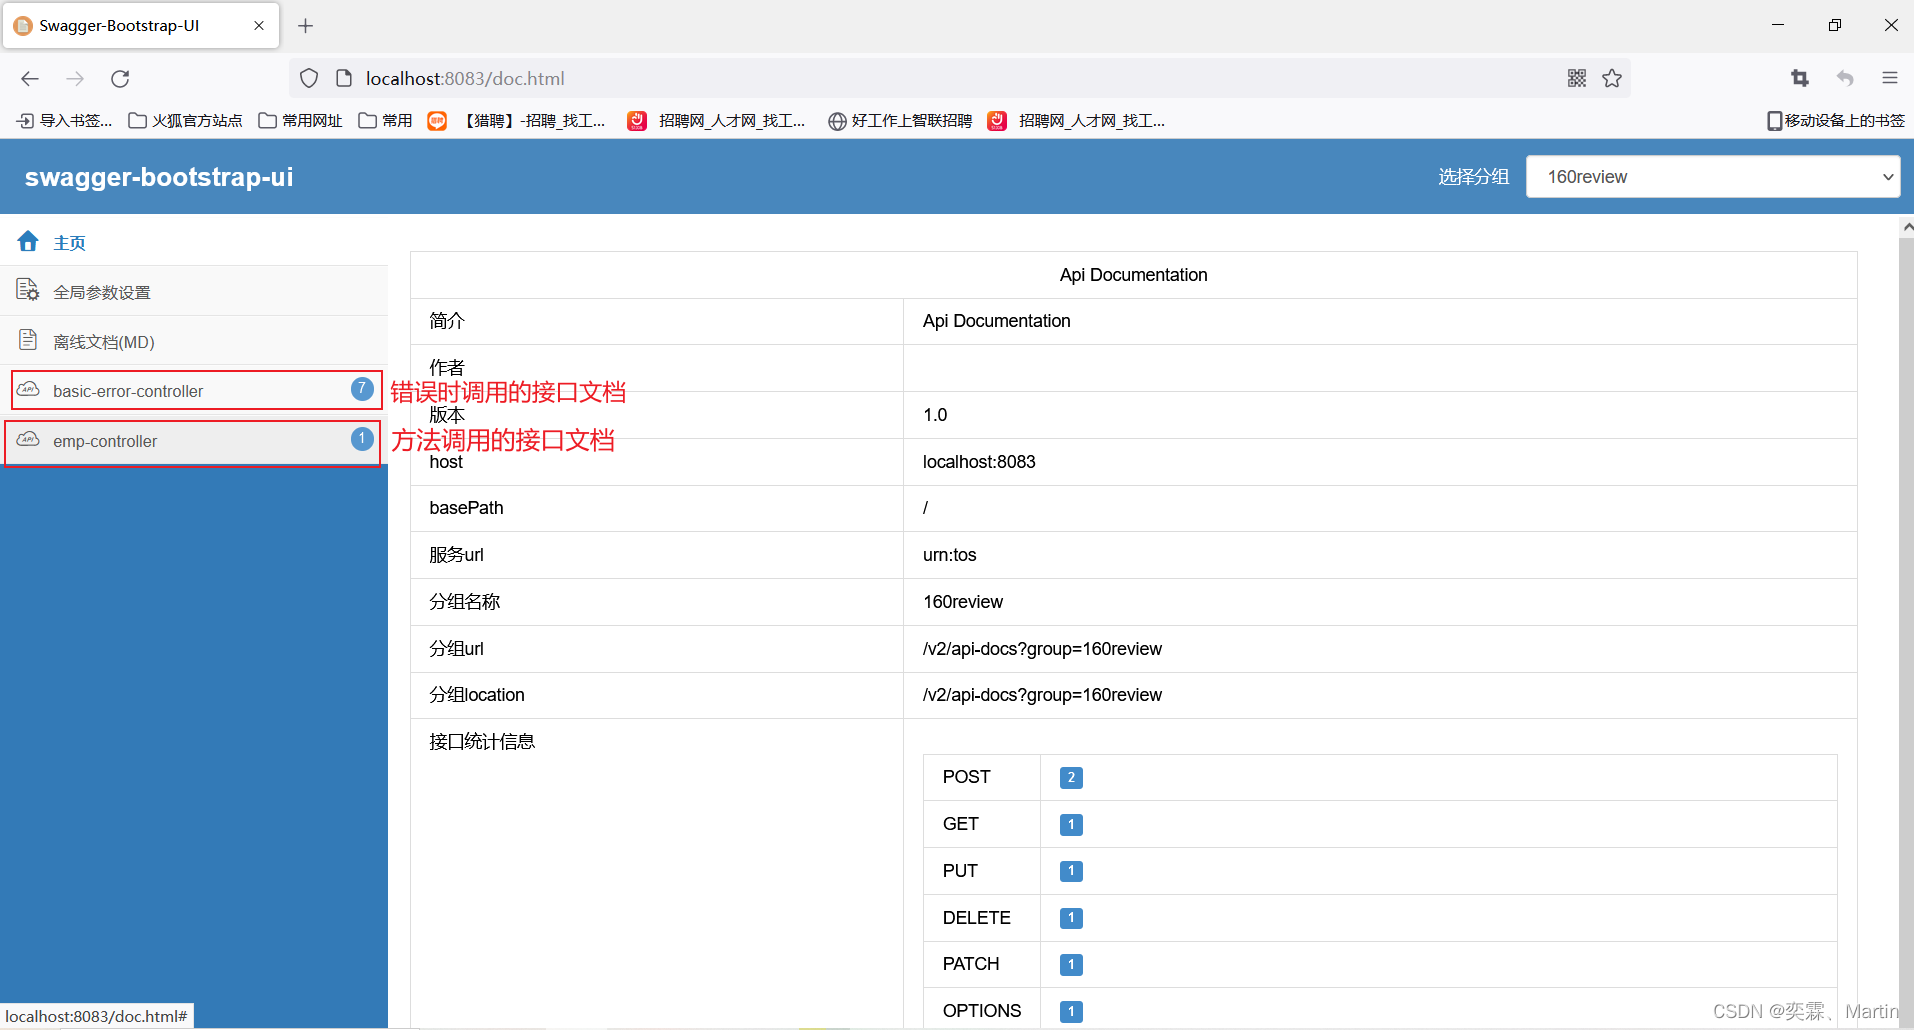
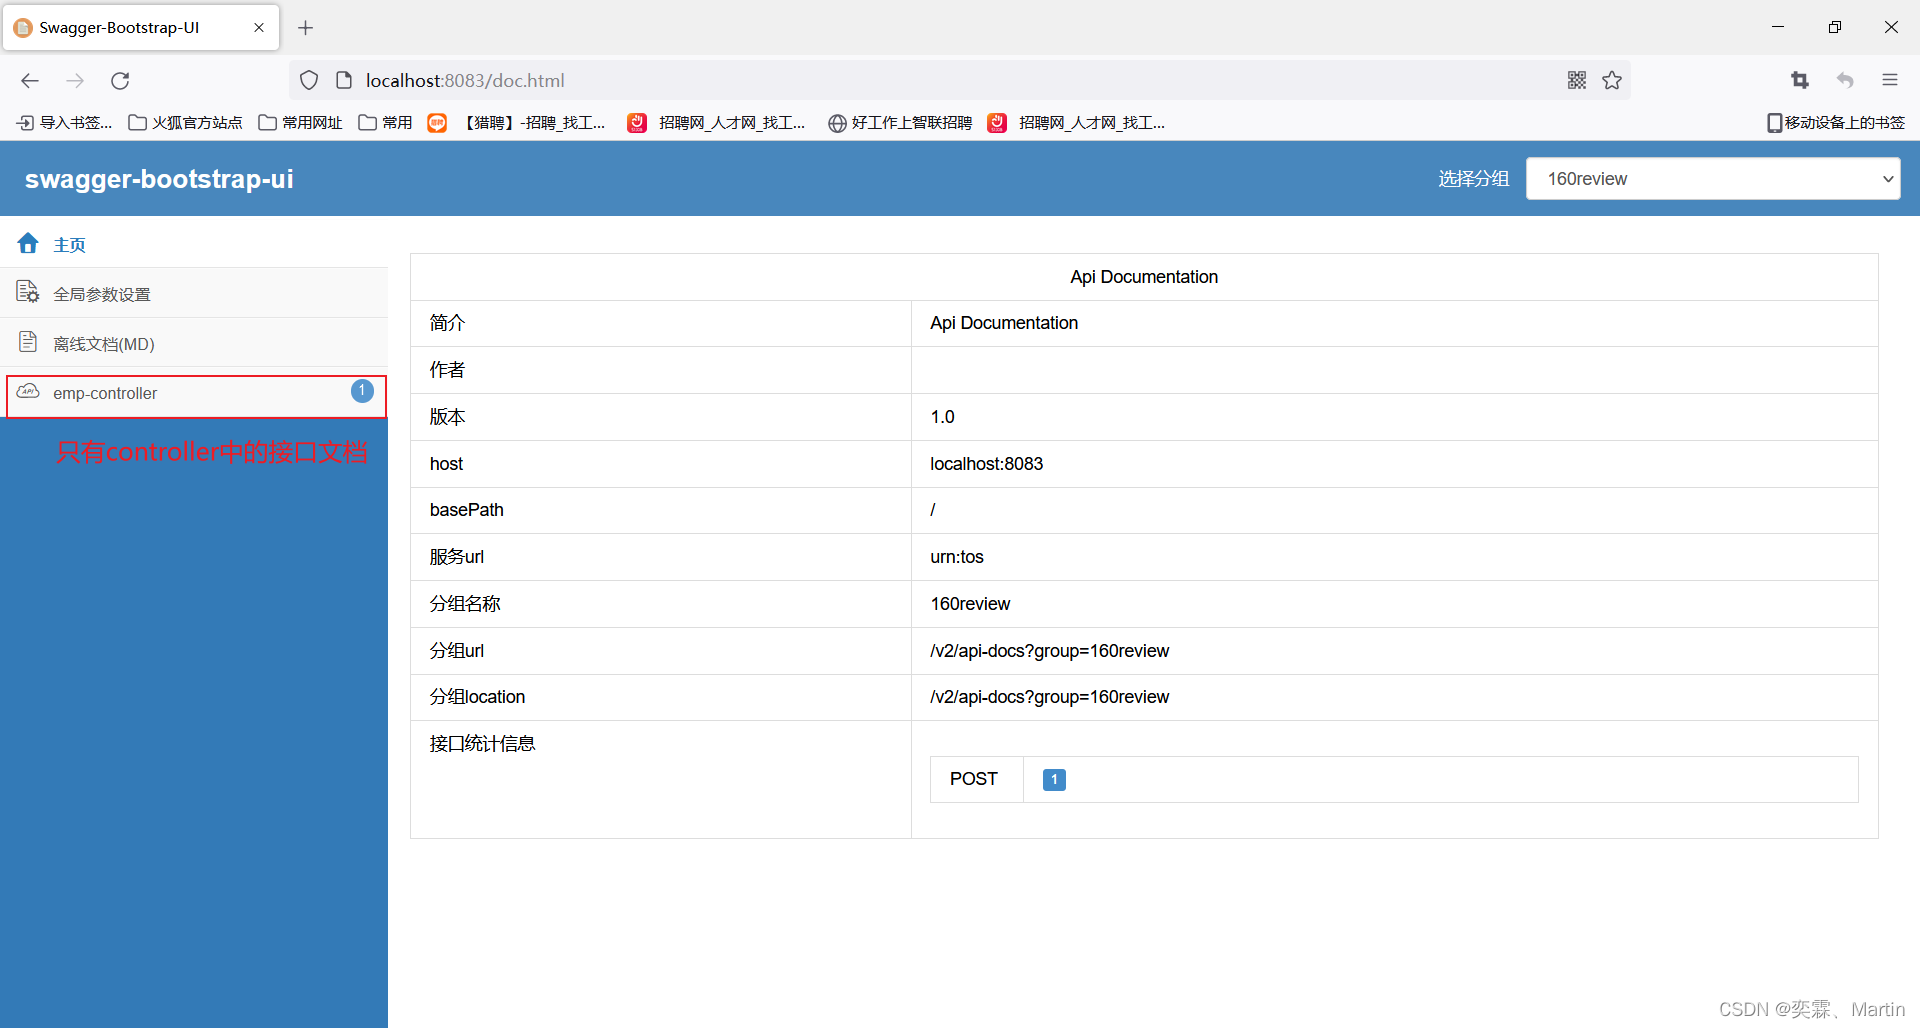
10.4 排除错误接口文档
配置排除错误时调用的接口文档
package com.example.review.config;

import org.springframework.context.annotation.Bean;
import org.springframework.context.annotation.Configuration;
import springfox.documentation.builders.RequestHandlerSelectors;
import springfox.documentation.spi.DocumentationType;
import springfox.documentation.spring.web.plugins.Docket;
import springfox.documentation.swagger2.annotations.EnableSwagger2;

/**
 * 封装了一个Docket类,完成swagger功能
 */
@Configuration
@EnableSwagger2  //不添加此注解,可能会是空页面
public class SwaggerConfig {
    @Bean
    public Docket docket(){
        /**
         * DocumentationType.SWAGGER_2:代表使用的是swagger2
         * DocumentationType.SWAGGER_12:代表使用的是swagger1
         *
         * 如果报错:Multiple Dockets with the same group name are not supported, The following duplicate groups were discovered. default
         *      1、可能是swagger版本过高,换个版本再试试即可
         *      2、也可以添加一个组名
         */
        Docket docket = new Docket(DocumentationType.SWAGGER_2).groupName("160review")
                .select()
                //paths()是根据路径判断生成接口文档的,apis()是根据包生成接口文档的
                //.paths(Predicates.not(Pathselectors.regex("/error")))
              .apis(RequestHandlerSelectors.basePackage("com.example.review.controller")) //只为com.example.review.controller生成接口文档
                .build();
        return docket;
    }
}
在进行访问
10.5 添加文档注解
package com.example.review.controller;
import com.baomidou.mybatisplus.extension.plugins.pagination.Page;
import com.example.review.entity.Emp;
import com.example.review.service.EmpService;
import com.example.review.vo.Result;
import io.swagger.annotations.Api;
import io.swagger.annotations.ApiOperation;
import io.swagger.annotations.ApiParam;
import org.springframework.web.bind.annotation.*;
import javax.annotation.Resource;
/**
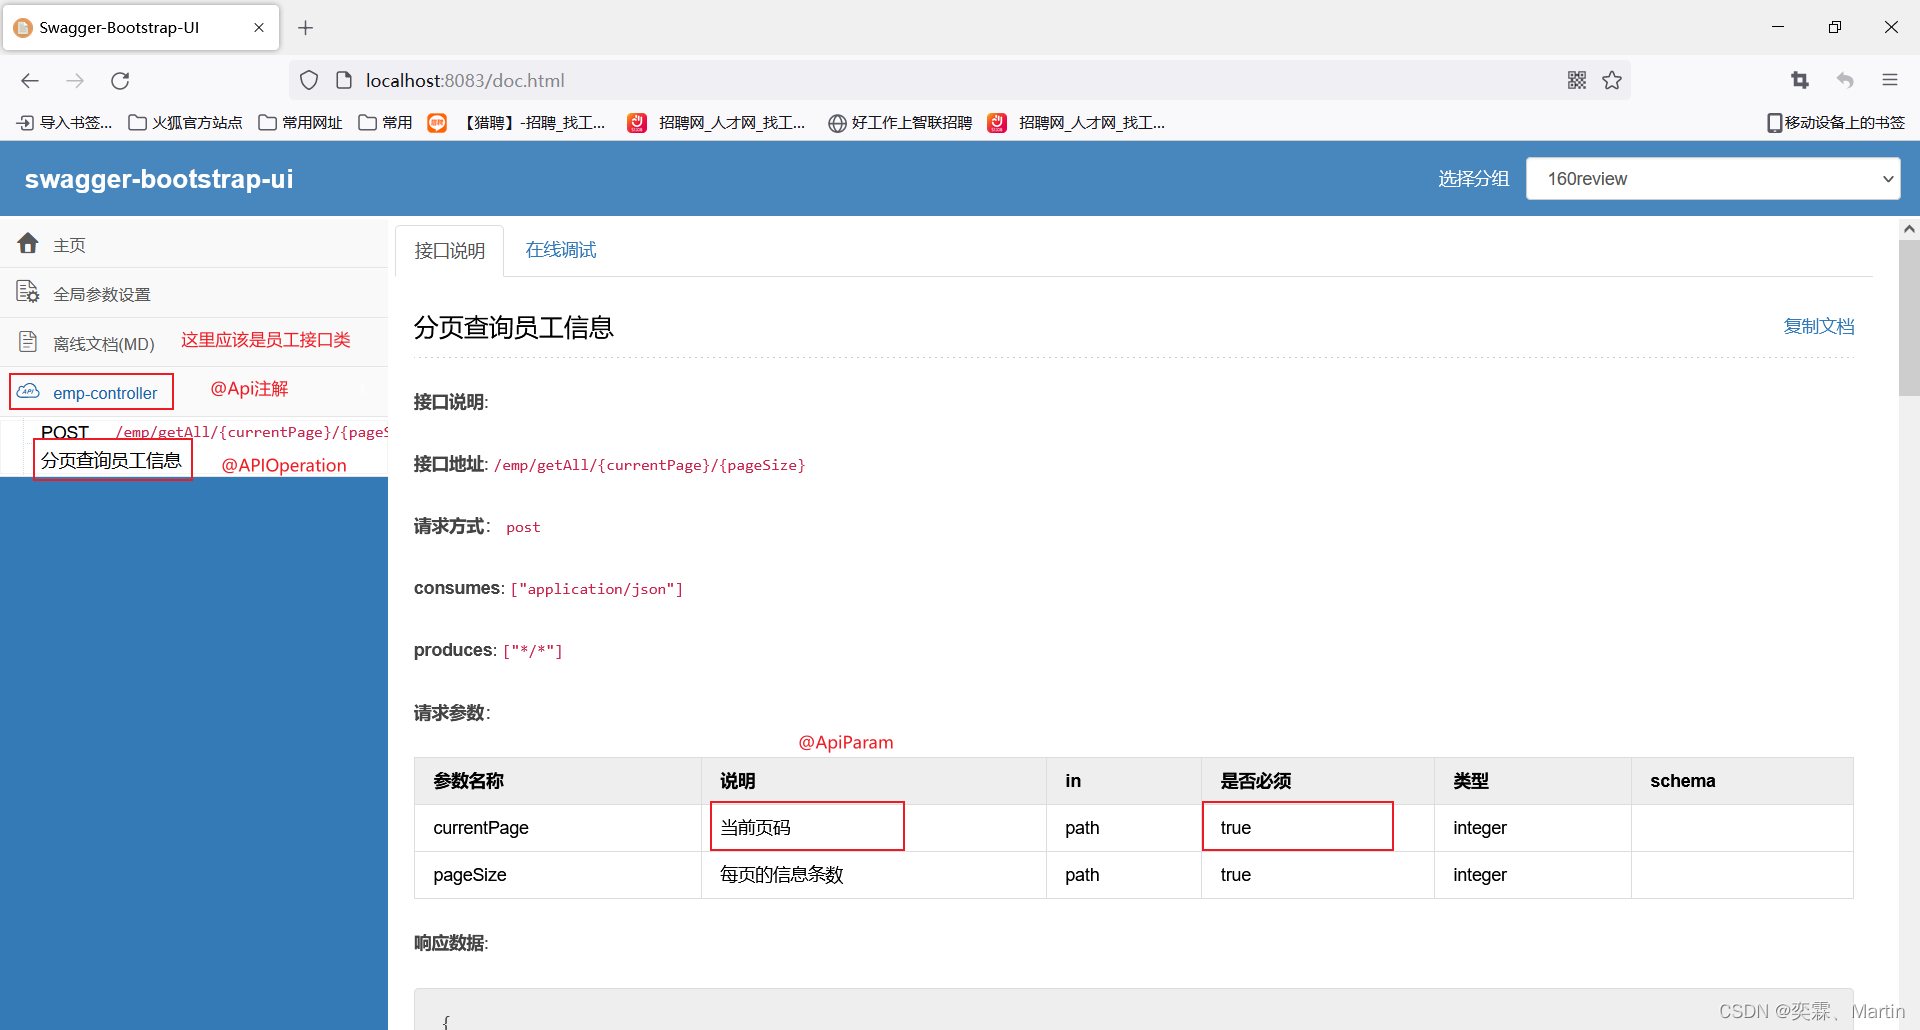
* @Api(value = "员工接口类") :接口文档的说明
* @ApiOperation(value = "分页查询员工信息"):接口文档中方法的说明
* @ApiParam(value = "当前页码",required = true):接口文档方法中参数的说明
* required = true代表此参数是必填项
*/
@Api(value = "员工接口类")
@RestController
@RequestMapping("/emp")
public class EmpController {
@Resource
private EmpService empService;
/**
* 分页查询所有员工信息
*/
@PostMapping("getAll/{currentPage}/{pageSize}")
@ApiOperation(value = "分页查询员工信息")
public Result<Page<Emp>> getAll(@ApiParam(value = "当前页码",required = true) @PathVariable Integer currentPage,
@ApiParam(value = "每页的信息条数",required = true) @PathVariable Integer pageSize){
return empService.listByPage(currentPage, pageSize);
}
}
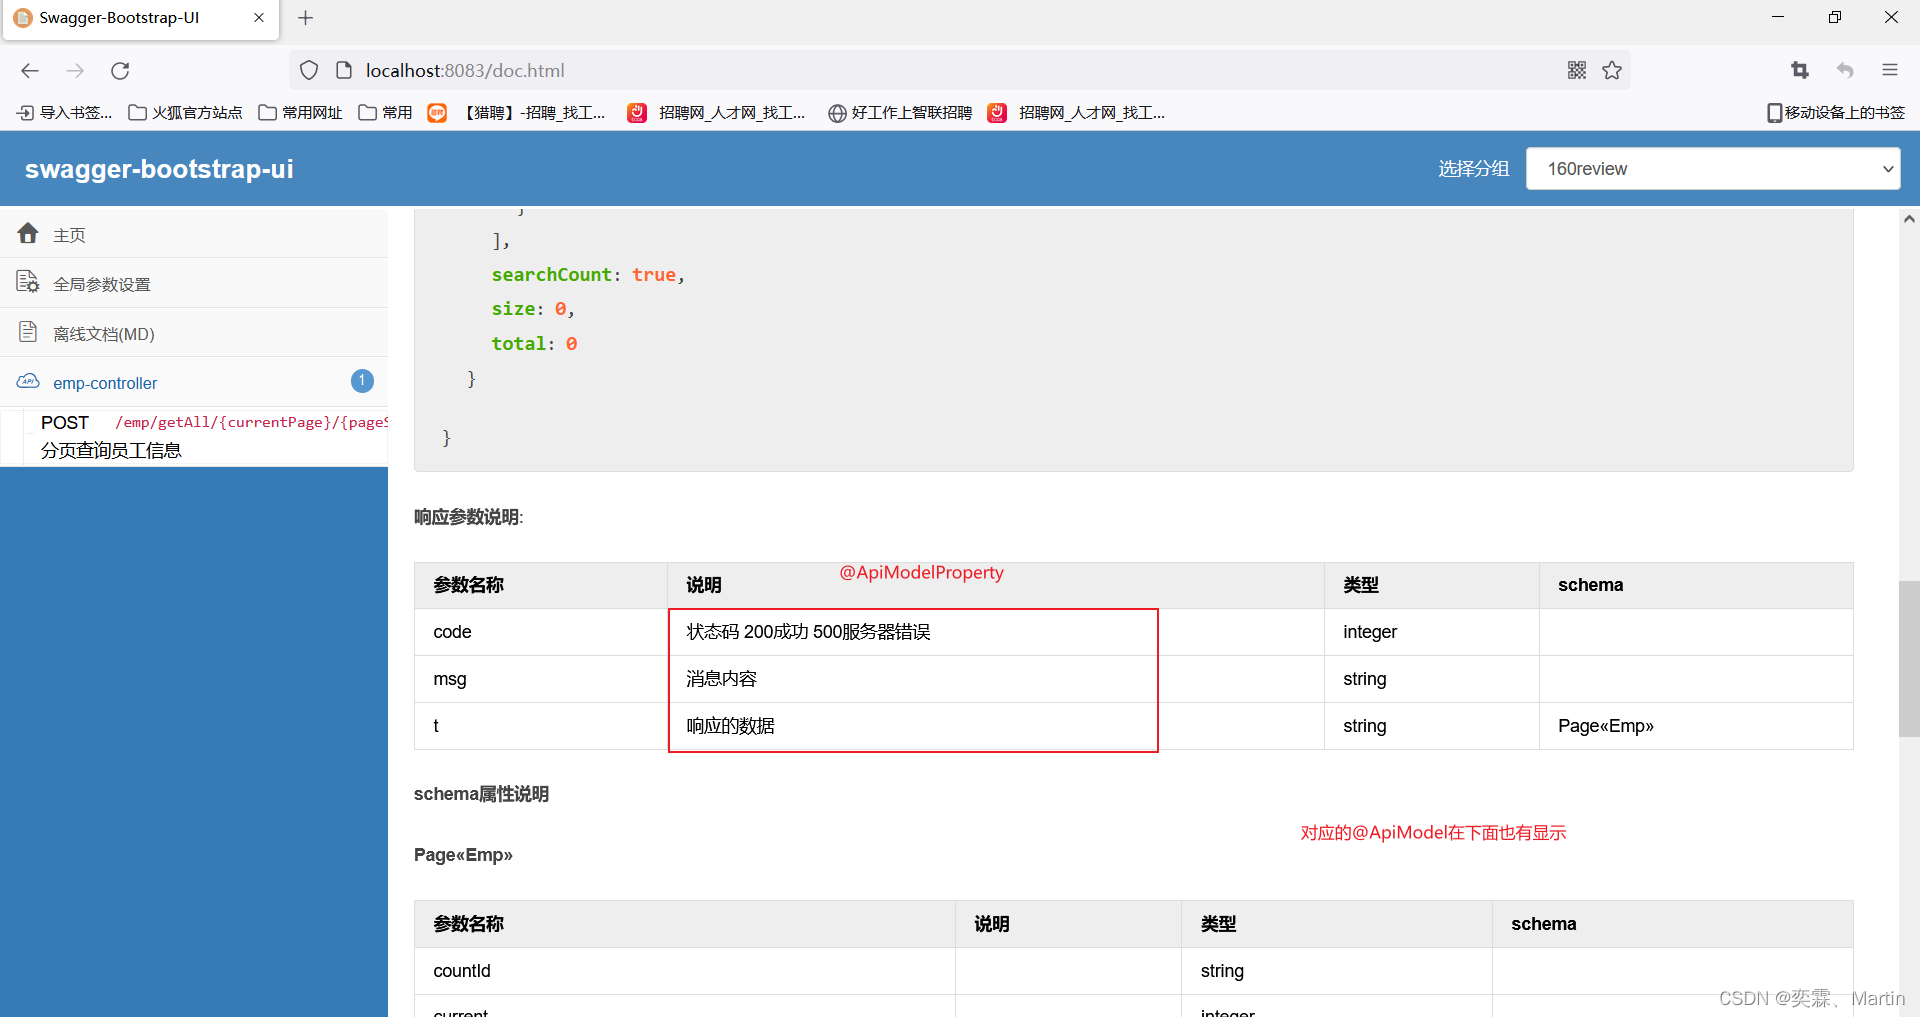
统一的响应数据

import io.swagger.annotations.ApiModel;
import io.swagger.annotations.ApiModelProperty;
import lombok.AllArgsConstructor;
import lombok.Data;
import lombok.NoArgsConstructor;

/**
 * 各种实体类的差别
 * pojo entity:简单的实体类对象
 * vo(view object):视图对象,接收和响应给前端的实体类
 * dto(data transmit object):数据传输对象,服务与服务之间传递的数据类型。(比如微服务之间的信息传递)
 */
@Data
@AllArgsConstructor
@NoArgsConstructor
//@Accessors:用于级联调用
@ApiModel(value = "统一的json对象")
public class Result<T> {
    @ApiModelProperty(value = "状态码 200成功 500服务器错误")
    private Integer code;
    @ApiModelProperty(value = "消息内容")
    private String msg;
    @ApiModelProperty(value = "响应的数据")
    private T t;
}
注解小结:
@Api: 接口类--对接口类的说明
@ApiOperation: 接口方法上--接口方法的说明
@ApiModel: 实体类上--实体类的说明
@ApiModelProperty: 实体类属性上--属性的说明
@ApiParam: 方法的参数上--接口方法的参数说明
mp的代码生成器中也有关于swagger2注解的功能,实体属性中的注解会自动添加
controller方法的路径不要使用RequestMapping(),swagger2会帮这种注解生成7个文档
11、vue可视化创建项目
11.1 打开可视化界面
这个命令要求vue客户端(cli)的版本为3.+,至少是3版本(本人版本是5.0.8)
查看客户端版本的命令为:vue-V
使用命令:vue ui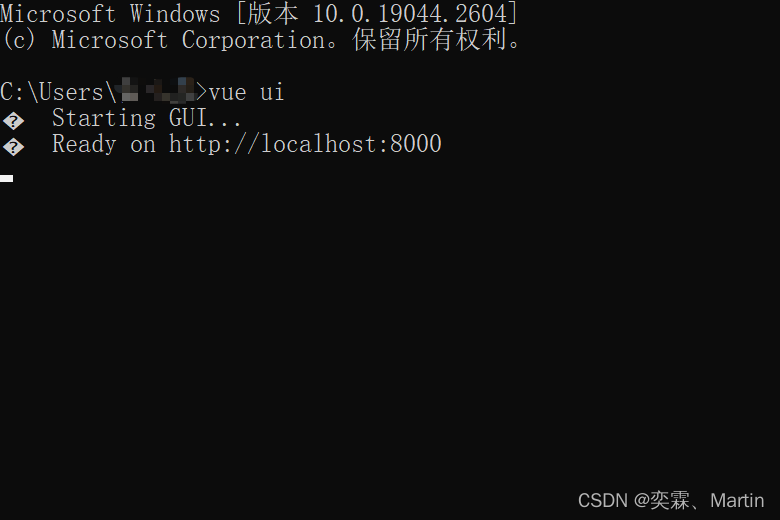
11.2 访问可视化界面
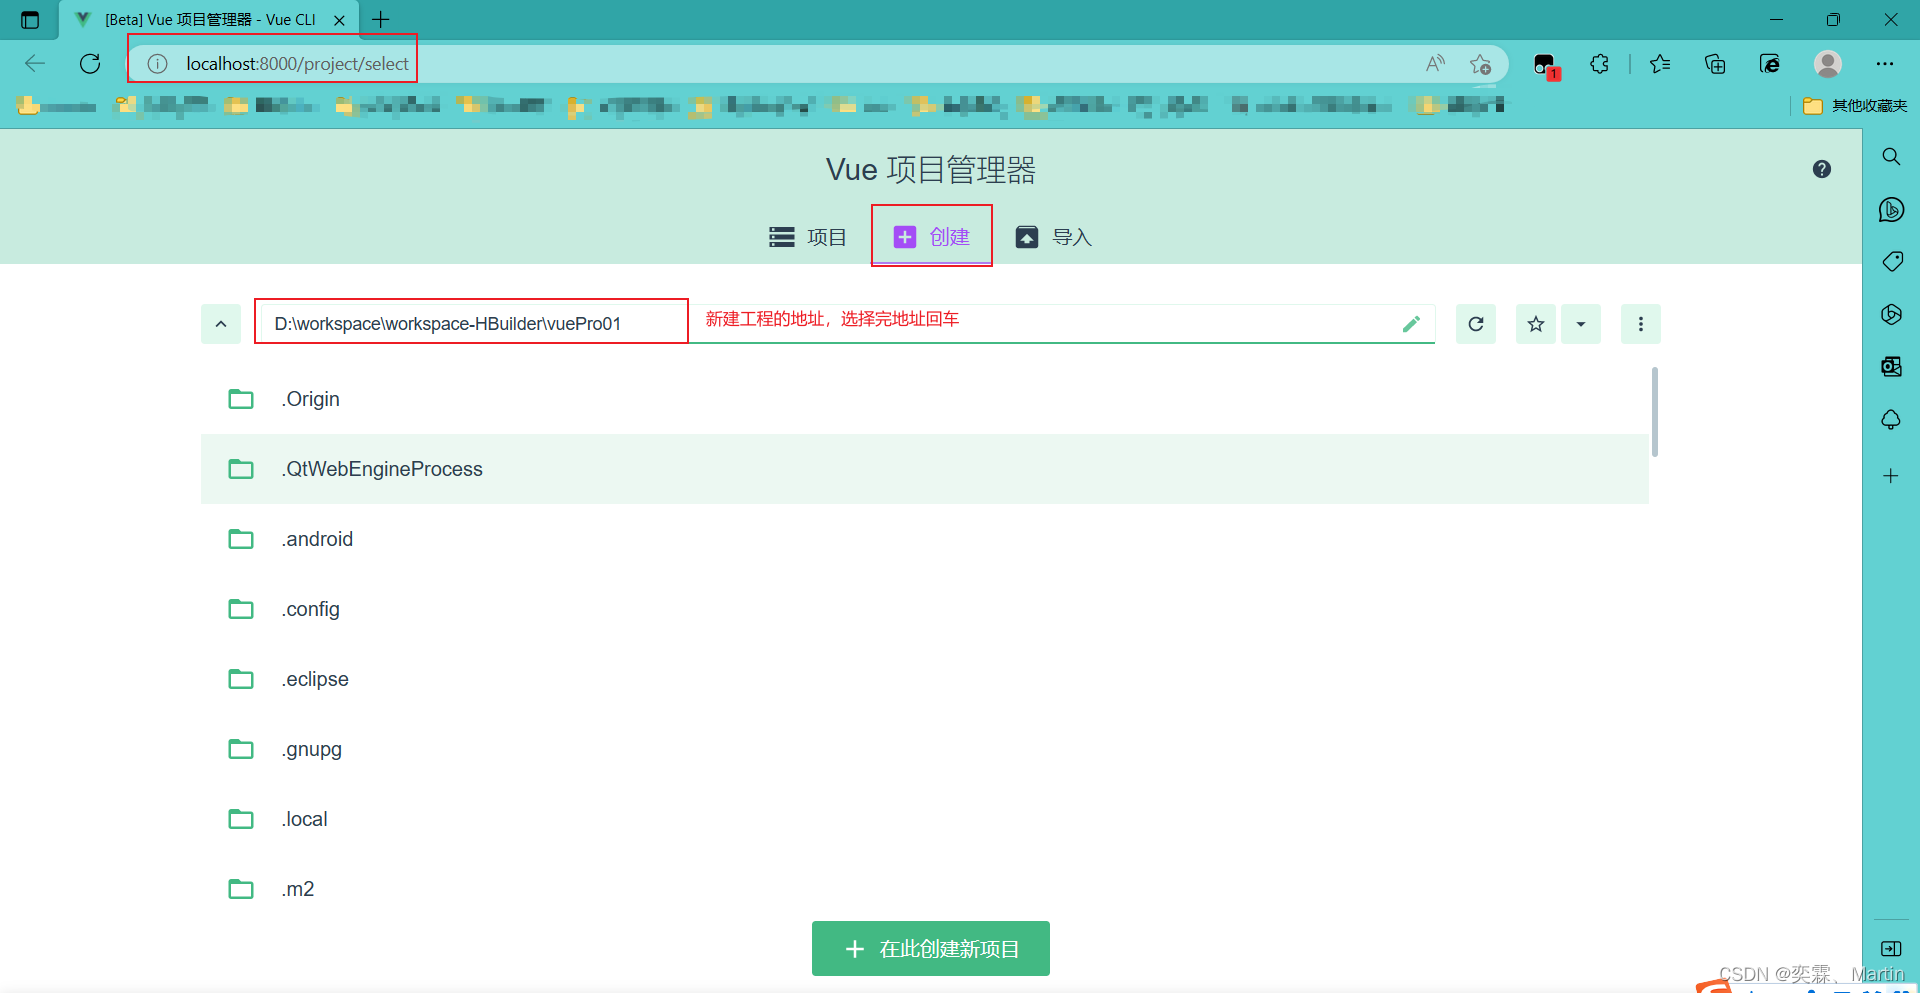
11.3 配置项目参数


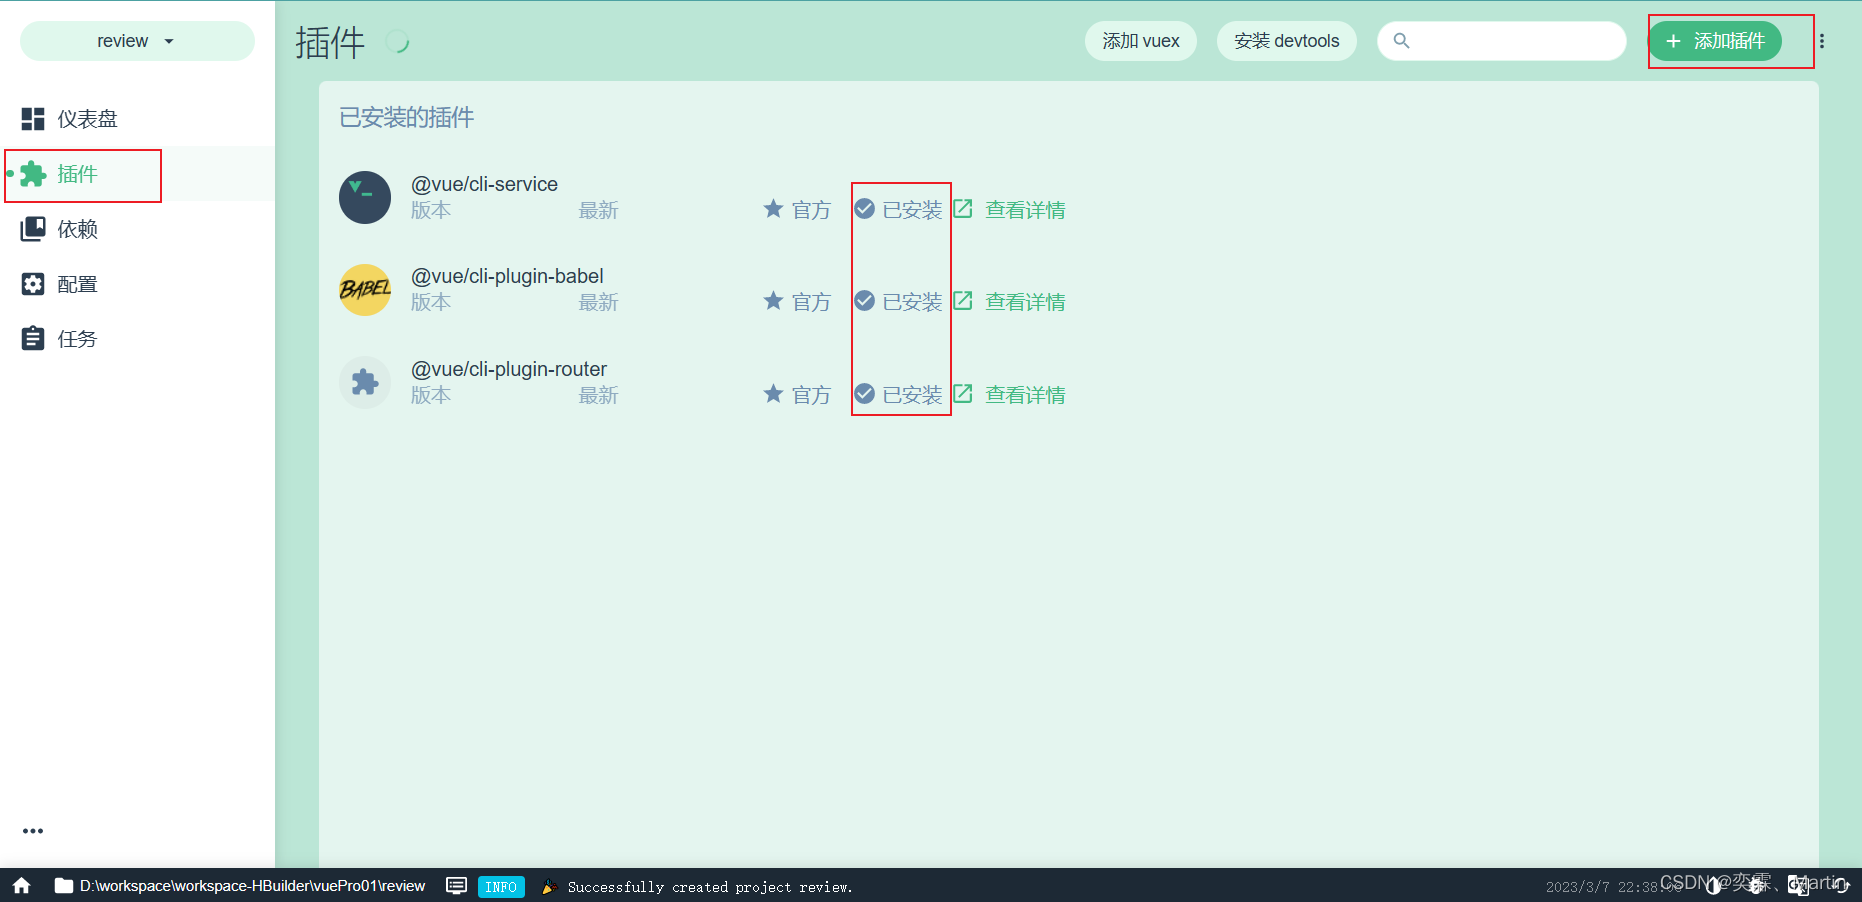
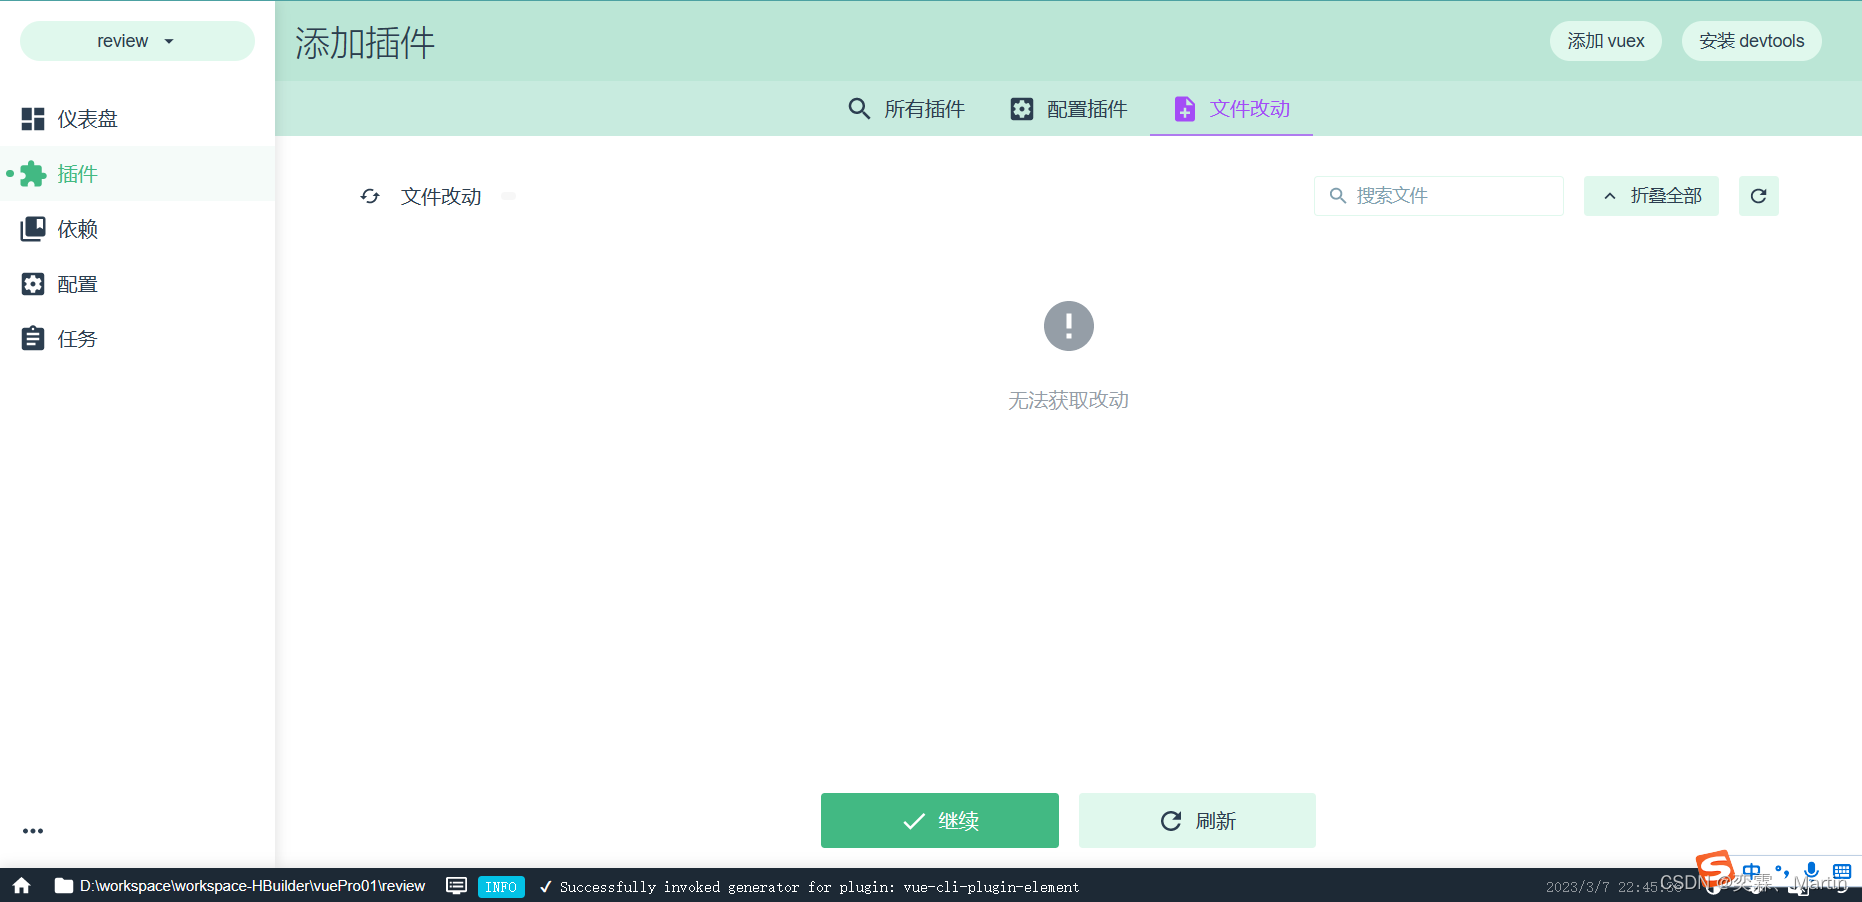
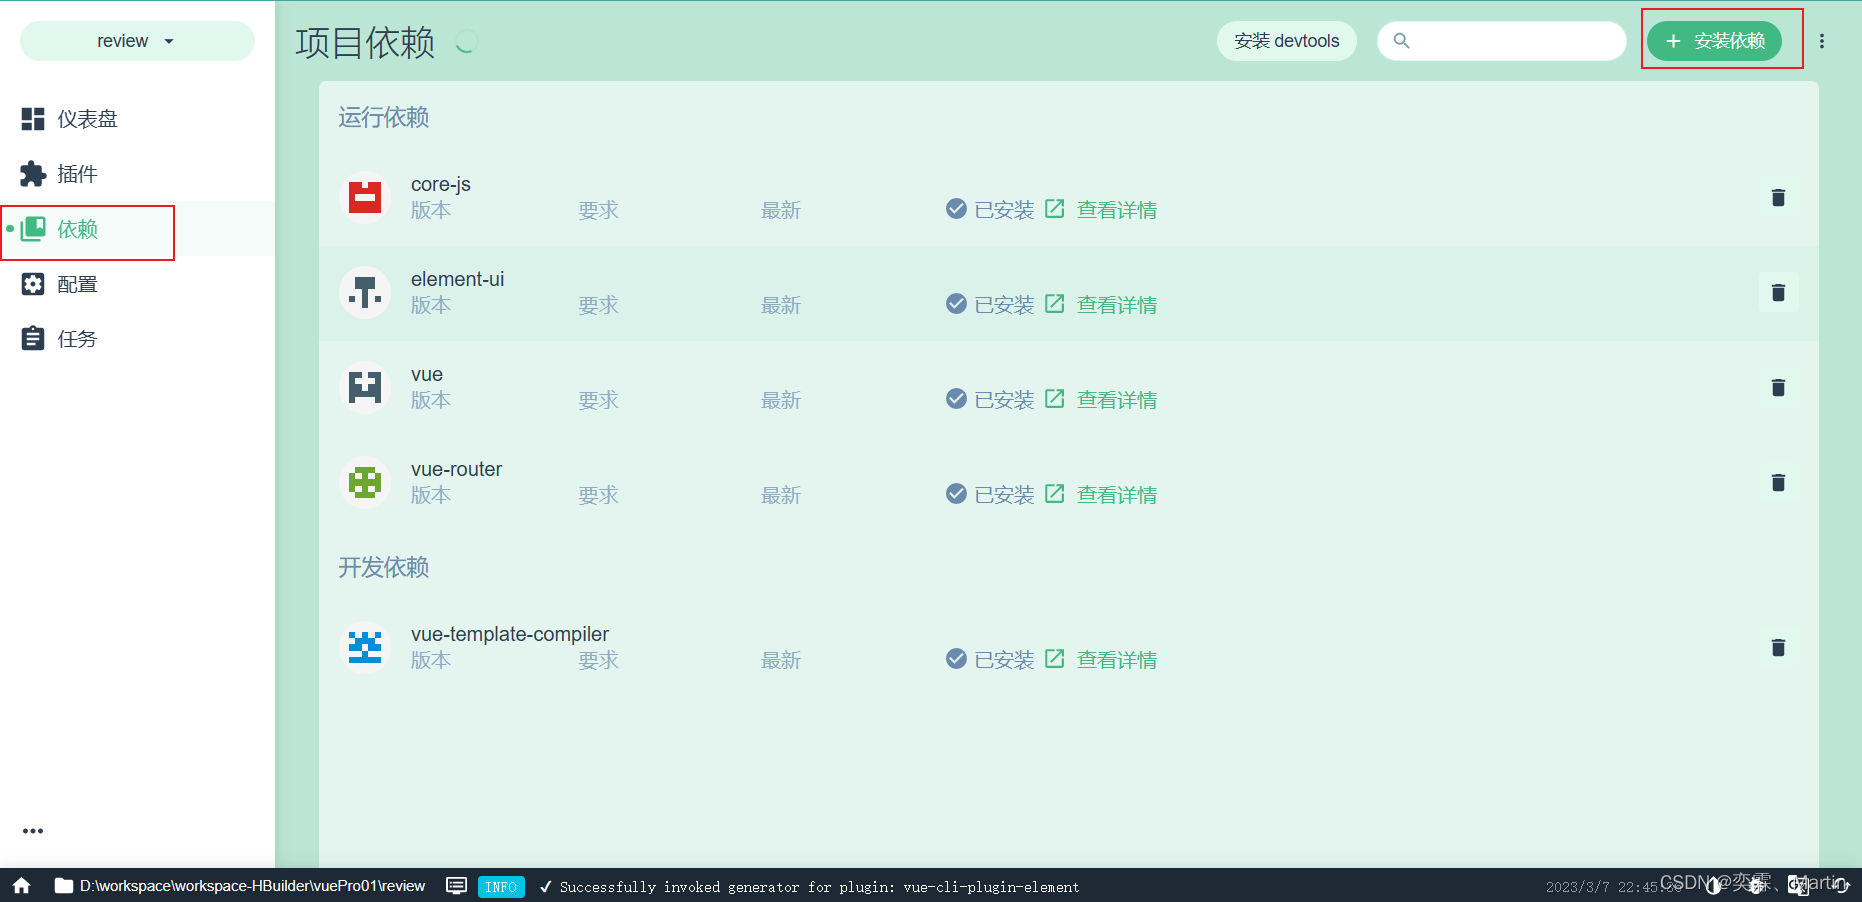
11.4 项目安装插件(elementui)

安装完之后点击完成安装开始调用elementui
11.5 项目安装依赖(axios)

12、编写前端代码
HbuilderX导入刚创建的项目
12.1 编写配置文件
App.vue文件
<template>
  <div id="app">
      <!-- 视图渲染 -->
    <router-view></router-view>
  </div>
</template>
router/index.js文件
const routes = [
  {
    path: '/',
    name: 'home',
    component: HomeView
  },
  {
      path:'/index',
      name:'index',
      component:()=>import('@/views/test/index.vue')
  },
  {
    path: '/about',
    name: 'about',
    component: () => import(/* webpackChunkName: "about" */ '../views/AboutView.vue')
  }
]
views/index.vue
<template>
    <div id="app">
       test项目是否成功
    </div>
</template>

<script>
</script>

<style>
</style>
12.2运行查看效果
npm run serve

这里的访问路径中要有  #/  不然会直接跳到首页面
12.3 单表查询
main.js
import axios from 'axios'

// 挂载到Vue对象上
Vue.prototype.$axios=axios;
// 配置axios基础路径
axios.defaults.baseURL="http://localhost:8083/"
index.vue
<template>
    <div id="app">
        <!-- 主表格 -->
        <el-table :data="tableData" border style="width: 100%">
            <el-table-column fixed prop="empno" label="编号" width="150">
            </el-table-column>
            <el-table-column prop="ename" label="姓名" >
            </el-table-column>
            <el-table-column prop="job" label="职位" >
            </el-table-column>
            <el-table-column prop="mgr" label="领导">
            </el-table-column>
            <el-table-column prop="sal" label="薪水" >
            </el-table-column>
            <el-table-column prop="hiredate" label="入职时间" >
            </el-table-column>
            <el-table-column prop="comm" label="奖金">
            </el-table-column>
            <el-table-column prop="deptno" label="部门">
            </el-table-column>
            <el-table-column fixed="right" label="操作">
                <template slot-scope="scope">
                    <el-button @click="handleClick(scope.row)" type="text" size="small">查看</el-button>
                    <el-button type="text" size="small">编辑</el-button>
                </template>
            </el-table-column>
        </el-table>
    </div>
</template>

<script>
    export default{
        name:'index',
        data(){
            return{
                tableData:[],
            }
        },
        //毕业加载完毕执行后的方法
        created() {
            this.initTable();
        },
        //自定义的方法
        methods:{
            initTable(){
                this.$axios.post("emp/getAll/1/3").then(res=>{
                    console.log(res);
                    this.tableData = res.data.t.records;
                })
            }
        }
    }
</script>

<style>
</style>
12.4 联表查询
两表联查:将部门编号改变为部门名称
后端代码
1、EmpMapper.xml

<?xml version="1.0" encoding="UTF-8" ?>
<!DOCTYPE mapper PUBLIC "-//mybatis.org//DTD Mapper 3.0//EN"
        "http://mybatis.org/dtd/mybatis-3-mapper.dtd">
<mapper namespace="com.example.review.dao.EmpDao">

    <resultMap id="my" type="com.example.review.entity.Emp" autoMapping="true">
        <id column="empno" property="empno"/>
        <association property="dept" javaType="com.example.review.entity.Dept" autoMapping="true">
            <id column="deptno" property="deptno"/>
            <result column="dname" property="dname"/>
            <result column="loc" property="loc"/>
        </association>
    </resultMap>
    <select id="queryTest" resultMap="my">
        select e.*,d.dname,d.loc from emp e join dept d on e.deptno=d.deptno
        <if test="ew!=null">
            <where>
                ${ew.customSqlSegment}
            </where>
        </if>
    </select>
</mapper>
2、EmpDao
public interface EmpDao extends BaseMapper<Emp> {
	//如果后续有where条件可以直接添加到后面的wrapper里面,这里别名叫ew
    IPage<Emp> queryTest(IPage<Emp> page, @Param(Constants.WRAPPER) Wrapper<Emp> wrapper);
}
3、EmpService
public interface EmpService {

    /**
     * 分页查询所有的数据
     */
    public Result<IPage<Emp>>  listByPage(Integer currentPage, Integer pageSize);
}
4、service实现类
@Service
public class EmpServiceImpl implements EmpService {

    @Resource
    private EmpDao empDao;

    @Override
    public Result<IPage<Emp>> listByPage(Integer currentPage, Integer pageSize) {
        Page<Emp> page = new Page<>(currentPage,pageSize);
        //有where条件就创建queryWrapper对象
        IPage<Emp> empIPage = empDao.queryTest(page, null);
        return new Result<>(200,"操作成功",empIPage);
    }
}
5、controller层
@Api(value = "员工接口类")
@RestController
@RequestMapping("/emp")
public class EmpController {

    @Resource
    private EmpService empService;

    /**
     * 分页查询所有员工信息
     */
    @PostMapping("getAll/{currentPage}/{pageSize}")
    @ApiOperation(value = "分页查询员工信息")
    public Result<IPage<Emp>> getAll(@ApiParam(value = "当前页码",required = true) @PathVariable Integer currentPage,
                                     @ApiParam(value = "每页的信息条数",required = true) @PathVariable Integer pageSize){
        return empService.listByPage(currentPage, pageSize);
    }
}
前端代码(index.vue)
<el-table :data="tableData" border style="width: 100%">
            <el-table-column fixed prop="empno" label="编号" width="150">
            </el-table-column>
            <el-table-column prop="ename" label="姓名" >
            </el-table-column>
            <el-table-column prop="job" label="职位" >
            </el-table-column>
            <el-table-column prop="mgr" label="领导">
            </el-table-column>
            <el-table-column prop="sal" label="薪水" >
            </el-table-column>
            <!-- 实体类中的名称调用 -->
            <el-table-column prop="hiredate" label="入职时间" >
            </el-table-column>
            <el-table-column prop="comm" label="奖金">
            </el-table-column>
            <el-table-column prop="dept.dname" label="部门">
            </el-table-column>
            <el-table-column fixed="right" label="操作">
                <template slot-scope="scope">
                    <el-button @click="handleClick(scope.row)" type="text" size="small">查看</el-button>
                    <el-button type="text" size="small">编辑</el-button>
                </template>
            </el-table-column>
        </el-table>
12.5 分页插件
<!-- 分页插件 -->
        <el-pagination
            @size-change="handleSizeChange"
            @current-change="handleCurrentChange"
            :current-page="page.currentPage"
            :page-sizes="[5, 10, 15, 20]"
            :page-size="page.pageSize"
            layout="total, sizes, prev, pager, next, jumper"
            :total="page.total">
        </el-pagination>


 method方法:

 initTable() {        this.$axios.post("emp/getAll/"+this.page.currentPage+"/"+this.page.pageSize).then(res => {
                    console.log(res);
                    this.tableData = res.data.t.records;
                    //数据总条数赋值给total
                    this.page.total = res.data.t.total;
                })
            },
            handleSizeChange(val) {
                console.log(`每页 ${val} 条`);
                this.page.pageSize = val;
                this.initTable();
            },
            handleCurrentChange(val) {
                console.log(`当前页: ${val}`);
                this.page.currentPage = val;
                this.initTable();
            }


 9456
9456


 被折叠的 条评论
为什么被折叠?
被折叠的 条评论
为什么被折叠?
 到【灌水乐园】发言


