u-view 2.0 实现tab栏切换

u-view1.0是有一个 u-tabs-swiper 使用,但是2.0没有了,所以需要用u-tabs 加上 uni提供的原生swipper实现该效果。

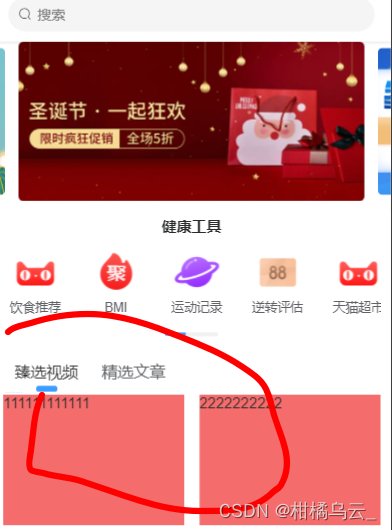
tab有两种情况:一种是在首页中使用如下图
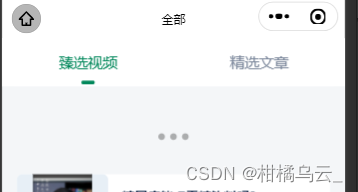
另一种是整个页面只包含一个tab页面

 因为swiper高度默认150px,swiper-item高度是100%,起初想让swiper-item中的内容吧swiper-item和其父元素高度撑开,理应将height设置成auto但是swiper的高度auto可以设置成功,但是swiper-item高度设置了auto始终是不成功(开发者工具中styles中显示出了但是就是不生效)但是!!给swiper标签设置高度100%是可以的(这里注意swiper的所有父级高度是否设置,如果没设置那么swiper的高度100%没有意义),到这里也就是说 图二这种全页面的tabs 可以给swiper设置高度100%,其余比如图一那种半个页面或者部分页面是tabs的这种,必须通过js去计算内容高度,可以看我另一篇文章​​​​​​​,然后赋值给swiper。至于在swiper是否使用scroll-view,取决于下拉刷新的需求,使用scroll-view的好处是可以自定义下拉刷新的位置,以为我们知道原生的下拉刷新的位置在navbarr下面,几乎是页面最上面,而使用scroll-view后可以控制下拉刷新的位置在tab下面。类似下图,

<div style="height:100%;">

    <div>
	    <u-sticky bgColor="#fff">
	        <u-tabs :list="list1" ref="uTabs" :current="currentNum" lineHeight="6"     @change="tabsChange">
            </u-tabs>
	    </u-sticky>
    </div>

    <div style="height:100%;">
	    <swiper :current="swiperCurrent" @change="transition" style="height:100%;">
			<swiper-item class="swiper-item" v-for="(item, index) in tabs" :key="index">
					<scroll-view scroll-y style="height: 100%;width: 100%;"     @scrolltolower="onreachBottom">
						    {{item.value}}
			       		</scroll-view>
	    		</swiper-item>
	    </swiper>
    </div>

</div>

data(){
return{
tabs: [
		{ value: '111111111111' },
		{ value: '222222222222' },
		],
ist1: [{
		name: '臻选视频',
		}, {
		name: '精选文章',
		}]
 }
}

methods: {
			// tabs通知swiper切换
			tabsChange(e) {
				this.swiperCurrent = e.index;
			},
			// swiper-item左右移动,通知tabs的滑块跟随移动
			transition(e) {
				this.currentNum = e.detail.current
				console.log(e.detail.current, '-------')
			},
			// scroll-view到底部加载更多
			onreachBottom() {
				console.log(11111111111)
			}
		}

在此推荐以下几个链接,供大家学习参考

uni-plugins/order.vue at master · xfjpeter/uni-plugins · GitHub

自定义 tab 选项卡 2 - DCloud 插件市场

关于微信小程序使用swiper组件实现tab页的高度自适应的问题_鱼子酱酱酱的博客-CSDN博客

​​​​​​小程序 swiper 如何多页面高度自适应 - 掘金

关于微信小程序使用swiper组件实现tab页的高度自适应的问题_鱼子酱酱酱的博客-CSDN博客

  • 0
    点赞
  • 5
    收藏
    觉得还不错? 一键收藏
  • 打赏
    打赏
  • 0
    评论
在uniapp中使用uView自定义底部导航的步骤如下: 1. 安装uView插件,在HBuilderX中打开项目,右键点击项目根目录,选择"插件安装",搜索uView,安装并重启HBuilderX。 2. 在App.vue文件中引入uView组件库: ```javascript import uView from 'uview-ui'; Vue.use(uView); ``` 3. 在pages.json中配置底部导航,如下所示: ```json { "pages": [ { "path": "pages/index/index", "style": { "navigationBarTitleText": "首页" } }, { "path": "pages/mine/mine", "style": { "navigationBarTitleText": "我的" } } ], "tabBar": { "color": "#7A7E83", "selectedColor": "#007AFF", "backgroundColor": "#ffffff", "borderStyle": "black", "list": [ { "pagePath": "pages/index/index", "text": "首页", "iconPath": "static/tabbar/home.png", "selectedIconPath": "static/tabbar/home_active.png" }, { "pagePath": "pages/mine/mine", "text": "我的", "iconPath": "static/tabbar/mine.png", "selectedIconPath": "static/tabbar/mine_active.png" } ] } } ``` 其中,"tabBar"字段配置底部导航,"list"数组配置每个导航项的属性。 4. 在各个页面中添加导航的内容,如下所示: ```html <template> <view> <view>这是首页</view> </view> </template> <script> export default { data() { return { title: '首页' } }, onNavigationBarButtonTap() { uni.navigateTo({ url: '/pages/search/search' }); } } </script> ``` 其中,"data"中配置页面标题,"onNavigationBarButtonTap"函数配置导航右侧按钮的点击事件。 5. 在App.vue中配置全局导航样式,如下所示: ```scss <style lang="scss"> // 配置全局导航样式 .u-navbar { background-color: #007aff; color: #ffffff; } </style> ``` 6. 运行项目,即可看到自定义的底部导航了。

“相关推荐”对你有帮助么?

  • 非常没帮助
  • 没帮助
  • 一般
  • 有帮助
  • 非常有帮助
提交
评论
添加红包

请填写红包祝福语或标题

红包个数最小为10个

红包金额最低5元

当前余额3.43前往充值 >
需支付:10.00
成就一亿技术人!
领取后你会自动成为博主和红包主的粉丝 规则
hope_wisdom
发出的红包

打赏作者

柑橘乌云_

你的鼓励将是我创作的最大动力

¥1 ¥2 ¥4 ¥6 ¥10 ¥20
扫码支付:¥1
获取中
扫码支付

您的余额不足,请更换扫码支付或充值

打赏作者

实付
使用余额支付
点击重新获取
扫码支付
钱包余额 0

抵扣说明:

1.余额是钱包充值的虚拟货币,按照1:1的比例进行支付金额的抵扣。
2.余额无法直接购买下载,可以购买VIP、付费专栏及课程。

余额充值