


Docker:
在配置集群之前我们需要有一个干净的系统环境,我使用的是Redhat7.6
参考环境配置:http://t.csdnimg.cn/Soivz
我们最终的部署是四台虚拟机,每台虚拟机2核2G
做一些准备:
selinux---disabled
防火墙---disabled
时间同步:
vim /etc/chrony.conf
server ntp1.aliyun.com iburst

systemctl enable --now chronyd
systemctl restart chronyd

date查看日期是否正确
域名解析:
127.0.0.1   localhost localhost.localdomain localhost4 localhost4.localdomain4
::1         localhost localhost.localdomain localhost6 localhost6.localdomain6
172.25.0.10 server0 reg.westos.org
172.25.0.11 server1
172.25.0.12 server2
172.25.0.13 server3
172.25.0.14 server4
172.25.0.15 server5
172.25.0.16 server6
写入yum源:
dockers.repo
[docker]
name=docker-ce
gpgcheck=0
baseurl=https://mirrors.aliyun.com/docker-ce/linux/centos/7/x86_64/stable/

[centos]
name=update
gpgcheck=0
baseurl=https://mirrors.aliyun.com/centos/7/extras/x86_64/
下载docker
我们可以先列出想要下载的版本,(参数--showduplicates)
yum list docker-ce --showduplicates
yum install -y docker-ce-20.10.18-3.el7
版本前面的3加上反而命令执行失败,去掉之后成功下载安装,有兴趣的可以了解下原因
开机自启:
systemctl enable --now dockerdocker info ##打印docker相关信息有的电脑在docker info执行之后,最后两行并没有显示disabled的警告,认为不需要调整内核选项,reboot再看看~~
调整内核选项:
vim /etc/sysctl.d/docker.conf
net.bridge.bridge-nf-call-iptables = 1
net.bridge.bridge-nf-call-ip6tables = 1

sysctl --system,reboot

docker info
harbor创建自签名证书:
mkdir -p certs
##创建目录存放证书

##这里是在/root下创建

yum  install -y openssl11-1.1.1k-2.el7.x86_64.rpm openssl11-libs-1.1.1k-2.el7.x86_64.rpm ##这两个包有依赖性,建议在阿里云下载

openssl11 req -newkey rsa:4096 -nodes -sha256 -keyout certs/westos.org.key -addext "subjectAltName = DNS:reg.westos.org" -x509 -days 365 -out certs/westos.org.crt

##生成自签名证书

Can't load /root/.rnd into RNG
139804299835200:error:2406F079:random number generator:RAND_load_file:Cannot open file:crypto/rand/randfile.c:98:Filename=/root/.rnd
Generating a RSA private key
.................................................................................................................................................................++++
........++++
writing new private key to 'certs/westos.org.key'
-----
You are about to be asked to enter information that will be incorporated
into your certificate request.
What you are about to enter is what is called a Distinguished Name or a DN.
There are quite a few fields but you can leave some blank
For some fields there will be a default value,
If you enter '.', the field will be left blank.
-----
Country Name (2 letter code) [XX]:cn
State or Province Name (full name) []:shaanxi
Locality Name (eg, city) [Default City]:xi'an
Organization Name (eg, company) [Default Company Ltd]:westos
Organizational Unit Name (eg, section) []:linux
Common Name (eg, your name or your server's hostname) []:reg.westos.org
Email Address []:root@westos.org


harbor和server1: mkdir -p /etc/docker/certs.d/reg.westos.org
                server2和server3也是如此


harbor:scp certs/ server1:/etc/docker/certs.d/reg.westos.org/ca.crt
        scp certs/ server2:/etc/docker/certs.d/reg.westos.org/ca.crt
        scp certs/ server3:/etc/docker/certs.d/reg.westos.org/ca.crt

##证书都需要复制
server1,2,3除了不需要创建证书,其余同上,添加私有仓库地址:
vim /etc/dokcer/daemon.json


{
"registry-mirrors" : ["https://reg.westos.org"]
}
server2和3步骤同上
重启docker:
systemctl restart dockerdocker info之后显示仓库地址
用户认证:
harbor:
yum install -y httpd-tools在root用户下mkdir auth
创建认证信息:
htpasswd -Bc auth/htpasswd admin
New password:
Re-type new password:
Adding password for user admin

auth/htpasswd 为认证信息文件:
cat auth/htpasswd
admin:$2y$05$F2tAZRcVf6mWrwjt9Te2rOGDdhml4PfFfd4cIsE4pntMF6rE73x06
下载docker-compose:
下载地址:https://github.com/goharbor/harbor/releases
还需要有docker-compose(根据文档选择版本)目前2.5.0还在5页左右
tar zxf harbor-offline-installer-v2.5.0.tgz
cd harbor/
cp harbor.yml.tmpl harbor.yml

vim harbor.yml    ##修改配置信息
hostname: reg.westos.org    域名
certificate: /data/certs/westos.org.crt    路径
private_key: /data/certs/westos.org.key
harbor_admin_password: westos    密码

mkdir /data
mv certs/ /data/

mv docker-compose-linux-x86_64-v2.5.0 /usr/local/bin/docker-compose
chmod +x /usr/local/bin/docker-compose
./install.sh
初始化成功之后harbor仓库如下:
[root@server1 harbor]#  docker-compose ps

NAME                COMMAND                  SERVICE             STATUS              PORTS
harbor-core         "/harbor/entrypoint.…"   core                running (healthy)
harbor-db           "/docker-entrypoint.…"   postgresql          running (healthy)
harbor-jobservice   "/harbor/entrypoint.…"   jobservice          running (healthy)
harbor-log          "/bin/sh -c /usr/loc…"   log                 running (healthy)   127.0.0.1:1514->10514/tcp
harbor-portal       "nginx -g 'daemon of…"   portal              running (healthy)
nginx               "nginx -g 'daemon of…"   proxy               running (healthy)   0.0.0.0:80->8080/tcp, 0.0.0.0:443->8443/tcp, :::80->8080/tcp, :::443->8443/tcp
redis               "redis-server /etc/r…"   redis               running (healthy)
registry            "/home/harbor/entryp…"   registry            running (healthy)
registryctl         "/home/harbor/start.…"   registryctl         running (healthy)
web访问:
http://172.25.0.10

这里的172.25.0.10是harbor的IP地址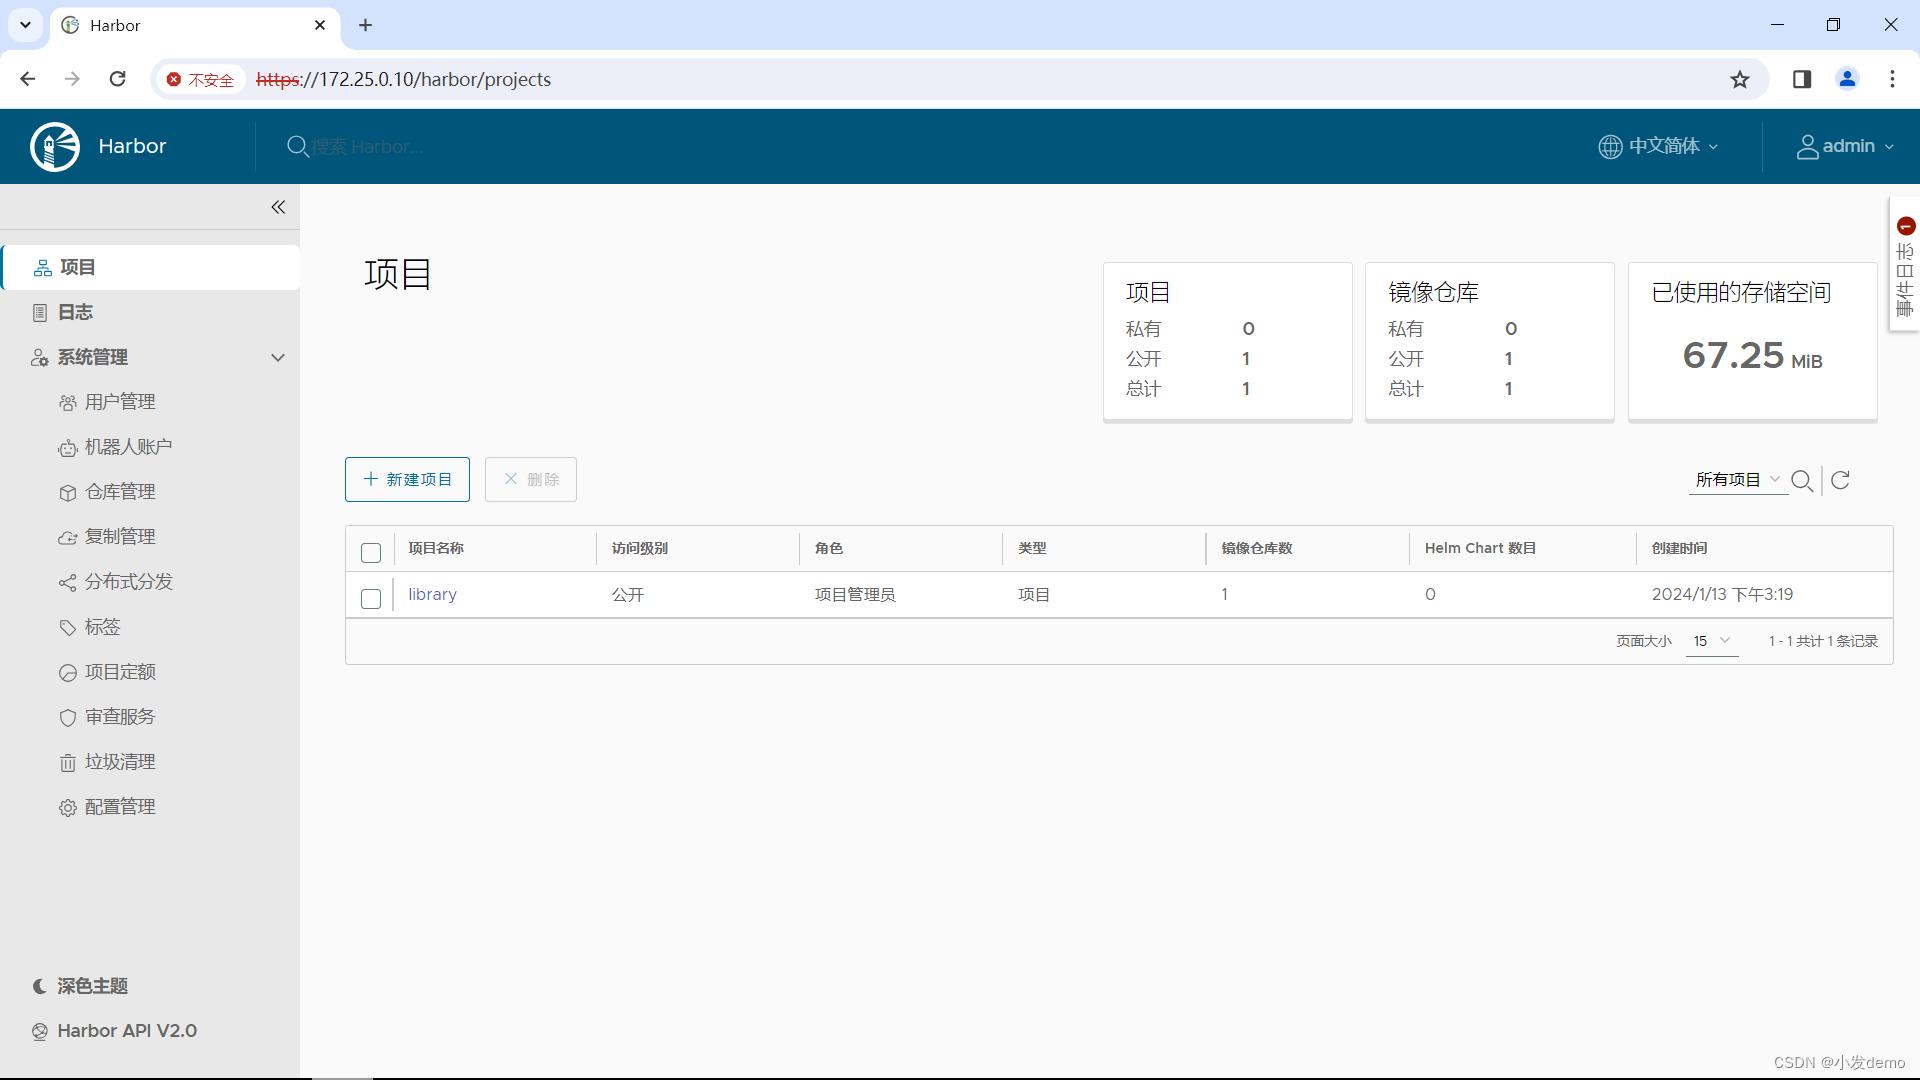
注意:在访问私有仓库时需要输入全部的仓库名称并且需要认证,访问共有仓库时则不需要
docker-compose down

root@server1 harbor]# ./install.sh --help

Note: Please set hostname and other necessary attributes in harbor.yml first. DO NOT use localhost or 127.0.0.1 for hostname, because Harbor needs to be accessed by external clients.
Please set --with-notary if needs enable Notary in Harbor, and set ui_url_protocol/ssl_cert/ssl_cert_key in harbor.yml bacause notary must run under https.
    //做签名
Please set --with-trivy if needs enable Trivy in Harbor
    //做镜像扫描
Please set --with-chartmuseum if needs enable Chartmuseum in Harbor
    //允许管理chart
如果需要更改harbor.yml的文件,在执行./install.sh之前需要执行 prepare进行清理配置并重新生成

在harbor中可以创建用户并添加进相应的仓库,其他节点也可使用该用户来进行认证登录和上传下载
K8S:
官网:kubernetes.io
在k8s部署时,本实验采用1master+2worker方式部署,所以在之前的harbor和server1部署好之后,我们还需要再部署两个worker域名解析有所改变,对应的主机名也应该做改变:
127.0.0.1   localhost localhost.localdomain localhost4 localhost4.localdomain4
::1         localhost localhost.localdomain localhost6 localhost6.localdomain6
172.25.0.10 harbor reg.westos.org
172.25.0.11 k8s1
172.25.0.12 k8s2
172.25.0.13 k8s3
172.25.0.14 k8s4
172.25.0.15 k8s5
172.25.0.16 k8s6
重复一次,需要注意将:
时间同步、域名解析、主机名修改、selinux关闭、防火墙关闭,
此时应该是一个harbor仓库+一个master准备节点+两个worker准备节点,三个节点应该都可以连接到harbor仓库,可以拉取镜像,三个节点之间也有解析
此时准备工作就绪:
三个节点写入k8s源:
[kubernetes]
name=Kubernetes
baseurl=https://mirrors.aliyun.com/kubernetes/yum/repos/kubernetes-el7-x86_64/
enabled=1
gpgcheck=0

采用阿里云镜像站的源
列出版本:
yum list --showduplicates kubeadm
yum list --showduplicates kubelet
yum list --showduplicates kubectl
选择合适版本下载:
yum install -y kubeadm-1.23.12-0 kubelet-1.23.12-0 kubectl-1.23.12-0三个节点开机自启:
systemctl enable --now kubelet之后只做master节点:
下载镜像(阿里云镜像站):
kubeadm config images pull --image-repository reg.westos.org/k8s --kubernetes-version 1.23.12初始化:
初始化成功之后留意命令:master成功部署之后,最后worker节点复制此命令直接运行

kubeadm init --pod-network-cidr=10.244.0.0/16 --image-repository reg.westos.org/k8s --kubernetes-version 1.23.12存放证书:
export KUBECONFIG=/etc/kubernetes/admin.conf

导入变量中:
vim .bash_profile

export KUBECONFIG=/etc/kubernetes/admin.conf
下载并更改flannel网络插件:
在github上搜索flannel
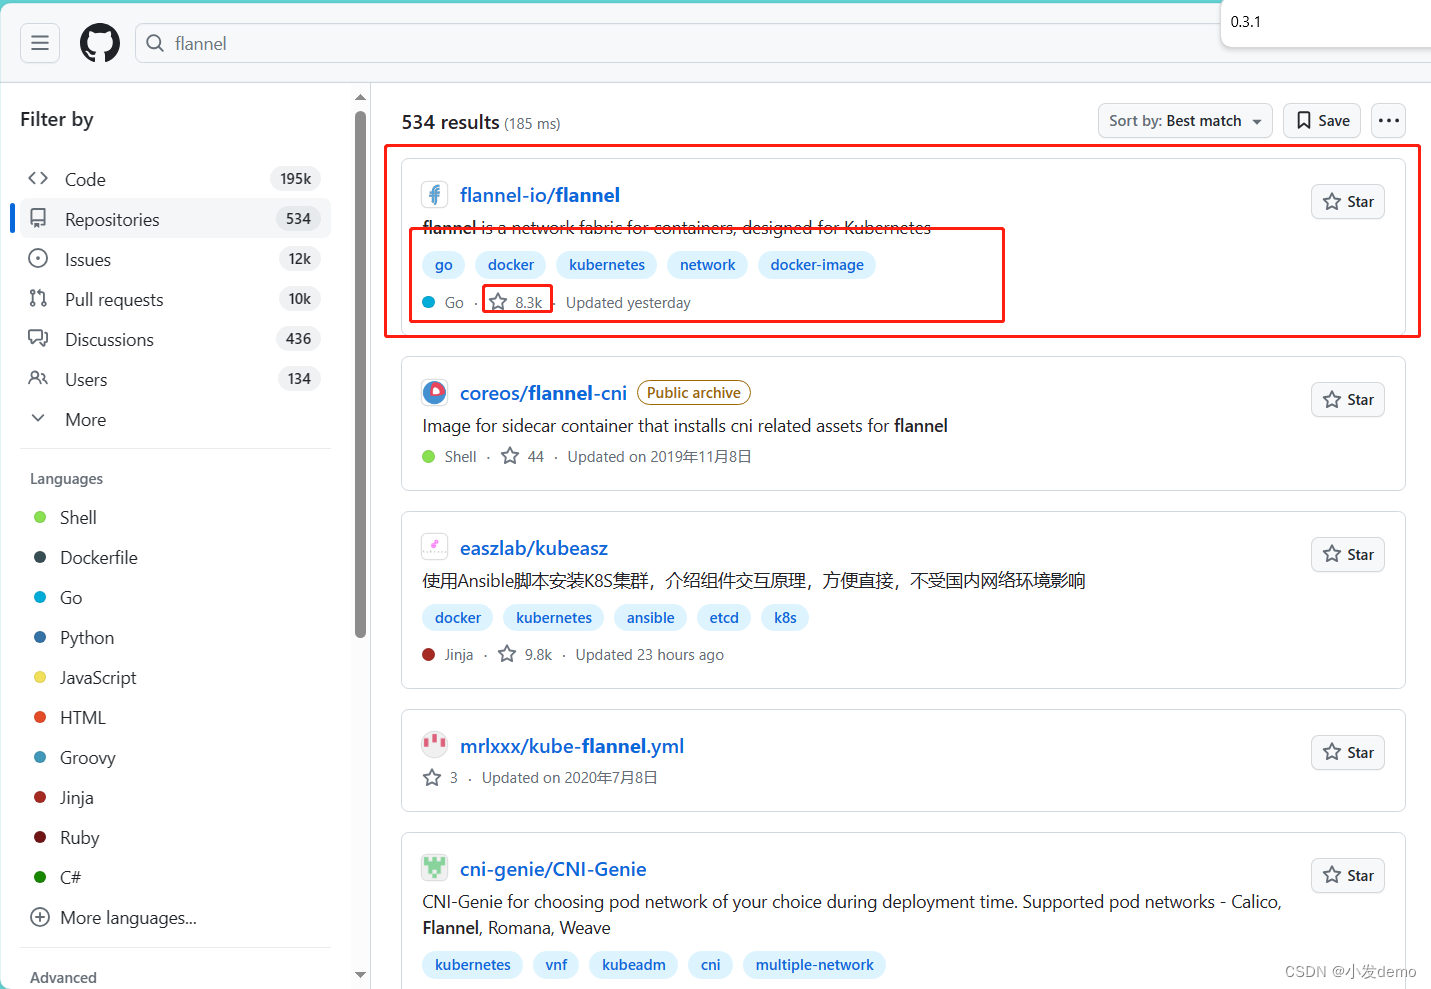
访问量较高的为正确位置
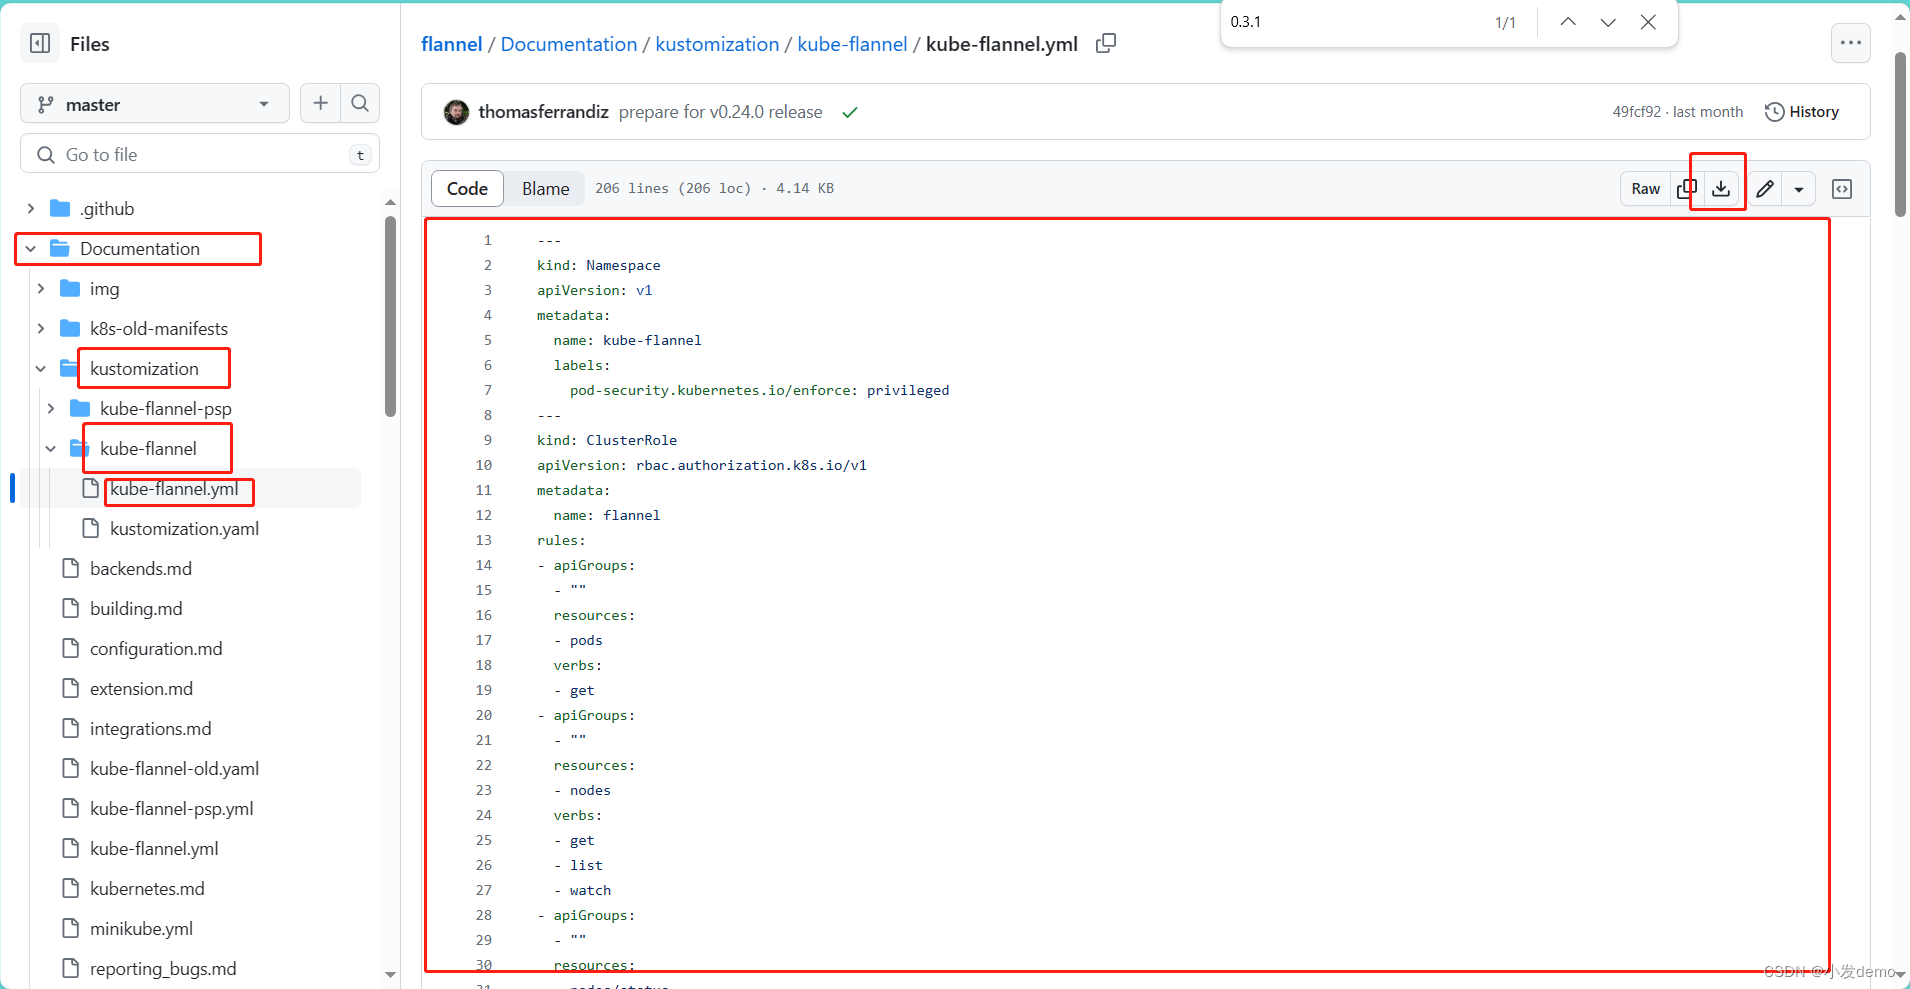
直达:
vim kube-flannel.yml
---
kind: Namespace
apiVersion: v1
metadata:
  name: kube-flannel
  labels:
    pod-security.kubernetes.io/enforce: privileged
---
kind: ClusterRole
apiVersion: rbac.authorization.k8s.io/v1
metadata:
  name: flannel
rules:
- apiGroups:
  - ""
  resources:
  - pods
  verbs:
  - get
- apiGroups:
  - ""
  resources:
  - nodes
  verbs:
  - list
  - watch
- apiGroups:
  - ""
  resources:
  - nodes/status
  verbs:
  - patch
---
kind: ClusterRoleBinding
apiVersion: rbac.authorization.k8s.io/v1
metadata:
  name: flannel
roleRef:
  apiGroup: rbac.authorization.k8s.io
  kind: ClusterRole
  name: flannel
subjects:
- kind: ServiceAccount
  name: flannel
  namespace: kube-flannel
---
apiVersion: v1
kind: ServiceAccount
metadata:
  name: flannel
  namespace: kube-flannel
---
kind: ConfigMap
apiVersion: v1
metadata:
  name: kube-flannel-cfg
  namespace: kube-flannel
  labels:
    tier: node
    app: flannel
data:
  cni-conf.json: |
    {
      "name": "cbr0",
      "cniVersion": "0.3.1",
      "plugins": [
        {
          "type": "flannel",
          "delegate": {
            "hairpinMode": true,
            "isDefaultGateway": true
          }
        },
        {
          "type": "portmap",
          "capabilities": {
            "portMappings": true
          }
        }
      ]
    }
  net-conf.json: |
    {
      "Network": "10.244.0.0/16",
      "Backend": {
        "Type": "vxlan"
      }
    }
---
apiVersion: apps/v1
kind: DaemonSet
metadata:
  name: kube-flannel-ds
  namespace: kube-flannel
  labels:
    tier: node
    app: flannel
spec:
  selector:
    matchLabels:
      app: flannel
  template:
    metadata:
      labels:
        tier: node
        app: flannel
    spec:
      affinity:
        nodeAffinity:
          requiredDuringSchedulingIgnoredDuringExecution:
            nodeSelectorTerms:
            - matchExpressions:
              - key: kubernetes.io/os
                operator: In
                values:
                - linux
      hostNetwork: true
      priorityClassName: system-node-critical
      tolerations:
      - operator: Exists
        effect: NoSchedule
      serviceAccountName: flannel
      initContainers:
      - name: install-cni-plugin
       #image: flannelcni/flannel-cni-plugin:v1.1.0 for ppc64le and mips64le (dockerhub limitations may apply)
        image: rancher/mirrored-flannelcni-flannel-cni-plugin:v1.1.0
        command:
        - cp
        args:
        - -f
        - /flannel
        - /opt/cni/bin/flannel
        volumeMounts:
        - name: cni-plugin
          mountPath: /opt/cni/bin
      - name: install-cni
       #image: flannelcni/flannel:v0.19.2 for ppc64le and mips64le (dockerhub limitations may apply)
        image: rancher/mirrored-flannelcni-flannel:v0.19.2
        command:
        - cp
        args:
        - -f
        - /etc/kube-flannel/cni-conf.json
        - /etc/cni/net.d/10-flannel.conflist
        volumeMounts:
        - name: cni
          mountPath: /etc/cni/net.d
        - name: flannel-cfg
          mountPath: /etc/kube-flannel/
      containers:
      - name: kube-flannel
       #image: flannelcni/flannel:v0.19.2 for ppc64le and mips64le (dockerhub limitations may apply)
        image: rancher/mirrored-flannelcni-flannel:v0.19.2
        command:
        - /opt/bin/flanneld
        args:
        - --ip-masq
        - --kube-subnet-mgr
        resources:
          requests:
            cpu: "100m"
            memory: "50Mi"
          limits:
            cpu: "100m"
            memory: "50Mi"
        securityContext:
          privileged: false
          capabilities:
            add: ["NET_ADMIN", "NET_RAW"]
        env:
        - name: POD_NAME
          valueFrom:
            fieldRef:
              fieldPath: metadata.name
        - name: POD_NAMESPACE
          valueFrom:
            fieldRef:
              fieldPath: metadata.namespace
        - name: EVENT_QUEUE_DEPTH
          value: "5000"
        volumeMounts:
        - name: run
          mountPath: /run/flannel
        - name: flannel-cfg
          mountPath: /etc/kube-flannel/
        - name: xtables-lock
          mountPath: /run/xtables.lock
      volumes:
      - name: run
        hostPath:
          path: /run/flannel
      - name: cni-plugin
        hostPath:
          path: /opt/cni/bin
      - name: cni
        hostPath:
          path: /etc/cni/net.d
      - name: flannel-cfg
        configMap:
          name: kube-flannel-cfg
      - name: xtables-lock
        hostPath:
          path: /run/xtables.lock
          type: FileOrCreate
kubectl apply -f kube-flannel.yml补齐命令:
echo "source <(kubectl completion bash)" >> ~/.bashrc运行插件:
kubectl apply -f kube-flannel.yml查看pod和master节点:
[root@k8s1 ~]# kubectl get pod -A
NAMESPACE      NAME                           READY   STATUS    RESTARTS      AGE
kube-flannel   kube-flannel-ds-df8rj          1/1     Running   3 (15h ago)   16h
kube-flannel   kube-flannel-ds-kbqz4          1/1     Running   1 (15h ago)   15h
kube-flannel   kube-flannel-ds-n5j5h          1/1     Running   3 (76m ago)   16h
kube-system    coredns-7b56f6bc55-9kjf8       1/1     Running   5 (76m ago)   16h
kube-system    coredns-7b56f6bc55-rrrjt       1/1     Running   6 (76m ago)   16h
kube-system    etcd-k8s1                      1/1     Running   4 (76m ago)   16h
kube-system    kube-apiserver-k8s1            1/1     Running   4 (76m ago)   16h
kube-system    kube-controller-manager-k8s1   1/1     Running   4 (76m ago)   16h
kube-system    kube-proxy-jcz7l               1/1     Running   1 (15h ago)   16h
kube-system    kube-proxy-rxcdx               1/1     Running   1 (15h ago)   15h
kube-system    kube-proxy-vthg8               1/1     Running   3 (76m ago)   16h
kube-system    kube-scheduler-k8s1            1/1     Running   4 (76m ago)   16h

root@k8s1 ~]# kubectl get nodes
NAME   STATUS   ROLES                  AGE   VERSION
k8s1   Ready    control-plane,master   16h   v1.23.12
此时worker节点复制token加入:
如果token过期:
root@k8s1 ~]# kubeadm token create --print-join-command
kubeadm join 172.25.0.11:6443 --token rwnt45.n2my5d3ko1pxv5z8 --discovery-token-ca-cert-hash sha256:81b5cfe1aa7dc6fe749f1a6dc2a33248f7f8617d03bdb05e6f14bdc8ee8d3d89
[root@k8s1 ~]# kubectl get nodes
NAME STATUS ROLES AGE VERSION
k8s1 Ready control-plane,master 17h v1.23.12
k8s2 Ready <none> 15h v1.23.12
k8s3 Ready <none> 16h v1.23.12至此集群搭建完成
PS:这是之前留下来的库存,由于昨天晚上内存给成4核4G(16G内存不建议尝试),电脑直接崩了不干活了,今天重新拉起来了,发文完了点,不足之处请批评!


 2810
2810


 被折叠的 条评论
为什么被折叠?
被折叠的 条评论
为什么被折叠?
 到【灌水乐园】发言


