


第一步、首先需要安装组件
yarn add stompjs
yarn add sockjs-client
安装完成后,(package.json)文件出现下面代码:

第二步,前端增加代理配置
(vue.config.js)文件中
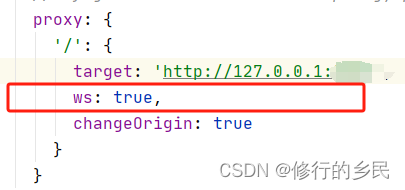
使用 ws: true, 支持websocket
第三步、后端增websocket依赖
pom.xml文件中
<dependency>
    <groupId>org.springframework.boot</groupId>
    <artifactId>spring-boot-starter-websocket</artifactId>
</dependency>
第四步、后端配置消息代理
使用spring自带的WebSocketMessageBrokerConfigurer
import org.springframework.beans.factory.annotation.Value;
import org.springframework.context.annotation.Configuration;
import org.springframework.messaging.simp.config.MessageBrokerRegistry;
import org.springframework.web.socket.config.annotation.*;

@Configuration
@EnableWebSocketMessageBroker
public class WebSocketConfig implements WebSocketMessageBrokerConfigurer {
    @Override
    public void registerStompEndpoints(StompEndpointRegistry registry) {
        // 注册消息监听端点,使用SockJS协议
        StompWebSocketEndpointRegistration registration = registry.addEndpoint("/stompPoint");
        registration.setAllowedOriginPatterns("*");
        registration.withSockJS();
    }
    @Override
    public void configureMessageBroker(MessageBrokerRegistry registry) {
        if (enable) {
            // 启用消息代理
            registry.enableStompBrokerRelay("/msgOneTopic").setRelayHost(host)
            .setRelayPort(port).setSystemHeartbeatReceiveInterval(5000)
            .setSystemHeartbeatSendInterval(5000);
        } else {
            registry.enableSimpleBroker("/topic","/retMsg");
        }
    }

}
第五步、前端连接并监听
需要注意监听的端点,和后端注册的端点一致
<template>
  <div class="websocket"></div>
</template>
<script>
  import SockJS from 'sockjs-client'
  import Stomp from 'stompjs'
  import {mapActions, mapGetters, mapMutations, mapState} from 'vuex'

  export default {
    data() {
      return {
        socketUrl: '/stompPoint',
        socket: null,
        stompClient: null,
        timer: null,
      }
    },
    mounted() {
      this.initWebSocket()
    },
    destroyed() {
      // 页面离开时断开连接,清除定时器
      this.disconnect();
      clearInterval(this.timer);
    },
    computed: {

    },
    methods: {
      initWebSocket() {
        // 建立连接对象
        this.socket = new SockJS(socketUrl)
        // 获取STOMP子协议的客户端对象
        this.stompClient = Stomp.over(this.socket)
        // 向服务器发起websocket连接
        this.stompClient.connect({}, (message) => {
          console.log("-----------------连接成功-----------------")
          console.log(message);
          // 连接成功
          this.successCallback();
        }, error => {
          console.log("-----------------连接失败-----------------")
          console.log(error)
          this.reconnect(this.socketUrl, this.successCallback)
        })
      },
      // 连接成功
      successCallback() {
        this.stompClient.subscribe('/topic/msgOneTopic', (msg) => {
          const receivedMsg = JSON.parse(msg.body)//接收服务端信息
          console.info("-------------successCallback---消息-------------");
          console.info(receivedMsg)
          //下面就可以根据从后端接收到消息干事情了
        })
      },
      reconnect(socketUrl, successCallback) {
        console.info('-----------------开始重新连接WebSocket-----------------')
        setTimeout(() => {
          this.socket = new SockJS(socketUrl)
          this.stompClient = Stomp.over(this.socket)
          this.stompClient.connect({}, (frame) => {
            console.info("-----------------重新连接WebSocket成功-----------------")
            console.info(frame);
            // 连接成功,清除定时器
            successCallback()
          }, error => {
            console.info("-----------------重新连接WebSocket成功-----------------")
            console.info(error);
            this.reconnect(socketUrl, successCallback);
          })
        }, 10000)
      },
      // 断开连接
      disconnect() {
        if (this.stompClient != null) {
          this.stompClient.disconnect()
        }
      }
    }
  }
</script>

<style lang="less" scoped>
</style>
第六步、后端发送消息
@Service("webSocketService")
public class WebSocketService {

	@Autowired
    private SimpMessagingTemplate simpMessagingTemplate;

	public void sendMsg() throws Exception {
        String destination = "/msgOneTopic";
        simpMessagingTemplate.convertAndSend(destination, "测试信息");
    }
}
第七步、前端增加处理逻辑
上面第五步中,successCallBack中继续增加我们需要的业务逻辑


 319
319


 被折叠的 条评论
为什么被折叠?
被折叠的 条评论
为什么被折叠?
 到【灌水乐园】发言


