


1、新建vite+vue3项目
npm create vite@latest

cd project-pc-03

npm install
npm run dev
2、配置路由vue-router
// 1、首先下载路由插件
npm install vue-router
// 2、在src目录下新建router文件夹,然后在router文件夹中新建index.js文件
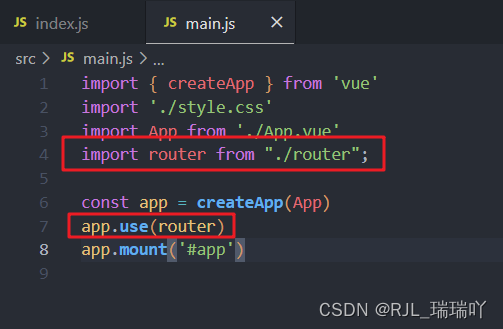
// 3、最后在main.js中引入路由文件

3、在src目录下新增views文件夹,用来存储vue组件
新增login.vue组件

然后在路由组件中配置路由,在app.vue中 使用<router-view />
import { createRouter, createWebHashHistory, } from "vue-router";
const router = createRouter({
  history: createWebHashHistory(),
  routes: [
    {
      path: '/',
      name: '登录',
      redirect: '/login',
    },
    {
      path: '/login',
      component: () => import('../views/login.vue')
    },
  ]
})
export default router
页面效果就是这样了
接下来是搭建框架。
1、首页下载 Ant Design
npm install ant-design-vue --save
在main.js中引入
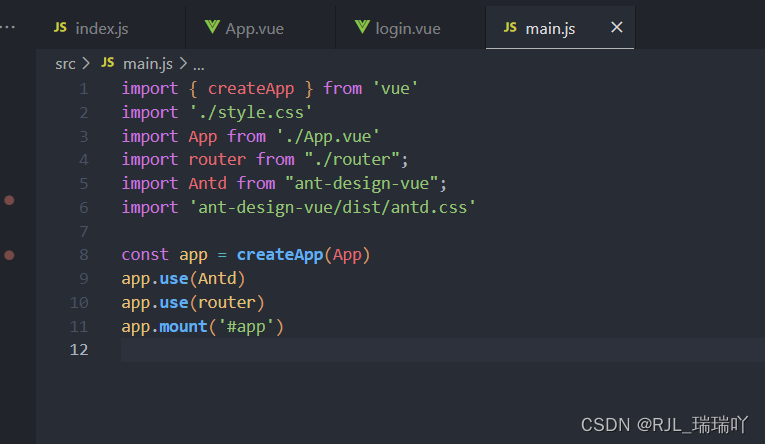
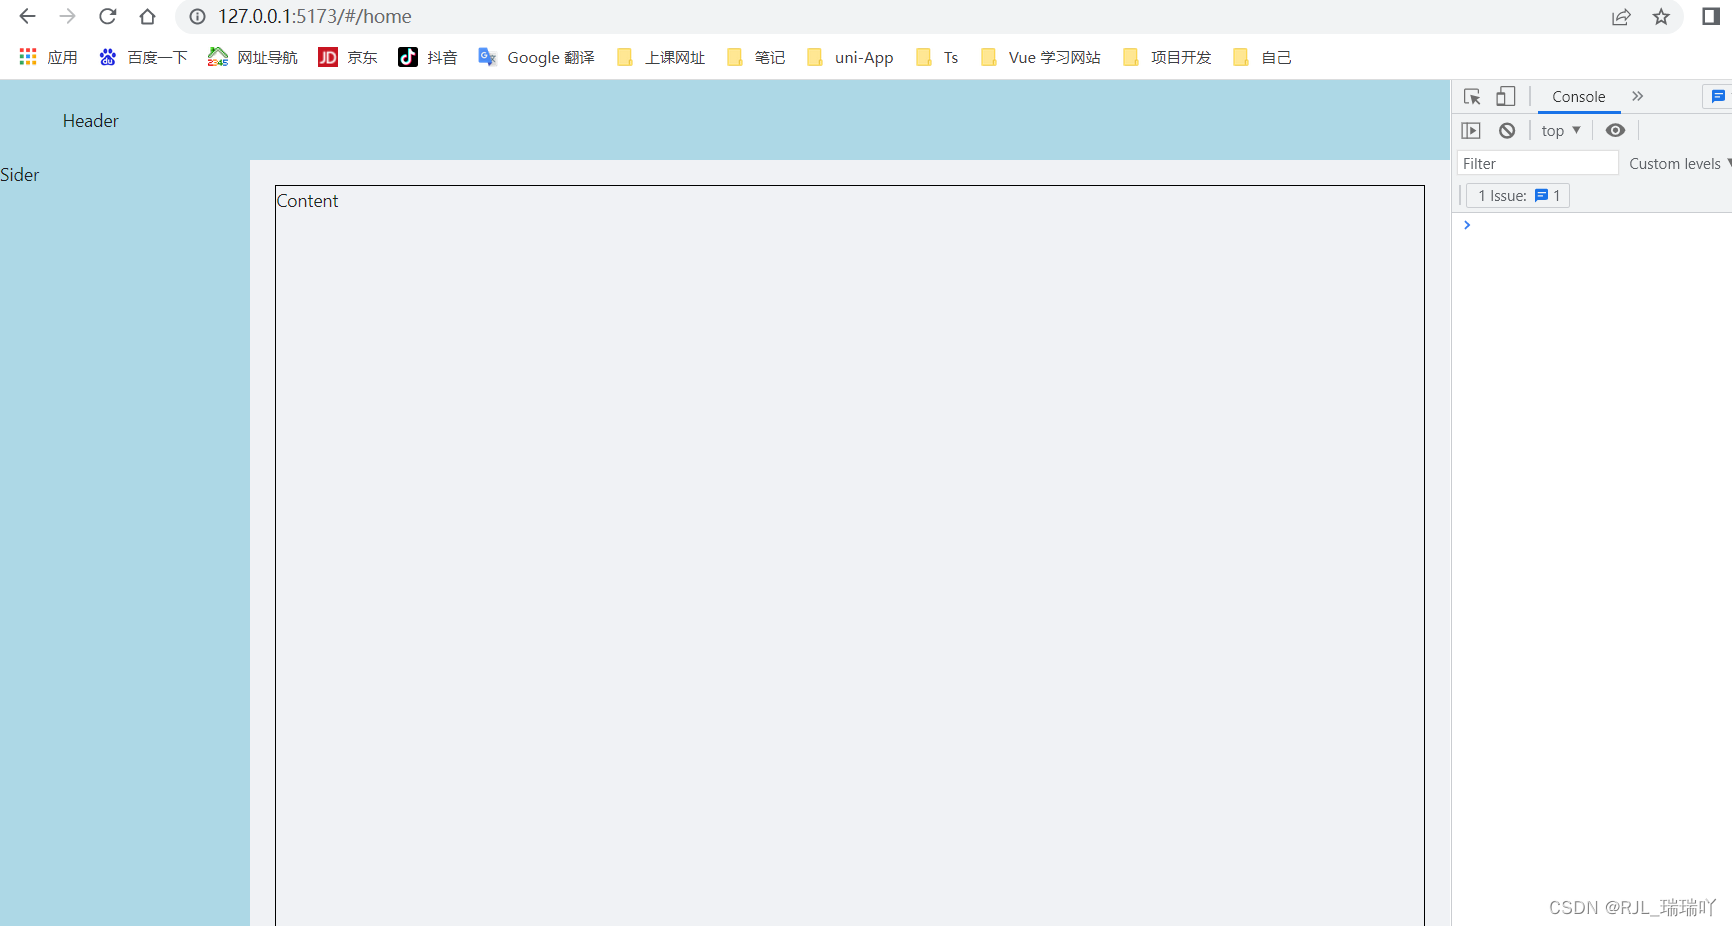
2、在views新建home组件
<template>
  <a-layout class="layout">
    <a-layout-header>Header</a-layout-header>
    <a-layout>
      <a-layout-sider>
        Sider
      </a-layout-sider>
      <a-layout-content>
        Content
      </a-layout-content>
    </a-layout>
  </a-layout>
</template>
<script setup>
import { getCurrentInstance, reactive, toRefs } from 'vue'
const protoType = getCurrentInstance().appContext.config.globalProperties
// console.log(protoType)
const state = reactive({

})

const {} = toRefs(state)
</script>

.layout {
  width: 100%;
  min-height: 100vh;
}
.ant-layout-header {
  background: lightblue;
}
.ant-layout-sider {
  background: lightblue;
}
.ant-menu {
  background: lightblue;
}
.ant-menu-sub.ant-menu-inline {
  background: lightblue;
}
.ant-layout-content {
  border: 1px solid #000;
  margin: 20px;
}
然后配置路由
import { createRouter, createWebHashHistory, } from "vue-router";
const router = createRouter({
history: createWebHashHistory(),
routes: [
{
path: '/',
name: '登录',
redirect: '/login',
},
{
path: '/login',
component: () => import('../views/login.vue')
},
{
path: '/home',
name: '首页',
component: () => import('../views/home.vue'),
children: [
{
path: '/sysMenu',
name: '菜单管理',
component: () => import('../views/sysMenu.vue')
},
{
path: '/sysSetting',
name: '系统设置',
component: () => import('../views/sysSetting.vue')
}
]
},
{
path: '/userList',
name: '用户列表',
component: () => import('../views/userList.vue')
}
]
})
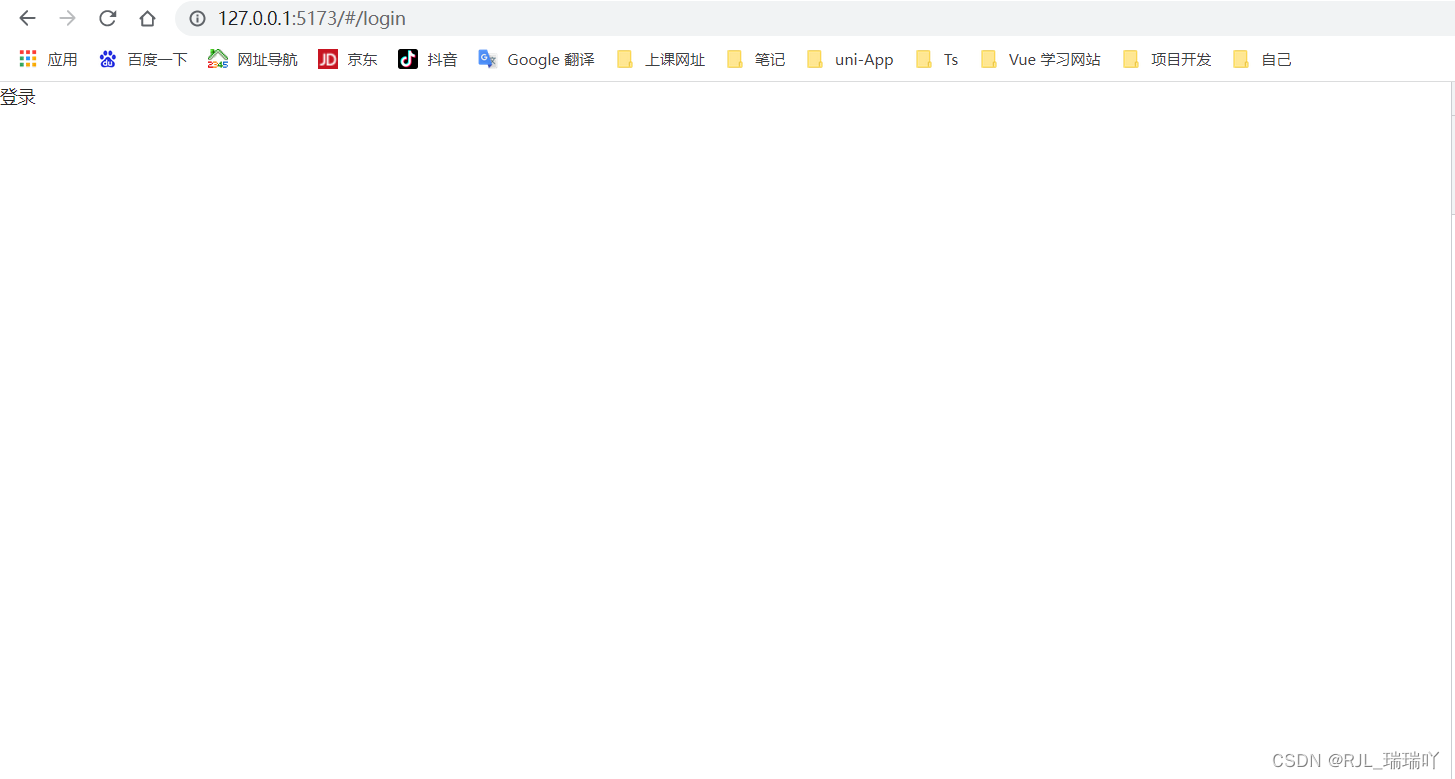
export default router另外补充login.vue组件
<template>
<div>
<a-button @click="login" style="margin: 20px;" type="primary">登录</a-button>
</div>
</template>
<script setup>
import { getCurrentInstance } from "vue";
const protoType = getCurrentInstance().appContext.config.globalProperties
const login = () => {
protoType.$router.push('home')
}
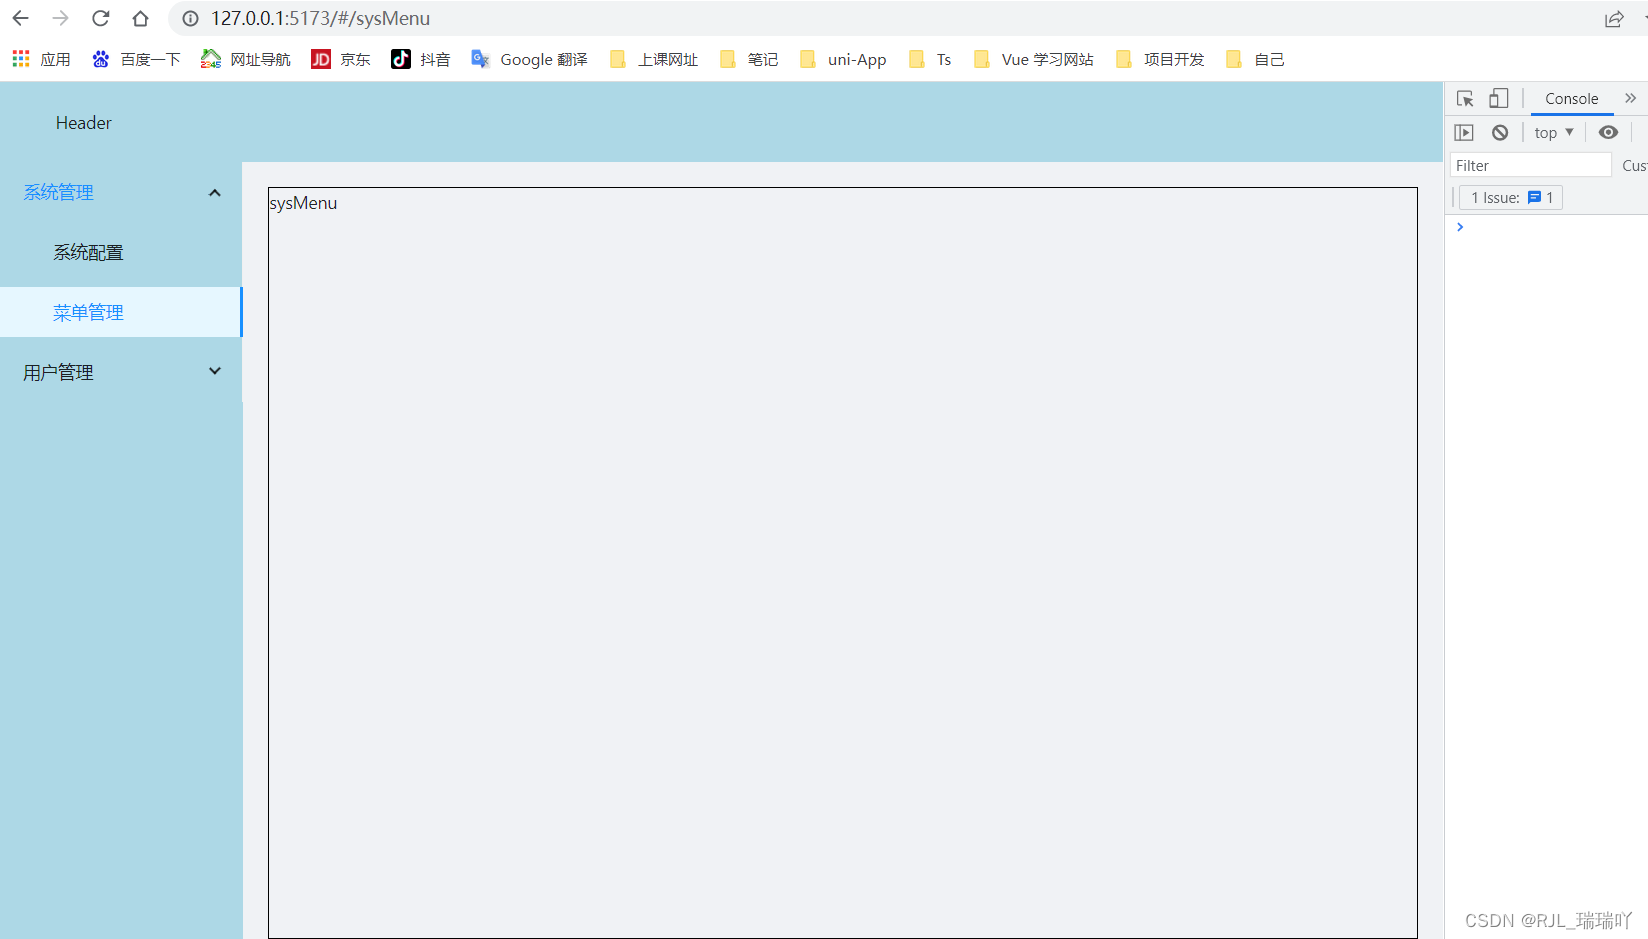
</script>点击登录按钮页面效果如下:
3、然后新建sysMenu.vue、sysSetting.vue、userList.vue
然后修改home.vue组件
<template>
  <a-layout class="layout">
    <a-layout-header>Header</a-layout-header>
    <a-layout>
      <a-layout-sider>
        <a-menu mode="inline">
          <a-sub-menu v-for="m in state.menus" :key="m.id">
            <template #title>
              <span>{{m.name}}</span>
            </template>
            <a-menu-item v-for="mc in m.children" :key="mc.id">
              <router-link :to="mc.path">{{mc.name}}</router-link>
            </a-menu-item>
          </a-sub-menu>
        </a-menu>
      </a-layout-sider>
      <a-layout-content>
        <router-view></router-view>
      </a-layout-content>
    </a-layout>
  </a-layout>
</template>

<script setup>
import { getCurrentInstance, reactive, toRefs } from 'vue'
const protoType = getCurrentInstance().appContext.config.globalProperties
// console.log(protoType)
const state = reactive({
  menus: [
    {
      name: '系统管理',
      id: 1,
      children: [
        {
          name: '系统配置',
          id: 3,
          path: '/sysSetting',
        },
        {
          name: '菜单管理',
          id: 4,
          path: '/sysMenu',
        },
      ],
    },
    {
      name: '用户管理',
      id: 2,
      children: [
        {
          name: '用户列表',
          id: 5,
          path: '/userList',
        },
      ],
    },
  ],
})

const {} = toRefs(state)
</script>

<style>
.layout {
  width: 100%;
  min-height: 100vh;
}
.ant-layout-header {
  background: lightblue;
}
.ant-layout-sider {
  background: lightblue;
}
.ant-menu {
  background: lightblue;
}
.ant-menu-sub.ant-menu-inline {
  background: lightblue;
}
.ant-layout-content {
  border: 1px solid #000;
  margin: 20px;
}
</style>
就完成了


 1635
1635


 被折叠的 条评论
为什么被折叠?
被折叠的 条评论
为什么被折叠?
 到【灌水乐园】发言


