jss文件在前端网页页面制作过程中作用主要是控制html文件中标签的逻辑问题,增强操作性实用性.
一、js的作用,写代码的位置
1)作用
1.修改双标签的标签内容
例如:改变他的文本
<p id="p1">我是段落1</p>
<button onclick="document.getElementById('p1').innerText = 'hello world!'">修改</button>
2.修改标签属性
例如:改变他的网址链接
<a id="a1" href="https://www.baidu.com" target="_blank">打开网页</a>
<button onclick="document.getElementById('a1').href = 'https://www.taobao.com/'">淘宝</button>
3.修改标签样式
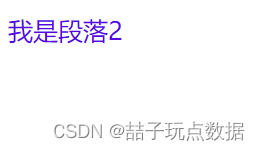
例如:改变段落的颜色和随时间改变它的字体大小
<p id="p3">我是段落2</p>
<script>
function changeColor(){

		// 0 ~ 1
		r = parseInt(Math.random() * 255)
		g = parseInt(Math.random() * 255)
		b = parseInt(Math.random() * 255)
		document.getElementById('p3').style.color = 'rgb('+r+', '+g+', '+b+')'
	}

	fs = 10

	t1 = setInterval(function(){

		r = parseInt(Math.random() * 255)
		g = parseInt(Math.random() * 255)
		b = parseInt(Math.random() * 255)
		document.getElementById('p3').style.color = 'rgb('+r+', '+g+', '+b+')'

		fs += 2
		if(fs >= 40){

			fs = 10
		}
		document.getElementById('p3').style.fontSize = fs + 'px'
	}, 500)

</script>

2)代码位置
.js代码写在哪儿?
1)将js代码写在标签的事件属性中
<button onclick="alert('你好!')">确定</button>
2)将js代码写在script标签中(script标签可以放在html文件中的任何位置)
<body>
<p id="p1">我是段落1</p>
</body>
<script>
	document.getElementById('p1').innerText = 'hello world!'
</script>
3)将js代码写在外部的js文件中,然后在html文件中用script标签导入
可以直接编写js文件,用下列代码导入html文件
<script src="js/demo.js"></script>
二、DOM操作标签
DOM(document object mode)操作:
通过document对象直接或者间接的操作网页内容
js中的document对象代表网页内容
DOM操作主要内容:
获取标签、添加标签、删除标签、操作标签内容、操作标签属性、操作标签样式
1.获取标签
1)直接获取标签 - 直接通过document对象获取标签
document.getElementById(id属性值)
获取网页中id属性值为指定值的标签,返回值是标签对象
document.getElementsByClassName(class属性值)
获取网页中class属性值为指定值的所有标签,返回值是数组(列表),数组中的元素是标签对象
document.getElementsByTagName(标签名)
获取网页中所有指定的标签,返回值是数组(列表),数组中的元素是标签对象
document.getElementsByName(name属性值)
获取网页中所有name属性值为指定值的标签
2)间接获取标签 - 通过父标签获取子标签,或者通过子标签获取父标签
a. 获取一个标签所有的子标签: 标签对象.children
b.获取一个标签的第一个子标签: 标签对象.firstElementChild
c.获取最后一个子标签:标签对象.lastElementChild
d.获取父标签: 标签对象.parentElement
*console.log(result)*在网页控制台中获取result的值
<body>

	<div id="box1">
		<p class="c1">我是段落1</p>
		<a>我是超链接1</a>
		<span class="c1">我是span1</span>
		<p id="p1">我是段落2</p>
		<p>我是段落3</p>
	</div>

	<div id="box2">
		<span>我是span2</span>
		<a class="c1">我是超链接2</a>

		<input type="text" name="username" id="">
		<input type="radio" name="gender">男
		<input type="radio" name="gender">女

	</div>


</body>

<!-------------- 1)直接获取标签 -------------->
<script type="text/javascript">
	// 通过id值获取标签
	result = document.getElementById('p1')
	console.log(result)

	// 通过class属性获取标签
	result = document.getElementsByClassName('c1')
	console.log(result)
	console.log(result[2])

	// 通过标签名获取标签
	result = document.getElementsByTagName('p')
	console.log(result)

	// 通过name属性值获取标签(了解)
	result = document.getElementsByName('gender')
	console.log(result)
</script>

<!-------------- 2)获取子标签和父标签 -------------->
<script>
	console.log('----------------------------------------------')
	// 1.获取子标签
	var box1 = document.getElementById('box1')
	// 1)获取一个标签所有的子标签: 标签对象.children
	result = box1.children
	console.log(result)

	// 2)获取一个标签的第一个子标签
	result = box1.firstElementChild
	console.log(result)

	// 3)获取最后一个子标签
	result = box1.lastElementChild
	console.log(result)

	// 2.获取父标签
	result = box1.parentElement
	console.log(result)

	var p = document.getElementById('p1')
	result = p.parentElement
	console.log(result)
</script>

三、添加和删除标签
1.添加标签: 创建标签 -> 添加标签
1)创建标签:document.createElement(标签名)


 最低0.47元/天 解锁文章


 6万+
6万+


 被折叠的 条评论
为什么被折叠?


