


Spring为Bean提供了多种实例化方式,通常包括4种方式。(也就是说在Spring中为Bean对象的创建准备了多种方案,目的是:更加灵活)
- 第一种:通过构造方法实例化
- 第二种:通过简单工厂模式实例化
- 第三种:通过factory-bean实例化
- 第四种:通过FactoryBean接口实例化
7.1 通过构造方法实例化
我们之前一直使用的就是这种方式。默认情况下,会调用Bean的无参数构造方法。
package com.powernode.spring6.bean;

/**
 * @author 动力节点
 * @version 1.0
 * @className User
 * @since 1.0
 **/
public class User {
    public User() {
        System.out.println("User类的无参数构造方法执行。");
    }
}
<?xml version="1.0" encoding="UTF-8"?>
<beans xmlns="http://www.springframework.org/schema/beans"
       xmlns:xsi="http://www.w3.org/2001/XMLSchema-instance"
       xsi:schemaLocation="http://www.springframework.org/schema/beans http://www.springframework.org/schema/beans/spring-beans.xsd">

    <bean id="userBean" class="com.powernode.spring6.bean.User"/>

</beans>
package com.powernode.spring6.test;

import com.powernode.spring6.bean.User;
import org.junit.Test;
import org.springframework.context.ApplicationContext;
import org.springframework.context.support.ClassPathXmlApplicationContext;

/**
 * @author 动力节点
 * @version 1.0
 * @className SpringInstantiationTest
 * @since 1.0
 **/
public class SpringInstantiationTest {

    @Test
    public void testConstructor(){
        ApplicationContext applicationContext = new ClassPathXmlApplicationContext("spring.xml");
        User user = applicationContext.getBean("userBean", User.class);
        System.out.println(user);
    }
}
执行结果:

7.2 通过简单工厂模式实例化
第一步:定义一个Bean
package com.powernode.spring6.bean;

/**
 * @author 动力节点
 * @version 1.0
 * @className Vip
 * @since 1.0
 **/
public class Vip {
}
第二步:编写简单工厂模式当中的工厂类
package com.powernode.spring6.bean;

/**
 * @author 动力节点
 * @version 1.0
 * @className VipFactory
 * @since 1.0
 **/
public class VipFactory {
    public static Vip get(){
        return new Vip();
    }
}
第三步:在Spring配置文件中指定创建该Bean的方法(使用factory-method属性指定)
<bean id="vipBean" class="com.powernode.spring6.bean.VipFactory" factory-method="get"/>
第四步:编写测试程序
@Test
public void testSimpleFactory(){
    ApplicationContext applicationContext = new ClassPathXmlApplicationContext("spring.xml");
    Vip vip = applicationContext.getBean("vipBean", Vip.class);
    System.out.println(vip);
}
执行结果:

7.3 通过factory-bean实例化
这种方式本质上是:通过工厂方法模式进行实例化。
第一步:定义一个Bean
package com.powernode.spring6.bean;

/**
 * @author 动力节点
 * @version 1.0
 * @className Order
 * @since 1.0
 **/
public class Order {
}
第二步:定义具体工厂类,工厂类中定义实例方法
package com.powernode.spring6.bean;

/**
 * @author 动力节点
 * @version 1.0
 * @className OrderFactory
 * @since 1.0
 **/
public class OrderFactory {
    public Order get(){
        return new Order();
    }
}
第三步:在Spring配置文件中指定factory-bean以及factory-method
<bean id="orderFactory" class="com.powernode.spring6.bean.OrderFactory"/>
<bean id="orderBean" factory-bean="orderFactory" factory-method="get"/>
第四步:编写测试程序
@Test
public void testSelfFactoryBean(){
    ApplicationContext applicationContext = new ClassPathXmlApplicationContext("spring.xml");
    Order orderBean = applicationContext.getBean("orderBean", Order.class);
    System.out.println(orderBean);
}
执行结果:

7.4 通过FactoryBean接口实例化
以上的第三种方式中,factory-bean是我们自定义的,factory-method也是我们自己定义的。
在Spring中,当你编写的类直接实现FactoryBean接口之后,factory-bean不需要指定了,factory-method也不需要指定了。
factory-bean会自动指向实现FactoryBean接口的类,factory-method会自动指向getObject()方法。
第一步:定义一个Bean
package com.powernode.spring6.bean;

/**
 * @author 动力节点
 * @version 1.0
 * @className Person
 * @since 1.0
 **/
public class Person {
}
第二步:编写一个类实现FactoryBean接口
package com.powernode.spring6.bean;

import org.springframework.beans.factory.FactoryBean;

/**
 * @author 动力节点
 * @version 1.0
 * @className PersonFactoryBean
 * @since 1.0
 **/
public class PersonFactoryBean implements FactoryBean<Person> {

    @Override
    public Person getObject() throws Exception {
        return new Person();
    }

    @Override
    public Class<?> getObjectType() {
        return null;
    }

    @Override
    public boolean isSingleton() {
        // true表示单例
        // false表示原型
        return true;
    }
}
第三步:在Spring配置文件中配置FactoryBean
<bean id="personBean" class="com.powernode.spring6.bean.PersonFactoryBean"/>
测试程序:
@Test
public void testFactoryBean(){
    ApplicationContext applicationContext = new ClassPathXmlApplicationContext("spring.xml");
    Person personBean = applicationContext.getBean("personBean", Person.class);
    System.out.println(personBean);

    Person personBean2 = applicationContext.getBean("personBean", Person.class);
    System.out.println(personBean2);
}
执行结果:

FactoryBean在Spring中是一个接口。被称为“工厂Bean”。“工厂Bean”是一种特殊的Bean。所有的“工厂Bean”都是用来协助Spring框架来创建其他Bean对象的。
7.5 BeanFactory和FactoryBean的区别
7.5.1 BeanFactory
Spring IoC容器的顶级对象,BeanFactory被翻译为“Bean工厂”,在Spring的IoC容器中,“Bean工厂”负责创建Bean对象。
BeanFactory是工厂。
7.5.2 FactoryBean
FactoryBean:它是一个Bean,是一个能够辅助Spring实例化其它Bean对象的一个Bean。
在Spring中,Bean可以分为两类:
- 第一类:普通Bean
- 第二类:工厂Bean(记住:工厂Bean也是一种Bean,只不过这种Bean比较特殊,它可以辅助Spring实例化其它Bean对象。)
7.6 注入自定义Date
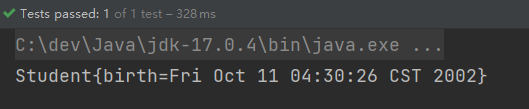
我们前面说过,java.util.Date在Spring中被当做简单类型,简单类型在注入的时候可以直接使用value属性或value标签来完成。但我们之前已经测试过了,对于Date类型来说,采用value属性或value标签赋值的时候,对日期字符串的格式要求非常严格,必须是这种格式的:Mon Oct 10 14:30:26 CST 2022。其他格式是不会被识别的。如以下代码:
package com.powernode.spring6.bean;

import java.util.Date;

/**
 * @author 动力节点
 * @version 1.0
 * @className Student
 * @since 1.0
 **/
public class Student {
    private Date birth;

    public void setBirth(Date birth) {
        this.birth = birth;
    }

    @Override
    public String toString() {
        return "Student{" +
                "birth=" + birth +
                '}';
    }
}
<bean id="studentBean" class="com.powernode.spring6.bean.Student">
  <property name="birth" value="Mon Oct 10 14:30:26 CST 2002"/>
</bean>
@Test
public void testDate(){
    ApplicationContext applicationContext = new ClassPathXmlApplicationContext("spring.xml");
    Student studentBean = applicationContext.getBean("studentBean", Student.class);
    System.out.println(studentBean);
}
执行结果:
如果把日期格式修改一下:
<bean id="studentBean" class="com.powernode.spring6.bean.Student">
  <property name="birth" value="2002-10-10"/>
</bean>
执行结果:

这种情况下,我们就可以使用FactoryBean来完成这个骚操作。
编写DateFactoryBean实现FactoryBean接口:
package com.powernode.spring6.bean;

import org.springframework.beans.factory.FactoryBean;

import java.text.SimpleDateFormat;
import java.util.Date;

/**
 * @author 动力节点
 * @version 1.0
 * @className DateFactoryBean
 * @since 1.0
 **/
public class DateFactoryBean implements FactoryBean<Date> {

    // 定义属性接收日期字符串
    private String date;

    // 通过构造方法给日期字符串属性赋值
    public DateFactoryBean(String date) {
        this.date = date;
    }

    @Override
    public Date getObject() throws Exception {
        SimpleDateFormat sdf = new SimpleDateFormat("yyyy-MM-dd");
        return sdf.parse(this.date);
    }

    @Override
    public Class<?> getObjectType() {
        return null;
    }
}
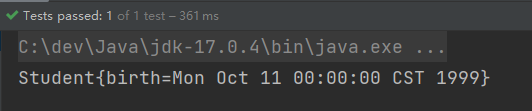
编写spring配置文件:
<bean id="dateBean" class="com.powernode.spring6.bean.DateFactoryBean">
  <constructor-arg name="date" value="1999-10-11"/>
</bean>

<bean id="studentBean" class="com.powernode.spring6.bean.Student">
  <property name="birth" ref="dateBean"/>
</bean>
执行测试程序:


 6607
6607


 被折叠的 条评论
为什么被折叠?
被折叠的 条评论
为什么被折叠?
 到【灌水乐园】发言


