


Zabbix部署
1. zabbix介绍
zabbix是一个基于WEB界面的提供分布式系统监视以及网络监视功能的企业级的开源解决方案。
zabbix能监视各种网络参数,保证服务器系统的安全运营;并提供灵活的通知机制以让系统管理员快速定位/解决存在的各种问题。
zabbix由2部分构成,zabbix server与可选组件zabbix agent。
zabbix server可以通过SNMP,zabbix agent,ping,端口监视等方法提供对远程服务器/网络状态的监视,数据收集等功能,它可以运行在Linux,Ubuntu,Solaris,HP-UX,AIX,Free BSD,Open BSD,OS X等平台上。
zabbix agent需要安装在被监视的目标服务器上,它主要完成对硬件信息或与操作系统有关的内存,CPU等信息的收集。
zabbix server可以单独监视远程服务器的服务状态;同时也可以与zabbix agent配合,可以轮询zabbix agent主动接收监视数据(agent方式),同时还可被动接收zabbix agent发送的数据(trapping方式)。
另外zabbix server还支持SNMP (v1,v2),可以与SNMP软件(例如:net-snmp)等配合使用。
2. zabbix特点
zabbix的主要特点:
- 安装与配置简单,学习成本低
- 支持多语言(包括中文)
- 免费开源
- 自动发现服务器与网络设备
- 分布式监视以及WEB集中管理功能
- 可以无agent监视
- 用户安全认证和柔软的授权方式
- 通过WEB界面设置或查看监视结果
- email等通知功能
Zabbix主要功能:
- CPU负荷
- 内存使用
- 磁盘使用
- 网络状况
- 端口监视
- 日志监视
3. zabbix配置文件
zabbix配置文件有两种:
- 服务器端配置文件(/usr/local/etc/zabbix_server.conf)
- 客户端配置文件(/usr/local/etc/zabbix_agentd.conf)
- zabbix代理配置文件(/usr/local/etc/zabbix_proxy.conf)
服务器端配置文件zabbix_server.conf常用配置参数:
| 参数 | 作用 |
|---|---|
| LogFile | 设置服务端日志文件存放路径 |
| ListenIP | 设置服务端监听IP |
| ListenPort | 设置服务端监听的端口号 |
| PidFile | 设置服务端进程号文件存放路径 |
| DBHost | 指定zabbix的数据库服务器IP |
| DBName | 指定zabbix使用的数据库库名 |
| DBUser | 指定zabbix数据库登录用户 |
| DBPassword | 指定zabbix数据库登录密码 |
| DBPort | 指定zabbix数据库端口号 |
| User | 设置zabbix以什么用户的身份运行 |
| AlertScriptsPath | 设置告警脚本存放路径 |
| ExternalScripts | 外部脚本存放路径 |
客户端配置文件zabbix_agentd.conf常用配置参数:
| 参数 | 作用 |
|---|---|
| Server | 指定zabbix服务器的IP或域名 |
| ServerActive | 指定zabbix服务器的IP或域名 |
| Hostname | 指定本机的主机名,此项必须与web界面配置项一致 |
| UnsafeUserParameters | 是否启用自定义监控项,可选值为{1 | 0} |
| UserParameter | 指定自定义监控脚本参数 |
| LogFile | 设置客户端日志文件存放路径 |
4. 部署zabbix
环境说明:
| 环境 | IP | 要安装的应用 | Zabbix版本 | MySQL版本 | 主机名 |
|---|---|---|---|---|---|
| 服务器 | 192.168.229.145 | lamp架构 zabbix server zabbix agent | zabbix5.0 | MySQL5.7 | node1 |
| 客户端 | 192.168.229.130 | zabbix agent | zabbix5.0 | MySQL5.7 | node2 |
因为zabbix是用php语言开发的,所以必须先部署lamp架构,使其能够支持运行php网页,部署lamp在我另一篇文章 http://t.csdn.cn/kyvy9
4.1 zabbix服务端安装
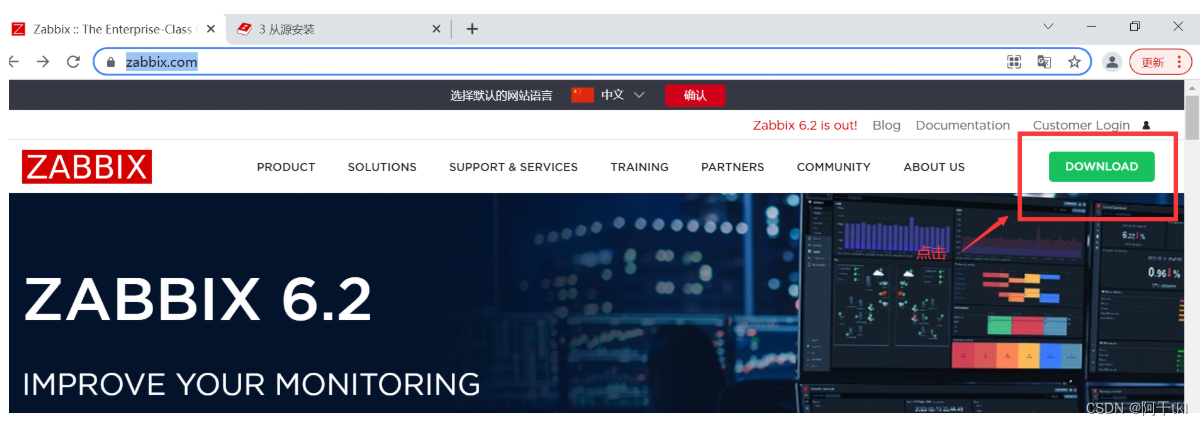
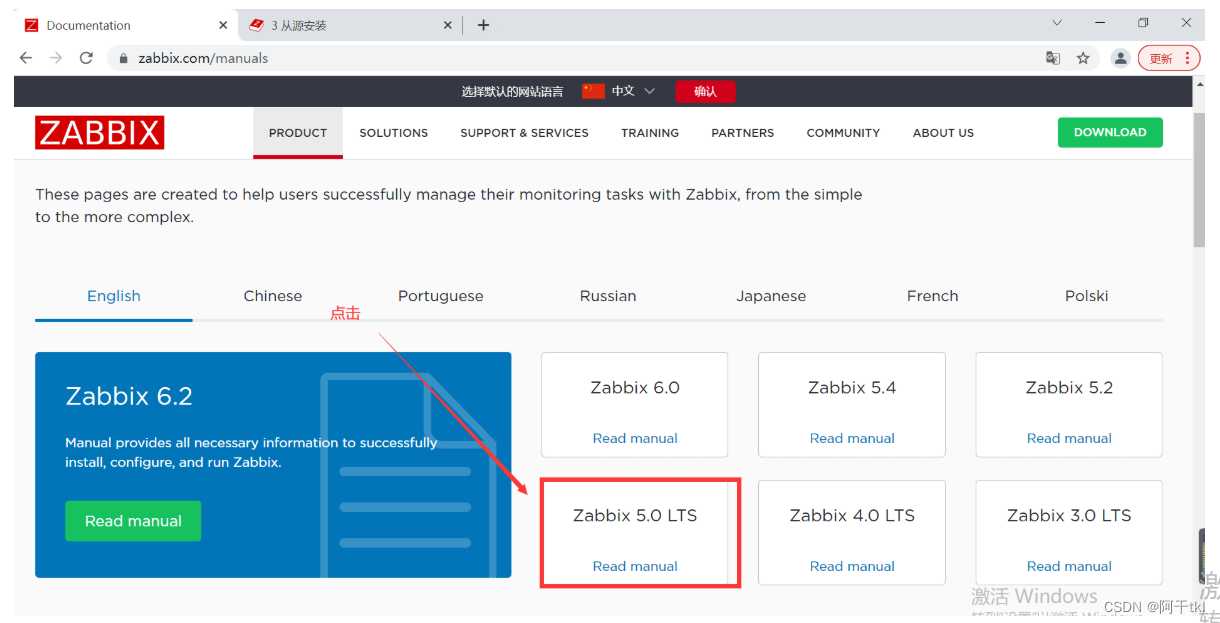
Zabbix官网:https://www.zabbix.com/
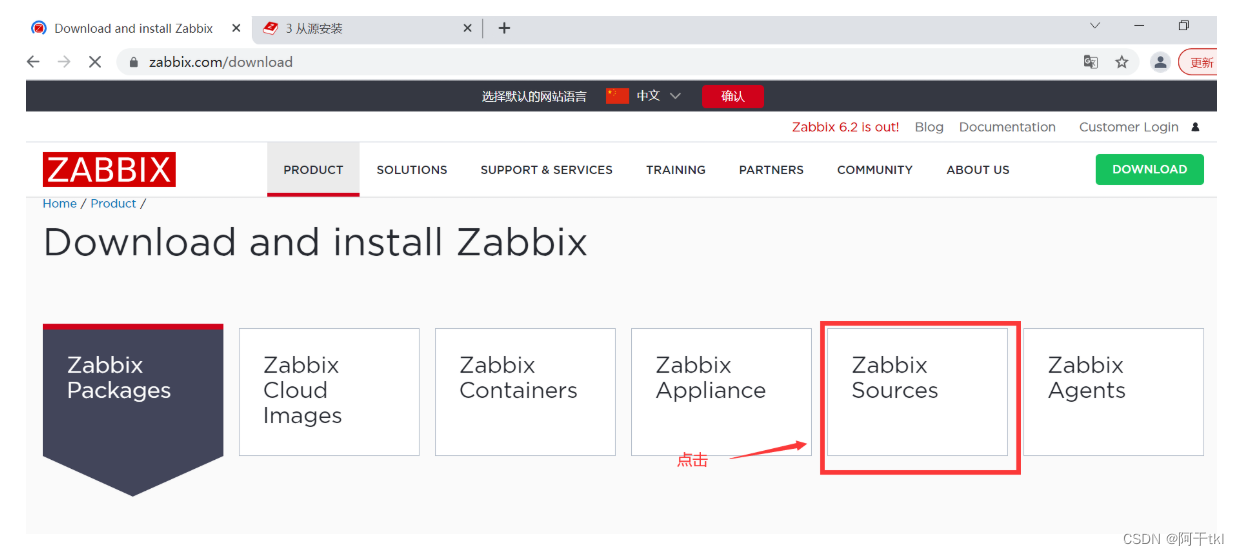
下载软件步骤
看到ZabbixSources点击进去
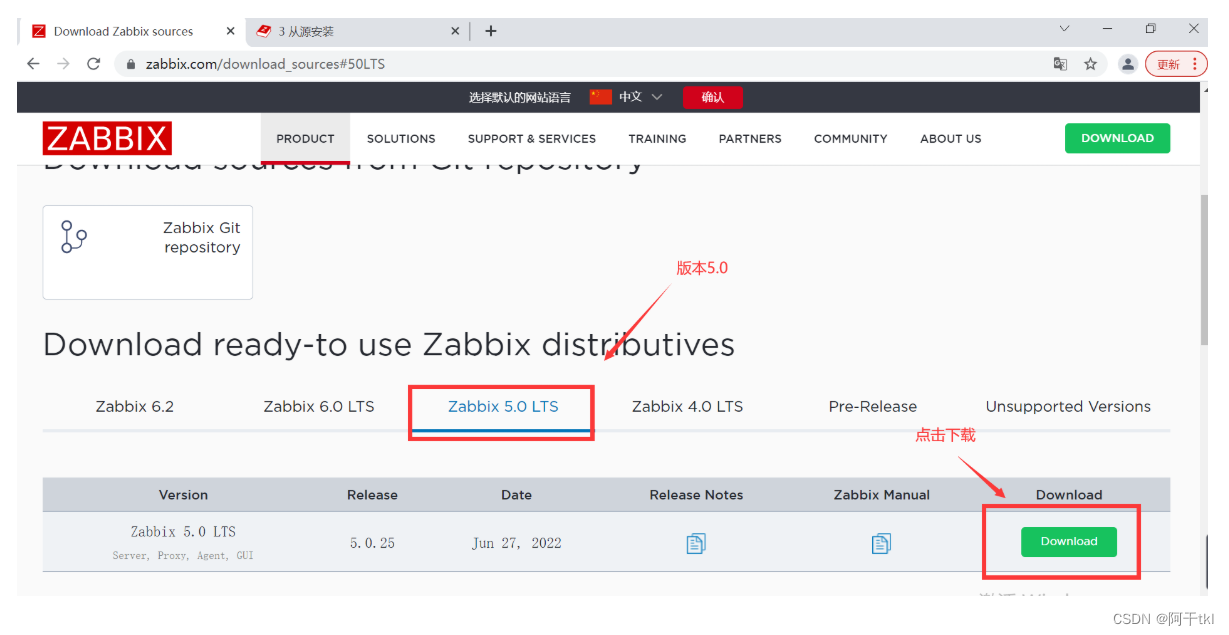
看到download点击下载
查看安装步骤
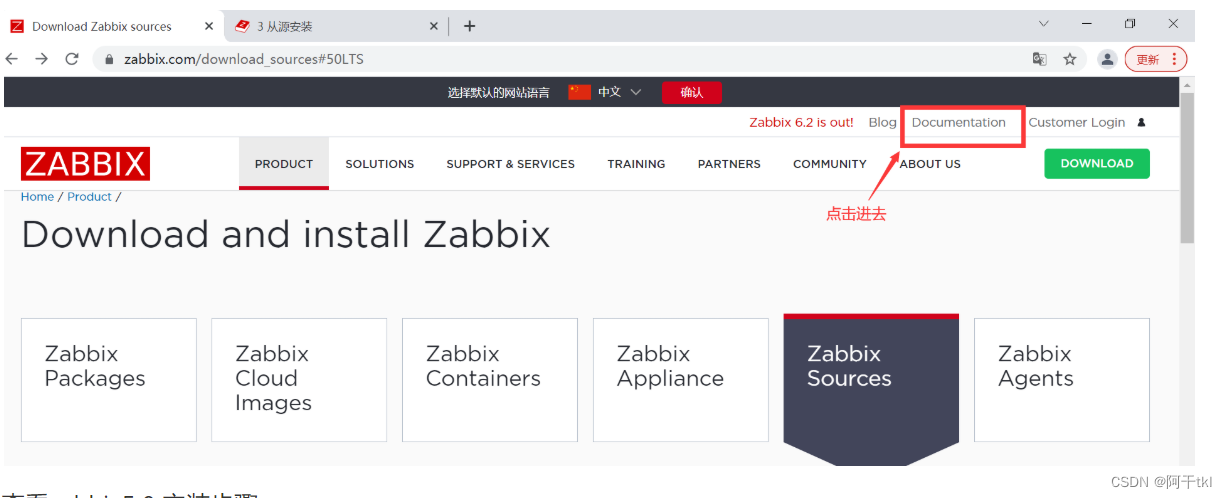
查看zabbix5.0 安装步骤
点击安装步骤 Installation
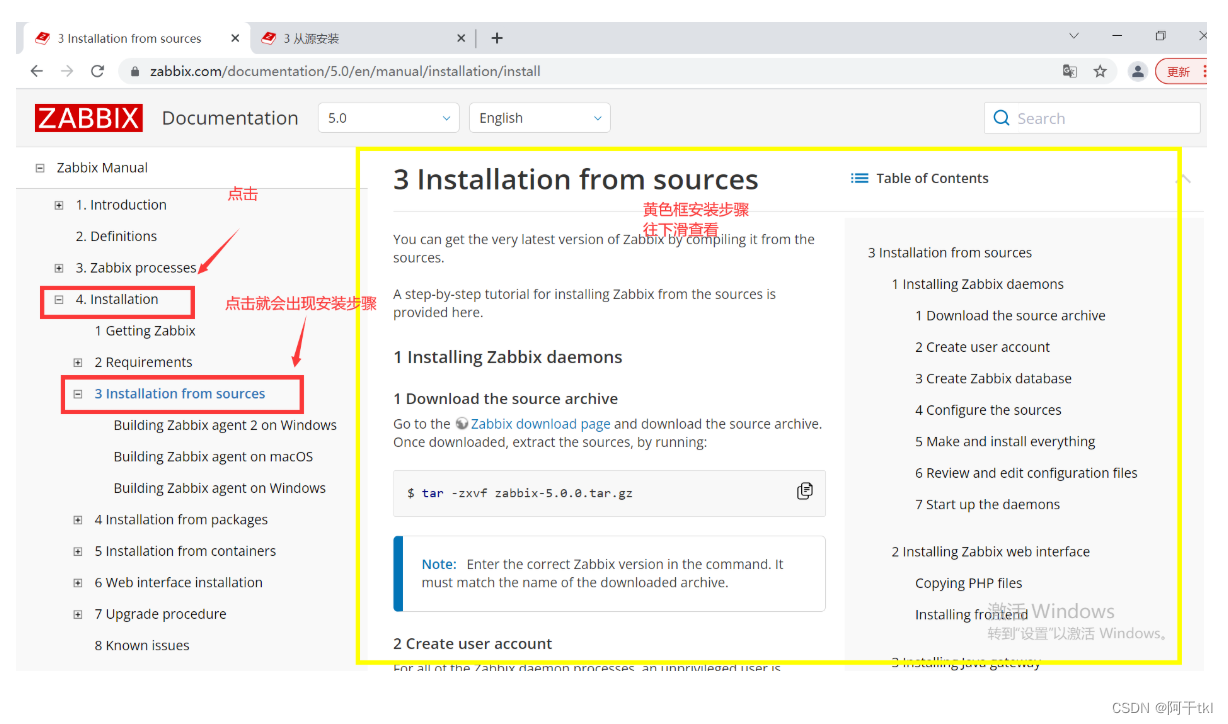
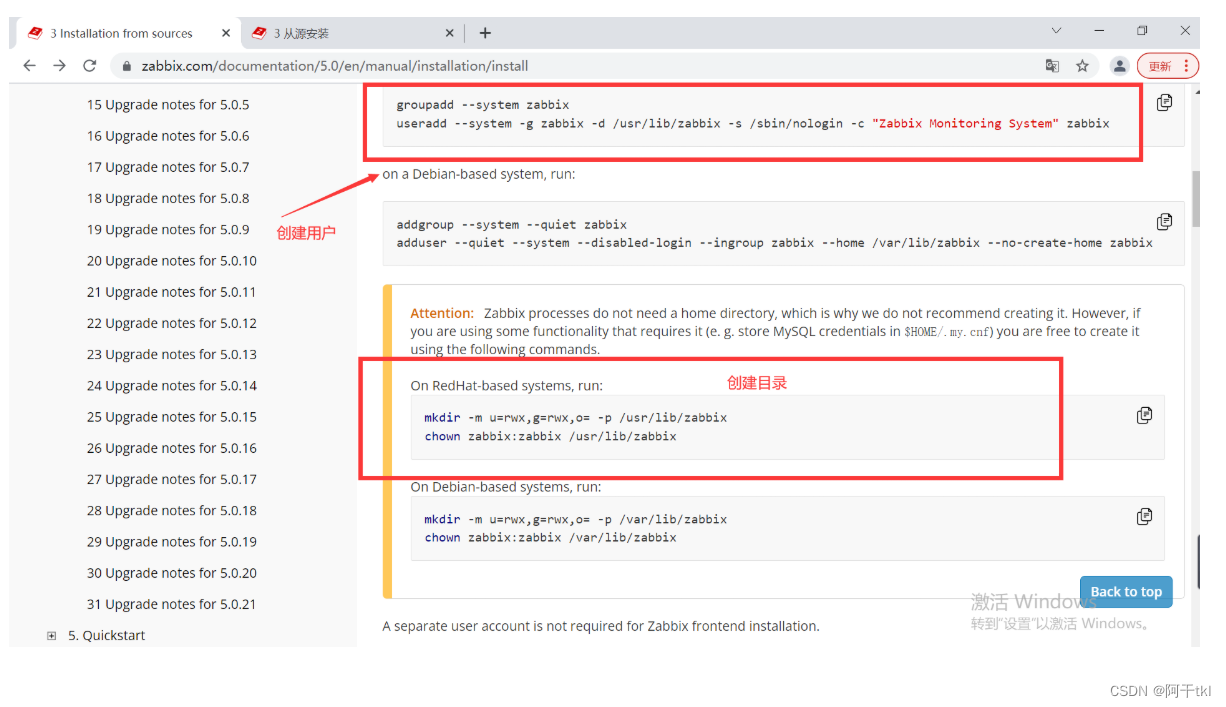
创建用户和目录
查看脚本
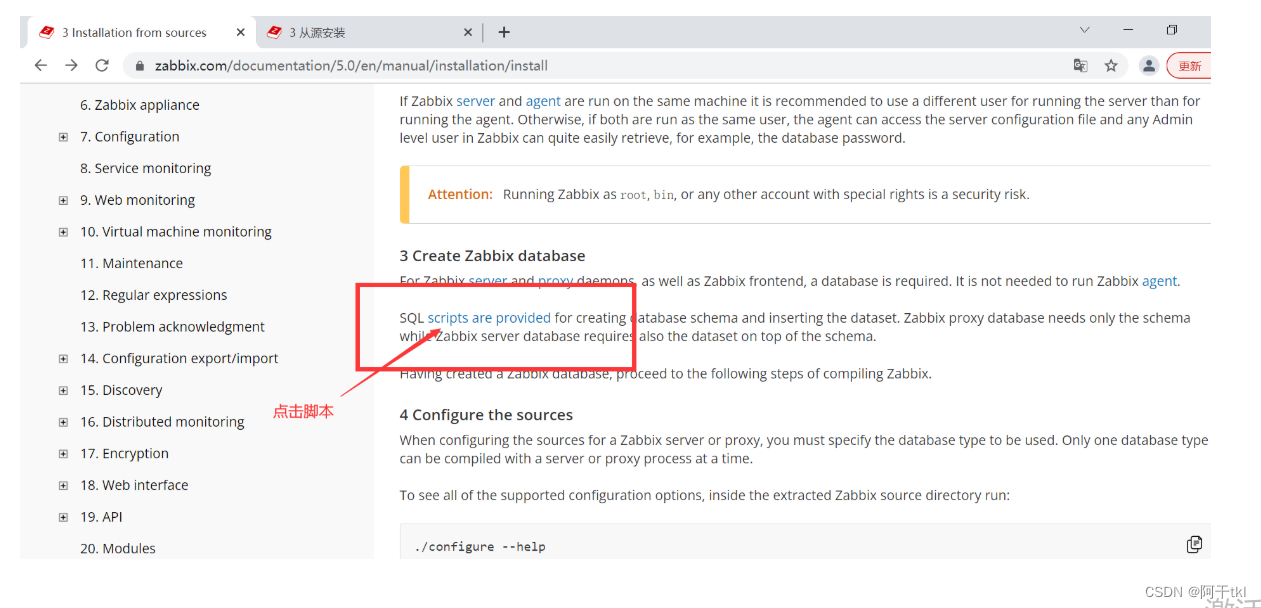
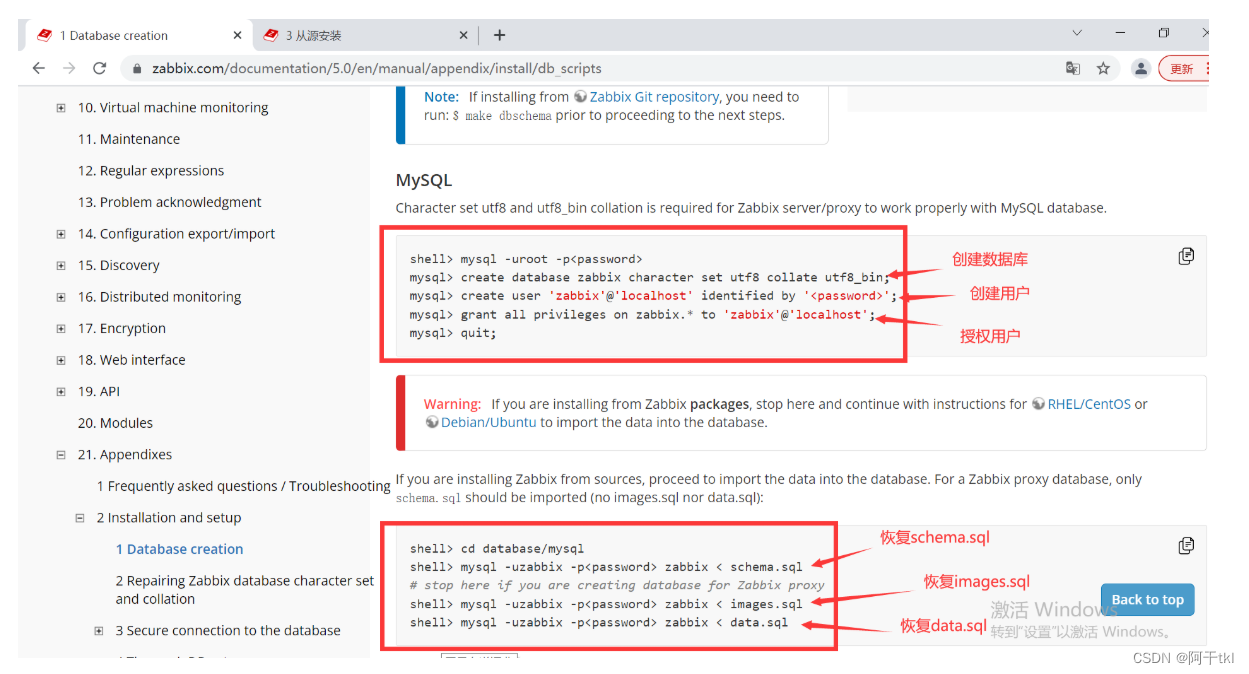
创建zabbix数据库
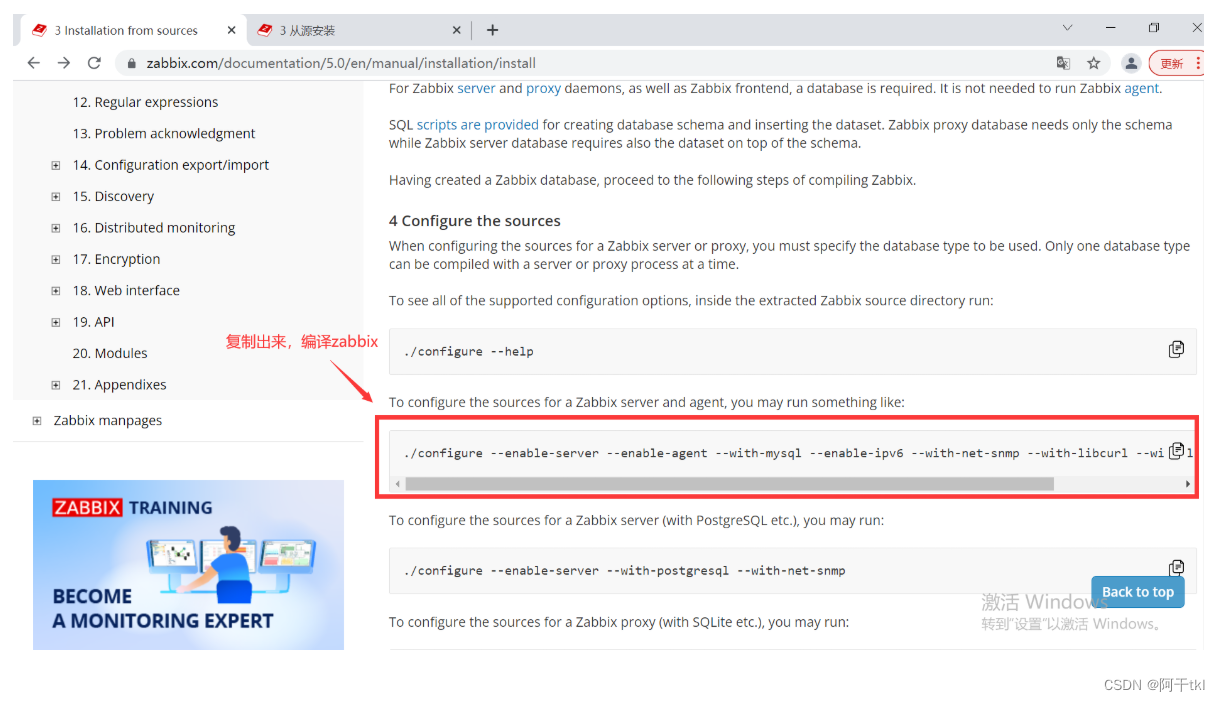
编译zabbix
windows装客户端的方式:如果监控Windows在这里下载
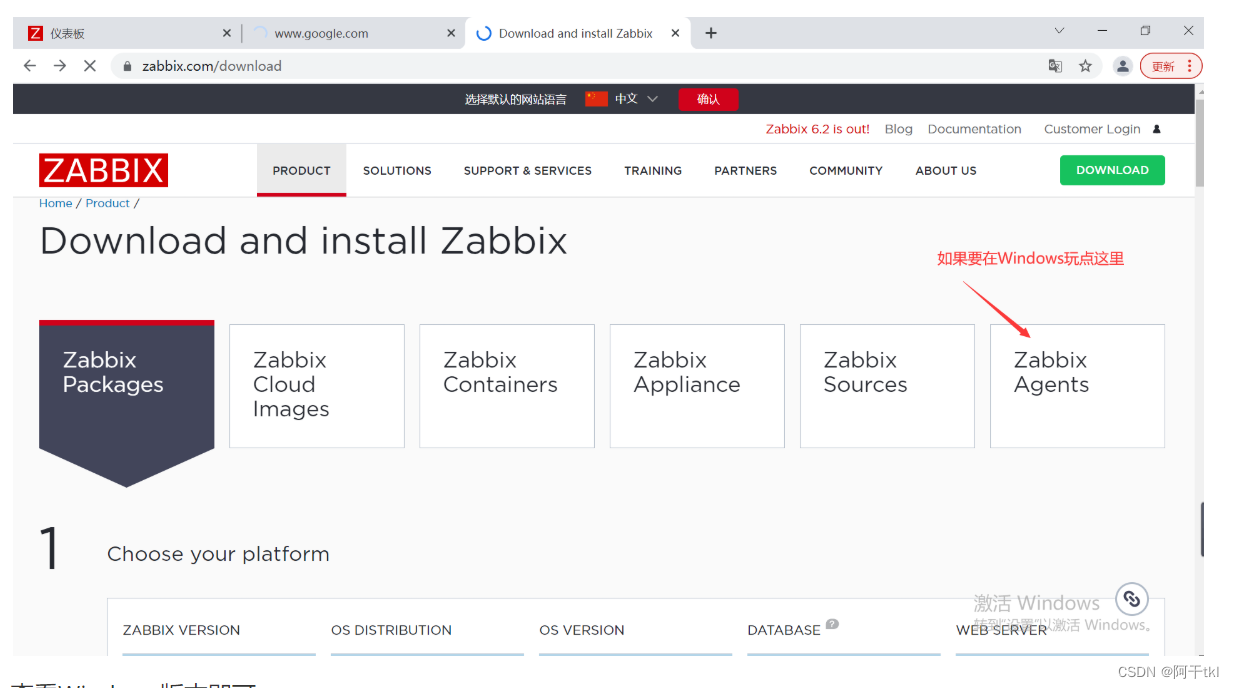
查看Windows版本即可

# 安装依赖包
[root@localhost ~]# dnf -y install net-snmp-devel libevent-devel
安装过程略....

# 下载zabbix
[root@localhost ~]# cd /opt/
[root@localhost opt]# wget https://cdn.zabbix.com/zabbix/sources/stable/5.0/zabbix-5.0.25.tar.gz
下载过程略....

# 解压到/usr/local/
[root@localhost opt]# tar xf zabbix-5.0.25.tar.gz -C /usr/local/

#创建zabbix系统用户
[root@localhost ~]# useradd -r -M -s /sbin/nologin zabbix
[root@localhost ~]# id zabbix
uid=992(zabbix) gid=990(zabbix) groups=990(zabbix)

# 创建zabbix目录
[root@localhost ~]# mkdir /usr/lib/zabbix
# 设置权限为 770
[root@localhost ~]# chmod 770 /usr/lib/zabbix
# 更改所有者和所属组为zabbix
[root@localhost ~]# chown -R zabbix.zabbix /usr/lib/zabbix/


# 配置zabbix数据库
[root@localhost ~]# mysql -uroot -p
Enter password:
Welcome to the MySQL monitor.  Commands end with ; or \g.
Your MySQL connection id is 5
Server version: 5.7.37 MySQL Community Server (GPL)

Copyright (c) 2000, 2022, Oracle and/or its affiliates.

Oracle is a registered trademark of Oracle Corporation and/or its
affiliates. Other names may be trademarks of their respective
owners.

Type 'help;' or '\h' for help. Type '\c' to clear the current input statement.
# 创建数据库
mysql> create database zabbix character set utf8 collate utf8_bin;
Query OK, 1 row affected (0.00 sec)
# 创建用户
mysql> create user 'zabbix'@'localhost' identified by 'zabbix123!';
Query OK, 0 rows affected (0.00 sec)
# 授权用户,这时候就不用写密码了,因为你创建用户的时候给密码了,
mysql> grant all privileges on zabbix.* to 'zabbix'@'localhost';
Query OK, 0 rows affected, 1 warning (0.00 sec)
# 刷新,让其生效
mysql>  flush privileges;
Query OK, 0 rows affected (0.00 sec)

mysql> quit

# 进到 /usr/local/zabbix-5.0.25/database/mysql/目录里恢复
[root@localhost ~]# cd /usr/local/zabbix-5.0.25/database/mysql/
[root@localhost mysql]# ls
data.sql  double.sql  images.sql  Makefile.am  Makefile.in  schema.sql

# 注意用zabbix用户来恢复,跟着官方网站走
[root@localhost mysql]# mysql -uzabbix -pruntime123! zabbix < schema.sql
mysql: [Warning] Using a password on the command line interface can beinsecure.
[root@localhost mysql]# mysql -uzabbix -pruntime123! zabbix < images.sql
mysql: [Warning] Using a password on the command line interface can beinsecure.
[root@localhost mysql]# mysql -uzabbix -pruntime123! zabbix < data.sql
mysql: [Warning] Using a password on the command line interface can beinsecure.
[root@localhost mysql]# pwd
/usr/local/zabbix-5.0.25/database/mysql


# 在解压目录里面执行
# 编译安装zabbix
[root@localhost ~]# cd /usr/local/zabbix-5.0.25/
[root@localhost zabbix-5.0.25]# ./configure --enable-server --enable-agent --with-mysql  --with-net-snmp --with-libcurl --with-libxml2
# make install 安装
[root@localhost zabbix-5.0.25]# make install
4.2 zabbix服务端配置
# 进入/usr/local/etc/目录
[root@localhost ~]# cd /usr/local/etc/
[root@localhost etc]# ls
zabbix_agentd.conf  zabbix_agentd.conf.d  zabbix_server.conf  zabbix_server.conf.d

# 修改服务端配置文件
# 设置数据库信息
[root@localhost ~]# vim /usr/local/etc/zabbix_server.conf
DBUser=zabbix
DBPassword=zabbix123!  #添加这一行、 设置zabbix数据库连接密码


# 启动zabbix_server和zabbix_agentd
[root@localhost ~]# zabbix_server
[root@localhost ~]# zabbix_agentd # 它在服务端部署的所以它可以直接启动
[root@localhost ~]# ss -antl
State  Recv-Q Send-Q   Local Address:Port    Peer Address:Port Process
LISTEN 0      128            0.0.0.0:10050        0.0.0.0:*
LISTEN 0      128            0.0.0.0:10051        0.0.0.0:*
LISTEN 0      128          127.0.0.1:9000         0.0.0.0:*
LISTEN 0      128            0.0.0.0:22           0.0.0.0:*
LISTEN 0      80                   *:3306               *:*
LISTEN 0      128                  *:80                 *:*
LISTEN 0      128               [::]:22              [::]:*
4.3 zabbix服务端web界面安装与配置
4.3.1 zabbix web界面安装前配置
# 修改/etc/php.ini的配置并重启php-fpm
## 第一种做法
[root@localhost ~]# sed -ri 's/(post_max_size =).*/\1 16M/g' /etc/php.ini
[root@localhost ~]# sed -ri 's/(max_execution_time =).*/\1 300/g' /etc/php.ini
[root@localhost ~]# sed -ri 's/(max_input_time =).*/\1 300/g' /etc/php.ini
[root@localhost ~]# sed -i '/;date.timezone/a date.timezone = Asia/Shanghai' /etc/php.ini
# 重启 php
[root@localhost ~]# systemctl restart php
[root@localhost ~]# systemctl status php
● php.service - php-fpm server daemon
   Loaded: loaded (/usr/lib/systemd/system/php.service; enabled; vendor pre>
   Active: active (running) since Wed 2022-07-06 21:31:31 CST; 7s ago # 七秒前启动的

# 第二种做法,用vim进去改
# 找到它们然后修改
[root@localhost ~]# vim /etc/php.ini
; http://php.net/post-max-size
post_max_size = 8M  # 改为16M

; Note: This directive is hardcoded to 0 for the CLI SAPI
max_execution_time = 30  # 改为300

; http://php.net/max-input-time
max_input_time = 60  # 改为300

[Date]
; Defines the default timezone used by the date functions
; http://php.net/date.timezone
;date.timezone =   # 改为 Asia/Shanghai


# 进入 /usr/local/apache/htdocs/
[root@localhost ~]# cd /usr/local/apache/htdocs/
[root@localhost htdocs]# ls
index.html  index.php # 把这两个文件删除
[root@localhost htdocs]# rm -rf *

# 把/usr/local/zabbix-5.0.25/ui/* 的所有东西复制到当前目录
[root@localhost htdocs]# cp -a /usr/local/zabbix-5.0.25/ui/* .
[root@localhost htdocs]# chown -R apache.apache /usr/local/apache
[root@localhost htdocs]# ls
actionconf.php       hostgroups.php               overview.php
api_jsonrpc.php      hostinventoriesoverview.php  queue.php
app                  hostinventories.php          report2.php
applications.php     host_prototypes.php          report4.php
assets               host_screen.php              robots.txt
audio                hosts.php                    screenconf.php
auditacts.php        httpconf.php                 screenedit.php
browserwarning.php   httpdetails.php              screen.import.php
chart2.php           image.php                    screens.php
chart3.php           imgstore.php                 services.php
chart4.php           include                      setup.php
chart5.php           index_http.php               slideconf.php
chart6.php           index.php                    slides.php
chart7.php           index_sso.php                srv_status.php
chart.php            items.php                    sysmap.php
conf                 js                           sysmaps.php
......省略N


# 配置apache虚拟主机在部署LAMP的时候已经做了,所以就不用做了。
# 这步忽略
[root@localhost extra]# pwd
/usr/local/apache/conf/extra
[root@localhost extra]# cat httpd-vhosts.conf
<VirtualHost *:80>
    DocumentRoot "/usr/local/apache/htdocs"
    ServerName www.example.com
    ErrorLog "logs/www.example.com-error_log"
    CustomLog "logs/www.example.com-access_log" common
    ProxyRequests Off
    ProxyPassMatch ^/(.*\.php)$ fcgi://127.0.0.1:9000/usr/local/apache/htdocs/$1
    <Directory "/usr/local/apache/htdocs">
        Options none
        AllowOverride none
        Require all granted
    </Directory>
</VirtualHost>


[root@localhost ~]# chmod 777 /usr/local/apache/htdocs/conf
[root@localhost ~]# ll -d /usr/local/apache/htdocs/conf
drwxrwxrwx 2 apache apache 81 Aug 17 13:03 /usr/local/apache/htdocs/conf


# 重启apache
[root@localhost ~]# systemctl restart httpd
[root@localhost ~]# systemctl status httpd
● httpd.service - httpd server daemon
   Loaded: loaded (/usr/lib/systemd/system/httpd.service; enabled; vendor preset: disabled)
   Active: active (running) since Wed 2022-07-06 21:40:03 CST; 7s ago
 ....省略
[root@localhost ~]# ss -antl
State   Recv-Q  Send-Q   Local Address:Port     Peer Address:Port  Process
LISTEN  0       128            0.0.0.0:22            0.0.0.0:*
LISTEN  0       128            0.0.0.0:10050         0.0.0.0:*
LISTEN  0       128            0.0.0.0:10051         0.0.0.0:*
LISTEN  0       128          127.0.0.1:9000          0.0.0.0:*
LISTEN  0       128                  *:80                  *:*
LISTEN  0       128               [::]:22               [::]:*
LISTEN  0       80                   *:3306                *:*
4.3.2 安装zabbix web界面
修改/etc/hosts文件,添加域名与IP的映射
在浏览器上访问域名,本文设置的域名为web.example.com ,你需要修改成你自己的域名
恢复zabbix/conf目录的权限为755
- 修改/etc/hosts文件,添加域名与IP的映射
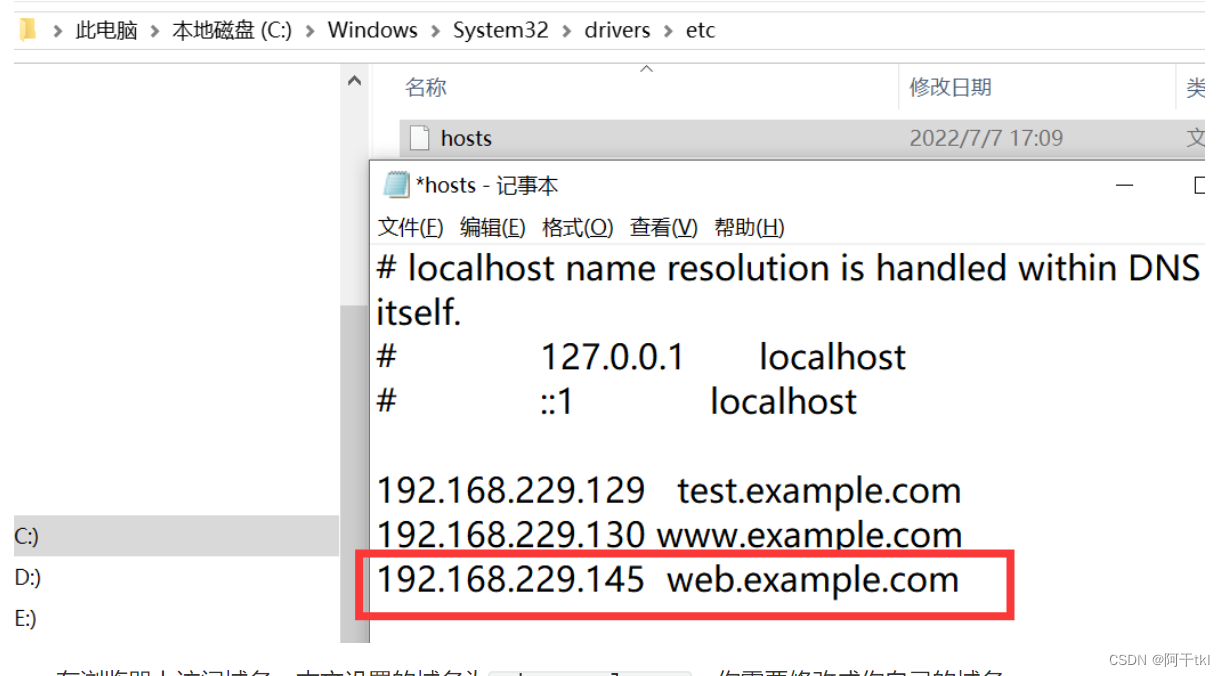
- 在浏览器上访问域名,本文设置的域名为
web.example.com,你需要修改成你自己的域名 - 恢复zabbix/conf目录的权限为755
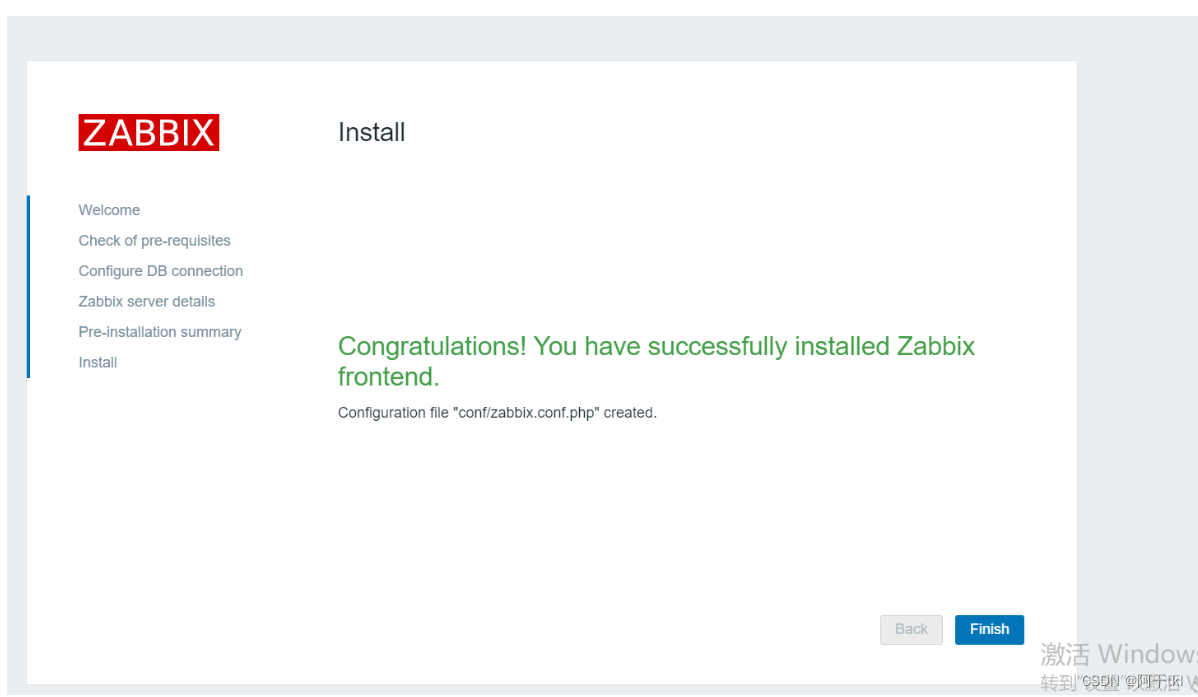
在浏览器上使用访问域名进行安装
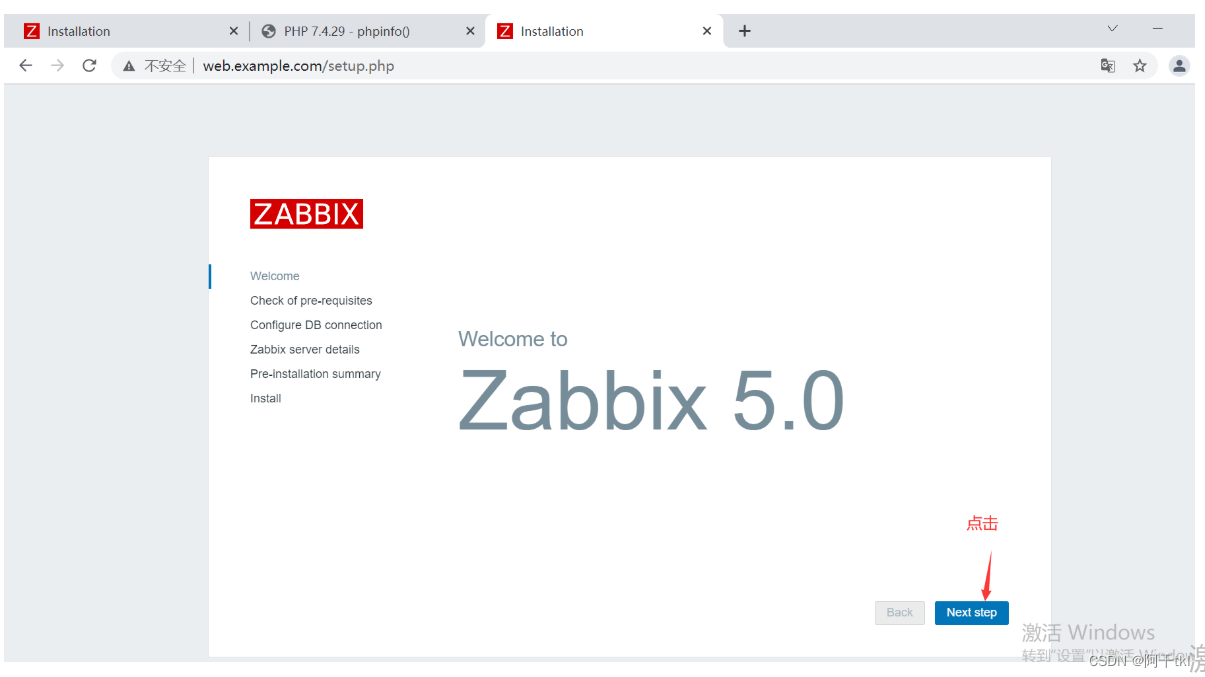
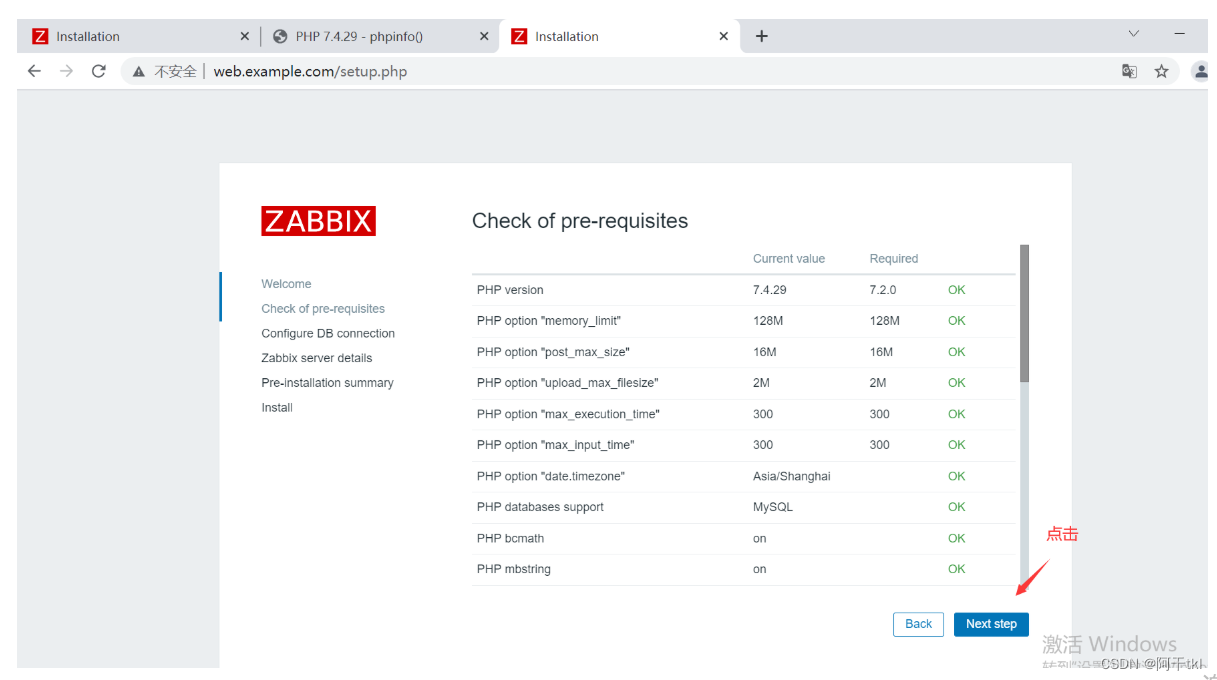

点点点
恢复/usr/local/apache/htdocs/conf目录的权限为755:
[root@localhost ~]# chmod 755 /usr/local/apache/htdocs/conf
[root@localhost ~]# ll -d /usr/local/apache/htdocs/conf
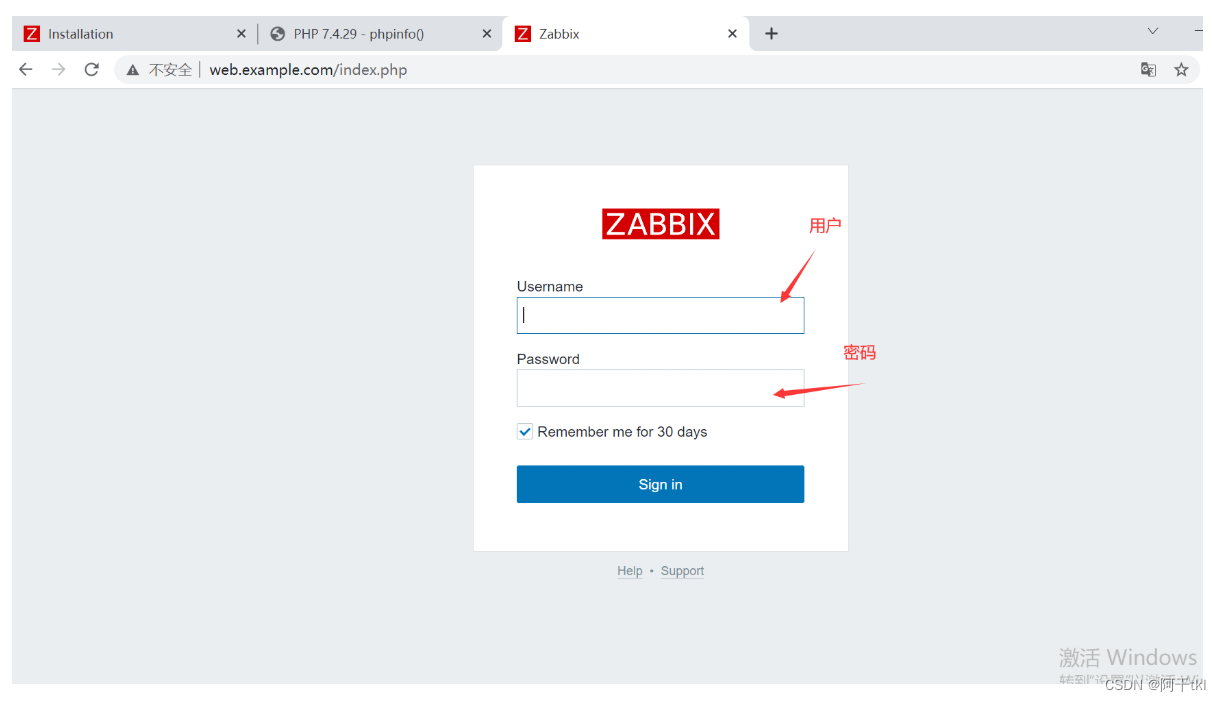
drwxr-xr-x 2 apache apache 104 Aug 17 13:05 /usr/local/apache/htdocs/conf4.4 登录zabbix
zabbix默认登录用户名和密码:
| 用户名 | 密码 |
|---|---|
| Admin | zabbix |
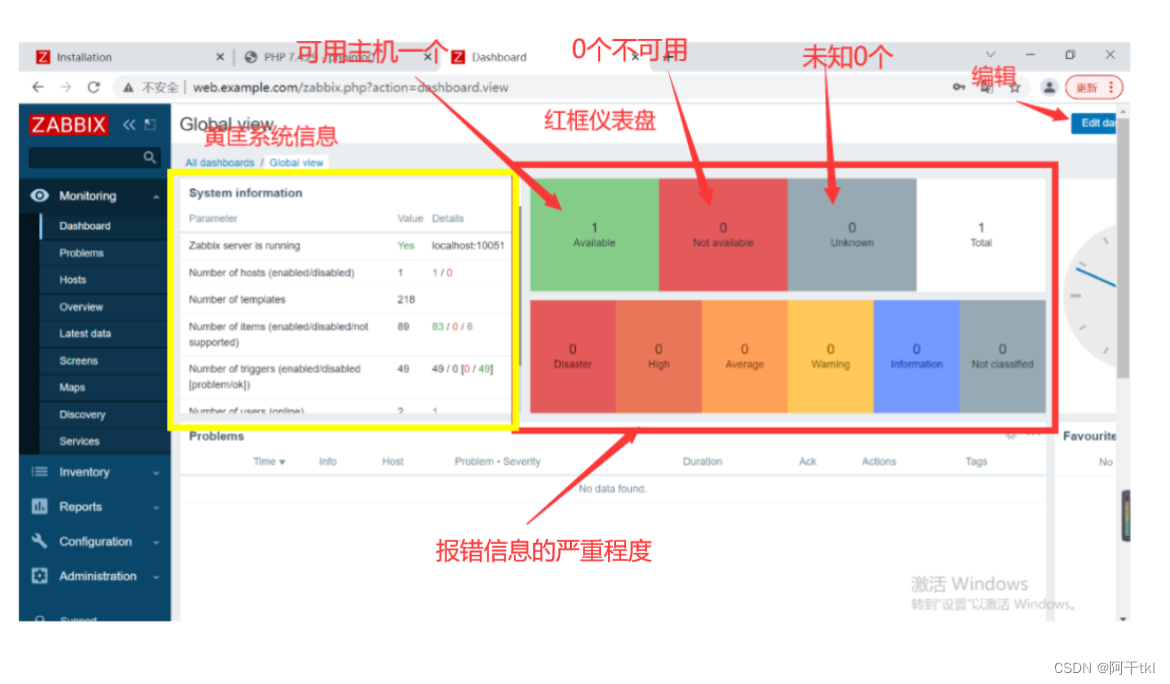
如果还看不懂就翻译成中文


 865
865


 被折叠的 条评论
为什么被折叠?
被折叠的 条评论
为什么被折叠?
 到【灌水乐园】发言


