


 本文介绍了如何在Windows和Linux系统中使用pip安装PyTorch的CPU及GPU版本。对于Linux系统,只需将Windows命令中的'win_amd64'替换为'linux_x86_64'。同时,提供了检查PyTorch版本、CUDA可用性、CUDA版本、GPU设备及数量的方法。
windows系统下安装pytorch0.4.0,在linux系统下安装时只需要将命令中的"win_amd64"换成''linux_x86_64''即可。(大部分如此,具体的还要看你系统,不过方法都是一样的)
Python3.6+pip安装cpu版本
pip install http://download.pytorch.org/whl/cpu/torch-0.4.0-cp36-cp36m-win_amd64.whl
Python3.6+pip安装gpu版本
目前gpu版本支持cuda8.0,cuda9.0和cuda9.1,请选择对应的版本下载安装,不要同时执行下面三个命令
pip install http://download.pytorch.org/whl/cu80/torch-0.4.0-cp36-cp36m-win_amd64.whl
pip install http://download.pytorch.org/whl/cu90/torch-0.4.0-cp36-cp36m-win_amd64.whl
pip install http://download.pytorch.org/whl/cu91/torch-0.4.0-cp36-cp36m-win_amd64.whl
1.查看pytorch是否存在以及pytorch的版本
import torch
print(torch.__version__)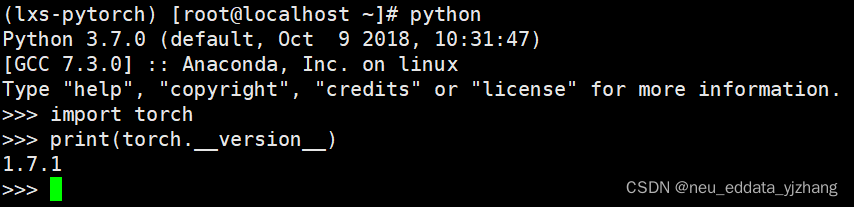
2.查看cuda是否可用
print(torch.cuda.is_available())3.查看cuda版本
print(torch.version.cuda)
4.查看当前工作的GPU
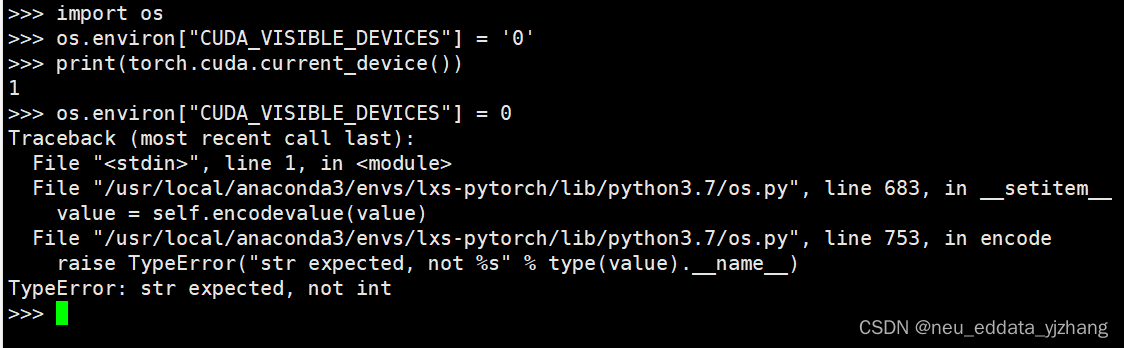
print(torch.cuda.current_device())
5.查看gpu的数目
print(torch.cuda.device_count())

6.设置工作GPU
print(torch.cuda.current_device())
torch.cuda.set_device(1)
print(torch.cuda.current_device())
也有的方法说下述方式也可以实现切换GPU但需要将这句话写在"import torch"之前。
os.environ["CUDA_VISIBLE_DEVICES"] = '0'
7.查看gpu名字,设备索引默认从0开始:
print(torch.cuda.get_device_name(0))
print(torch.cuda.get_device_name(1))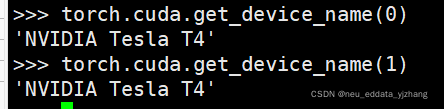


 2050
2050

 被折叠的 条评论
为什么被折叠?
被折叠的 条评论
为什么被折叠?
 到【灌水乐园】发言


