


1、net-stats
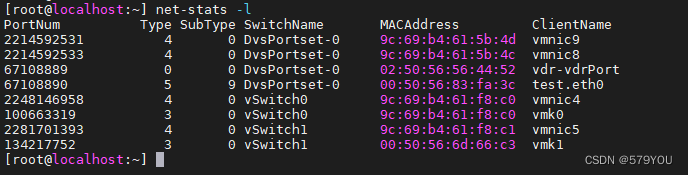
该命令可以收集端口统计信息。可以通过net-stats -h命令显示所有标志。最常见的是使用net-stats -l来确定所有VMkernel接口、vmnic上行链路和vNIC端口的交换机端口号和MAC地址。
1.1 查看所有支持的标志
[root@localhost:~] net-stats -h
Usage:
-l : List ports in system
-a : Print absolute counts instead of per second counts
-c <start>:<end> : specify vsi-cache files instead of live kernel
-d <level> : verbose/debug level
-f : ignore version check
-h : this message
-i <interval> : Interval for stats collection (default=30 seconds)
-n <iterations> : number of iterations to run (default = 1)
-o <outfile> : output file
Specify ports of interest as one of (Prioritized List of options)
-A : Get stats for all ports on host
-S <switchName> : switch name
Lists stats for all non mgmt/test ports
-N <pnicName> : pnic name
List stats for all ports on switch that contains 'N'
-V <vmname> : VM name
Find switches that contains the VM's ports. Print stats for VM's ports and uplinks
-s : Get storage world stats
-I : Get SCSI and VSCSI storage I/O stats
-D <name> : Name of SCSI device/adapter/path or VM
To be used along with storage stat specs
Can be used multiple times
eg: net-stats -I -ta -D vmhba0 -D vmhba1
OR specify port spec on command line
-p <portid> : portNum
-t <type> : specify a string with types of stats needed
OR specify port spec in a config file
-C <cfgFile> : config file to read stats from
File Format: <portNum/switchName> <StatsSpec>
Stats Spec can contain one or more of these characters
c : Coalesce Stats: Only for vnics
i : Interrupt stats: Only for vmnics
h : Cluster and Packet size histograms
v : virtual nic stats
e : Detailed error stats
q : Queue Stats for port/nic
Q : Detailed Queue stats for the port/nic
f : Detailed Queue filter information for port/nic
W : world stats for the tx, vmnic/vmknic worlds
V : vcpu histograms
S : System time breakdown by pcpus
n : NIOC stats
p : Passthru/sriov stats
P : Detailed sriov/passthru stats
E : Enable stats collection for ENS module
For ENS lcore stats:
lcore in : vnic tx/pnic rx
lcore out : vnic rx/pnic tx
I : IOChain InputFilters stats
O : IOChain OutputFilters stats
Stats Spec for Storage stats (-I)
d : SCSI Device Stats
a : SCSI Adapter Stats
t : SCSI Path Stats
s : VSCSI Stats
Note:
net-stats reads multiple vsi nodes, one at a time, using system calls
As data in the vsi nodes are continuously updated, there is going to
be some inconsistency in numbers, hopefully, not a lot
For ENS lcore stats:
lcore in : vnic tx/pnic rx
lcore out : vnic rx/pnic tx
1.2 查看vmkernel、vNic及MAC地址等的对应关系
net-status –l
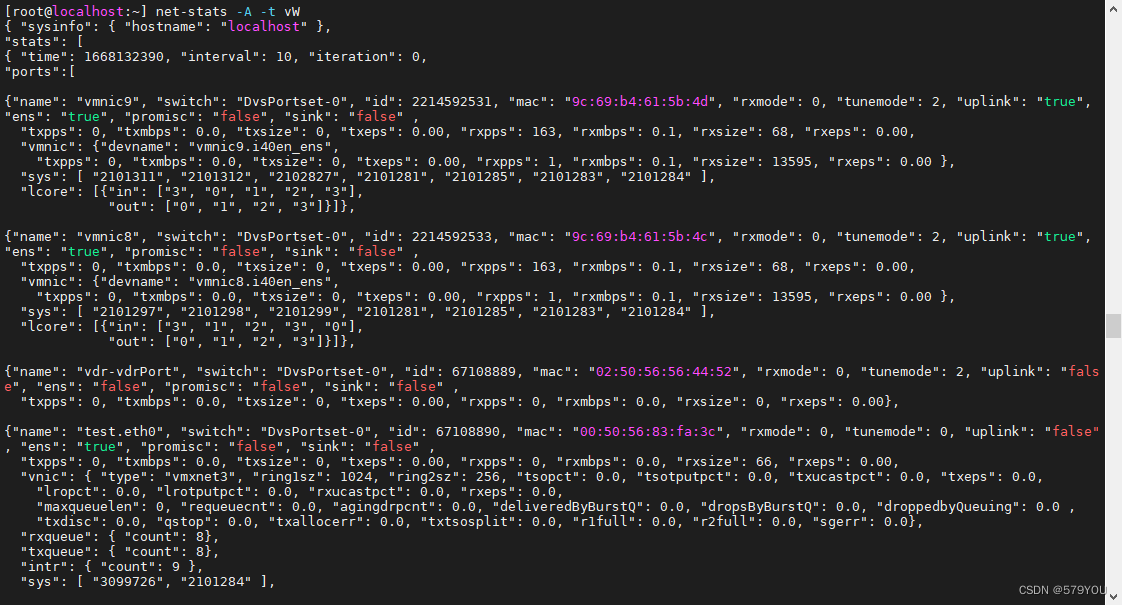
1.3 查看NetQueue或Receive Side Scaling (RSS)是否被vmnic激活
net-stats -A -t vW

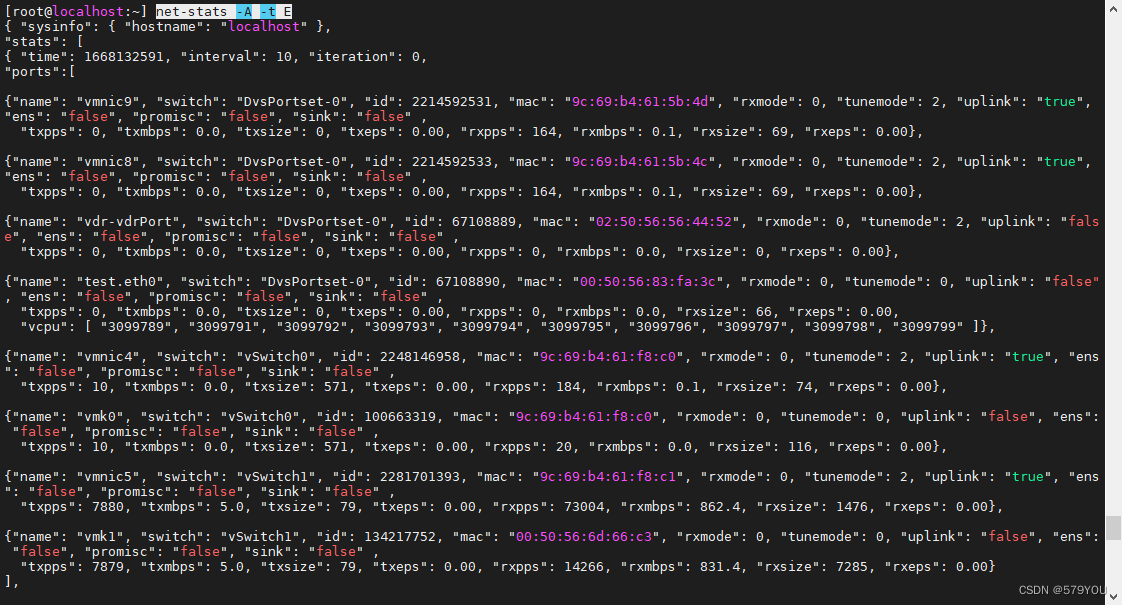
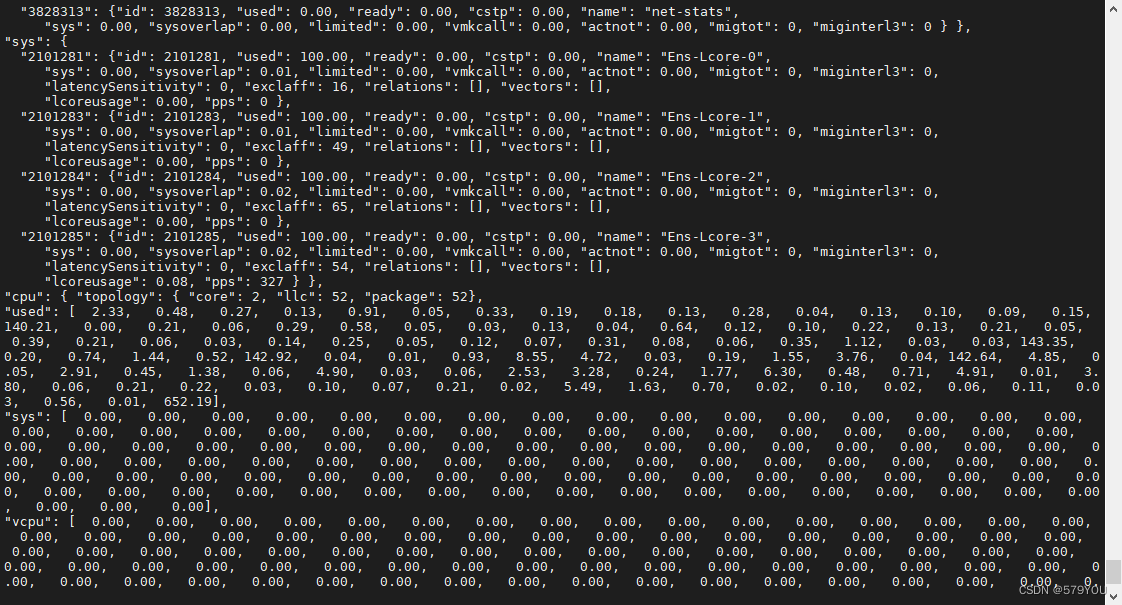
1.4 查看ENS module的端口状态
net-stats -A -t E

2、Pktcap-uw
vSphere ESXi 5.5及之后版本用pktcap-uw代替了tcpdump-uw工具,tcpdump-uw工具只能捕获VMkernel接口级别的数据包。pktcap-uw工具还能捕获uplink、vSwith或vnic级别的数据帧。
从下图可以理解从虚拟机vNic到物理网卡的数据流量和抓包点:
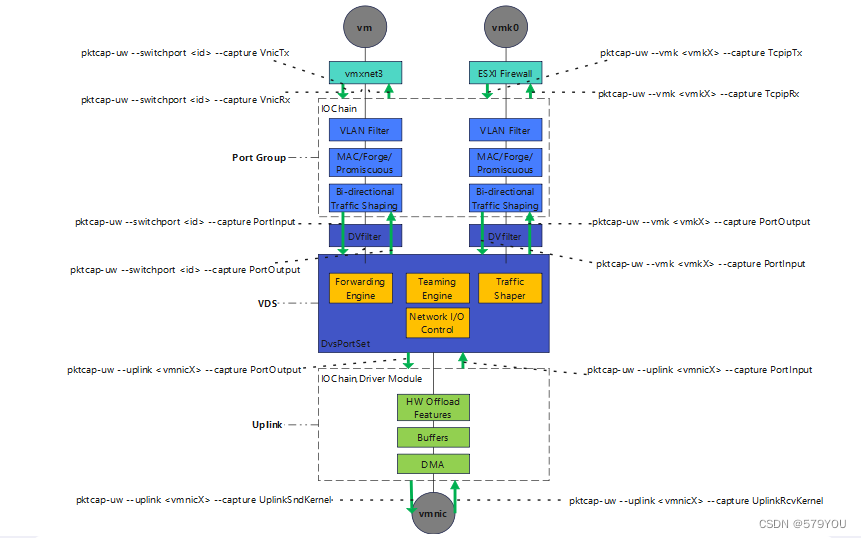
具体抓包命令请参考:ESXI主机之pktcap-uw抓包_579YOU的博客-CSDN博客_esxi 抓包
3、NC
NC是NetCat的缩写,是一个老式的linux命令,用来验证特定端口连接。
例如如果要验证磁阵的iSCSI路径及端口是否可达,可以用以下命令:
nc -z <destination IP> 3260

4、Iperf
Iperf是一个带宽工具,它用来测试源和目的地之间的最大带宽。它通常在VM内部使用,也可以在ESXI主机内部使用,它可以使用ESXi主机上的任何VMkernel接口,包括管理网路、磁阵网络、vmotion网络等。
4.1 拷贝iperf3文件
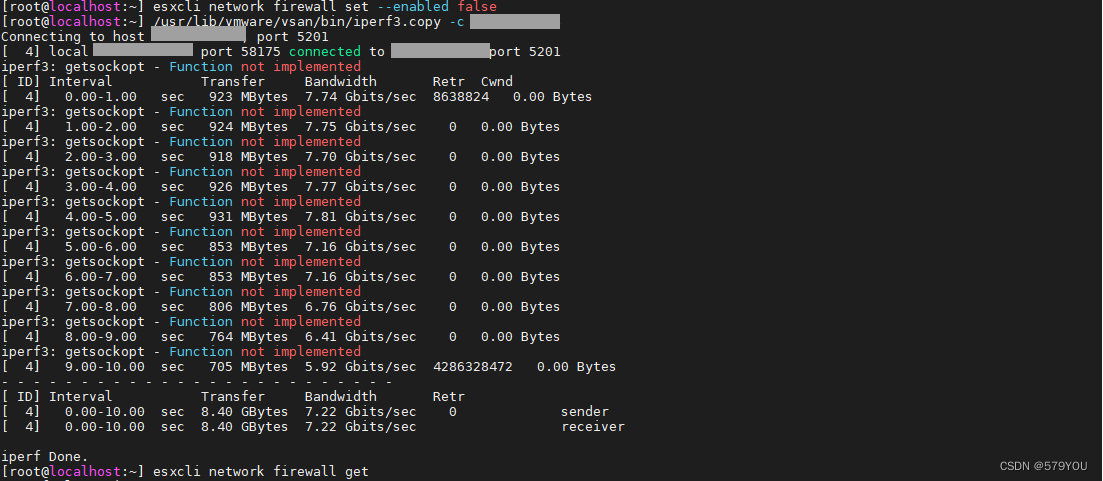
默认情况下,ESXi不允许你在服务器模式下从shell运行iperf3,解决方式是创建一个iperf的副本:
cp /usr/lib/vmware/vsan/bin/iperf3 /usr/lib/vmware/vsan/bin/iperf3.copy
4.2 关闭防火墙
因为在默认情况下,iperf3运行在ESXi防火墙不允许的端口上。可以通过下面命令暂时关闭防火墙:一定要在之后启用ESXi防火墙!
esxcli network firewall set --enabled false
注意:测试完后要启用ESXI防火墙
esxcli network firewall set –enabled true
4.3 目的主机(server)使用iperf3绑定IP
在目标ESXi主机上使用-s标记复制。这样做的好处是,所有的VMkernel IP都可以被使用。因此,如果需要测试管理网络,请将iperf3与管理IP绑定。vMotion网络或任何其他VMkernel接口也一样。
Server (ESXi host 1):
/usr/lib/vmware/vsan/bin/iperf3.copy -s -B [IP]

4.4 源主机(client)发送连接测试请求
Client (ESXi host 2):
/usr/lib/vmware/vsan/bin/iperf3.copy -c [IP]


 1万+
1万+


 被折叠的 条评论
为什么被折叠?
被折叠的 条评论
为什么被折叠?
 到【灌水乐园】发言


