


⭐️前面的话⭐️
本文已经收录到《Spring框架全家桶系列》专栏,本文将介绍如何使用Xml文件完成Spring对象实例化和注入。
📒博客主页:未见花闻的博客主页
🎉欢迎关注🔎点赞👍收藏⭐️留言📝
📌本文由未见花闻原创,CSDN首发!
📆首发时间:🌴2023年4月16日🌴
✉️坚持和努力一定能换来诗与远方!
💭推荐书籍:📚《无》
💬参考在线编程网站:🌐牛客网🌐力扣🌐acwing
博主的码云gitee,平常博主写的程序代码都在里面。
博主的github,平常博主写的程序代码都在里面。
🍭作者水平很有限,如果发现错误,一定要及时告知作者哦!感谢感谢!

下面我们来尝试通过Spring配置xml文件的方式实现业务层和数据层的交互,任务就是将业务层下的TestServiceImpl和数据层下的TestDaoImpl交给Spring管理,并从容器中获取对应的bean对象进行方法调用。
这是实战的第一篇文章,那就写详细一点,从建项目到案例的完成一步步详细说明。
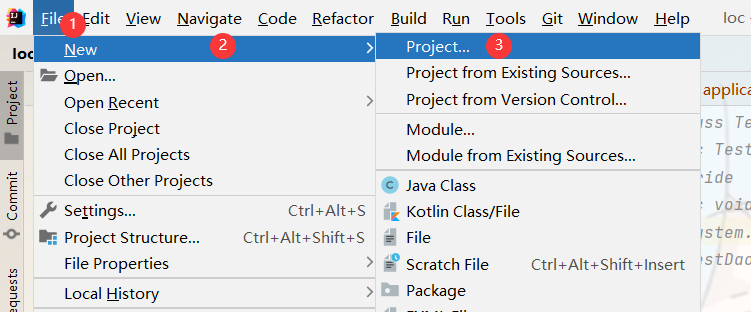
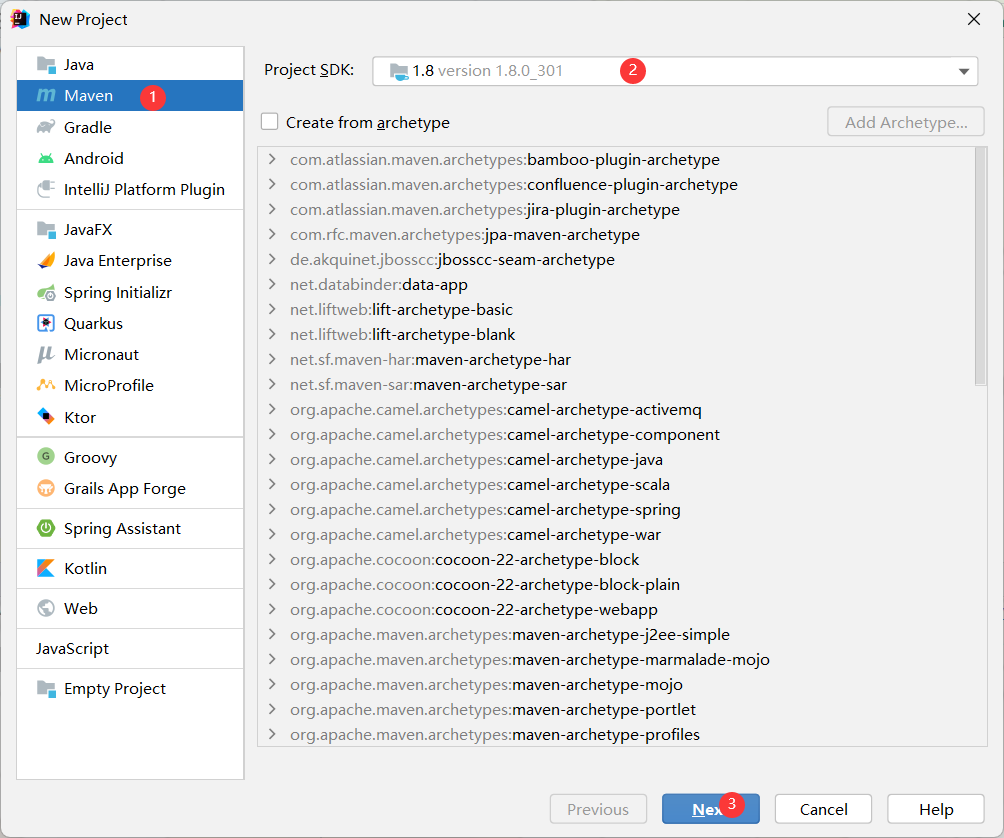
1.创建Maven项目
第一步,打开idea,选择创建maven项目,下面截图是2021版本idea的操作,如果其他版本不一致,不会创建的话,网上搜一搜吧,这个很多的。
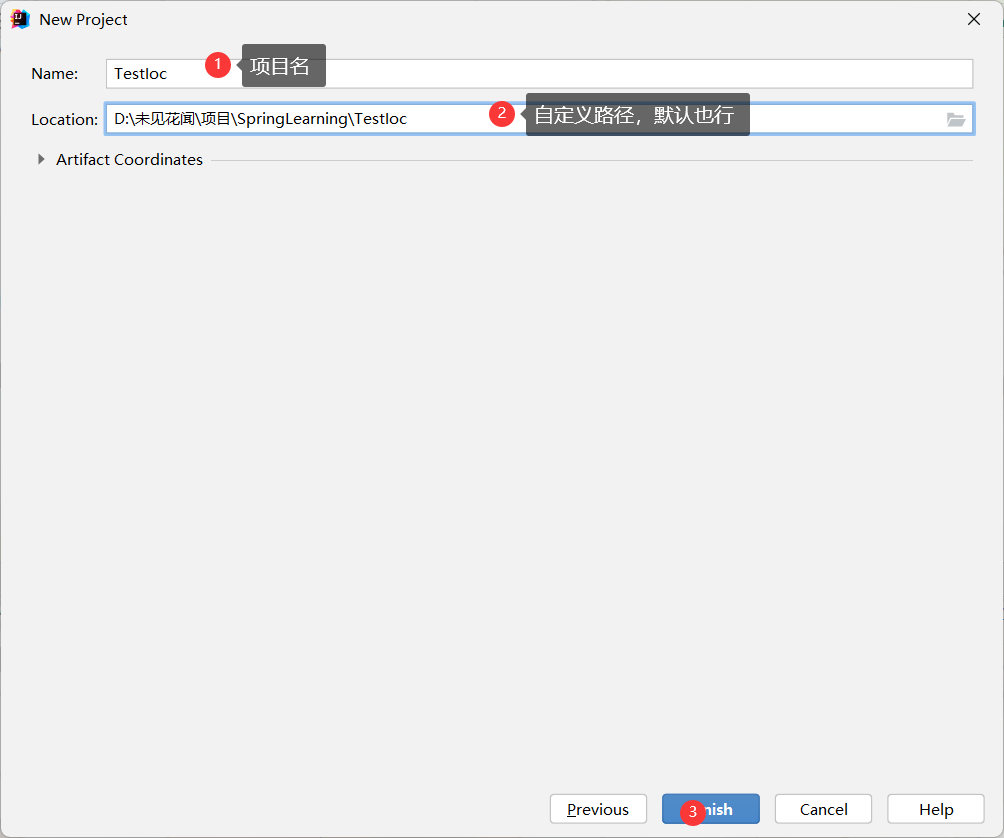
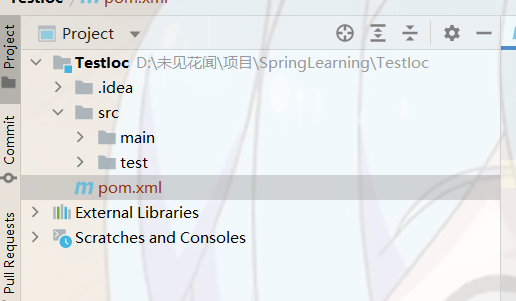
这样就创建好了,然后配xml,写代码就好了。
2.配置项目
第二步,配置pom.xml文件,导入spring依赖。
xml文件配置如下:
<?xml version="1.0" encoding="UTF-8"?>
<project xmlns="http://maven.apache.org/POM/4.0.0"
         xmlns:xsi="http://www.w3.org/2001/XMLSchema-instance"
         xsi:schemaLocation="http://maven.apache.org/POM/4.0.0 http://maven.apache.org/xsd/maven-4.0.0.xsd">
    <modelVersion>4.0.0</modelVersion>

    <groupId>org.example</groupId>
    <artifactId>Ioc</artifactId>
    <version>1.0-SNAPSHOT</version>

    <properties>
        <maven.compiler.source>8</maven.compiler.source>
        <maven.compiler.target>8</maven.compiler.target>
    </properties>

    <dependencies>
<!--        spring框架依赖-->
        <dependency>
            <groupId>org.springframework</groupId>
            <artifactId>spring-context</artifactId>
            <version>5.3.15</version>
        </dependency>
    </dependencies>

</project>
第三步,创建数据层,业务层所需的类。
在java标蓝的目录下创建包结构,在dao包下创建数据层的接口和实现类,service包下创建业务层接口和实现类,可以参考下图进行创建。
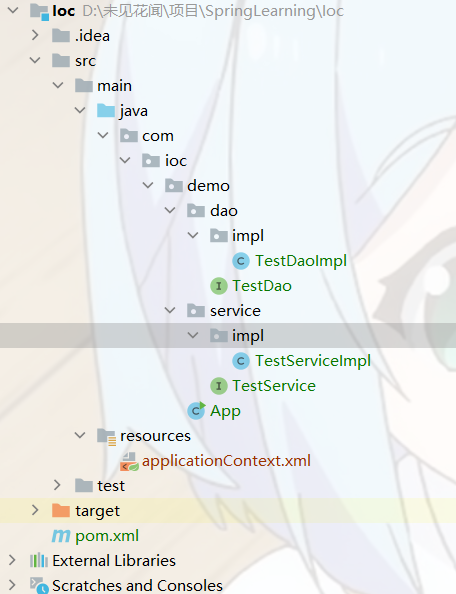
其中App类用于模拟启动项目,在demo包下。
案例所需的TestService接口代码:
public interface TestService {
    public void service(TestDaoImpl testDao);
}
TestService实现类TestServiceImpl:
public class TestServiceImpl implements TestService {
    //Dao
    public TestDaoImpl testDao;
    @Override
    public void service(TestDaoImpl testDao) {
        System.out.println("Service层开始服务!");
        this.testDao = testDao;
        testDao.save();
    }
}
TestDao接口代码:
public interface TestDao {
    public void save();
}
TestDao实现类TestDaoImpl:
public class TestDaoImpl implements TestDao {
    @Override
    public void save() {
        System.out.println("Dao层储存数据!");
    }
}
3.基于Xml配置文件
第四步,创建spring配置文件。
我们在resource文件夹下面创建一个xml文件applicationContext.xml文件,这个文件名不一定要和我一样,这个文件用来作为spring对象管理的配置文件,基础配置代码:
<?xml version="1.0" encoding="UTF-8"?>
<beans xmlns="http://www.springframework.org/schema/beans"
       xmlns:xsi="http://www.w3.org/2001/XMLSchema-instance"
       xsi:schemaLocation="http://www.springframework.org/schema/beans http://www.springframework.org/schema/beans/spring-beans.xsd">
<!--        spring配置文件-->
</beans>
3.1基于xml配置文件实现Ioc
第五步,完成bean配置,实现Ioc思想。
<?xml version="1.0" encoding="UTF-8"?>
<beans xmlns="http://www.springframework.org/schema/beans"
       xmlns:xsi="http://www.w3.org/2001/XMLSchema-instance"
       xsi:schemaLocation="http://www.springframework.org/schema/beans http://www.springframework.org/schema/beans/spring-beans.xsd">
<!--        spring配置文件-->

<!--    基于配置文件将对象依托给IOC容器管理-->
    <bean id="testService" class="com.ioc.demo.service.impl.TestServiceImpl"/>
    <bean id="testDao" class="com.ioc.demo.dao.impl.TestDaoImpl"/>

</beans>
对于bean标签,其中id表示设置容器中对象的名字叫什么,class表示对象的类型是什么,要加上包路径。
如<bean id="testDao" class="com.ioc.demo.dao.impl.TestDaoImpl"/>表示将类型为TestDaoImpl名字为testDao的对象放入bean容器当中。
虽然对象已经放到容器当中了,但是在上面的代码实现中并没有从容器中取对象,专业一点我们就将这个取对象的过程叫做注入或者叫做装配Bean对象,为做区分将对象创建到容器当中的过程叫做Bean实例化。
将对象交给容器后,我们就可以通过ApplicationContext进行获取,这个是一个接口,由于我们是通过xml配置文件装配Bean对象,所以我们可以通过创建ClassPathXmlApplicationContext对象中的getBean方法来获取容器中的对象。
创建ClassPathXmlApplicationContext对象参数为spring bean的配置文件在resource目录下的位置。
getBean方法的参数可以通过id获取也可以通过类型获取。
由于我们没有在配置文件中为业务层配置依赖注入,我们先通过ApplicationContext获取对象,然后通过参数的形式传递。
App模拟启动类:
public class App {
    //Service
    public static TestServiceImpl testService;
    public static TestDaoImpl testDao;
    //从IOC容器中获取Bean
    //ClassPathXmlApplicationContext参数表示基于xml配置文件拿对象,参数为配置文件在resource目录下的路径
    public static ApplicationContext context = new ClassPathXmlApplicationContext("applicationContext.xml");
    public static void main(String[] args) {
        System.out.println("程序启动!");
        //根据id拿对象
        testService = (TestServiceImpl) context.getBean("testService");
//        // 根据类型拿对象
//        testService = (TestServiceImpl) context.getBean(TestServiceImpl.class);
        //获取Dao对象
        testDao = (TestDaoImpl) context.getBean("testDao");
        testService.service(testDao);
    }
}
注意,不要在Service再写一个ApplicationContext,这样会形成循环依赖而报错。
运行结果:

3.2基于xml配置文件实现关系注入
根据需求,我们的业务层的对象需要依赖数据层的对象,也就是业务层中的TestServiceImpl对象依赖与TestDaoImpl对象,其实可以通过xml进行bean标签的配置,将这种依赖关系绑定到TestServiceImpl对象上,就可以自动将TestDaoImpl对象注入到业务层了。
第六步,完成bean配置,实现依赖注入。
xml配置:
<!--    基于配置文件将对象依托给IOC容器管理-->
    <bean id="testService" class="com.ioc.demo.service.impl.TestServiceImpl">
        <property name="testDao" ref="testDao"/>
    </bean>
    <bean id="testDao" class="com.ioc.demo.dao.impl.TestDaoImpl"/>
通过bean标签里面的property标签为TestServiceImpl创建所需的依赖关系,其中属性name对应与TestServiceImpl类中TestDaoImpl对象的变量名,ref表示映射被依赖对象的id,还有一个属性也很常用,就是value,它表示直接为name字段赋值,一般适用于基本类型和字符串。
注意该方式默认通过set注入的方式将对象注入,所以需要先准备一个set方法。
App模拟启动类:
public class App {
    //Service
    public static TestServiceImpl testService;
    public static TestDaoImpl testDao;
    //从IOC容器中获取Bean
    //ClassPathXmlApplicationContext参数表示基于xml配置文件拿对象,参数为配置文件在resource目录下的路径
    public static ApplicationContext context = new ClassPathXmlApplicationContext("applicationContext.xml");
    public static void main(String[] args) {
        System.out.println("程序启动!");
        //根据id拿对象
        testService = (TestServiceImpl) context.getBean("testService");
//        // 根据类型拿对象
//        testService = (TestServiceImpl) context.getBean(TestServiceImpl.class);
        testService.service();
    }
}
TestServiceImpl类:
public class TestServiceImpl implements TestService {
    //Dao
    private TestDaoImpl testDao;
    @Override
    public void service() {
        System.out.println("Service层开始服务!");
        this.testDao = testDao;
        testDao.save();
    }

    public void setTestDao(TestDaoImpl testDao) {
        this.testDao = testDao;
    }
}
其他都不变,运行结果:


 658
658


 被折叠的 条评论
为什么被折叠?
被折叠的 条评论
为什么被折叠?
 到【灌水乐园】发言


