


一、环境安装
1.创建虚拟环境
conda create -n mmlab(自己起的环境名) python=3.7
conda activate mmlab
此时就会进入到你自己创建的环境(mmlab)中
2.首先查看适配cuda
输入nvcc -V查看适配cuda版本

如上图所示,我输入命令后显示cuda_11.0,那么就代表我的机器是适配cuda11.0
根据版本号去Pytorch官网安装所对应pytorch以及cuda
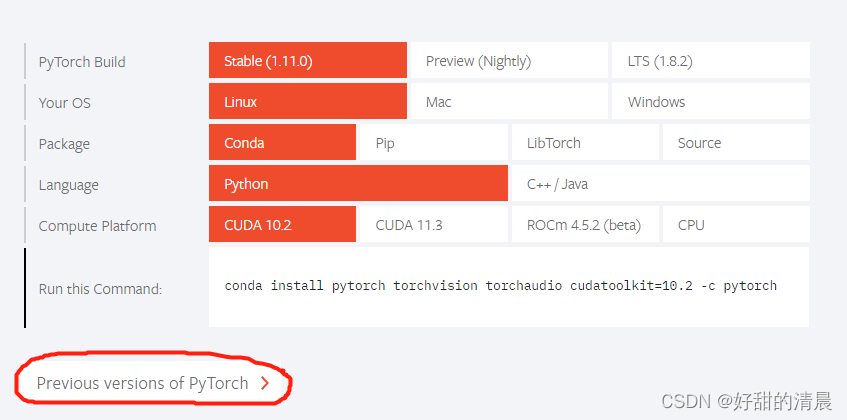
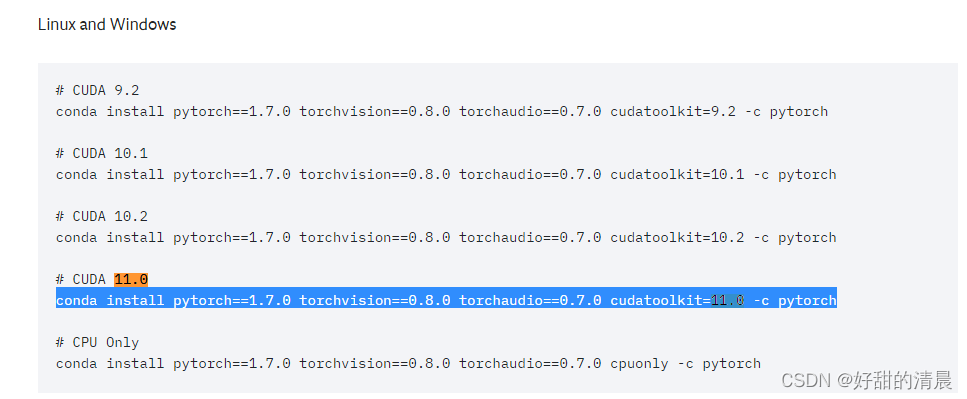
我的是在linux中安装的所以选择了linux,因为我是cuda11.0,但这里没有此版本,所以选择之前的版本,也就是红色画笔标注的地方。
进入此页面后找到cuda 11.0版本的位置,讲代码复制到终端敲回车即可安装完成。
3.安装mmcv(对应版本)
pip install mmcv-full -f https://download.openmmlab.com/mmcv/dist/cu110/torch1.7.0/index.html
其中110和1.7.0分别是cuda版本号和Pytorch版本号
4.安装mmdetection
git clone https://github.com/open-mmlab/mmdetection.git
运行完本段代码后会将mmdetection文件克隆下来,此时你可以发现多了个文件mmdetection
cd mmdetection
pip install -r requirements/build.txt
pip install -v -e .#or 'python setup.py develop'
运行完上三行代码后基本配置就完成了
二、测试环境
1.先测试环境是否安装成功
wget http://download.openmmlab.com/mmdetection/v2.0/faster_rcnn/faster_rcnn_r50_fpn_1x_coco/faster_rcnn_r50_fpn_1x_coco_20200130-047c8118.pth 这一步是下载预训练权重
2.可视化测试结果
from mmdet.apis import init_detector, inference_detector, show_result_pyplot
config_file = 'configs/faster_rcnn/faster_rcnn_r50_fpn_1x_coco.py'
checkpoint_file = 'checkpoints/faster_rcnn_r50_fpn_1x_coco_20200130-047c8118.pth'#权重路径
device = 'cuda:0'
model = init_detector(config_file, checkpoint_file, device=device)
# 这一步会输出: "Use load_from_local loader"
img = 'demo/demo.jpg'
result = inference_detector(model,img)
show_result_pyplot(model,img,result)
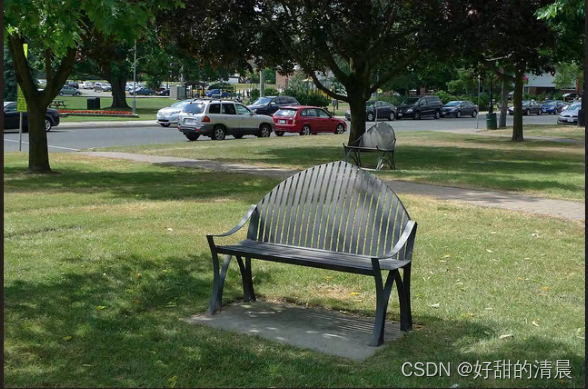
然后我们先看一下原图
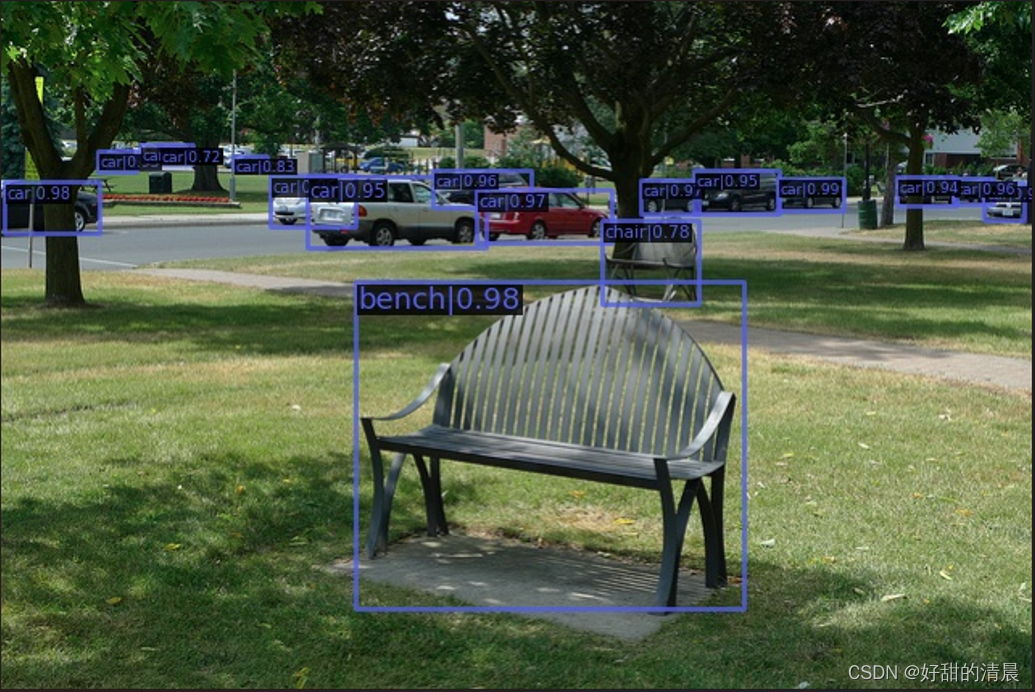
下面再来看一下测试结果


 541
541


 被折叠的 条评论
为什么被折叠?
被折叠的 条评论
为什么被折叠?
 到【灌水乐园】发言


