


在LinerLayout布局里面嵌套FrameLayout和RelativeLayout布局,将TabWidget放置在RelativeLayout里面,之后设置RelativeLayout的android:layout_alignParentBottom=“true” 属性,这个属性的功能是将TabWidget置于父元素(也就是LinerLayout)的底部。这样就能将Tab置于底部了。
- <?xml version\="1.0" encoding\="utf-8"?>
-
<LinearLayout
-
xmlns:android\="http://schemas.android.com/apk/res/android" -
android:orientation\="vertical" -
android:layout\_width\="fill\_parent" -
android:layout\_height\="fill\_parent"\> -
<TabHost -
android:id\="@+id/tabhost" -
android:layout\_width\="fill\_parent" -
android:layout\_height\="fill\_parent"\> -
<FrameLayout -
android:id\="@android:id/tabcontent" -
android:layout\_width\="fill\_parent" -
android:layout\_height\="fill\_parent" -
android:paddingBottom\="62px" -
\> -
<TextView -
android:id\="@+id/tab1" -
android:layout\_width\="fill\_parent" -
android:layout\_height\="fill\_parent" -
android:text\="这是TabOne" -
/> -
<TextView -
android:id\="@+id/tab2" -
android:layout\_width\="fill\_parent" -
android:layout\_height\="fill\_parent" -
android:text\="这是TabTwo"/> -
</FrameLayout\> -
<RelativeLayout -
android:layout\_width\="fill\_parent" -
android:layout\_height\="fill\_parent" -
\> -
<TabWidget -
android:id\="@android:id/tabs" -
android:layout\_alignParentBottom\="true" -
android:layout\_width\="fill\_parent" -
android:layout\_height\="65.0px" -
android:background\="@drawable/tab\_bg" -
/> -
</RelativeLayout\> -
</TabHost\> -
</LinearLayout>
main.xml
- <?xml version\="1.0" encoding\="utf-8"?>
-
<LinearLayout xmlns:android=“http://schemas.android.com/apk/res/android”
-
android:orientation\="vertical" -
android:layout\_width\="fill\_parent" -
android:layout\_height\="fill\_parent" -
\> -
<TextView
-
android:layout\_width\="fill\_parent" -
android:layout\_height\="wrap\_content" -
android:text\="@string/hello" -
/> -
</LinearLayout>
TabHostActivity.java
-
package com.lingdududu.test;
-
import android.app.Activity;
-
import android.os.Bundle;
-
import android.widget.TabHost;
-
public class TabHostActivity extends Activity {
-
public void onCreate(Bundle savedInstanceState) { -
super.onCreate(savedInstanceState); -
setContentView(R.layout.tabs); -
TabHost tabs=(TabHost)findViewById(R.id.tabhost); -
tabs.setup(); -
TabHost.TabSpec spec=tabs.newTabSpec("tag1"); -
spec.setContent(R.id.tab1); -
spec.setIndicator("TabOne"); -
tabs.addTab(spec); -
spec=tabs.newTabSpec("tag2"); -
spec.setContent(R.id.tab2); -
spec.setIndicator("TabTwo"); -
tabs.addTab(spec); -
tabs.setCurrentTab(0); -
} -
}
自我介绍一下,小编13年上海交大毕业,曾经在小公司待过,也去过华为、OPPO等大厂,18年进入阿里一直到现在。
深知大多数初中级安卓工程师,想要提升技能,往往是自己摸索成长,但自己不成体系的自学效果低效又漫长,而且极易碰到天花板技术停滞不前!
因此收集整理了一份《2024年最新Android移动开发全套学习资料》送给大家,初衷也很简单,就是希望能够帮助到想自学提升又不知道该从何学起的朋友,同时减轻大家的负担。

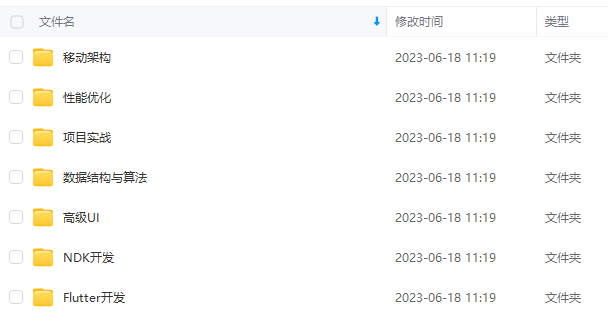

由于文件比较大,这里只是将部分目录截图出来,每个节点里面都包含大厂面经、学习笔记、源码讲义、实战项目、讲解视频
如果你觉得这些内容对你有帮助,可以添加下面V无偿领取!(备注Android)

片转存中…(img-31SuomQ7-1710918002754)]
[外链图片转存中…(img-gHePLNXv-1710918002754)]
由于文件比较大,这里只是将部分目录截图出来,每个节点里面都包含大厂面经、学习笔记、源码讲义、实战项目、讲解视频
如果你觉得这些内容对你有帮助,可以添加下面V无偿领取!(备注Android)
[外链图片转存中…(img-oUiVWG5R-1710918002755)]


 4000
4000


 被折叠的 条评论
为什么被折叠?
被折叠的 条评论
为什么被折叠?
 到【灌水乐园】发言


