


vue3+vite项目中使用百度地图
方式一:直接使用百度地图的ak
提前准备:
- 创建一个vite项目
- 申请好的百度地图ak值
百度地图使用:
- 在创建好的vite项目的入口文件index.html中引入百度地图ak

附代码
<!DOCTYPE html>
<html lang="en">

<head>
  <meta charset="UTF-8" />
  <link rel="icon" type="image/svg+xml" href="/vite.svg" />
  <meta name="viewport" content="width=device-width, initial-scale=1.0" />
  <title>Vite + Vue</title>
  <script src="https://api.map.baidu.com/api?v=3.0&ak=IszZX5*****************“></script>
</head>

<body>
  <div id="app"></div>
  <script type="module" src="/src/main.js"></script>
</body>

</html>
- 去创建自己的地图
- 在\src\echarts\MyMap.vue创建自己的地图
<template>
  <div class="map" ref="baiduRef"></div>
</template>
<script setup>
import { ref, onMounted } from "vue";

const baiduRef = ref();
const map = ref();
const point = ref();

function initMap(lng = 116.405725, lat = 39.935362) {
  map.value = new BMap.Map(baiduRef.value);
  point.value = new BMap.Point(lng, lat);

  map.value.centerAndZoom(point.value, 15);
  map.value.enableScrollWheelZoom(true); //滚轮缩放
  map.value.setMapStyleV2({
  //可以自己去百度地图中调整样式(方法在在一条)
    styleId: "9a7c760437*********************",
  });
}
onMounted(() => {
  initMap();
});
</script>
<style  scoped>
.map {
  width: 100%;
  height: 400px;
}
</style>
- 在百度地图开放平台中申请样式id(不是关键步骤,可忽略)
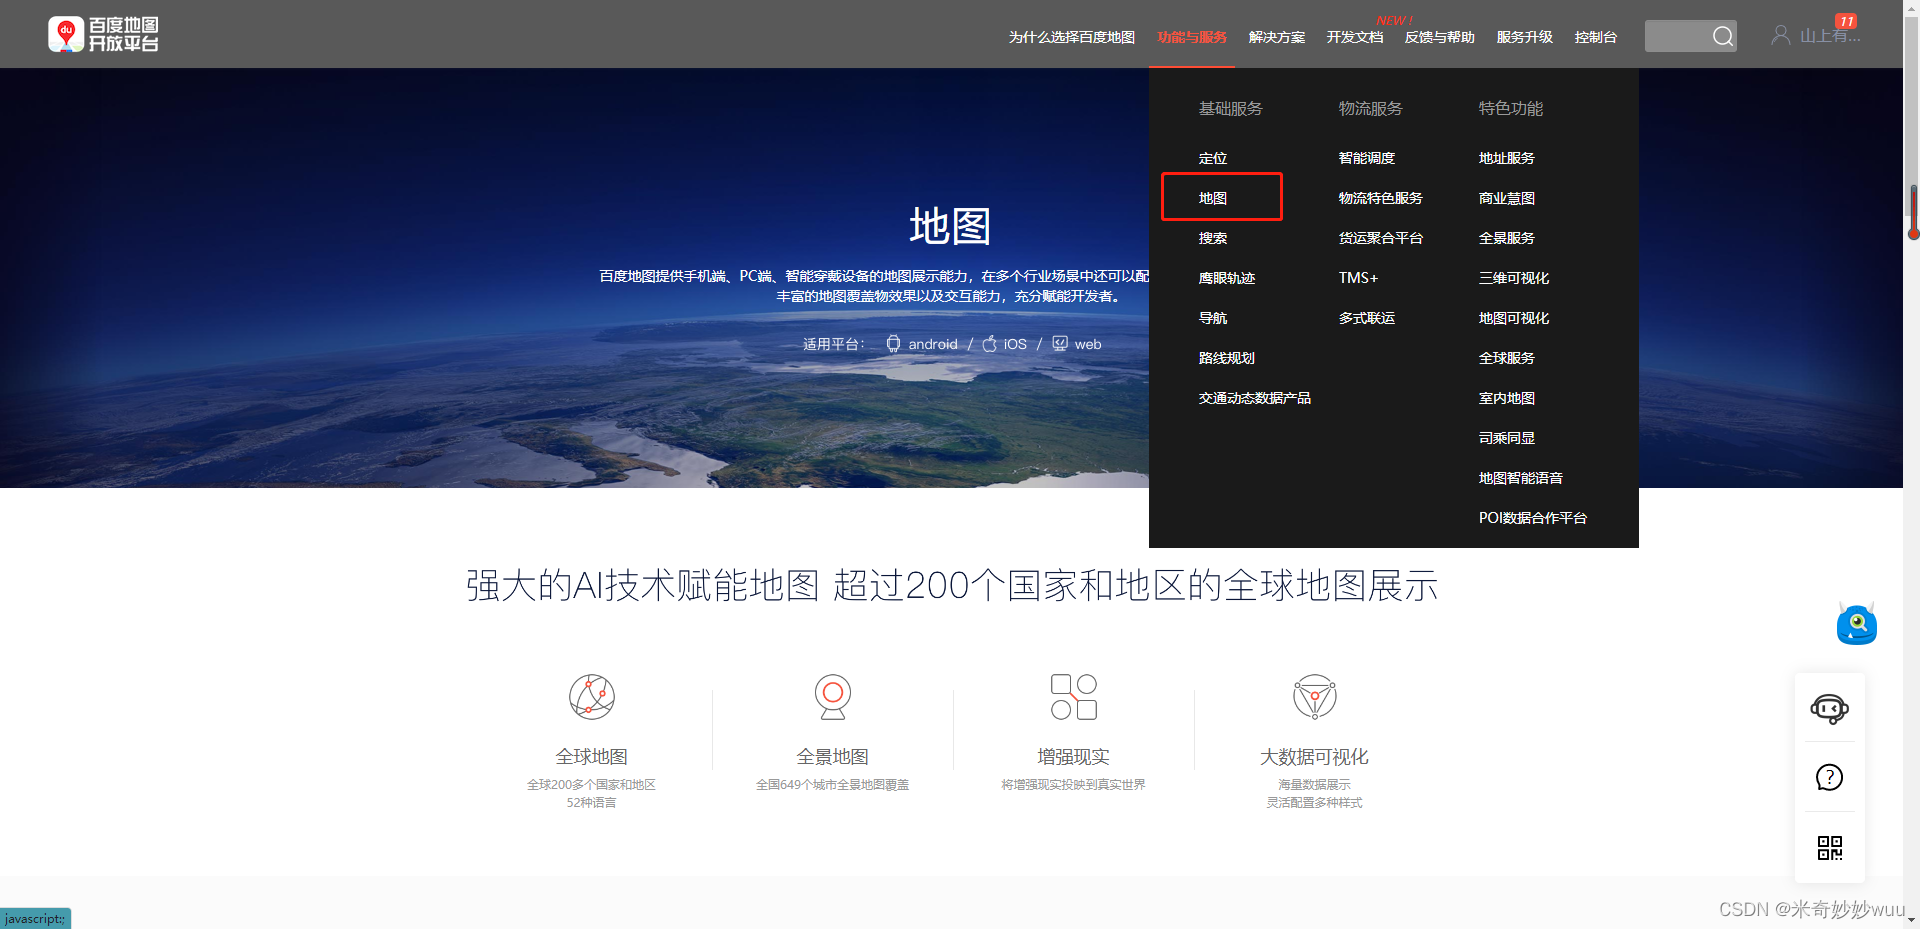
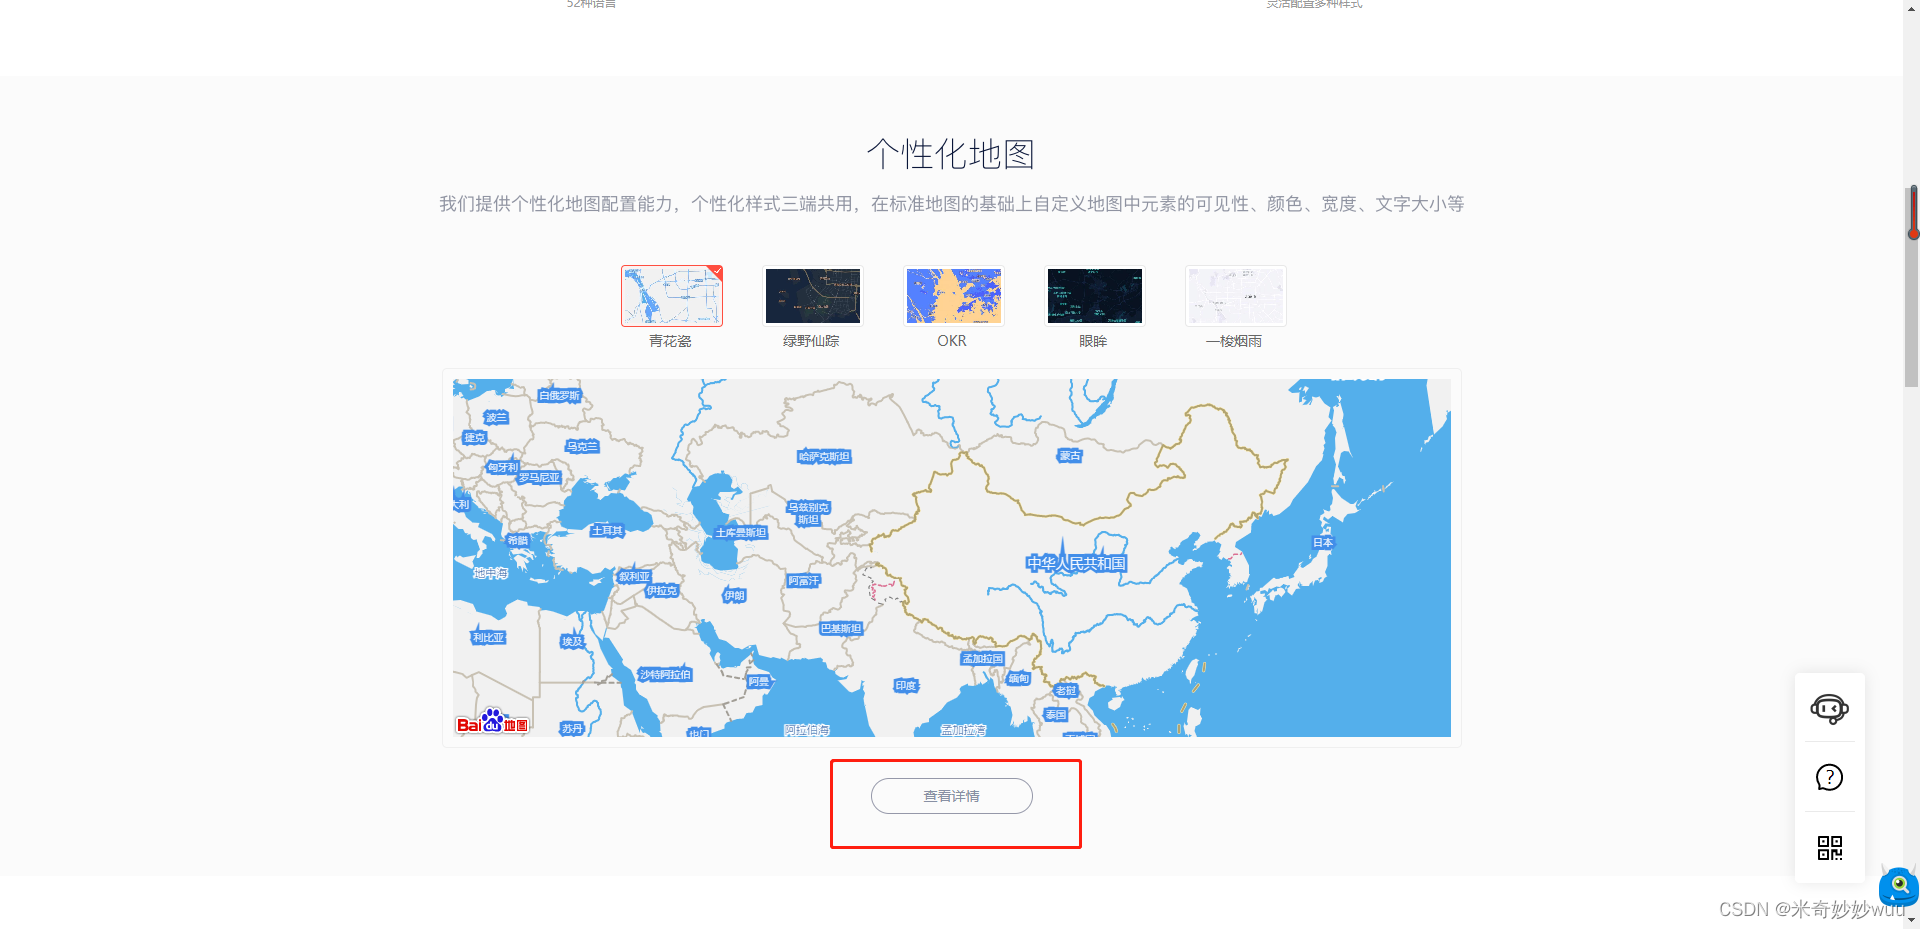
-
进入地图选项,下滑页面,可以看到查看详情
-
在详情页有新建选项,去创建自己的样式,并进行发布
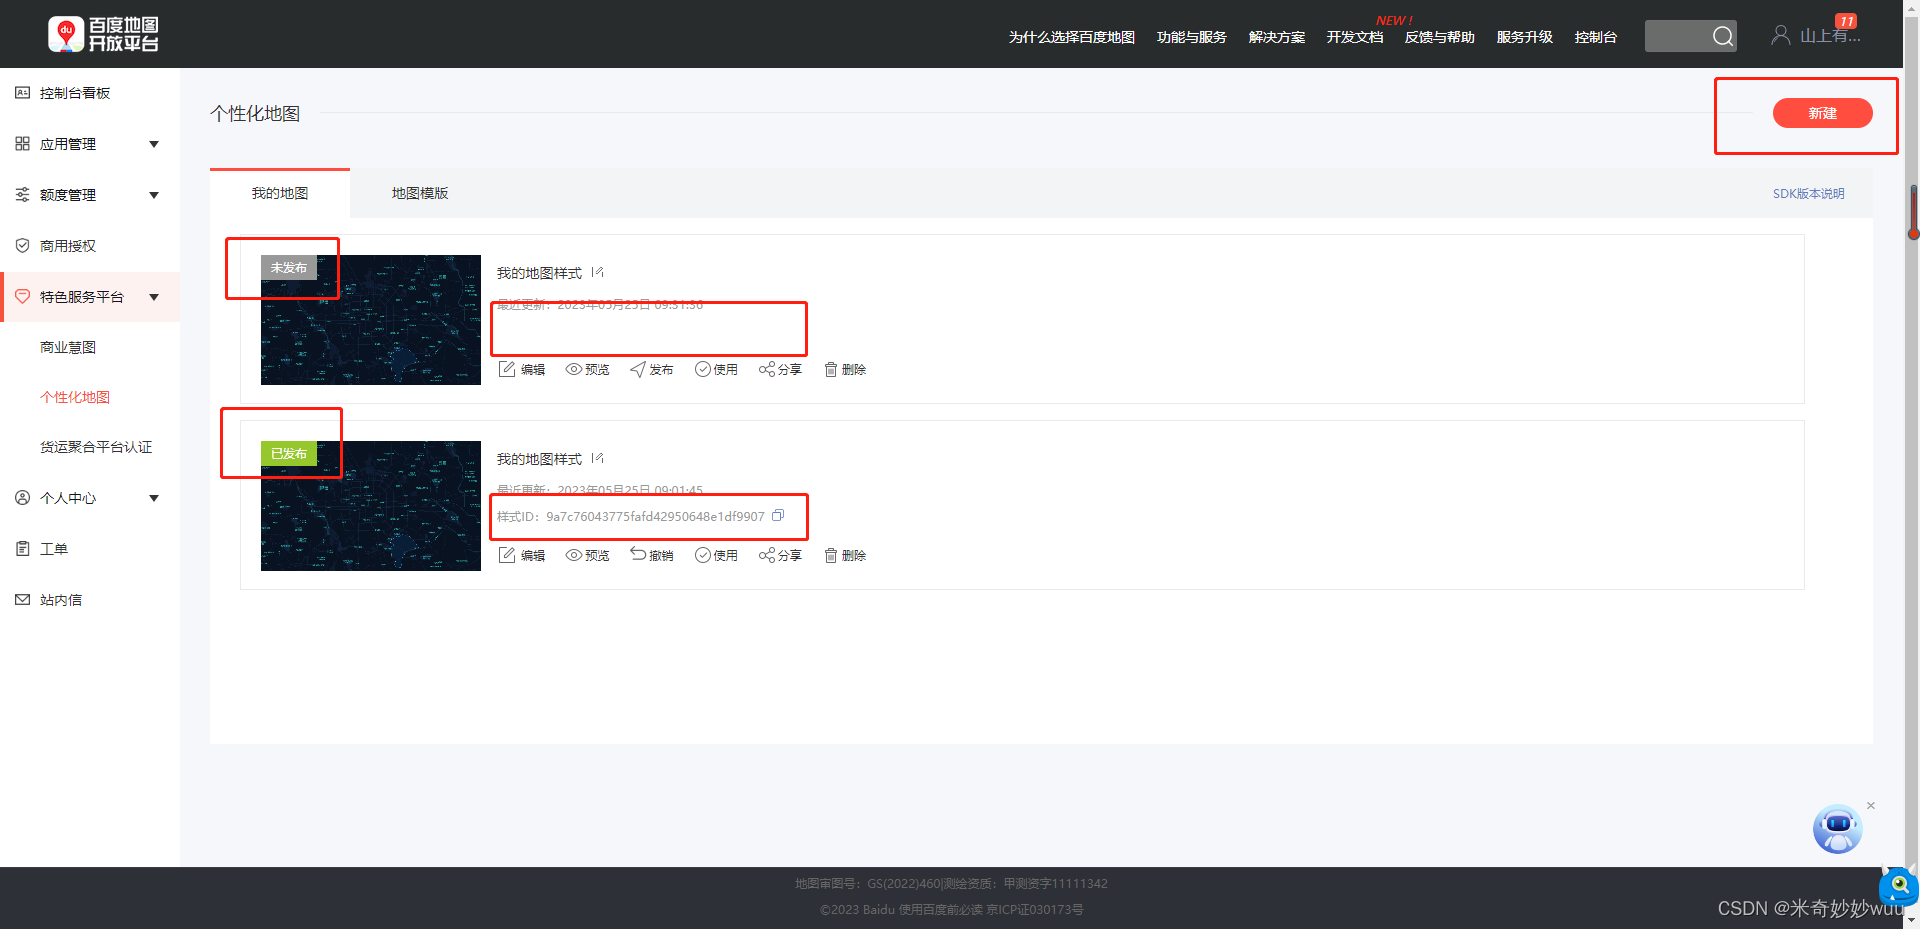
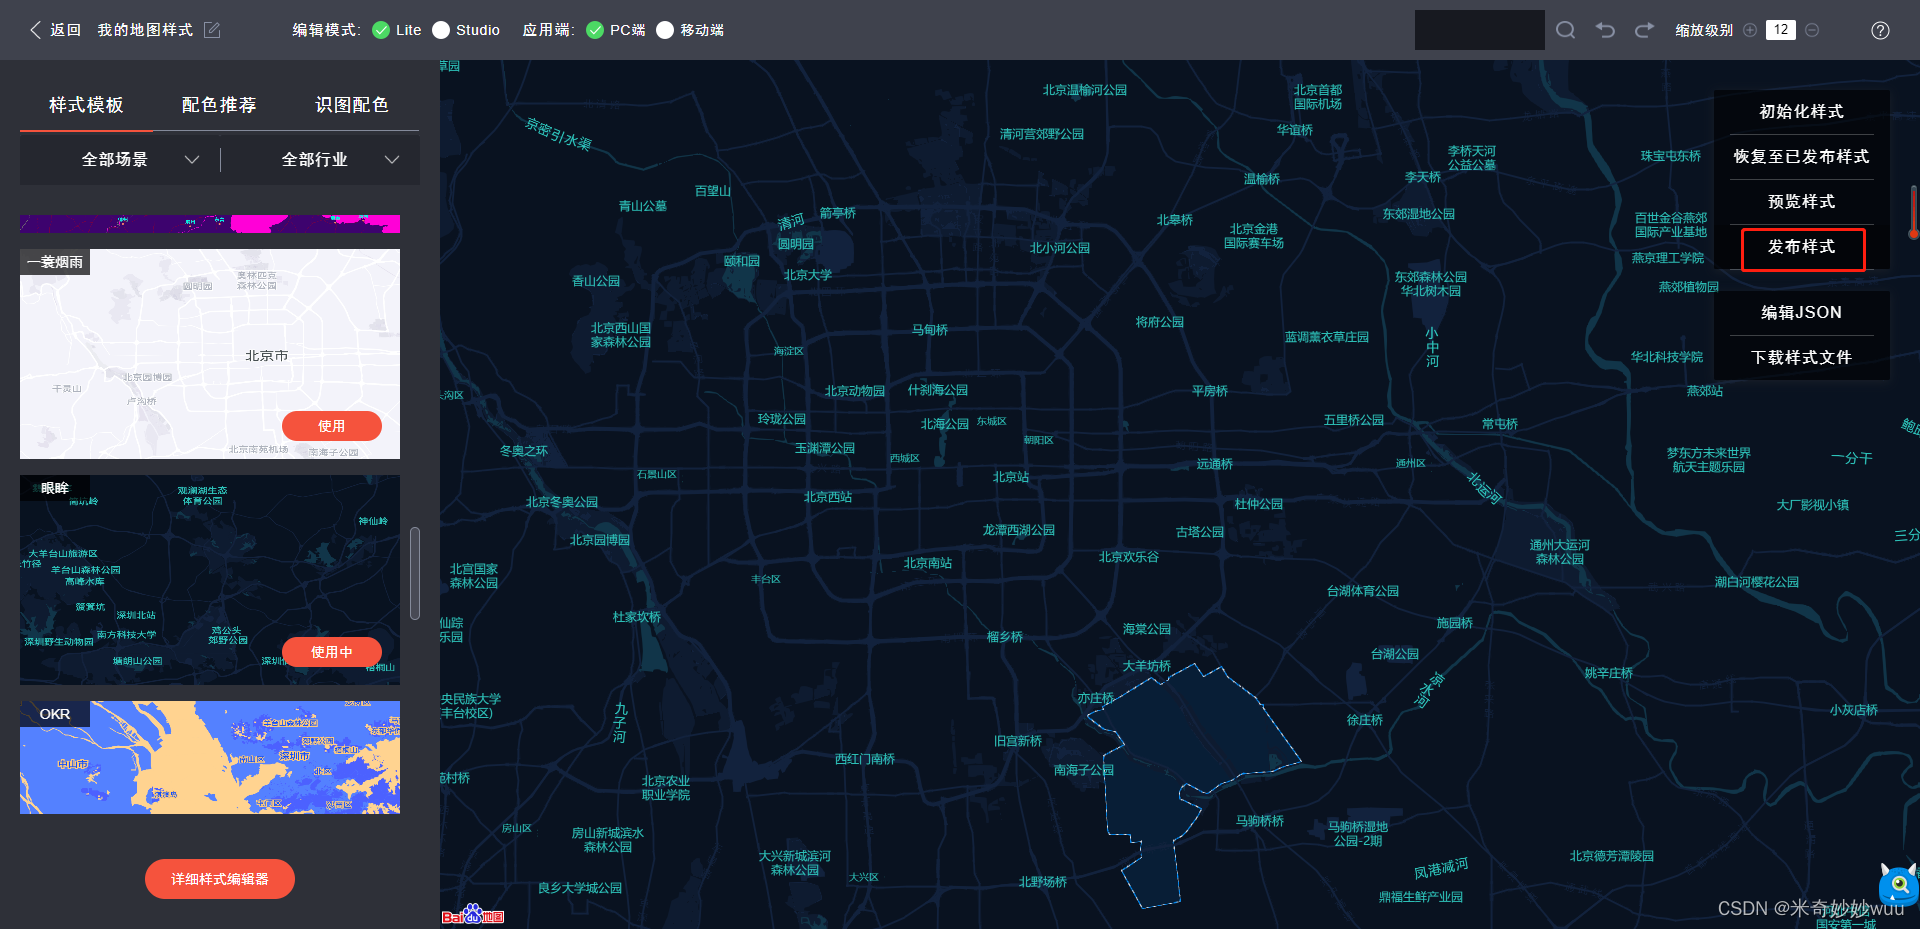
-
点击发布后就能够获取到样式的id,还可以进行修改等操作
-
- 在App组件中进行调用
<template>
  <BaiduMap  />
</template>
<script setup>
import BaiduMap from './components/baiduMap.vue'
</script>
方式二:使用vue-baidu-map-3x插件
提前准备
- vue-baidu-map-3x官网
- 百度地图ak
使用方法
- 在项目中安装vue-baidu-map-3x
npm i vue-baidu-map-3x
- 在/src/main.js中引入
import { createApp } from 'vue'
import BaiduMap from 'vue-baidu-map-3x'
import App from './App.vue'
const app = createApp(App);
app.use(BaiduMap, {
    ak: "IszZX5ST6*********************"  //使用自己的ak
})
app.mount('#app')
- 在 \src\echarts\MyMap.vue中使用(样式功能等可参照 vue-baidu-map-3x官网)
<template>
  <div>
    <baidu-map
      class="map"
      :center="{ lng: 116.404, lat: 39.915 }"
      :zoom="14"
      @mousemove="syncPolyline"
      @click="paintPolyline"
      @rightclick="newPolyline"
    >
      <bm-control>
        <button @click.stop="toggle">
          {{ polyline.editing ? "停止绘制" : "开始绘制" }}
        </button>
      </bm-control>
      <bm-polyline
        :path="path"
        v-for="path of polyline.paths"
        :key="path"
      ></bm-polyline>
    </baidu-map>
  </div>
</template>

<script setup>
import { ref, toRef } from "vue";

const polyline = ref({
  editing: false,
  paths: [],
});

const toggle = (name) => {
  polyline.value.editing = !polyline.value.editing;
};

const syncPolyline = (e) => {
  if (!polyline.value.editing) {
    return;
  }

  if (!polyline.value.paths.length) {
    return;
  }
  const path = polyline.value.paths[polyline.value.paths.length - 1];
  if (!path.length) {
    return;
  }
  if (path.length === 1) {
    polyline.value.paths[polyline.value.paths.length - 1].push(e.point);
  }
  polyline.value.paths[polyline.value.paths.length - 1][path.length - 1] =
    e.point;
};

const newPolyline = (e) => {
  if (!polyline.value.editing) {
    return;
  }
  if (!polyline.value.paths.length) {
    polyline.value.paths.push([]);
  }
  const path = polyline.value.paths[polyline.value.paths.length - 1];
  path.pop();
  if (path.length) {
    polyline.value.paths.push([]);
  }
};

const paintPolyline = (e) => {
  if (!polyline.value.editing) {
    return;
  }
  !polyline.value.paths.length && polyline.value.paths.push([]);
  polyline.value.paths[polyline.value.paths.length - 1].push(e.point);
};
</script>

<style>
.map {
  width: 400px;
  height: 100%;
}
</style>


 6379
6379


 被折叠的 条评论
为什么被折叠?
被折叠的 条评论
为什么被折叠?
 到【灌水乐园】发言


