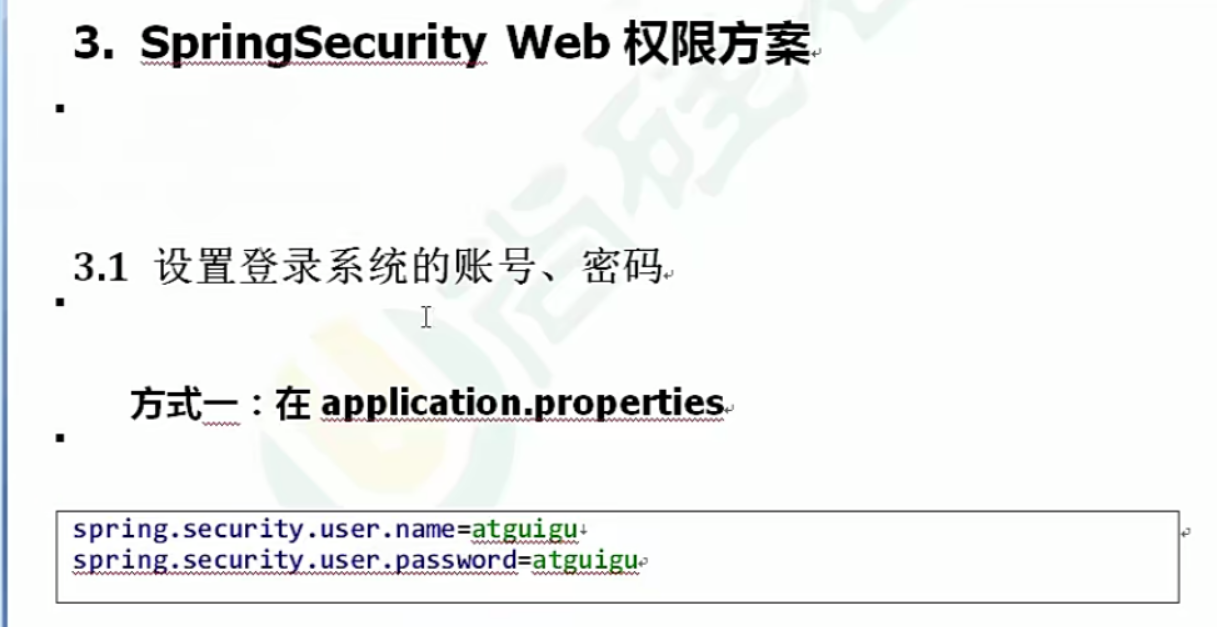
#配置文件方式
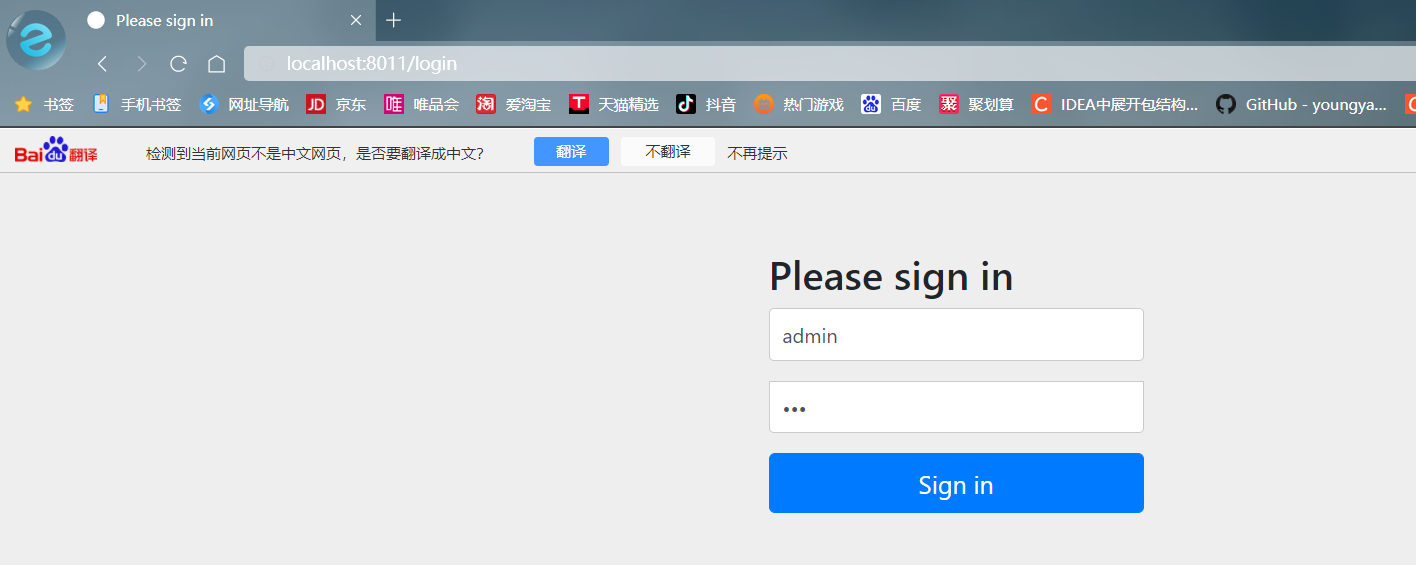
server:
  port: 8011
spring:
  security:
    user:
      name: admin
      password: 123
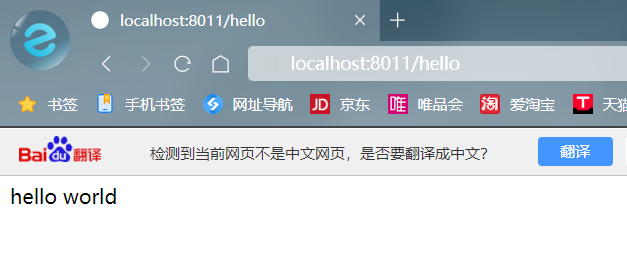
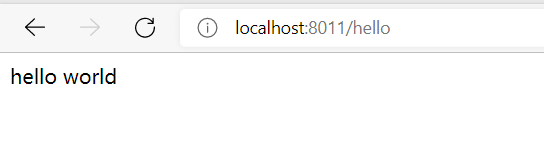
@RestController
public class helloController {
    @RequestMapping("/hello")
    public String hello(){
        return "hello world";
    }
}
#编写类实现接口
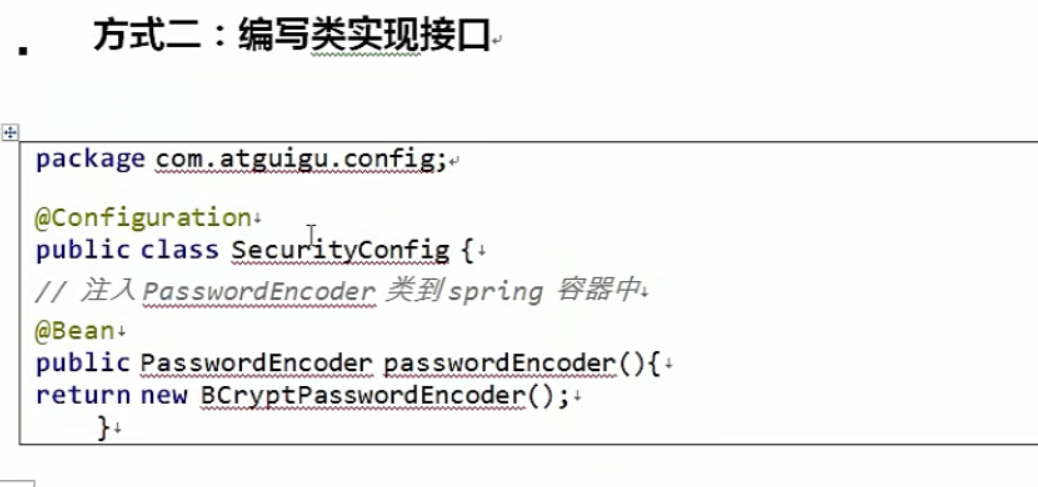
 @Configuration
public class securityConfig extends WebSecurityConfigurerAdapter {
    @Override
    protected void configure(AuthenticationManagerBuilder auth) throws Exception {
        //auth可以设置用户名和密码
        BCryptPasswordEncoder bCryptPasswordEncoder = new BCryptPasswordEncoder();//加密
        String encode = bCryptPasswordEncoder.encode("123456");
        auth.inMemoryAuthentication().withUser("root").password(encode).roles("admin");
    }
    @Bean //注册编码器,不注册会报错
    PasswordEncoder passwordEncoder(){
        return new BCryptPasswordEncoder();
    }
}

#自定义实现类
@Service("userDetailsService") //当前对象注入容器时的名称
public class myUserDetailsService implements UserDetailsService {
    @Override
    public UserDetails loadUserByUsername(String username) throws UsernameNotFoundException {
        List<GrantedAuthority> auths = AuthorityUtils.commaSeparatedStringToAuthorityList("role");
        return new User("boy",new BCryptPasswordEncoder().encode("123"),auths);
    }
}
@Configuration
public class securityConfig1 extends WebSecurityConfigurerAdapter {
    @Autowired
    private UserDetailsService userDetailsService;
    @Override
    protected void configure(AuthenticationManagerBuilder auth) throws Exception {
        auth.userDetailsService(userDetailsService).passwordEncoder(passwordEncoder());//填入自定义的实现类
    }
    @Bean
    PasswordEncoder passwordEncoder(){
        return new BCryptPasswordEncoder();
    }
}


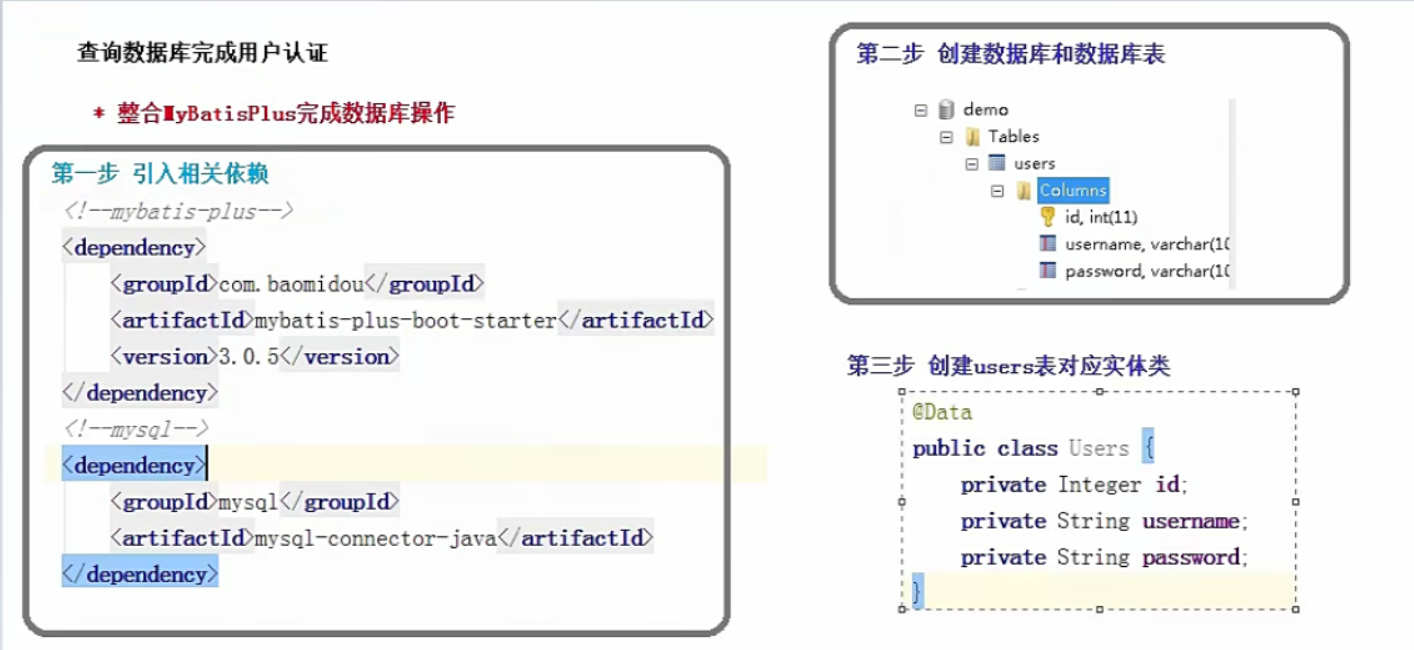
#查询数据库完成认证
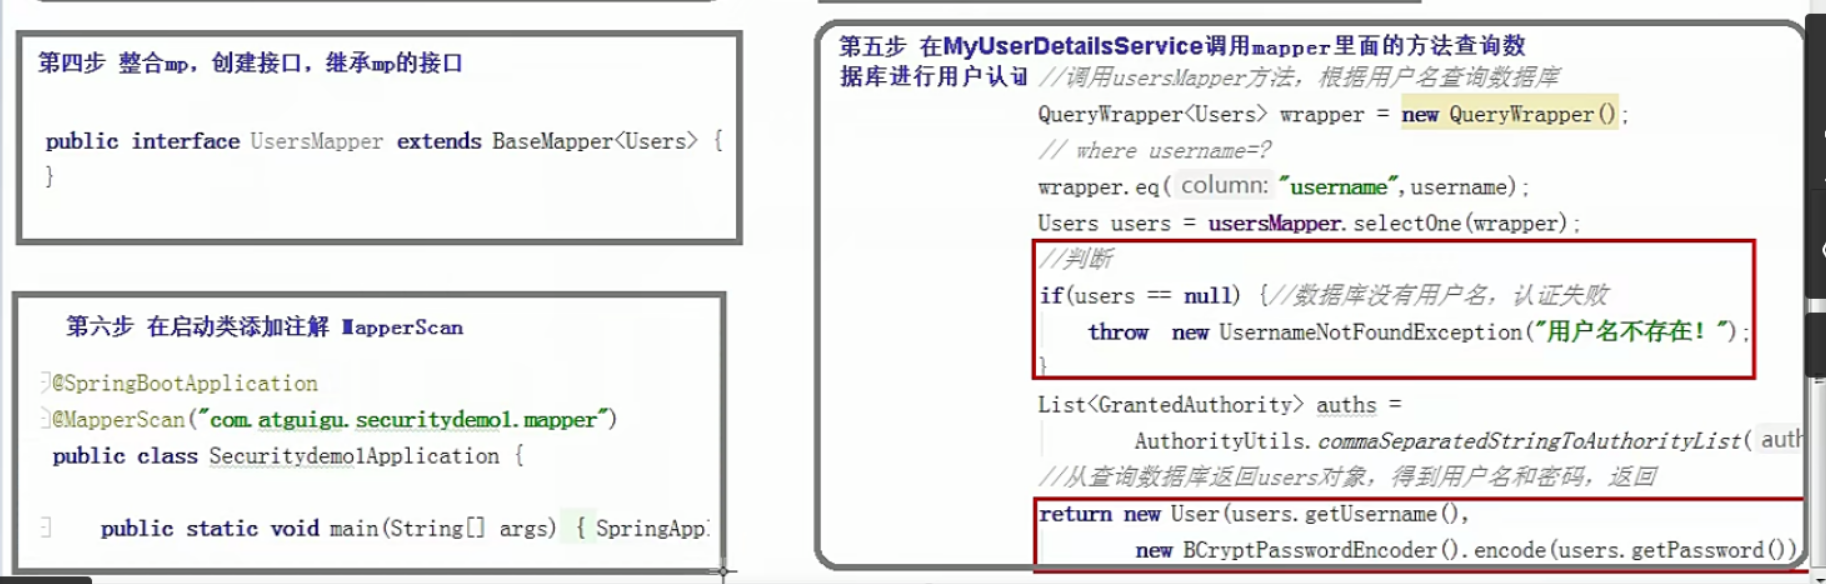
@SpringBootApplication
@MapperScan("com.malred.security.mappers")
public class SecuritySggApplication {
    public static void main(String[] args) {
        SpringApplication.run(SecuritySggApplication.class, args);
    }
}
spring:
  datasource:
    driver-class-name: com.mysql.cj.jdbc.Driver #boot2.2开始,默认支持mysql8,需要加上cj
    username: root
    password:
    url: jdbc:mysql://localhost:5408/demo
@Repository
public interface userMapper extends BaseMapper<user> {
}
@Repository
public interface userMapper extends BaseMapper<user> {
}
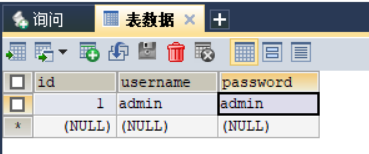
@Data
@TableName("columns") //表名为columns
public class user {
    private String username;
    private String password;
    private Integer id;
}
@Service("userDetailsService") //当前对象注入容器时的名称
public class myUserDetailsService implements UserDetailsService {
@Autowired
private com.malred.security.mappers.userMapper userMapper;
@Override
public UserDetails loadUserByUsername(String username) throws UsernameNotFoundException {
//根据用户名来查询数据库
QueryWrapper<user> wrapper = new QueryWrapper<>();
wrapper.eq("username",username);
user user = userMapper.selectOne(wrapper);
//判断是否存在
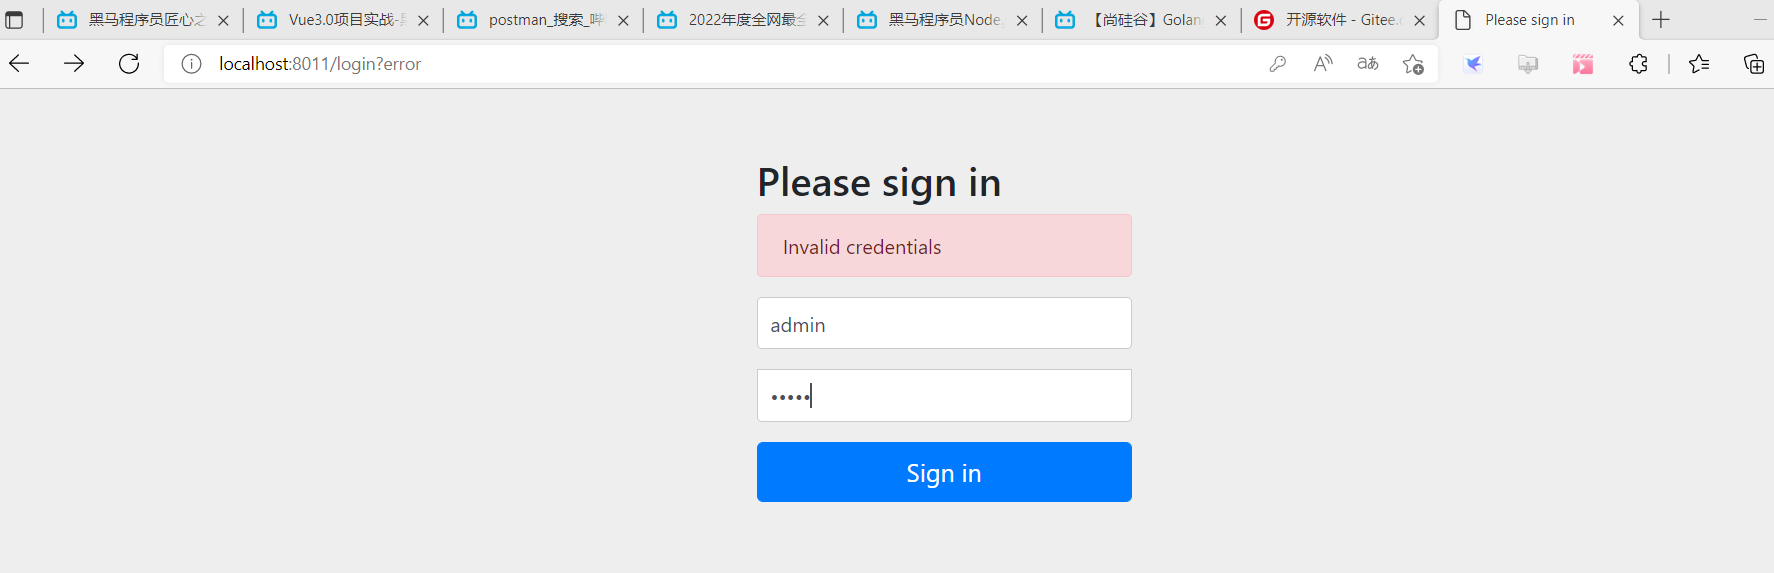
if(user==null) throw new UsernameNotFoundException("用户名不存在");//抛出异常
//权限集合
List<GrantedAuthority> auths = AuthorityUtils.commaSeparatedStringToAuthorityList("role");
//返回一个认证成功的用户信息
return new User(user.getUsername(),new BCryptPasswordEncoder().encode(user.getPassword()),auths);
}
}

#自定义登录页面
修改配置类
@Configuration
public class securityConfig1 extends WebSecurityConfigurerAdapter {
    @Autowired
    private UserDetailsService userDetailsService;

    @Override
    protected void configure(AuthenticationManagerBuilder auth) throws Exception {
        auth.userDetailsService(userDetailsService).passwordEncoder(passwordEncoder());//填入自定义的实现类
    }

    @Bean
    PasswordEncoder passwordEncoder() {
        return new BCryptPasswordEncoder();
    }

    @Override
    protected void configure(HttpSecurity http) throws Exception {
        http.formLogin() //自定义登录页面
                .loginPage("/login.html") //跳转到自己的登录页面,只能是接口
                .loginProcessingUrl("/user/login")  //登录访问路径(表单提交到哪个controller),security会自动处理
                .defaultSuccessUrl("/test/index").permitAll() //登录成功后跳转到哪
                .and().authorizeRequests() //哪些需要认证才能访问,哪些不需要
                .antMatchers( "/user/login", "/hello").permitAll() //访问这些路径的时候不需要认证
                .anyRequest().authenticated() //表示其他所有请求都需要认证
                .and().csrf().disable(); //关闭csrf的认知防护
    }
}
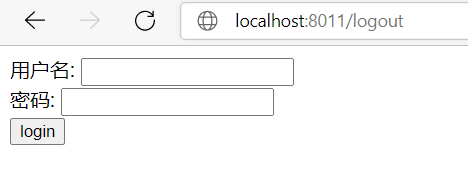
写需要的页面
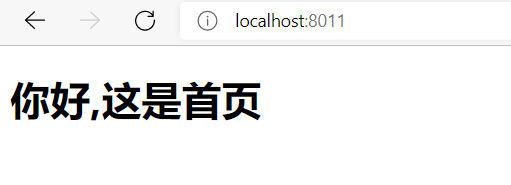
<!DOCTYPE html>
<html lang="zh_CN">
<head>
    <meta charset="UTF-8">
    <title>Title</title>
</head>
<body>
<h1>你好,这是首页</h1>
</body>
</html>
<!DOCTYPE html>
<html lang="zh_CN">
<head>
<meta charset="UTF-8">
<title>Title</title>
</head>
<body>
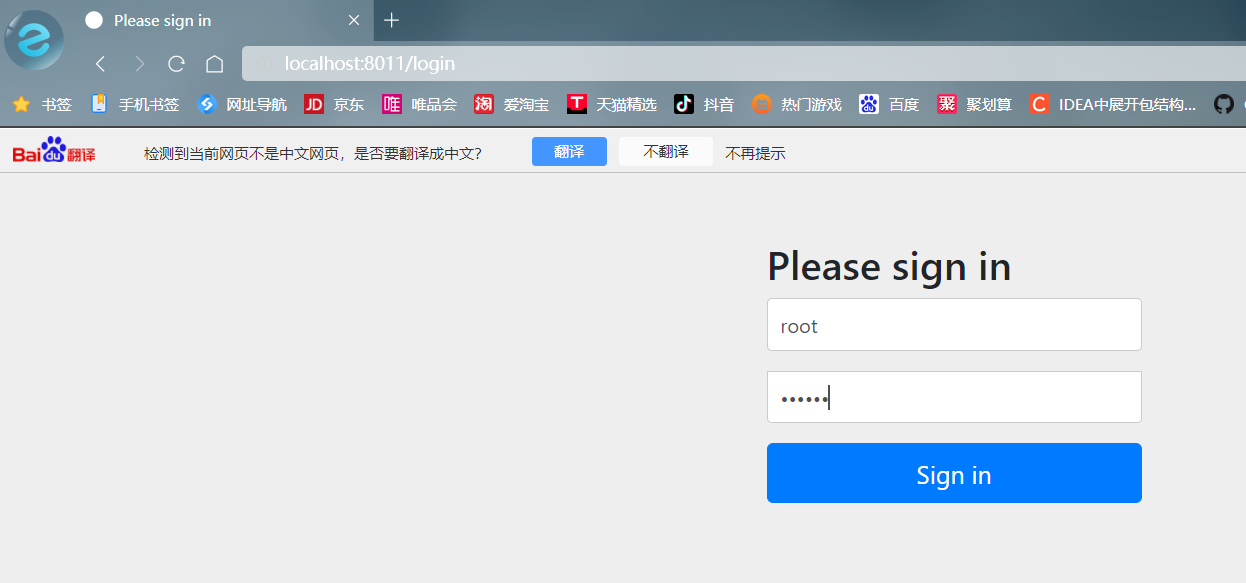
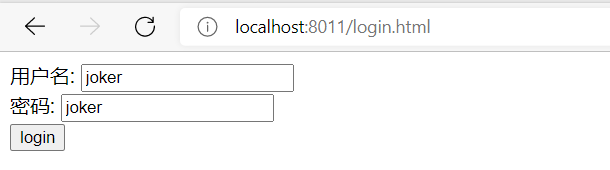
<form action="/user/login" method="post">
<!--必须叫username和password,否则security不能识别 -->
用户名: <input type="text" name="username"> <br>
密码: <input type="text" name="password"> <br>
<input type="submit" value="login">
</form>
</body>
</html>
接口
@Controller
@RequestMapping("/test")
public class testController {
    @RequestMapping("/index")
    public String login(){
        return "index";
    }
}


 496
496


 被折叠的 条评论
为什么被折叠?
被折叠的 条评论
为什么被折叠?
 到【灌水乐园】发言


