


如果你也是看准了Python,想自学Python,在这里为大家准备了丰厚的免费学习大礼包,带大家一起学习,给大家剖析Python兼职、就业行情前景的这些事儿。
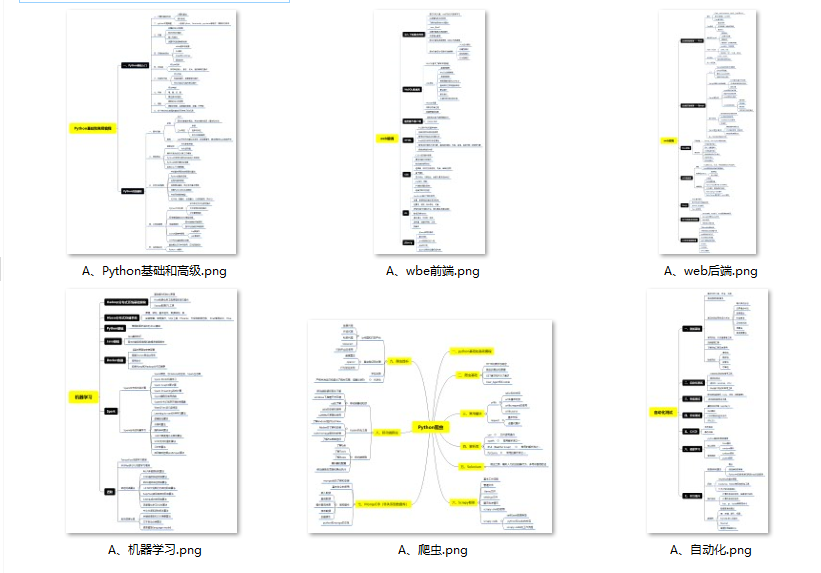
一、Python所有方向的学习路线
Python所有方向路线就是把Python常用的技术点做整理,形成各个领域的知识点汇总,它的用处就在于,你可以按照上面的知识点去找对应的学习资源,保证自己学得较为全面。

二、学习软件
工欲善其必先利其器。学习Python常用的开发软件都在这里了,给大家节省了很多时间。

三、全套PDF电子书
书籍的好处就在于权威和体系健全,刚开始学习的时候你可以只看视频或者听某个人讲课,但等你学完之后,你觉得你掌握了,这时候建议还是得去看一下书籍,看权威技术书籍也是每个程序员必经之路。

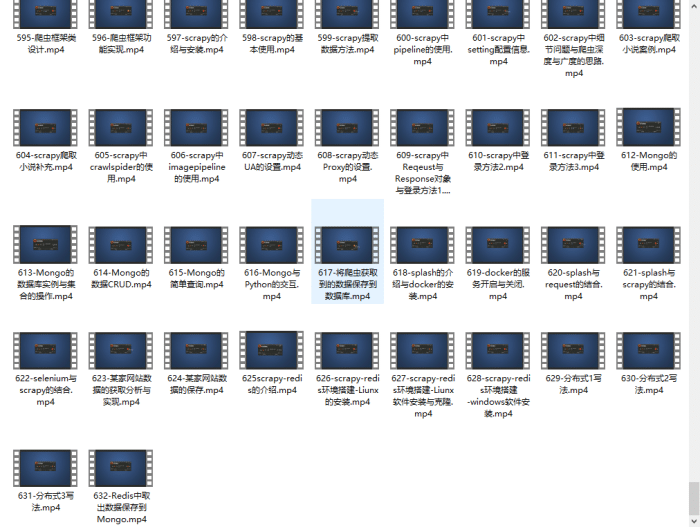
四、入门学习视频
我们在看视频学习的时候,不能光动眼动脑不动手,比较科学的学习方法是在理解之后运用它们,这时候练手项目就很适合了。

四、实战案例
光学理论是没用的,要学会跟着一起敲,要动手实操,才能将自己的所学运用到实际当中去,这时候可以搞点实战案例来学习。

五、面试资料
我们学习Python必然是为了找到高薪的工作,下面这些面试题是来自阿里、腾讯、字节等一线互联网大厂最新的面试资料,并且有阿里大佬给出了权威的解答,刷完这一套面试资料相信大家都能找到满意的工作。

成为一个Python程序员专家或许需要花费数年时间,但是打下坚实的基础只要几周就可以,如果你按照我提供的学习路线以及资料有意识地去实践,你就有很大可能成功!
最后祝你好运!!!
网上学习资料一大堆,但如果学到的知识不成体系,遇到问题时只是浅尝辄止,不再深入研究,那么很难做到真正的技术提升。
一个人可以走的很快,但一群人才能走的更远!不论你是正从事IT行业的老鸟或是对IT行业感兴趣的新人,都欢迎加入我们的的圈子(技术交流、学习资源、职场吐槽、大厂内推、面试辅导),让我们一起学习成长!
可以自动从摄像头中抠取人脸图片存储到本地;
根据抠取的 / 已有的同一个人多张人脸图片提取128D特征值,然后计算该人的128D特征均值;
然后和摄像头中实时获取到的人脸提取出的特征值,计算欧氏距离,判定是否为同一张人脸;
效果如下(摄像头认出来我是default_person预设的人脸 / 另一个人不是预设人脸显示diff):

图1 摄像头人脸识别效果gif
1.总体流程
先说下 人脸检测 (face detection) 和 人脸识别 (face recognition) ,前者是达到检测出场景中人脸的目的就可以了,而后者不仅需要检测出人脸,还要和 已有人脸数据进行比对 ,识别出是否在数据库中,或者进行身份标注之类处理,人脸检测和人脸识别两者有时候可能会被理解混淆;
我的之前一些项目都是用dlib做人脸检测这块,这个项目想要实现的功能是人脸识别功能,借助的是 dlib官网中 face_recognition.py这个例程 (link: http://dlib.net/face_recognition.py.html);
核心在于 利用 “dlib_face_recognition_resnet_model_v1.dat” 这个model,提取 人脸图像的128D特征 ,然后比对不同人脸图片的128D特征,设定阈值 计算欧氏距离 来判断是否为同一张脸;
1 # face recognition model, the object maps human faces into 128D vectors
2 facerec = dlib.face_recognition_model_v1("dlib\_face\_recognition\_resnet\_model\_v1.dat")
3
4 shape = predictor(img, dets[0])
5 face_descriptor = facerec.compute_face_descriptor(img, shape)
 # face recognition model, the object maps human faces into 128D vectors
2 facerec = dlib.face_recognition_model_v1("dlib\_face\_recognition\_resnet\_model\_v1.dat")
3
4 shape = predictor(img, dets[0])
5 face_descriptor = facerec.compute_face_descriptor(img, shape)

图2 总体设计流程
2.源码介绍
主要有 get_face_from_camera.py, get_features_into_CSV.py 和 face_reco_from_camera.py这三个py文件;
2.1 get_face_from_camera.py / 采集构建XXX人脸数据
人脸识别需要将 提取到的图像数据 和 已有图像数据 进行比对分析,所以这个py文件实现的功能就是 采集构建XXX的人脸数据 ;
程序会生成一个窗口,显示调用的摄像头实时获取的图像(关于摄像头的调用方式可以参考我的另一博客 http://www.cnblogs.com/AdaminXie/p/8472743.html );
按s键可以保存当前视频流中的人脸图像,保存的路径由 path_save = “xxxx/get_from_camera/” 规定;
按q键退出窗口;
摄像头的调用是利用opencv库的 cv2.VideoCapture(0), 此处参数为0代表调用的是笔记本的默认摄像头,你也可以让它调用传入已有视频文件;

图3 get_face_from_camera.py 的界面
这样的话,你就可以在 path_save指定的目录下得到一组捕获到的人脸;

图4 捕获到的一组人脸
源码如下:
  1 # 2018-5-11
  2 # By TimeStamp
  3 # cnblogs: http://www.cnblogs.com/AdaminXie
  4
  5 **import** dlib  # 人脸识别的库dlib
  6 **import** numpy **as** np  # 数据处理的库numpy
  7 **import** cv2  # 图像处理的库OpenCv
  8
  9 # dlib预测器
 10 detector = dlib.get_frontal_face_detector()
 11 predictor = dlib.shape_predictor('shape\_predictor\_68\_face\_landmarks.dat')
 12
 13 # 创建cv2摄像头对象
 14 cap = cv2.VideoCapture(0)
 15
 16 # cap.set(propId, value)
 17 # 设置视频参数,propId设置的视频参数,value设置的参数值
 18 cap.set(3, 480)
 19
 20 # 截图screenshoot的计数器
 21 cnt_ss = 0
 22
 23 # 人脸截图的计数器
 24 cnt_p = 0
 25
 26 # 保存
 27 path_save = "F:/code/python/P\_dlib\_face\_reco/data/get\_from\_camera/"
 28
 29 # cap.isOpened() 返回true/false 检查初始化是否成功
 30 **while** cap.isOpened():
 31
 32     # cap.read()
 33     # 返回两个值:
 34     # 一个布尔值true/false,用来判断读取视频是否成功/是否到视频末尾
 35     # 图像对象,图像的三维矩阵q
 36     flag, im_rd = cap.read()
 37
 38     # 每帧数据延时1ms,延时为0读取的是静态帧
 39     kk = cv2.waitKey(1)
 40
 41     # 取灰度
 42     img_gray = cv2.cvtColor(im_rd, cv2.COLOR_RGB2GRAY)
 43
 44     # 人脸数rects
 45     rects = detector(img_gray, 0)
 46
 47     # print(len(rects))
 48
 49     # 待会要写的字体
 50     font = cv2.FONT_HERSHEY_SIMPLEX
 51
 52     **if** (len(rects) != 0):
 53         # 检测到人脸
 54
 55         # 矩形框
 56         **for** k, d **in** enumerate(rects):
 57
 58             # 计算矩形大小
 59             # (x,y), (宽度width, 高度height)
 60             pos_start = tuple([d.left(), d.top()])
 61             pos_end = tuple([d.right(), d.bottom()])
 62
 63             # 计算矩形框大小
 64             height = d.bottom() - d.top()
 65             width = d.right() - d.left()
 66
 67             # 根据人脸大小生成空的图像
 68             im_blank = np.zeros((height, width, 3), np.uint8)
 69
 70             im_rd = cv2.rectangle(im_rd, tuple([d.left(), d.top()]), tuple([d.right(), d.bottom()]), (0, 255, 255), 2)
 71             im_blank = np.zeros((height, width, 3), np.uint8)
 72
 73             # 保存人脸到本地
 74             **if** (kk == ord('s')):
 75                 cnt_p += 1
 76                 **for** ii **in** range(height):
 77                     **for** jj **in** range(width):
 78                         im_blank[ii][jj] = im_rd[d.top() + ii][d.left() + jj]
 79                 print(path_save + "img\_face\_" + str(cnt_p) + ".jpg")
 80                 cv2.imwrite(path_save + "img\_face\_" + str(cnt_p) + ".jpg", im_blank)
 81         cv2.putText(im_rd, "faces: " + str(len(rects)), (20, 50), font, 1, (0, 0, 255), 1, cv2.LINE_AA)
 82
 83     **else**:
 84         # 没有检测到人脸
 85         cv2.putText(im_rd, "no face", (20, 50), font, 1, (0, 0, 255), 1, cv2.LINE_AA)
 86
 87     # 添加说明
 88     im_rd = cv2.putText(im_rd, "s: save face", (20, 400), font, 0.8, (255, 255, 255), 1, cv2.LINE_AA)
 89     im_rd = cv2.putText(im_rd, "q: quit", (20, 450), font, 0.8, (255, 255, 255), 1, cv2.LINE_AA)
 90
 91     # 按下q键退出
 92     **if** (kk == ord('q')):
 93         **break**
 94
 95     # 窗口显示
 96     cv2.imshow("camera", im_rd)
 97
 98 # 释放摄像头
 99 cap.release()
100
101 # 删除建立的窗口
102 cv2.destroyAllWindows()
1 # 2018-5-11
  2 # By TimeStamp
  3 # cnblogs: http://www.cnblogs.com/AdaminXie
  4
  5 **import** dlib  # 人脸识别的库dlib
  6 **import** numpy **as** np  # 数据处理的库numpy
  7 **import** cv2  # 图像处理的库OpenCv
  8
  9 # dlib预测器
 10 detector = dlib.get_frontal_face_detector()
 11 predictor = dlib.shape_predictor('shape\_predictor\_68\_face\_landmarks.dat')
 12
 13 # 创建cv2摄像头对象
 14 cap = cv2.VideoCapture(0)
 15
 16 # cap.set(propId, value)
 17 # 设置视频参数,propId设置的视频参数,value设置的参数值
 18 cap.set(3, 480)
 19
 20 # 截图screenshoot的计数器
 21 cnt_ss = 0
 22
 23 # 人脸截图的计数器
 24 cnt_p = 0
 25
 26 # 保存
 27 path_save = "F:/code/python/P\_dlib\_face\_reco/data/get\_from\_camera/"
 28
 29 # cap.isOpened() 返回true/false 检查初始化是否成功
 30 **while** cap.isOpened():
 31
 32     # cap.read()
 33     # 返回两个值:
 34     # 一个布尔值true/false,用来判断读取视频是否成功/是否到视频末尾
 35     # 图像对象,图像的三维矩阵q
 36     flag, im_rd = cap.read()
 37
 38     # 每帧数据延时1ms,延时为0读取的是静态帧
 39     kk = cv2.waitKey(1)
 40
 41     # 取灰度
 42     img_gray = cv2.cvtColor(im_rd, cv2.COLOR_RGB2GRAY)
 43
 44     # 人脸数rects
 45     rects = detector(img_gray, 0)
 46
 47     # print(len(rects))
 48
 49     # 待会要写的字体
 50     font = cv2.FONT_HERSHEY_SIMPLEX
 51
 52     **if** (len(rects) != 0):
 53         # 检测到人脸
 54
 55         # 矩形框
 56         **for** k, d **in** enumerate(rects):
 57
 58             # 计算矩形大小
 59             # (x,y), (宽度width, 高度height)
 60             pos_start = tuple([d.left(), d.top()])
 61             pos_end = tuple([d.right(), d.bottom()])
 62
 63             # 计算矩形框大小
 64             height = d.bottom() - d.top()
 65             width = d.right() - d.left()
 66
 67             # 根据人脸大小生成空的图像
 68             im_blank = np.zeros((height, width, 3), np.uint8)
 69
 70             im_rd = cv2.rectangle(im_rd, tuple([d.left(), d.top()]), tuple([d.right(), d.bottom()]), (0, 255, 255), 2)
 71             im_blank = np.zeros((height, width, 3), np.uint8)
 72
 73             # 保存人脸到本地
 74             **if** (kk == ord('s')):
 75                 cnt_p += 1
 76                 **for** ii **in** range(height):
 77                     **for** jj **in** range(width):
 78                         im_blank[ii][jj] = im_rd[d.top() + ii][d.left() + jj]
 79                 print(path_save + "img\_face\_" + str(cnt_p) + ".jpg")
 80                 cv2.imwrite(path_save + "img\_face\_" + str(cnt_p) + ".jpg", im_blank)
 81         cv2.putText(im_rd, "faces: " + str(len(rects)), (20, 50), font, 1, (0, 0, 255), 1, cv2.LINE_AA)
 82
 83     **else**:
 84         # 没有检测到人脸
 85         cv2.putText(im_rd, "no face", (20, 50), font, 1, (0, 0, 255), 1, cv2.LINE_AA)
 86
 87     # 添加说明
 88     im_rd = cv2.putText(im_rd, "s: save face", (20, 400), font, 0.8, (255, 255, 255), 1, cv2.LINE_AA)
 89     im_rd = cv2.putText(im_rd, "q: quit", (20, 450), font, 0.8, (255, 255, 255), 1, cv2.LINE_AA)
 90
 91     # 按下q键退出
 92     **if** (kk == ord('q')):
 93         **break**
 94
 95     # 窗口显示
 96     cv2.imshow("camera", im_rd)
 97
 98 # 释放摄像头
 99 cap.release()
100
101 # 删除建立的窗口
102 cv2.destroyAllWindows()
2.2 get_features_into_CSV.py / 提取特征存入CSV
已经得到了XXX的一组人脸图像,现在就需要把他的面部特征提取出来;
这里借助 dlib 库的 face recognition model 人脸识别模型;
 1 # face recognition model, the object maps human faces into 128D vectors
 2 facerec = dlib.face_recognition_model_v1("dlib\_face\_recognition\_resnet\_model\_v1.dat")
 3
 4 # detector to find the faces
 5 detector = dlib.get_frontal_face_detector()
 6
 7 # shape predictor to find the face landmarks
 8 predictor = dlib.shape_predictor("shape\_predictor\_5\_face\_landmarks.dat")
 9
10 # 读取图片
11 img = io.imread(path_img)
12 img_gray = cv2.cvtColor(img, cv2.COLOR_BGR2RGB)
13
14 dets = detector(img_gray, 1)
15 shape = predictor(img_gray, dets[0])
16 face_descriptor = facerec.compute_face_descriptor(img_gray, shape)
1 # face recognition model, the object maps human faces into 128D vectors
 2 facerec = dlib.face_recognition_model_v1("dlib\_face\_recognition\_resnet\_model\_v1.dat")
 3
 4 # detector to find the faces
 5 detector = dlib.get_frontal_face_detector()
 6
 7 # shape predictor to find the face landmarks
 8 predictor = dlib.shape_predictor("shape\_predictor\_5\_face\_landmarks.dat")
 9
10 # 读取图片
11 img = io.imread(path_img)
12 img_gray = cv2.cvtColor(img, cv2.COLOR_BGR2RGB)
13
14 dets = detector(img_gray, 1)
15 shape = predictor(img_gray, dets[0])
16 face_descriptor = facerec.compute_face_descriptor(img_gray, shape)
我们可以看下对于某张图片,face_descriptor的输出结果:
绿色框内是我们的返回128D特征的函数 , 在红色框内调用该函数来计算img_face_13.jpg , 可以看到黄色框中的输出为128D的向量 ;

图5 返回单张图像的128D特征的计算结果
所以我们就可以把path_save中的图像,进行批量的特征计算,然后写入CSV中(利用 write_into_CSV 函数),我这边csv的命名为default_person.csv;
就可以得到行数(人脸数)*128列的一个特征CSV;
这是某个人的人脸特征,然后计算128D特征的均值,求mean(利用 compute_the_mean 函数)
运行的输出结果,这个128D的特征值,就是default_person的特征;
也就是我们 内置/预设的人脸 ,之后 摄像头捕获的人脸将要拿过来和这个特征值进行比对,进行人脸识别的处理 ;
[-0.030892765492592986, 0.13333227054068916, 0.054221574805284799, -0.050820438289328626, -0.056331159841073189, 0.0039378538311116004, -0.044465327145237675, -0.13096490031794497, 0.14215188983239627, -0.084465635842398593, 0.34389359700052363, -0.062936659118062566, -0.24372901571424385, -0.13270603316394905, -0.0472818422866495, 0.15475224742763921, -0.24415240554433121, -0.11213862150907516, 0.032288033417180964, 0.023676671577911628, 0.098508275653186594, -0.010117797634417289, 0.0048202000815715448, -0.014808513420192819, -0.060100053486071135, -0.34934839135722112, -0.095795629448012301, -0.050788544706608117, 0.032316677762489567, -0.099673464894294739, -0.080181991975558434, 0.096361607705291952, -0.1823408101734362, -0.045472671817007815, -0.0066827326326778062, 0.047393877549391041, -0.038414973079373964, -0.039067085930391363, 0.15961966781239761, 0.0092458106136243598, -0.16182226570029007, 0.026322136191945327, -0.0039144184832510193, 0.2492692768573761, 0.19180528427425184, 0.022950534855848866, -0.019220497949342979, -0.15331173021542399, 0.047744840089427795, -0.17038608616904208, 0.026140184680882254, 0.19366614363695445, 0.066497623724372762, 0.07038829416820877, -0.0549700813073861, -0.11961311768544347, -0.032121153940495695, 0.083507449611237169, -0.14934051350543373, 0.011458799806668571, 0.10686114273573223, -0.10744074888919529, -0.04377919611962218, -0.11030520381111848, 0.20804878441910996, 0.093076545941202266, -0.11621182490336268, -0.1991656830436305, 0.10751579348978244, -0.11251544991606161, -0.12237925866716787, 0.058218707869711672, -0.15829276019021085, -0.17670038891466042, -0.2718416170070046, 0.034569320955166689, 0.30443575821424784, 0.061833358712886512, -0.19622498672259481, 0.011373612000361868, -0.050225612756453063, -0.036157087079788507, 0.12961127491373764, 0.13962576616751521, -0.0074232793168017737, 0.020964263007044792, -0.11185114399382942, 0.012502493042694894, 0.17834208513561048, -0.072658227462517586, -0.041312719401168194, 0.25095899873658228, -0.056628625839948654, 0.10285118379090961, 0.046701753217923012, 0.042323612264896691, 0.0036216247826814651, 0.066720707440062574, -0.16388990533979317, -0.0193739396421925, 0.027835704435251261, -0.086023958105789985, -0.05472404568603164, 0.14802298341926776, -0.10644183582381199, 0.098863413851512108, 0.00061285014778963834, 0.062096107555063146, 0.051960245755157973, -0.099548895108072383, -0.058173993112225285, -0.065454461562790375, 0.14721672511414477, -0.25363486848379435, 0.20384312381869868, 0.16890435312923632, 0.097537552447695477, 0.087824966562421697, 0.091438713434495431, 0.093809676797766431, -0.034379941362299417, -0.085149037210564868, -0.24900743130006289, 0.021165960517368819, 0.076710369830068792, -0.0061752907196549996, 0.028413473285342519, -0.029983982541843465]
-0.030892765492592986, 0.13333227054068916, 0.054221574805284799, -0.050820438289328626, -0.056331159841073189, 0.0039378538311116004, -0.044465327145237675, -0.13096490031794497, 0.14215188983239627, -0.084465635842398593, 0.34389359700052363, -0.062936659118062566, -0.24372901571424385, -0.13270603316394905, -0.0472818422866495, 0.15475224742763921, -0.24415240554433121, -0.11213862150907516, 0.032288033417180964, 0.023676671577911628, 0.098508275653186594, -0.010117797634417289, 0.0048202000815715448, -0.014808513420192819, -0.060100053486071135, -0.34934839135722112, -0.095795629448012301, -0.050788544706608117, 0.032316677762489567, -0.099673464894294739, -0.080181991975558434, 0.096361607705291952, -0.1823408101734362, -0.045472671817007815, -0.0066827326326778062, 0.047393877549391041, -0.038414973079373964, -0.039067085930391363, 0.15961966781239761, 0.0092458106136243598, -0.16182226570029007, 0.026322136191945327, -0.0039144184832510193, 0.2492692768573761, 0.19180528427425184, 0.022950534855848866, -0.019220497949342979, -0.15331173021542399, 0.047744840089427795, -0.17038608616904208, 0.026140184680882254, 0.19366614363695445, 0.066497623724372762, 0.07038829416820877, -0.0549700813073861, -0.11961311768544347, -0.032121153940495695, 0.083507449611237169, -0.14934051350543373, 0.011458799806668571, 0.10686114273573223, -0.10744074888919529, -0.04377919611962218, -0.11030520381111848, 0.20804878441910996, 0.093076545941202266, -0.11621182490336268, -0.1991656830436305, 0.10751579348978244, -0.11251544991606161, -0.12237925866716787, 0.058218707869711672, -0.15829276019021085, -0.17670038891466042, -0.2718416170070046, 0.034569320955166689, 0.30443575821424784, 0.061833358712886512, -0.19622498672259481, 0.011373612000361868, -0.050225612756453063, -0.036157087079788507, 0.12961127491373764, 0.13962576616751521, -0.0074232793168017737, 0.020964263007044792, -0.11185114399382942, 0.012502493042694894, 0.17834208513561048, -0.072658227462517586, -0.041312719401168194, 0.25095899873658228, -0.056628625839948654, 0.10285118379090961, 0.046701753217923012, 0.042323612264896691, 0.0036216247826814651, 0.066720707440062574, -0.16388990533979317, -0.0193739396421925, 0.027835704435251261, -0.086023958105789985, -0.05472404568603164, 0.14802298341926776, -0.10644183582381199, 0.098863413851512108, 0.00061285014778963834, 0.062096107555063146, 0.051960245755157973, -0.099548895108072383, -0.058173993112225285, -0.065454461562790375, 0.14721672511414477, -0.25363486848379435, 0.20384312381869868, 0.16890435312923632, 0.097537552447695477, 0.087824966562421697, 0.091438713434495431, 0.093809676797766431, -0.034379941362299417, -0.085149037210564868, -0.24900743130006289, 0.021165960517368819, 0.076710369830068792, -0.0061752907196549996, 0.028413473285342519, -0.029983982541843465]
源码:
1 # 2018-5-11
2 # By TimeStamp
3 # cnblogs: http://www.cnblogs.com/AdaminXie
4
5 # return\_128d\_features() 获取某张图像的128d特征
6 # write\_into\_csv() 将某个文件夹中的图像读取特征兵写入csv
7 # compute\_the\_mean() 从csv中读取128d特征,并计算特征均值
8
9 **import** cv2
10 **import** os
11 **import** dlib
12 **from** skimage **import** io
13 **import** csv
14 **import** numpy **as** np
15 **import** pandas **as** pd
16
17 path_pics = "F:/code/python/P\_dlib\_face\_reco/data/get\_from\_camera/"
18 path_csv = "F:/code/python/P\_dlib\_face\_reco/data/csvs/"
19
20 # detector to find the faces
21 detector = dlib.get_frontal_face_detector()
22
23 # shape predictor to find the face landmarks
24 predictor = dlib.shape_predictor("shape\_predictor\_5\_face\_landmarks.dat")
25
26 # face recognition model, the object maps human faces into 128D vectors
27 facerec = dlib.face_recognition_model_v1("dlib\_face\_recognition\_resnet\_model\_v1.dat")
28
29 # 返回单张图像的128D特征
30 **def** **return\_128d\_features**(path_img):
31 img = io.imread(path_img)
32 img_gray = cv2.cvtColor(img, cv2.COLOR_BGR2RGB)
33 dets = detector(img_gray, 1)
34
35 **if**(len(dets)!=0):
36 shape = predictor(img_gray, dets[0])
37 face_descriptor = facerec.compute_face_descriptor(img_gray, shape)
38 **else**:
39 face_descriptor = 0
40 print("no face")
41
42 # print(face\_descriptor)
43 **return** face_descriptor
44
45 #return\_128d\_features(path\_pics+"img\_face\_13.jpg")
46
47 # 将文件夹中照片特征提取出来,写入csv
48 # 输入input:
49 # path\_pics: 图像文件夹的路径
50 # path\_csv: 要生成的csv路径
51
52 **def** **write\_into\_csv**(path_pics ,path_csv):
53 dir_pics = os.listdir(path_pics)
54
55 **with** open(path_csv, "w", newline="") **as** csvfile:
56 writer = csv.writer(csvfile)
57 **for** i **in** range(len(dir_pics)):
58 # 调用return\_128d\_features()得到128d特征
59 print(path_pics+dir_pics[i])
60 features_128d = return_128d_features(path_pics+dir_pics[i])
61 # print(features\_128d)
62 # 遇到没有检测出人脸的图片跳过
63 **if** features_128d==0:
64 i += 1
65 **else**:
66 writer.writerow(features_128d)
67
68 #write\_into\_csv(path\_pics, path\_csv+"default\_person.csv")
69
70 path_csv_rd = "F:/code/python/P\_dlib\_face\_reco/data/csvs/default\_person.csv"
71
72 # 从csv中读取数据,计算128d特征的均值
73 **def** **compute\_the\_mean**(path_csv_rd):
74 column_names = []
75
76 **for** i **in** range(128):
77 column_names.append("features\_" + str(i + 1))
78
79 rd = pd.read_csv(path_csv_rd, names=column_names)
80
81 # 存放128维特征的均值
82 feature_mean = []
83
84 **for** i **in** range(128):
85 tmp_arr = rd["features\_"+str(i+1)]
86 tmp_arr = np.array(tmp_arr)
87
88 # 计算某一个特征的均值
89 tmp_mean = np.mean(tmp_arr)
90
91 feature_mean.append(tmp_mean)
92
93 print(feature_mean)
94 **return** feature_mean
95
96 compute_the_mean(path_csv_rd)
1 # 2018-5-11
2 # By TimeStamp
3 # cnblogs: http://www.cnblogs.com/AdaminXie
4
5 # return\_128d\_features() 获取某张图像的128d特征
6 # write\_into\_csv() 将某个文件夹中的图像读取特征兵写入csv
7 # compute\_the\_mean() 从csv中读取128d特征,并计算特征均值
8
9 **import** cv2
10 **import** os
11 **import** dlib
12 **from** skimage **import** io
13 **import** csv
14 **import** numpy **as** np
15 **import** pandas **as** pd
16
17 path_pics = "F:/code/python/P\_dlib\_face\_reco/data/get\_from\_camera/"
18 path_csv = "F:/code/python/P\_dlib\_face\_reco/data/csvs/"
19
20 # detector to find the faces
21 detector = dlib.get_frontal_face_detector()
22
23 # shape predictor to find the face landmarks
24 predictor = dlib.shape_predictor("shape\_predictor\_5\_face\_landmarks.dat")
25
26 # face recognition model, the object maps human faces into 128D vectors
27 facerec = dlib.face_recognition_model_v1("dlib\_face\_recognition\_resnet\_model\_v1.dat")
28
29 # 返回单张图像的128D特征
30 **def** **return\_128d\_features**(path_img):
31 img = io.imread(path_img)
32 img_gray = cv2.cvtColor(img, cv2.COLOR_BGR2RGB)
33 dets = detector(img_gray, 1)
34
35 **if**(len(dets)!=0):
36 shape = predictor(img_gray, dets[0])
37 face_descriptor = facerec.compute_face_descriptor(img_gray, shape)
38 **else**:
39 face_descriptor = 0
### 最后
Python崛起并且风靡,因为优点多、应用领域广、被大牛们认可。学习 Python 门槛很低,但它的晋级路线很多,通过它你能进入机器学习、数据挖掘、大数据,CS等更加高级的领域。Python可以做网络应用,可以做科学计算,数据分析,可以做网络爬虫,可以做机器学习、自然语言处理、可以写游戏、可以做桌面应用…Python可以做的很多,你需要学好基础,再选择明确的方向。这里给大家分享一份全套的 Python 学习资料,给那些想学习 Python 的小伙伴们一点帮助!
#### 👉Python所有方向的学习路线👈
Python所有方向的技术点做的整理,形成各个领域的知识点汇总,它的用处就在于,你可以按照上面的知识点去找对应的学习资源,保证自己学得较为全面。
#### 👉Python必备开发工具👈
工欲善其事必先利其器。学习Python常用的开发软件都在这里了,给大家节省了很多时间。

#### 👉Python全套学习视频👈
我们在看视频学习的时候,不能光动眼动脑不动手,比较科学的学习方法是在理解之后运用它们,这时候练手项目就很适合了。
#### 👉实战案例👈
学python就与学数学一样,是不能只看书不做题的,直接看步骤和答案会让人误以为自己全都掌握了,但是碰到生题的时候还是会一筹莫展。
因此在学习python的过程中一定要记得多动手写代码,教程只需要看一两遍即可。
#### 👉大厂面试真题👈
我们学习Python必然是为了找到高薪的工作,下面这些面试题是来自阿里、腾讯、字节等一线互联网大厂最新的面试资料,并且有阿里大佬给出了权威的解答,刷完这一套面试资料相信大家都能找到满意的工作。

**[需要这份系统化学习资料的朋友,可以戳这里获取](https://bbs.csdn.net/forums/4304bb5a486d4c3ab8389e65ecb71ac0)**
**一个人可以走的很快,但一群人才能走的更远!不论你是正从事IT行业的老鸟或是对IT行业感兴趣的新人,都欢迎加入我们的的圈子(技术交流、学习资源、职场吐槽、大厂内推、面试辅导),让我们一起学习成长!**
a9c677ac40fc0.png)
#### 👉实战案例👈
学python就与学数学一样,是不能只看书不做题的,直接看步骤和答案会让人误以为自己全都掌握了,但是碰到生题的时候还是会一筹莫展。
因此在学习python的过程中一定要记得多动手写代码,教程只需要看一两遍即可。

#### 👉大厂面试真题👈
我们学习Python必然是为了找到高薪的工作,下面这些面试题是来自阿里、腾讯、字节等一线互联网大厂最新的面试资料,并且有阿里大佬给出了权威的解答,刷完这一套面试资料相信大家都能找到满意的工作。

**[需要这份系统化学习资料的朋友,可以戳这里获取](https://bbs.csdn.net/forums/4304bb5a486d4c3ab8389e65ecb71ac0)**
**一个人可以走的很快,但一群人才能走的更远!不论你是正从事IT行业的老鸟或是对IT行业感兴趣的新人,都欢迎加入我们的的圈子(技术交流、学习资源、职场吐槽、大厂内推、面试辅导),让我们一起学习成长!**


 5589
5589


 被折叠的 条评论
为什么被折叠?
被折叠的 条评论
为什么被折叠?
 到【灌水乐园】发言


