


1.readFile读取模块
格式如下:
const fs = require("fs")
fs.readFile(路径地址,编码格式,回调函数)
// fs.readFile(path[,options], callback) 读取格式如下
const fs = require('fs');
fs.readFile("1.txt", "utf-8", function(err, data) {
if (err) {
console.log(err);
} else {
console.log(data);
}
});2.writeFile写入模块(这里与读取模块相似)
const fs = require("fs")
fs.readFile(路径地址,内容,回调函数)
// fs.readFile(path[,options], callback) 读取格式如下
const fs = require('fs');
fs.writeFile("2.txt","Hello World", function(err) {
if (err) {
console.log(err);
} else {
console.log("写入成功");
}
});3.dome 实现(成绩整理)
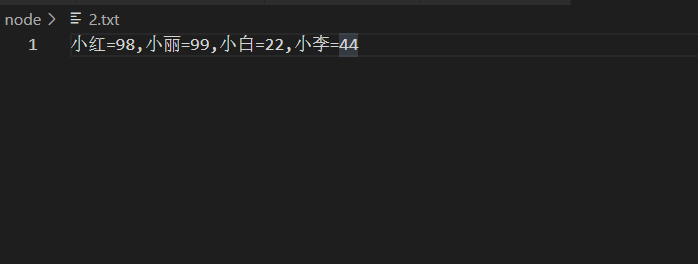
先准备一个成绩2.txt(注意需要用逗号隔开,方便处理)
const fs = require('fs')

fs.readFile('2.txt', 'utf-8', function (err, dataStr) {
    if (err) {
        return console.log(err)
    }
    console.log(dataStr)
    const arrOld = dataStr.split(',')
    console.log(arrOld)
    const arrNew = []
    arrOld.forEach(item => {
        arrNew.push(item.replace('=', ':'))
    })
    console.log(arrNew);
    const newStr = arrNew.join('\r\n')
    console.log(newStr);
    fs.writeFile("1.txt", newStr, function (err) {
        if (err) {
            console.log(err);
        } else {
            console.log("写入成功");
        }
    });
});
这里利用了数组的一些知识,不知道的可以去补习一下,效果如下:

4.path.join(__dirname)路径优化
// 获取路径中的文件路径
const path = require("path")
const fs = require("fs")
fs.readFile(path.join(__dirname, "1.txt"),"utf-8",function(err,data){
    if(err){
        console.log(err)
    }else{
        console.log(data + "获取文件成功~~")
    }
})这里要注意的是__dirname表示的是当前文件所在的路径
const fpath= "node/1.txt"
// 获取路径中的文件路径名
const fullName = path.basename(fpath)
// 获得文件名(不带后缀)
const name = path.basename(fpath,path.extname(fpath))
// 获文件后缀名
const extname = path.extname(fpath)
console.log(extname);
console.log(fullName)
console.log(name)
5.dome(拆分含有css.js的html文件到形成各自的文件)
先准备要拆分的html文件
<!DOCTYPE html>
<html lang="en">

<head>
    <meta charset="UTF-8">
    <meta http-equiv="X-UA-Compatible" content="IE=edge">
    <meta name="viewport" content="width=device-width, initial-scale=1.0">
    <title>手风琴案例</title>
    <style>
        .list {
            width: 950px;
            height: 500px;
            margin: 100px auto;
            overflow: hidden;
            position: relative;
        }

        span {
            width: 20px;
            height: 500px;
            border-right: oldlace 1px solid;
            position: absolute;
            cursor: pointer;
        }

        ul {
            margin: 0;
            padding: 0;
        }
        .list1{
            left: 0;
        }
        .list1 span {
            background-color: rgb(82, 143, 236);
        }
        .list2{
            left: 801px;
        }
        .list2 span {
            background-color: rgb(98, 64, 221);
        }
        .list3{
            left: 822px;
        }
        .list3 span {
            background-color: rgb(241, 226, 85);
        }
        .list4{
            left: 843px;
        }
        .list4 span {
            background-color: rgb(48, 194, 68);
        }
        .list5{
            left: 864px;
        }
        .list5 span {
            background-color: rgb(145, 228, 96);
        }
        .list6{
            left: 885px;
        }
        .list6 span {
            background-color: rgb(151, 204, 83);
        }
        .list7{
            left: 906px;
        }
        .list7 span {
            background-color: rgb(201, 190, 42);
        }
        .list8{
            left: 927px;
        }
        .list8 span {
            background-color: rgb(230, 55, 64);
        }
        .list9{
            left: 948px;
        }
        .list9 span {
            background-color: rgb(219, 195, 197);
        }
        li {
            list-style: none;
            position: absolute;
        }

        img {
            width: 800px;
            height: 500px;
            display: block;
        }
    </style>
</head>

<body>
    <div class="list">
        <ul>
            <li class="list1"><span>古银杏公园12</span><img src="image/古银杏公园-12.png" alt=""></li>
            <li class="list2"><span>古银杏公园12</span><img src="image/古银杏公园-15.png" alt=""></li>
            <li class="list3"><span>古银杏公园12</span><img src="image/古银杏公园-26.png" alt=""></li>
            <li class="list4"><span>古银杏公园12</span><img src="image/古银杏公园-29.png" alt=""></li>
            <li class="list5"><span>古银杏公园12</span><img src="image/古银杏公园-30.png" alt=""></li>
            <li class="list6"><span>古银杏公园12</span><img src="image/古银杏公园-32.png" alt=""></li>
            <li class="list7"><span>古银杏公园12</span><img src="image/古银杏公园-34.png" alt=""></li>
            <li class="list8"><span>古银杏公园12</span><img src="image/古银杏公园-59.png" alt=""></li>
            <li class="list9"><span>古银杏公园12</span><img src="image/古银杏公园-62.png" alt=""></li>
        </ul>
    </div>
    <script src="jquery.min.js"></script>
    <script>
        $(document).ready(function () {
            $("ul li").click(function(){
                    $(this).animate({left:$(this).index()*21})
                    $(this).prevAll().each(function(){
                        $(this).animate({left:$(this).index()*21})
                    });
                    $(this).nextAll().each(function(){
                        $(this).animate({left:(950-(9-$(this).index())*21)})
                    })
            })
        })
    </script>
</body>

</html>
代码实现
const fs = require('fs');
const path = require("path")
fs.readFile(path.join(__dirname,"./jquery案例:手风琴动画/手风琴案例.html"),"utf8",(err,data)=>{
    if(err){
        console.log(err);
    }else{
        const regStyle = /<style>[\s\S]*<\/style>/;
        const regJS = /<script>[\s\S]*<\/script>/;
        const CSS = regStyle.exec(data)[0].replace("<style>","").replace("</style>","");
        const JS = regJS.exec(data)[0].replace("<script>","").replace("</script>","");
        const HTML = data.replace(regStyle,"").replace(regJS,"");
        fs.writeFile(path.join(__dirname,"dome05.css"),CSS,(err,data)=>{
            if(err) return console.log(err)
            console.log("写入css成功");
        })
        fs.writeFile(path.join(__dirname,"dome06.js"),JS,(err,data)=>{
            if(err) return console.log(err)
            console.log("写入js成功");
        })
        fs.writeFile(path.join(__dirname,"dome07.html"),HTML,(err,data)=>{
            if(err) return console.log(err)
            console.log("写入html成功");
        })
    }
})
这里设计到一些正则表达式与数组查找与替换的知识,不清楚的可以问问度娘
6.http模块(简单创建服务器)
导入http模块
// 导入http模块
const http = require("http")
创建web服务器实例
// 创建web服务器实例
const server = http.createServer()
监听请求
// 监听请求
server.on("request", (req, res) => {}启动服务器(127.0.0.1默认是本地ip,默认端口80也可省略)
// 启动服务器
server.listen(80,() => {
    console.log("服务器启动成功");
    console.log("http://127.0.0.1:80");
})
简单实例如下
//  导入http模块
const http = require('http');
//  创建web服务器实例
const Server = http.createServer();
//  监听请求
Server.on('request', (req, res) => {
    res.writeHead(200, { 'Content-Type': 'text/html;charset=utf-8' });
    res.end('<h1>Hello World</h1>');
})
//  启动服务器
Server.listen(80, () => {
    console.log('服务器启动成功');
    console.log('http://localhost:80');
})
7.dome(制作简单的本地服务器)
// 导入http模块
const http = require("http")
// 导入fs模块
const fs = require("fs")
// 导入path模块
const path = require("path")
// 创建web服务器实例
const server = http.createServer()
// 监听请求
server.on("request", (req, res) => {
    const url = req.url
    console.log(url);
    // jquery案例:手风琴动画/手风琴案例.html
    let fpath = " "
    if(url ==='/'){
        fpath = path.join(__dirname, "index/index.html")
    }else{
        fpath = path.join(__dirname, "./index",url)
    }
    fs.readFile(fpath,"utf-8", (err, data) => {
       if(err) return res.end("404 Not Found.")
       res.end(data)
    })
})
// 启动服务器
server.listen(80,() => {
    console.log("服务器启动成功");
    console.log("http://127.0.0.1:80");
})
7.向外共享模块(moudle.exports={})
//定义格式化时间的方法
function dataFormat(dtStr){
    const dt = new Date(dtStr)
    const y = dt.getFullYear()
    const m = zeroFill(dt.getMonth()+1)
    const d =zeroFill(dt.getDate())

    const h = zeroFill(dt.getHours())
    const mm = zeroFill(dt.getMinutes())
    const s = zeroFill(dt.getSeconds())
    return `${y}-${m}-${d} ${h}:${mm}:${s}`
}
// 定义补零的函数
function zeroFill(num){
    return num<10 ? '0'+num : num
}
module.exports = {
    dataFormat
}
这里涉及到es6的模板字符号串,也就是反引号,不清楚的可以百度哦~
向外共享时module.exports与exports的作用相似,但是与moudule为标准,在一个文件中最好统一用一种要么统一moudule,要么exports向外共享


 192
192


 被折叠的 条评论
为什么被折叠?
被折叠的 条评论
为什么被折叠?
 到【灌水乐园】发言


