


 本文通过两个案例介绍HarmonyOS开发,涵盖Java和JS语言。首先讲解如何配置项目并创建基本布局,涉及ability_main.xml、string.json、background_button.xml文件的使用。接着在MainAbilitySlice.java中实现页面跳转功能。然后转向JS开发,创建新的Empty Ability,编写index.hml、index.css和index.js文件,完成页面和跳转。最后,介绍了如何预览和运行项目。
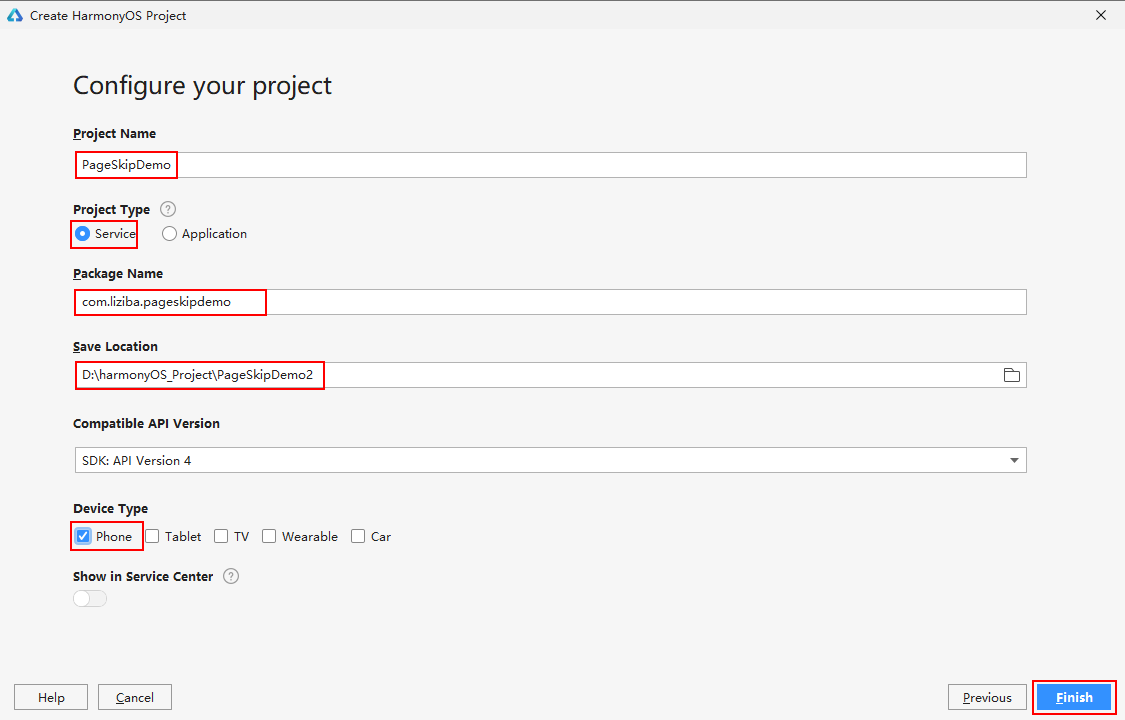
配置项目的相关信息,包括Project Name、Project Type、Package Name、Save Location、Device Type等信息,最后点击Next即可
在Project窗口中,点击entry -> src -> main -> resources -> base -> layout -> ability_main.xml文件,可以看到如下代码

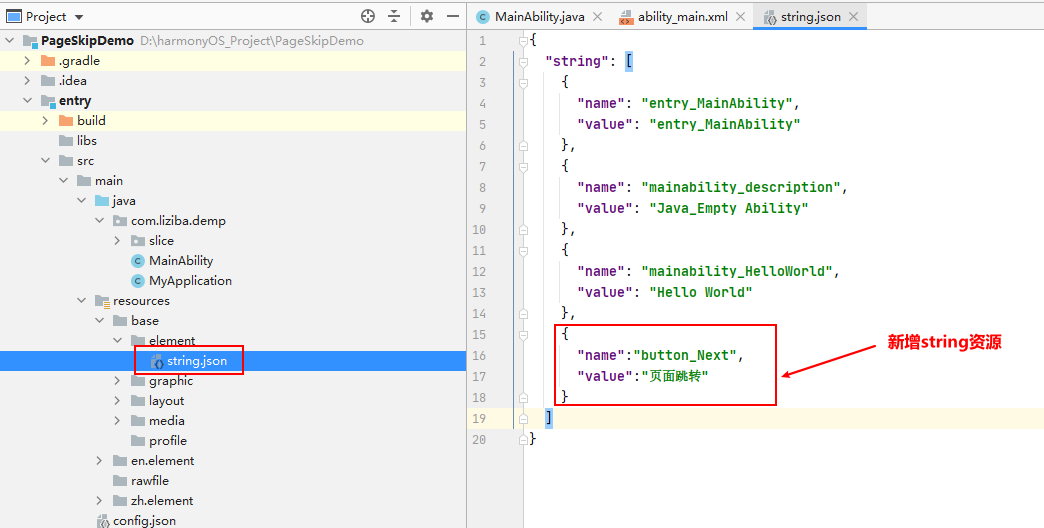
(可选)如果需要引用String资源推荐在"string.json"文件中进行配置,在Project窗口中,点击entry -> src -> main -> resources -> base -> element -> string.json文件,新增button——Next按钮资源
页面中的内容包括一个文本和一个按钮,使用DependentLayout方式进行布局,通过Text和Button组件实现其中vp代表虚拟像素,fp代表字体像素,其中Button中的内容引用自string.json资源,这是HarmonyOS官方推荐的方式。注意如下内容修改的是ability_main.xml文件。
<?xml version="1.0" encoding="utf-8"?>

<DependentLayout

    xmlns:ohos="http://schemas.huawei.com/res/ohos"

    ohos:width="match_parent"

    ohos:height="match_parent">

    <Text

        ohos:id="$+id:text"

        ohos:width="match_content"

        ohos:height="match_content"

        ohos:text="Hello World"

        ohos:text_color="#000000"

        ohos:text_size="32fp"

        ohos:center_in_parent="true"/>

    <Button

        ohos:id="$+id:button"

        ohos:width="match_content"

        ohos:height="match_content"

        ohos:text="$string:button_Next"

        ohos:text_size="19fp"

        ohos:text_color="#FFFFFF"

        ohos:top_padding="8vp"

        ohos:bottom_padding="8vp"

        ohos:right_padding="70vp"

        ohos:left_padding="70vp"

        ohos:center_in_parent="true"

        ohos:below="$id:text"

        ohos:margin="10vp"/>

</DependentLayout>
设置按钮的样式,通过entry -> src -> main -> resources -> base -> graphic目录下新增文件background_button.xml文件来实现
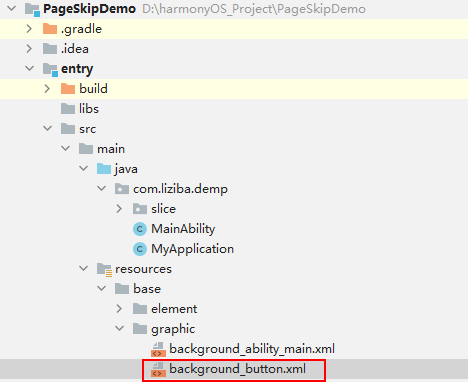
background_button.xml文件内容如下:
<?xml version="1.0" encoding="utf-8"?>

<shape

    xmlns:ohos="http://schemas.huawei.com/res/ohos"

    ohos:shape="rec
最低0.47元/天 解锁文章


 1912
1912


 被折叠的 条评论
为什么被折叠?
被折叠的 条评论
为什么被折叠?
 到【灌水乐园】发言


