


给圆盘类和汉诺塔类各设计一个.move()方法,主旨思想是圆盘的相对位置移动,不需要在调用时计算各种控件的具体坐标值。

代码:
import pyglet

window = pyglet.window.Window(800, 500, caption='汉诺塔')
pyglet.gl.glClearColor(1, 1, 1, 1)
batch = pyglet.graphics.Batch()

Color = (182,128,18),(25,65,160),(56,170,210),(16,188,78),(20,240,20),(240,240,20),(255,128,20),(240,20,20),(245,60,138)

class Disk:
    def __init__(self, x, y, color=(0,0,0), width=200, height=20):
        self.cir1 = pyglet.shapes.Circle(x+width/2-height/2, y, radius=height/2, color=color, batch=batch)
        self.cir2 = pyglet.shapes.Circle(x-width/2+height/2, y, radius=height/2, color=color, batch=batch)
        self.rect = pyglet.shapes.Rectangle(x-width/2+height/2, y-height/2, width-height, height, color=color, batch=batch)
    def move(self, dx, dy):
        self.cir1.x += dx; self.cir1.y += dy
        self.cir2.x += dx; self.cir2.y += dy
        self.rect.x += dx; self.rect.y += dy

class Hann:
    def __init__(self, x, y, order=2, space=250, thickness=20, width=200, height=300):
        assert(order>1)
        self.pole = [pyglet.shapes.Line(x-i*space, y, x-i*space, y+height, width=thickness, color=Color[0], batch=batch) for i in range(-1,2)]
        self.disk = [Disk(x+i*space, y, color=Color[0], width=width+thickness, height=thickness) for i in range(-1,2)]
        self.x, self.y = x, y
        self.order = order
        self.space = space
        self.thickness = thickness
        self.width = width
        self.height = (height-thickness*2)/order
        self.step = (width-thickness)/(order+1)
        coordinates = [(self.x-space, self.y+(i+1)*self.height-(self.height-thickness)/2) for i in range(order)]
        self.beads = [Disk(*xy, Color[i%8+1], width=self.width-i*self.step, height=self.height) for i,xy in enumerate(coordinates)]
        self.array = [[*range(order)], [], []]
    def move(self, pole1, pole2):
        if self.array[pole1]:
            bead = self.array[pole1].pop()
            if self.array[pole2] and bead<self.array[pole2][-1]:
                print('大盘不能搬到小盘上')
                return False
        else:
            print('所选择的塔架为空!')
            return None
        self.beads[bead].move((pole2-pole1)*self.space, (len(self.array[pole2])-len(self.array[pole1]))*self.height)
        self.array[pole2].append(bead)
        return True

@window.event
def on_draw():
    window.clear()
    batch.draw()

hann = Hann(window.width/2, 100, 7)
hann.move(0,1)
hann.move(0,2)
hann.move(1,2)
hann.move(0,1)
hann.move(2,0)
hann.move(2,1)
hann.move(0,1)
hann.move(0,2)

pyglet.app.run()
9. 移动演示
pyglet.clock.schedule_interval(function, seconds) 是 Pyglet 库中的一个函数调用,用于定期调度另一个函数function在指定的时间间隔seconds内执行。
pyglet.clock.unschedule(function) 任务完成后使用此函数来取消调度,以避免不必要的资源消耗。
以下展示一个四层汉诺塔的移动演示:

代码:
import pyglet

window = pyglet.window.Window(800, 500, caption='汉诺塔')
pyglet.gl.glClearColor(1, 1, 1, 1)
batch = pyglet.graphics.Batch()

Color = (182,128,18),(25,65,160),(56,170,210),(16,188,78),(20,240,20),(240,240,20),(255,128,20),(240,20,20),(245,60,138)

class Disk:
    def __init__(self, x, y, color=(0,0,0), width=200, height=20):
        self.cir1 = pyglet.shapes.Circle(x+width/2-height/2, y, radius=height/2, color=color, batch=batch)
        self.cir2 = pyglet.shapes.Circle(x-width/2+height/2, y, radius=height/2, color=color, batch=batch)
        self.rect = pyglet.shapes.Rectangle(x-width/2+height/2, y-height/2, width-height, height, color=color, batch=batch)
    def move(self, dx, dy):
        self.cir1.x += dx; self.cir1.y += dy
        self.cir2.x += dx; self.cir2.y += dy
        self.rect.x += dx; self.rect.y += dy

class Hann:
    def __init__(self, x, y, order=2, space=250, thickness=20, width=200, height=300):
        assert(order>1)
        self.pole = [pyglet.shapes.Line(x-i*space, y, x-i*space, y+height, width=thickness, color=Color[0], batch=batch) for i in range(-1,2)]
        self.disk = [Disk(x+i*space, y, color=Color[0], width=width+thickness, height=thickness) for i in range(-1,2)]
        self.x, self.y = x, y
        self.order = order
        self.space = space
        self.thickness = thickness
        self.width = width
        self.height = (height-thickness*2)/order
        self.step = (width-thickness)/(order+1)
        coordinates = [(self.x-space, self.y+(i+1)*self.height-(self.height-thickness)/2) for i in range(order)]
        self.beads = [Disk(*xy, Color[i%8+1], width=self.width-i*self.step, height=self.height) for i,xy in enumerate(coordinates)]
        self.array = [[*range(order)], [], []]
    def move(self, pole1, pole2):
        if self.array[pole1]:
            bead = self.array[pole1].pop()
            if self.array[pole2] and bead<self.array[pole2][-1]:
                print('大盘不能搬到小盘上')
                return False
        else:
            print('所选择的塔架为空!')
            return None
        self.beads[bead].move((pole2-pole1)*self.space, (len(self.array[pole2])-len(self.array[pole1]))*self.height)
        self.array[pole2].append(bead)
        return True

@window.event
def on_draw():
    window.clear()
    batch.draw()

def on_move(event):
    global moves
    if moves:
        x, y = moves.pop(0)
        hann.move(x, y)
        label.text = f'盘架{x+1}的圆盘移到盘架{y+1}上'
    else:
        label.text = '演示完毕!'
        pyglet.clock.unschedule(on_move)

hann = Hann(window.width/2, 120, 4)
moves = [(0,1), (0,2), (1,2), (0,1), (2,0), (2,1), (0,1), (0,2), (1,2), (1,0), (2,0), (1,2), (0,1), (0,2), (1,2)]
label = pyglet.text.Label('汉诺塔圆盘自动移动演示', font_size=24, color=(0,0,0,255), x=window.width/2, y=50, anchor_x='center', batch=batch)

pyglet.clock.schedule_interval(on_move, 1)
pyglet.app.run()
10. 递归问题
虽然解决了自动演示的功能,但继续增加层数怎么办?还是要自己解决这个问题,本篇前言里就说了汉诺塔问题就是一个递归问题,所以就用递归函数来解决,通常写法:
def hanoi(n, start, mid, end):
    if n == 1:
        print('Move disk 1 from', start, 'to', end)
    else:
        hanoi(n-1, start, end, mid)
        print('Move disk', n, 'from', start, 'to', end)
        hanoi(n-1, mid, start, end)

hanoi(4, 0, 1, 2)
运行的打印结果为:
Move disk 1 from 0 to 1
Move disk 2 from 0 to 2
Move disk 1 from 1 to 2
Move disk 3 from 0 to 1
Move disk 1 from 2 to 0
Move disk 2 from 2 to 1
Move disk 1 from 0 to 1
Move disk 4 from 0 to 2
Move disk 1 from 1 to 2
Move disk 2 from 1 to 0
Move disk 1 from 2 to 0
Move disk 3 from 1 to 2
Move disk 1 from 0 to 1
Move disk 2 from 0 to 2
Move disk 1 from 1 to 2
移动的坐标刚好与上一步指定的相同,但要改造这个函数,我们需要的是坐标返回值不是打印信息,所以指定一列表用于存放这些坐标,改造后的函数:
def hanoi(n, start, mid, end, moves=None):
    if moves is None:
        moves = []
    if n == 1:
        moves.append((start, end))
    else:
        hanoi(n-1, start, end, mid, moves)
        moves.append((start, end))
        hanoi(n-1, mid, start, end, moves)
    return moves

for order in (4,7,8):
    moves = hanoi(order, 0, 1, 2)
    print(len(moves)==2**order-1)
    print(moves)
运行结果:
True
[(0, 1), (0, 2), (1, 2), (0, 1), (2, 0), (2, 1), (0, 1), (0, 2), (1, 2), (1, 0), (2, 0), (1, 2), (0, 1), (0, 2), (1, 2)]
True
[(0, 2), (0, 1), (2, 1), (0, 2), (1, 0), (1, 2), (0, 2), (0, 1), (2, 1), (2, 0), (1, 0), (2, 1), (0, 2), (0, 1), (2, 1), (0, 2), (1, 0), (1, 2), (0, 2), (1, 0), (2, 1), (2, 0), (1, 0), (1, 2), (0, 2), (0, 1), (2, 1), (0, 2), (1, 0), (1, 2), (0, 2), (0, 1), (2, 1), (2, 0), (1, 0), (2, 1), (0, 2), (0, 1), (2, 1), (2, 0), (1, 0), (1, 2), (0, 2), (1, 0), (2, 1), (2, 0), (1, 0), (2, 1), (0, 2), (0, 1), (2, 1), (0, 2), (1, 0), (1, 2), (0, 2), (0, 1), (2, 1), (2, 0), (1, 0), (2, 1), (0, 2), (0, 1), (2, 1), (0, 2), (1, 0), (1, 2), (0, 2), (1, 0), (2, 1), (2, 0), (1, 0), (1, 2), (0, 2), (0, 1), (2, 1), (0, 2), (1, 0), (1, 2), (0, 2), (1, 0), (2, 1), (2, 0), (1, 0), (2, 1), (0, 2), (0, 1), (2, 1), (2, 0), (1, 0), (1, 2), (0, 2), (1, 0), (2, 1), (2, 0), (1, 0), (1, 2), (0, 2), (0, 1), (2, 1), (0, 2), (1, 0), (1, 2), (0, 2), (0, 1), (2, 1), (2, 0), (1, 0), (2, 1), (0, 2), (0, 1), (2, 1), (0, 2), (1, 0), (1, 2), (0, 2), (1, 0), (2, 1), (2, 0), (1, 0), (1, 2), (0, 2), (0, 1), (2, 1), (0, 2), (1, 0), (1, 2), (0, 2)]
True
[(0, 1), (0, 2), (1, 2), (0, 1), (2, 0), (2, 1), (0, 1), (0, 2), (1, 2), (1, 0), (2, 0), (1, 2), (0, 1), (0, 2), (1, 2), (0, 1), (2, 0), (2, 1), (0, 1), (2, 0), (1, 2), (1, 0), (2, 0), (2, 1), (0, 1), (0, 2), (1, 2), (0, 1), (2, 0), (2, 1), (0, 1), (0, 2), (1, 2), (1, 0), (2, 0), (1, 2), (0, 1), (0, 2), (1, 2), (1, 0), (2, 0), (2, 1), (0, 1), (2, 0), (1, 2), (1, 0), (2, 0), (1, 2), (0, 1), (0, 2), (1, 2), (0, 1), (2, 0), (2, 1), (0, 1), (0, 2), (1, 2), (1, 0), (2, 0), (1, 2), (0, 1), (0, 2), (1, 2), (0, 1), (2, 0), (2, 1), (0, 1), (2, 0), (1, 2), (1, 0), (2, 0), (2, 1), (0, 1), (0, 2), (1, 2), (0, 1), (2, 0), (2, 1), (0, 1), (2, 0), (1, 2), (1, 0), (2, 0), (1, 2), (0, 1), (0, 2), (1, 2), (1, 0), (2, 0), (2, 1), (0, 1), (2, 0), (1, 2), (1, 0), (2, 0), (2, 1), (0, 1), (0, 2), (1, 2), (0, 1), (2, 0), (2, 1), (0, 1), (0, 2), (1, 2), (1, 0), (2, 0), (1, 2), (0, 1), (0, 2), (1, 2), (0, 1), (2, 0), (2, 1), (0, 1), (2, 0), (1, 2), (1, 0), (2, 0), (2, 1), (0, 1), (0, 2), (1, 2), (0, 1), (2, 0), (2, 1), (0, 1), (0, 2), (1, 2), (1, 0), (2, 0), (1, 2), (0, 1), (0, 2), (1, 2), (1, 0), (2, 0), (2, 1), (0, 1), (2, 0), (1, 2), (1, 0), (2, 0), (1, 2), (0, 1), (0, 2), (1, 2), (0, 1), (2, 0), (2, 1), (0, 1), (0, 2), (1, 2), (1, 0), (2, 0), (1, 2), (0, 1), (0, 2), (1, 2), (1, 0), (2, 0), (2, 1), (0, 1), (2, 0), (1, 2), (1, 0), (2, 0), (2, 1), (0, 1), (0, 2), (1, 2), (0, 1), (2, 0), (2, 1), (0, 1), (2, 0), (1, 2), (1, 0), (2, 0), (1, 2), (0, 1), (0, 2), (1, 2), (1, 0), (2, 0), (2, 1), (0, 1), (2, 0), (1, 2), (1, 0), (2, 0), (1, 2), (0, 1), (0, 2), (1, 2), (0, 1), (2, 0), (2, 1), (0, 1), (0, 2), (1, 2), (1, 0), (2, 0), (1, 2), (0, 1), (0, 2), (1, 2), (0, 1), (2, 0), (2, 1), (0, 1), (2, 0), (1, 2), (1, 0), (2, 0), (2, 1), (0, 1), (0, 2), (1, 2), (0, 1), (2, 0), (2, 1), (0, 1), (0, 2), (1, 2), (1, 0), (2, 0), (1, 2), (0, 1), (0, 2), (1, 2), (1, 0), (2, 0), (2, 1), (0, 1), (2, 0), (1, 2), (1, 0), (2, 0), (1, 2), (0, 1), (0, 2), (1, 2), (0, 1), (2, 0), (2, 1), (0, 1), (0, 2), (1, 2), (1, 0), (2, 0), (1, 2), (0, 1), (0, 2), (1, 2)]
由此,也验证了总步骤数 steps = 2^n - 1,n为层数。
11. 任意展示
解决递归问题后,就可以展示任意层数的移动演示了,就用上一步得到的7层汉诺塔的移动坐标来展示一下它的移动过程:
完整代码:
import pyglet

window = pyglet.window.Window(800, 500, caption='汉诺塔')
pyglet.gl.glClearColor(1, 1, 1, 1)
batch = pyglet.graphics.Batch()

Color = (182,128,18),(25,65,160),(56,170,210),(16,188,78),(20,240,20),(240,240,20),(255,128,20),(240,20,20),(245,60,138)

class Disk:
    def __init__(self, x, y, color=(0,0,0), width=200, height=20):
        self.cir1 = pyglet.shapes.Circle(x+width/2-height/2, y, radius=height/2, color=color, batch=batch)
        self.cir2 = pyglet.shapes.Circle(x-width/2+height/2, y, radius=height/2, color=color, batch=batch)
        self.rect = pyglet.shapes.Rectangle(x-width/2+height/2, y-height/2, width-height, height, color=color, batch=batch)
    def move(self, dx, dy):
        self.cir1.x += dx; self.cir1.y += dy
        self.cir2.x += dx; self.cir2.y += dy
        self.rect.x += dx; self.rect.y += dy

class Hann:
    def __init__(self, x, y, order=2, space=250, thickness=20, width=200, height=300):
        assert(order>1)
        self.pole = [pyglet.shapes.Line(x-i*space, y, x-i*space, y+height, width=thickness, color=Color[0], batch=batch) for i in range(-1,2)]
        self.disk = [Disk(x+i*space, y, color=Color[0], width=width+thickness, height=thickness) for i in range(-1,2)]
        self.x, self.y = x, y
        self.order = order
        self.space = space
        self.thickness = thickness
        self.width = width
        self.height = (height-thickness*2)/order
        self.step = (width-thickness)/(order+1)
        coordinates = [(self.x-space, self.y+(i+1)*self.height-(self.height-thickness)/2) for i in range(order)]
        self.beads = [Disk(*xy, Color[i%8+1], width=self.width-i*self.step, height=self.height) for i,xy in enumerate(coordinates)]
        self.array = [[*range(order)], [], []]
    def move(self, pole1, pole2):
        if self.array[pole1]:
            bead = self.array[pole1].pop()
            if self.array[pole2] and bead<self.array[pole2][-1]:
                self.array[pole1].append(bead)
                print('大盘不能搬到小盘上')
                return False
        else:
            print('所选择的塔架为空!')
            return None
        self.beads[bead].move((pole2-pole1)*self.space, (len(self.array[pole2])-len(self.array[pole1]))*self.height)
        self.array[pole2].append(bead)
        return True

@window.event
def on_draw():
    window.clear()
    batch.draw()

@window.event
def on_key_press(symbol, modifiers):
    global start
    if not start:
        start = True
        pyglet.clock.schedule_interval(on_move, 0.3)

@window.event
def on_mouse_press(x, y, button, modifier):
    global start
    if not start:
        start = True
        pyglet.clock.schedule_interval(on_move, 0.3)

def hanoi(n, start, mid, end, moves=None):
    if moves is None:
        moves = []
    if n == 1:
        moves.append((start, end))
    else:
        hanoi(n-1, start, end, mid, moves)
        moves.append((start, end))
        hanoi(n-1, mid, start, end, moves)
    return moves

def on_move(event):
    global moves,steps
    if moves:
        x, y = moves.pop(0)
        hanns.move(x, y)
        label.text = f'盘架{x+1}的圆盘移到盘架{y+1}上'
        message.text = f'总步骤数:{steps}\t当前步数:{steps-len(moves)}'
    else:
        label.text = '演示完毕!'
        pyglet.clock.unschedule(on_move)

order = 7
start = False
hanns = Hann(window.width/2, 120, order)
label = pyglet.text.Label('汉诺塔圆盘自动移动演示,任意按键开始......', font_size=24, color=(0,0,0,255), x=window.width/2, y=50, anchor_x='center', batch=batch)
moves = hanoi(order, 0, 1, 2)
steps = len(moves)
message = pyglet.text.Label(f'总步骤数:{steps}\t当前步数:{steps-len(moves)}', font_size=24, color=(0,0,0,255), x=100, y=450, batch=batch)

pyglet.app.run()
12. 鼠标操作
增加一个新的属性.poleheight,把原来的.height属性改为.beadheight以示区别;再给塔类增加两个方法判断鼠标点击和是否成功:
最后
Python崛起并且风靡,因为优点多、应用领域广、被大牛们认可。学习 Python 门槛很低,但它的晋级路线很多,通过它你能进入机器学习、数据挖掘、大数据,CS等更加高级的领域。Python可以做网络应用,可以做科学计算,数据分析,可以做网络爬虫,可以做机器学习、自然语言处理、可以写游戏、可以做桌面应用…Python可以做的很多,你需要学好基础,再选择明确的方向。这里给大家分享一份全套的 Python 学习资料,给那些想学习 Python 的小伙伴们一点帮助!
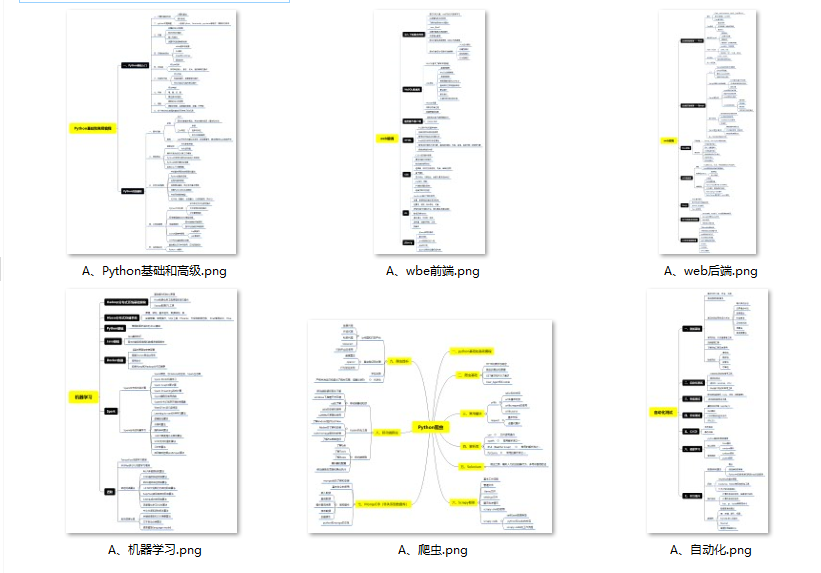
👉Python所有方向的学习路线👈
Python所有方向的技术点做的整理,形成各个领域的知识点汇总,它的用处就在于,你可以按照上面的知识点去找对应的学习资源,保证自己学得较为全面。
👉Python必备开发工具👈
工欲善其事必先利其器。学习Python常用的开发软件都在这里了,给大家节省了很多时间。
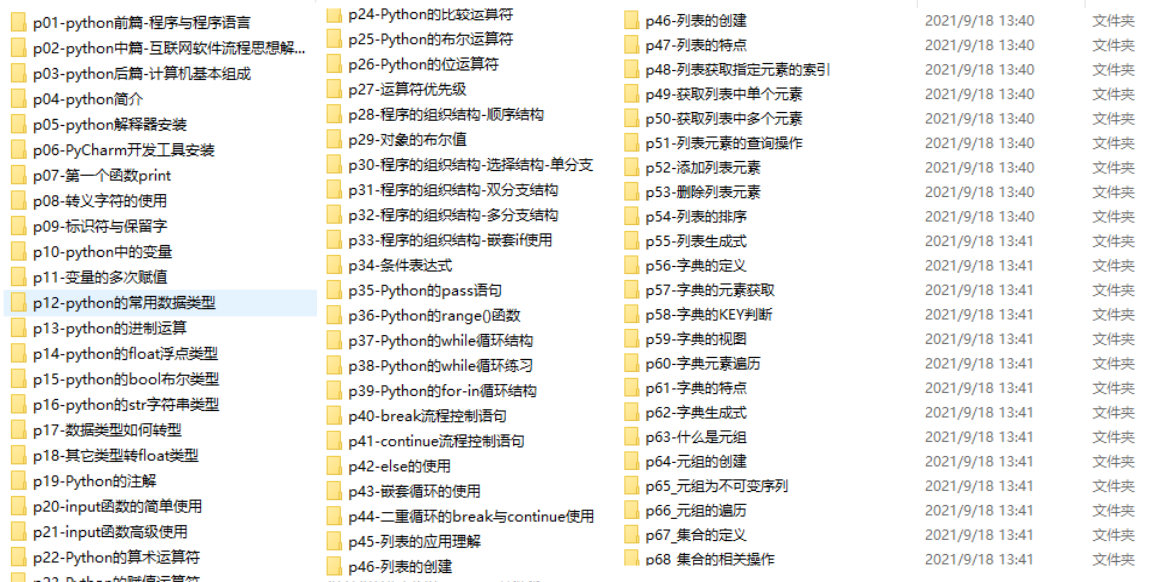
👉Python全套学习视频👈
我们在看视频学习的时候,不能光动眼动脑不动手,比较科学的学习方法是在理解之后运用它们,这时候练手项目就很适合了。
👉实战案例👈
学python就与学数学一样,是不能只看书不做题的,直接看步骤和答案会让人误以为自己全都掌握了,但是碰到生题的时候还是会一筹莫展。
因此在学习python的过程中一定要记得多动手写代码,教程只需要看一两遍即可。

👉大厂面试真题👈
我们学习Python必然是为了找到高薪的工作,下面这些面试题是来自阿里、腾讯、字节等一线互联网大厂最新的面试资料,并且有阿里大佬给出了权威的解答,刷完这一套面试资料相信大家都能找到满意的工作。

一个人可以走的很快,但一群人才能走的更远!不论你是正从事IT行业的老鸟或是对IT行业感兴趣的新人,都欢迎加入我们的的圈子(技术交流、学习资源、职场吐槽、大厂内推、面试辅导),让我们一起学习成长!


 2477
2477


 被折叠的 条评论
为什么被折叠?
被折叠的 条评论
为什么被折叠?
 到【灌水乐园】发言


