


1 更换源
1.1 pip源
pip config set global.index-url https://pypi.tuna.tsinghua.edu.cn/simple
pip config set install.trusted-host pypi.tuna.tsinghua.edu.cn
超时时间配置
pip config set global.timeout 6000 国内常用镜像:
https://pypi.tuna.tsinghua.edu.cn/simple     #清华
http://mirrors.aliyun.com/pypi/simple/       #阿里云
https://pypi.mirrors.ustc.edu.cn/simple/     #中国科技大学
http://pypi.hustunique.com/                  #华中理工大学
http://pypi.sdutlinux.org/                   #山东理工大学
http://pypi.douban.com/simple/               #豆瓣
1.2 conda源
1.2.1 cmd命令行执行
清华源
conda config --add channels https://mirrors.tuna.tsinghua.edu.cn/anaconda/cloud/msys2/
conda config --add channels https://mirrors.tuna.tsinghua.edu.cn/anaconda/cloud/conda-forge
conda config --add channels https://mirrors.tuna.tsinghua.edu.cn/anaconda/pkgs/free/
conda config --add channels https://mirrors.tuna.tsinghua.edu.cn/anaconda/cloud/pytorch/
conda config --add channels https://mirrors.tuna.tsinghua.edu.cn/anaconda/pkgs/main/
conda config --set show_channel_urls yes
中科大
conda config --add channels https://mirrors.ustc.edu.cn/anaconda/pkgs/main/
conda config --add channels https://mirrors.ustc.edu.cn/anaconda/pkgs/free/
conda config --add channels https://mirrors.ustc.edu.cn/anaconda/cloud/conda-forge/
conda config --add channels https://mirrors.ustc.edu.cn/anaconda/cloud/msys2/
conda config --add channels https://mirrors.ustc.edu.cn/anaconda/cloud/bioconda/
conda config --add channels https://mirrors.ustc.edu.cn/anaconda/cloud/menpo/
conda config --set show_channel_urls yes
1.2.2执行文件
生成执行文件
conda config --set show_channel_urls yes配置文件在系统盘的个人用户文件夹中(C:\Users\username\),用记事本打开后修改
channels:
  - https://mirrors.tuna.tsinghua.edu.cn/anaconda/pkgs/main/
  - https://mirrors.tuna.tsinghua.edu.cn/anaconda/pkgs/free/
  - https://mirrors.tuna.tsinghua.edu.cn/anaconda/cloud/conda-forge/
ssl_verify: true
2 Jupyter Notebook配置
2.1 生成配置文件
打开Anaconda Prompt,输入
jupyter notebook --generate-configwi10 配置文件生成在C:\Users\username\.jupyter
ubuntu和wsl ubuntu 直接cd .jupyter/就可以进入文件所在问价夹
2.2生成密匙
在Anaconda Prompt中输入ipython,然后输入from notebook.auth import passwd,最后输入passwd(),设置密码,然后复制输出生成的密钥文件。
2.3 修改配置文件
记事本打开配置文件后在最后输入
c.NotebookApp.ip = '*'                     # 设置远程所有ip可访问
c.NotebookApp.open_browser = False         # 关闭浏览器
c.NotebookApp.password=u'密钥'              # 输入上面生成的密钥
c.NotebookApp.port = 8888                   # 设置SSH访问的端口
c.NotebookApp.allow_remote_access = True   # 允许远程连接
c.NotebookApp.notebook_dir = 'F:/Jupyter'  # 文件地址
2.4 开启ssh服务(wsl也要开启win10ssh)
在windows 10系统中找到设置—应用和功能—选择可选功能,安装SSH服务。
2.5 设置ssh
以管理员打开PowerShell,通过 Set-Service -StartupType Automatic ssh-agent 将 ssh-agent 服务的启动类型设为自启,随后键入 Start-Service ssh-agent 启动当前会话下的 ssh-agent 服务。
2.6 Jupyter lab设置
1. 生成配置文件
jupyter server --generate-config提示: 该命令会在 C:\Users\username.jupyter 目录下生成配置文件 jupyter_server_config.py 文件最下方, 如果该配置文件已经存在,则会提示是否替换该文件。
2. 生成密匙
cmd 输入
jupyter server password用记事本打开生成的文件,拷贝密匙,输入在 jupyter_server_config.py 文件最下方
c.ServerApp.password = u'密匙'3. 启动并连接
启动
在cmd中输入
jupyter lab 即可启动,启动后不要关闭命令行
连接
win10在cmd中输入ipconfig查找ip4地址,同一局域网中在浏览器中输入
ip:port # ip为ip4的地址,port为2.3中的SSH端口
4.VPN访问
推荐 VPN zerotier
3 自动补齐功能设置
3.1 括号补齐
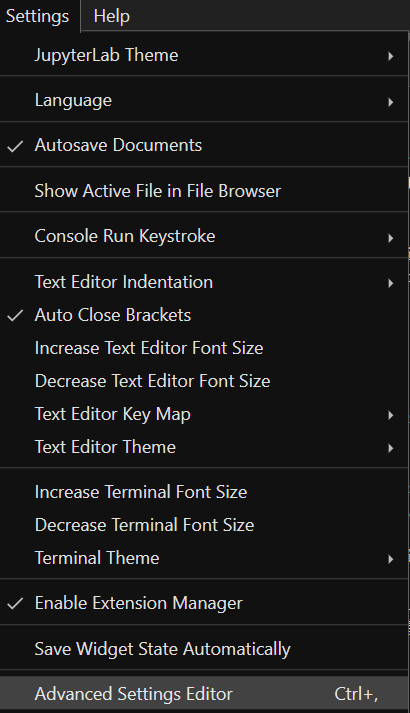
打卡高级设置

在notebook中的 User Preferences页面输入
{
    "codeCellConfig": {
        "autoClosingBrackets": true,
    }
}
3.2 Jupyter-lsp插件
3.2.1 环境准备
下载安装 Nodejs,给出官网连接
https://nodejs.org/zh-cn/download/
1.安装JupyterLab-lsp
pip install jupyter-lsp 若出现红色的错误,则需要按要求更改包的版本
pip install pkgname==vesion
2.安装python-lsp-server
pip install python-lsp-server[all]若出现红色的错误,则需要按要求更改包的版本
pip install pkgname==vesion
3.安装插件
启动jupyter lab,在插件中搜索lsp,点击@krassowski/jupyterlab-lsp下的install安装.
若无法安装,参考以下文章进行配置Nodejs https://blog.csdn.net/qq_34732729/article/details/105652029
3.2.2 开启自动提示(Hinterland mode)
打卡jupyter lab高级设置
选择Code Completion,在User Preferences输入如下代码,点击右上角保存,即可开启Hinterland mode
{
"continuousHinting": true
}
3.2.3 如果显示一直在initializing,可以尝试使用下面命令
conda install -c conda-forge jedi-language-server3.2.4 若无法启动,报错'ExtensionManager' object has no attribute '_extensions',可以尝试下面指令
pip install -U "nbclassic>=0.2.8"3.3 Jupyter Lab调试内核
可以直接安装 xeus-python(在目前环境中)
conda install xeus-python -c conda-forge也可以创建一个新环境,但是可能会无法启动
可以参考这个文章https://blog.csdn.net/weixin_43935696/article/details/113565089


 825
825


 被折叠的 条评论
为什么被折叠?
被折叠的 条评论
为什么被折叠?
 到【灌水乐园】发言


