


xmlns:context=“http://www.springframework.org/schema/context”
xmlns:aop=“http://www.springframework.org/schema/aop”
xmlns:tx=“http://www.springframework.org/schema/tx”
xsi:schemaLocation="http://www.springframework.org/schema/beans
https://www.springframework.org/schema/beans/spring-beans.xsd
http://www.springframework.org/schema/aop
https://www.springframework.org/schema/aop/spring-aop.xsd
http://www.springframework.org/schema/context
https://www.springframework.org/schema/context/spring-context.xsd
http://www.springframework.org/schema/tx
http://www.springframework.org/schema/tx/spring-tx.xsd">
<context:component-scan base-package=“com.kuang.service”/>
<tx:advice id=“txAdvice” transaction-manager=“transactionManager”>
tx:attributes
<tx:method name=“*” propagation=“REQUIRED”/>
</tx:attributes>
</tx:advice>
aop:config
<aop:pointcut id=“txPointCut” expression=“execution(* com.kuang.dao..(…))”/>
<aop:advisor advice-ref=“txAdvice” pointcut-ref=“txPointCut”/>
</aop:config>
<?xml version="1.0" encoding="UTF-8"?>
<beans xmlns=“http://www.springframework.org/schema/beans”
xmlns:xsi=“http://www.w3.org/2001/XMLSchema-instance”
xmlns:mvc=“http://www.springframework.org/schema/mvc”
xmlns:context=“http://www.springframework.org/schema/context”
xsi:schemaLocation="http://www.springframework.org/schema/beans
https://www.springframework.org/schema/beans/spring-beans.xsd
http://www.springframework.org/schema/mvc
http://www.springframework.org/schema/mvc/spring-mvc.xsd
http://www.springframework.org/schema/context
https://www.springframework.org/schema/context/spring-context.xsd">
mvc:annotation-driven/
mvc:default-servlet-handler/
<context:component-scan base-package=“com.kuang.controller”/>
<?xml version="1.0" encoding="UTF-8"?>
<beans xmlns=“http://www.springframework.org/schema/beans”
xmlns:xsi=“http://www.w3.org/2001/XMLSchema-instance”
xsi:schemaLocation="http://www.springframework.org/schema/beans
https://www.springframework.org/schema/beans/spring-beans.xsd">
<?xml version="1.0" encoding="UTF-8"?>
<web-app xmlns=“http://xmlns.jcp.org/xml/ns/javaee”
xmlns:xsi=“http://www.w3.org/2001/XMLSchema-instance”
xsi:schemaLocation=“http://xmlns.jcp.org/xml/ns/javaee http://xmlns.jcp.org/xml/ns/javaee/web-app_4_0.xsd”
version=“4.0”>
springmvc
org.springframework.web.servlet.DispatcherServlet
contextConfigLocation
classpath:applicationContext.xml
1
小编13年上海交大毕业,曾经在小公司待过,也去过华为、OPPO等大厂,18年进入阿里一直到现在。
深知大多数初中级Java工程师,想要提升技能,往往是自己摸索成长,但自己不成体系的自学效果低效又漫长,而且极易碰到天花板技术停滞不前!
因此收集整理了一份《2024年最新Java开发全套学习资料》送给大家,初衷也很简单,就是希望能够帮助到想自学提升又不知道该从何学起的朋友,同时减轻大家的负担。
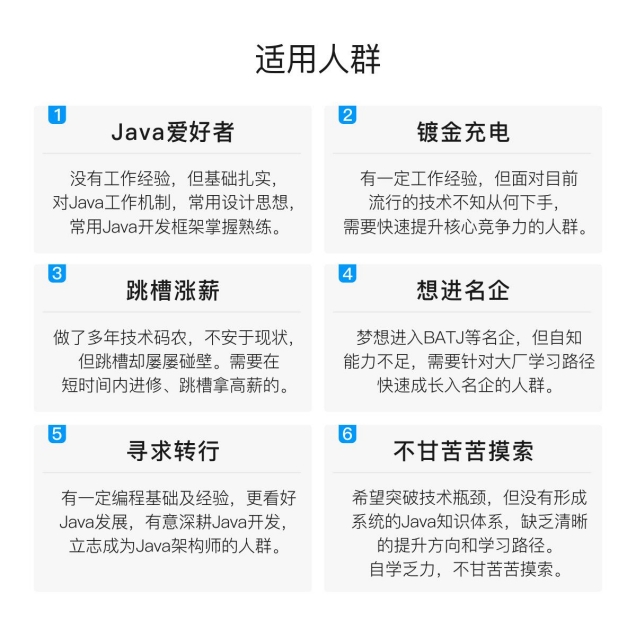
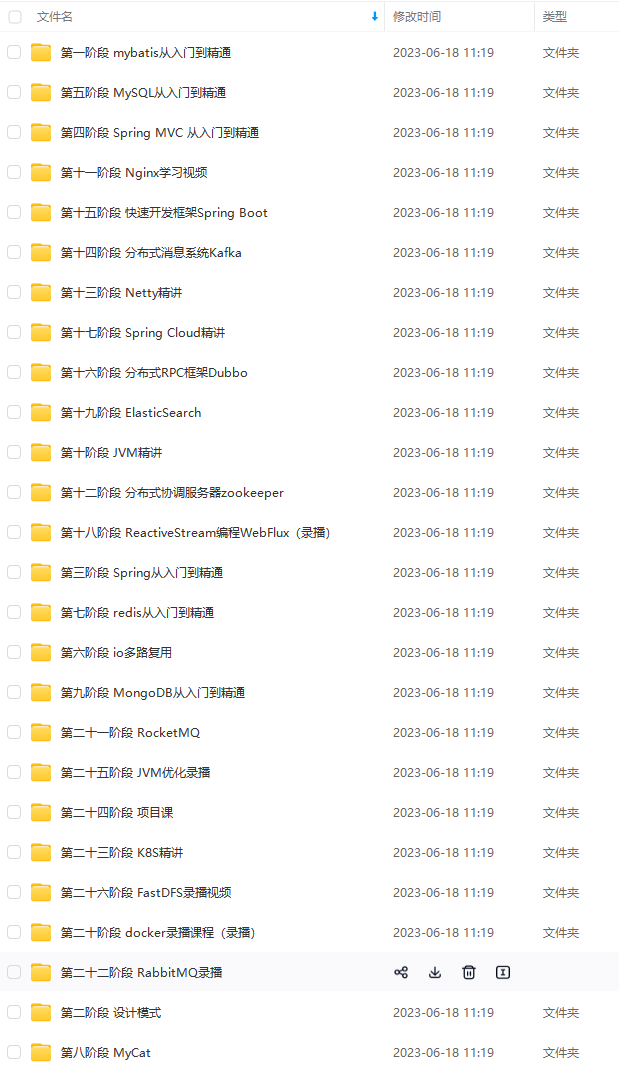
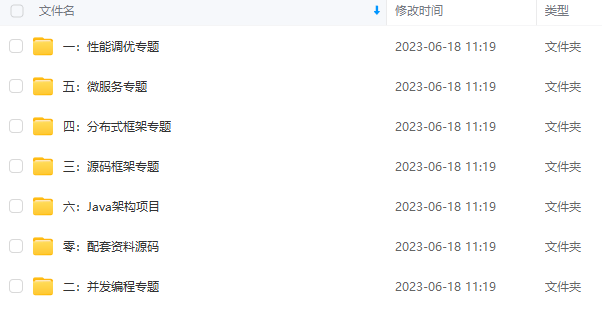
由于文件比较大,这里只是将部分目录截图出来,每个节点里面都包含大厂面经、学习笔记、源码讲义、实战项目、讲解视频
如果你觉得这些内容对你有帮助,可以添加下面V无偿领取!(备注Java)

最后


由于篇幅原因,就不多做展示了
711269795420)]
[外链图片转存中…(img-CrwKxKUe-1711269795420)]
[外链图片转存中…(img-9gdDIuIf-1711269795421)]
[外链图片转存中…(img-8nkoEupv-1711269795421)]
[外链图片转存中…(img-2tJQHvkm-1711269795421)]
[外链图片转存中…(img-qRTvYOdZ-1711269795422)]
由于篇幅原因,就不多做展示了


 1917
1917


 被折叠的 条评论
为什么被折叠?
被折叠的 条评论
为什么被折叠?
 到【灌水乐园】发言


