817406040
1955915048
1270855946
2083117811
157683534
单线程—单例
多线程—多例
自动装配是Spring 满足bean依赖的一种方式!
Spring 会在上下文自动寻找,并自动给bean 装配属性!
在Spring 中有三种装配的方式
-
在xml 中显示的配置
-
在java中显示配置
-
隐式 的自动装配bean【重要】
ByName方法自动装配
-
autowire=“byName”
-
会自动在容器上下文中查找,和自己对象set方法后面的值对应的bean id!
-
弊端:set 方法后面的值和 id 相同
bean.xml
测试
public static void main(String[] args) {
ApplicationContext ac = new ClassPathXmlApplicationContext(“bean.xml”);
People people = ac.getBean(“people”, People.class);
people.getCat().shout();
people.getDog().shout();
}
ByName方法自动装配
-
autowire=“byType”
-
会自动在容器上下文中查找,和自己对象属性类型相同的bean
-
弊端:它必须保证类型全局唯一(在IOC容器中只能由一个)。
测试
public static void main(String[] args) {
ApplicationContext ac = new ClassPathXmlApplicationContext(“bean.xml”);
People people = ac.getBean(“people”, People.class);
people.getCat().shout();
people.getDog().shout();
}
总结:
byName的时候,需要保证所有bean的id唯一,并且这个bean需要和自动注入的属性的set方法的值一致
byType的时候,需要保证所有bean的class唯一,并且这个bean需要和自动注入的属性的类型一致
-
jdk1.5支持的注解 Spring2.5支持的注解
-
The introduction of annotation-based configuration raised the question of whether this approach is “better” than XML
-
@Autowired
-
@Quelifier
-
@Resource
xml头文件约束
<?xml version="1.0" encoding="UTF-8"?><beans xmlns=“http://www.springframework.org/schema/beans”
xmlns:xsi=“http://www.w3.org/2001/XMLSchema-instance”
xmlns:context=“http://www.springframework.org/schema/context”
xmlns:aop=“http://www.springframework.org/schema/aop”
xsi:schemaLocation="http://www.springframework.org/schema/beans
https://www.springframework.org/schema/beans/spring-beans.xsd
http://www.springframework.org/schema/context
https://www.springframework.org/schema/context/spring-context.xsd
http://www.springframework.org/schema/aop
https://www.springframework.org/schema/aop/spring-aop.xsd">
context:annotation-config/
11-1.@Autowired
-
在属性上使用
-
在set方式上使用
-
使用Autowired 可以不用编写set方法了,前提是你这个自动装配的属性在IOC(Spring)容器中存在(需要通过其他方式注入进容器),且符合名字byName。
public class People {
@Autowired
private Dog dog;
@Autowired
private Cat cat;
private String name;
public People() {
}
public People(Dog dog, Cat cat, String name) {
this.dog = dog;
this.cat = cat;
this.name = name;
}
省略setter
}
Autowired 有一个个唯一的属性( required )
@Target({ElementType.CONSTRUCTOR, ElementType.METHOD, ElementType.PARAMETER, ElementType.FIELD, ElementType.ANNOTATION_TYPE})
@Retention(RetentionPolicy.RUNTIME)
@Documented
public @interface Autowired {
boolean required() default true;
}
@Nullable
字段标记了这个注解,表示这个字段可以为null
@Qualifier
-
当我们的容器存在多个相同类型,不同名称的bean。使用@Autowired 无法完成自动装配了
-
这个时候需要使用@Qualifier 和@Autowired 注解一起使用。
-
使用@Qualifier 指定一个唯一的bean对象注入!
例如
IOC容器中存在多个 相同类型不同id的bean

通过@Qualifier 指定一个唯一的bean

测试


11-2.@Resource
不指定name值,先去判断byName和byType,有一个能注入即成功
根据类型查找


11-3.根据类型和id查找
如果IOC容器中存在多个不同名称,相同类型的bean,可以通过@Resource注解的name属性指定唯一的id;


总结:
-
都是用来自动装配的,都可以放在*属性字段*上
-
@Autowired通过byType(类型)的方式实现,而且必须要求这个对象存在!
-
@Resource默认通过byName(id)的方式实现,如果找不到名字,则通过byType实现!如果两个都找不到的情况下,就报错!
-
执行顺序不同:@Autowired通过byType的方式实现。@Resource默认通过byName的方式实现。
在Spring4之后,要使用注解开发,必须保证aop的包导入了

使用注解需要导入context约束,增加注解的支持!
<?xml version="1.0" encoding="UTF-8"?><beans xmlns=“http://www.springframework.org/schema/beans”
xmlns:xsi=“http://www.w3.org/2001/XMLSchema-instance”
xmlns:context=“http://www.springframework.org/schema/context”
xmlns:aop=“http://www.springframework.org/schema/aop”
xsi:schemaLocation="http://www.springframework.org/schema/beans
https://www.springframework.org/schema/beans/spring-beans.xsd
http://www.springframework.org/schema/context
https://www.springframework.org/schema/context/spring-context.xsd
http://www.springframework.org/schema/aop
https://www.springframework.org/schema/aop/spring-aop.xsd">
<context:component-scan base-package=“cn.bloghut”/>
context:annotation-config/
bean注入使用**@Componet**注解
等价于<bean id="user" class="cn.bloghut.domain.User">
@Component
public class User {
}
属性注入使用@Value注解
@Component
public class User {
private String name;
@Value(“闲言”)
public void setName(String name){
this.name = name;
}
}
衍生注解
-
@Componet有几个衍生注解,在web开发中,会按照mvc三层架构分层!
-
@Service--------业务层注解
-
@Repository—持久层注解
-
@Controller-----控制层注解
这四个注解功能都是一样的,都是代表将某个类注册到Spring中,装配Bean
自动装配
- @Autowired 自动装配通过类型、名字
如果Autowired不能唯一自动装配上属性,则需要通过@Qualifier(value=“xxx”)
-
@Nullable 字段标记了这个注解,说明这个字段可以为null
-
@Resource 自动装配通过名字,类型
作用域
@Scope(“singleton”)单例

总结
XML 与 注解
-
xml更加万能,适用于任何场合!维护简单方便
-
注解不是自己类使用不了, 维护相对复杂
XML 与 注解最佳实践
-
xml用来管理bean
-
注解只负责完成属性的注入
-
我们在使用过程中,只需要注意一个问题:必须让注解生效,就需要开启注解的支持
<context:component-scan base-package=“cn.bloghut”/>
context:annotation-config/
JavaConfig 是Spring的 一个子项目,在Spring 4之后,它成为了新功能

-
首先定义一个类,在类上添加@Component注解,让它加载到Spring IOC容器(让Spring 管理)
-
定义Java 配置类,在其类上添加@Configuration 注解,说明该类是一个配置类,这个类也会被Spring 托管,因为它本身是一个@Component
-
在Myconfig 类中 添加getUser 方法,返回一个user对象
-
getUser 方法上的@Bean 注解 则是注册一个bean功能,相当于
-
方法的名字,相当于bean 标签中的id 属性。
-
方法的返回值,相当于bean 标签中的class属性。(因为我们导包了,Spring 知道是哪一个)
-
如果完全使用了配置类方式去做,我们只能通过AnnotationConfigApplicationContext 上下文来获取容器,通过配置类的class 对象加载!

完整代码
-
@Configuration 这个一个配置类
-
@ComponentScan 用于扫描包
-
@Import 用于导入其他配置类
13-1.主配置类
@Configuration
@ComponentScan(basePackages = {“cn.bloghut.domain”})
@Import({MyConfig2.class})
public class MyConfig {
/**
-
返回一个User Bean
-
@return
*/
@Bean
public User getUser(){
return new User();
}
}
13-2.配置类2
@Configuration
public class MyConfig2 {
}
13-3.User实体类
@Component
public class User {
private String name;
public String getName() {
return name;
}
@Value(“闲言”)
public void setName(String name) {
this.name = name;
}
@Override
public String toString() {
return “User{” +
“name='” + name + ‘’’ +
‘}’;
}
}
13-4.测试类
public class MyTest {
public static void main(String[] args) {
ApplicationContext ac = new AnnotationConfigApplicationContext(MyConfig.class);
User user = ac.getBean(“getUser”, User.class);
System.out.println(user);
}
}
14-1.角色分析:
-
抽象角色:一般会使用接口或者抽象类来解决
-
真实角色:被代理的角色
-
代理角色:代理 真实角色,代理真实角色后,我们一般会做一些附属操作
-
客户:访问代理对象的人
代码步骤:
14-2.接口
public interface Rent {
/**
- 租房
*/
void rent();
}
14-3.真实角色
public class Host implements Rent{
@Override
public void rent() {
System.out.println(“房东要出租房子”);
}
}
14-4.代理角色
public class Proxy implements Rent{
private Host host;
public Proxy() {
}
public Proxy(Host host) {
this.host = host;
}
@Override
public void rent() {
seeHouse();
host.rent();
fare();
hetong();
}
//看房
public void seeHouse(){
System.out.println(“中介带你看房”);
}
//收中介费
public void fare(){
System.out.println(“收中介费”);
}
//签合同
public void hetong(){
System.out.println(“签合同”);
}
}
14-5.客户端访问代理角色
public class Client {
public static void main(String[] args) {
Host host = new Host();
//代理,中介帮房东,但是呢?代理角色一般会有一些附属操作!
Proxy proxy = new Proxy(host);
//你不用面对房东,直接找中介租房即可!
proxy.rent();
}
}
14-6.代理模式的好处:
-
可以使真实角色的操作更加存粹!不用去关注一些公共的业务
-
公共交给了代理角色,实现了业务的分工
-
公共业务发生扩展的时候,方便集中管理
14-7.缺点:
- 一个真实角色就会产生一个代理角色,代码量会翻倍 开发效率变低


-
有一天,公司领导要求我为 某个类的所有方法新增日志输出功能。
-
怎么做呢?
-
在原来的类上的每一个方法添加日志输出?
-
这就是改变原来人家的代码了。
-
改动原有的业务代码,在公司中是大忌!
-
有可能人家你修改了人家的代码,可能给改蹦了。
-
新增一个类,制作成本小,职责单一。
原来的开发方式(纵向开发)

添加日志功能(横切进去)

代码如下:
业务接口:
public interface UserService {
void add();
void delete();
void update();
void query();
}
原来业务类
public class UserServiceImpl implements UserService {
@Override
public void add() {
System.out.println(“新增用户”);
}
@Override
public void delete() {
System.out.println(“删除用户”);
}
@Override
public void update() {
System.out.println(“修改用户”);
}
@Override
public void query() {
System.out.println(“查询用户”);
}
}
代理类
public class UserServiceProxy implements UserService {
private UserService userService;
public void setUserService(UserService userService) {
this.userService = userService;
}
@Override
public void add() {
log(“add”);
userService.add();
}
@Override
public void delete() {
log(“delete”);
userService.delete();
}
@Override
public void update() {
log(“update”);
userService.update();
}
@Override
public void query() {
System.out.println(“query”);
userService.query();
}
//日志方法
public void log(String msg){
System.out.println(“【Debug 】使用了”+msg+“方法”);
}
}
测试类
public static void main(String[] args) {
UserServiceProxy userService = new UserServiceProxy();
userService.setUserService(new UserServiceImpl());
userService.add();
}
-
动态代理和静态代理角色一样
-
动态代理的代理类是动态生成的,不是我们直接写好的
动态代理分为两大类:基于接口的动态代理,基于类的动态代理
-
基于接口:JDK动态代理
-
基于类: cglib
-
java字节码实现: javasist
需要了解两个类:Proxy :代理 InvocationHandler:调用处理程序
java.lang.reflect.Proxy
Proxy提供了创建动态代理类和实例的静态方法,它也是由这些方法创建的所有动态代理类的超类。(大白话:这是一个静态类,类里边有方法得到代理类)
动态代理类 (以下简称为代理类 )是一个实现在类创建时在运行时指定的接口列表的类,具有如下所述的行为。 代理接口是由代理类实现的接口。 代理实例是代理类的一个实例。 每个代理实例都有一个关联的调用处理程序对象,它实现了接口
通过其代理接口之一的代理实例上的方法调用将被分派到实例调用处理程序的invoke方法,传递代理实例, java.lang.reflect.Method被调用方法的java.lang.reflect.Method对象以及包含参数的类型Object Object的数组。 调用处理程序适当地处理编码方法调用,并且返回的结果将作为方法在代理实例上调用的结果返回。
代理类具有以下属性:
-
代理类是公共的,最终的,而不是抽象的,如果所有代理接口都是公共的。
-
如果任何代理接口是非公开的,代理类是非公开的,最终的,而不是抽象的 。
-
代理类的不合格名称未指定。 然而,以字符串"$Proxy"开头的类名空间应该保留给代理类。
-
一个代理类扩展了java.lang.reflect.Proxy 。
-
代理类完全按照相同的顺序实现其创建时指定的接口。
-
如果一个代理类实现一个非公共接口,那么它将被定义在与该接口相同的包中。 否则,代理类的包也是未指定的。 请注意,程序包密封不会阻止在运行时在特定程序包中成功定义代理类,并且类也不会由同一类加载器定义,并且与特定签名者具有相同的包。
-
由于代理类实现了在其创建时指定的所有接口, getInterfaces在其类对象上调用getInterfaces将返回一个包含相同列表接口的数组(按其创建时指定的顺序),在其类对象上调用getMethods将返回一个数组的方法对象,其中包括这些接口中的所有方法,并调用getMethod将在代理接口中找到可以预期的方法。
-
Proxy.isProxyClass方法将返回true,如果它通过代理类 - 由Proxy.getProxyClass返回的类或由Proxy.newProxyInstance返回的对象的类 - 否则为false。
-
所述java.security.ProtectionDomain代理类的是相同由引导类装载程序装载系统类,如java.lang.Object ,因为是由受信任的系统代码生成代理类的代码。 此保护域通常将被授予java.security.AllPermission 。
-
每个代理类有一个公共构造一个参数,该接口的实现InvocationHandler ,设置调用处理程序的代理实例。 而不必使用反射API来访问公共构造函数,也可以通过调用Proxy.newProxyInstance方法来创建代理实例,该方法将调用Proxy.getProxyClass的操作与调用处理程序一起调用构造函数。
17、基于Proxy类和InvocationHandler 实现动态代理
17-1.真实的角色
public class Host implements Rent{
public void rent() {
System.out.println(“租房”);
}
}
public interface Rent {
void rent();
}
17-3.代理 真实的角色 ProxyInvocationHandler
public class ProxyInvocationHandler implements InvocationHandler {
//被代理的接口
private Rent rent;
public void setRent(Rent rent){
this.rent = rent;
}
//生成得到代理类
public Object getProxy(){
return Proxy.newProxyInstance(this.getClass().getClassLoader(),rent.getClass().getInterfaces(),this);
}
/**
-
处理代理实例,并返回结果
-
@param proxy
-
@param method
-
@param args
-
@return
-
@throws Throwable
*/
public Object invoke(Object proxy, Method method, Object[] args) throws Throwable {
//动态代理的本质,就是使用反射机制
//在方法调用前调用
seeHouse();
Object result = method.invoke(rent,args);
//在方法调用后调用
heTong();
return result;
}
public void seeHouse(){
System.out.println(“看房子”);
}
public void heTong(){
System.out.println(“签合同”);
}
}
17-4.用户
public class Client {
public static void main(String[] args) {
//创建真实角色
Host host = new Host();
//创建代理角色 不存在
ProxyInvocationHandler proxyInvocationHandler = new ProxyInvocationHandler();
//设置要代理的对象
proxyInvocationHandler.setRent(host);
//获取代理对象,并强制转换
Rent proxy = (Rent)proxyInvocationHandler.getProxy();
//调用
proxy.rent();
}
}
17-5.输出结果
看房子
租房
签合同
18、基于Proxy类和InvocationHandler 实现动态代理 2
Proxy:生成动态代理实例的
InvocationHandler:调用处理程序并返回结果的
万能的自动生成代理类
package cn.bloghut.demo3;
import java.lang.reflect.InvocationHandler;
import java.lang.reflect.Method;
import java.lang.reflect.Proxy;
/**
-
@Classname ProxyInvocationHandler
-
@Description 自动生成代理类
-
@Date 2021/5/17 15:44
-
@Created by 闲言
*/
public class ProxyInvocationHandler implements InvocationHandler {
//1.被代理的接口
public Object target;
public void setTarget(Object target){
this.target = target;
}
//2.生成得到代理类(代理谁)
public Object getProxy(){
return Proxy.newProxyInstance(this.getClass().getClassLoader(),
target.getClass().getInterfaces(),this);
}
//3.处理代理实例,并返回结果(代用代理程序)
public Object invoke(Object proxy, Method method, Object[] args) throws Throwable {
//动态获取方法名称
log(method.getName());
Object result = method.invoke(target, args);
return result;
}
/**
-
打印日志方法
-
@param msg
*/
public void log(String msg){
System.out.println(“[debug]===> 执行可”+msg+“方法”);
}
}
public static void main(String[] args) {
//真实角色
UserServiceImpl userService = new UserServiceImpl();
//代理角色,不存在
ProxyInvocationHandler invocationHandler = new ProxyInvocationHandler();
//设置要代理的对象
invocationHandler.setTarget(userService);
//获取代理对象
UserService proxy = (UserService)invocationHandler.getProxy();
//执行方法
proxy.query();
}
[debug]===> 执行可query方法
query
19-1.静态代理
-
由程序员创建或由特定工具自动生成源代码,再对其编译。在程序运行前,代理类的.class文件就已经存在了
-
静态代理通常只代理一个类
-
静态代理事先知道要代理的是什么
代码如下:
-
如下, HelloServiceProxy类是代理类,HelloServiceImpl类是委托类,这两个类都实现了HelloService接口。
-
其中HelloServiceImpl类是HelloService接口的真正实现者,而HelloServiceProxy类是通过调用HelloServiceImpl类的相关方法来提供特定服务的。
-
HelloServiceProxy类的echo()方法和getTime()方法会分别调用被代理的HelloServiceImpl对象的echo()方法和getTime()方法,并且在方法调用前后都会执行一些简单的打印操作。
-
由此可见,代理类可以为委托类预处理消息、把消息转发给委托类和事后处理消息等。
HelloService接口
public interface HelloService {
String echo(String msg);
Date getTime();
}
HelloServiceImpl委托类
public class HelloServiceImpl implements HelloService {
@Override
public String echo(String msg) {
return “echo:” + msg;
}
@Override
public Date getTime() {
return new Date();
}
}
HelloServiceProxy代理类
public class HelloServiceProxy implements HelloService {
//表示被代理的HelloService 实例
private HelloService helloService;
public HelloServiceProxy(HelloService helloService) {
this.helloService = helloService;
}
public void setHelloServiceProxy(HelloService helloService) {
this.helloService = helloService;
}
@Override
public String echo(String msg) {
//预处理
System.out.println(“before calling echo()”);
//调用被代理的HelloService 实例的echo()方法
String result = helloService.echo(msg);
//事后处理
System.out.println(“after calling echo()”);
return result;
}
public Date getTime() {
//预处理
System.out.println(“before calling getTime()”);
//调用被代理的HelloService 实例的getTime()方法
Date date = helloService.getTime();
//事后处理
System.out.println(“after calling getTime()”);
return date;
}
}
测试
public class Test {
public static void main(String[] args) {
//创建委托类
HelloServiceImpl helloService = new HelloServiceImpl();
//创建代理类
HelloServiceProxy helloServiceProxy = new HelloServiceProxy(helloService);
//调用方法
Date time = helloServiceProxy.getTime();
System.out.println(time);
}
}
19-2.动态代理
-
在程序运行时,运用反射机制动态创建而成
-
动态代理是代理一个接口下的多个实现类
-
动态代理不知道要代理什么东西,只有在运行时才知道
与静态代理类对照的是动态代理类,动态代理类的字节码在程序运行时由Java反射机制动态生成,无需程序员手工编写它的源代码。动态代理类不仅简化了编程工作,而且提高了软件系统的可扩展性,因为Java反射机制可以生成任意类型的动态代理类。java.lang.reflect 包中的Proxy类和InvocationHandler接口提供了生成动态代理类的能力。
Proxy类提供了创建动态代理类及其实例的静态方法。
代码如下:
public static void main(String[] args) {
//真实角色
HelloServiceImpl helloService = new HelloServiceImpl();
//代理角色 不存在
ProxyInvocationHandler proxyInvocationHandler = new ProxyInvocationHandler();
proxyInvocationHandler.setTarget(helloService);
HelloService proxy = (HelloService)proxyInvocationHandler.getProxy();
//执行方法
String echo = proxy.echo(“Proxy InvocationHandler 实现动态代理”);
System.out.println(echo);
}
输出
代理方法执行前调用
代理方法执行后调用
echo:Proxy InvocationHandler 实现动态代理
public class ProxyInvocationHandler implements InvocationHandler {
//要代理的类
private Object target;
public void setTarget(Object target){
this.target = target;
}
//获取要代理的实例
public Object getProxy(){
return Proxy.newProxyInstance(this.getClass().getClassLoader(),target.getClass().getInterfaces(),this);
}
//执行代理的方法
@Override
public Object invoke(Object proxy, Method method, Object[] args) throws Throwable {
System.out.println(“代理方法执行前调用”);
//执行方法
Object result = method.invoke(target, args);
System.out.println(“代理方法执行后调用”);
return result;
}
}
AOP(Aspect Oriented Programming)意为:面向切面编程,通过预编译方式和运行期动态代理实现程序功能的统一维护的一种技术,AOP是OOP的延续,是软件开发中的一个热点,也是Spring框架中的一个重要内容,是函数式编程的一种衍生泛型。利用AOP可以对业务逻辑的各个部分进行隔离,从而使得业务逻辑各部分之间的耦合度降低,提高程序的可重用性,同时提高了开发的效率。

20-1.Aop在Spring中的作用
提供声明事务:允许用户自定义切面
-
横切关注点:跨越应用程序多个模块的方法或功能。即与我们的业务逻辑无关的,但是我们需要关注的部分,就是横切关注点。如日志,安全,缓存,事务等等。。。
-
切面(ASPECT):横切关注点 被模块化的特殊对象。即 它是一个类
-
通知(Advice):切面必须要完成的工作,即 他是类中的一个方法
-
目标(target):被通知的对象
-
代理(Proxy):向目标对象应用通知之后创建的对象
-
切入点(PointCut):切面通知 执行的"地点"的定义
-
连接点(jointPoint):与切入点匹配的执行点

Spring Aop中,通过Advice定义横切逻辑,Spring中支持的5种类型的Advice

21-1.导入依赖
org.aspectj
aspectjweaver
1.9.4
21-2.在执行UserService实现类的所有方法前,增加日志功能
public class Log implements MethodBeforeAdvice {
/**
-
@param method 要执行的目标对象方法
-
@param args 参数
-
@param target 目标对象
-
@throws Throwable
*/
public void before(Method method, Object[] args, Object target) throws Throwable {
System.out.println(target.getClass().getName()+" 的 "+method.getName()+“方法执行了”);
}
}
21-3.在执行UserService实现类的所有方法后,增加日志功能
public class AfterLog implements AfterReturningAdvice {
/**
-
@param returnValue 返回值
-
@param method
-
@param args
-
@param target
-
@throws Throwable
*/
public void afterReturning(Object returnValue, Method method, Object[] args, Object target) throws Throwable {
System.out.println(“执行了”+method.getName()+“方法, 返回结果为”+returnValue);
}
}
21-4.UserService 接口
public interface UserService {
void add();
void delete();
void update();
void select();
}
21-5.UserServiceImpl 接口
public class UserServiceImpl implements UserService {
public void add() {
System.out.println(“add”);
}
public void delete() {
System.out.println(“delete”);
}
public void update() {
System.out.println(“update”);
}
public void select() {
System.out.println(“select”);
}
}
21-6.bean.xml 文件
<?xml version="1.0" encoding="UTF-8"?><beans xmlns=“http://www.springframework.org/schema/beans”
xmlns:xsi=“http://www.w3.org/2001/XMLSchema-instance”
xmlns:context=“http://www.springframework.org/schema/context”
xmlns:aop=“http://www.springframework.org/schema/aop”
xsi:schemaLocation="http://www.springframework.org/schema/beans
https://www.springframework.org/schema/beans/spring-beans.xsd
http://www.springframework.org/schema/context
https://www.springframework.org/schema/context/spring-context.xsd
http://www.springframework.org/schema/aop
https://www.springframework.org/schema/aop/spring-aop.xsd">
aop:config
<aop:pointcut id=“pointcut” expression=“execution(* cn.bloghut.service.UserServiceImpl.*(…))”/>
<aop:advisor advice-ref=“log” pointcut-ref=“pointcut”/>
<aop:advisor advice-ref=“afterLog” pointcut-ref=“pointcut”/>
</aop:config>
21-7.测试类
public class Test {
public static void main(String[] args) {
ApplicationContext ac = new ClassPathXmlApplicationContext(“bean.xml”);
//动态代理 代理的是接口
UserService userService = (UserService)ac.getBean(“userService”);
userService.add();
}
}
21-7.输出结果
cn.bloghut.service.UserServiceImpl 的 add方法执行了
add
执行了add方法, 返回结果为null
-
配置文件
-
配置aop
-
配置切入点
-
配置自定义切面要引用的类
-
在哪个方法配置
22-1.配置文件
<?xml version="1.0" encoding="UTF-8"?><beans xmlns=“http://www.springframework.org/schema/beans”
xmlns:xsi=“http://www.w3.org/2001/XMLSchema-instance”
xmlns:context=“http://www.springframework.org/schema/context”
xmlns:aop=“http://www.springframework.org/schema/aop”
xsi:schemaLocation="http://www.springframework.org/schema/beans
https://www.springframework.org/schema/beans/spring-beans.xsd
http://www.springframework.org/schema/context
https://www.springframework.org/schema/context/spring-context.xsd
http://www.springframework.org/schema/aop
https://www.springframework.org/schema/aop/spring-aop.xsd">
aop:config
<aop:pointcut id=“pointcut” expression=“execution(* cn.bloghut.service.UserServiceImpl.*(…))”/>
<aop:aspect id=“aspect” ref=“diyPointCut”>
<aop:before method=“before” pointcut-ref=“pointcut”/>
<aop:after method=“after” pointcut-ref=“pointcut”/>
</aop:aspect>
</aop:config>
22-2.自定义切面
package cn.bloghut.diy;
/**
-
@Classname DiyPointCut
-
@Description TODO
-
@Date 2021/5/17 17:23
-
@Created by 闲言
*/
public class DiyPointCut {
public void before(){
System.out.println(“=方法执行之前=====”);
}
public void after(){
System.out.println(“=方法执行之后=====”);
}
}
22-3.Usersevice 接口
package cn.bloghut.service;
/**
-
@Classname UserService
-
@Description TODO
-
@Date 2021/5/17 16:51
-
@Created by 闲言
*/
public interface UserService {
void add();
void delete();
void update();
void select();
}
22-4.UserServiceImpl 实现类
package cn.bloghut.service;
/**
-
@Classname UserServiceImpl
-
@Description TODO
-
@Date 2021/5/17 16:51
-
@Created by 闲言
*/
public class UserServiceImpl implements UserService {
public void add() {
System.out.println(“add”);
}
public void delete() {
System.out.println(“delete”);
}
public void update() {
System.out.println(“update”);
}
public void select() {
System.out.println(“select”);
}
}
22-5.测试类
package cn.bloghut.test;
import cn.bloghut.service.UserService;
import org.springframework.context.ApplicationContext;
import org.springframework.context.support.ClassPathXmlApplicationContext;
/**
-
@Classname Test2
-
@Description TODO
-
@Date 2021/5/17 17:24
-
@Created by 闲言
*/
public class Test2 {
public static void main(String[] args) {
ApplicationContext ac = new ClassPathXmlApplicationContext(“bean2.xml”);
UserService userService = ac.getBean(“userService”, UserService.class);
userService.select();
}
}
22-6.输出
=方法执行之前=====
select
=方法执行之后=====
23-1.bean配置文件
-
注意开启注解aop支持
-
<aop:aspectj-autoproxy/>
<beans xmlns=“http://www.springframework.org/schema/beans”
xmlns:xsi=“http://www.w3.org/2001/XMLSchema-instance”
xmlns:context=“http://www.springframework.org/schema/context”
xmlns:aop=“http://www.springframework.org/schema/aop”
xsi:schemaLocation="http://www.springframework.org/schema/beans
https://www.springframework.org/schema/beans/spring-beans.xsd
http://www.springframework.org/schema/context
https://www.springframework.org/schema/context/spring-context.xsd
http://www.springframework.org/schema/aop
https://www.springframework.org/schema/aop/spring-aop.xsd">
aop:aspectj-autoproxy/
23-2.自定义类
-
标注这是一个切面
-
@Aspect //标注这个类是一个切面
public class AnnotationPointcut {
/**
- 定义切入点
*/
@Pointcut(“execution(* cn.bloghut.service.UserServiceImpl.*(…))”)
public void pointcut(){}
@Before(“pointcut()”)
public void before(){
System.out.println(“=方法执行前=”);
}
@After(“pointcut()”)
public void after(){
System.out.println(“=方法执行后=”);
}
}
23-3.UserService 类:
public interface UserService {
void add();
void delete();
void update();
void select();
}
23-4.UserServiceImpl 类
public class UserServiceImpl implements UserService {
public void add() {
System.out.println(“add”);
}
public void delete() {
System.out.println(“delete”);
}
public void update() {
System.out.println(“update”);
}
public void select() {
System.out.println(“select”);
}
}
23-5.测试类
public static void main(String[] args) {
ApplicationContext ac = new ClassPathXmlApplicationContext(“bean3.xml”);
UserService userService = ac.getBean(“userService”, UserService.class);
userService.delete();
}
23-6.输出结果
=方法执行前=
delete
=方法执行后=
24-1.导入依赖
junit
junit
4.13
test
mysql
mysql-connector-java
5.1.47
org.mybatis
mybatis
3.5.2
org.springframework
spring-webmvc
5.2.0.RELEASE
org.springframework
spring-jdbc
5.1.9.RELEASE
org.aspectj
aspectjweaver
1.9.4
org.aspectj
aspectjrt
1.8.13
org.mybatis
mybatis-spring
2.0.2
org.projectlombok
lombok
1.16.10
24-2.编写数据源配置
自我介绍一下,小编13年上海交大毕业,曾经在小公司待过,也去过华为、OPPO等大厂,18年进入阿里一直到现在。
深知大多数Java工程师,想要提升技能,往往是自己摸索成长或者是报班学习,但对于培训机构动则几千的学费,着实压力不小。自己不成体系的自学效果低效又漫长,而且极易碰到天花板技术停滞不前!
因此收集整理了一份《2024年Java开发全套学习资料》,初衷也很简单,就是希望能够帮助到想自学提升又不知道该从何学起的朋友,同时减轻大家的负担。


既有适合小白学习的零基础资料,也有适合3年以上经验的小伙伴深入学习提升的进阶课程,基本涵盖了95%以上Java开发知识点,真正体系化!
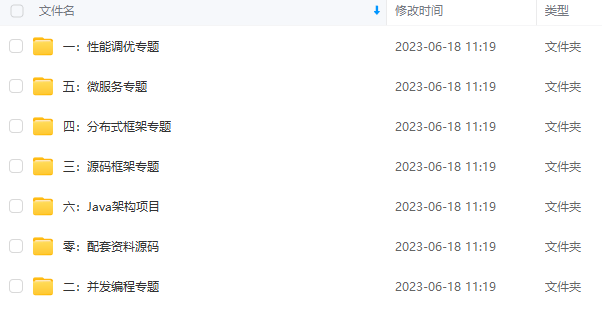
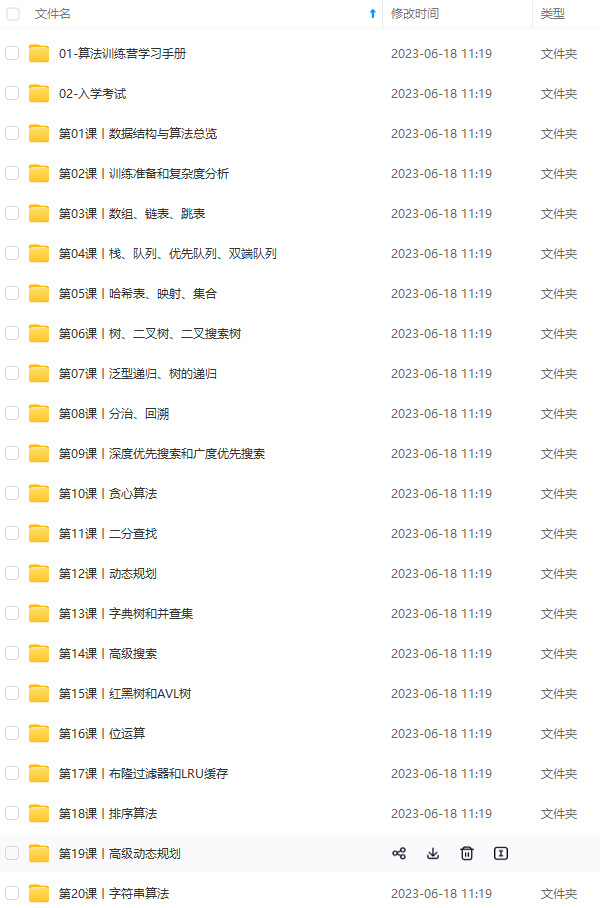
由于文件比较大,这里只是将部分目录大纲截图出来,每个节点里面都包含大厂面经、学习笔记、源码讲义、实战项目、讲解视频,并且后续会持续更新
如果你觉得这些内容对你有帮助,可以添加V获取:vip1024b (备注Java)

总结
虽然我个人也经常自嘲,十年之后要去成为外卖专员,但实际上依靠自身的努力,是能够减少三十五岁之后的焦虑的,毕竟好的架构师并不多。
架构师,是我们大部分技术人的职业目标,一名好的架构师来源于机遇(公司)、个人努力(吃得苦、肯钻研)、天分(真的热爱)的三者协作的结果,实践+机遇+努力才能助你成为优秀的架构师。
如果你也想成为一名好的架构师,那或许这份Java成长笔记你需要阅读阅读,希望能够对你的职业发展有所帮助。

=方法执行前=========
delete
=方法执行后=
24-1.导入依赖
junit
junit
4.13
test
mysql
mysql-connector-java
5.1.47
org.mybatis
mybatis
3.5.2
org.springframework
spring-webmvc
5.2.0.RELEASE
org.springframework
spring-jdbc
5.1.9.RELEASE
org.aspectj
aspectjweaver
1.9.4
org.aspectj
aspectjrt
1.8.13
org.mybatis
mybatis-spring
2.0.2
org.projectlombok
lombok
1.16.10
24-2.编写数据源配置
自我介绍一下,小编13年上海交大毕业,曾经在小公司待过,也去过华为、OPPO等大厂,18年进入阿里一直到现在。
深知大多数Java工程师,想要提升技能,往往是自己摸索成长或者是报班学习,但对于培训机构动则几千的学费,着实压力不小。自己不成体系的自学效果低效又漫长,而且极易碰到天花板技术停滞不前!
因此收集整理了一份《2024年Java开发全套学习资料》,初衷也很简单,就是希望能够帮助到想自学提升又不知道该从何学起的朋友,同时减轻大家的负担。
[外链图片转存中…(img-voq6IWRM-1711996256403)]
[外链图片转存中…(img-VECFYTMe-1711996256404)]
[外链图片转存中…(img-Lq9cPEOf-1711996256404)]
[外链图片转存中…(img-xsKfwIN2-1711996256405)]
[外链图片转存中…(img-IYfBL0wQ-1711996256405)]
[外链图片转存中…(img-PtoHMOim-1711996256405)]
既有适合小白学习的零基础资料,也有适合3年以上经验的小伙伴深入学习提升的进阶课程,基本涵盖了95%以上Java开发知识点,真正体系化!
由于文件比较大,这里只是将部分目录大纲截图出来,每个节点里面都包含大厂面经、学习笔记、源码讲义、实战项目、讲解视频,并且后续会持续更新
如果你觉得这些内容对你有帮助,可以添加V获取:vip1024b (备注Java)
[外链图片转存中…(img-a4oXKa5r-1711996256406)]
总结
虽然我个人也经常自嘲,十年之后要去成为外卖专员,但实际上依靠自身的努力,是能够减少三十五岁之后的焦虑的,毕竟好的架构师并不多。
架构师,是我们大部分技术人的职业目标,一名好的架构师来源于机遇(公司)、个人努力(吃得苦、肯钻研)、天分(真的热爱)的三者协作的结果,实践+机遇+努力才能助你成为优秀的架构师。
如果你也想成为一名好的架构师,那或许这份Java成长笔记你需要阅读阅读,希望能够对你的职业发展有所帮助。
[外链图片转存中…(img-7zyXBVMR-1711996256406)]


 3731
3731


 被折叠的 条评论
为什么被折叠?


