


伙伴匹配系统(持续更新中)
需求分析
- 用户去添加标签,标签的分类(要有哪些标签、怎么把标签进行分类)学习方向 java / c++,工作 / 大学
- 主动搜索:允许用户根据标签去搜索其他用户
- Redis 缓存
- 组队
- 创建队伍
- 加入队伍
- 根据标签查询队伍
- 邀请其他人
- 允许用户去修改标签
- 推荐
- 相似度计算算法 + 本地分布式计算
技术栈
前端
- Vue 3 开发框架(提高页面开发的效率)
- Vant UI(基于 Vue 的移动端组件库)(React 版 Zent)
- Vite(打包工具,快!)
- Nginx 来单机部署
后端
- Java 编程语言 + SpringBoot 框架
- SpringMVC + MyBatis + MyBatis Plus(提高开发效率)
- MySQL 数据库
- Redis 缓存
- Swagger + Knife4j 接口文档
前端项目初始化
参考 vite 和 vant 官网
vite : https://cn.vitejs.dev/guide/
vant : https://vant-contrib.gitee.io/vant/v3/#/zh-CN/home
创建项目:
yarn create vite
安装依赖:
npm install / yarn install
此时已经可以启动项目看到初始页
接下来要整合 vant 组件库:
npm i vant / yarn add vant
按需引入组件样式:
- 安装插件
# 通过 npm 安装
npm i unplugin-vue-components -D

# 通过 yarn 安装
yarn add unplugin-vue-components -D
- 配置插件,对于基于
vite的项目在vite.config.js文件中配置插件:
import vue from '@vitejs/plugin-vue';
import Components from 'unplugin-vue-components/vite';
import { VantResolver } from 'unplugin-vue-components/resolvers';

export default {
  plugins: [
    vue(),
    Components({
      resolvers: [VantResolver()],
    }),
  ],
};
前端主页 + 组件概览
设计:
- 导航条:展示当前页面名称
- 主页搜索框 => 搜索页 => 搜索结果页(标签筛选页)
- 内容:
- tab 栏
- 主页( 推荐页 + 广告 ) ps.你要做商业网站,一定要考虑清楚,广告位置一定要想好,这个很重要 ❗
- 搜索框
- banner
- 推荐信息流
- 队伍页
- 用户页(消息 - 暂时考虑发邮件)
- 主页( 推荐页 + 广告 ) ps.你要做商业网站,一定要考虑清楚,广告位置一定要想好,这个很重要 ❗
- tab 栏
到这儿,已经可以使用vant组件库了,我们来试试引入 NavBar 导航栏
- 在
main.ts中全局注册组件
import { createApp } from 'vue';
import { NavBar } from 'vant';

const app = createApp();
app.use(NavBar);
- 创建
BasicLayout.vue文件,添加vue组件
<van-nav-bar
      title="标题"
      left-arrow
      @click-left="onClickLeft"
      @click-right="onClickRight"
  >
    <template #right>
      <van-icon name="search" size="18"/>
    </template>
  </van-nav-bar>
import { Toast } from 'vant';

export default {
  setup() {
    const onClickLeft = () => history.back();
    const onClickRight = () => Toast('按钮');
    return {
      onClickLeft,
      onClickRight,
    };
  },
};
效果如下:
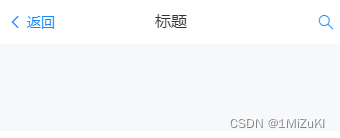
踩坑:如果发现导航栏的样式混乱,在 main.js 中删除引入的 ./style.css
添加 NavBar 导航栏的方法如法炮制,最终效果如下:

在vue文件中有个语法糖,可在 script 标签中添加 setup 可省略返回值:
<script setup>
  import {ref} from 'vue';
  import {Toast} from 'vant';
  import Index from "../pages/Index.vue";
  import Team from "../pages/Team.vue";

  const onClickLeft = () => alert('a');
  const onClickRight = () => alert('b');

  const active = ref('index');
  const onChange = (index) => Toast(`标签 ${index}`);

</script>
前端开发
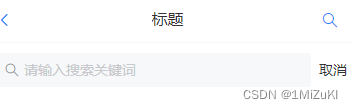
添加搜索框
在官方文档里找到搜索框组件,复制到 SearchPage.vue 下
使用编程式导航给返回和搜索添加路由
<script setup>
  import {useRouter} from 'vue-router'

  const router = useRouter();
  const onClickLeft = () => {
    router.back()
  };
  const onClickRight = () => {
    router.push('/search')
  };

</script>
添加搜索删除标签
添加组件,SearchPage.vue
<template>
<form action="/">
<van-search
v-model="searchText"
show-action
placeholder="请输入搜索关键词"
@search="onSearch"
@cancel="onCancel"
/>
</form>
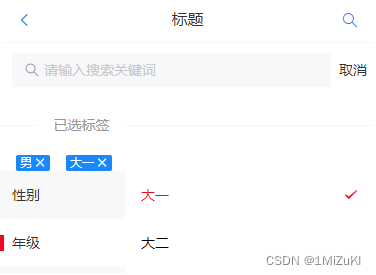
<van-divider content-position="left">已选标签</van-divider>
<div v-if="activeIds.length===0">请选择标签</div>
<van-row gutter="16" style="padding: 0 16px">
<van-col v-for="tag in activeIds">
<van-tag closeable size="small" type="primary">
{{tag}}
</van-tag>
</van-col>
</van-row>
<van-tree-select
v-model:active-id="activeIds"
v-model:main-active-index="activeIndex"
:items="tagList"
/>
</template>
<script setup>
import { ref } from 'vue';
import { Toast } from 'vant';
const searchText = ref('');
const onSearch = (val) => Toast(val);
const onCancel = () => Toast('取消');
//已选中的标签
const activeIds = ref([]);
const activeIndex = ref(0);
const tagList = [
{
text: '性别',
children: [
{ text: '男', id: '男' },
{ text: '女', id: '女' },
],
},
{
text: '年级',
children: [
{ text: '大一', id: '大一' },
{ text: '大二', id: '大二' },
],
},
];
</script>
<style scoped>
</style>
点击 × 删除标签
//移除标签
const doClose = (tag) =>{
  activeIds.value=activeIds.value.filter(item =>{
    return item !== tag;
  })
}
在tag里面添加 @close="doClose(tag)"
<van-tag closeable size="small" type="primary" @close="doClose(tag)">
        {{tag}}
</van-tag>
关键字查询
const originTagList = [
  {
    text: '性别',
    children: [
      { text: '男', id: '男' },
      { text: '女', id: '女' },
    ],
  },
  {
    text: '年级',
    children: [
      { text: '大一', id: '大一' },
      { text: '大二', id: '大二' },
    ],
  },
];
let tagList = ref(originTagList)

const onSearch = (val) => {
  tagList.value = originTagList.map(parentTag =>{
    const tempChildren = [...parentTag.children];
    const tempParentTag = {...parentTag};
    tempParentTag.children = tempChildren.filter(item => item.text.includes(searchText.value));
    return tempParentTag;
  });
};

const onCancel = () => {
  searchText.value = '';
  tagList.value = originTagList;
};

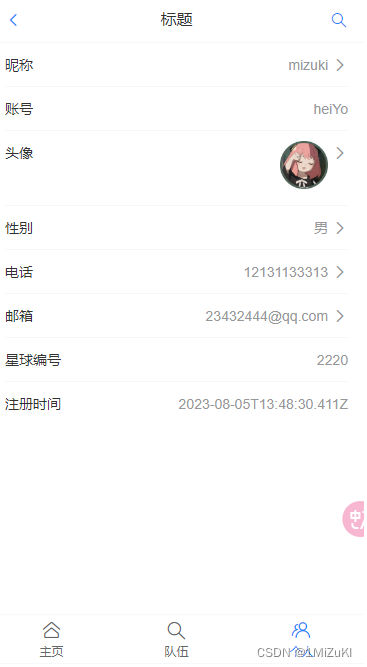
创建用户信息页
使用 cell 单元格组件, 在 UserPage.vue 中引入
<template>
  <van-cell title="昵称" is-link to='/user/edit' :value="user.username"/>
  <van-cell title="账号" is-link to='/user/edit' :value="user.userAccount" />
  <van-cell title="头像" is-link to='/user/edit'>
    <img style="height: 48px" :src="user.avatarUrl"/>
  </van-cell>
  <van-cell title="性别" is-link to='/user/edit' :value="user.gender" />
  <van-cell title="电话" is-link to='/user/edit' :value="user.phone" />
  <van-cell title="邮箱" is-link to='/user/edit' :value="user.email" />
  <van-cell title="星球编号" :value="user.planetCode" />
  <van-cell title="注册时间" :value="user.createTime.toISOString()" />
</template>

<script setup>
const user = {
  id: 1,
  username: '鱼皮',
  userAccount: 'dogYupi',
  avatarUrl: 'https://profile.csdnimg.cn/2/B/1/1_qq_56098191',
  gender: '男',
  phone: '12131133313',
  email: '23432444@qq.com',
  planetCode: '2220',
  createTime: new Date(),
};
</script>

<style scoped>

</style>
新建一个用户编辑页 UserEditPage.vue,并添加路由 /user/edit
修改 UserPage.vue
  <van-cell title="性别" is-link to='/user/edit' :value="user.gender"
            @click="toEdit('gender', user.gender, '性别')"/>
const toEdit = (editKey: string, currentValue: string, editName : string) => {
  router.push({
    path: '/user/edit',
    query: {
      editKey,
      currentValue,
      editName
    }
  })
}
使用表单组件,修改 UserEditPage.vue
<template>
  <van-form @submit="onSubmit">
    <van-field
        v-model="editUser.currentValue"
        :name="editUser.editKey"
        :label="editUser.editName"
        :placeholder="'请输入${editUser.editName}'"
    />
    <div style="margin: 16px;">
      <van-button round block type="primary" native-type="submit">
        提交
      </van-button>
    </div>
  </van-form>
</template>

<script setup lang="ts">
import {useRoute} from "vue-router";
import {ref} from "vue";

const route = useRoute();
const editUser = ref({
  editKey: route.query.editKey,
  currentValue: route.query.currentValue,
  editName: route.query.editName,
})
const onSubmit = (values) => {
  //todo 把editKey currentValue editName提交到后台
  console.log('onSubmit', values);
}

</script>

<style scoped>

</style>


 553
553


 被折叠的 条评论
为什么被折叠?
被折叠的 条评论
为什么被折叠?
 到【灌水乐园】发言


