


文章目录
1. 什么是跨域
1.1 本域和同源策略
在了解什么是跨域之前,我们需要先了解两个概念:本域和同源策略
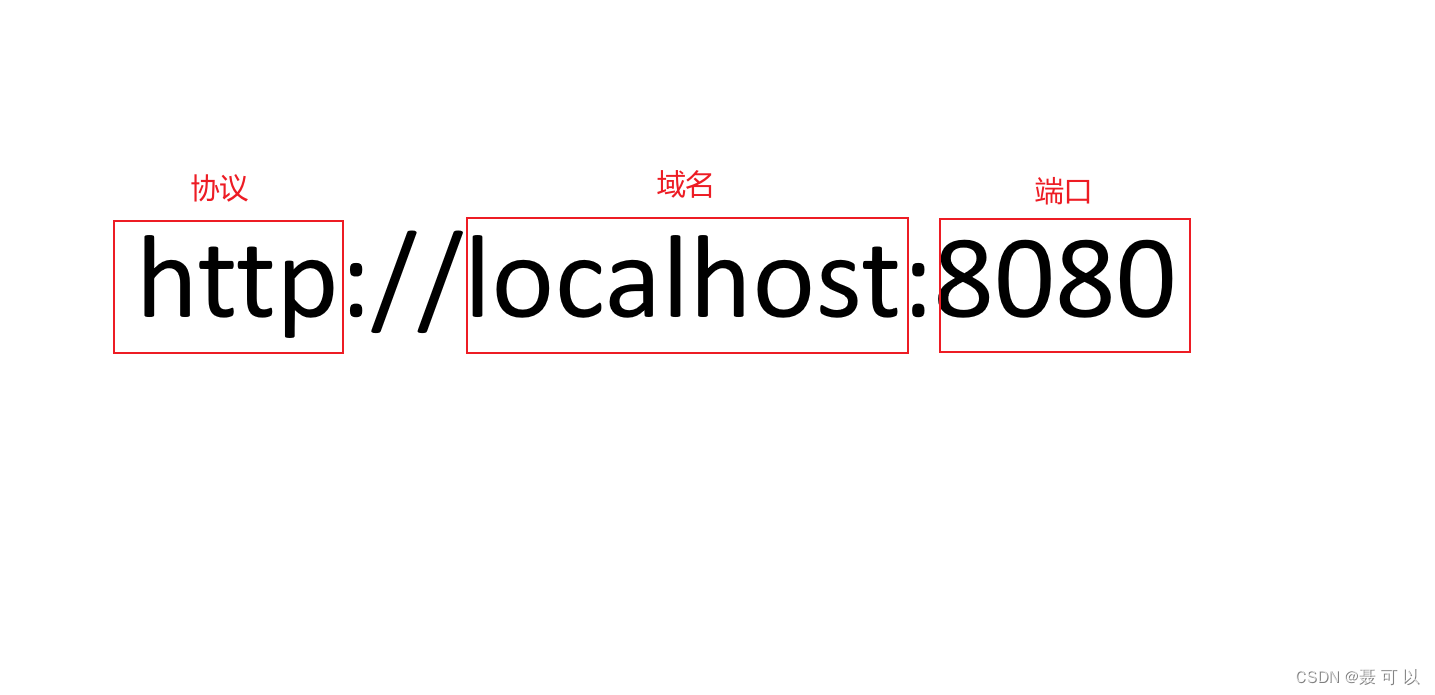
- 本域:同协议、同域名、同端口
- 同源策略:为了保护用户隐私和防止恶意网站窃取数据,浏览器默认只允许与本域的接口进行交互
同源策略规定,一个域下的 JavaScript 脚本不能直接访问或读取另一个域的资源,也不能直接向另一个域发起请求
1.2 跨域的概念
当浏览器发出一个请求时,只要请求URL的协议、域名、端口三者之间任意一个与当前页面URL不同,就称为跨域
| 当前页面URL | 请求URL | 是否跨域 | 原因 |
|---|---|---|---|
| http://www.test.com | http://www.test.com/index.html | 否 | 同源(协议、域名、端口都相同) |
http://www.test.com | https://www.test.com/index.html | 是 | 协议不同 |
http://www.test.com | http://www.baidu.com | 是 | 域名不同 |
http://www.test.com:8080 | http://www.test.com:8088 | 是 | 端口不同 |
2.在Vue3项目(由Vite构建)中通过代理解决跨域问题
2.1 编写vite.config.js配置文件
在项目的根目录下找到vite.config.js配置文件,编写与代理相关的配置
import {fileURLToPath, URL} from 'node:url'

import {defineConfig} from 'vite'
import vue from '@vitejs/plugin-vue'

// https://vitejs.dev/config/
export default defineConfig({
    plugins: [
        vue()
    ],
    resolve: {
        alias: {
            '@': fileURLToPath(new URL('./src', import.meta.url))
        }
    },
    server: {
        proxy: {
            // 在此处编写代理规则
        }
    }
})
2.2 代理详解
配置代理规则主要关注proxy中的四个属性:要代理的路径、target、changeOrigin、rewrite
2.2.1 要代理的路径
以下述代理规则为例
proxy: {
    // 在此处编写代理规则
    '/api': {
        target: 'http://localhost:7150',
        changeOrigin: true,
        rewrite: (path) => {
            return path.replace(/\/api/, '')
        }
    }
}
只要浏览器发出的请求URL的路径中含有/api,该代理规则就会生效
2.2.2 target和changeOrigin
target要和changeOrigin结合使用,只有changeOrigin的值为true,target才会生效
以上述代理规则为例,如果浏览器发出的请求URL为/api/user/login,经过代理后,浏览器真正发出的请求URL就是http://localhost:7150/user/login
changeOrgin的作用就是改变请求URL的源(也就是域)。在上述例子中,请求URL的源被改成了http://localhost:7150(target)
2.2.3 rewrite
在配置代理规则时,我们不仅可以改变请求URL的源,还可以修改请求URL的路径
rewrite: (path) => {
    return path.replace(/\/api/, '')
}
path.replace()方法接收两个参数
- 第一个参数可以填写正则表达式,也可以填写纯字符串,代表要匹配的路径
- 第二个参数填写字符串,代表匹配到路径后,要将匹配到的路径替换成什么样的内容
在上述例子中,浏览器发出的请求URL为/api/user/login,因为请求URL的路径中含有/api,经过代理后,路径中的/api被替换成了空字符串。最后,浏览器真正发出的请求URL就是http://localhost:7150/user/login
2.3 测试
2.3.1 搭建后台服务器
我们用SpringBoot搭建一个后台服务器,编写一个简单的实体类和一个简单的Controller,在 7150 端口上启动,用于接收前端发送的请求
LoginDto.java
import lombok.AllArgsConstructor;
import lombok.Getter;
import lombok.NoArgsConstructor;
import lombok.Setter;

@Getter
@Setter
@NoArgsConstructor
@AllArgsConstructor
public class LoginDto {
    private String username;
    private String password;

    @Override
    public String toString() {
        return "LoginDto{" +
                "username='" + username + '\'' +
                ", password='" + password + '\'' +
                '}';
    }
}
UserController.java
import cn.edu.scau.pojo.LoginDto;
import org.springframework.web.bind.annotation.PostMapping;
import org.springframework.web.bind.annotation.RequestBody;
import org.springframework.web.bind.annotation.RequestMapping;
import org.springframework.web.bind.annotation.RestController;

@RestController
@RequestMapping("/user")
public class UserController {
    @PostMapping("/login")
    public String login(@RequestBody LoginDto loginDto) {
        System.err.println("登录信息:" + loginDto);
        return "已成功接收到登录信息:" + loginDto;
    }
}
2.3.2 前端发起请求
我们用axios发起请求
axios.post('/api/user/login', {
  username: 'admin',
  password: '123456'
}).then((response) => {
  console.log('后端返回的数据:', response.data)
})
后台服务器成功收到数据

前端也成功收到后台服务器返回的信息

2.4 配置多个代理规则
配置多个代理规则时,代理规则之间需要用逗号分隔
proxy: {
    // 在此处编写代理规则
    '/api': {
        target: 'http://localhost:7150',
        changeOrigin: true,
        rewrite: (path) => {
            return path.replace(/\/api/, '')
        }
    },
    '/dev': {
        target: 'http://localhost:7150',
        changeOrigin: true,
        rewrite: (path) => {
            return path.replace(/\/dev/, '')
        }
    }
}
2.5 代理举例
为了方便演示,使用黑马程序员提供的接口(大家多多支持黑马程序员的课程)
接口文档地址:B站-AJAX和黑马头条-数据管理平台
2.5.1 例一
代理规则
'/areaList': {
    target: 'http://hmajax.itheima.net',
    changeOrigin: true,
    rewrite: (path) => {
        return path.replace(/\/areaList/, '/api/area')
    }
}
前端发起的请求URL
axios.get('/areaList?pname=广东省&cname=广州市')
    .then((response) => {
      console.log('广东省广州市的地区列表:', response.data)
    })
经过代理后真正发出的请求URL
http://hmajax.itheima.net/api/area?pname=广东省&cname=广州市
返回的数据
{
    "message": "获取地区县成功",
    "list": [
        "荔湾区",
        "越秀区",
        "海珠区",
        "天河区",
        "白云区",
        "黄埔区",
        "番禺区",
        "花都区",
        "南沙区",
        "萝岗区",
        "增城市",
        "从化市"
    ]
}
2.5.2 例二
代理规则
'/newsList': {
    target: 'http://hmajax.itheima.net',
    changeOrigin: true,
    rewrite: (path) => {
        return path.replace(/\/newsList/, '/api/news')
    }
}
前端发起的请求URL
axios.get('/newsList')
    .then((response) => {
      console.log('新闻列表:', response.data)
    })
经过代理后真正发出的请求URL
http://hmajax.itheima.net/api/news
返回的数据
{
    "message": "获取新闻列表成功",
    "data": [
        {
            "id": 1,
            "title": "5G渗透率持续提升,创新业务快速成长",
            "source": "新京报经济新闻",
            "cmtcount": 58,
            "img": "http://ajax-api.itheima.net/images/0.webp",
            "time": "2222-10-28 11:50:28"
        },
        {
            "id": 5,
            "title": "为什么说中美阶段性协议再近一步,读懂周末的这些关键信息",
            "source": "澎湃新闻",
            "cmtcount": 131,
            "img": "http://ajax-api.itheima.net/images/4.webp",
            "time": "2222-10-24 09:08:34"
        },
        {
            "id": 6,
            "title": "阿根廷大选结果揭晓:反对派费尔南德斯有话要说",
            "source": "海外网",
            "cmtcount": 99,
            "img": "http://ajax-api.itheima.net/images/5.webp",
            "time": "2222-10-23 17:41:15"
        },
        {
            "id": 8,
            "title": "LV母公司当年史上最大并购:报价145亿美元购Tiffany",
            "source": "澎湃新闻",
            "cmtcount": 119,
            "img": "http://ajax-api.itheima.net/images/7.webp",
            "time": "2222-10-22 03:59:44"
        },
        {
            "id": 9,
            "title": "黄峥当年1350亿蝉联80后白手起家首富:1年中财富每天涨1个亿",
            "source": "胡润百富",
            "cmtcount": 676,
            "img": "http://ajax-api.itheima.net/images/8.webp",
            "time": "2222-10-21 06:19:37"
        }
    ]
}
2.5.3 例三
代理规则
'/weather': {
    target: 'http://hmajax.itheima.net',
    changeOrigin: true,
    rewrite: (path) => {
        return path.replace(/\/weather/, '/api/weather')
    }
}
前端发起的请求URL
axios.get('/weather?city=110100')
    .then((response) => {
      console.log('北京市的天气信息:', response.data)
    })
经过代理后真正发出的请求URL
http://hmajax.itheima.net/api/weather?city=110100
返回的数据
{
    "code": 10000,
    "message": "查询天气成功",
    "data": {
        "date": "2024-05-19",
        "area": "北京市",
        "dateShort": "05月19日",
        "dateLunar": "四月十二",
        "temperature": "23",
        "weather": "晴",
        "weatherImg": "https://hmajax.itheima.net/weather/qingline.png",
        "windPower": "4级",
        "windDirection": "东风",
        "psPm25Level": "良",
        "psPm25": "94",
        "todayWeather": {
            "humidity": "65.0",
            "sunriseTime": "04:56",
            "sunsetTime": "19:27",
            "ultraviolet": "弱",
            "weather": "小雨",
            "temDay": "28",
            "temNight": "17"
        },
        "dayForecast": [
            {
                "date": "05月19日",
                "temDay": "28",
                "weather": "小雨",
                "temNight": "17",
                "windPower": "3-4级",
                "dateFormat": "今天",
                "weatherImg": "https://hmajax.itheima.net/weather/xiaoyu.png",
                "windDirection": "东风"
            },
            {
                "date": "05月20日",
                "temDay": "28",
                "weather": "晴",
                "temNight": "17",
                "windPower": "<3级",
                "dateFormat": "明天",
                "weatherImg": "https://hmajax.itheima.net/weather/qing.png",
                "windDirection": "南风"
            },
            {
                "date": "05月21日",
                "temDay": "31",
                "weather": "晴",
                "temNight": "20",
                "windPower": "<3级",
                "dateFormat": "后天",
                "weatherImg": "https://hmajax.itheima.net/weather/qing.png",
                "windDirection": "南风"
            },
            {
                "date": "05月22日",
                "temDay": "33",
                "weather": "多云",
                "temNight": "21",
                "windPower": "3-4级",
                "dateFormat": "周三",
                "weatherImg": "https://hmajax.itheima.net/weather/duoyun.png",
                "windDirection": "西南风"
            },
            {
                "date": "05月23日",
                "temDay": "32",
                "weather": "多云",
                "temNight": "18",
                "windPower": "3-4级",
                "dateFormat": "周四",
                "weatherImg": "https://hmajax.itheima.net/weather/duoyun.png",
                "windDirection": "东风"
            },
            {
                "date": "05月24日",
                "temDay": "28",
                "weather": "多云",
                "temNight": "18",
                "windPower": "<3级",
                "dateFormat": "周五",
                "weatherImg": "https://hmajax.itheima.net/weather/duoyun.png",
                "windDirection": "西南风"
            },
            {
                "date": "05月25日",
                "temDay": "28",
                "weather": "阴",
                "temNight": "18",
                "windPower": "<3级",
                "dateFormat": "周六",
                "weatherImg": "https://hmajax.itheima.net/weather/yin.png",
                "windDirection": "东南风"
            }
        ]
    }
}
2.5.4 例四
代理规则
'/comment': {
    target: 'https://hmajax.itheima.net',
    changeOrigin: true,
    rewrite: (path) => {
        return path.replace(/\/comment/, '/api/addcmt')
    }
}
前端发起的请求URL
axios.post('/comment', {
  username: "老李",
  content: "大家好!"
}).then((response) => {
  console.log('评论成功:', response.data)
})
经过代理后真正发出的请求URL
https://hmajax.itheima.net/api/addcmt
返回的数据


 1917
1917

 被折叠的 条评论
为什么被折叠?
被折叠的 条评论
为什么被折叠?
 到【灌水乐园】发言


